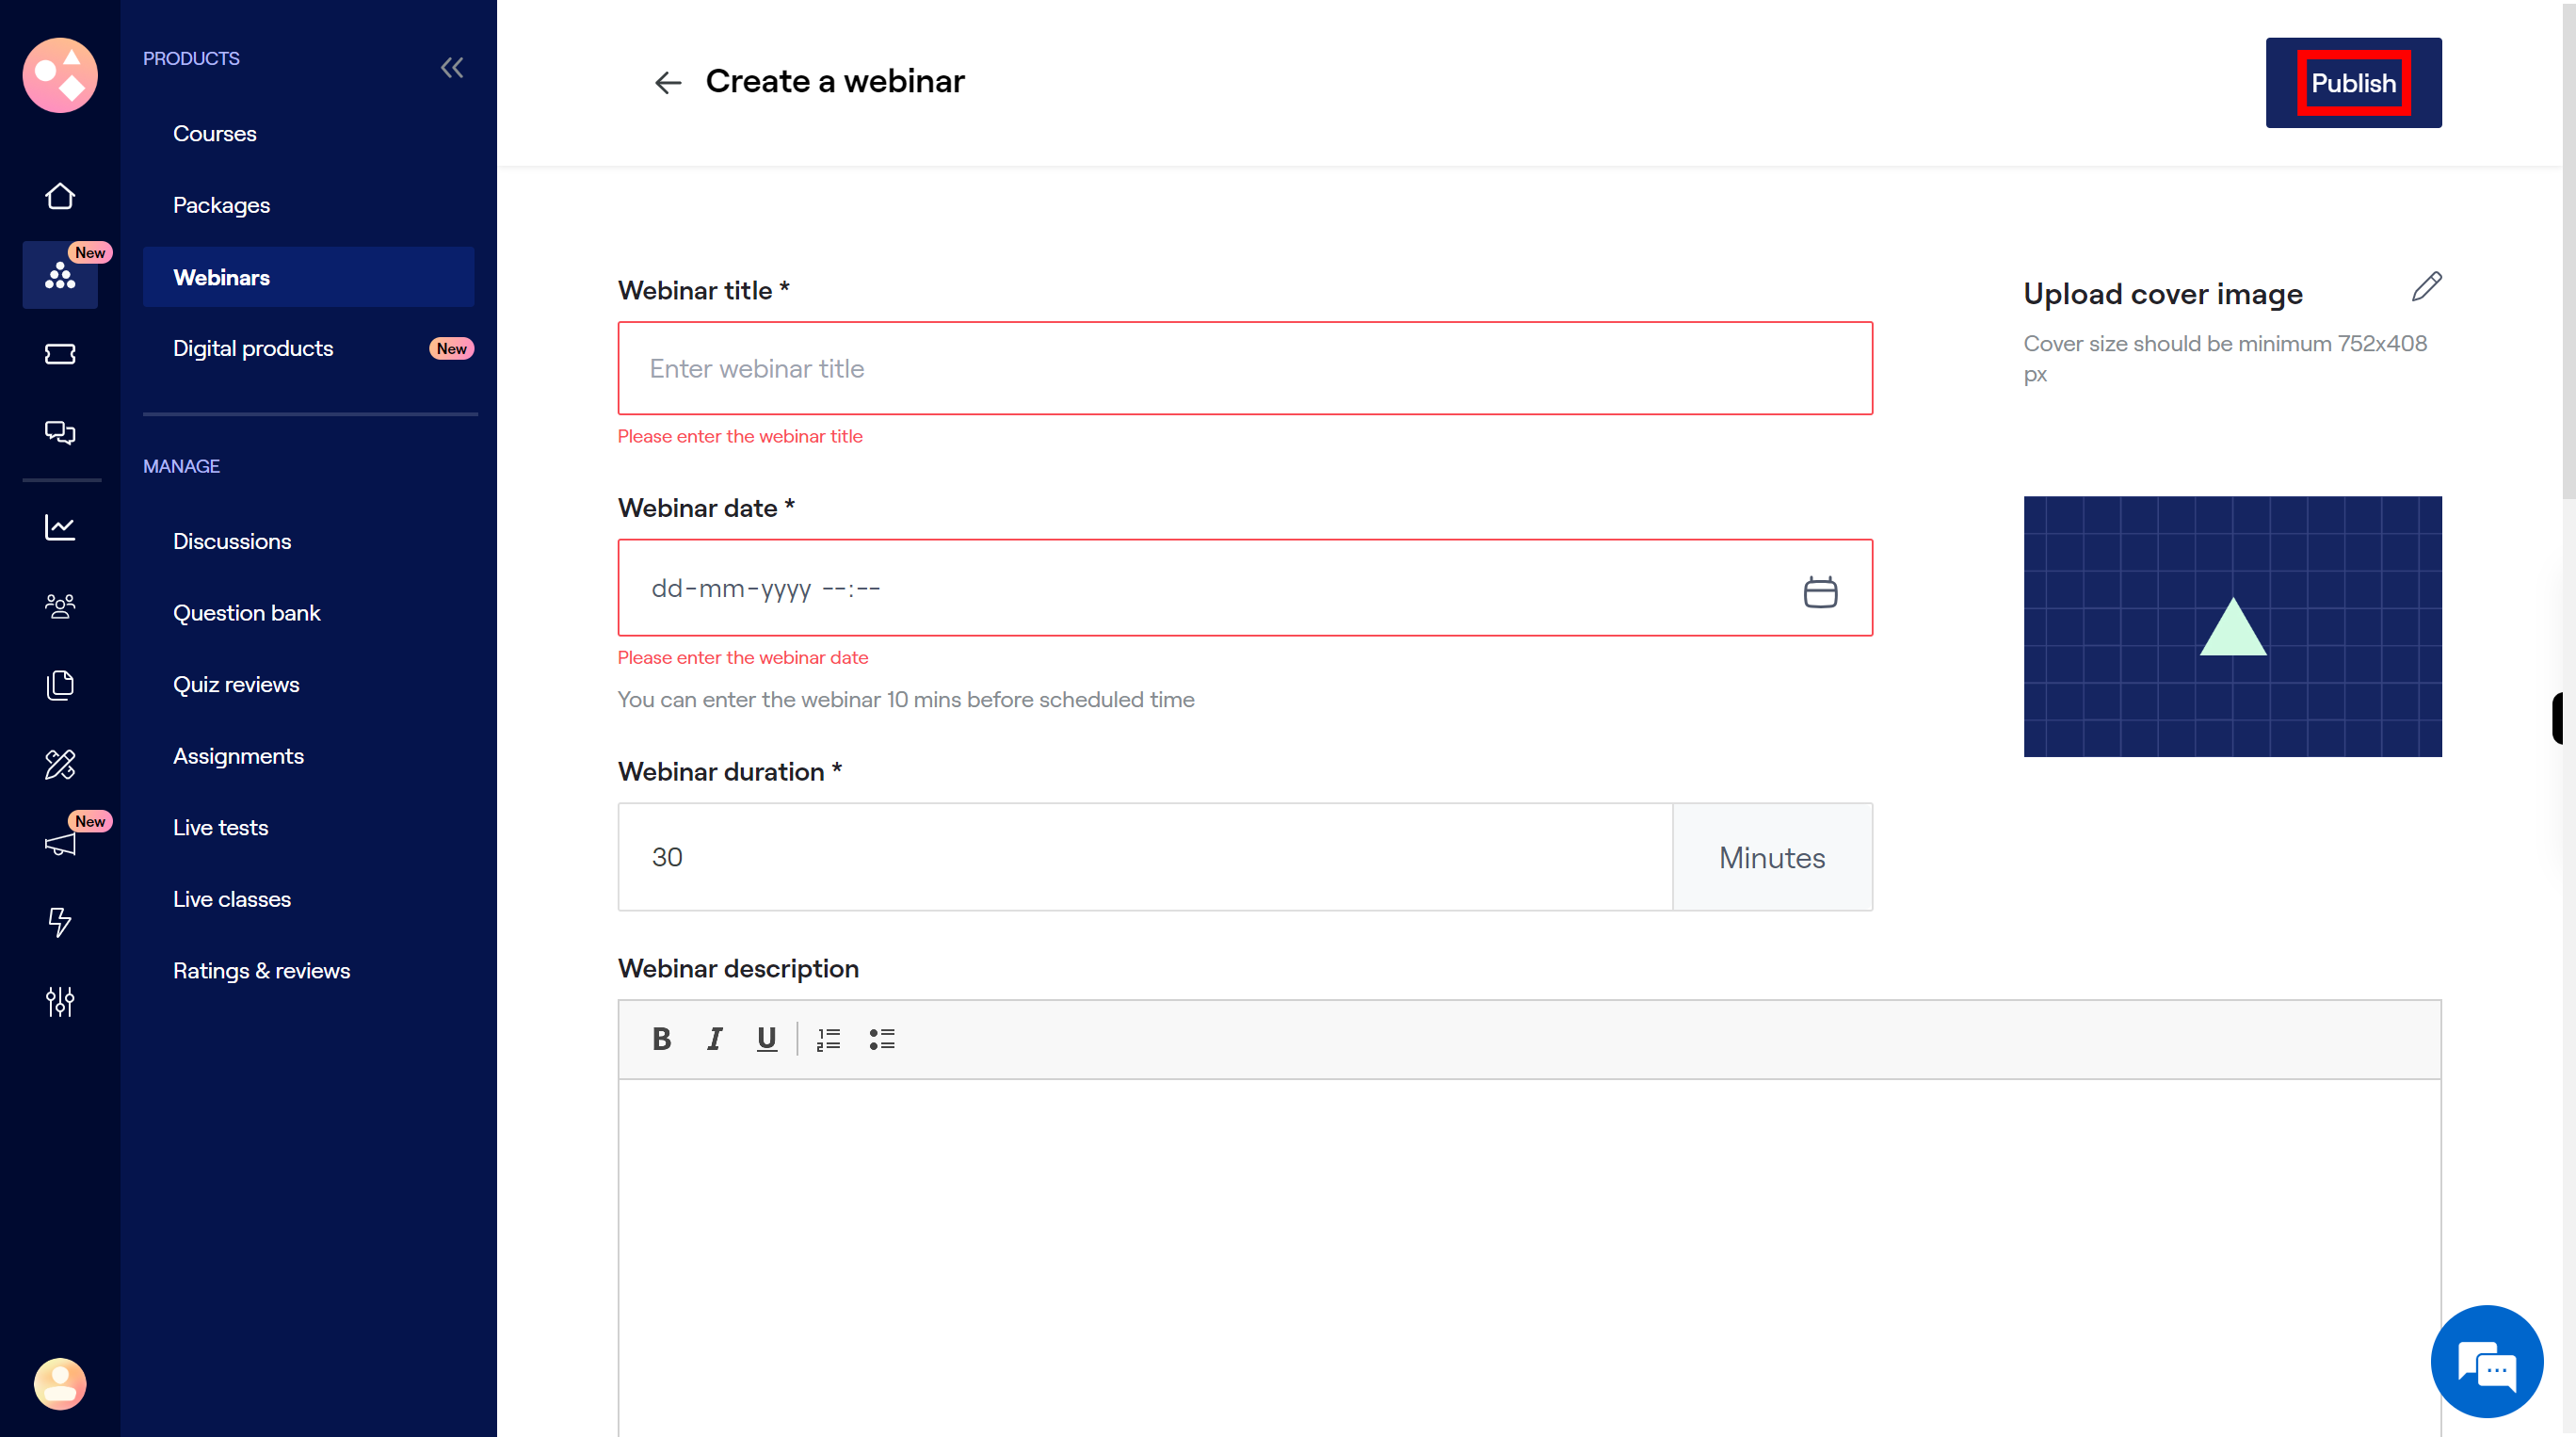
Step by step procedere to create a webinar on Graphy app. Prerequisites : Need to sign in.
-
1.
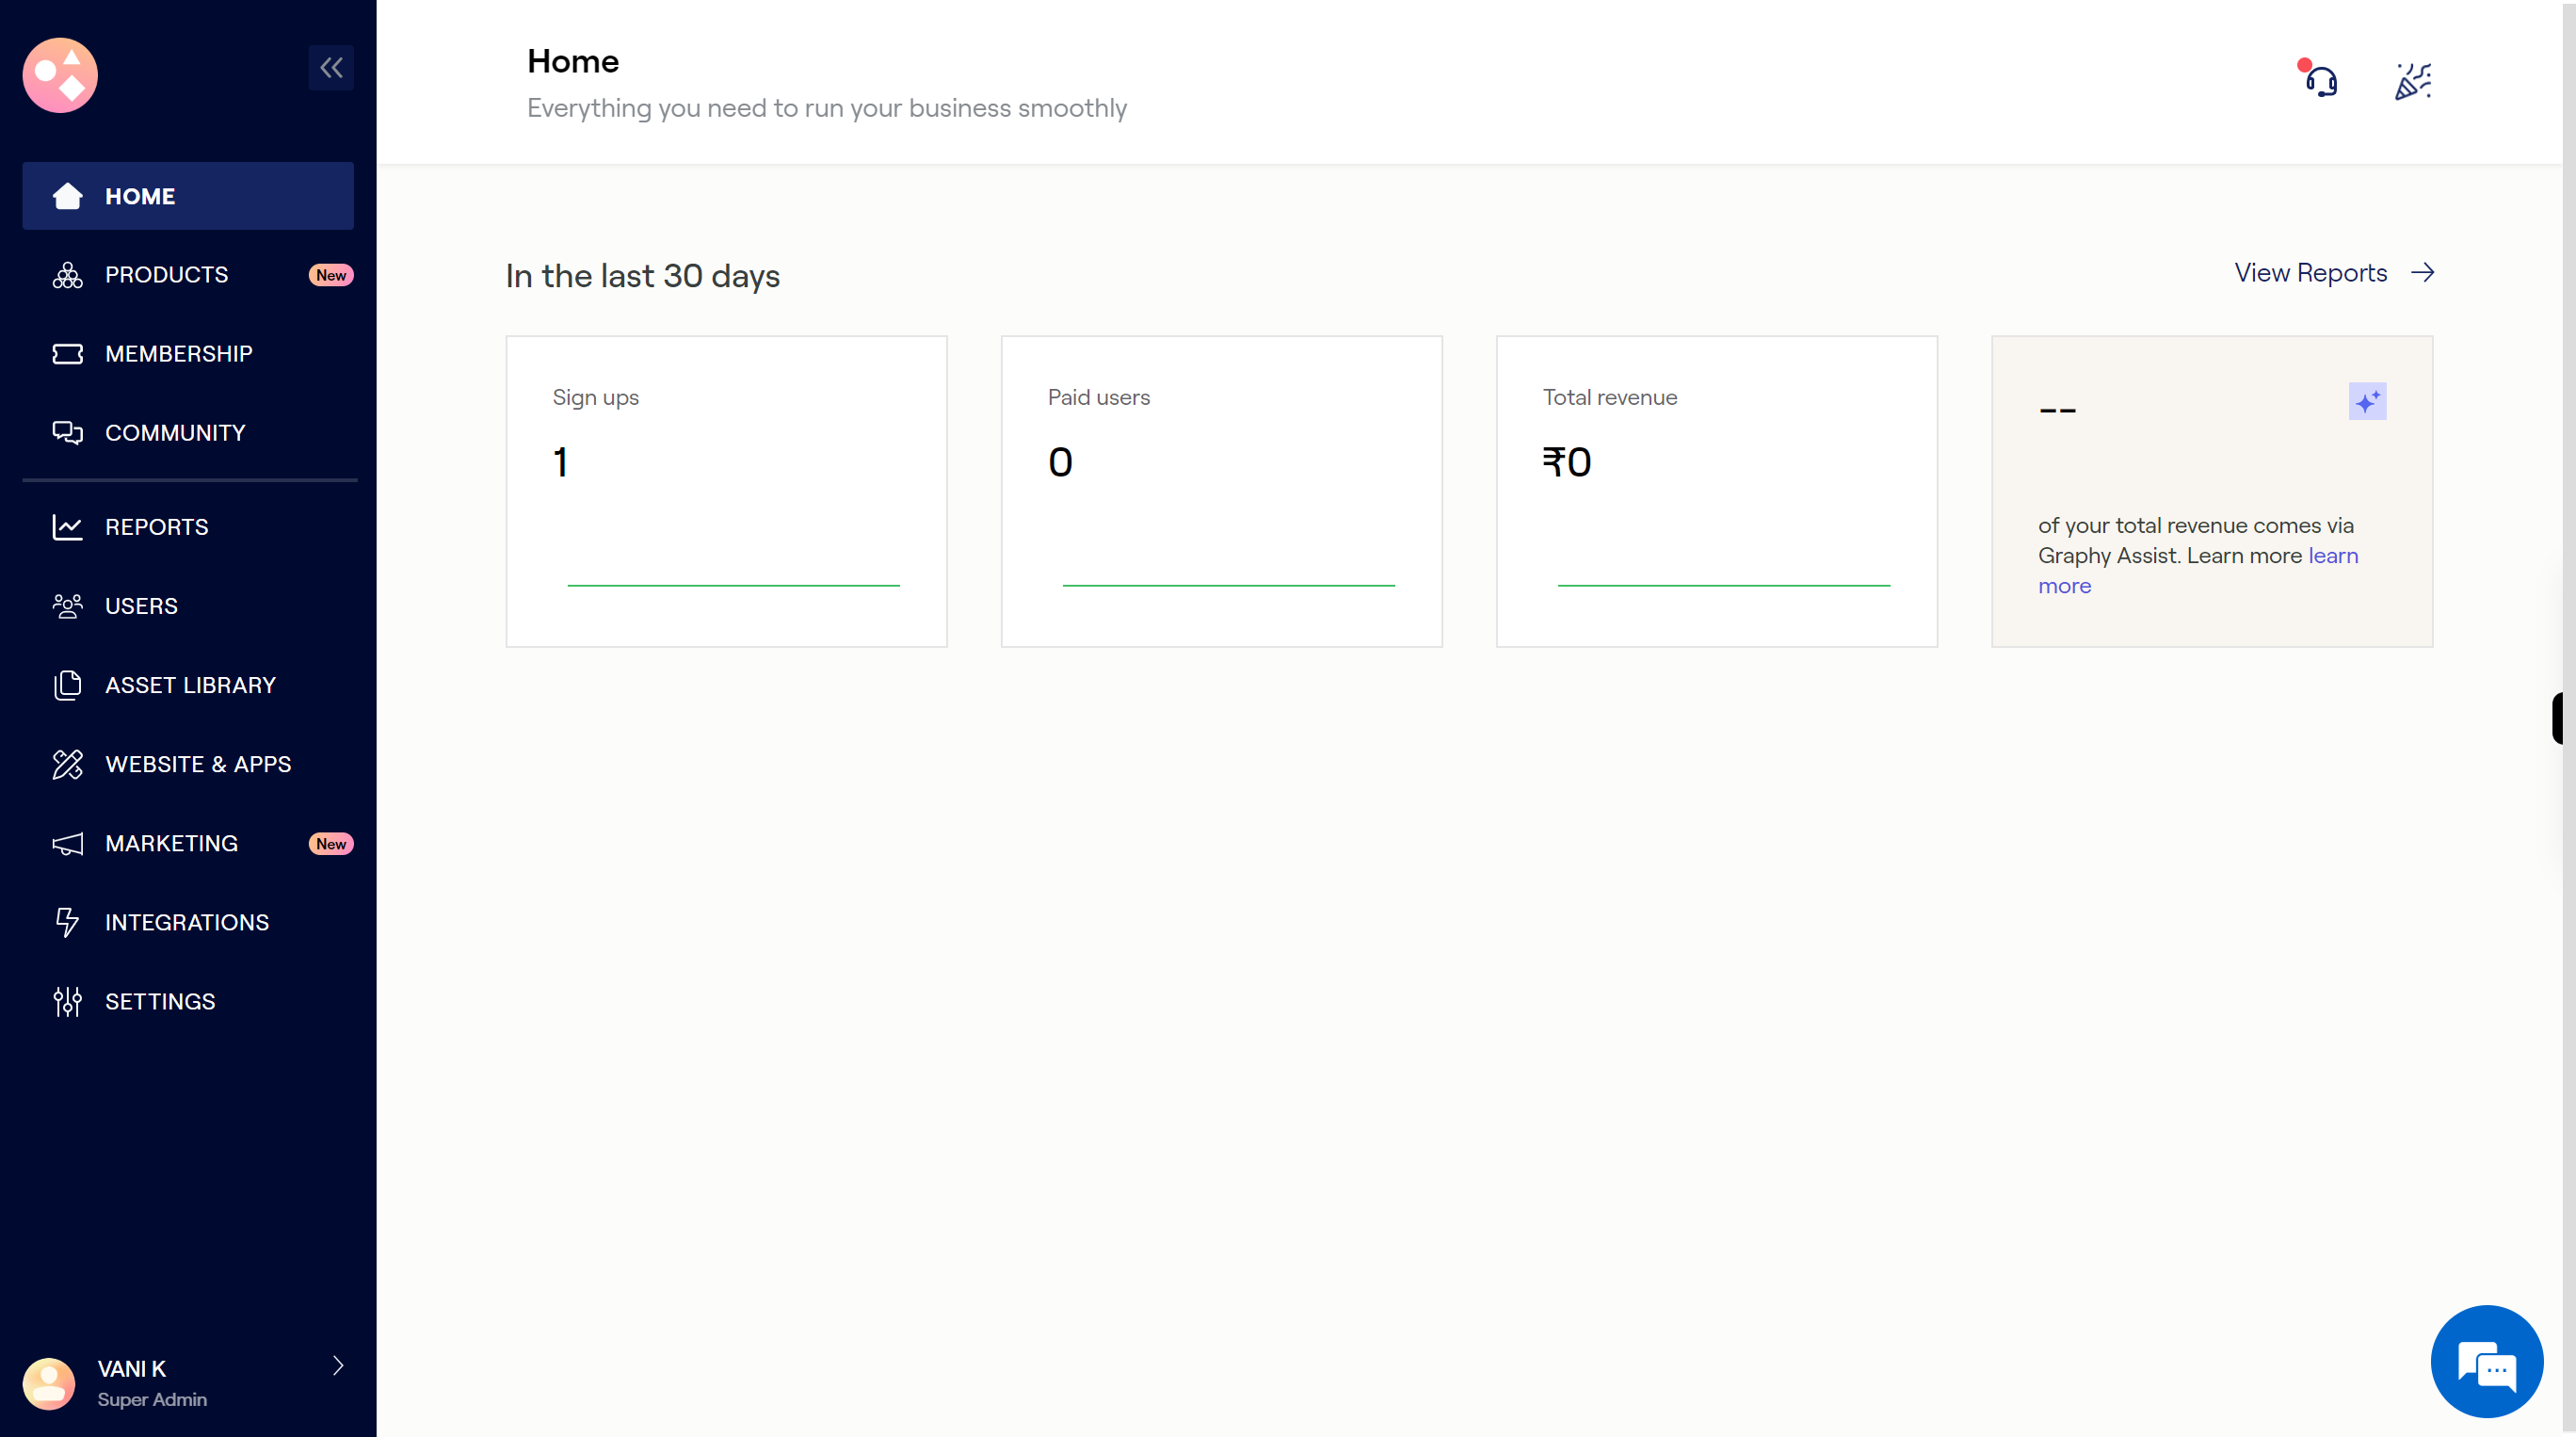
Open Home
-
2.
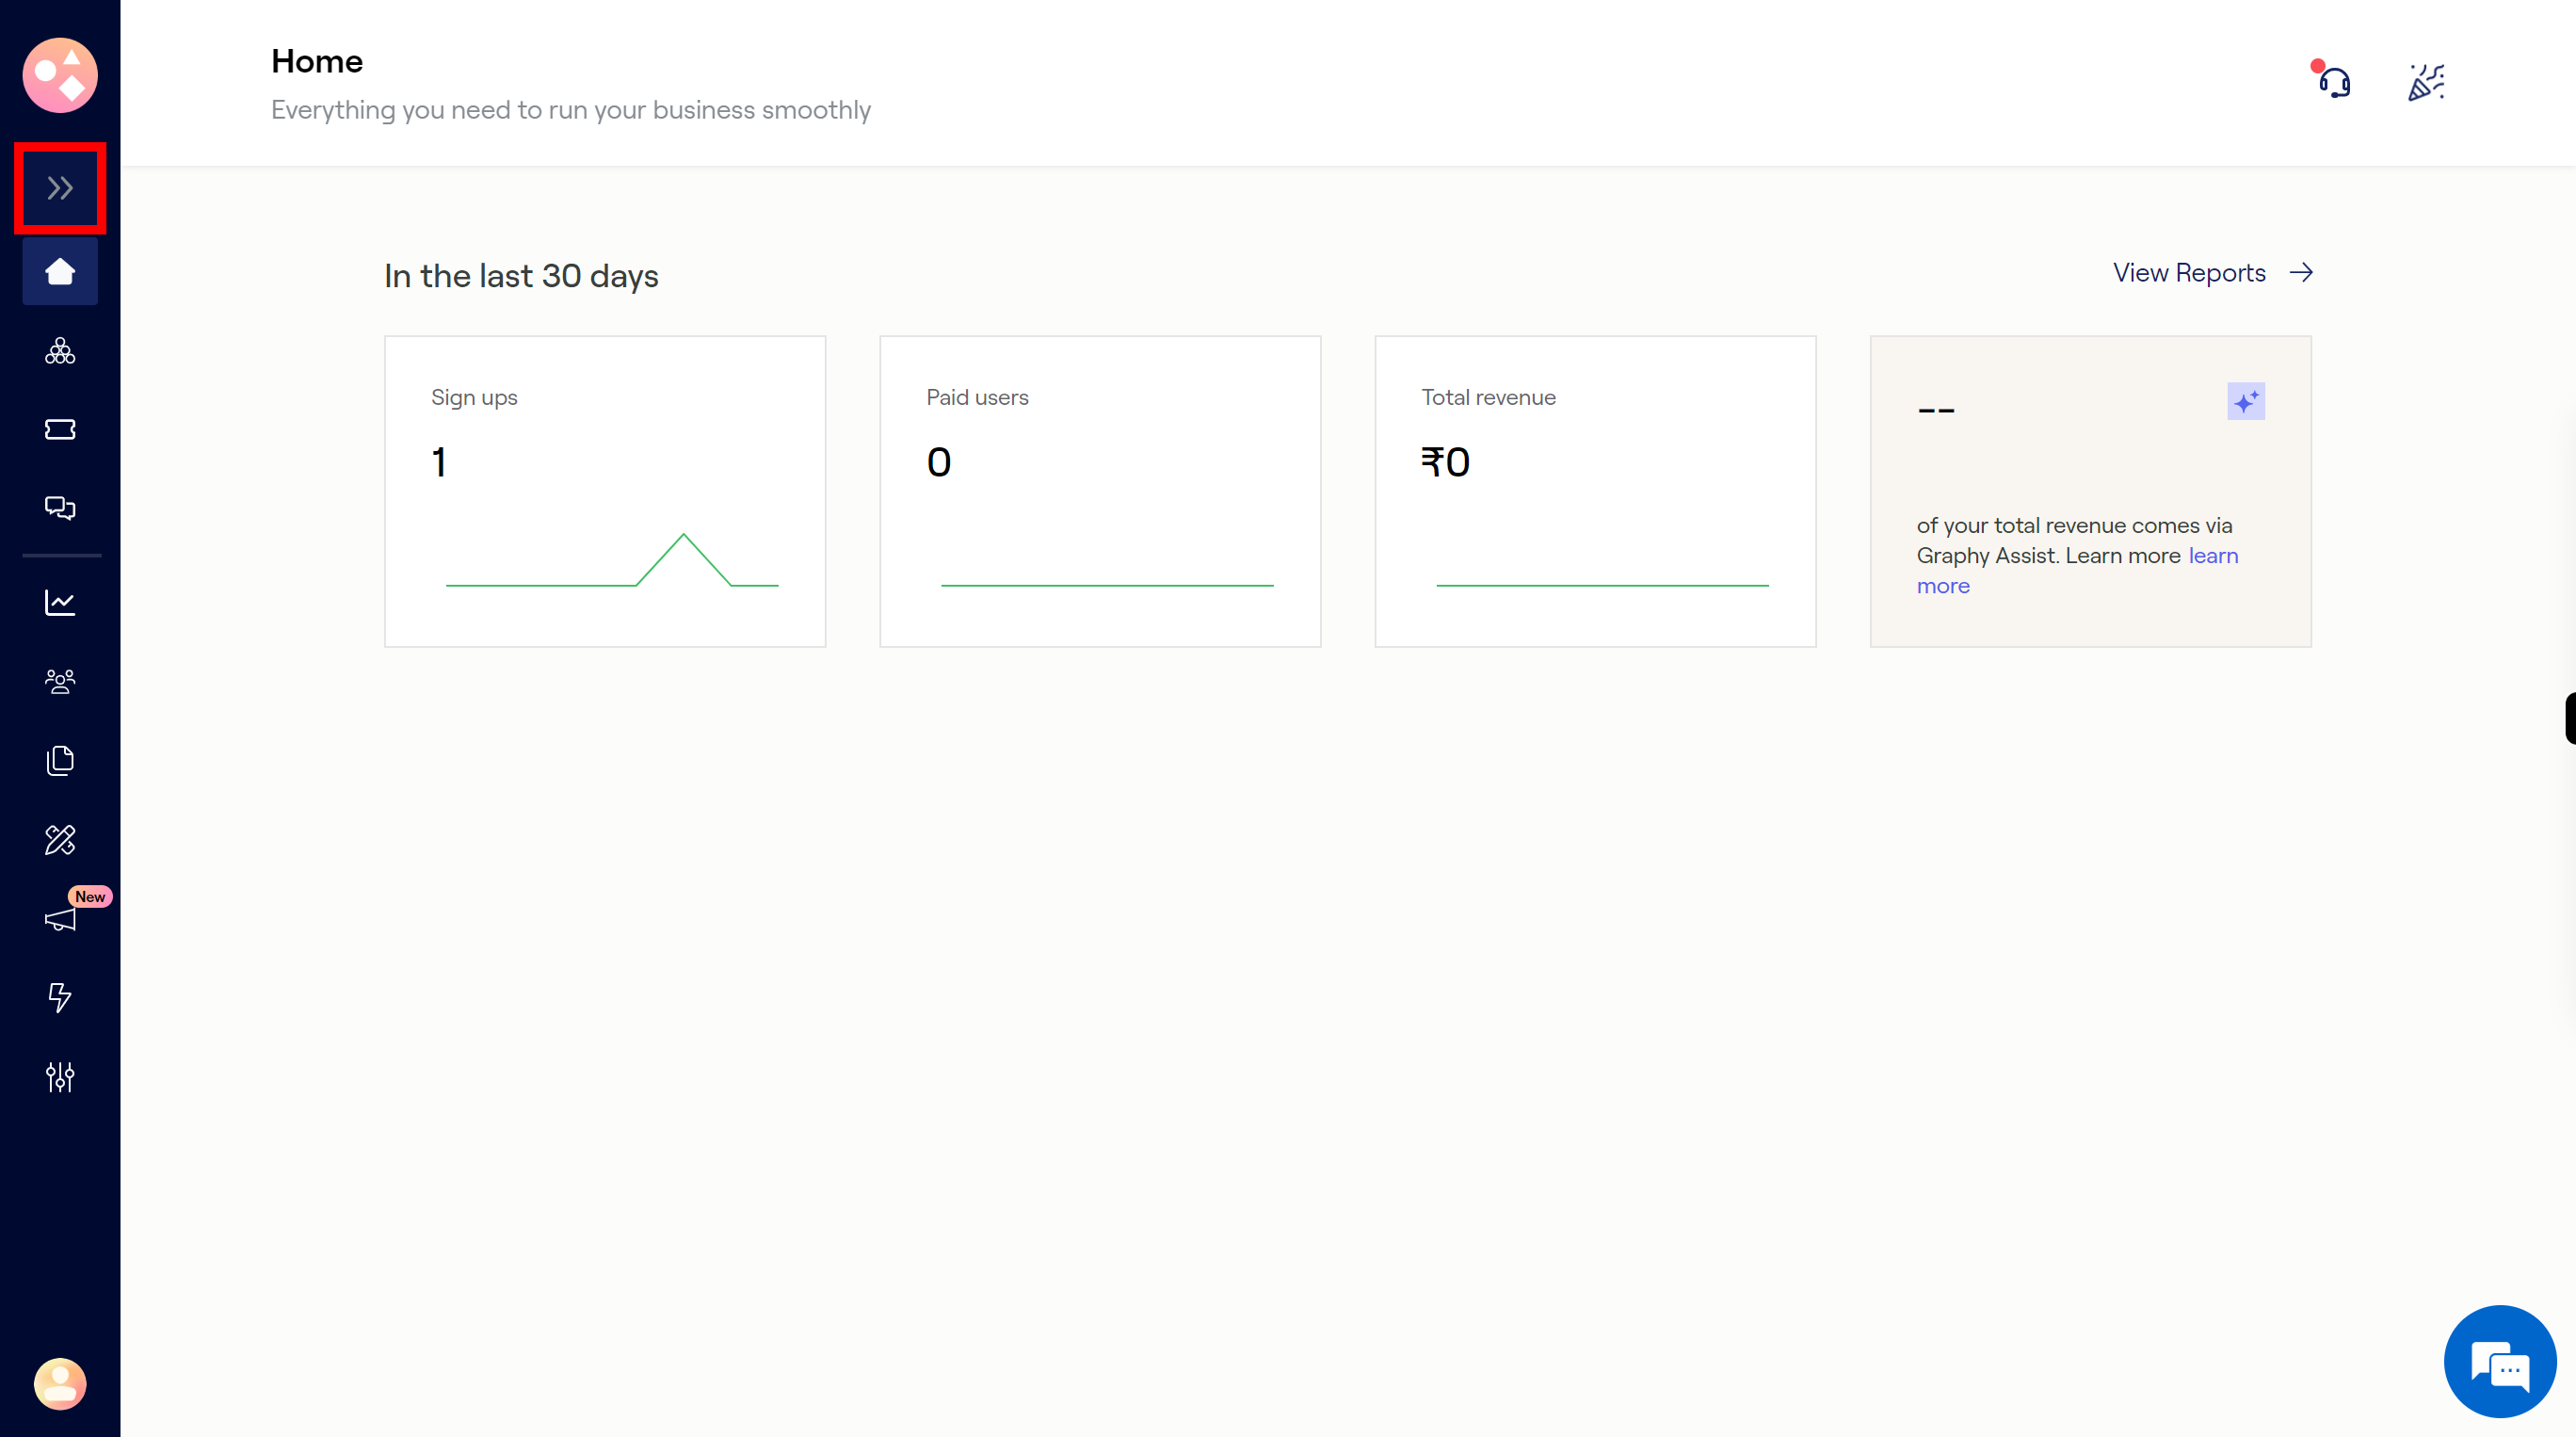
Click on ">>" icon to open all icon.
-
3.
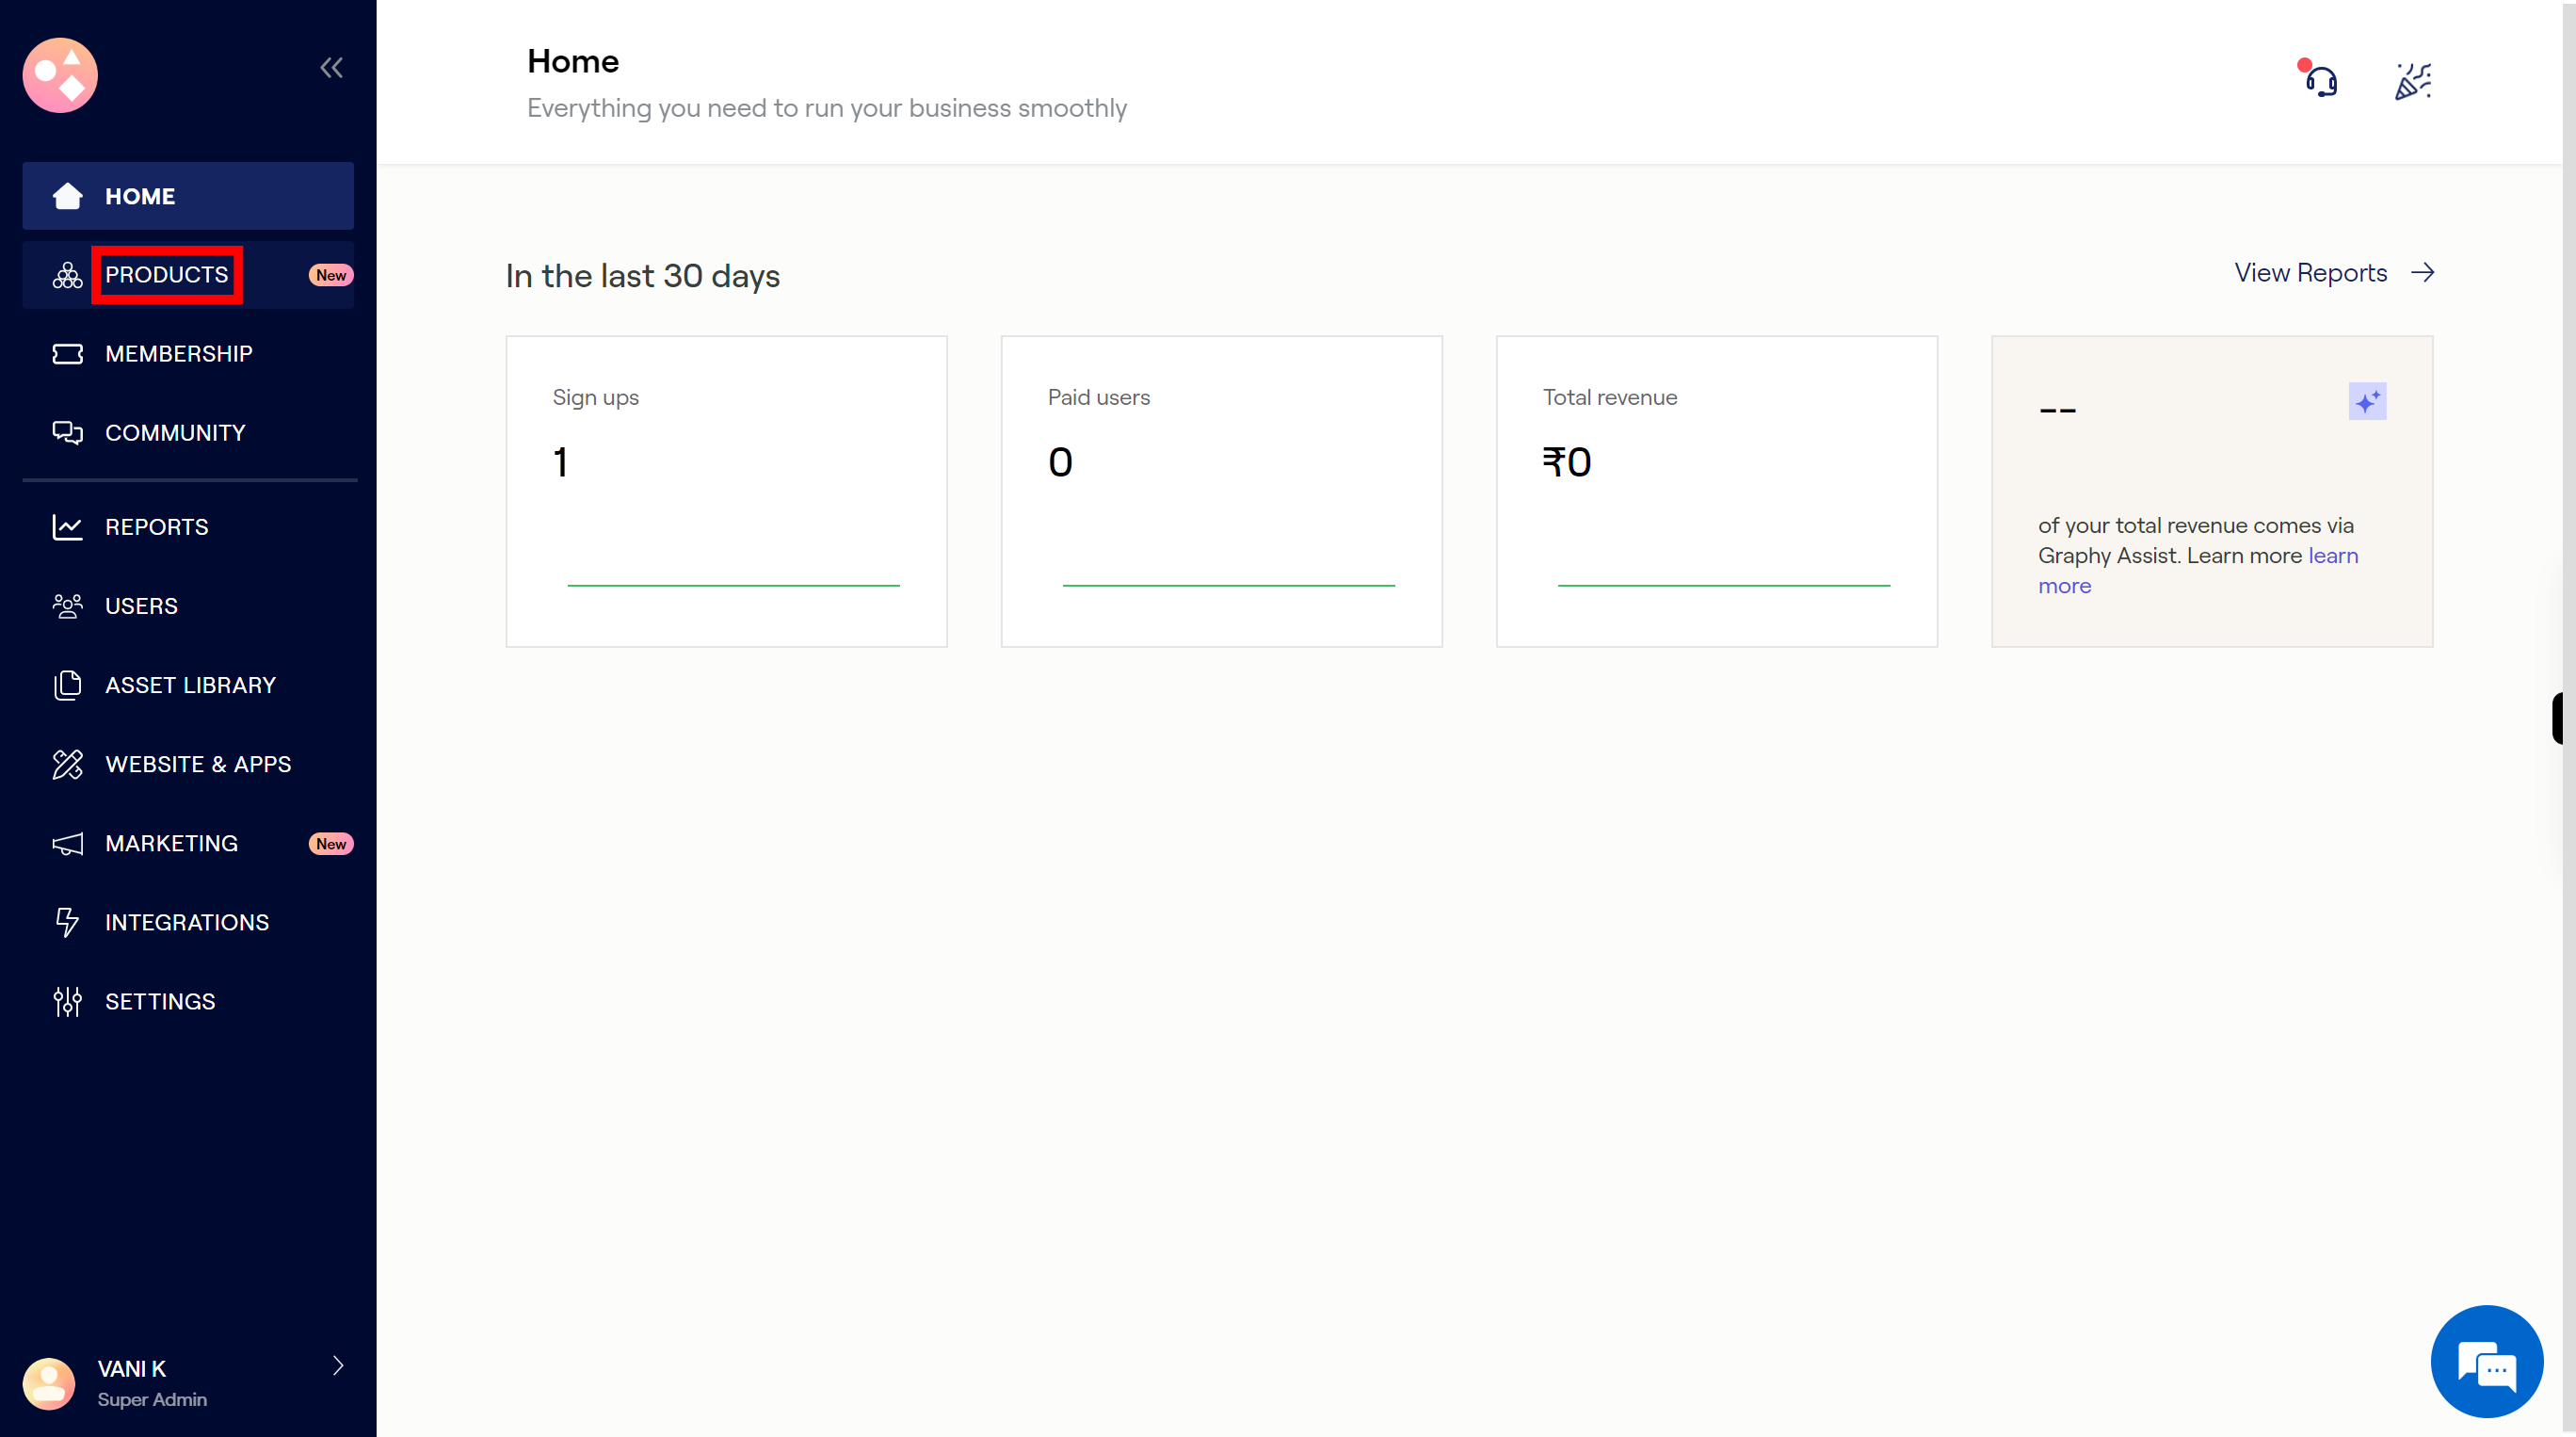
Click on the "Products" icon to see the courses.
-
4.
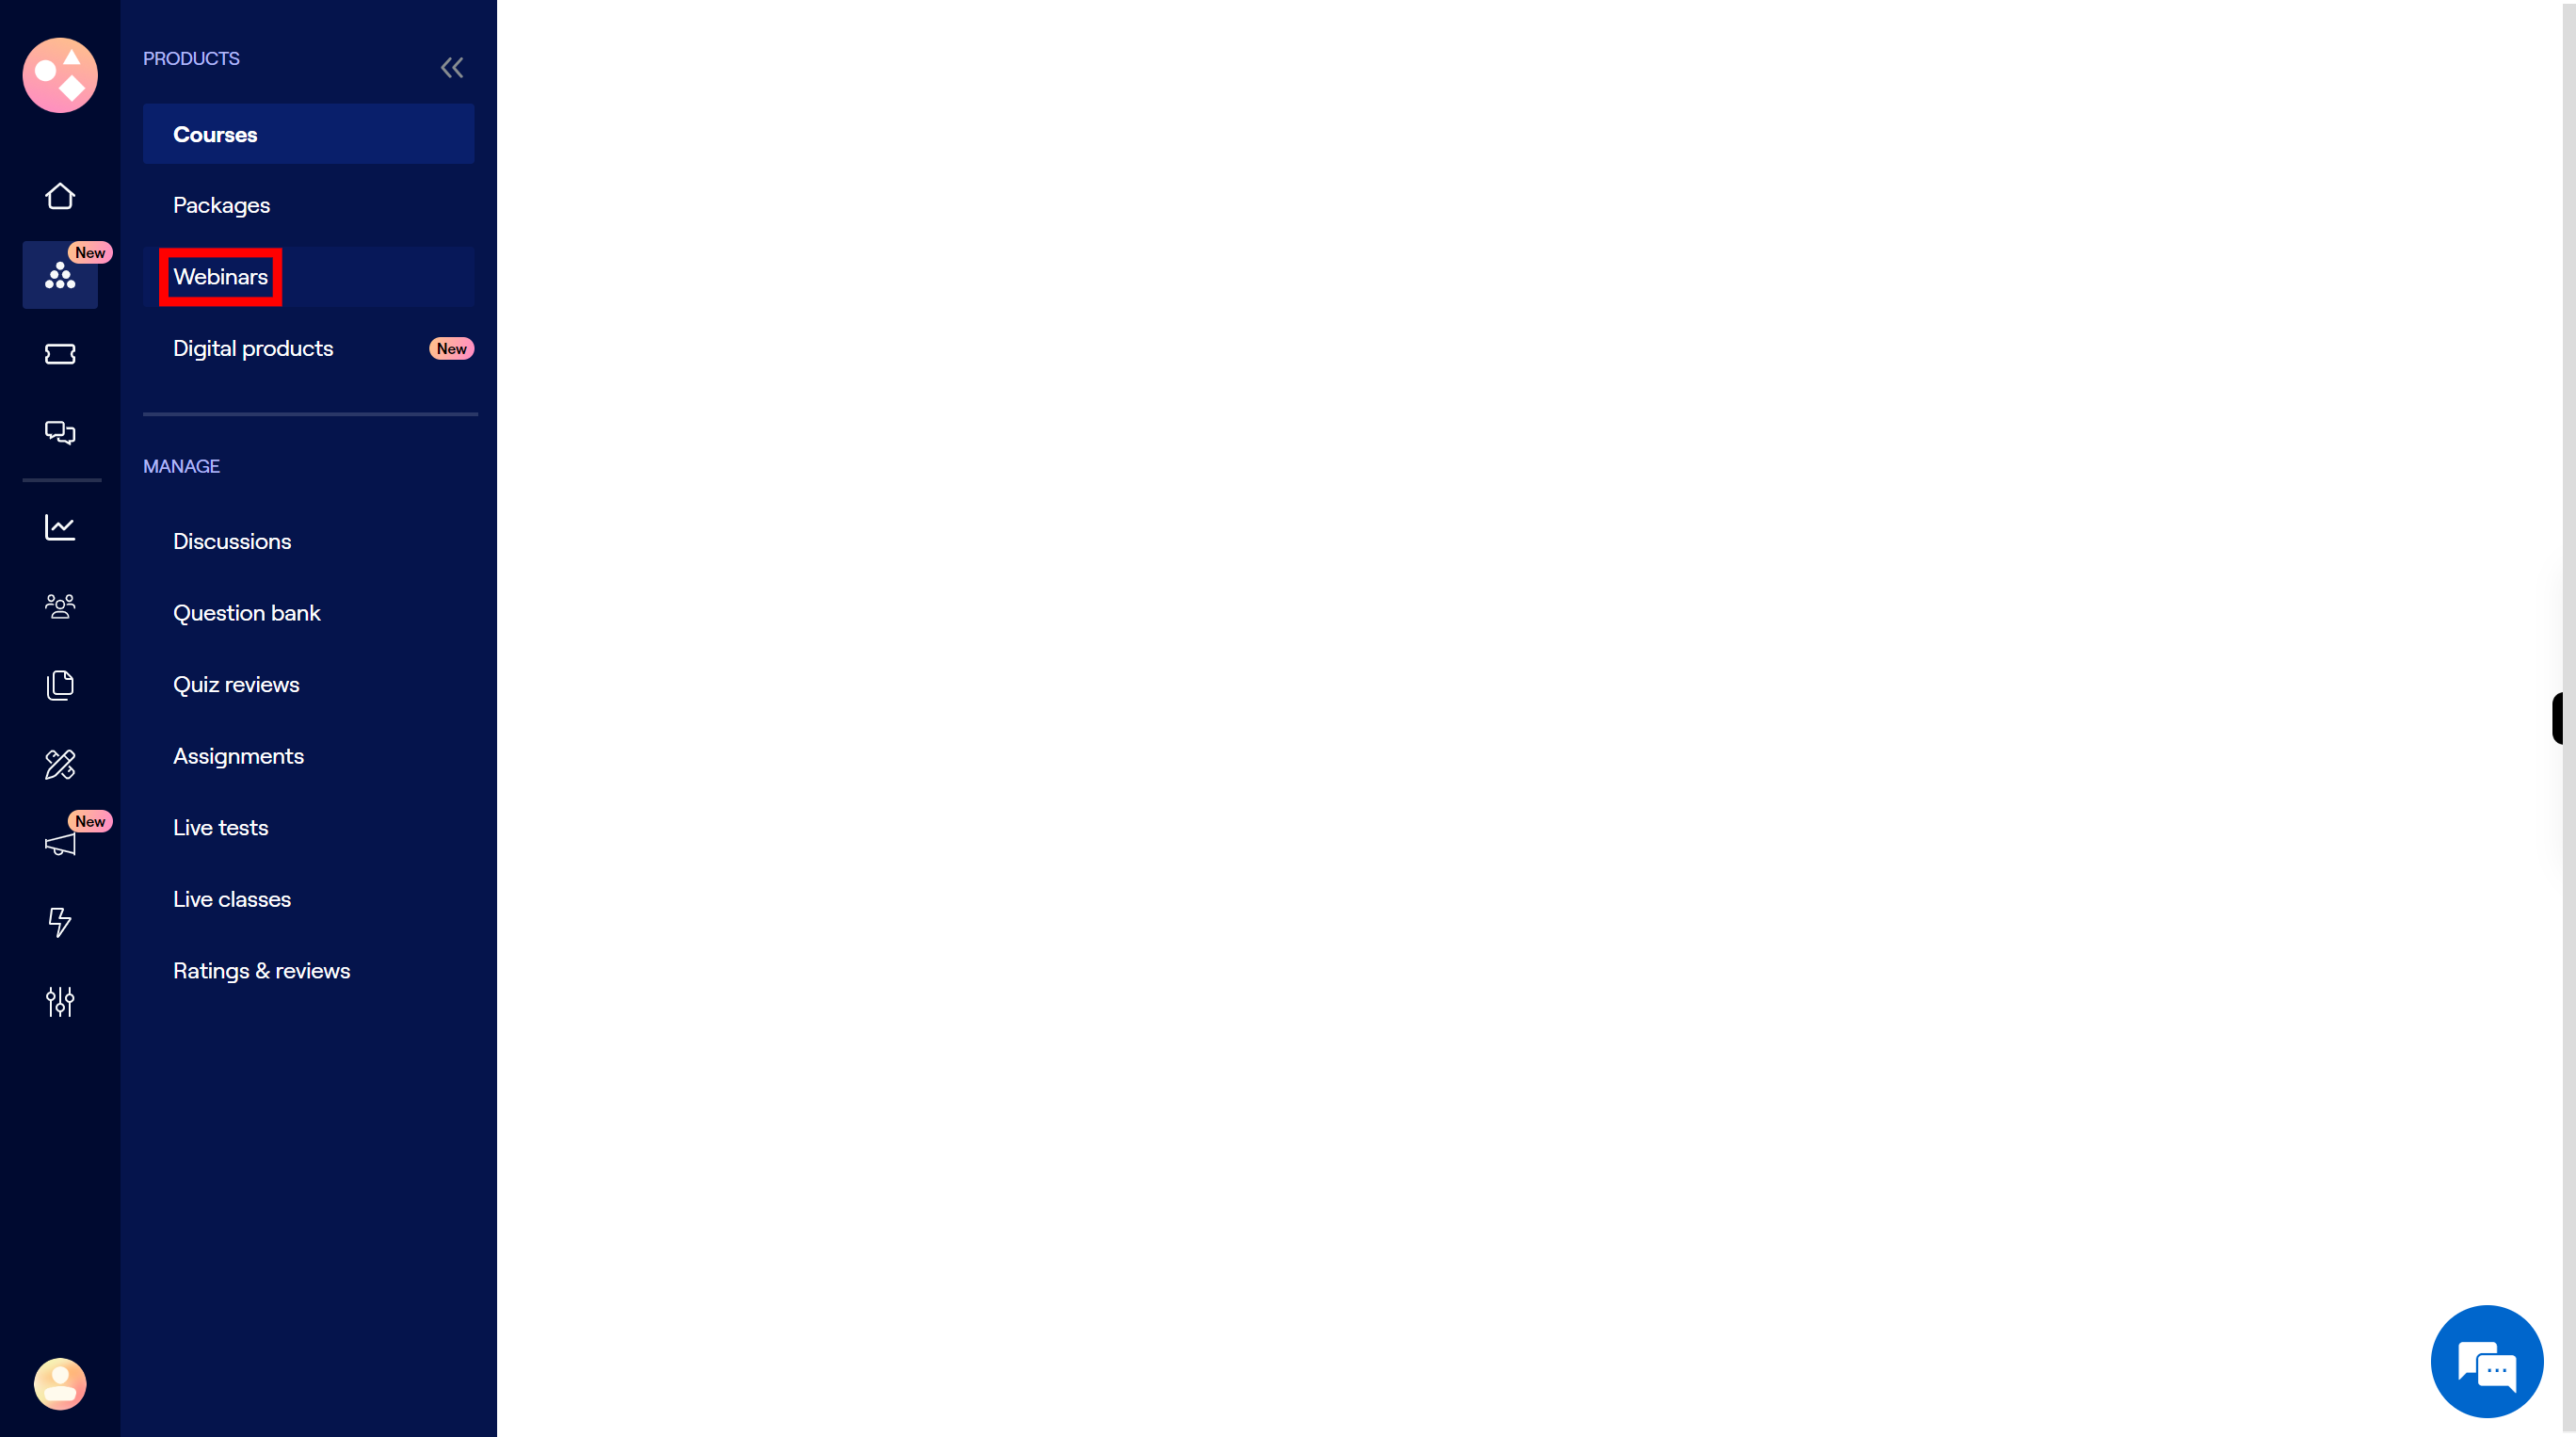
Click on the "Webinars" icon to add the webinars.
-
5.
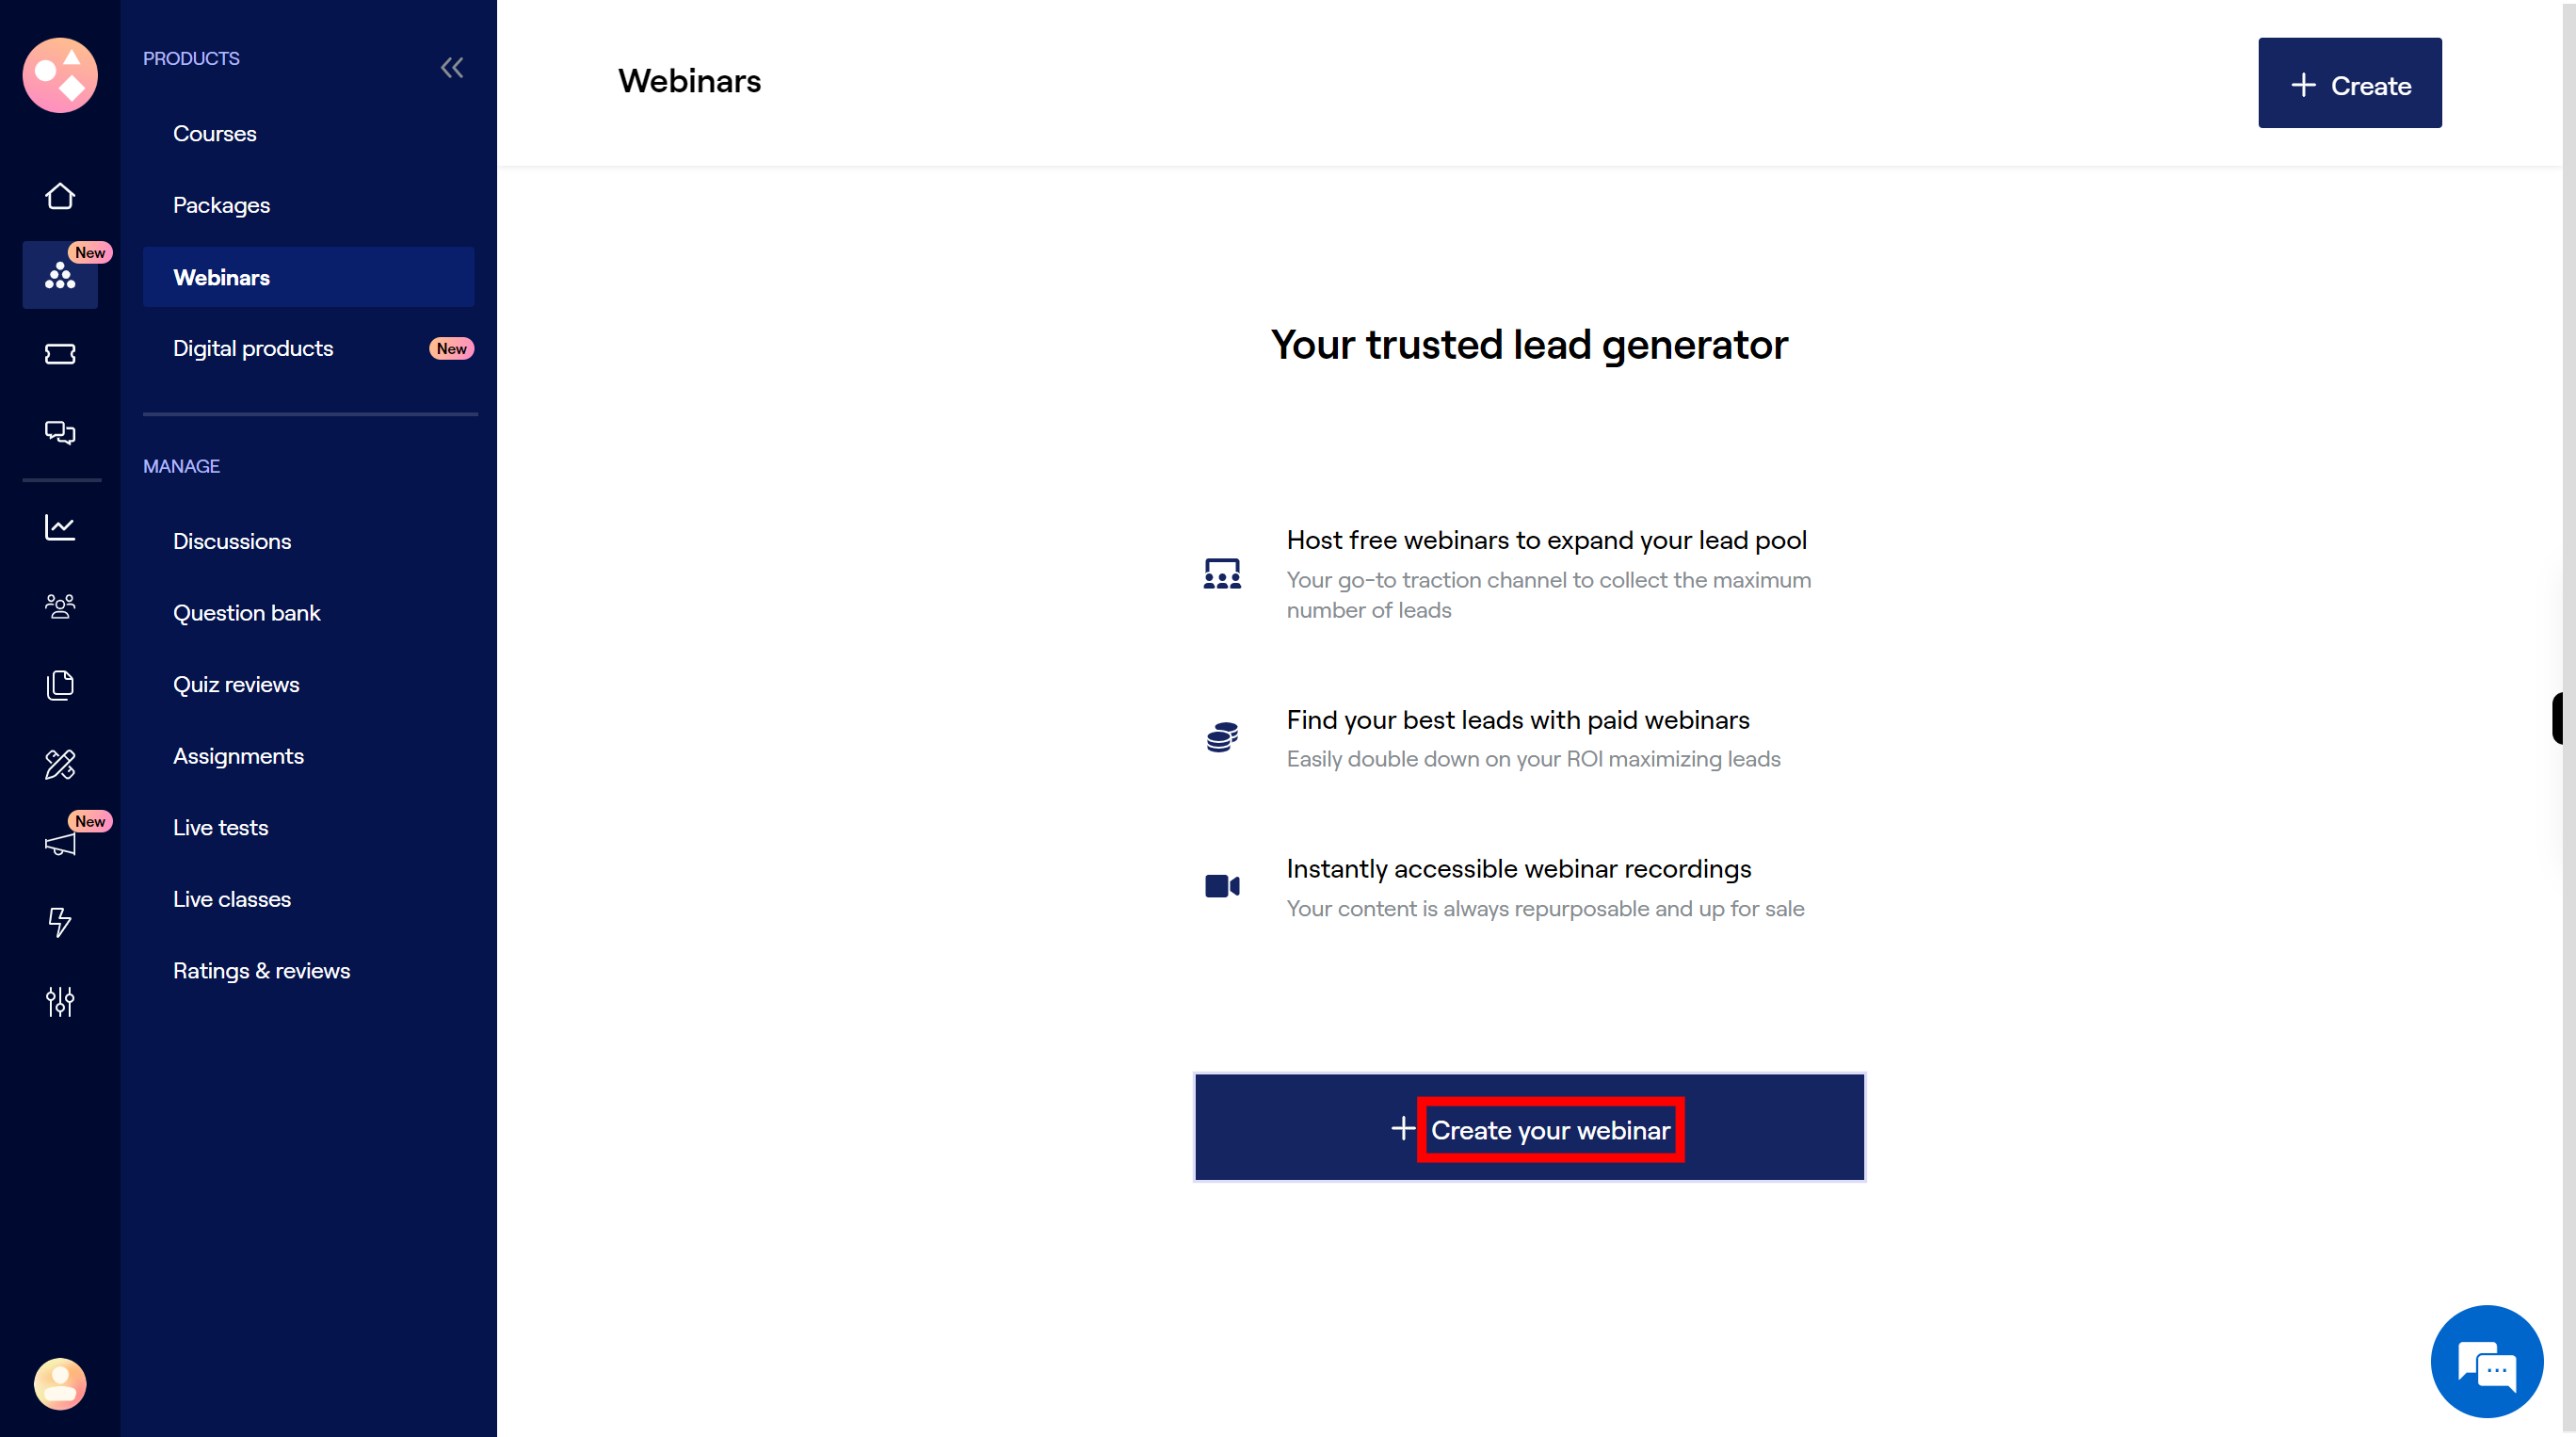
Click on the "Create your webinar" button to create the webinar.
-
6.
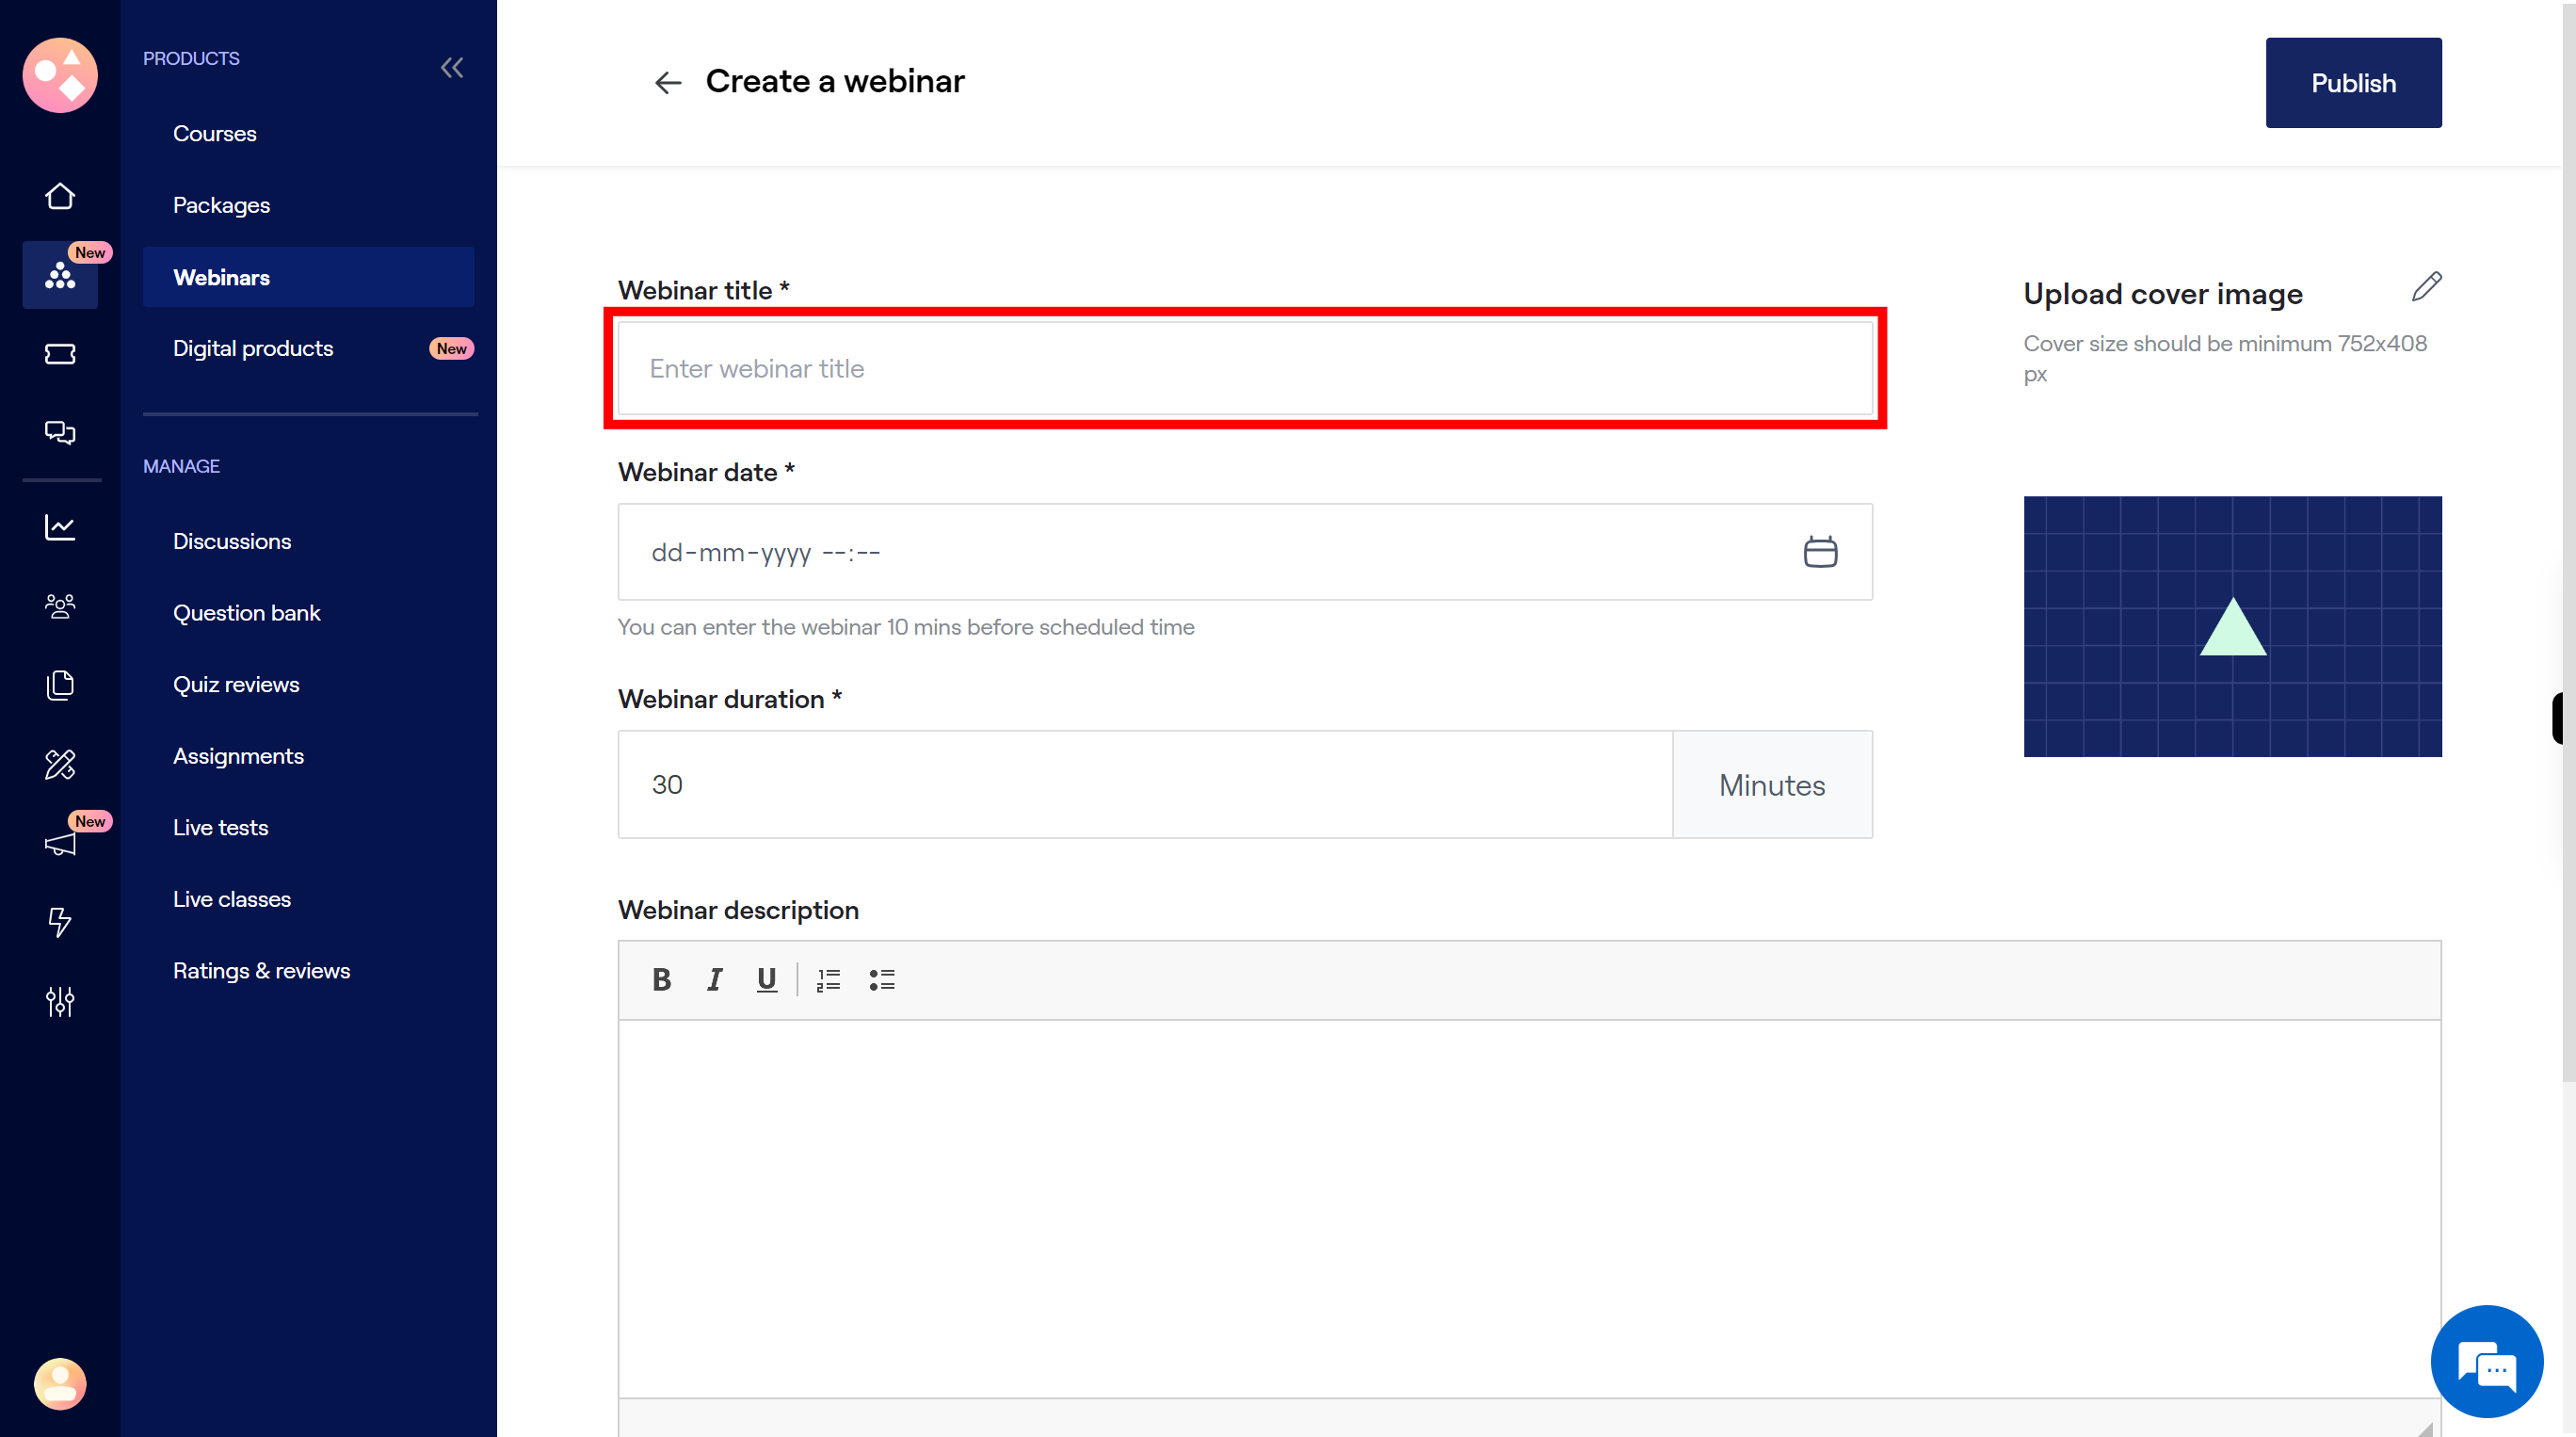
Click on the "Title" field, then enter webinar title. Once done, click on the "Next" button on the Supervity instruction widget.
-
7.
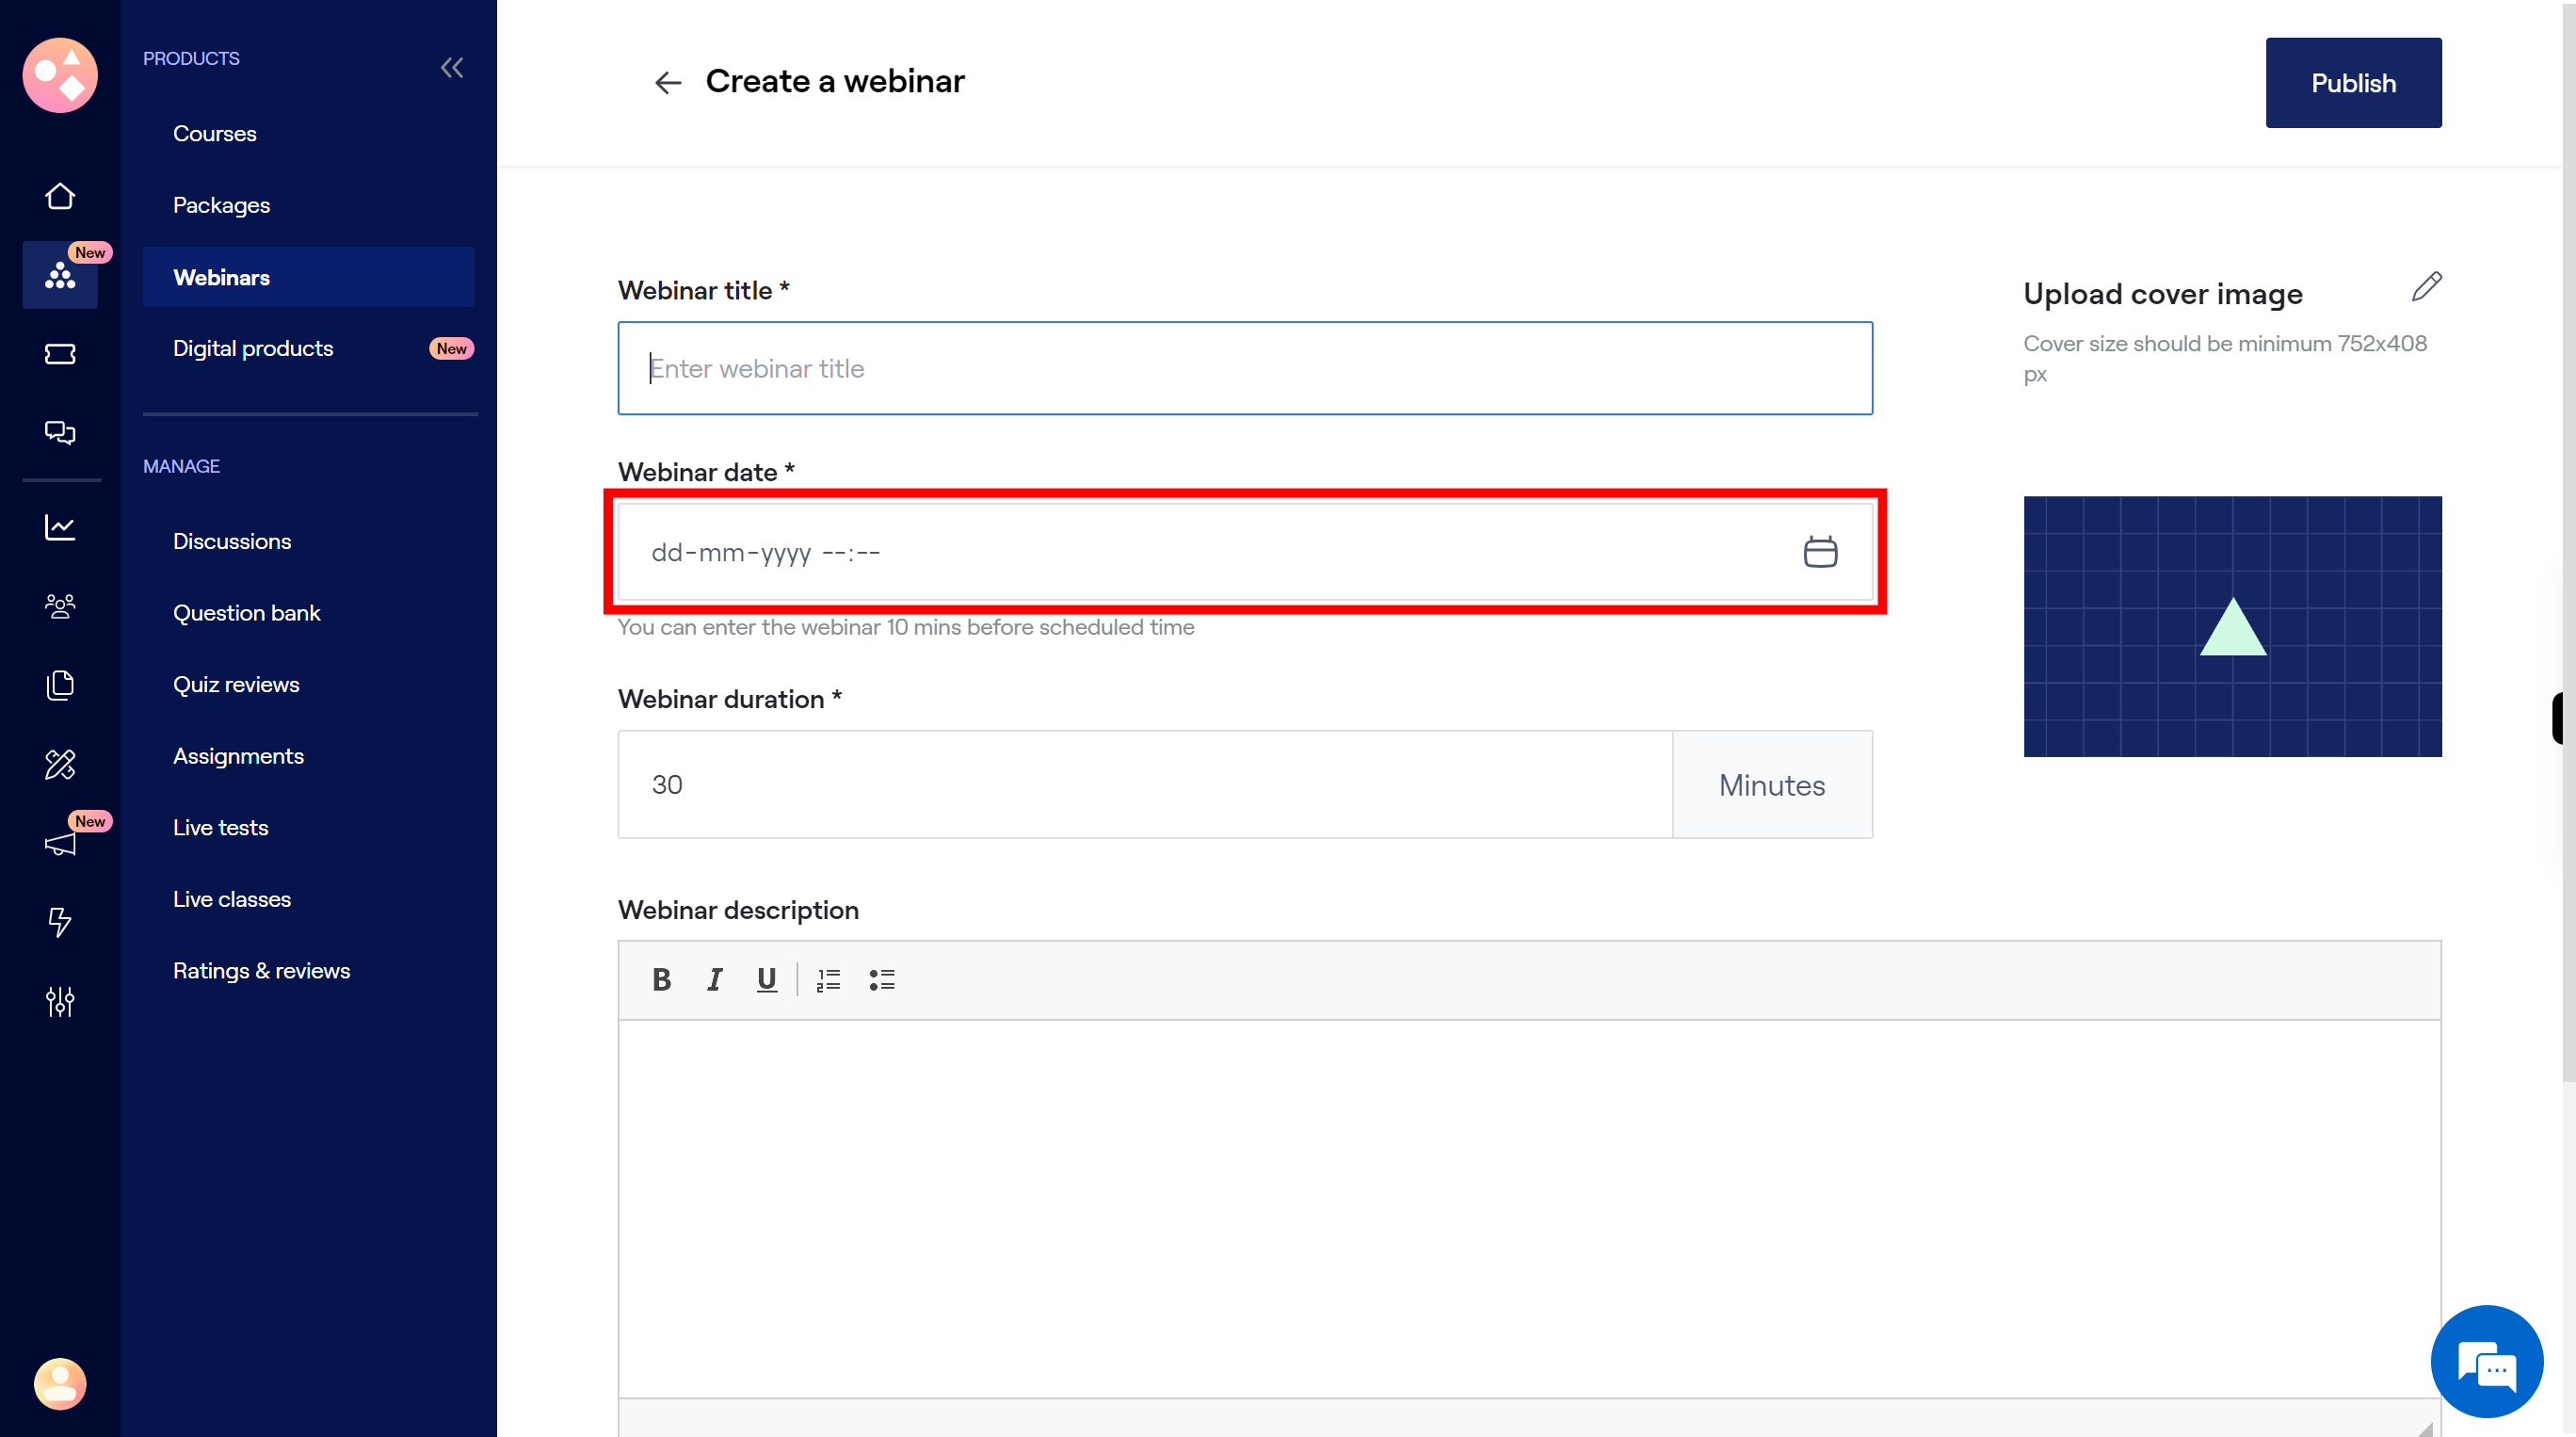
Click on the "Date" field, then select the date from the calendar. Once done, click on the "Next" button on the Supervity instruction widget.
-
8.
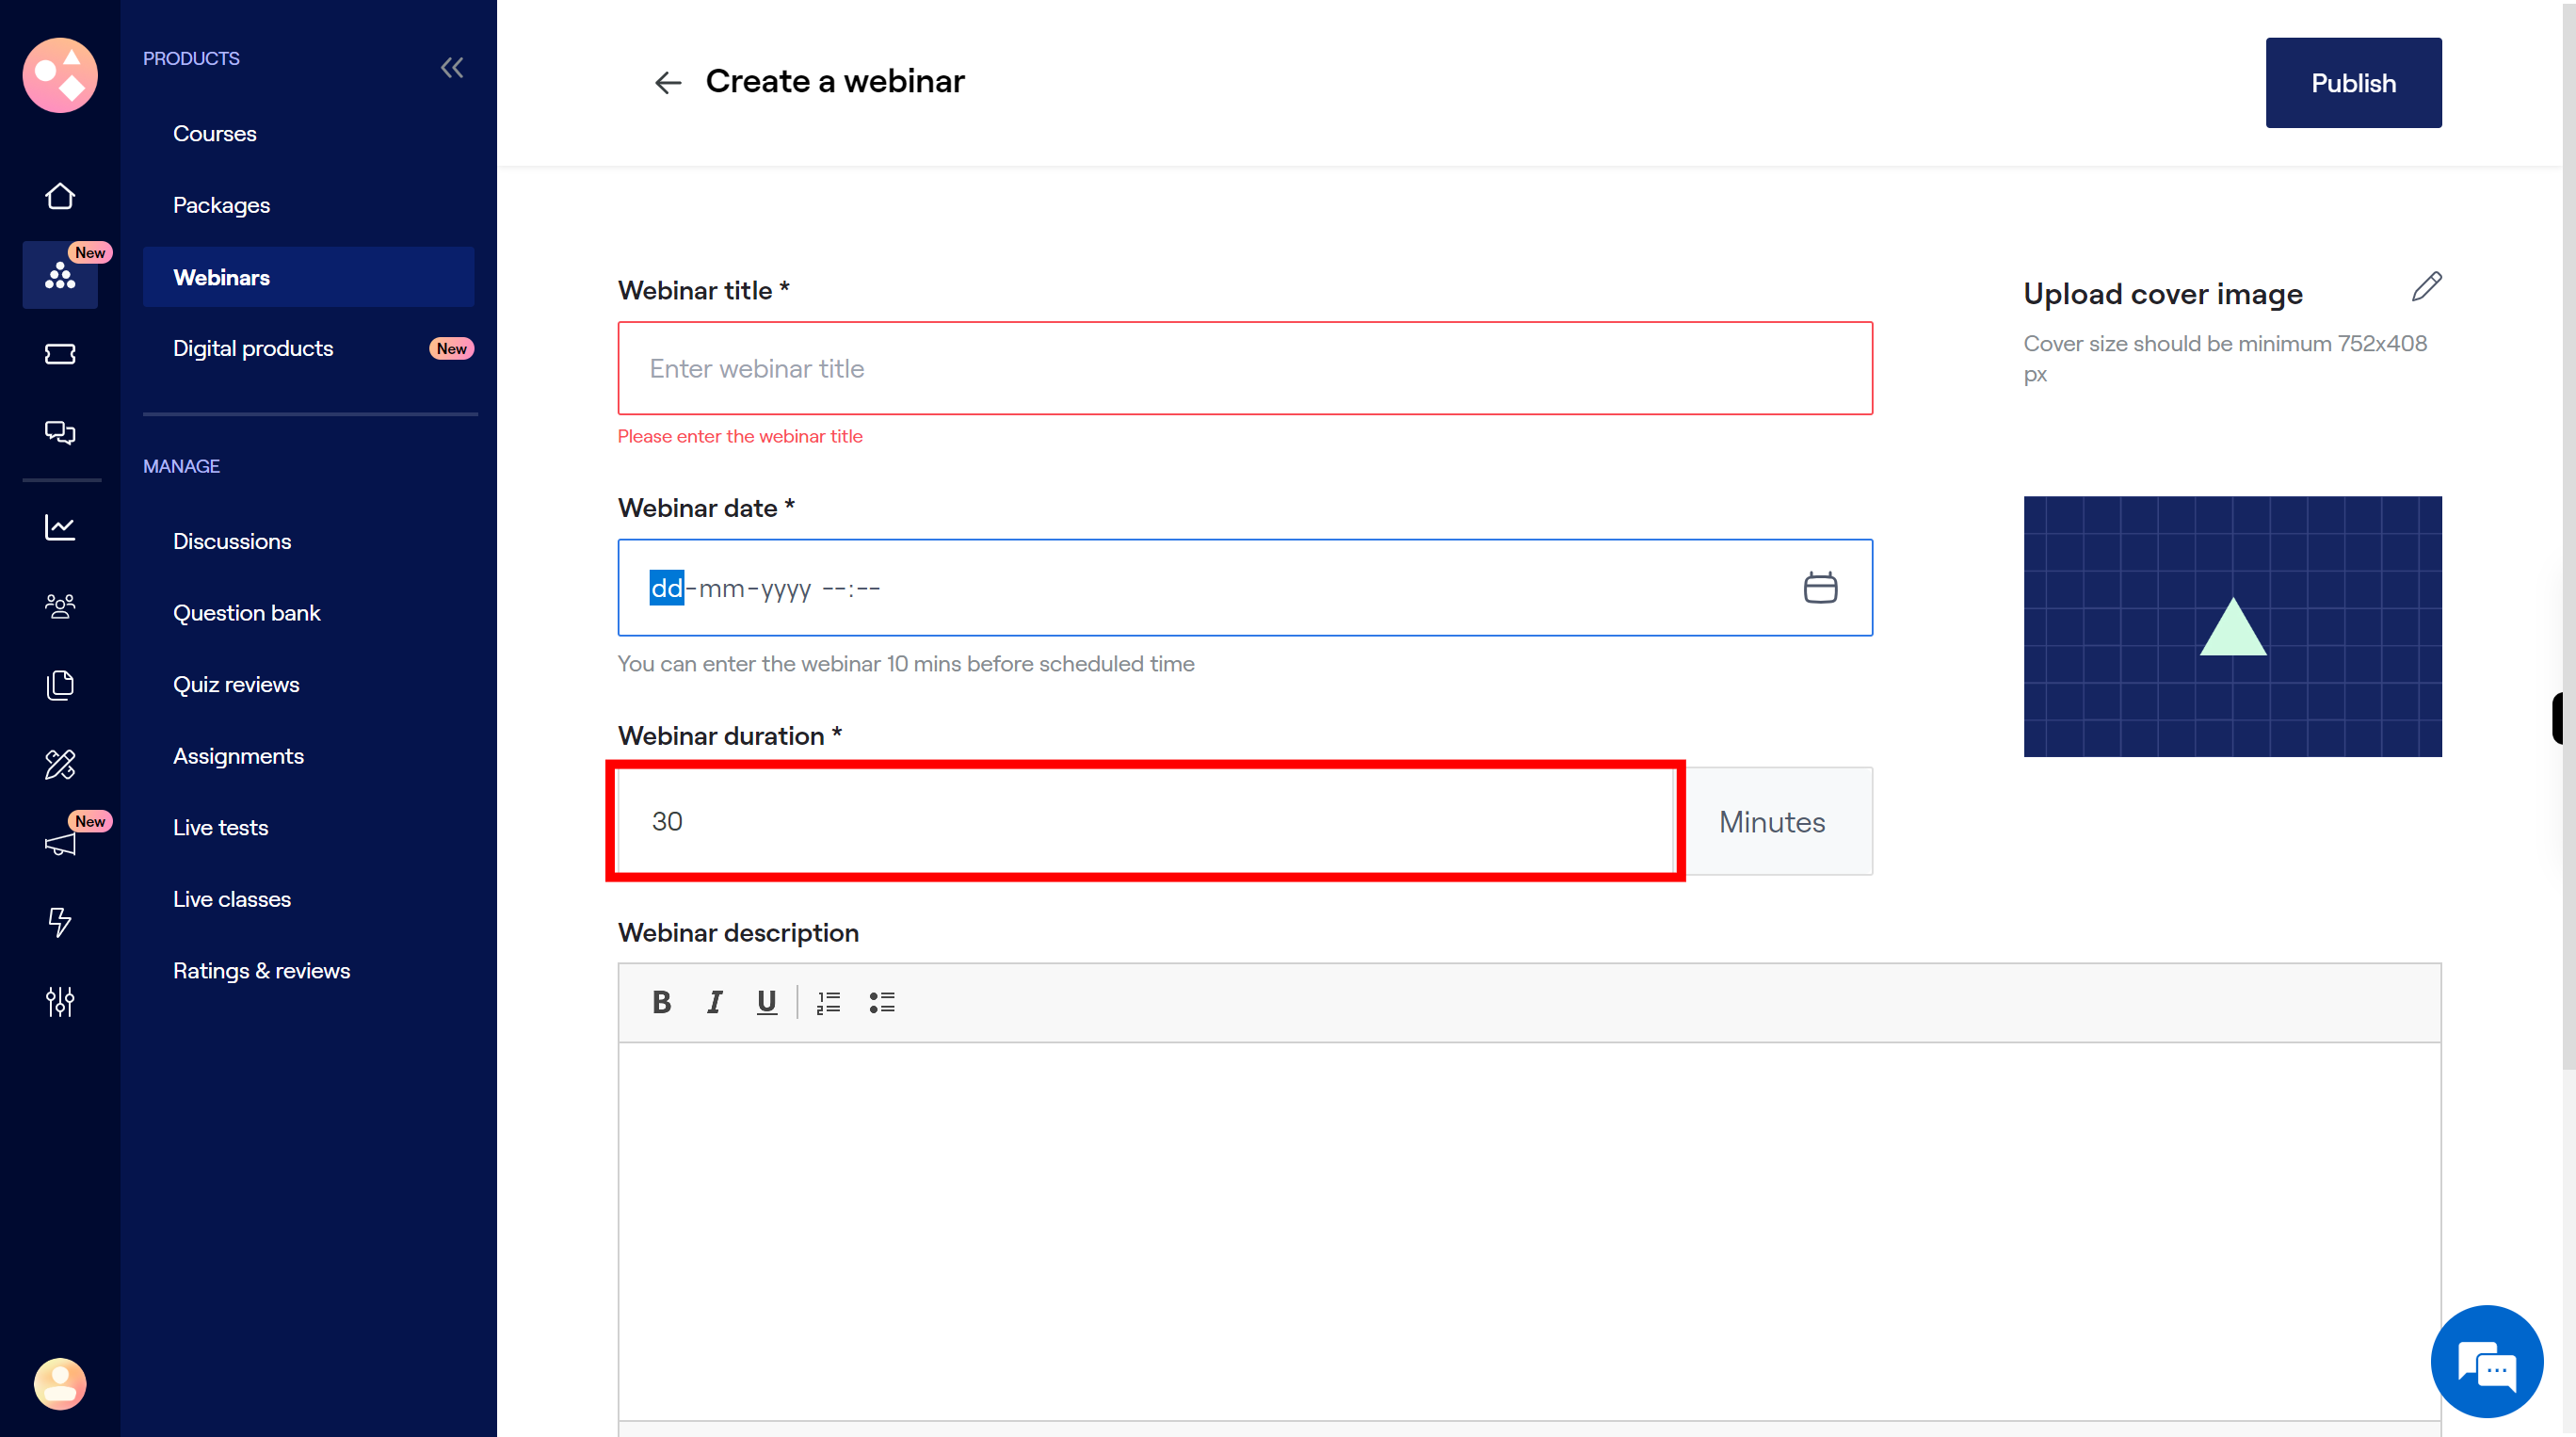
Click on the "Duration" field, then enter webinar duration. Once done, click on the "Next" button on the Supervity instruction widget.
-
9.
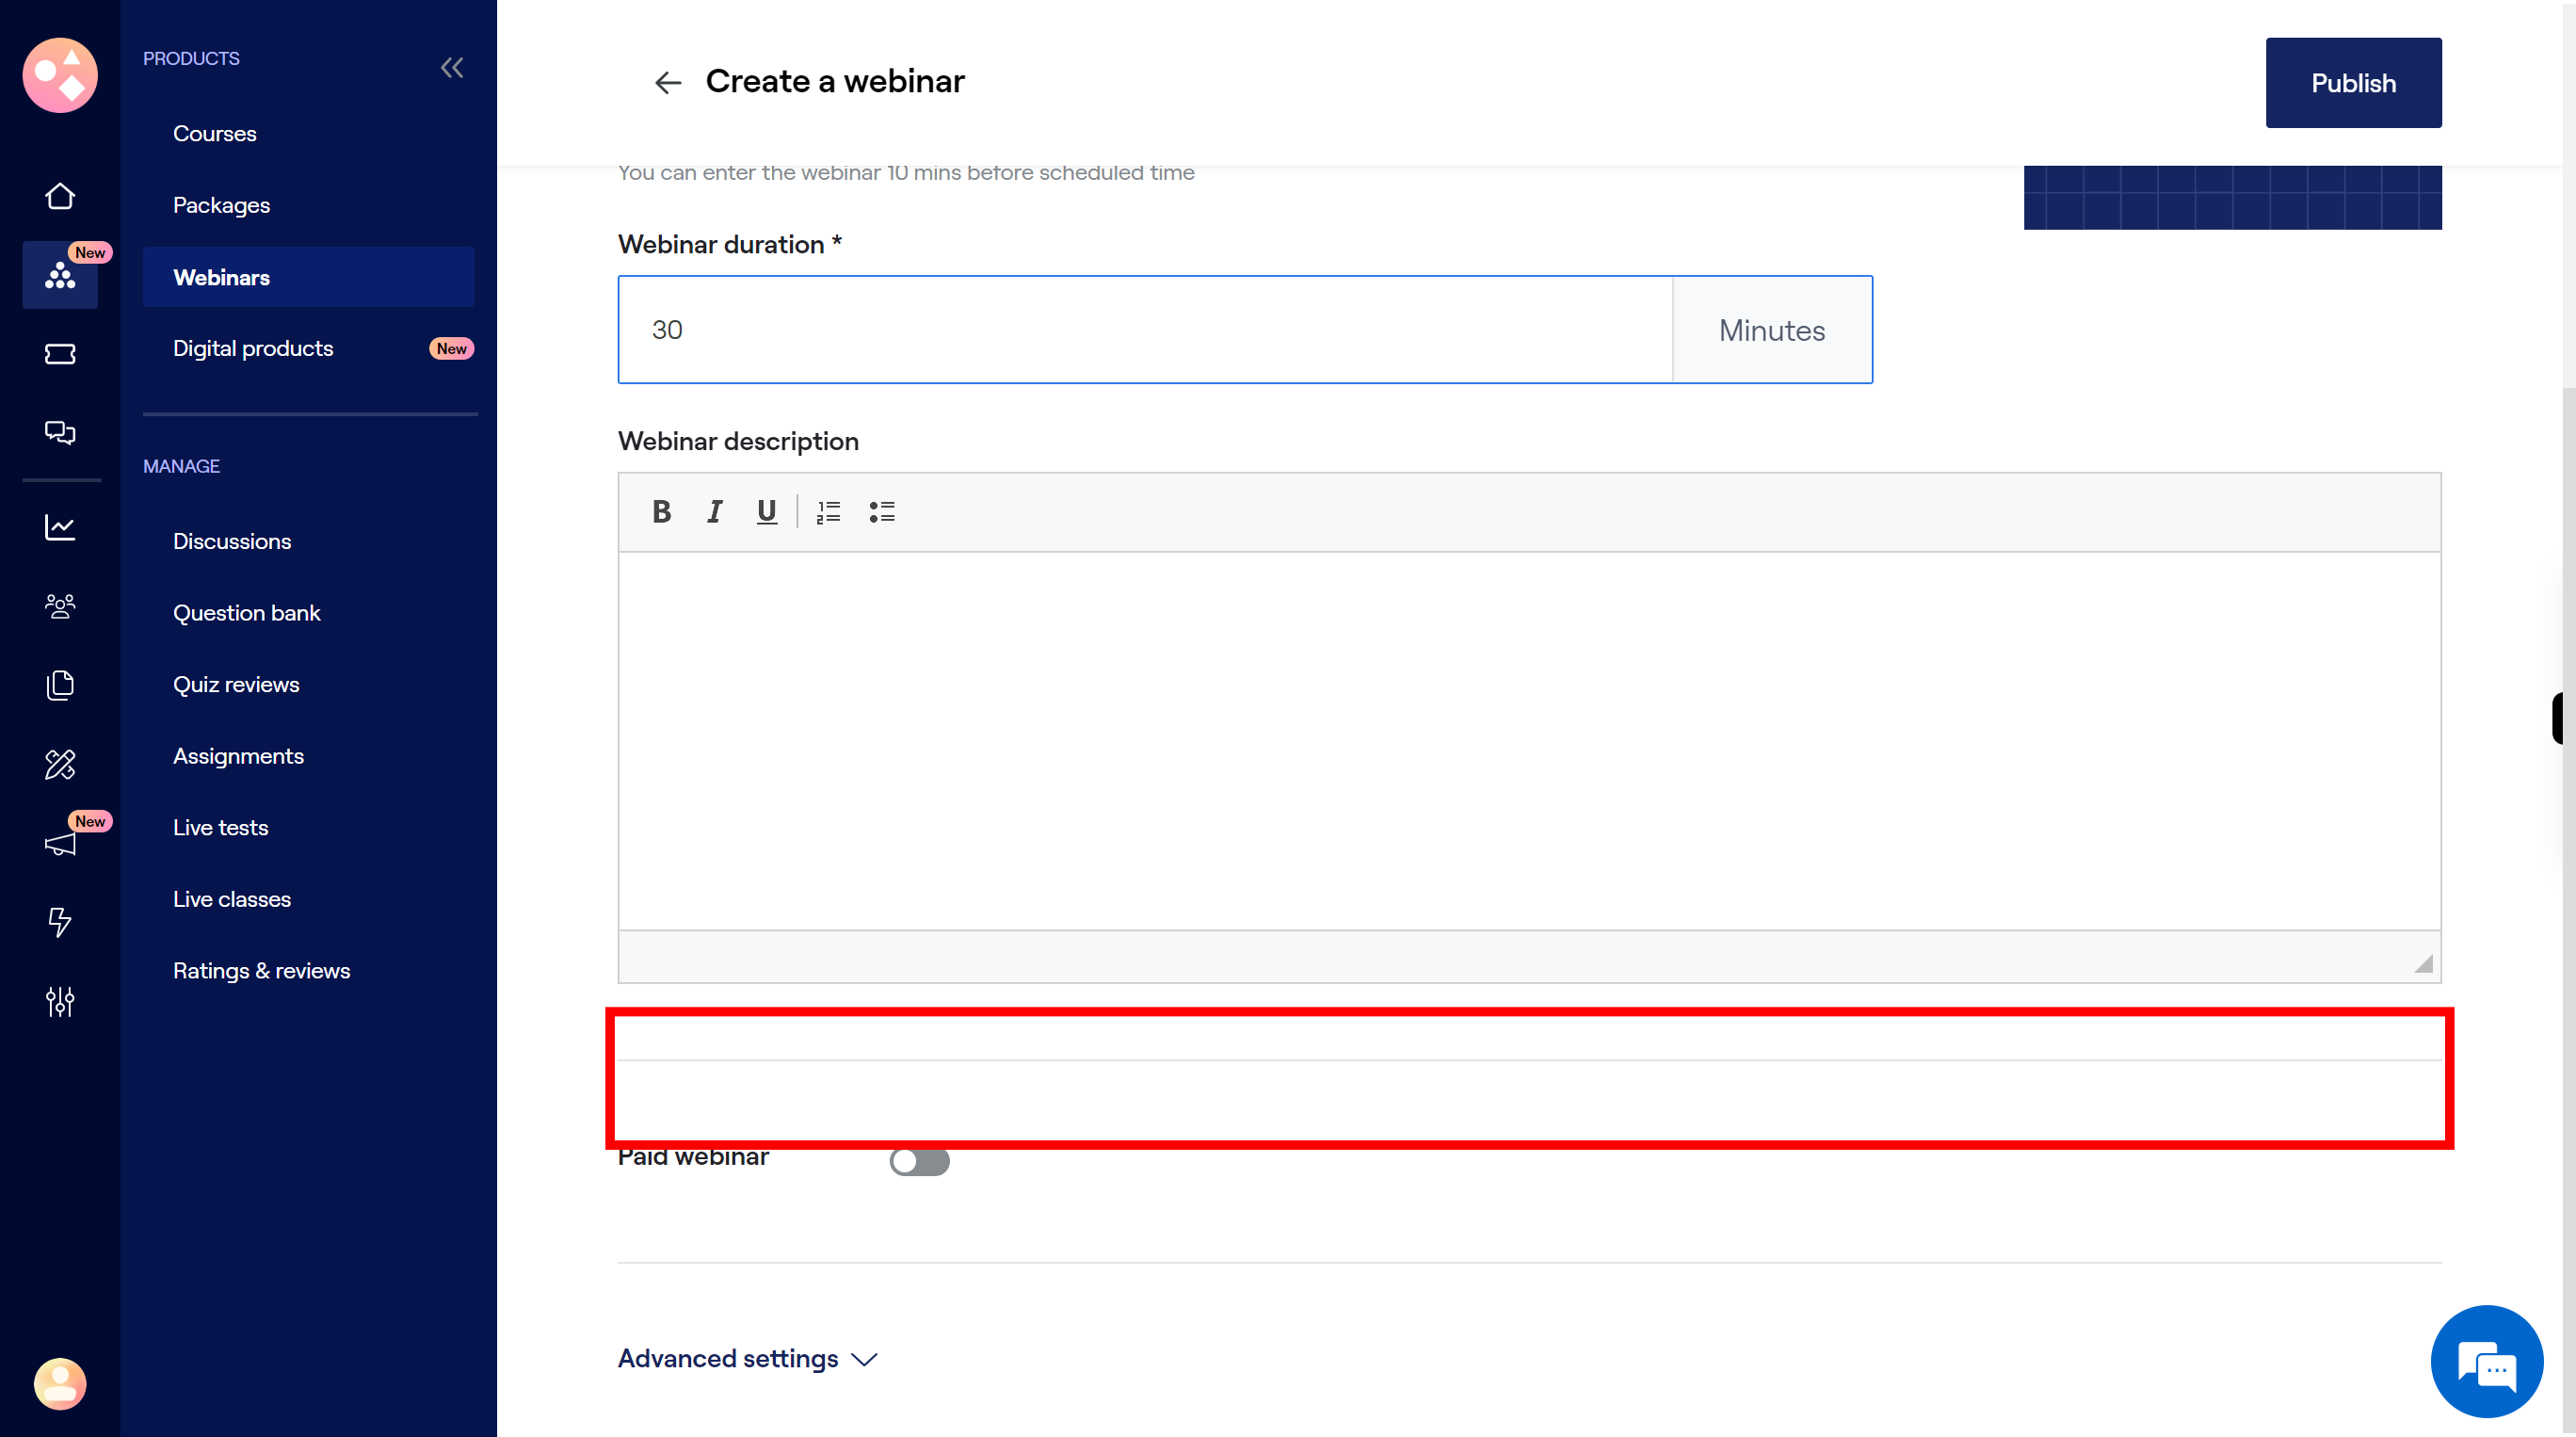
Click on the "Description" field, then enter webinar description. Once done, click on the "Next" button on the Supervity instruction widget.
-
10.
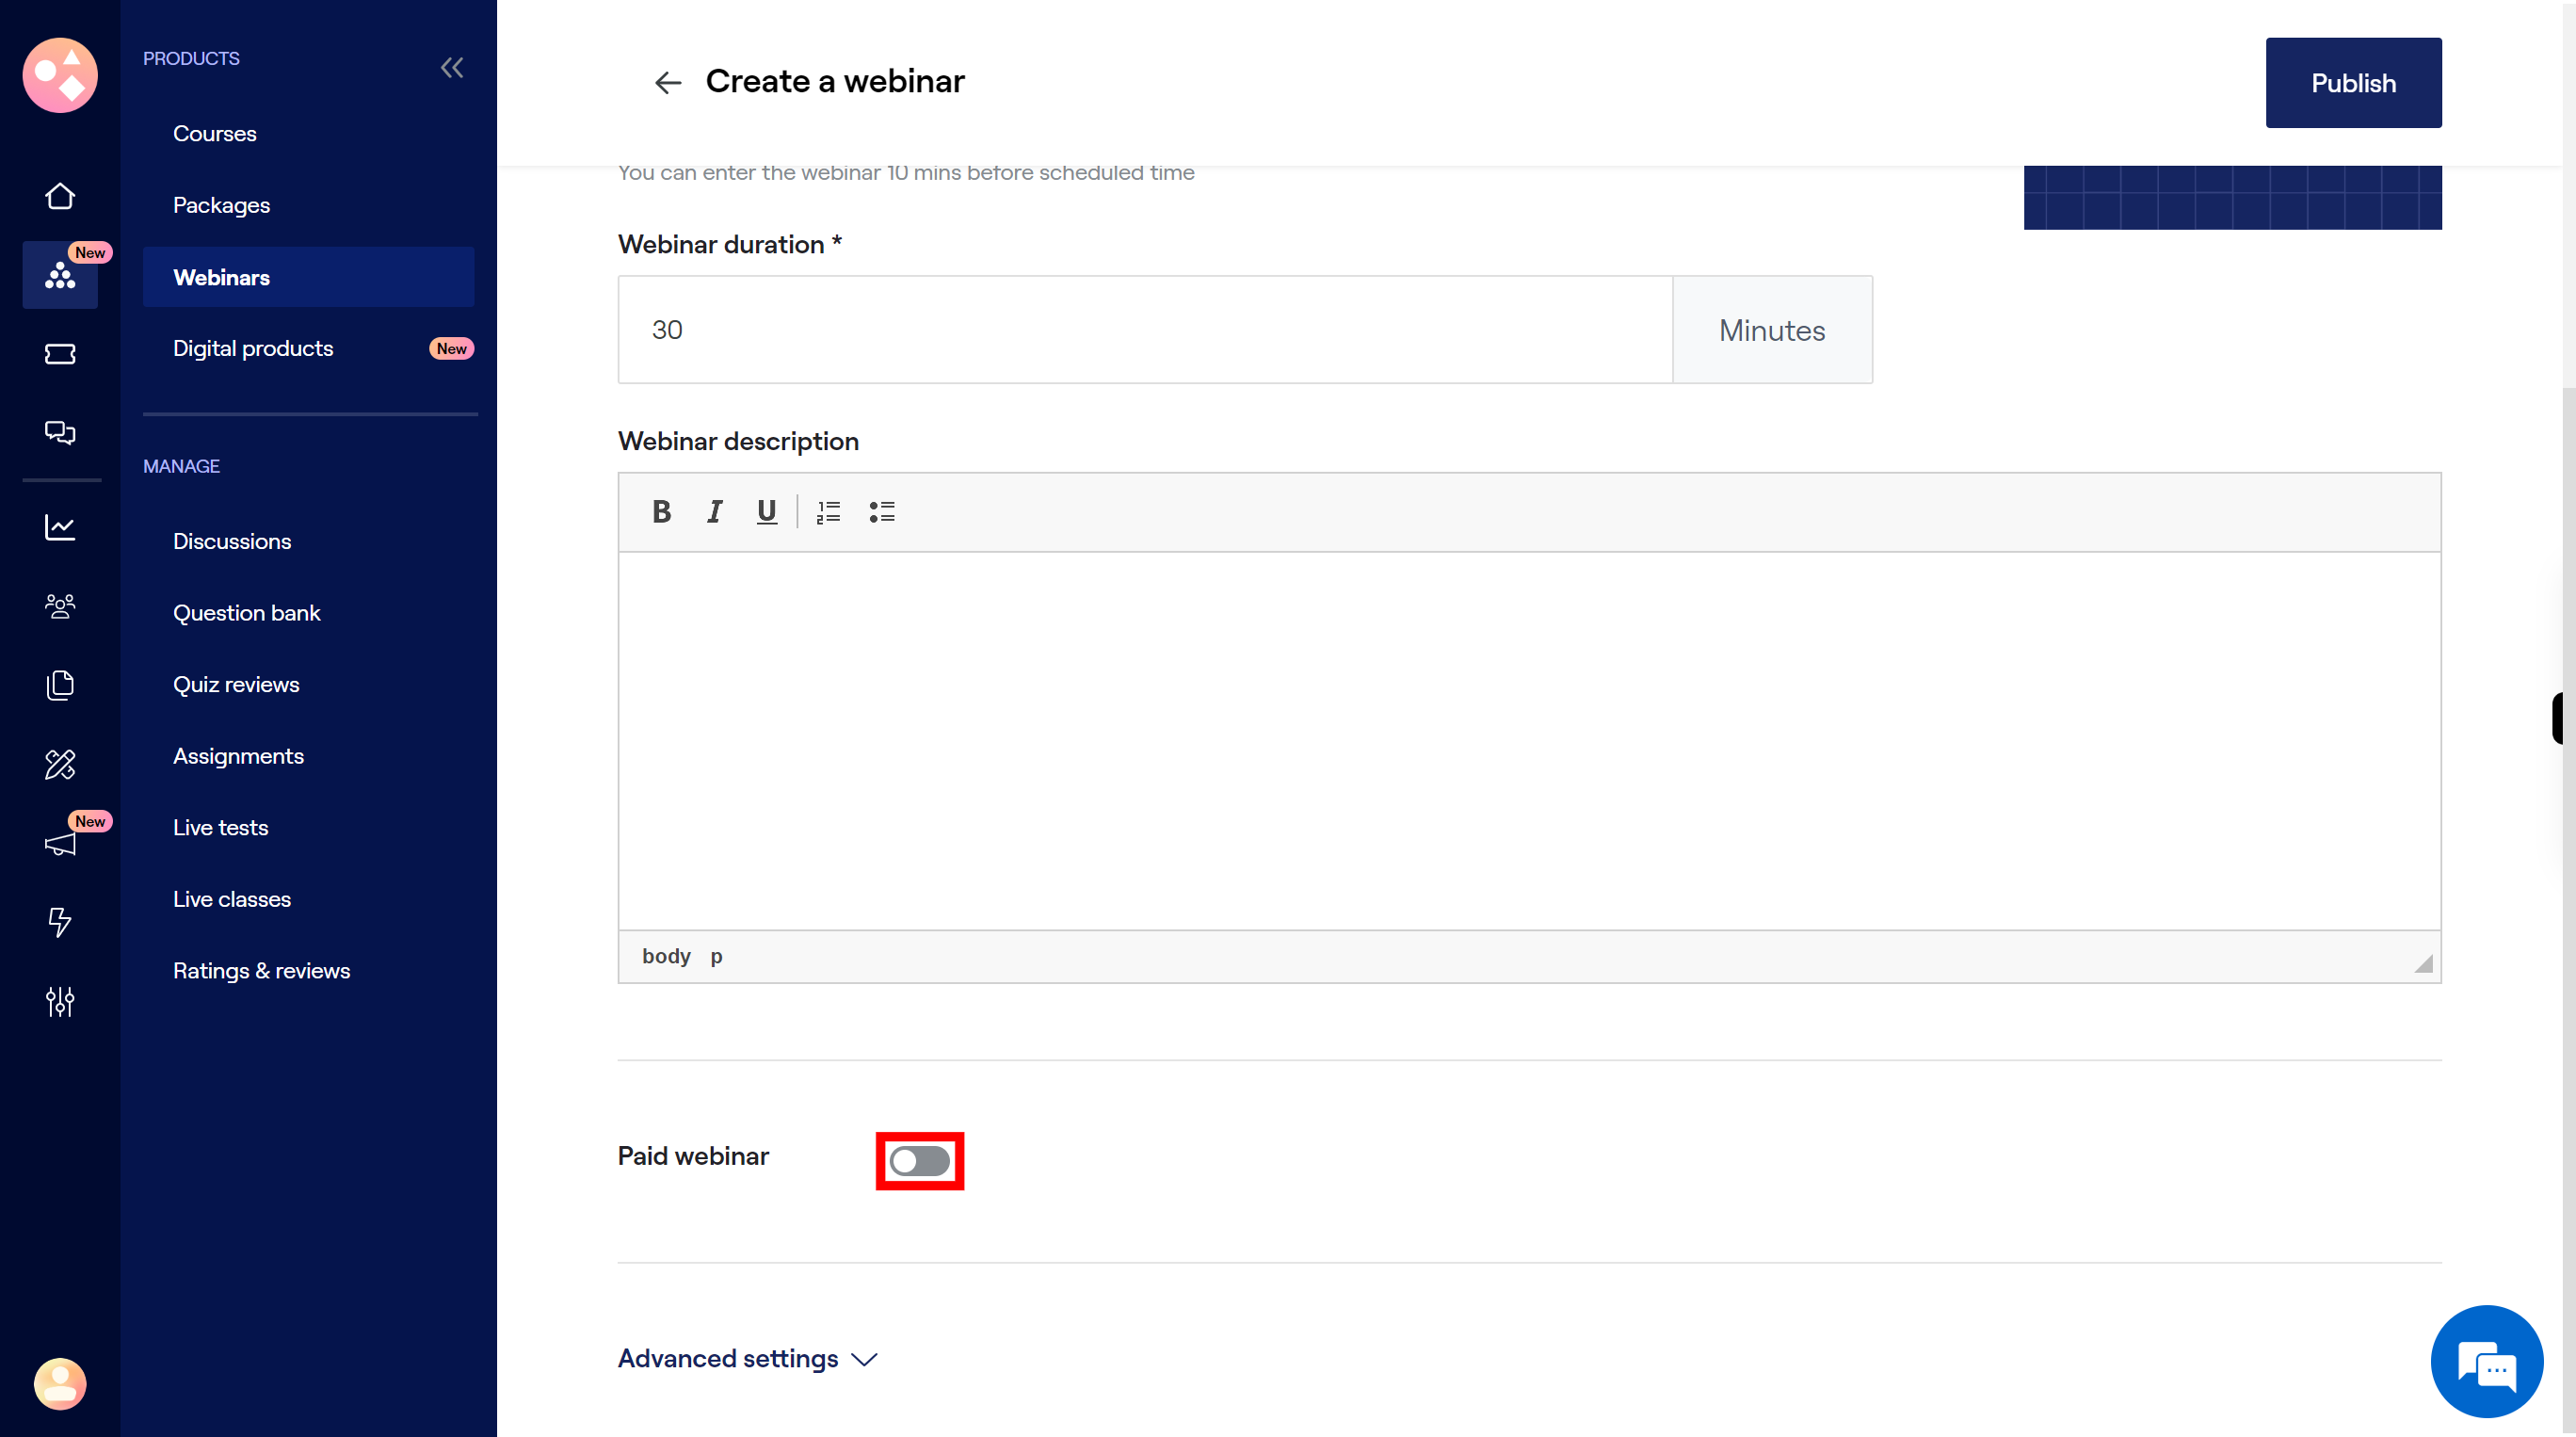
Select the radio button paid webinar or non paid one. If paid mention the cost of the webinar. Once done, click on the "Next" button on the Supervity instruction widget.
-
11.
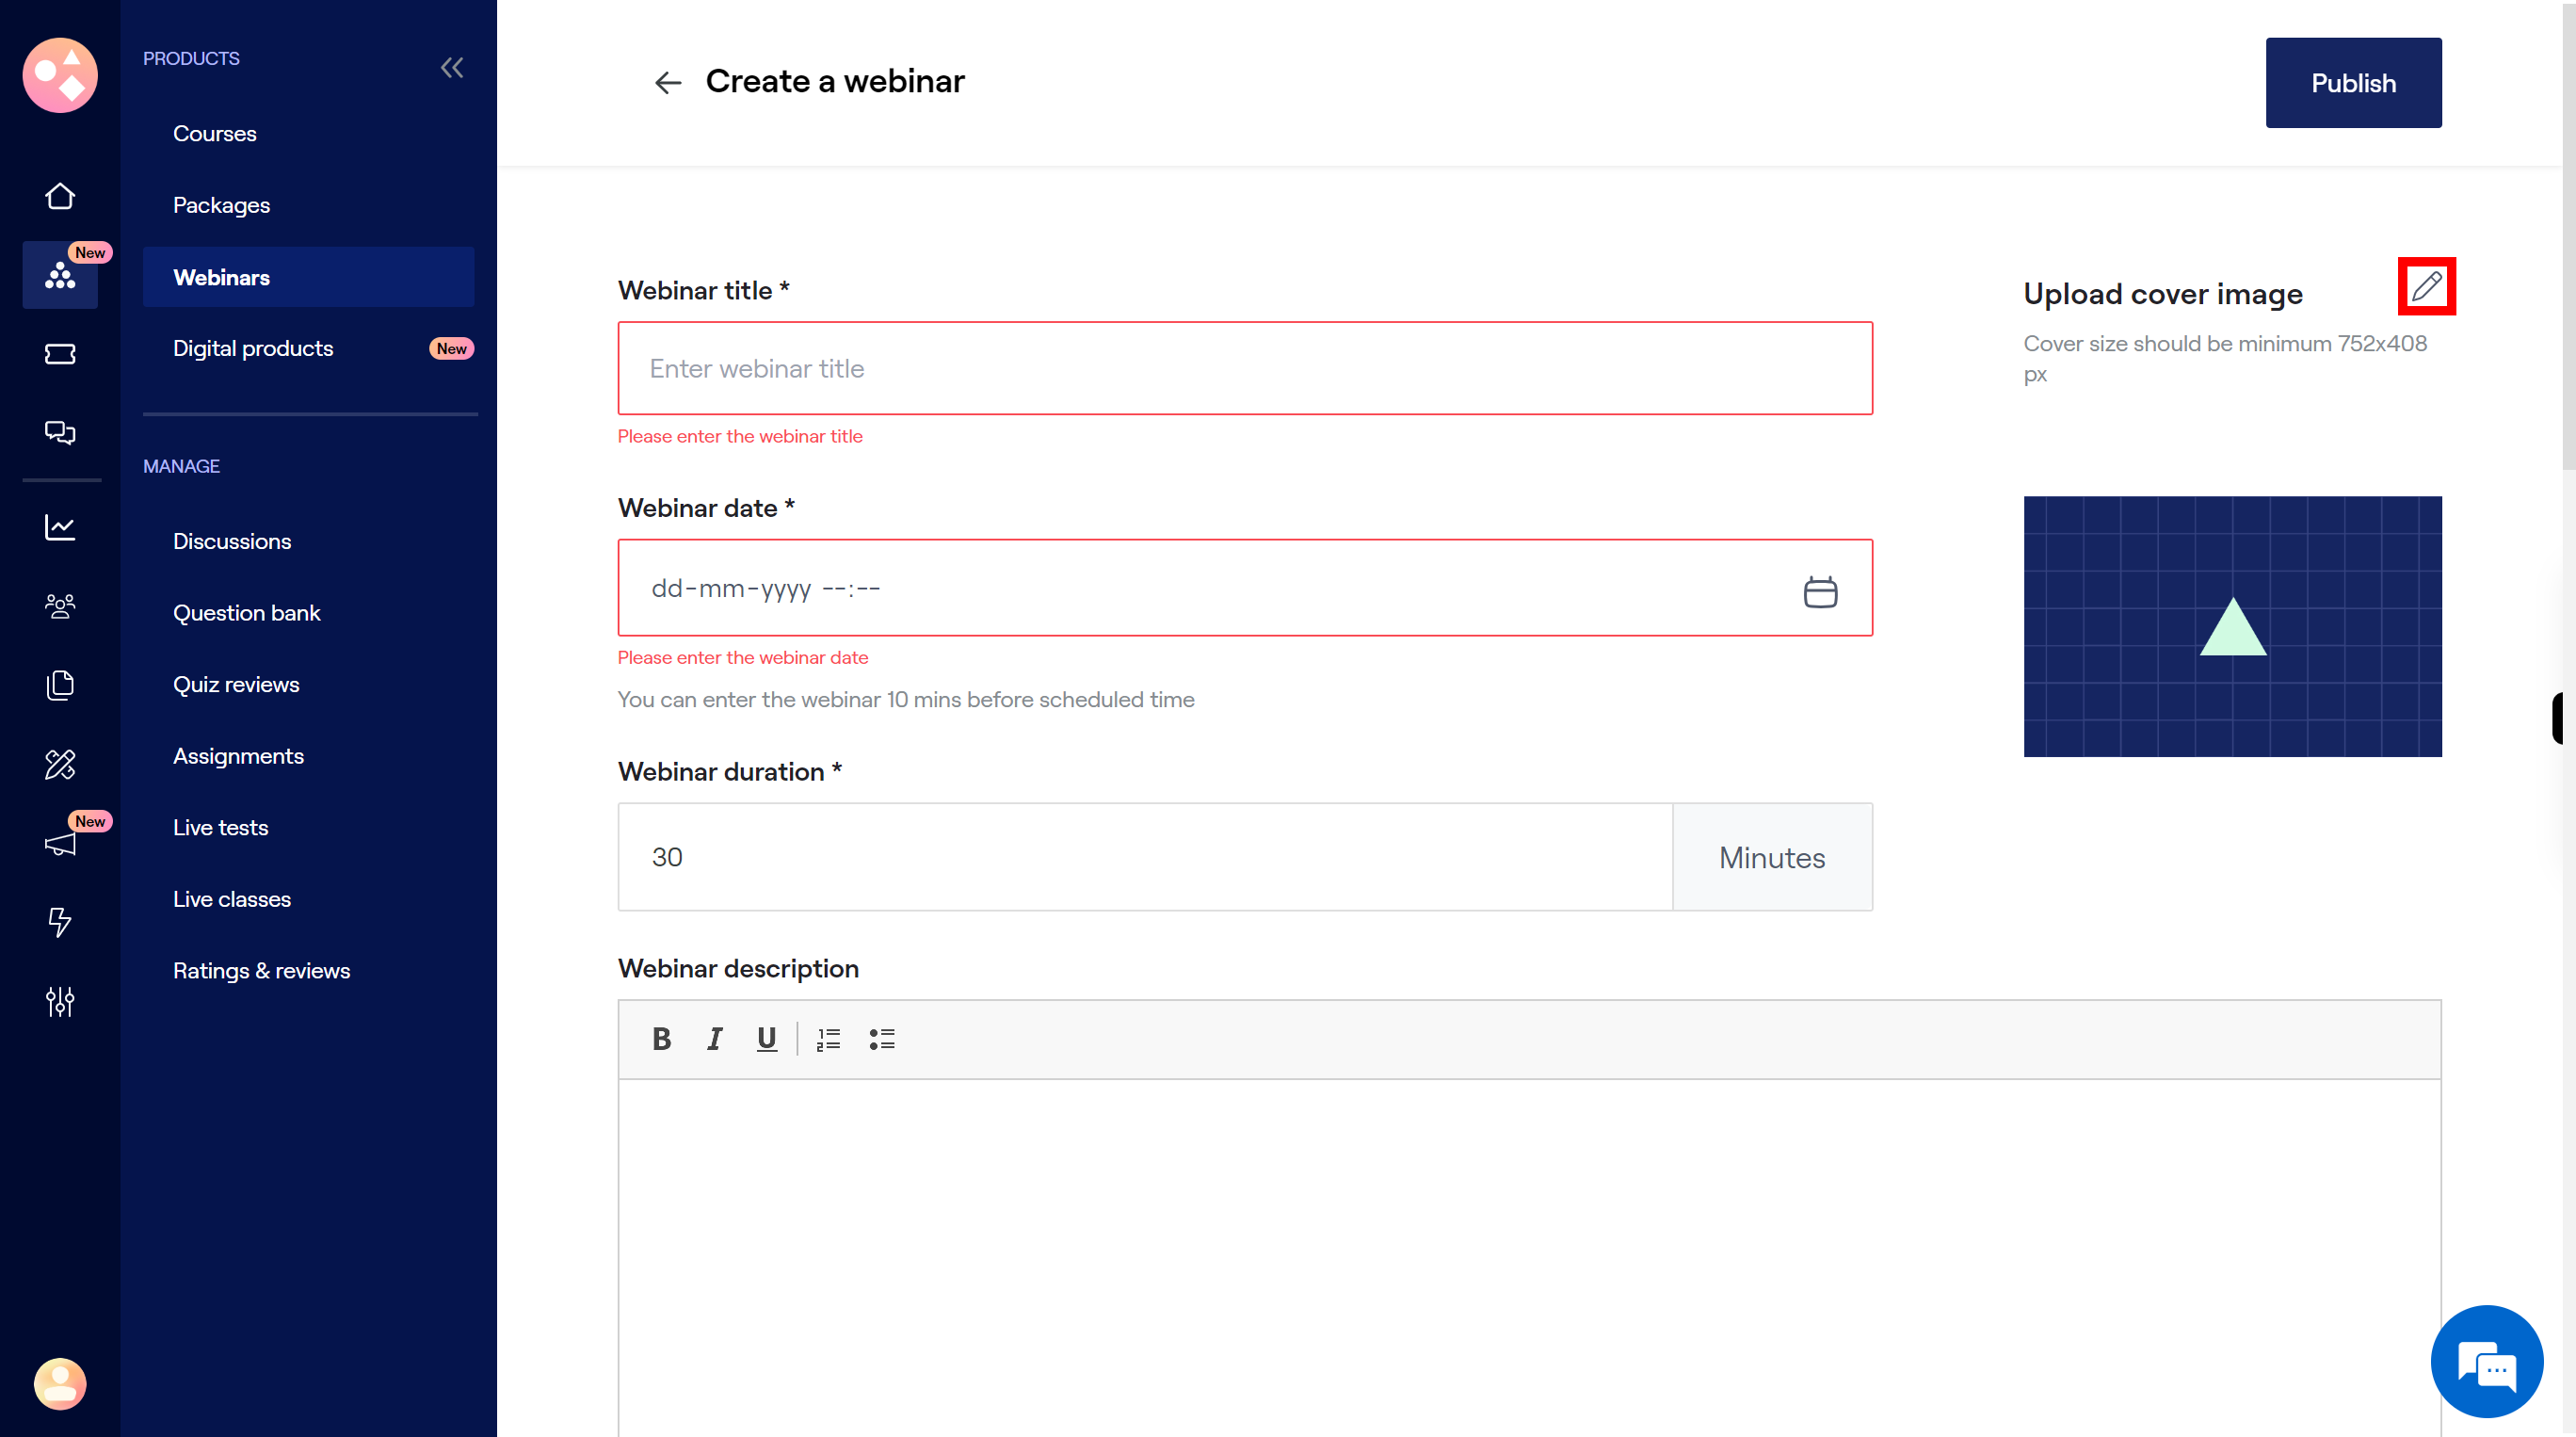
Click on the "pencil" icon, upload cover image. Size should be minimum 752x408px. Once done, click on the "Next" button on the Supervity instruction widget.
-
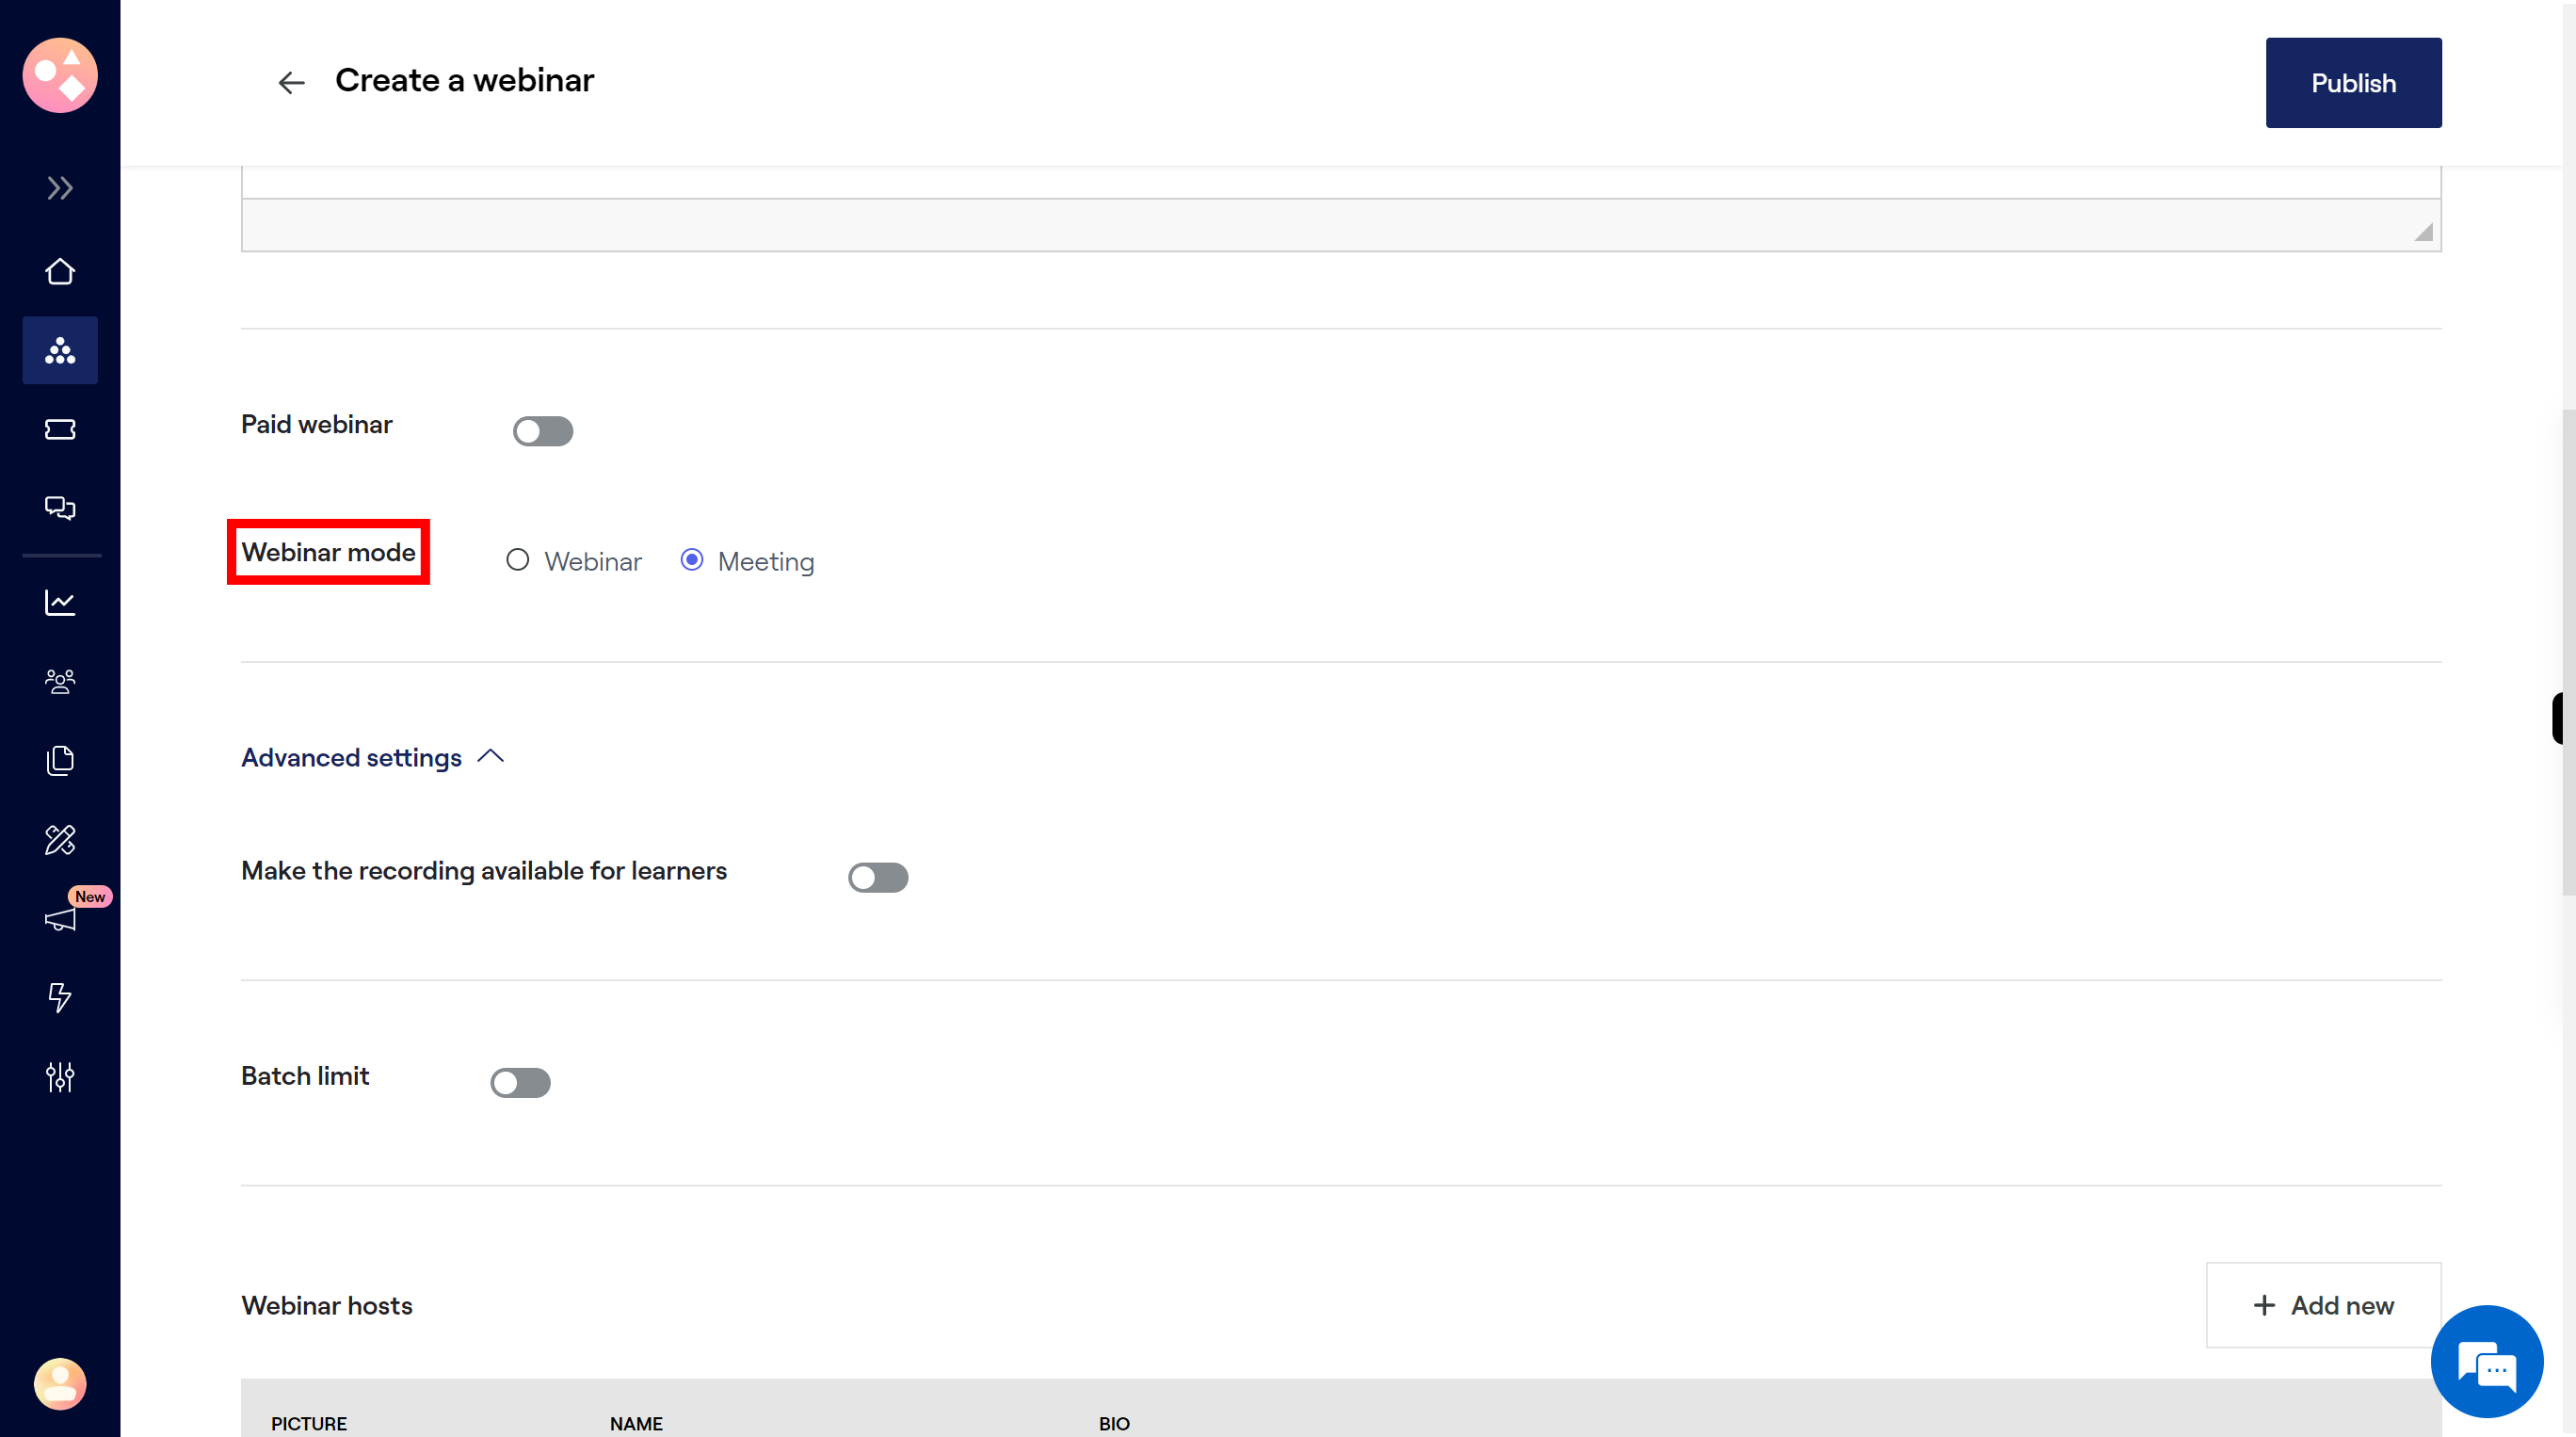
12.
Select the radio button of Webinar mode is Webinar or Meeting
-
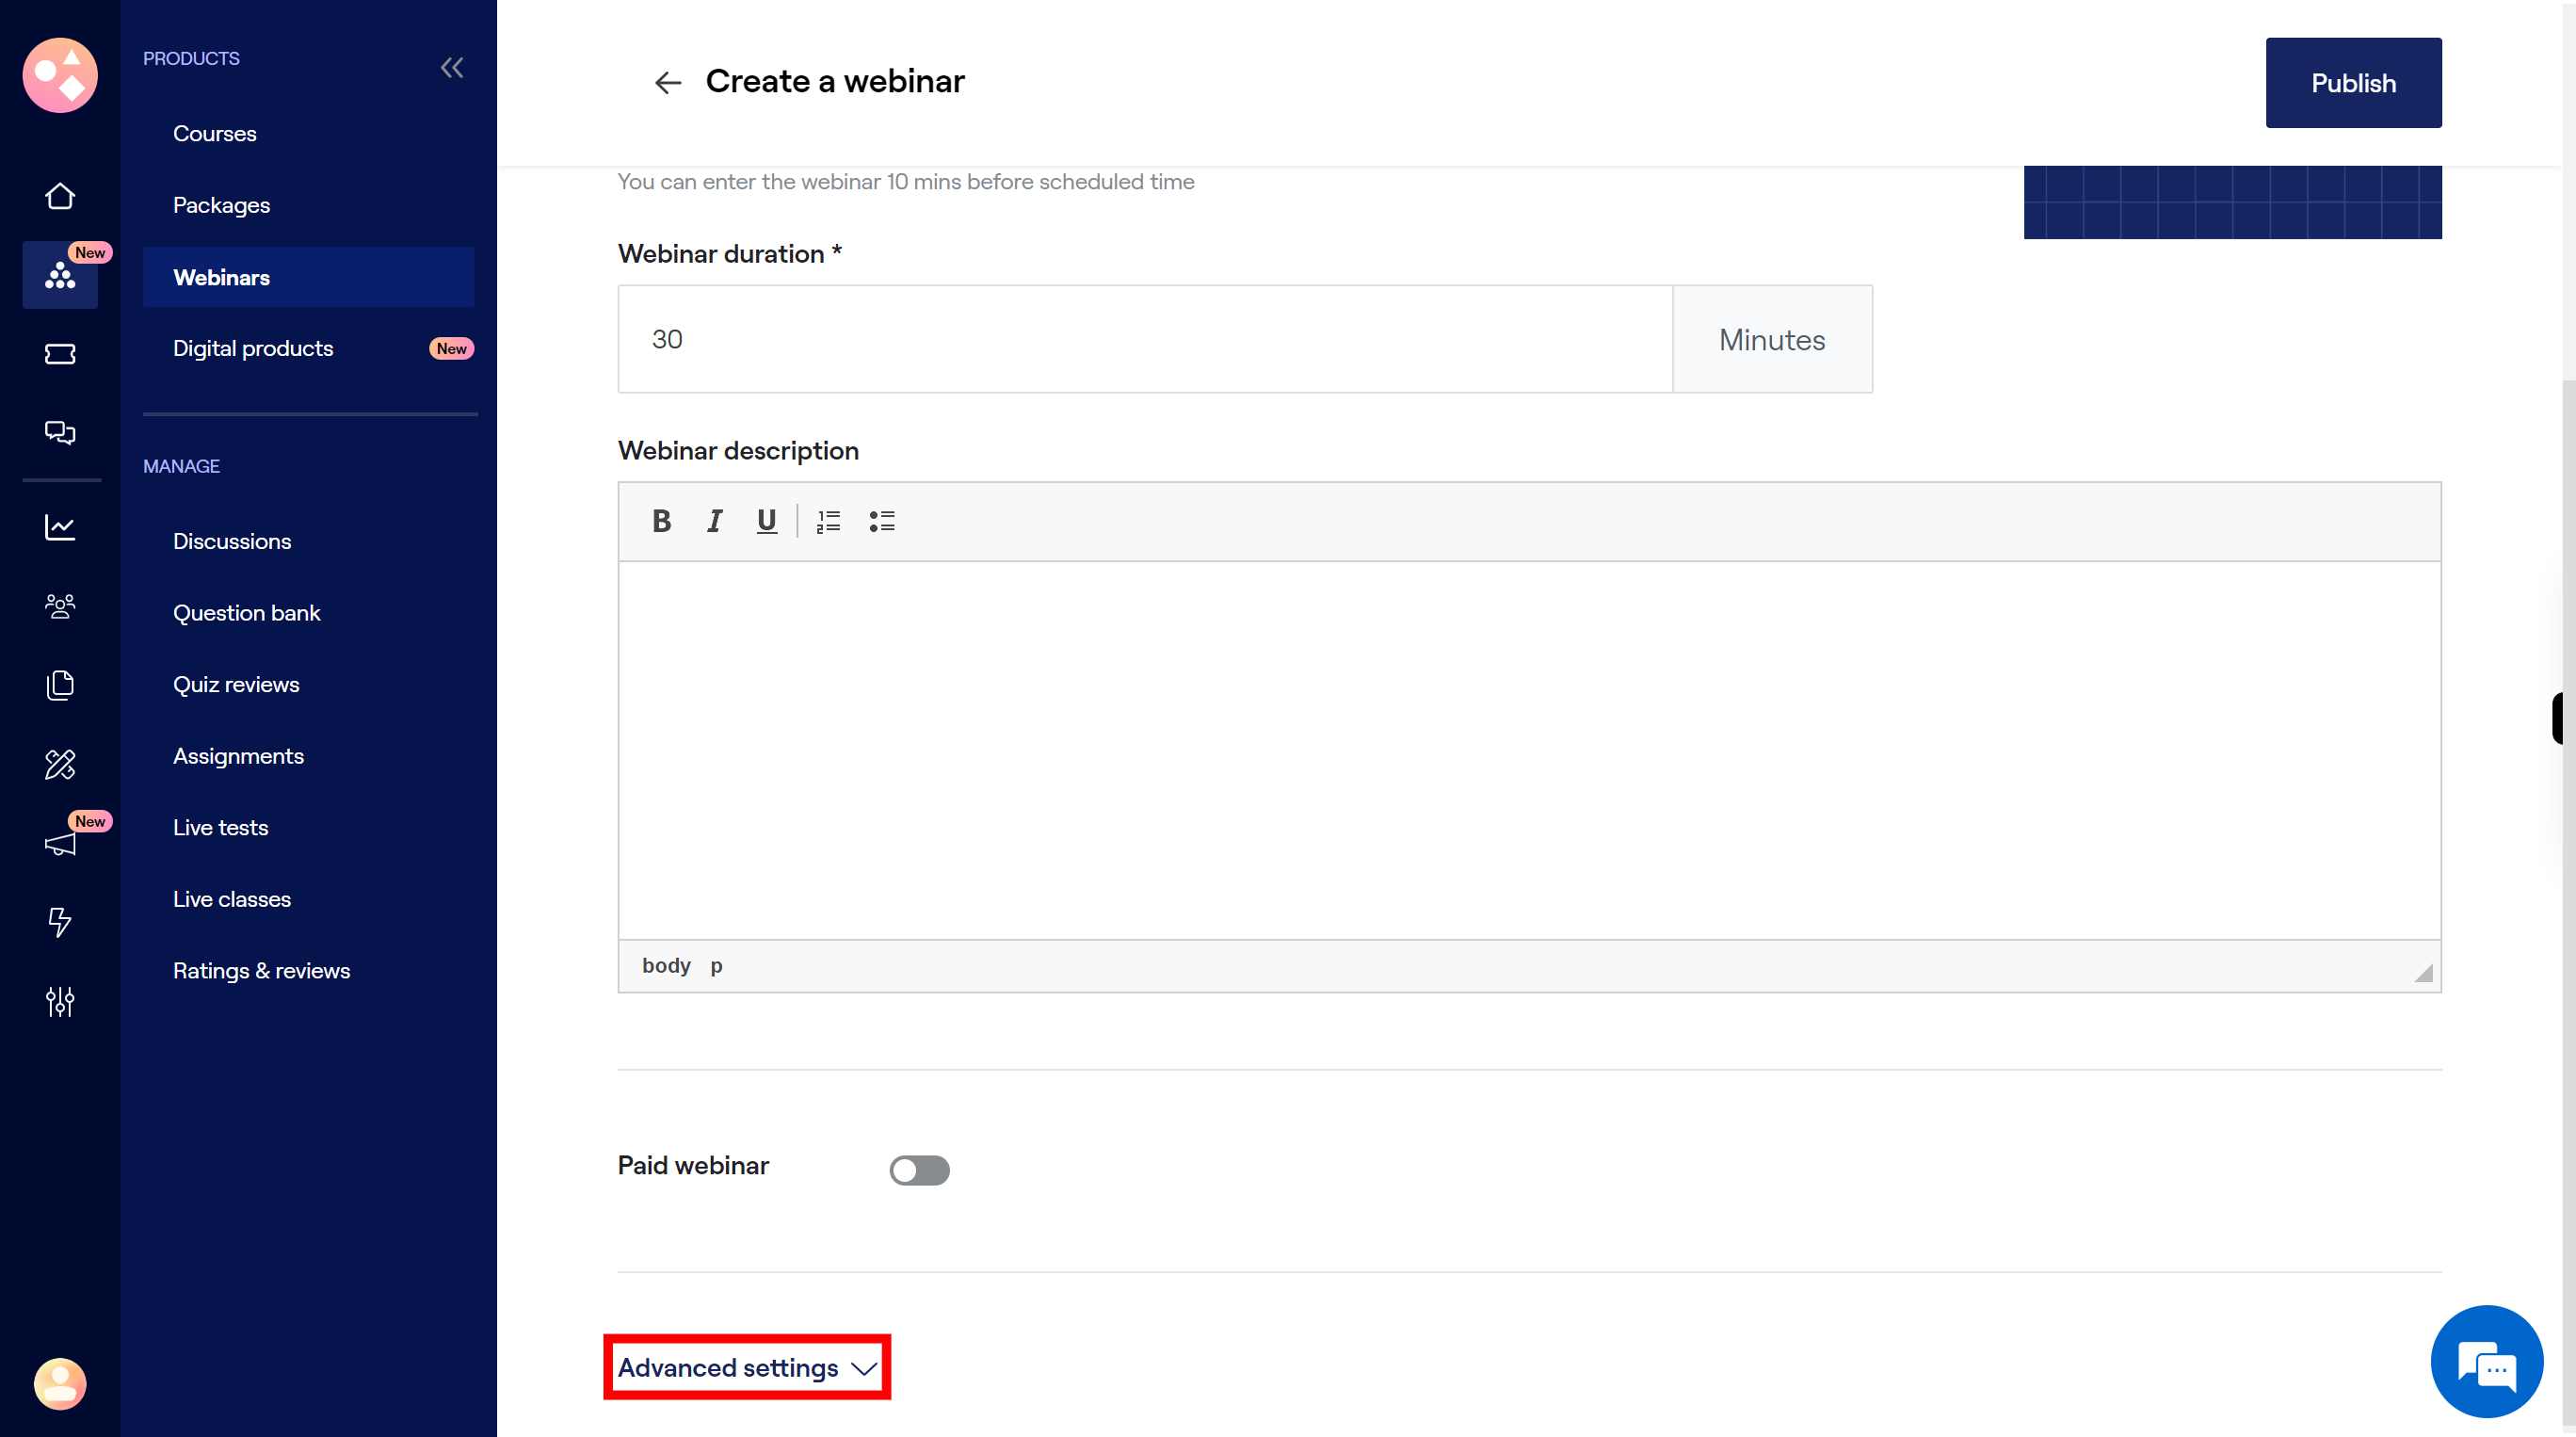
13.
Click on the "Advanced settings" to add some more details about webinar.
-
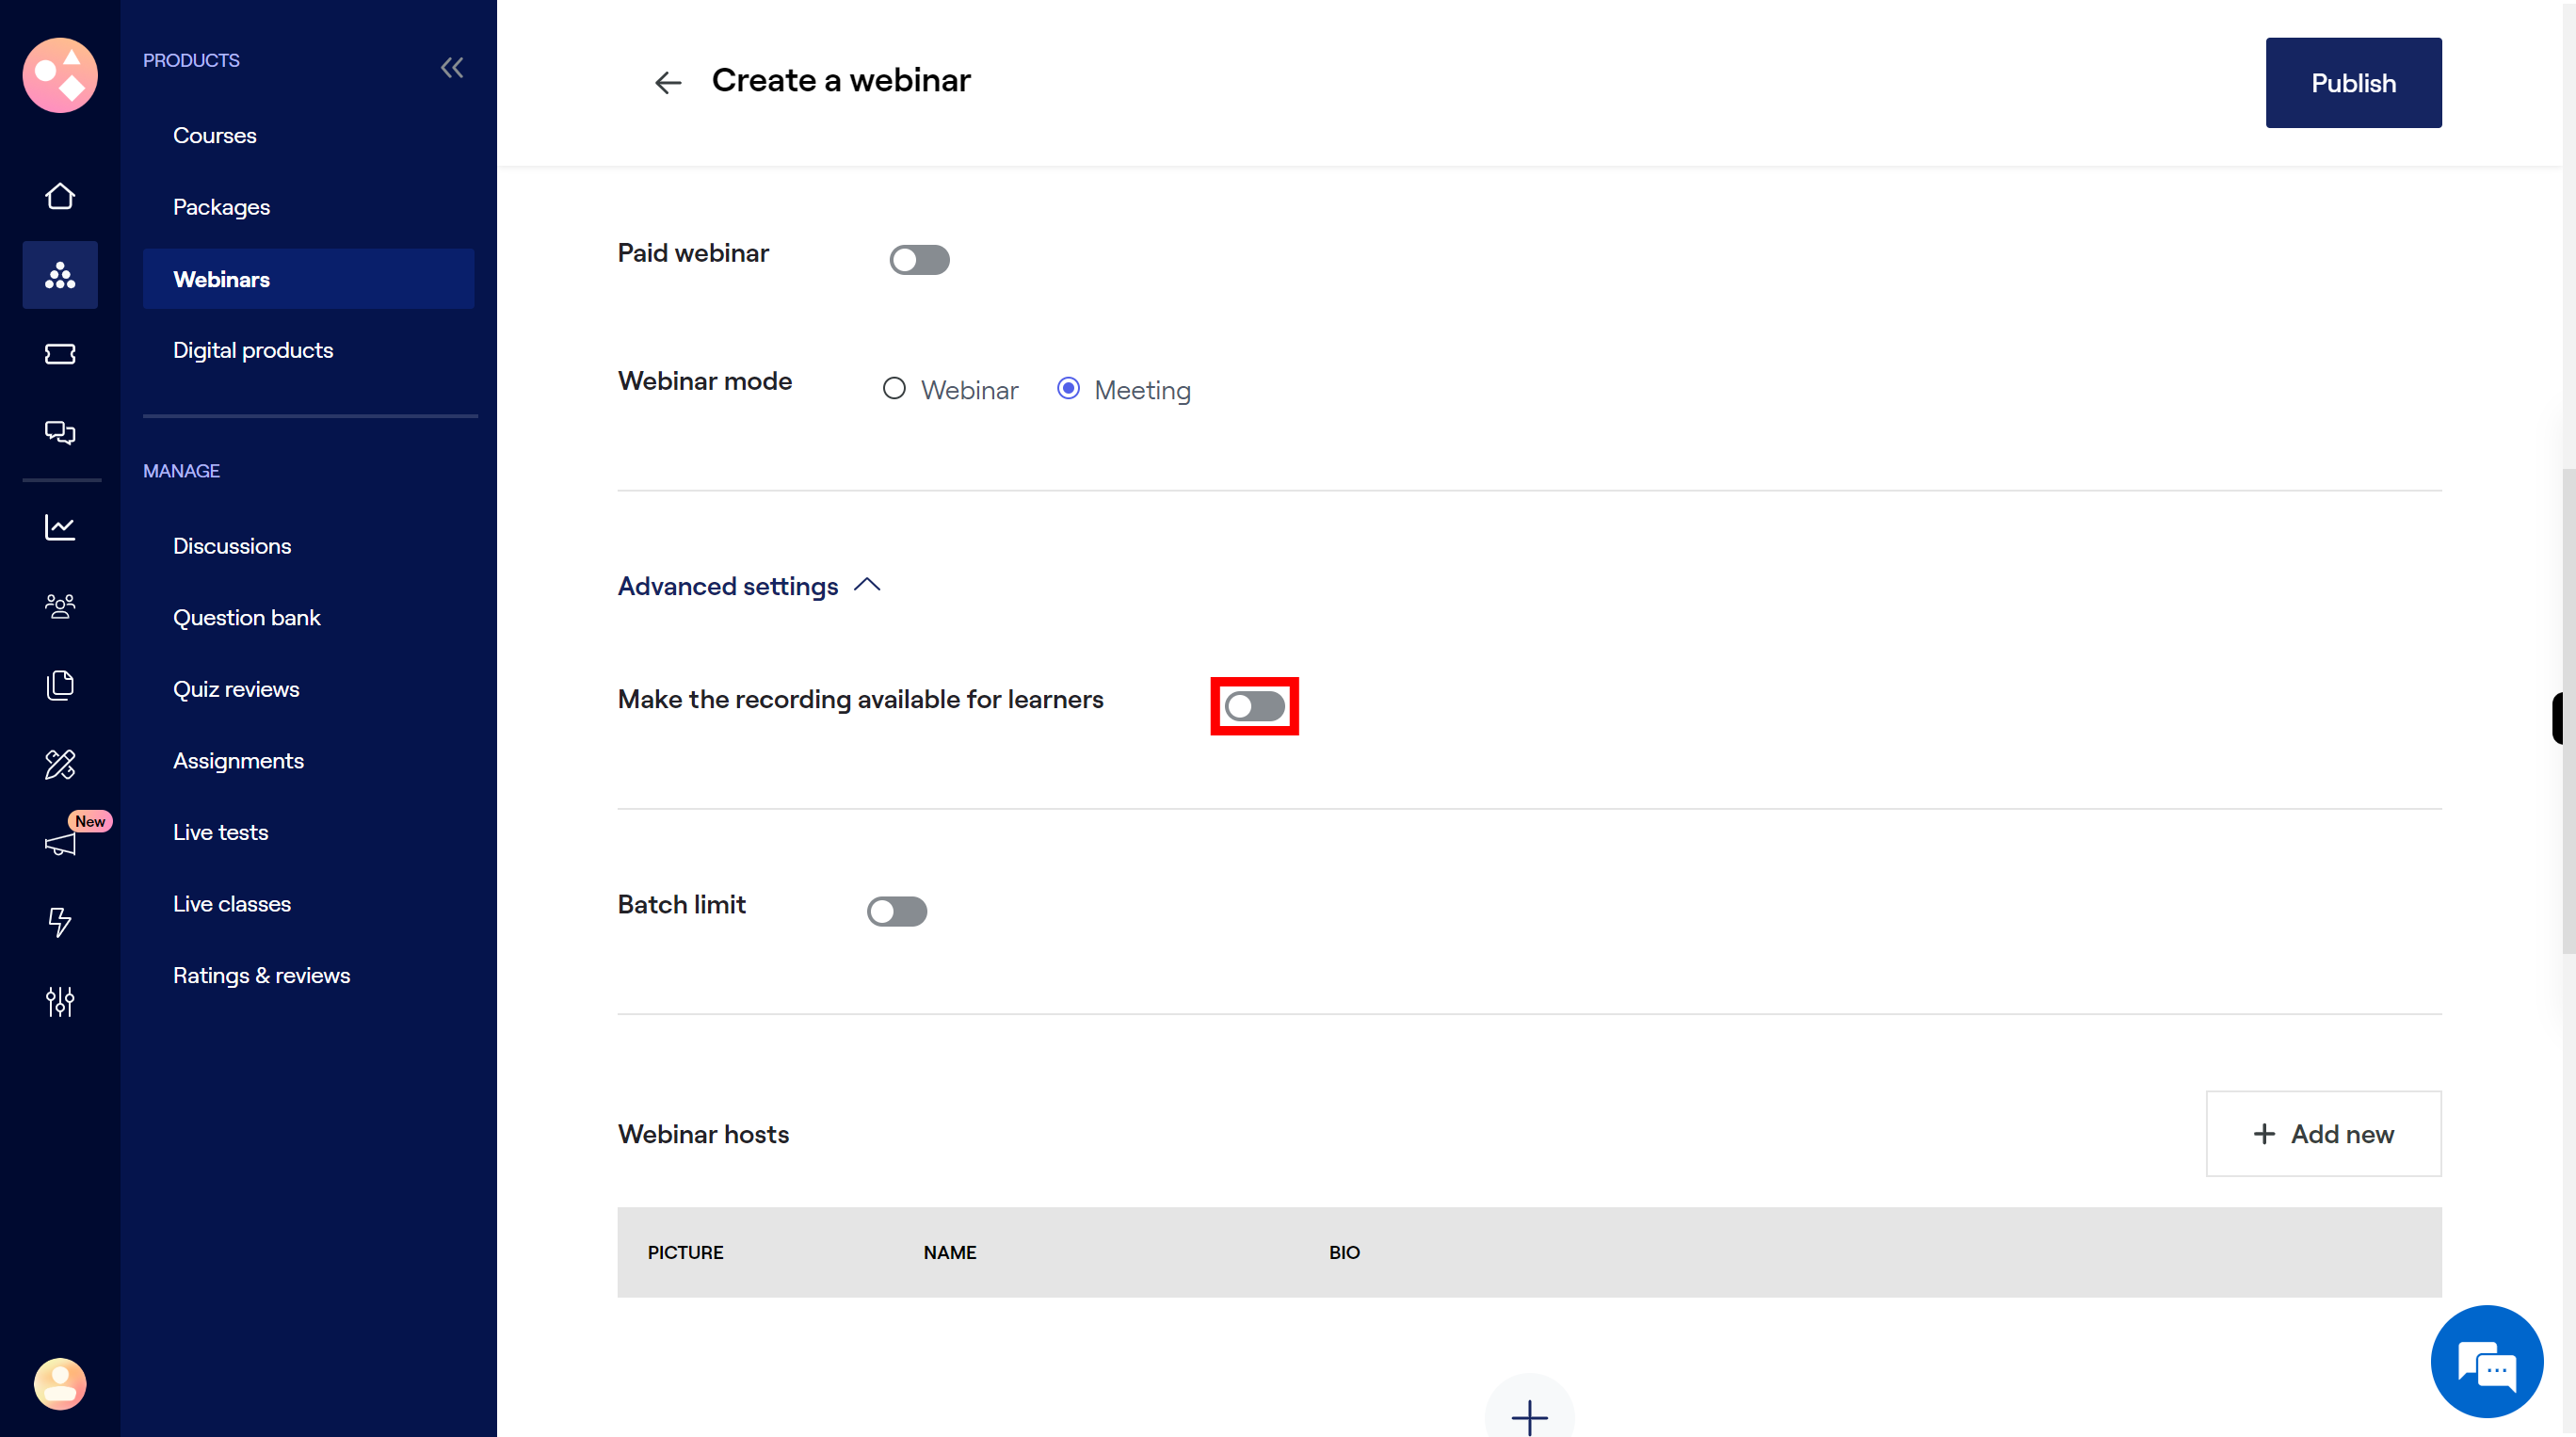
14.
Select the On and Off button to make the recording available for learners. Once done, click on the "Next" button on the Supervity instruction widget.
-
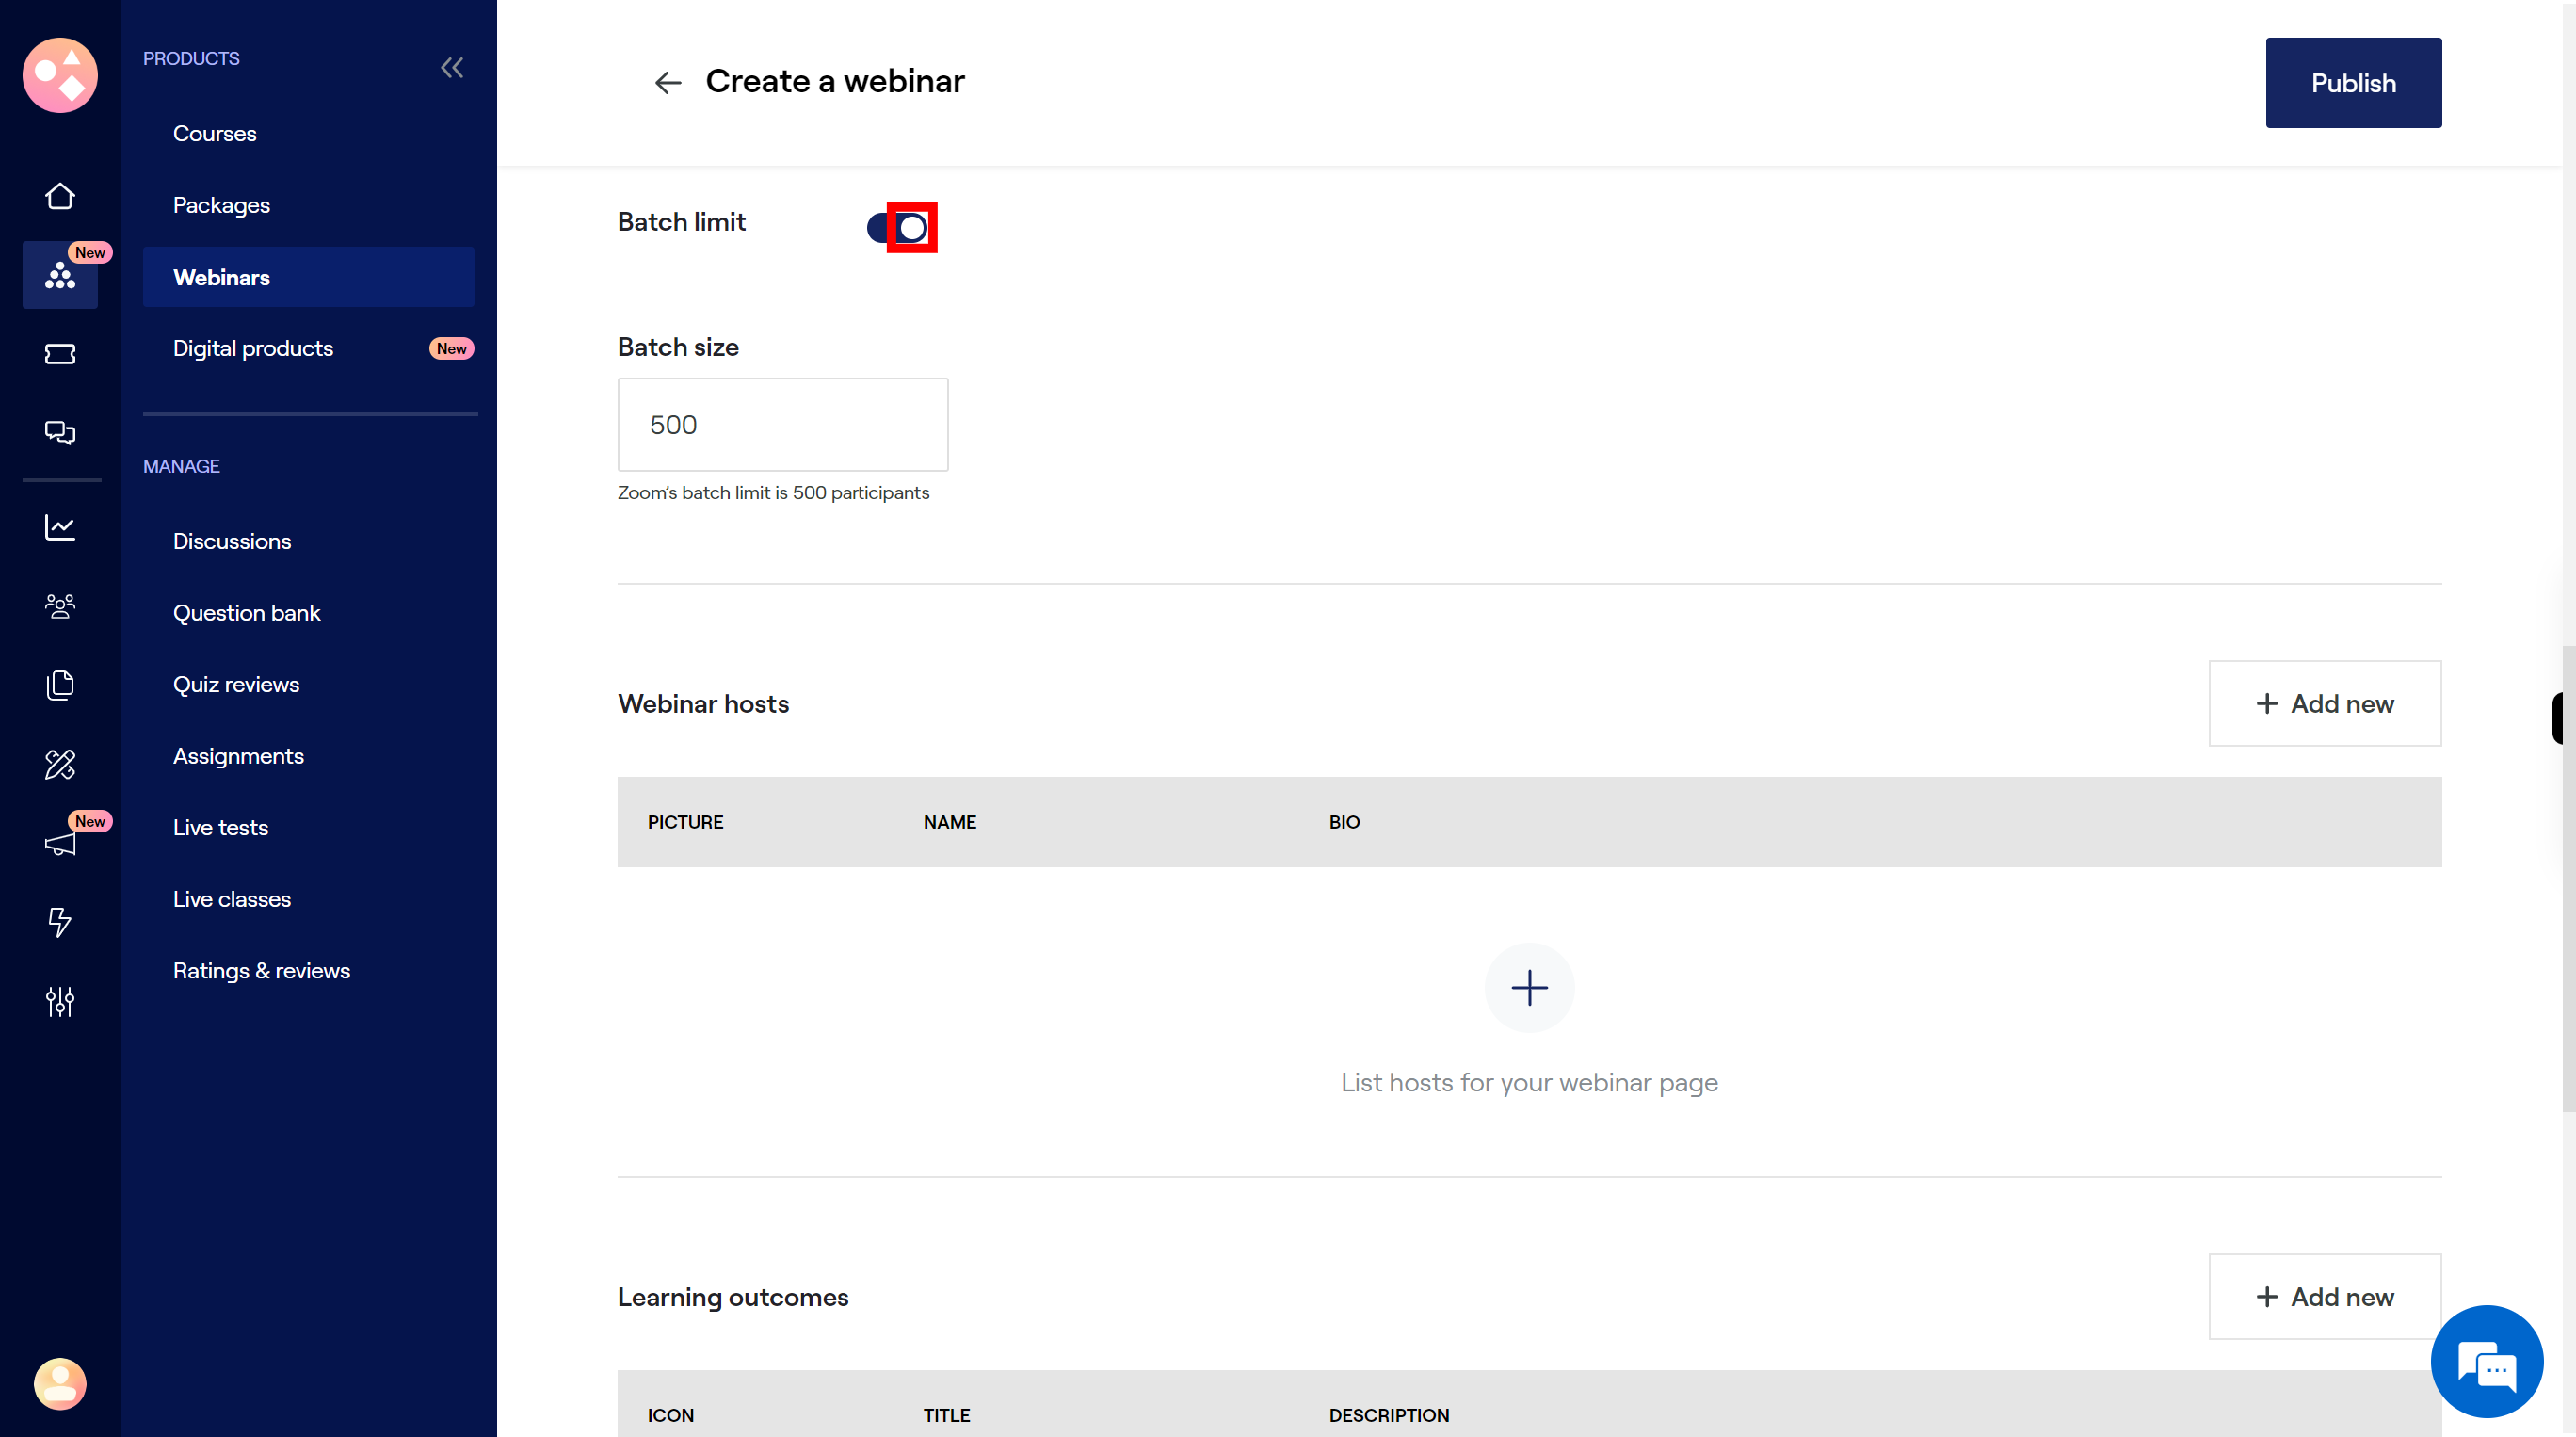
15.
Select the Batch limit button to limited or Unlimited. If limited mention the size in below box. Once done, click on the "Next" button on the Supervity instruction widget.
-
16.
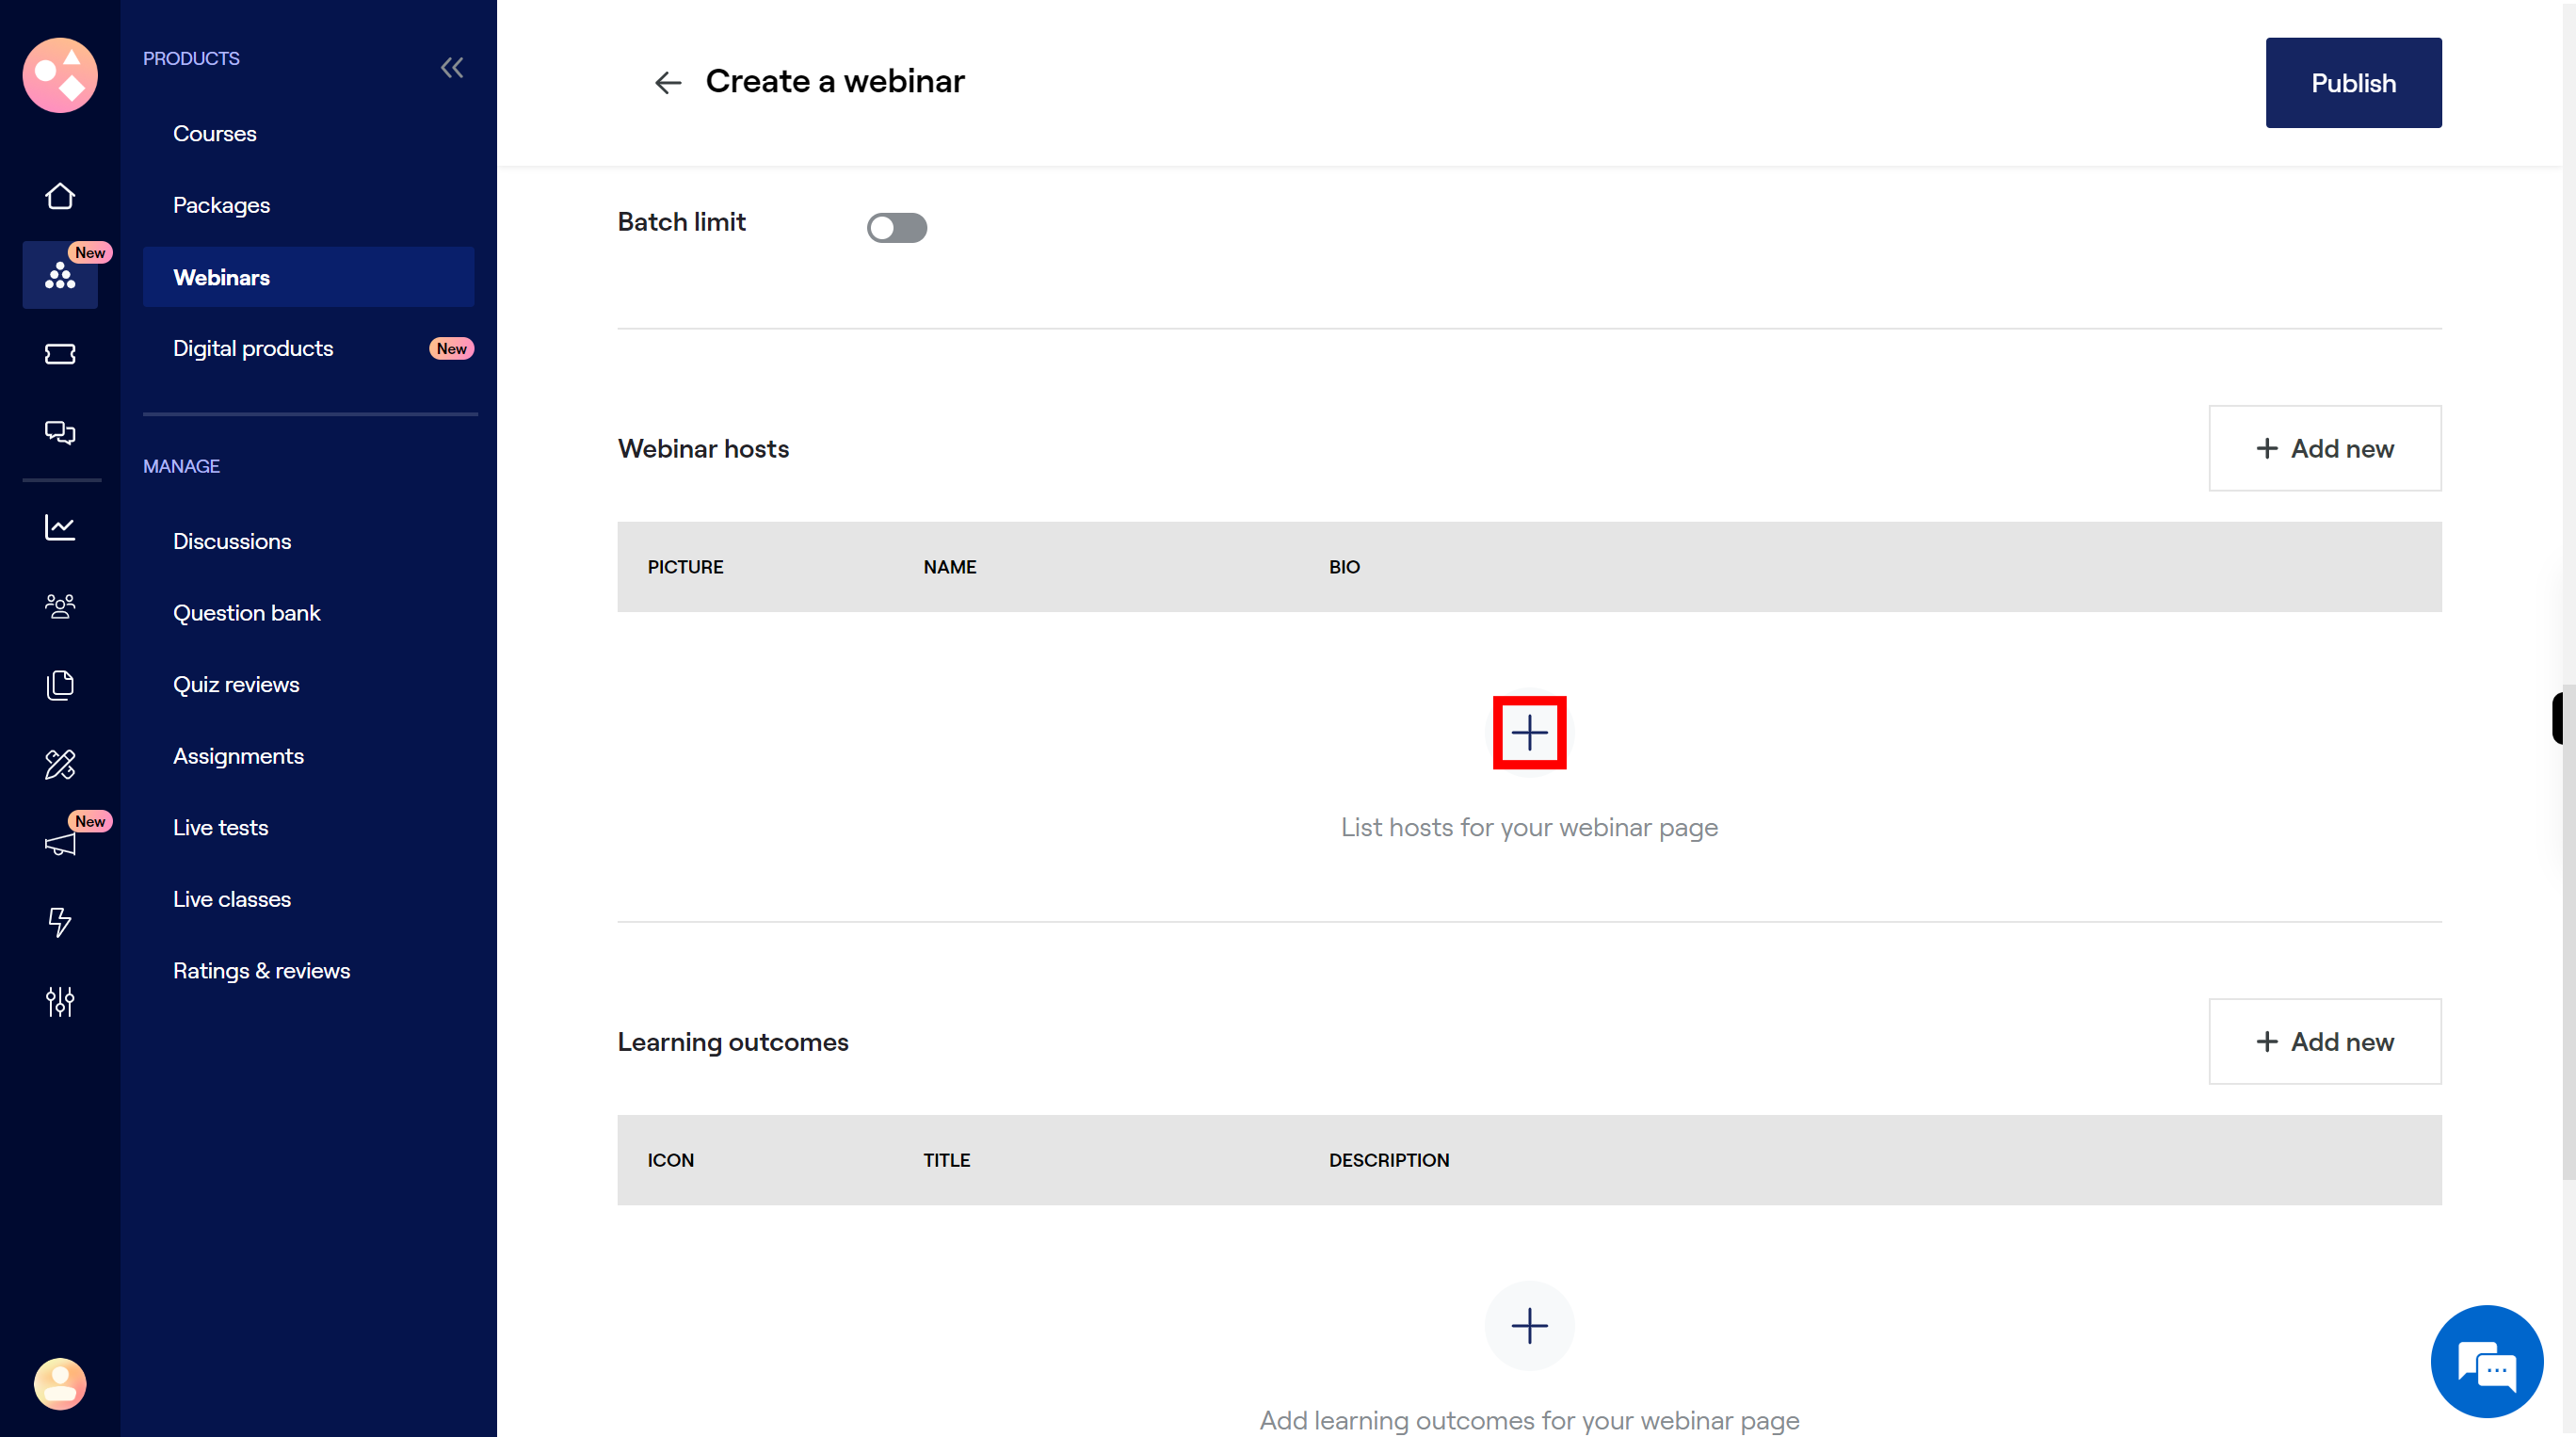
Click on the "+" button to add webinar hosts.
-
17.
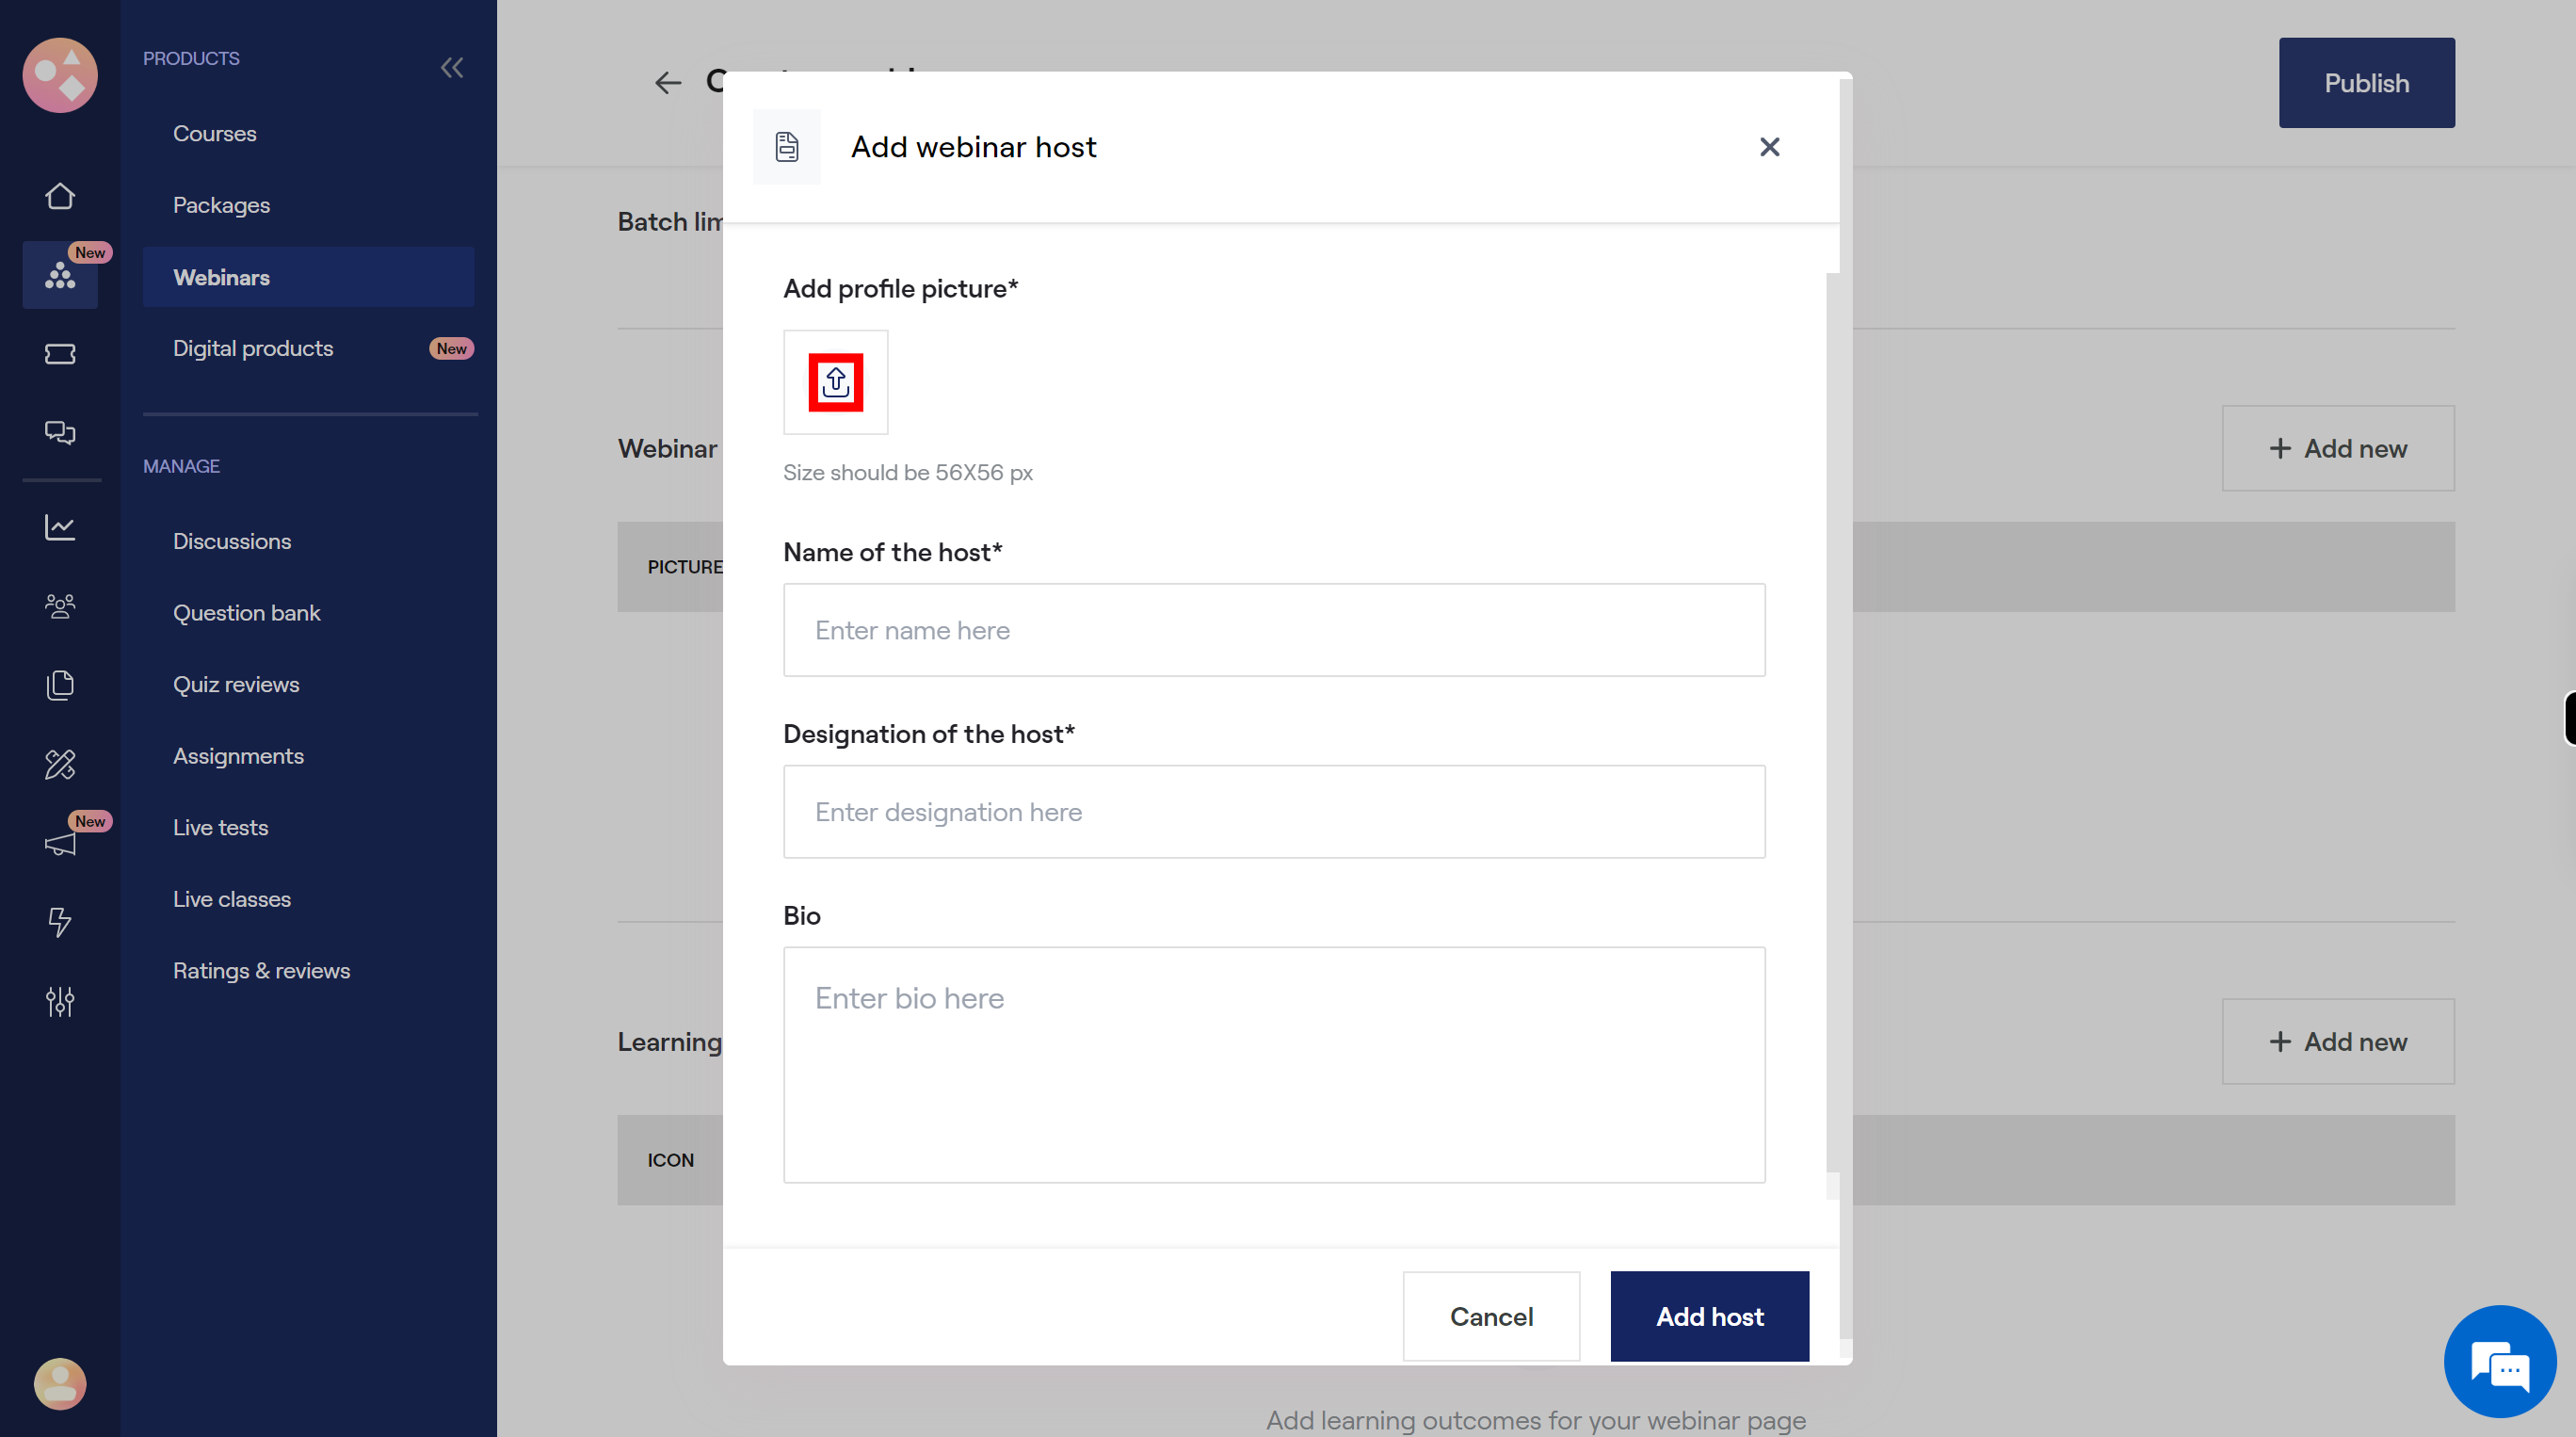
Click on the Upload icon to add the profile picture, size should be 56x56 px. Once done, click on the "Next" button on the Supervity instruction widget.
-
18.
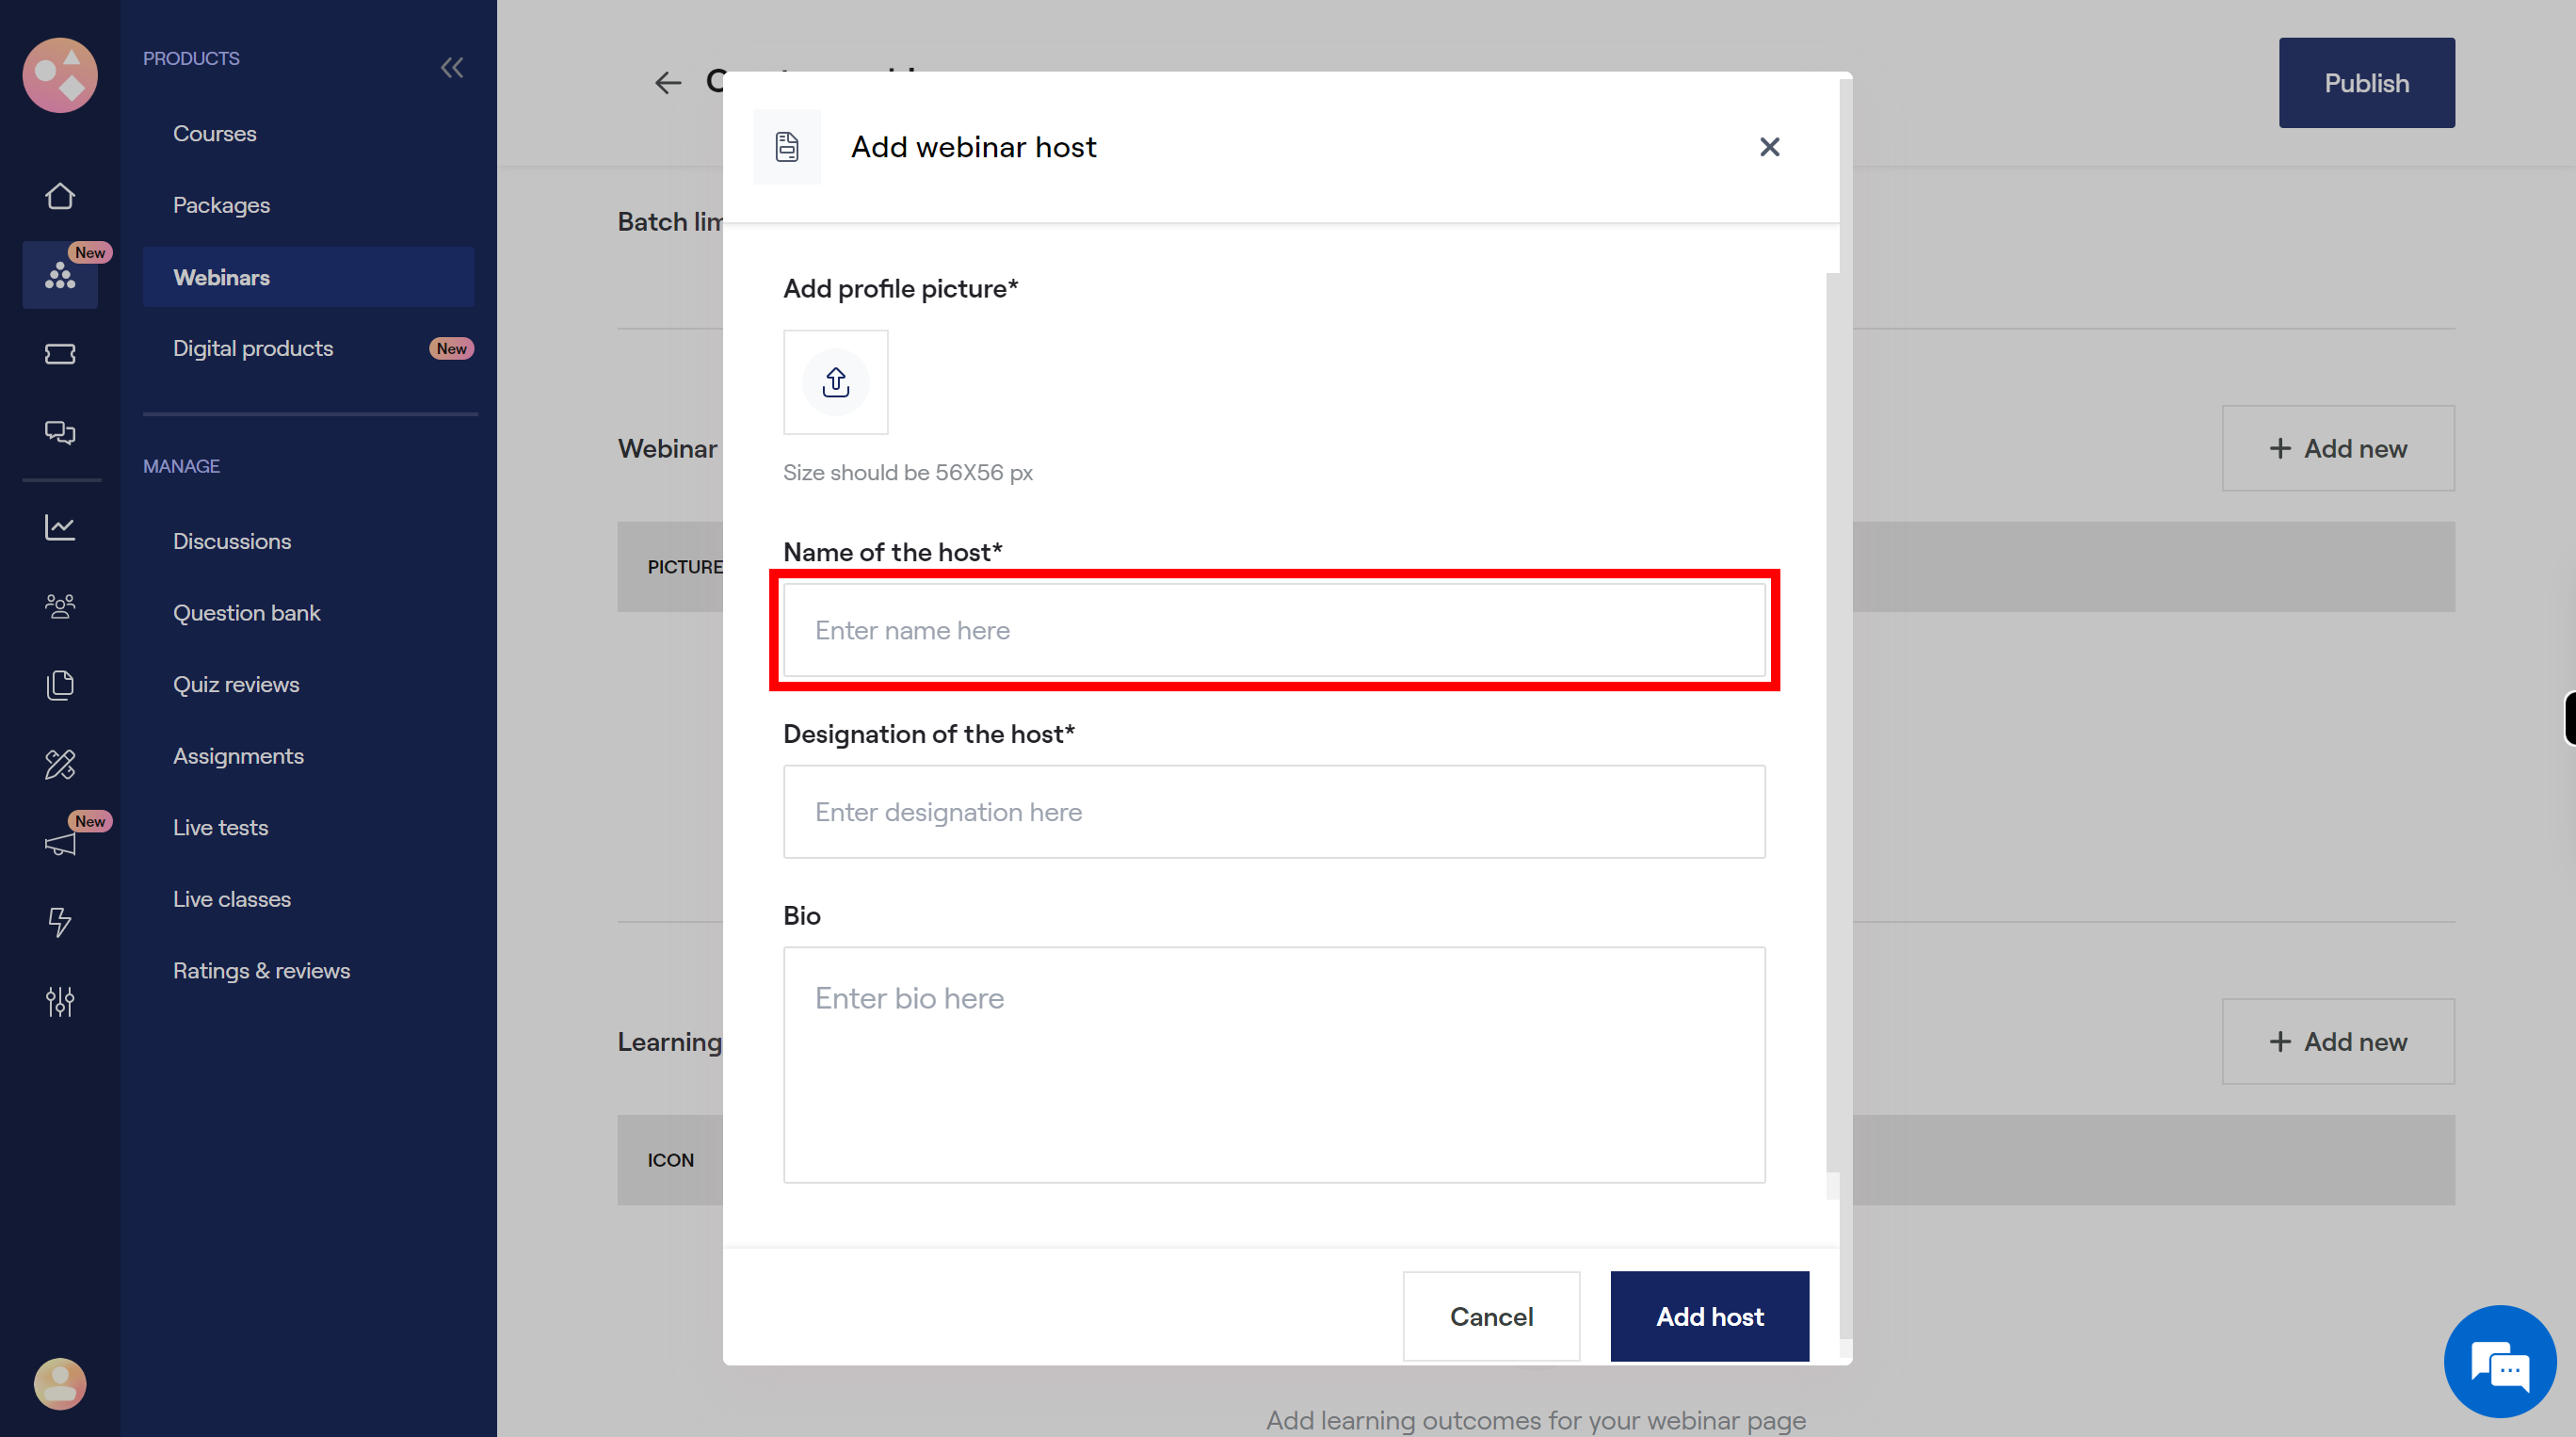
Click on the "Name" field, then enter name of the host. Once done, click on the "Next" button on the Supervity instruction widget.
-
19.
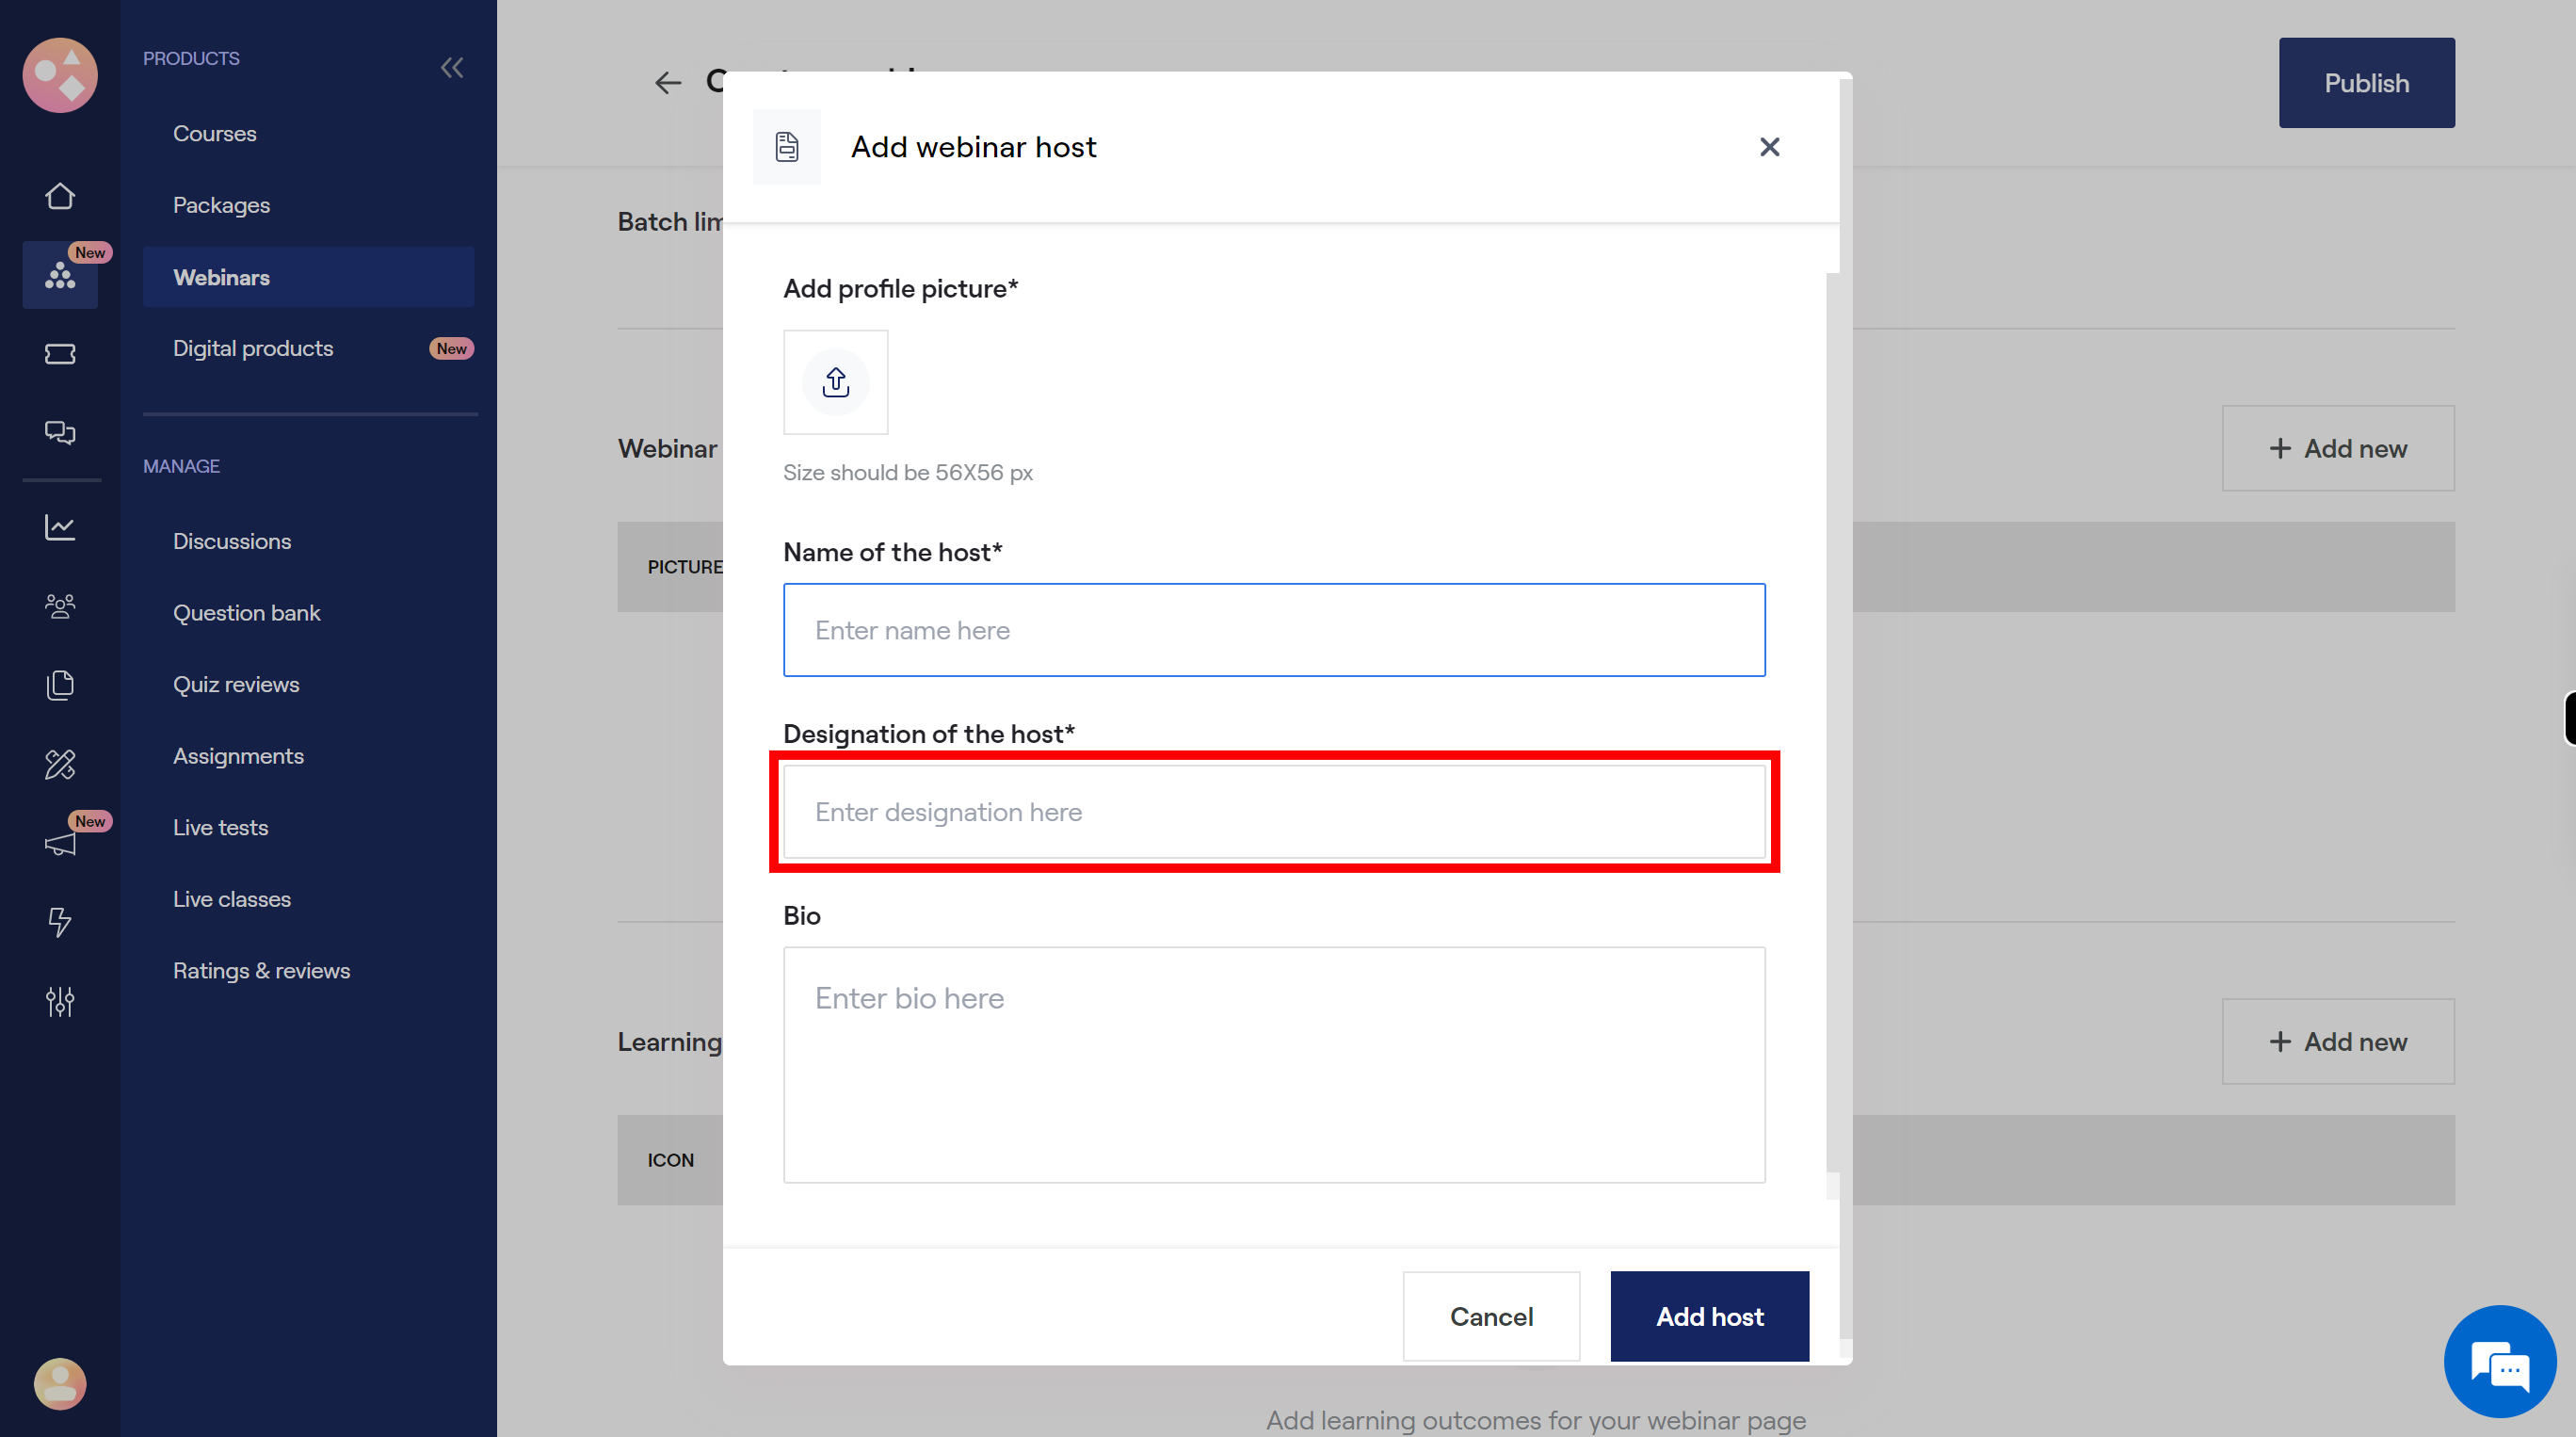
Click on the "Designation" field, enter the designation of the host. Once done, click on the "Next" button on the Supervity instruction widget.
-
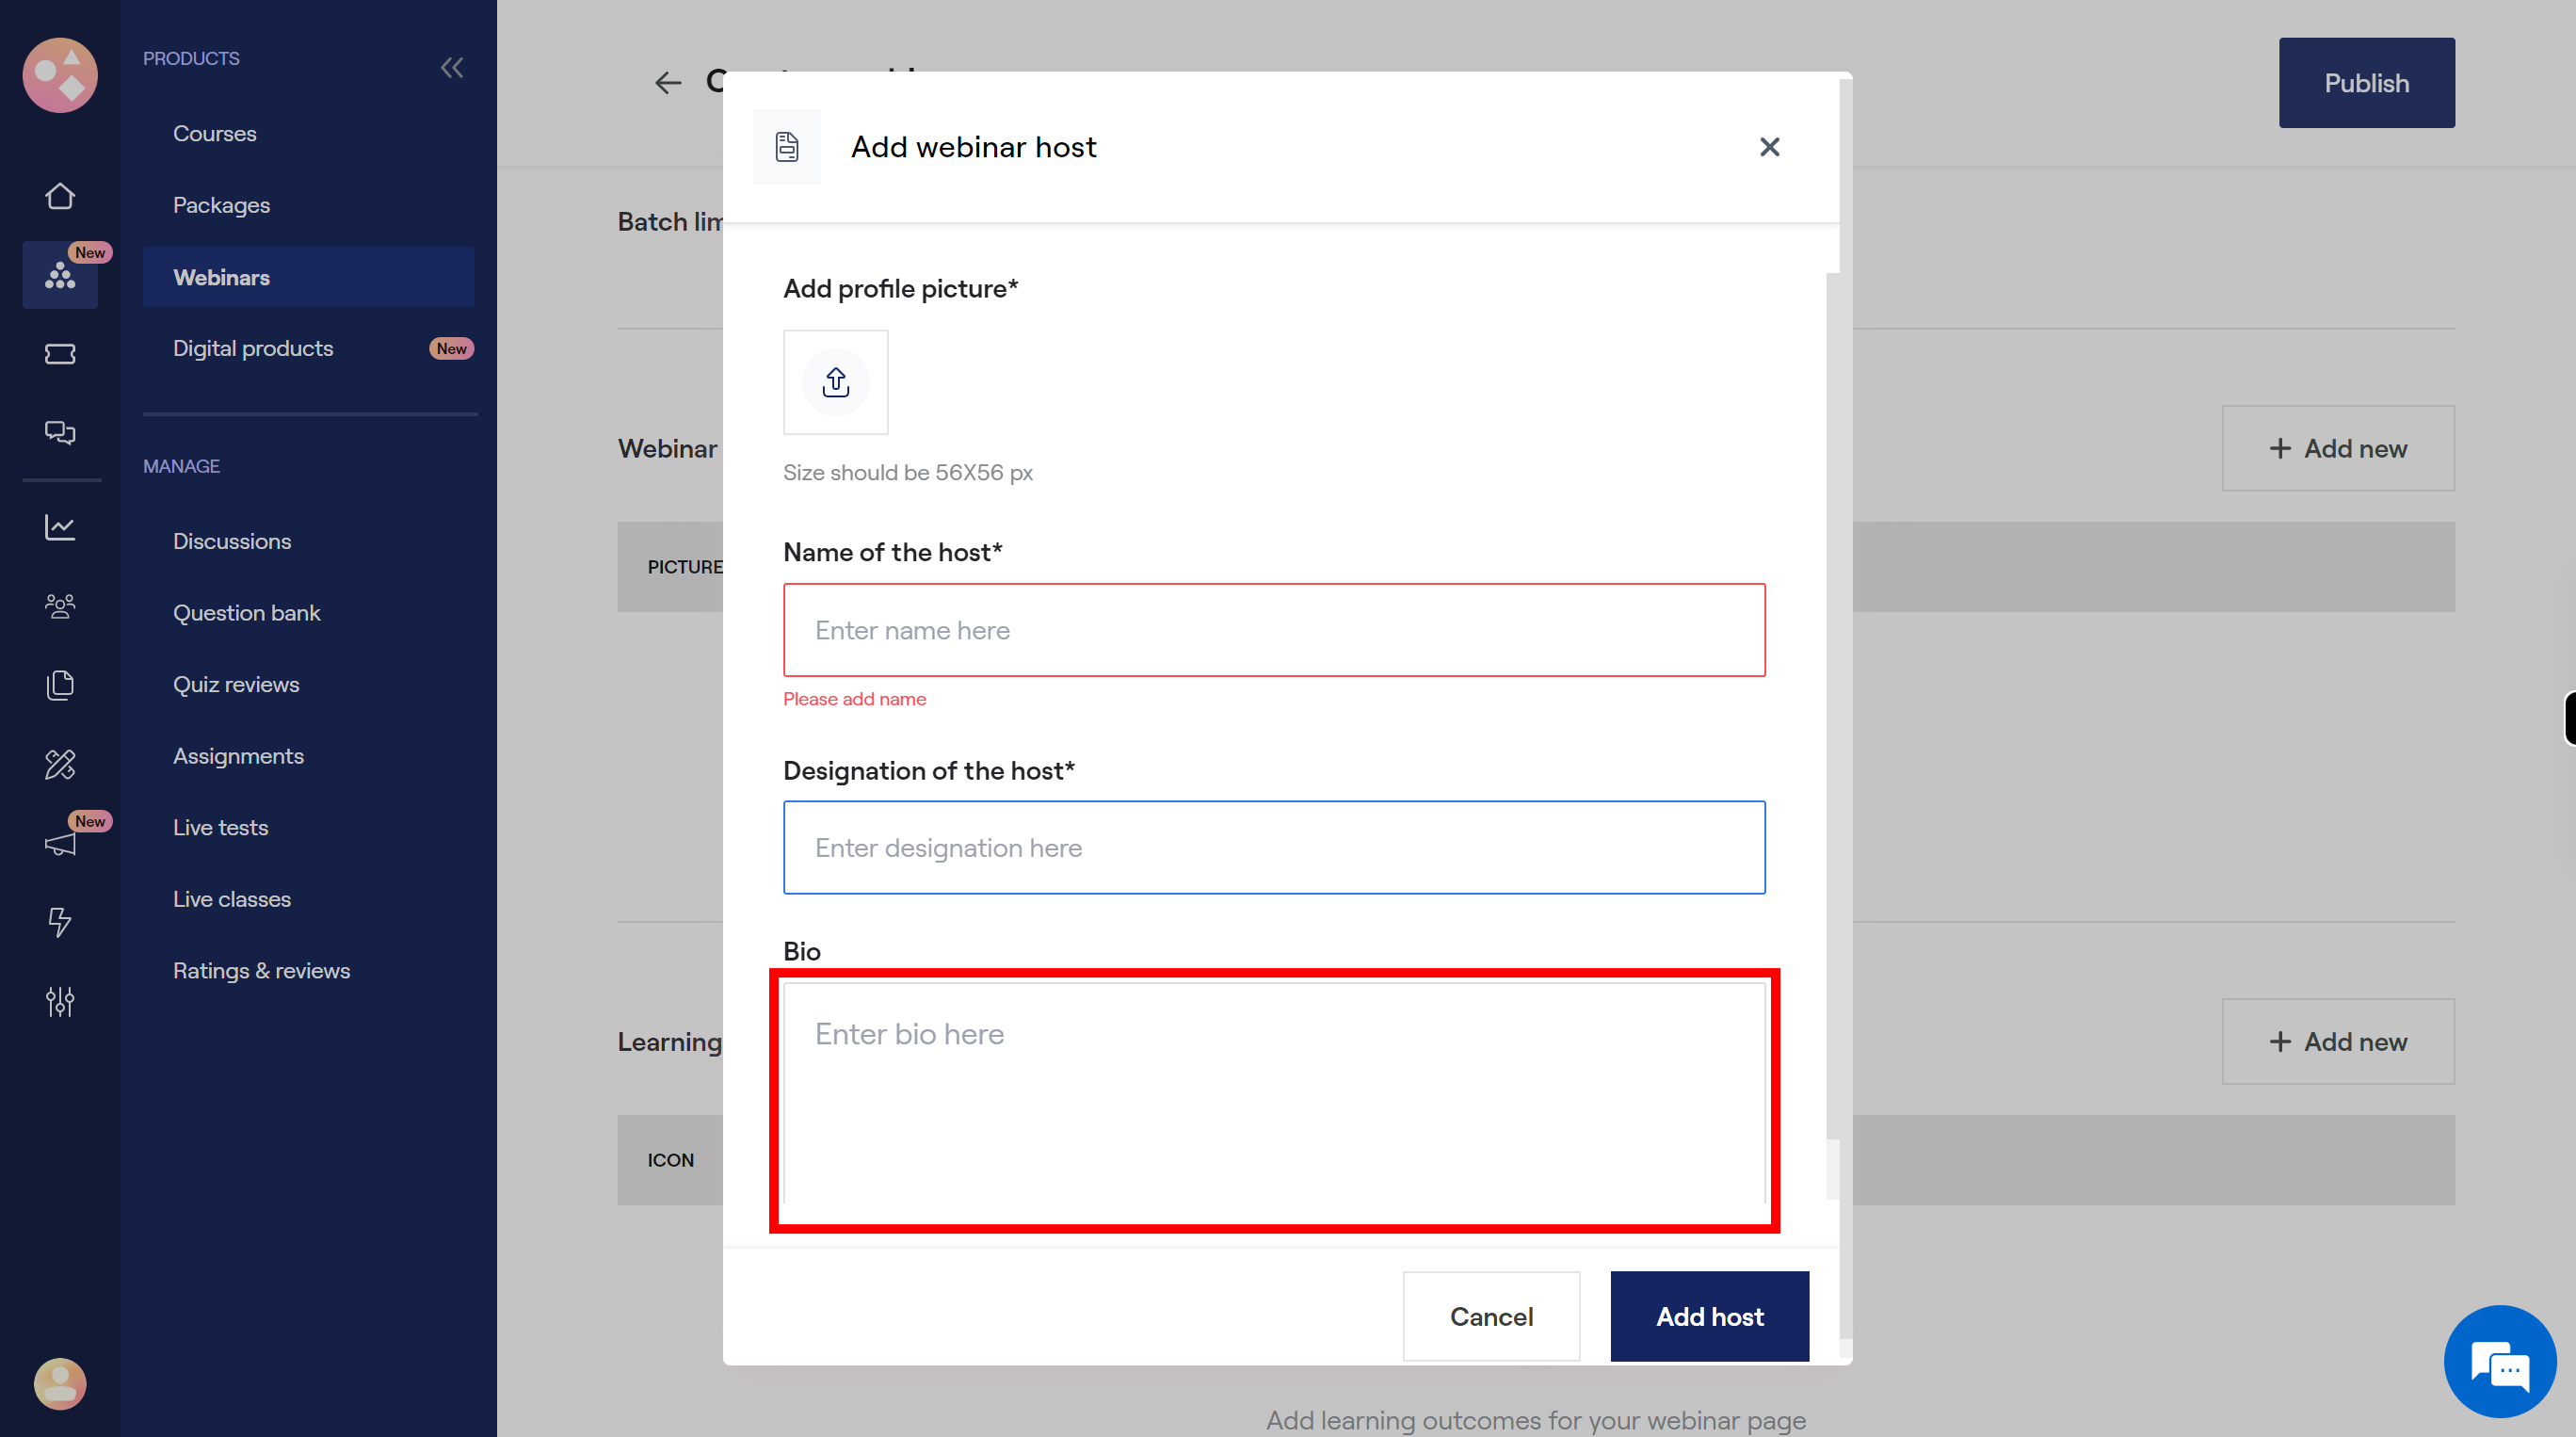
20.
Click on the "Bio" field, then enter the details of the host. Once done, click on the "Next" button on the Supervity instruction widget.
-
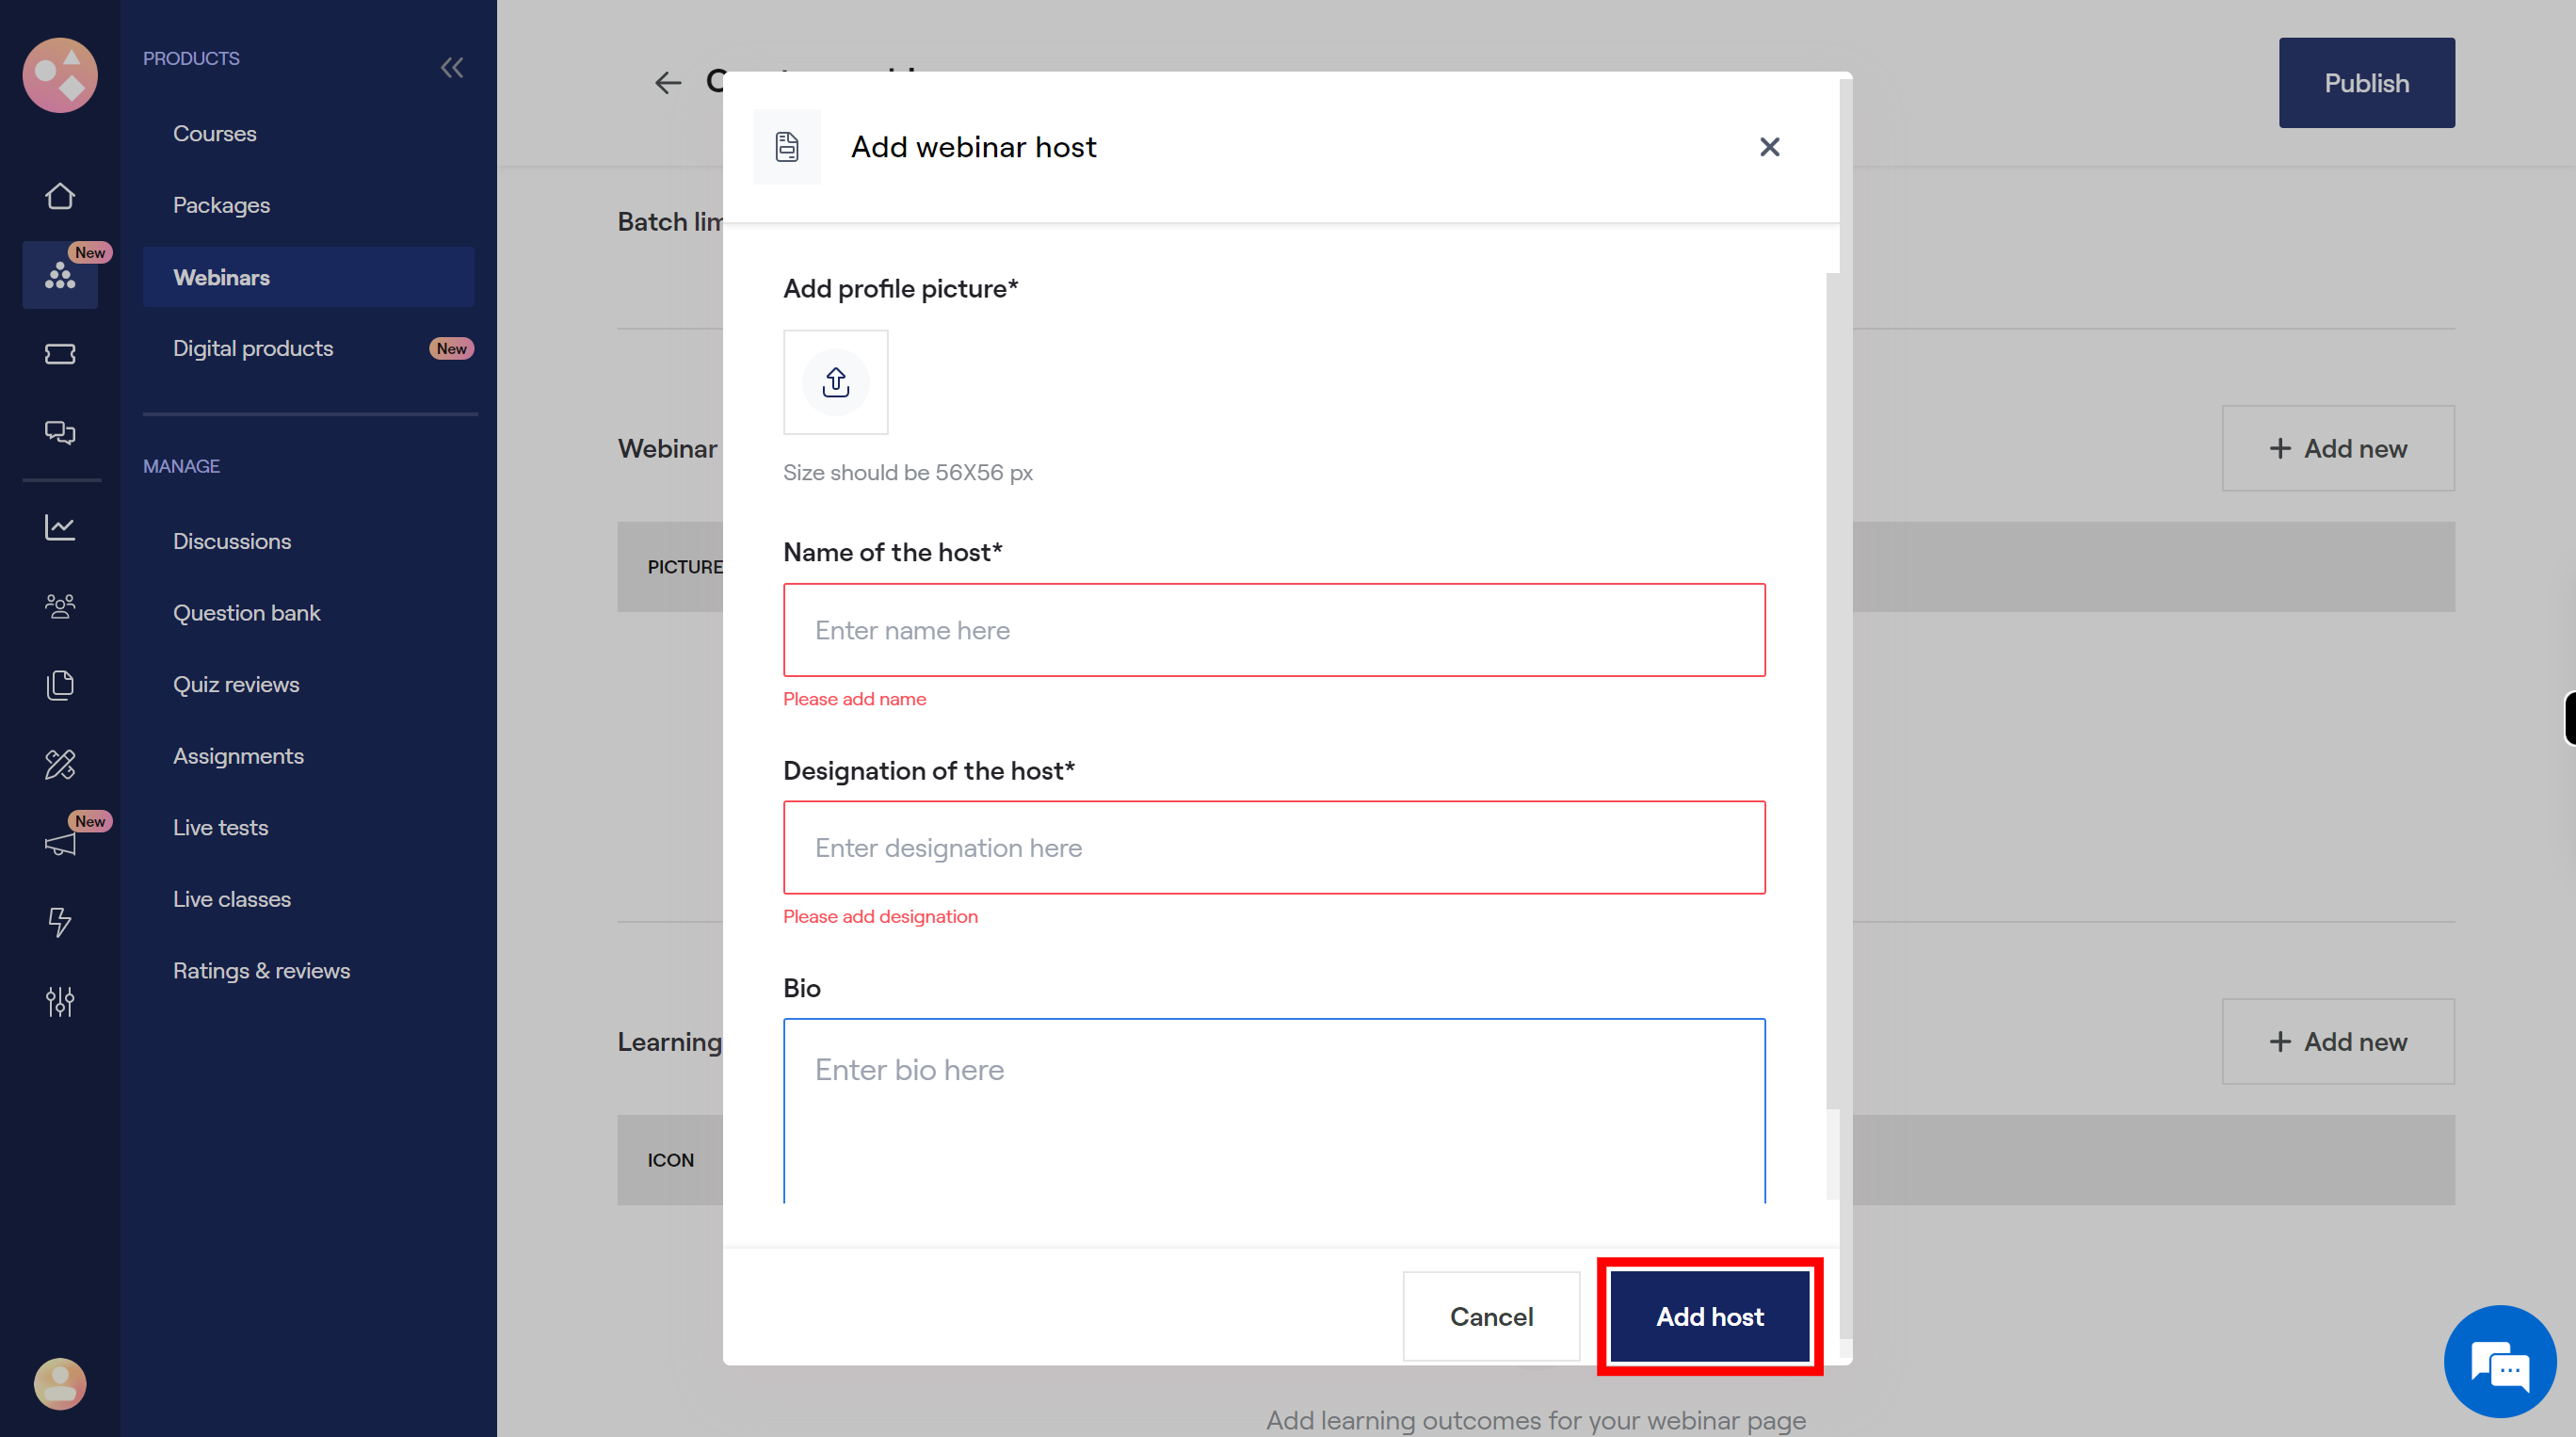
21.
Click on the "Add host" button to add the mention details below.
-
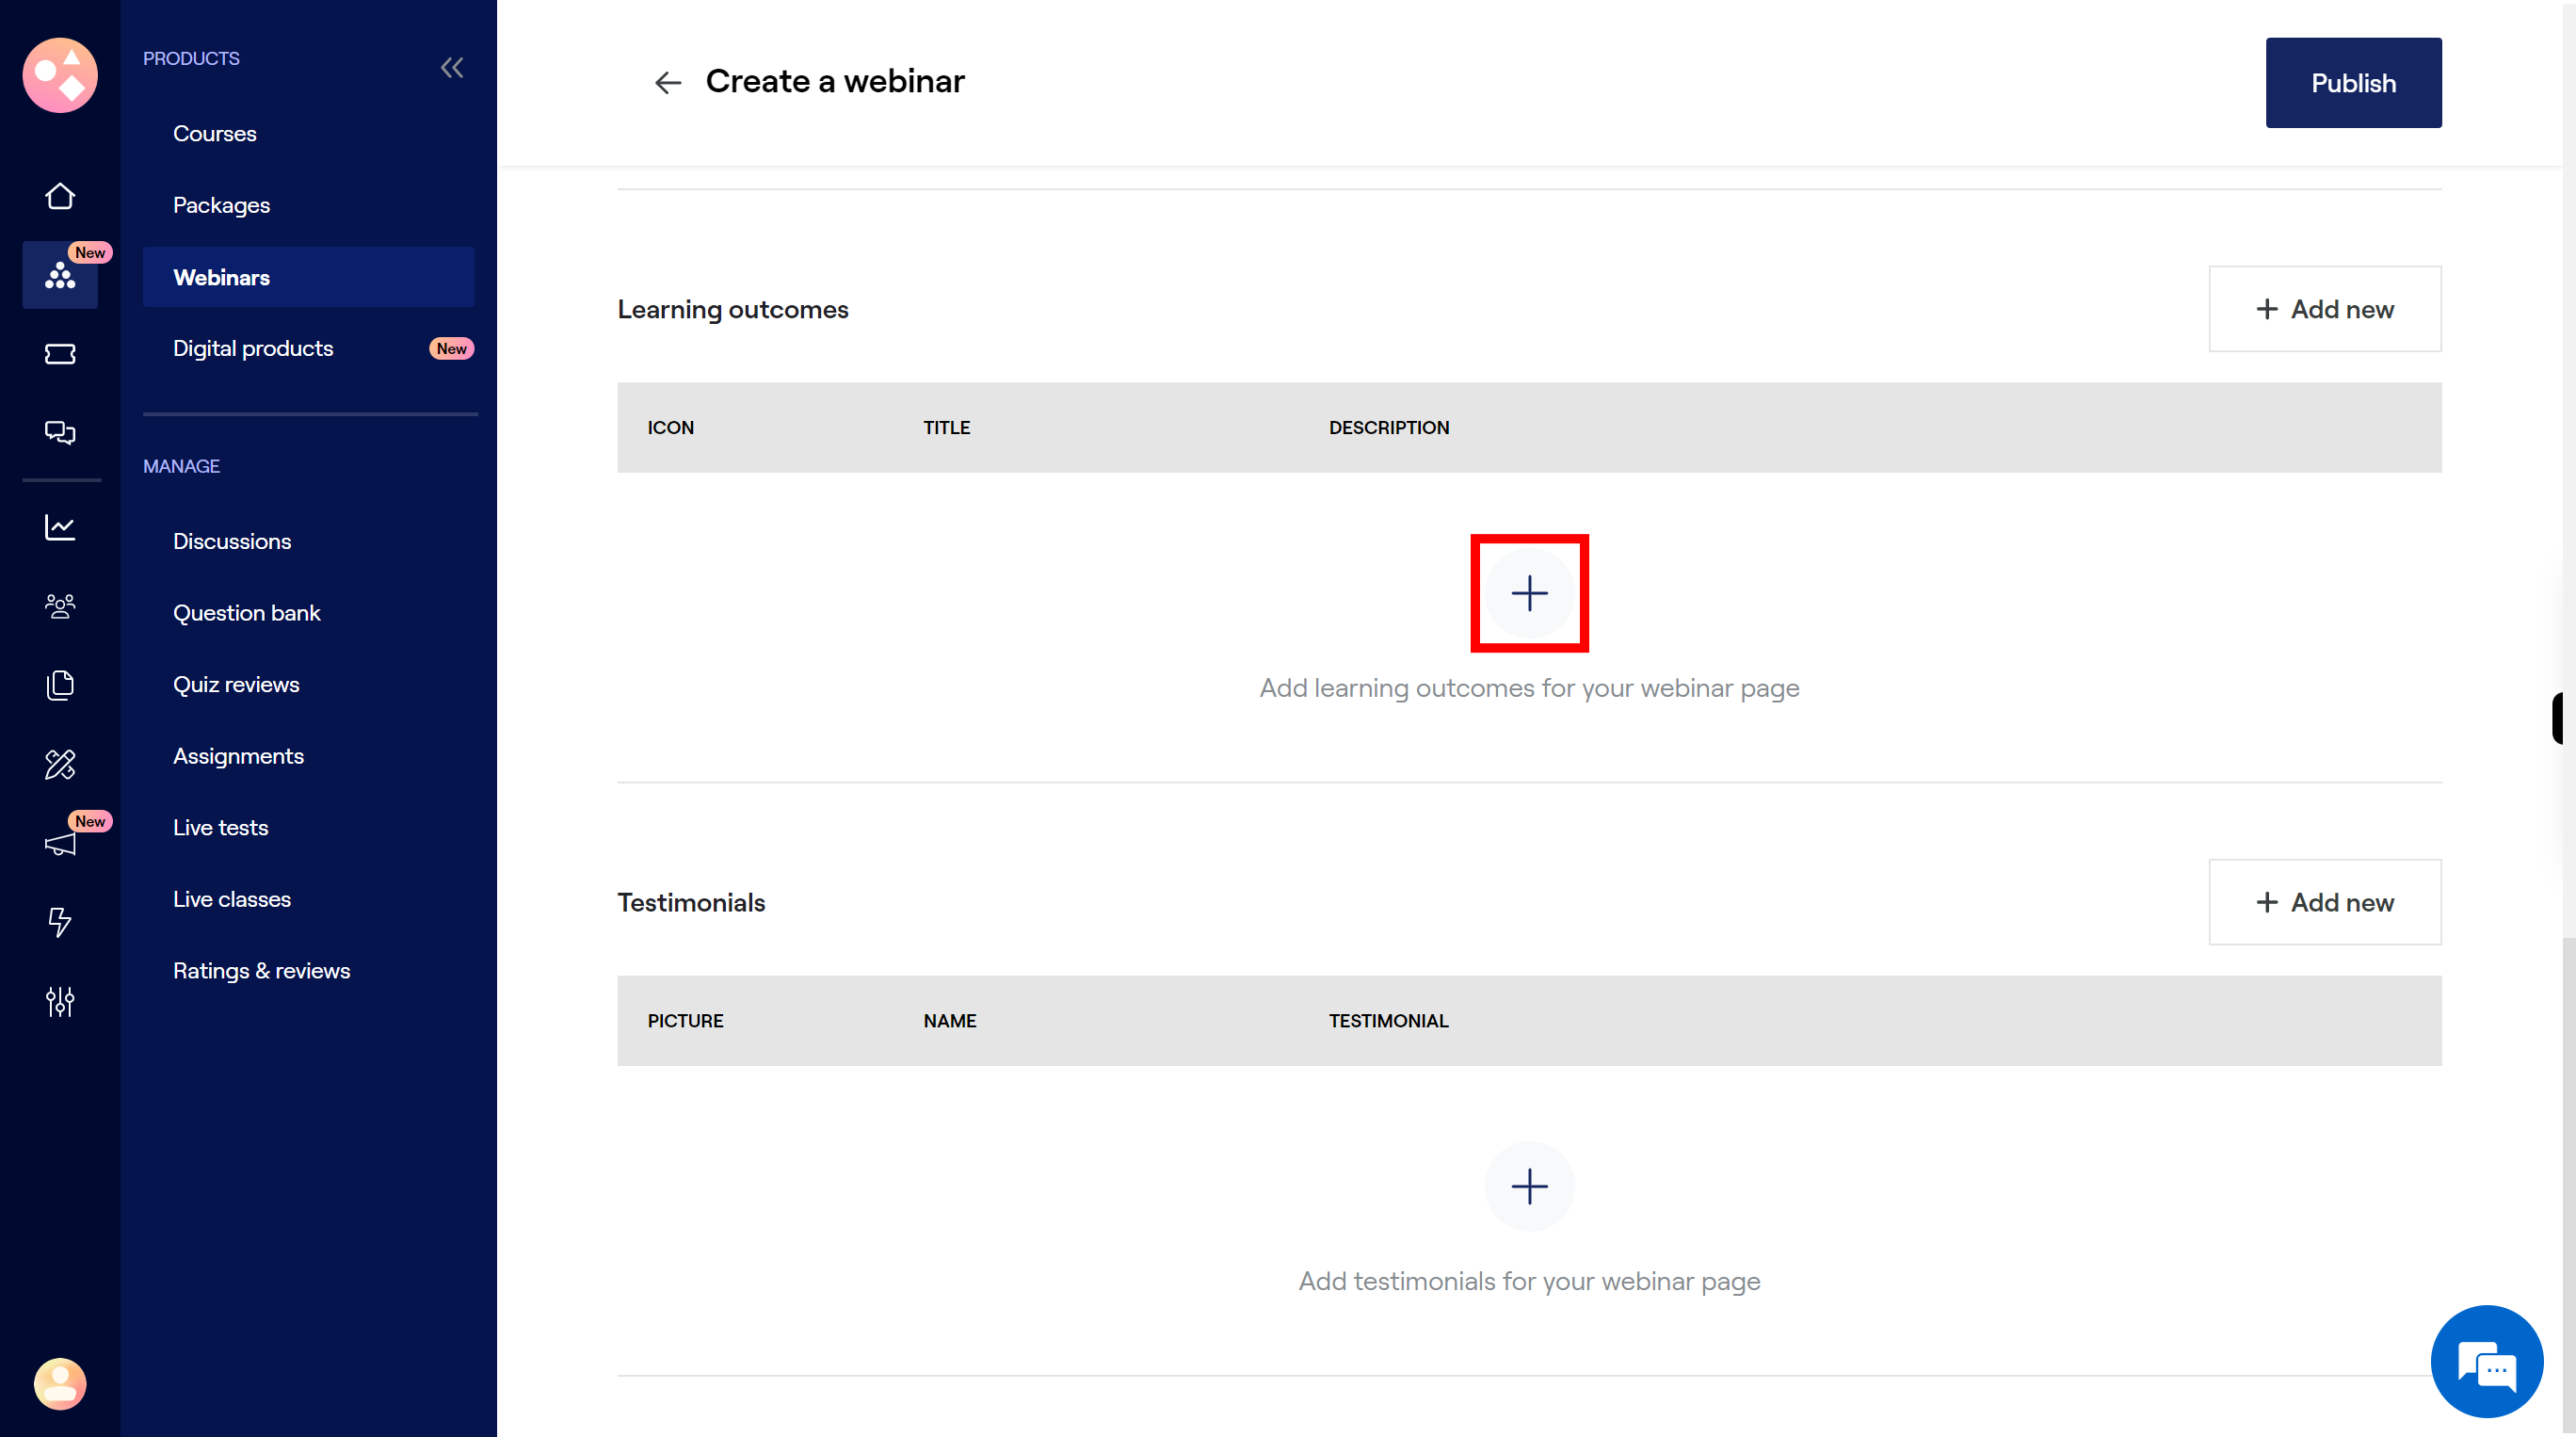
22.
Click on the "+" button to add learning outcomes for webinar.
-
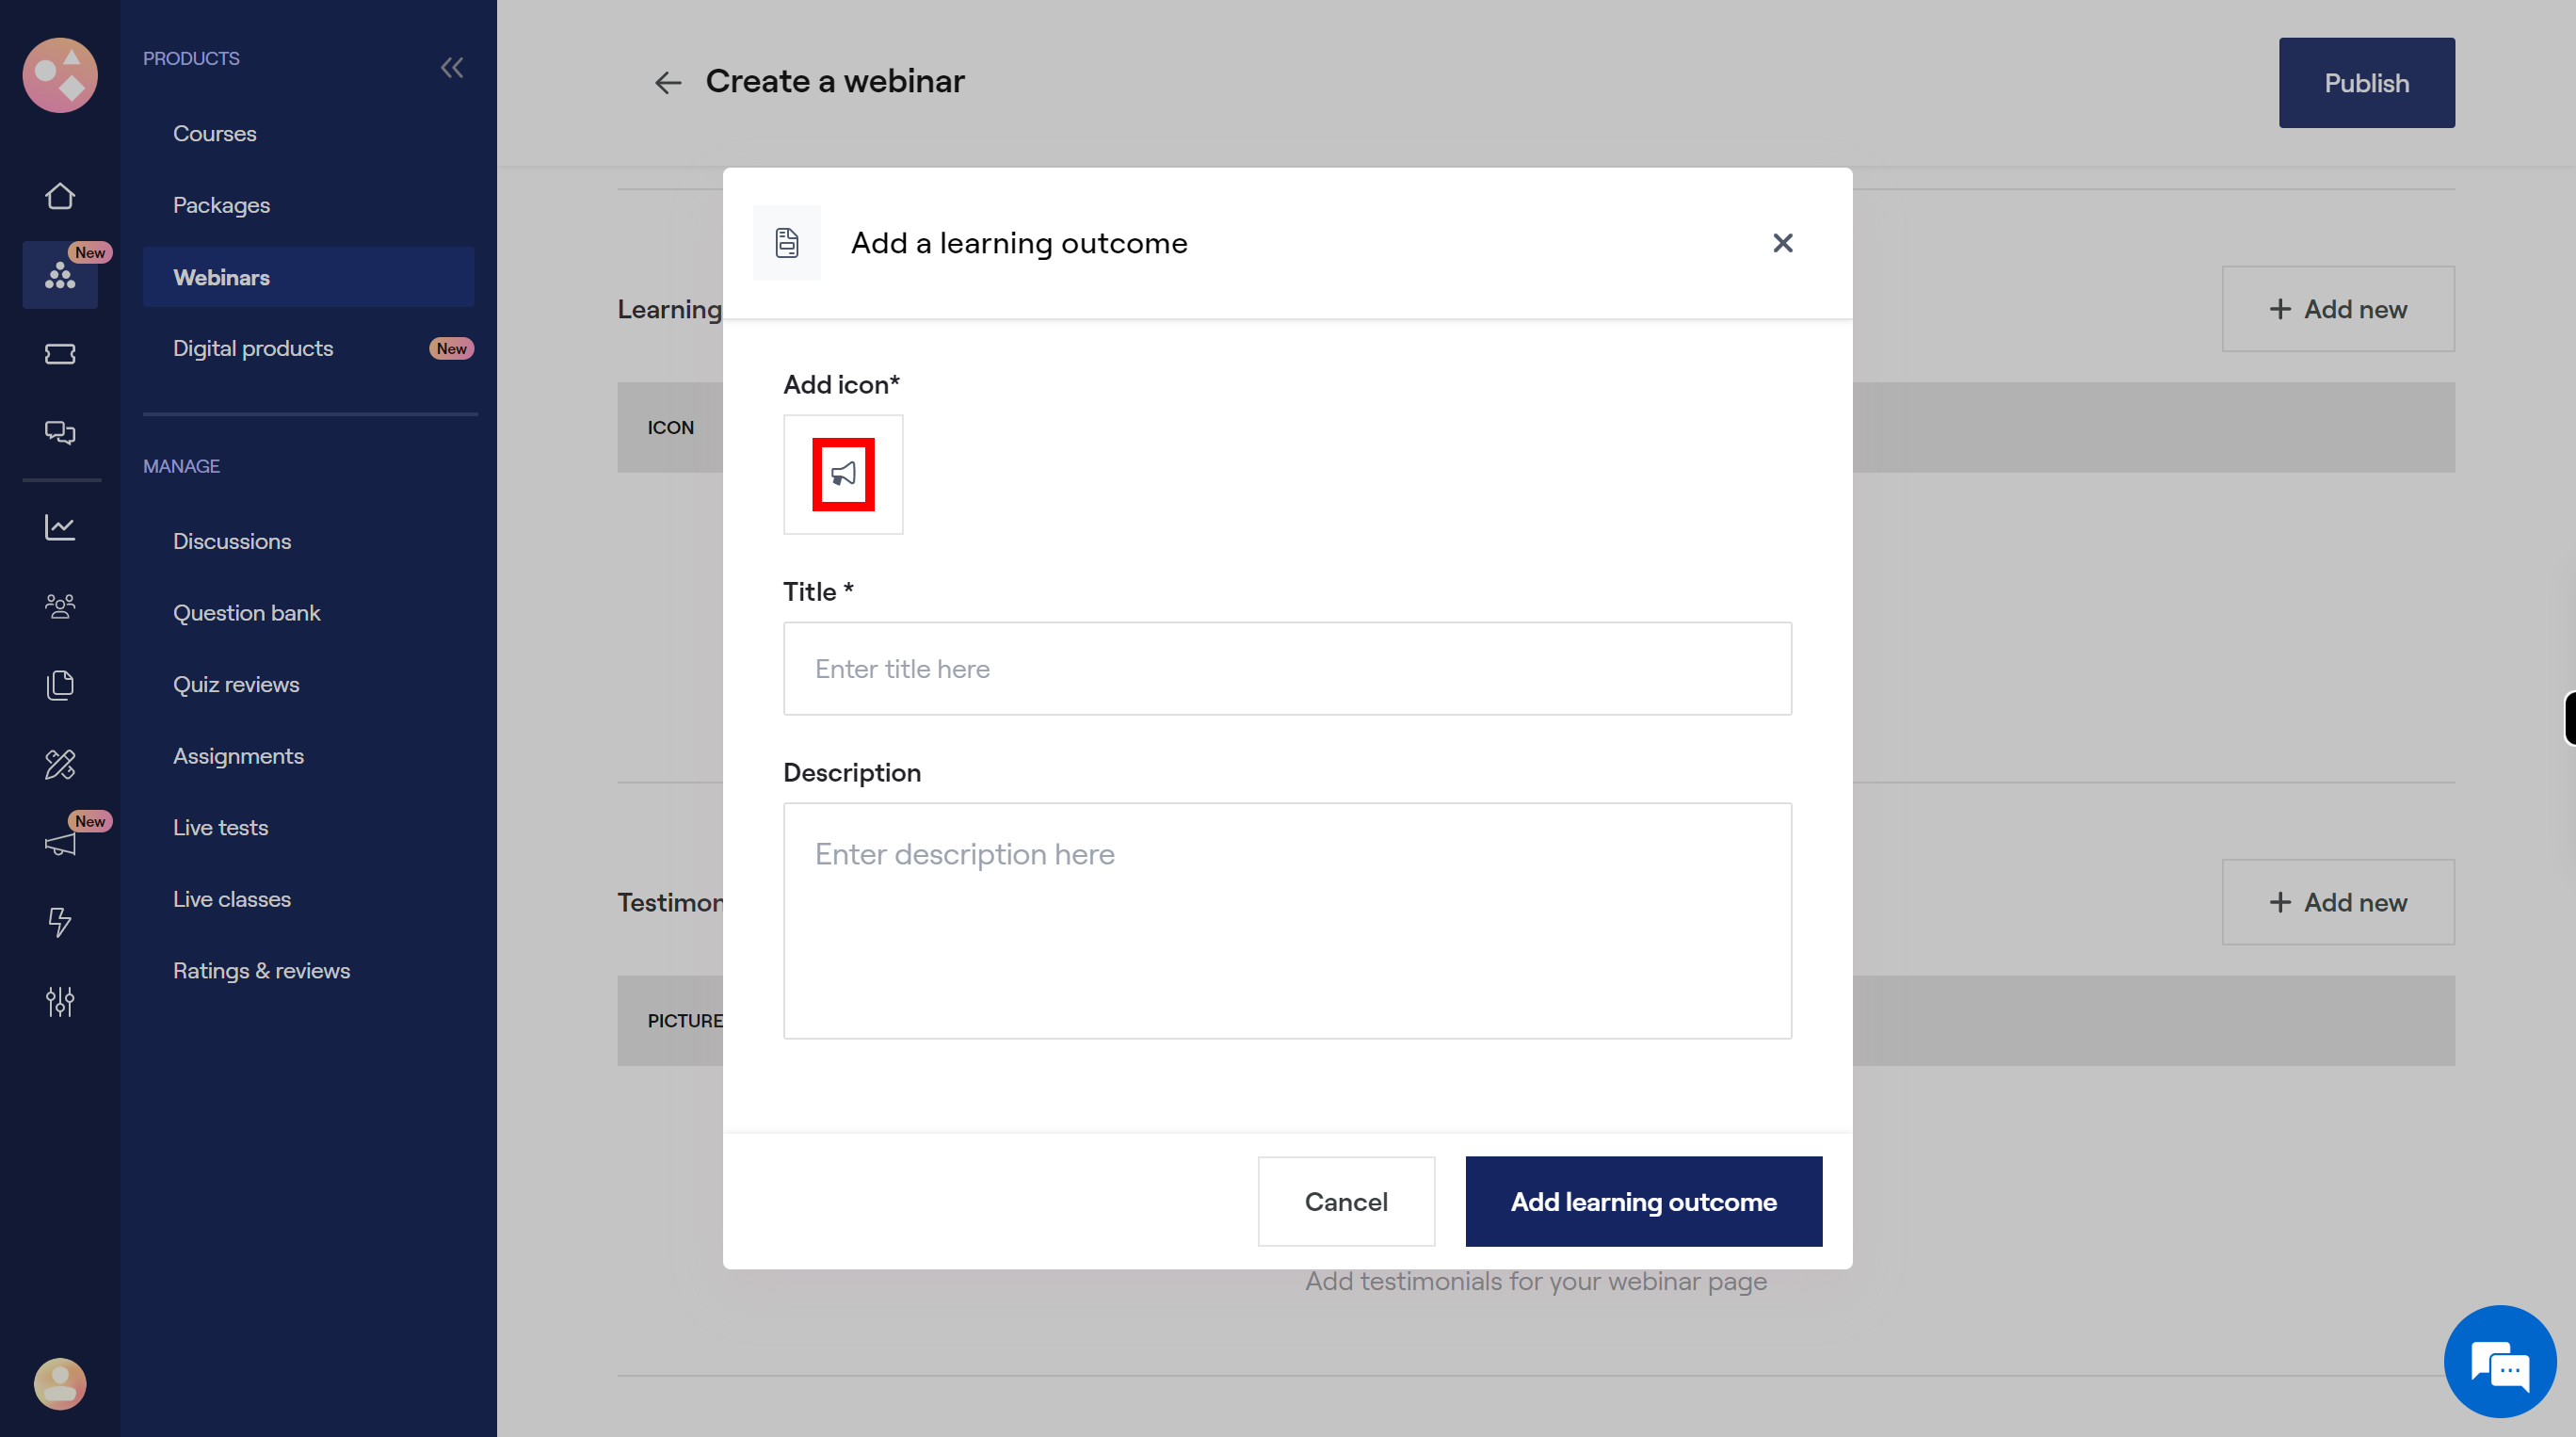
23.
Click on the "Add icon", then select one of the icon. Once done, click on the "Next" button on the Supervity instruction widget.
-
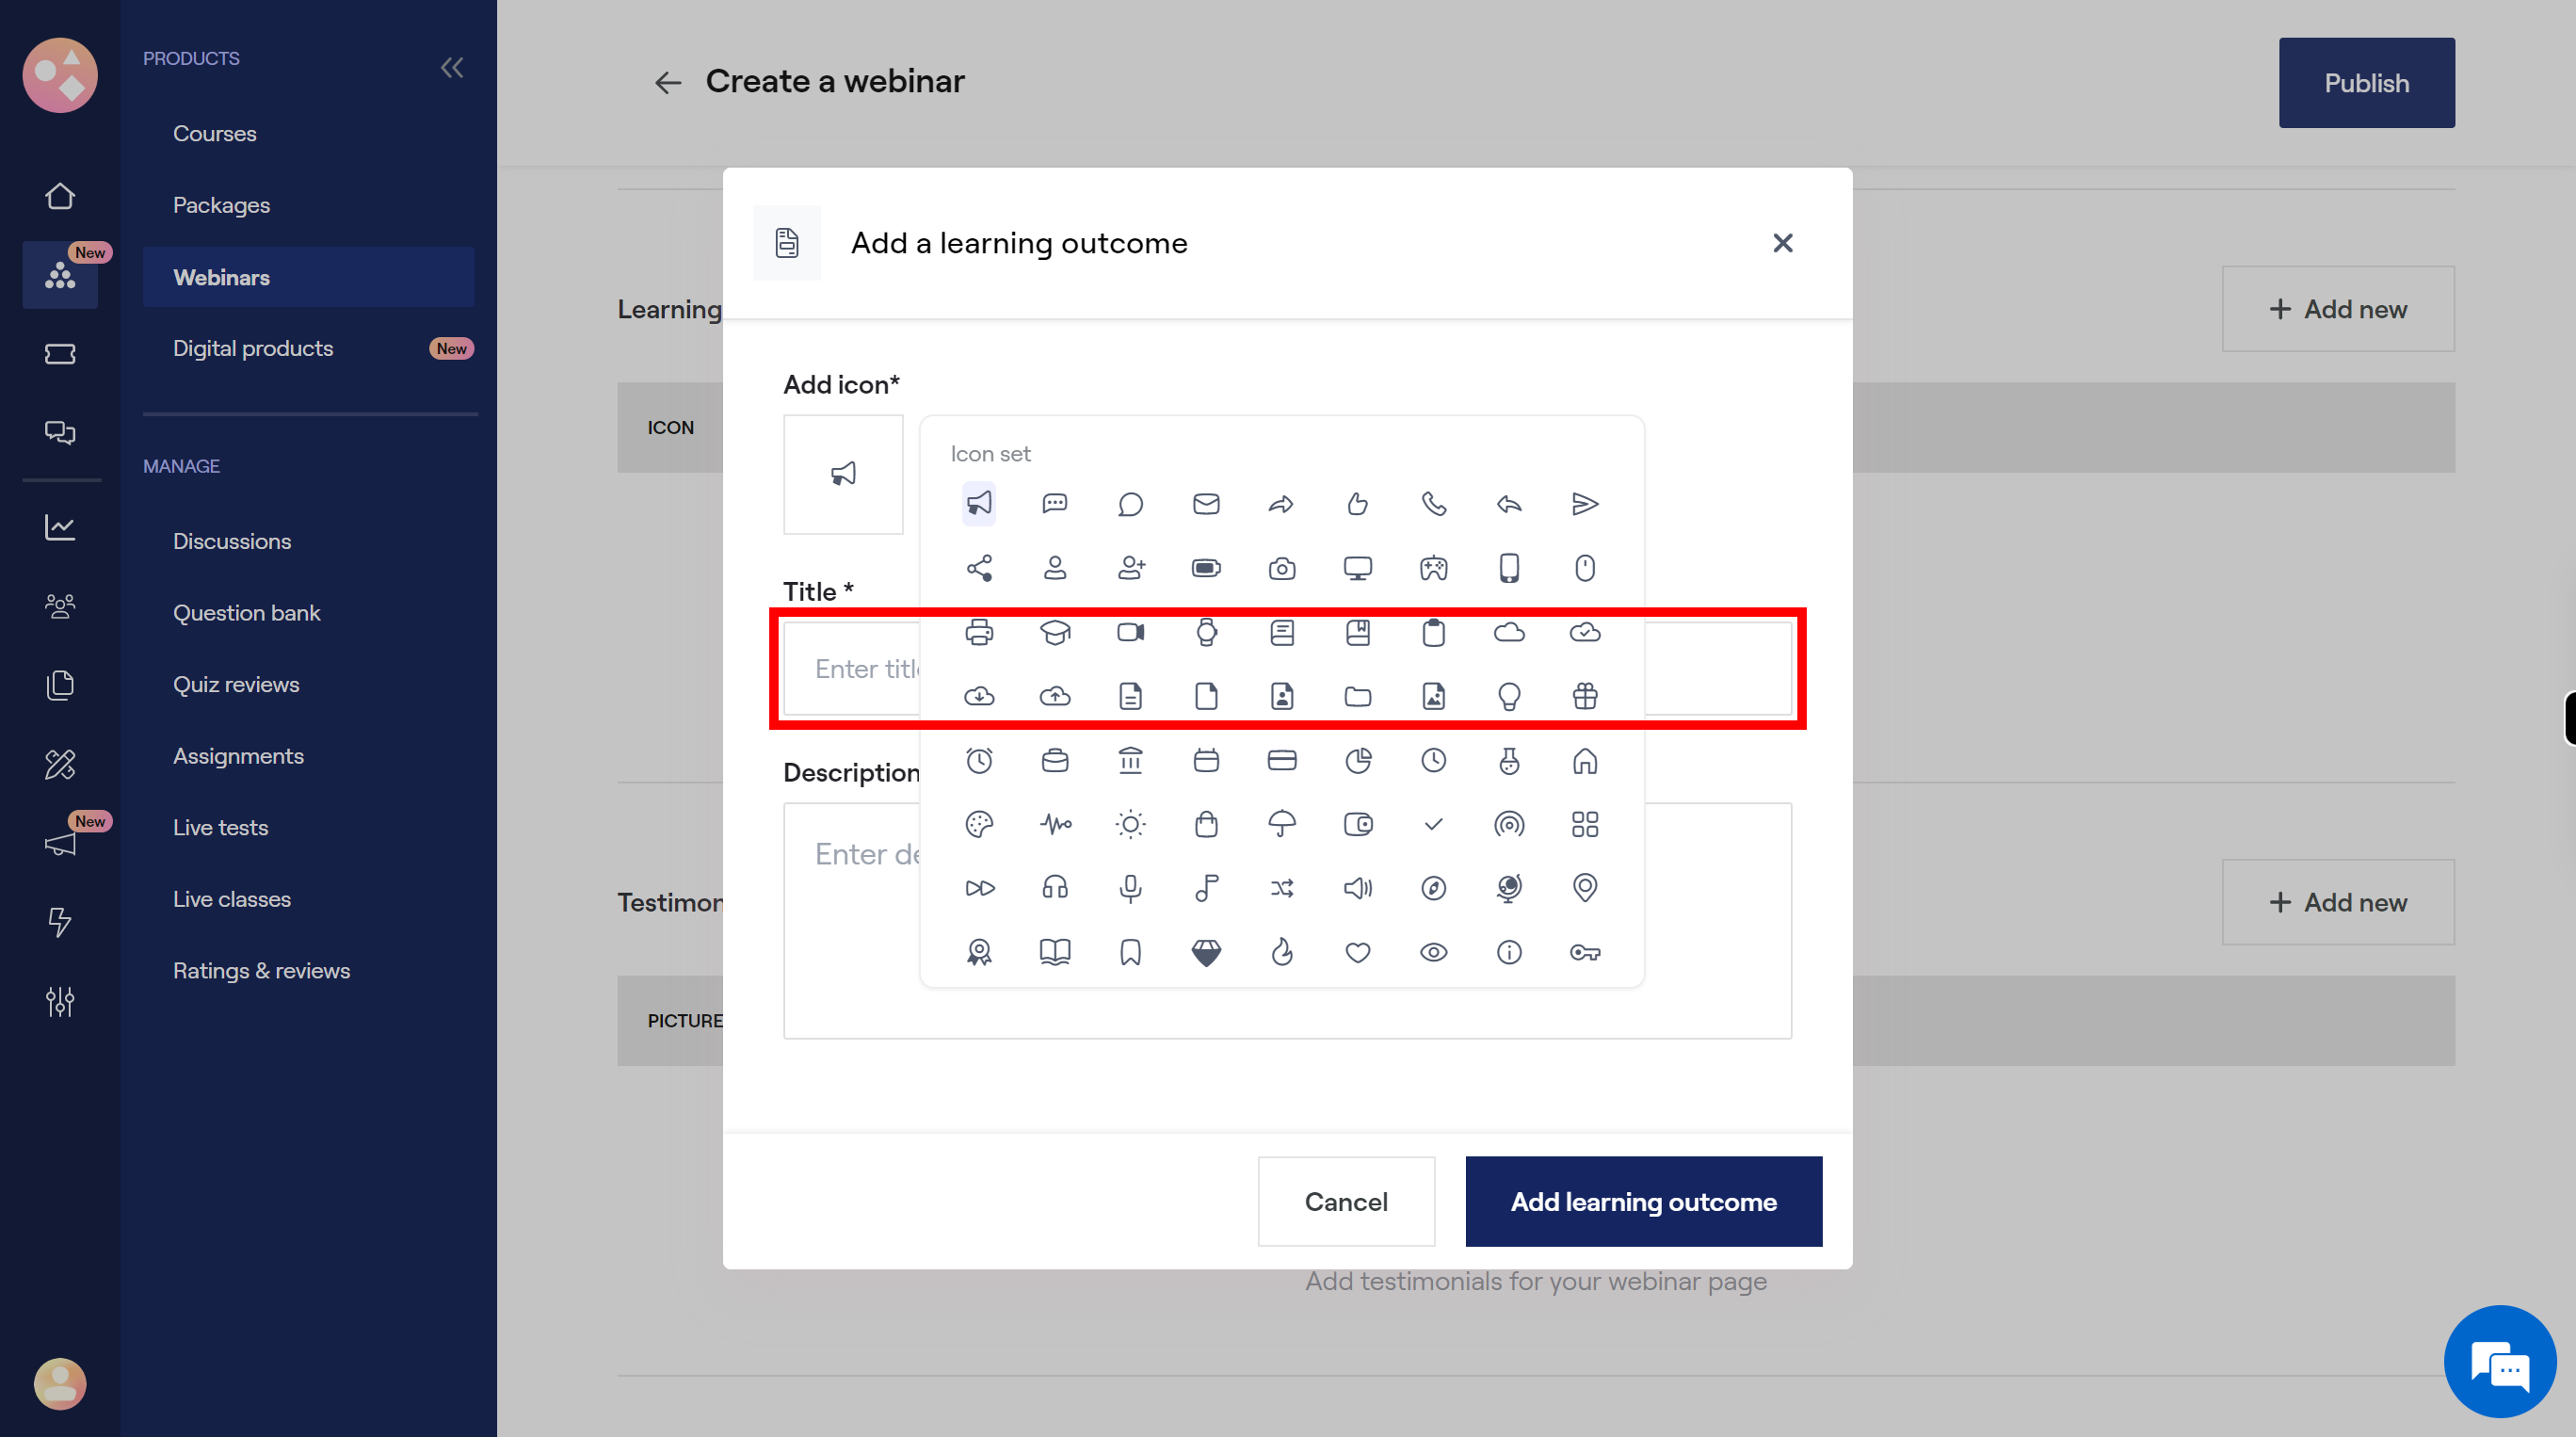
24.
Click on the "Title" field, then enter title. Once done, click on the "Next" button on the Supervity instruction widget.
-
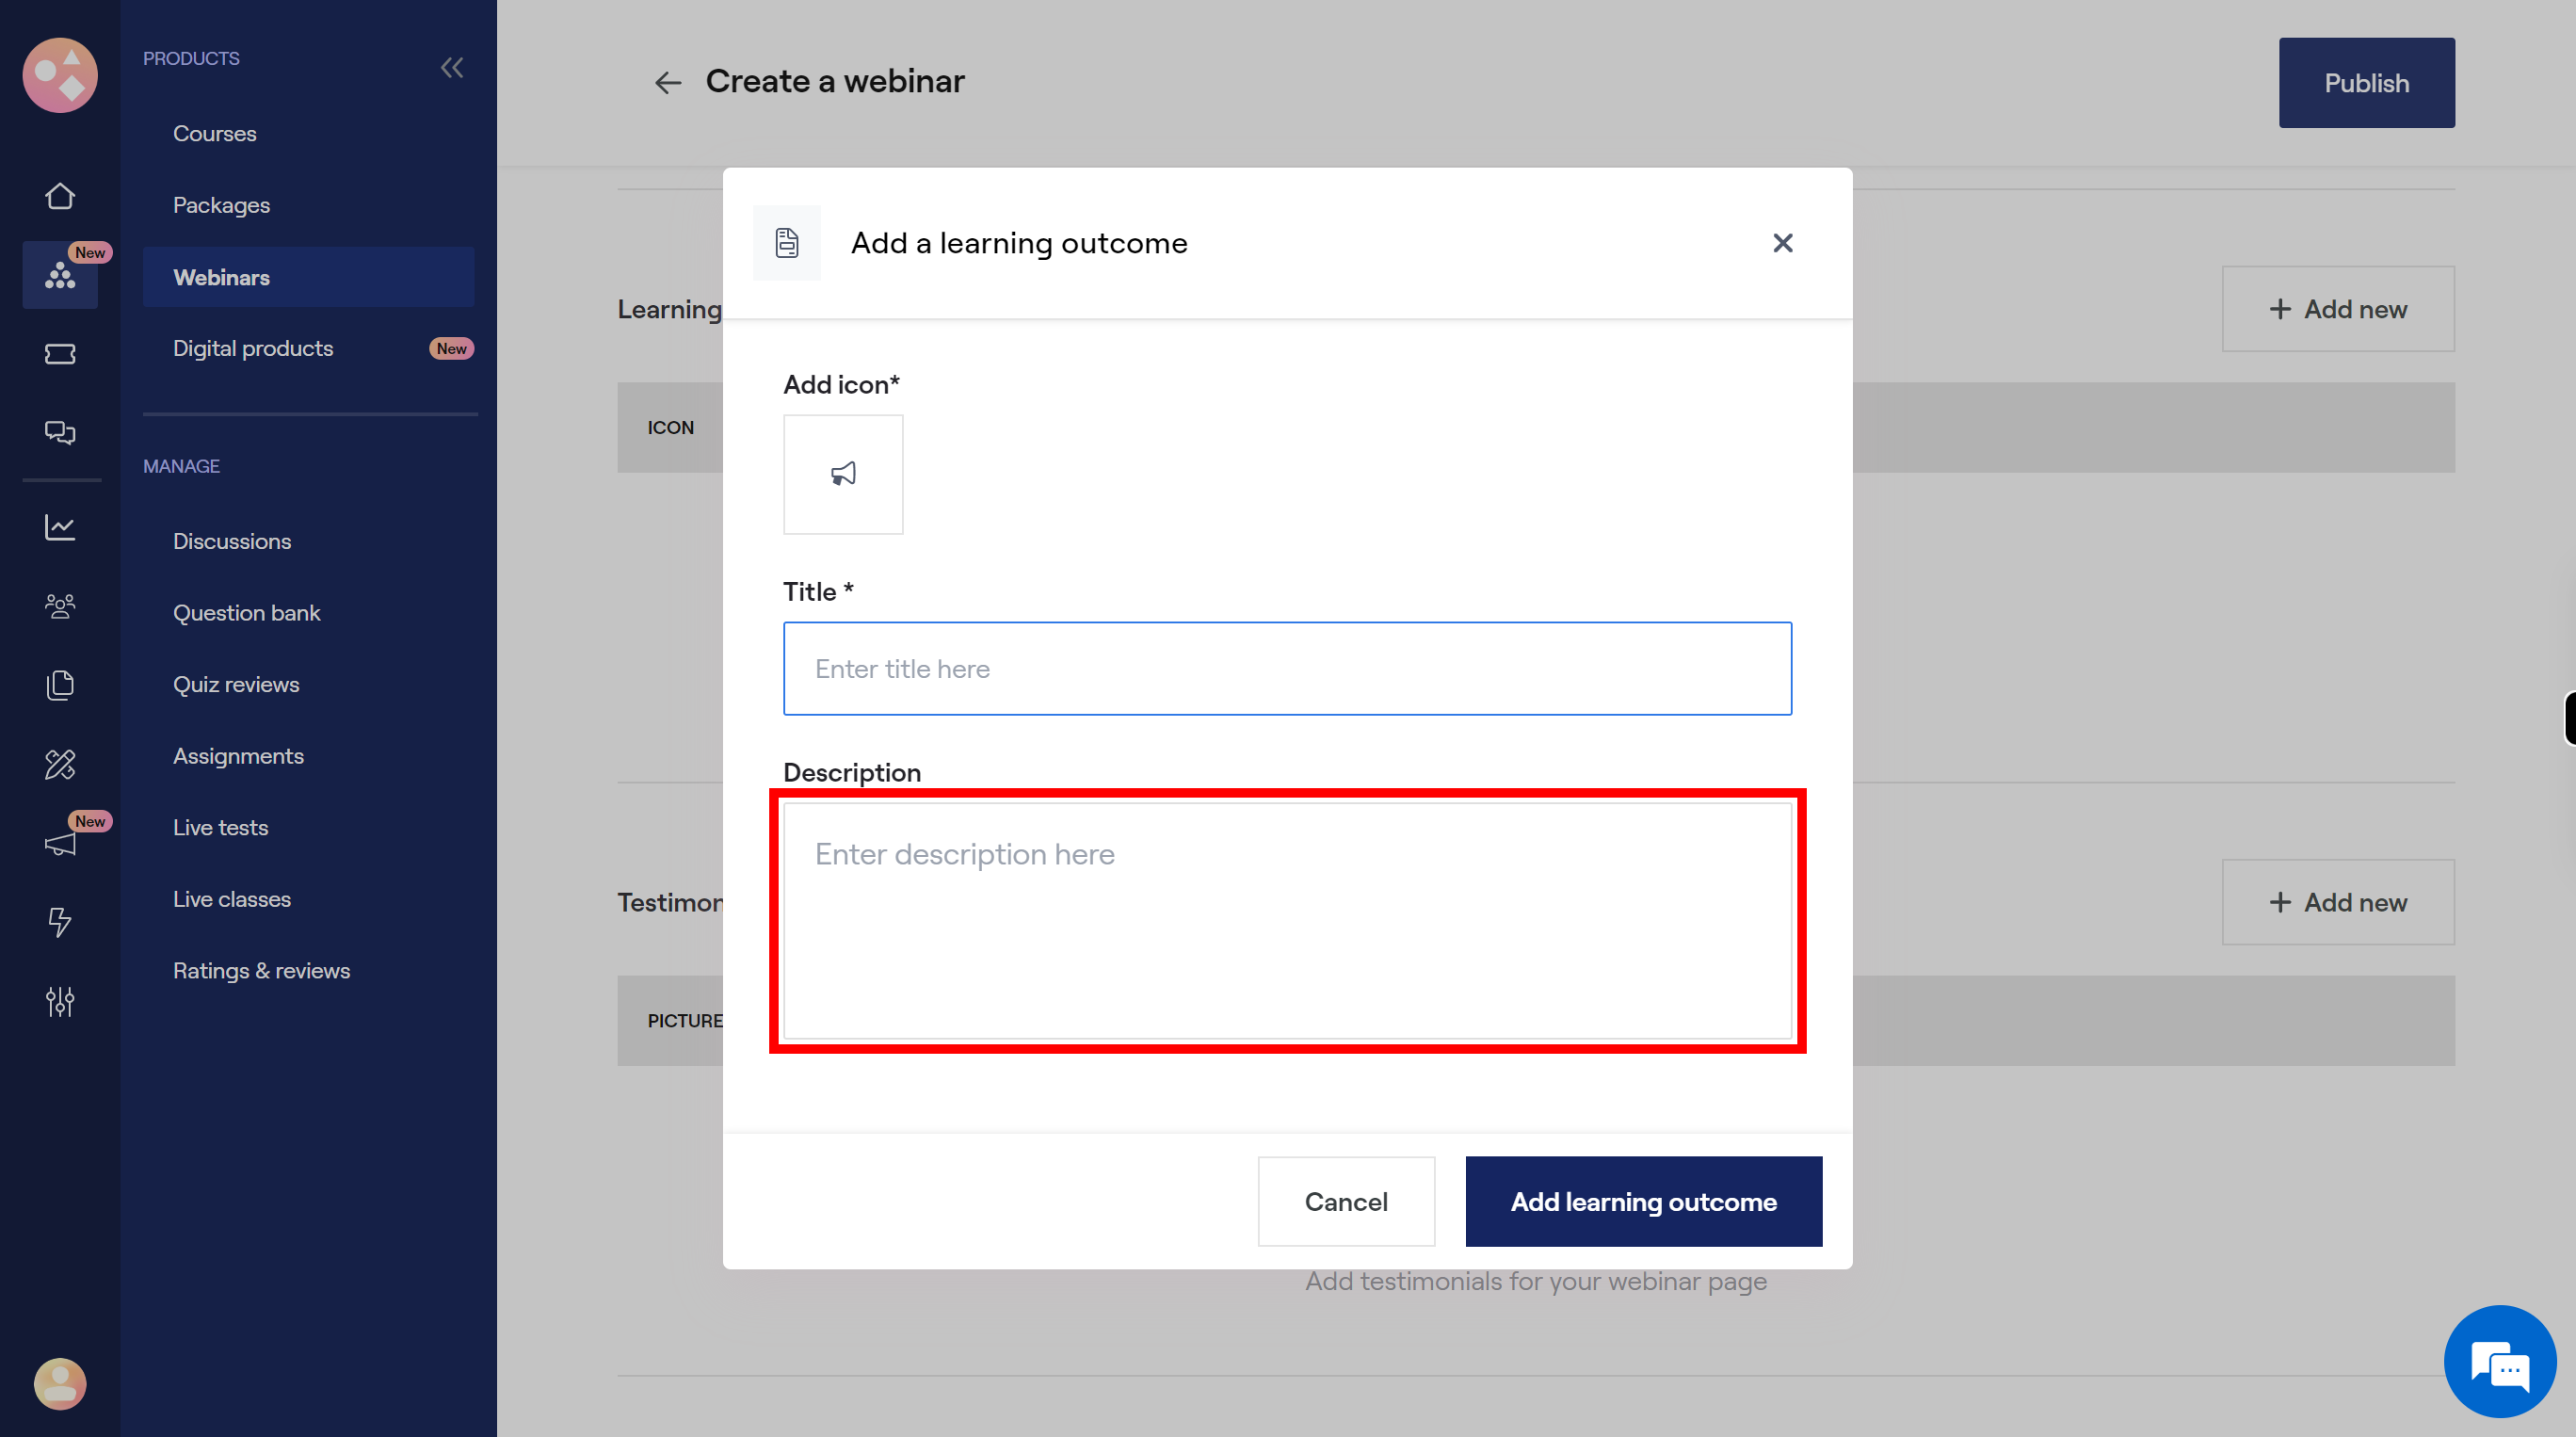
25.
Click on the "Description" field, enter the description. Once done, click on the "Next" button on the Supervity instruction widget.
-
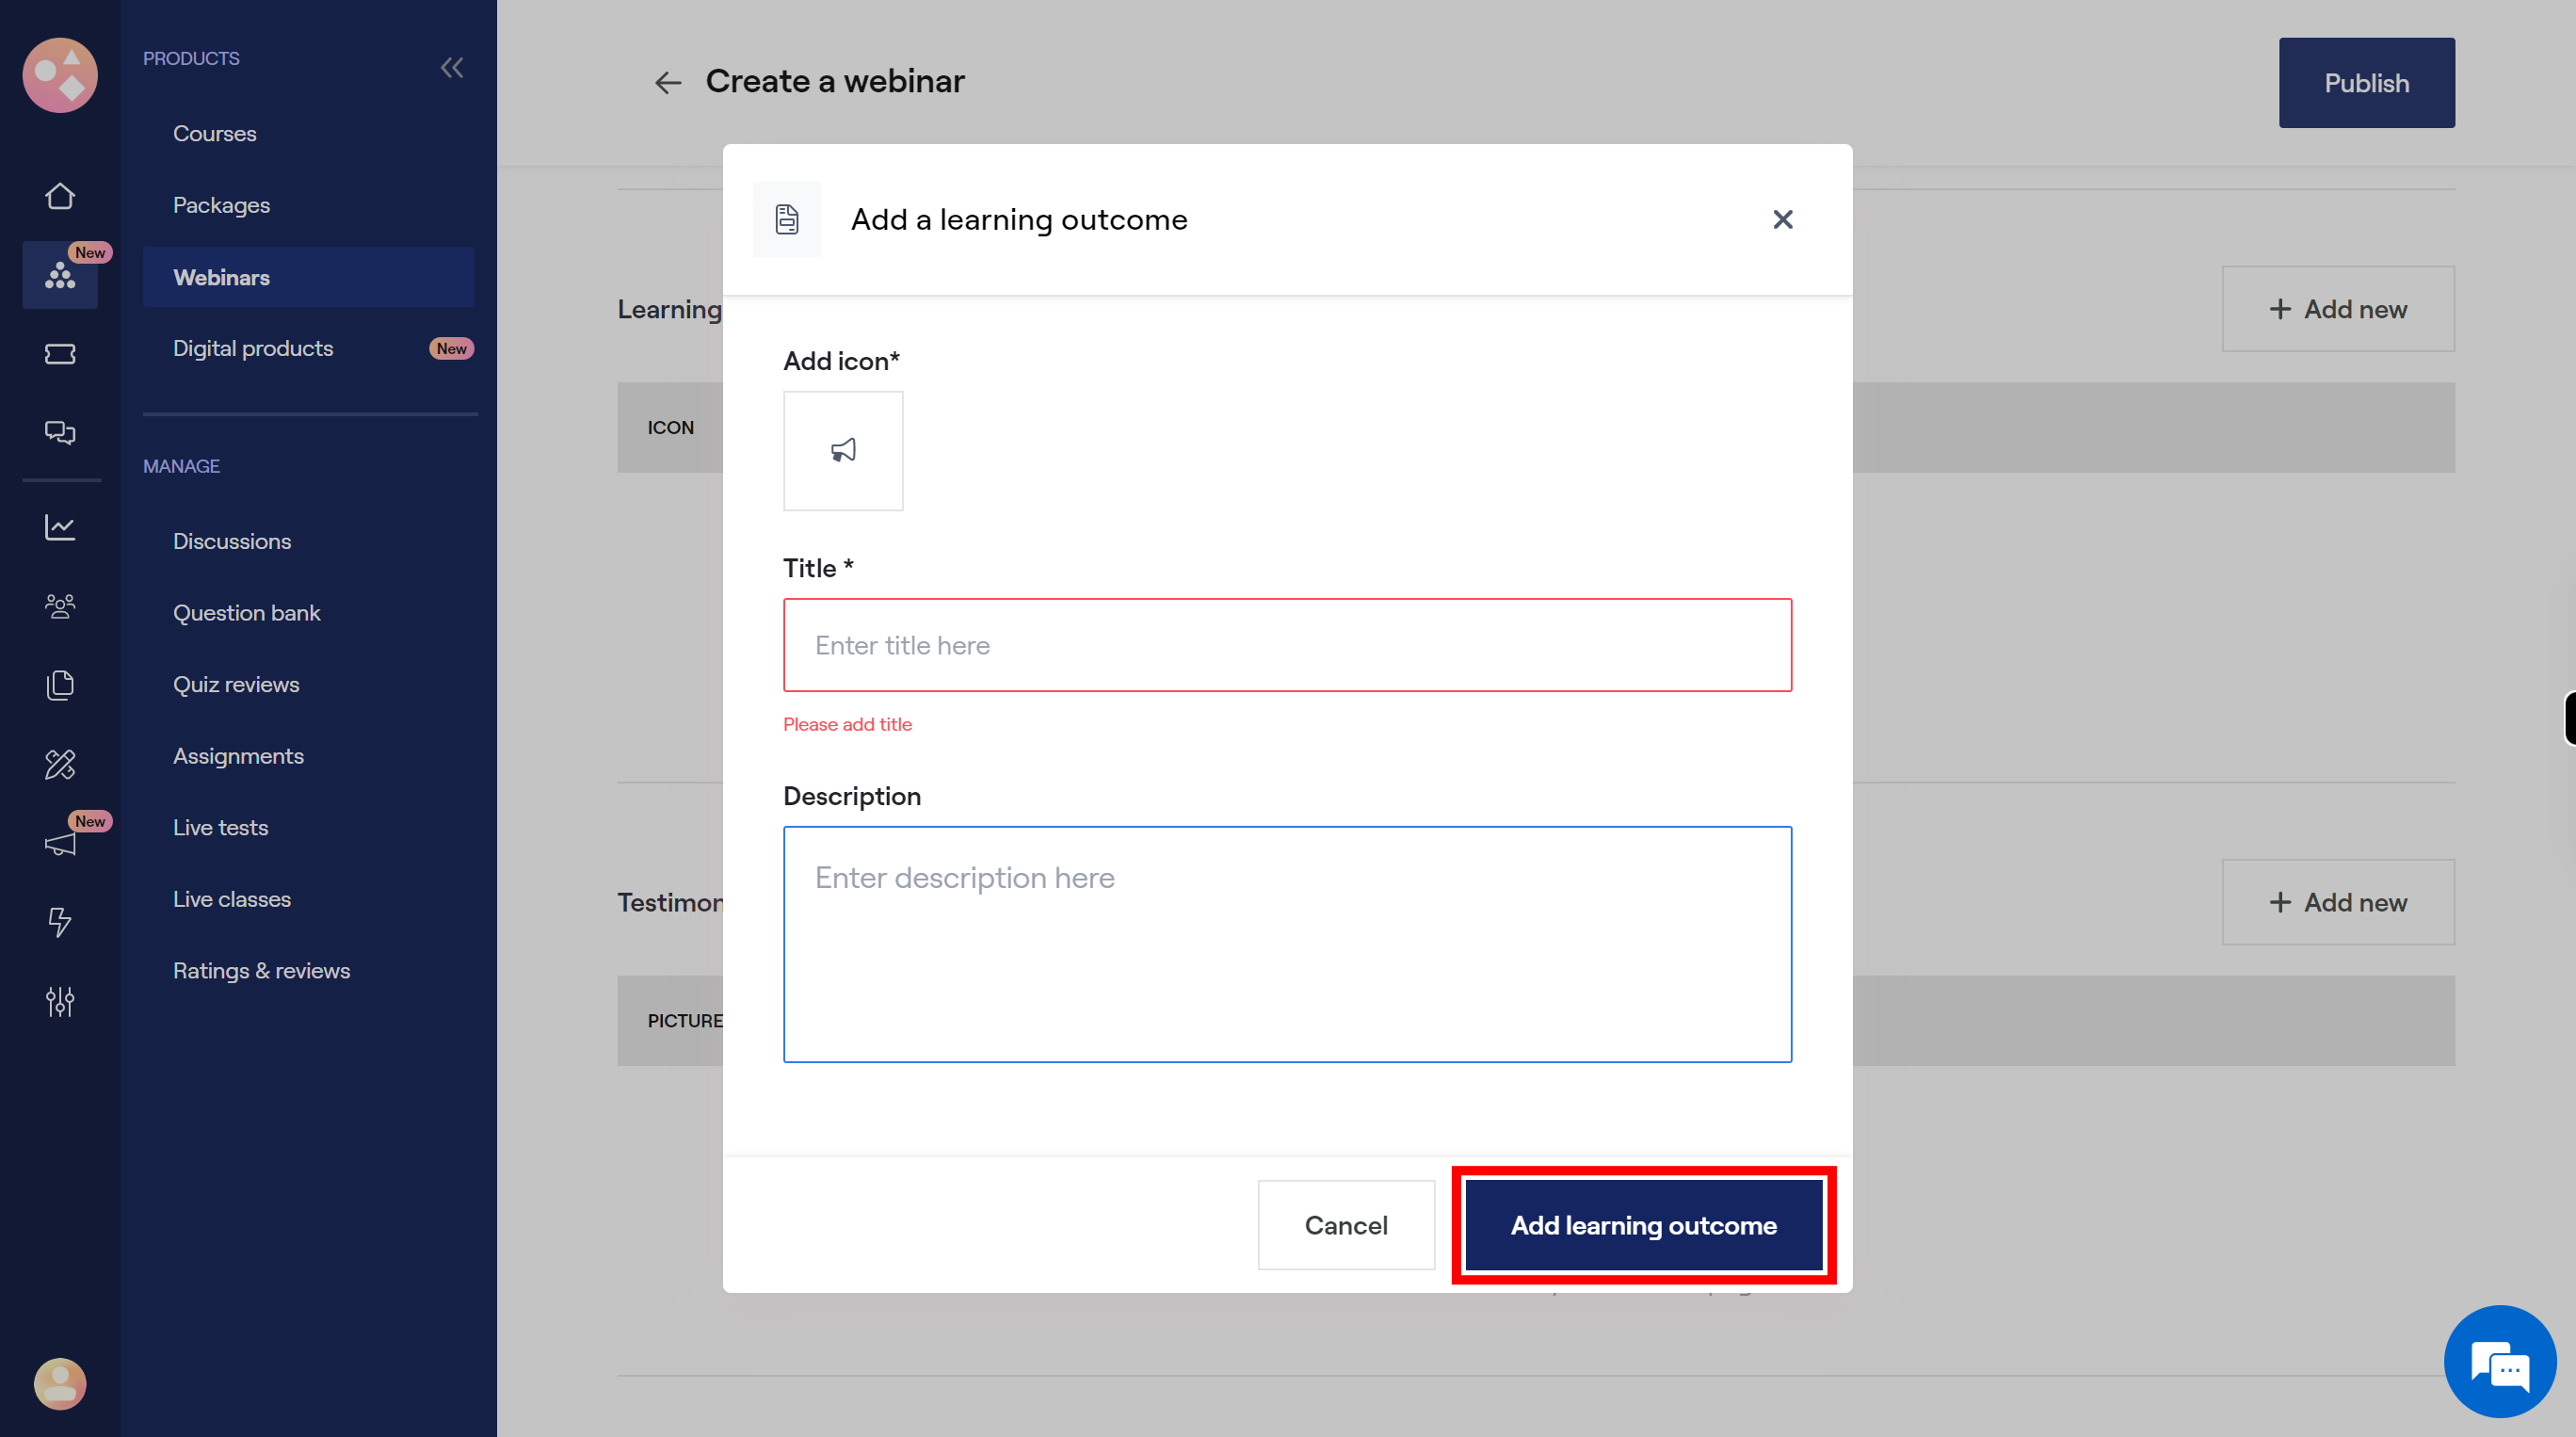
26.
Click on the "Add learning outcome" button to add the details mention below.
-
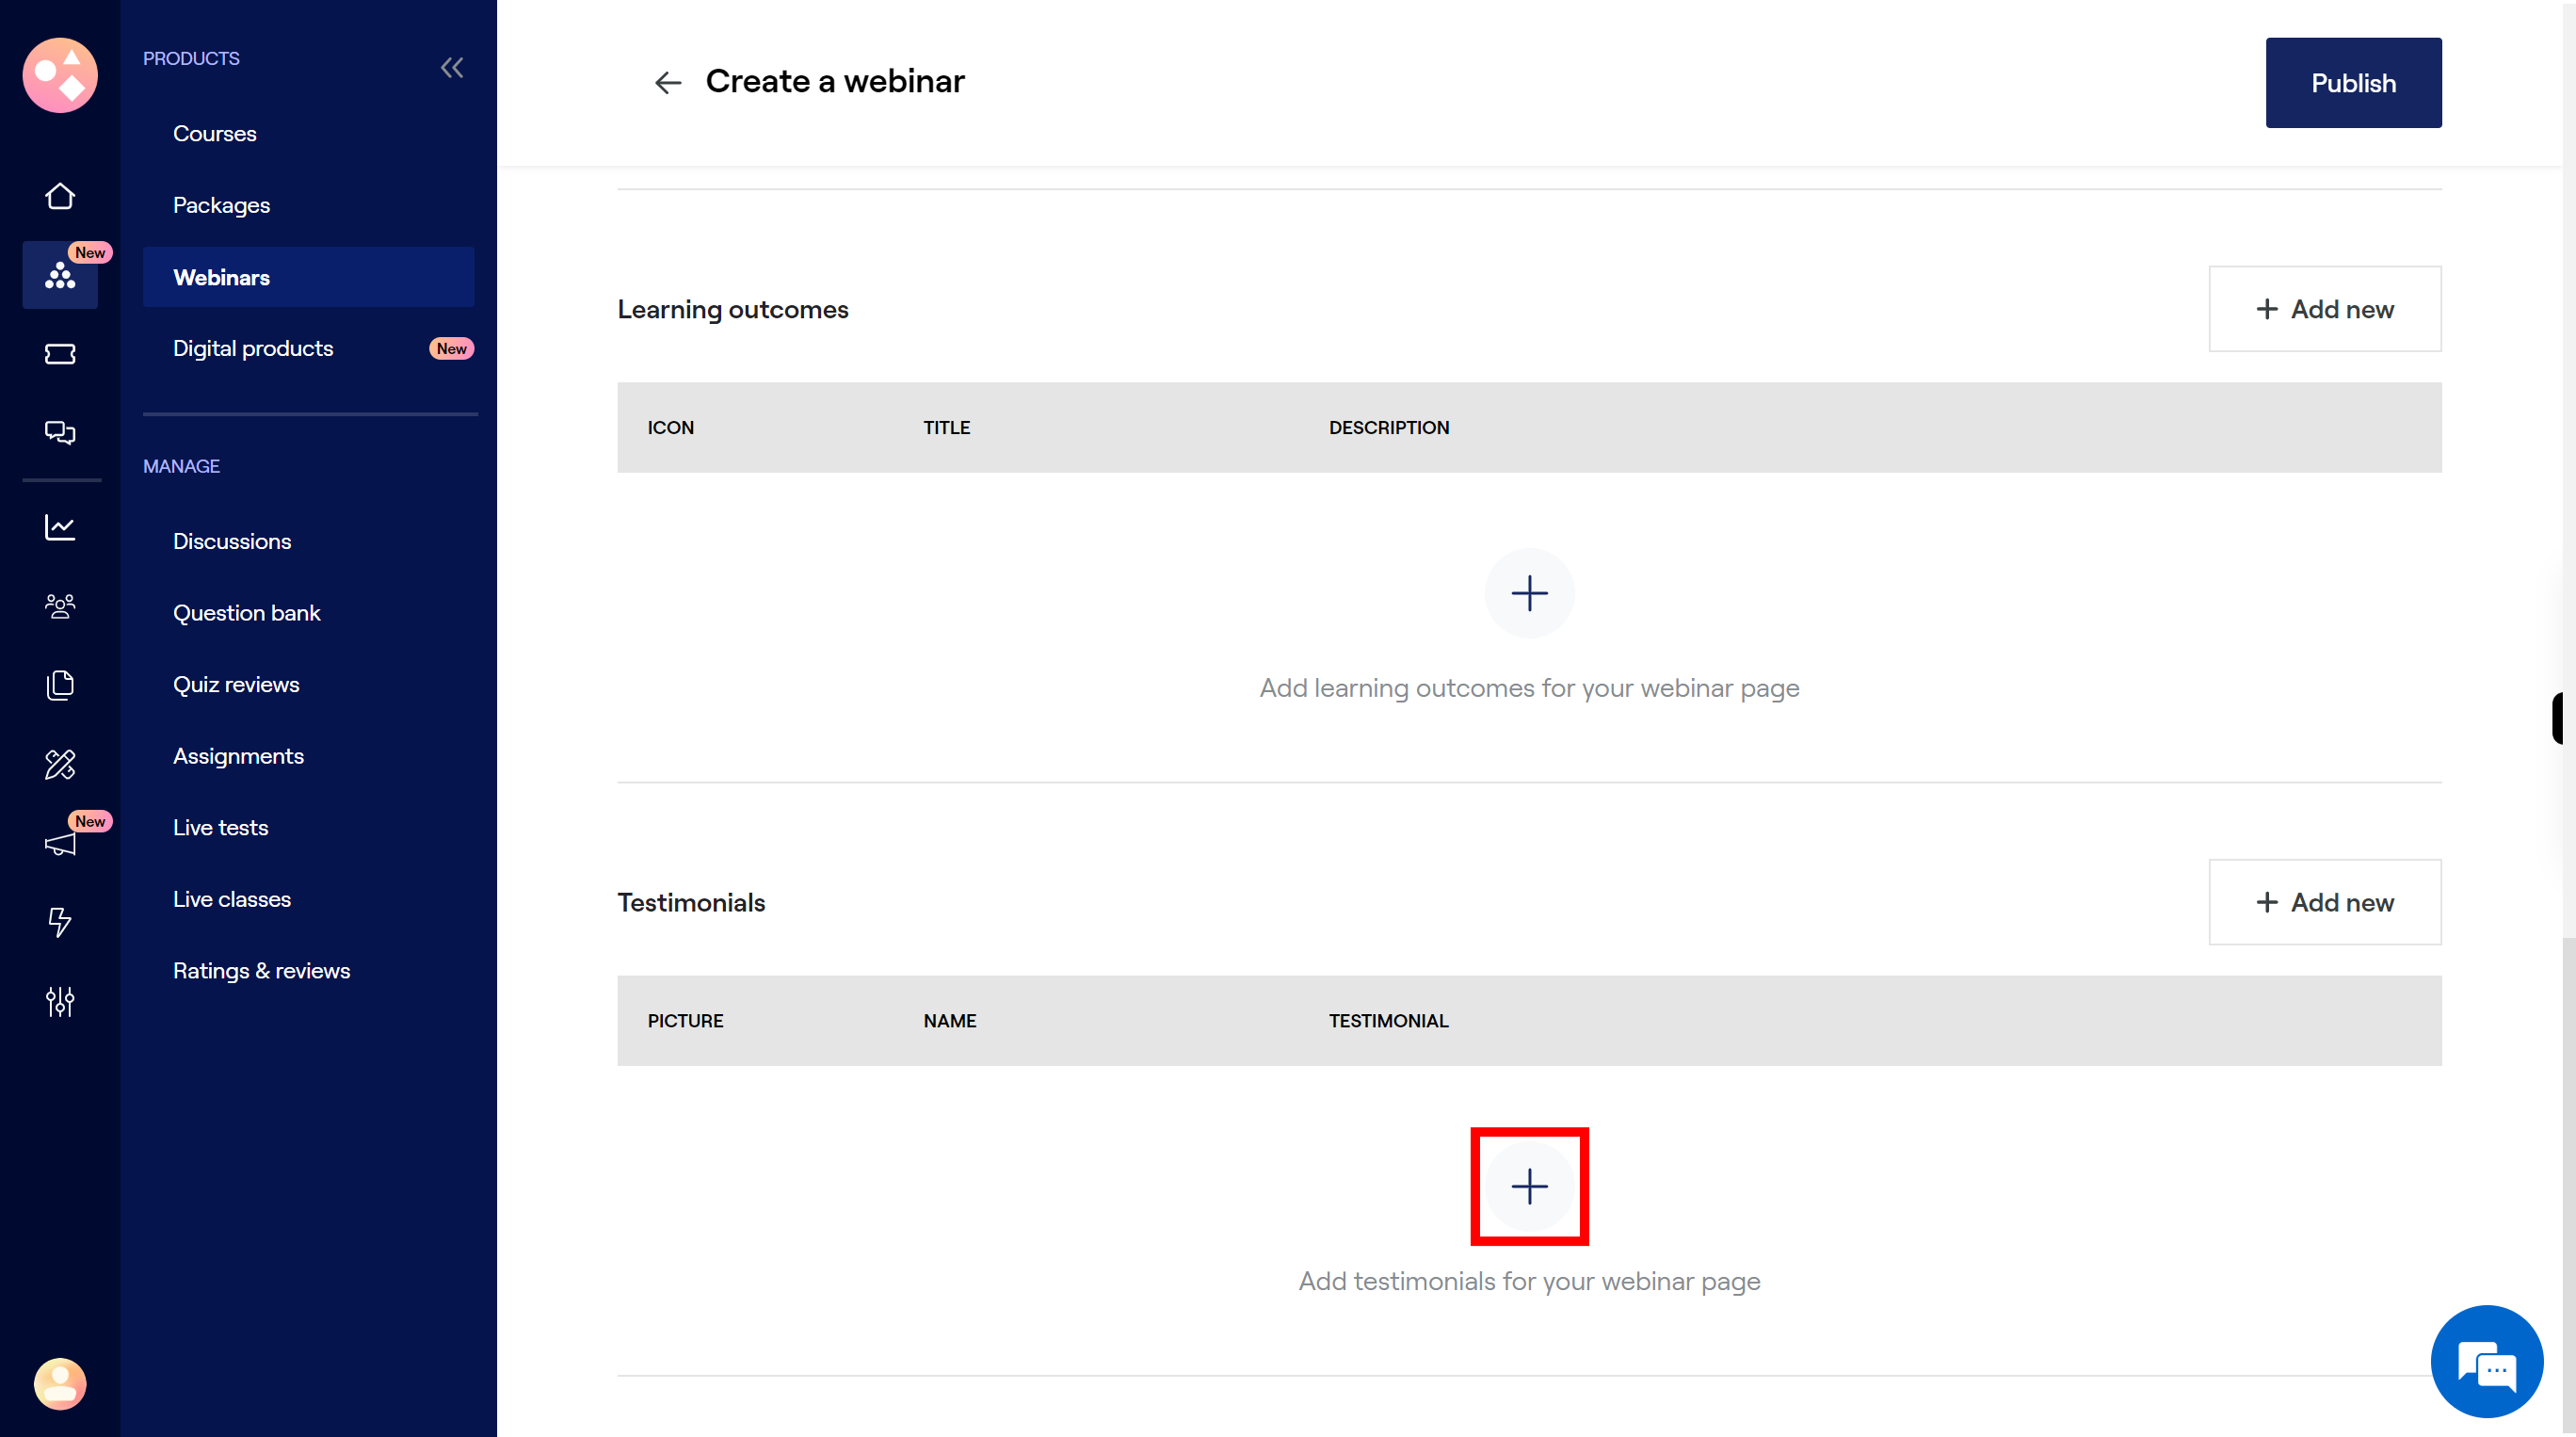
27.
Click on the "+" icon to add testimonials for webinar page.
-
28.
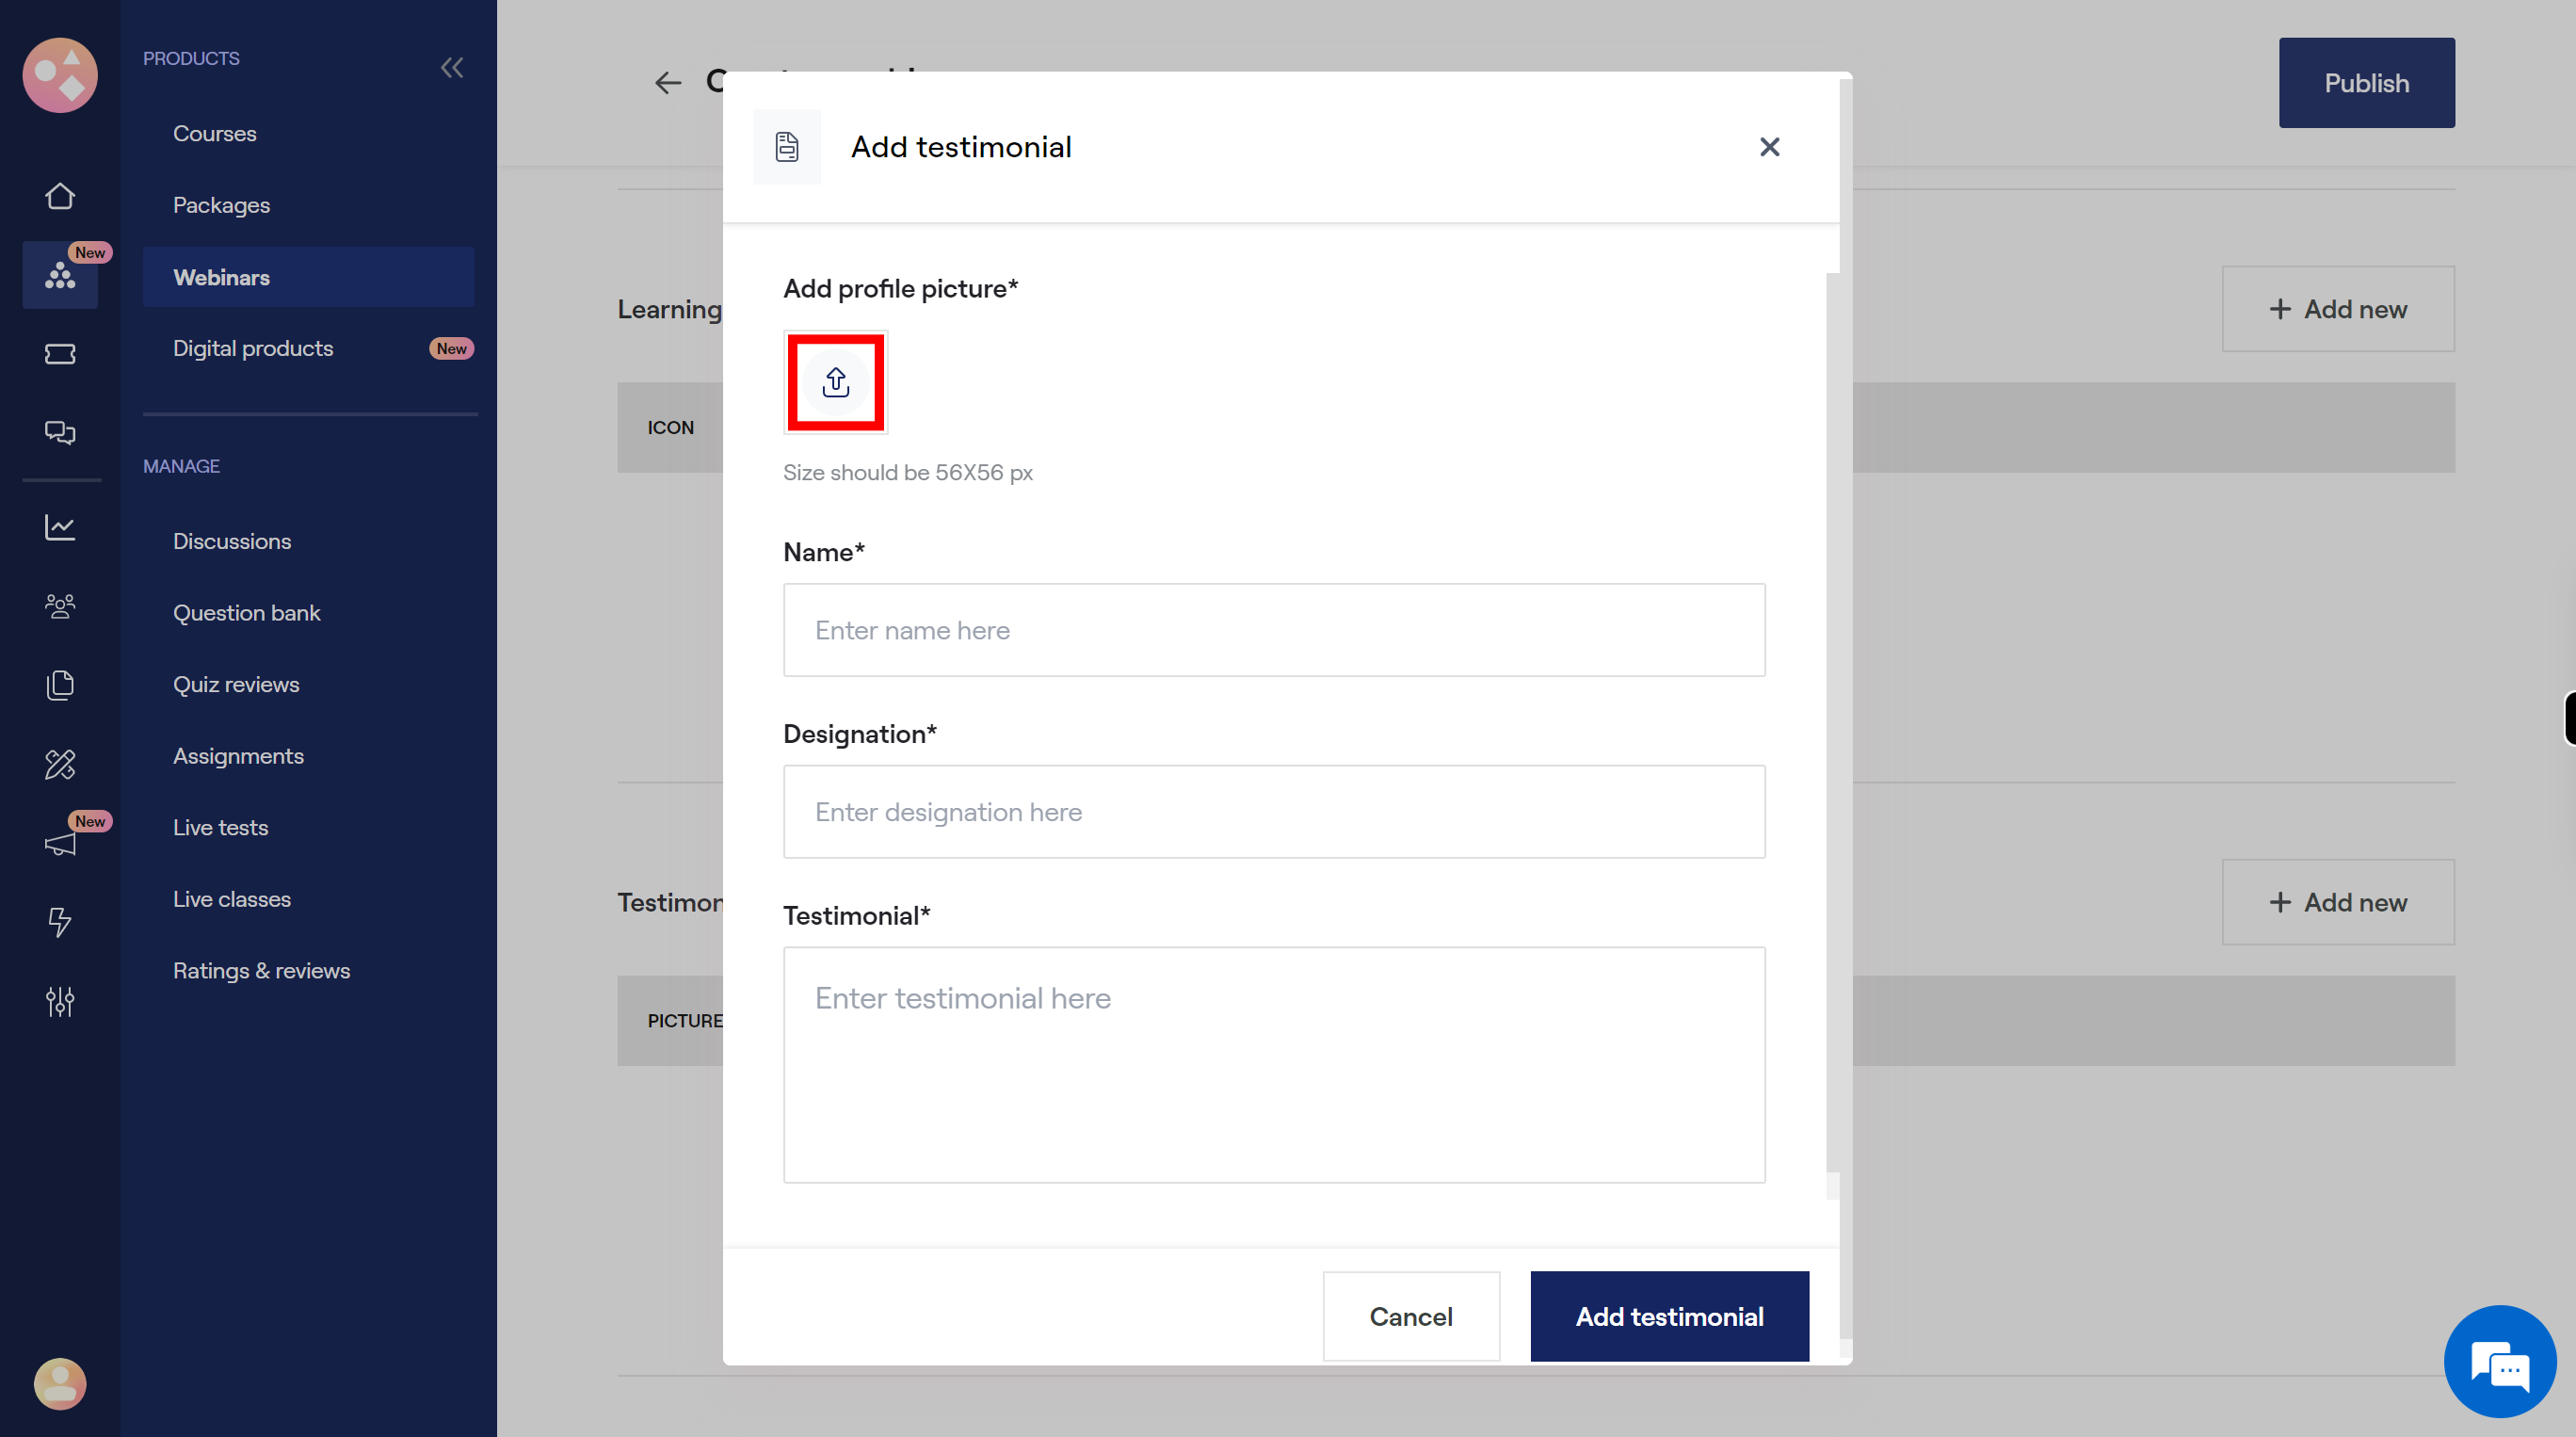
Click on the Upload icon to add the profile picture, size should be 56x56 px. Once done, click on the "Next" button on the Supervity instruction widget.
-
29.
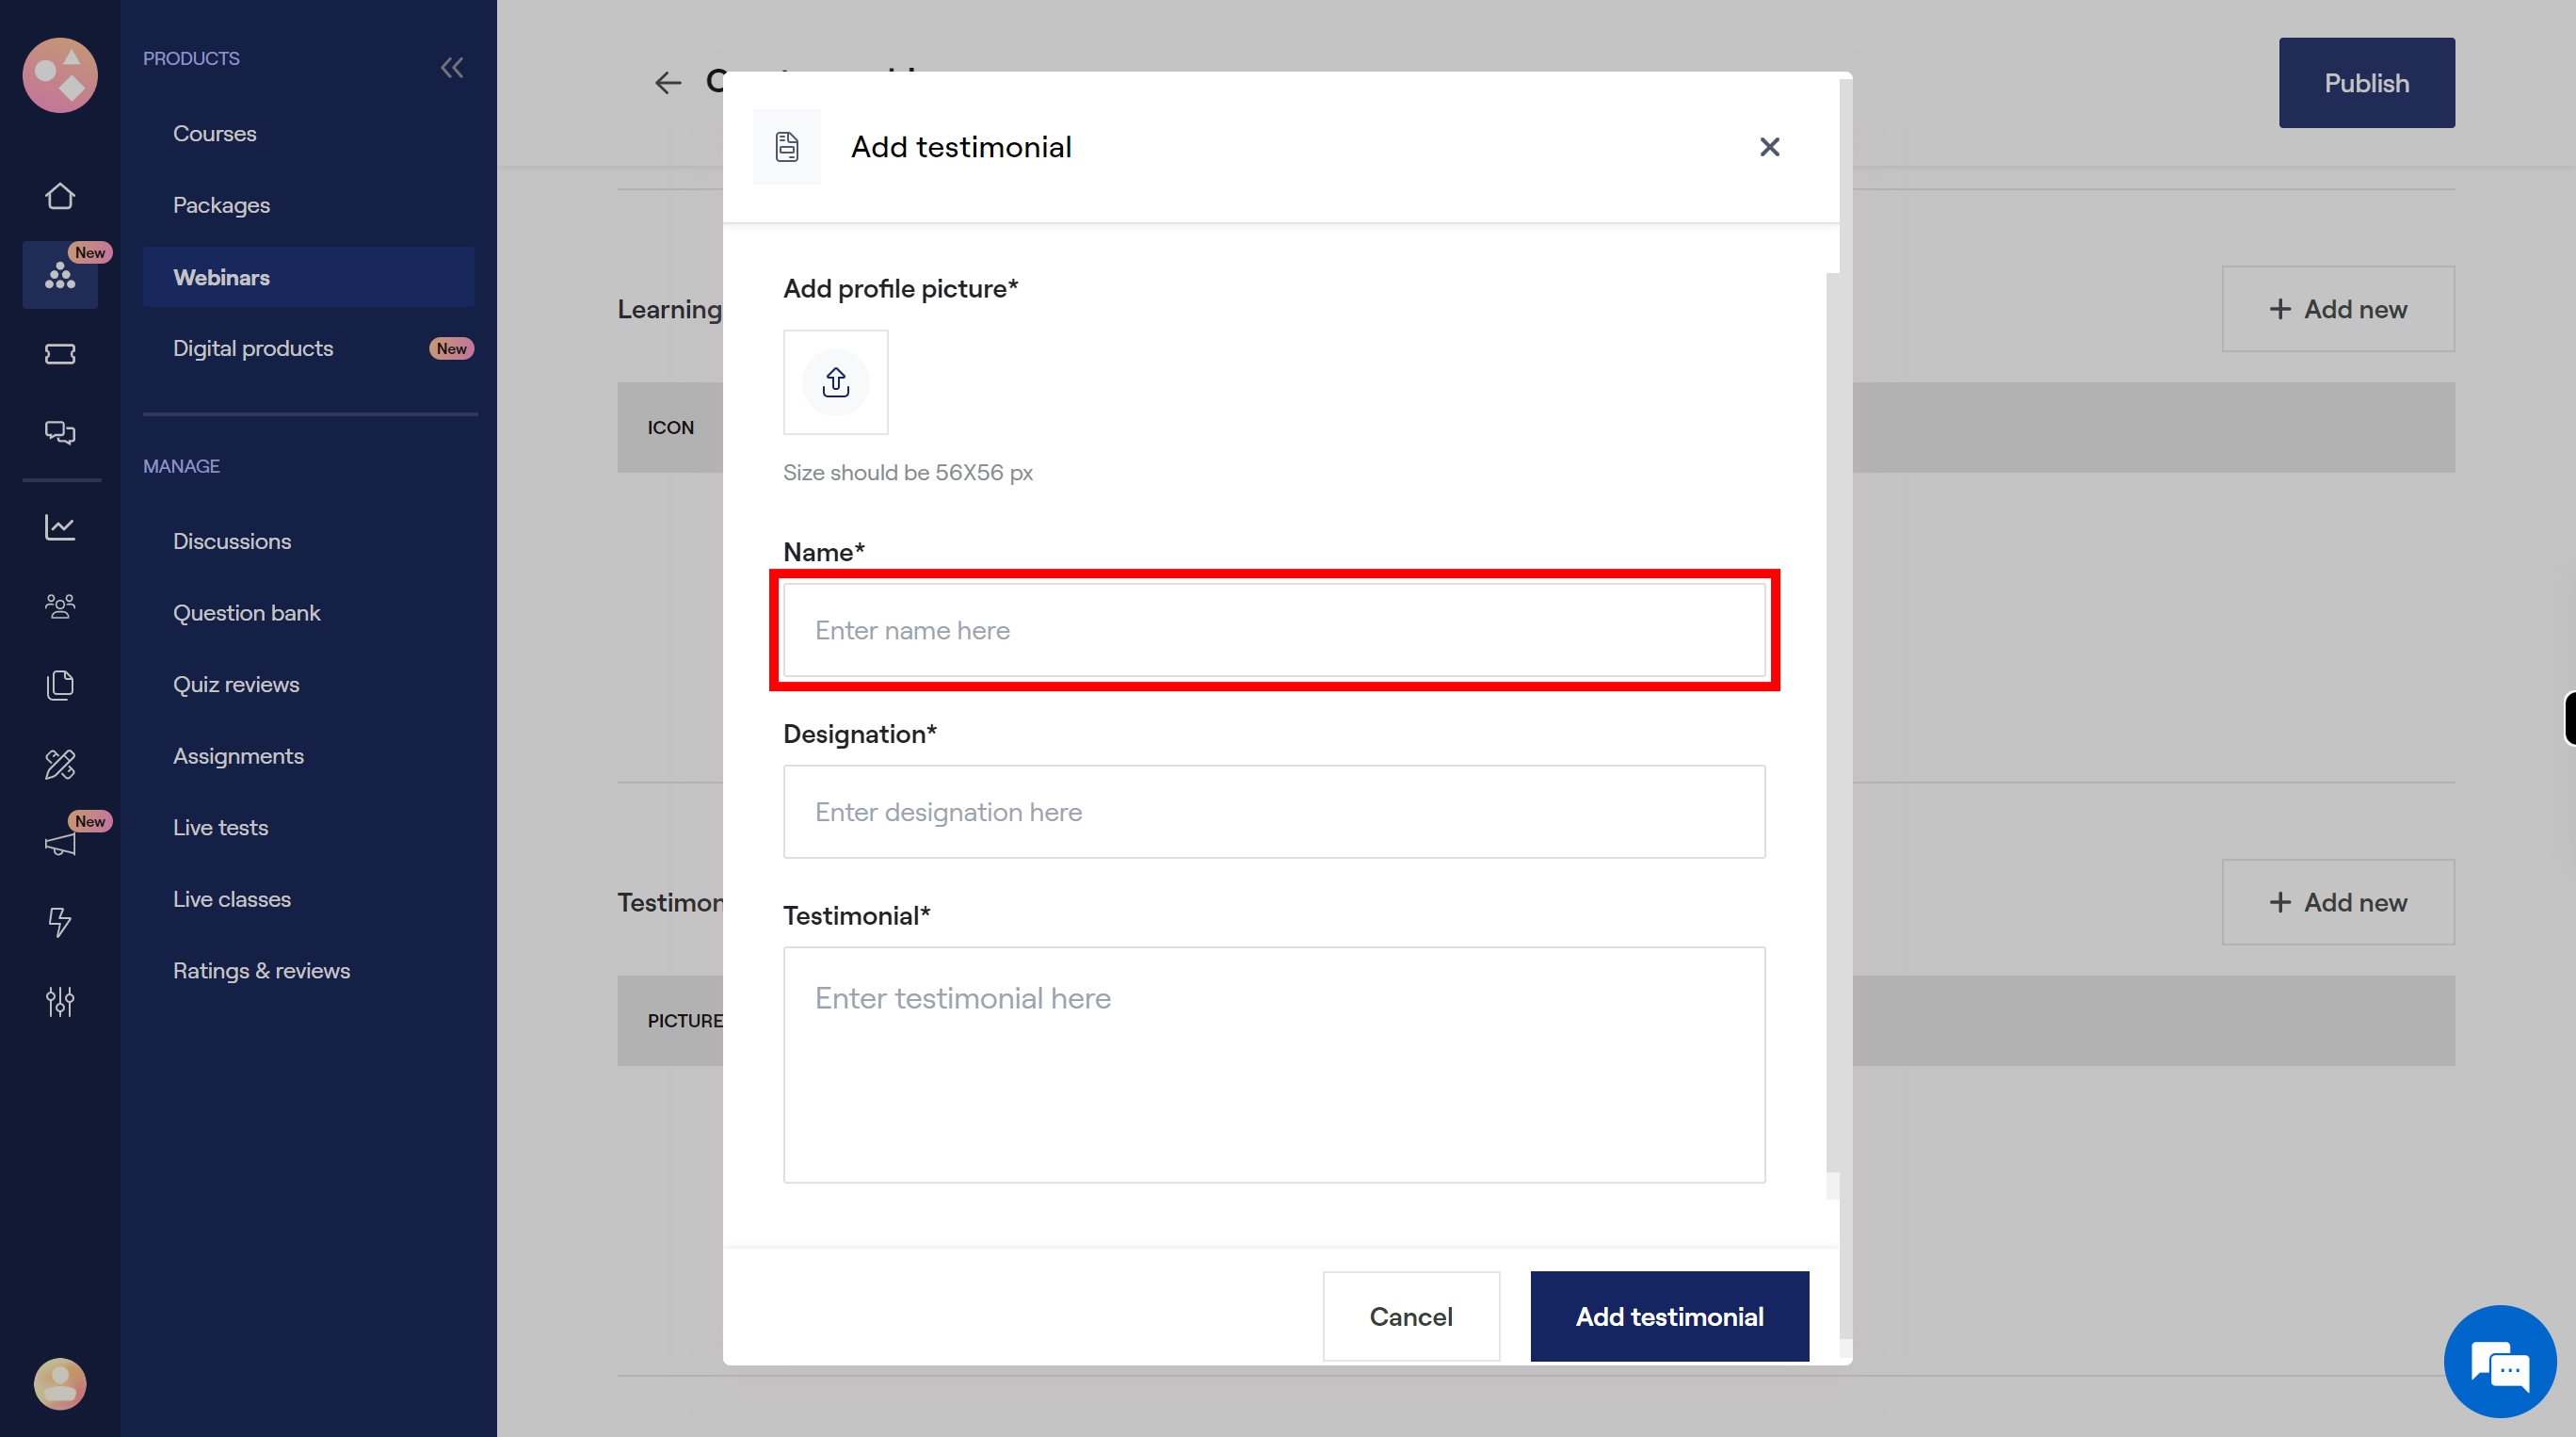
Click on the "Name" field, then enter the name. Once done, click on the "Next" button on the Supervity instruction widget.
-
30.
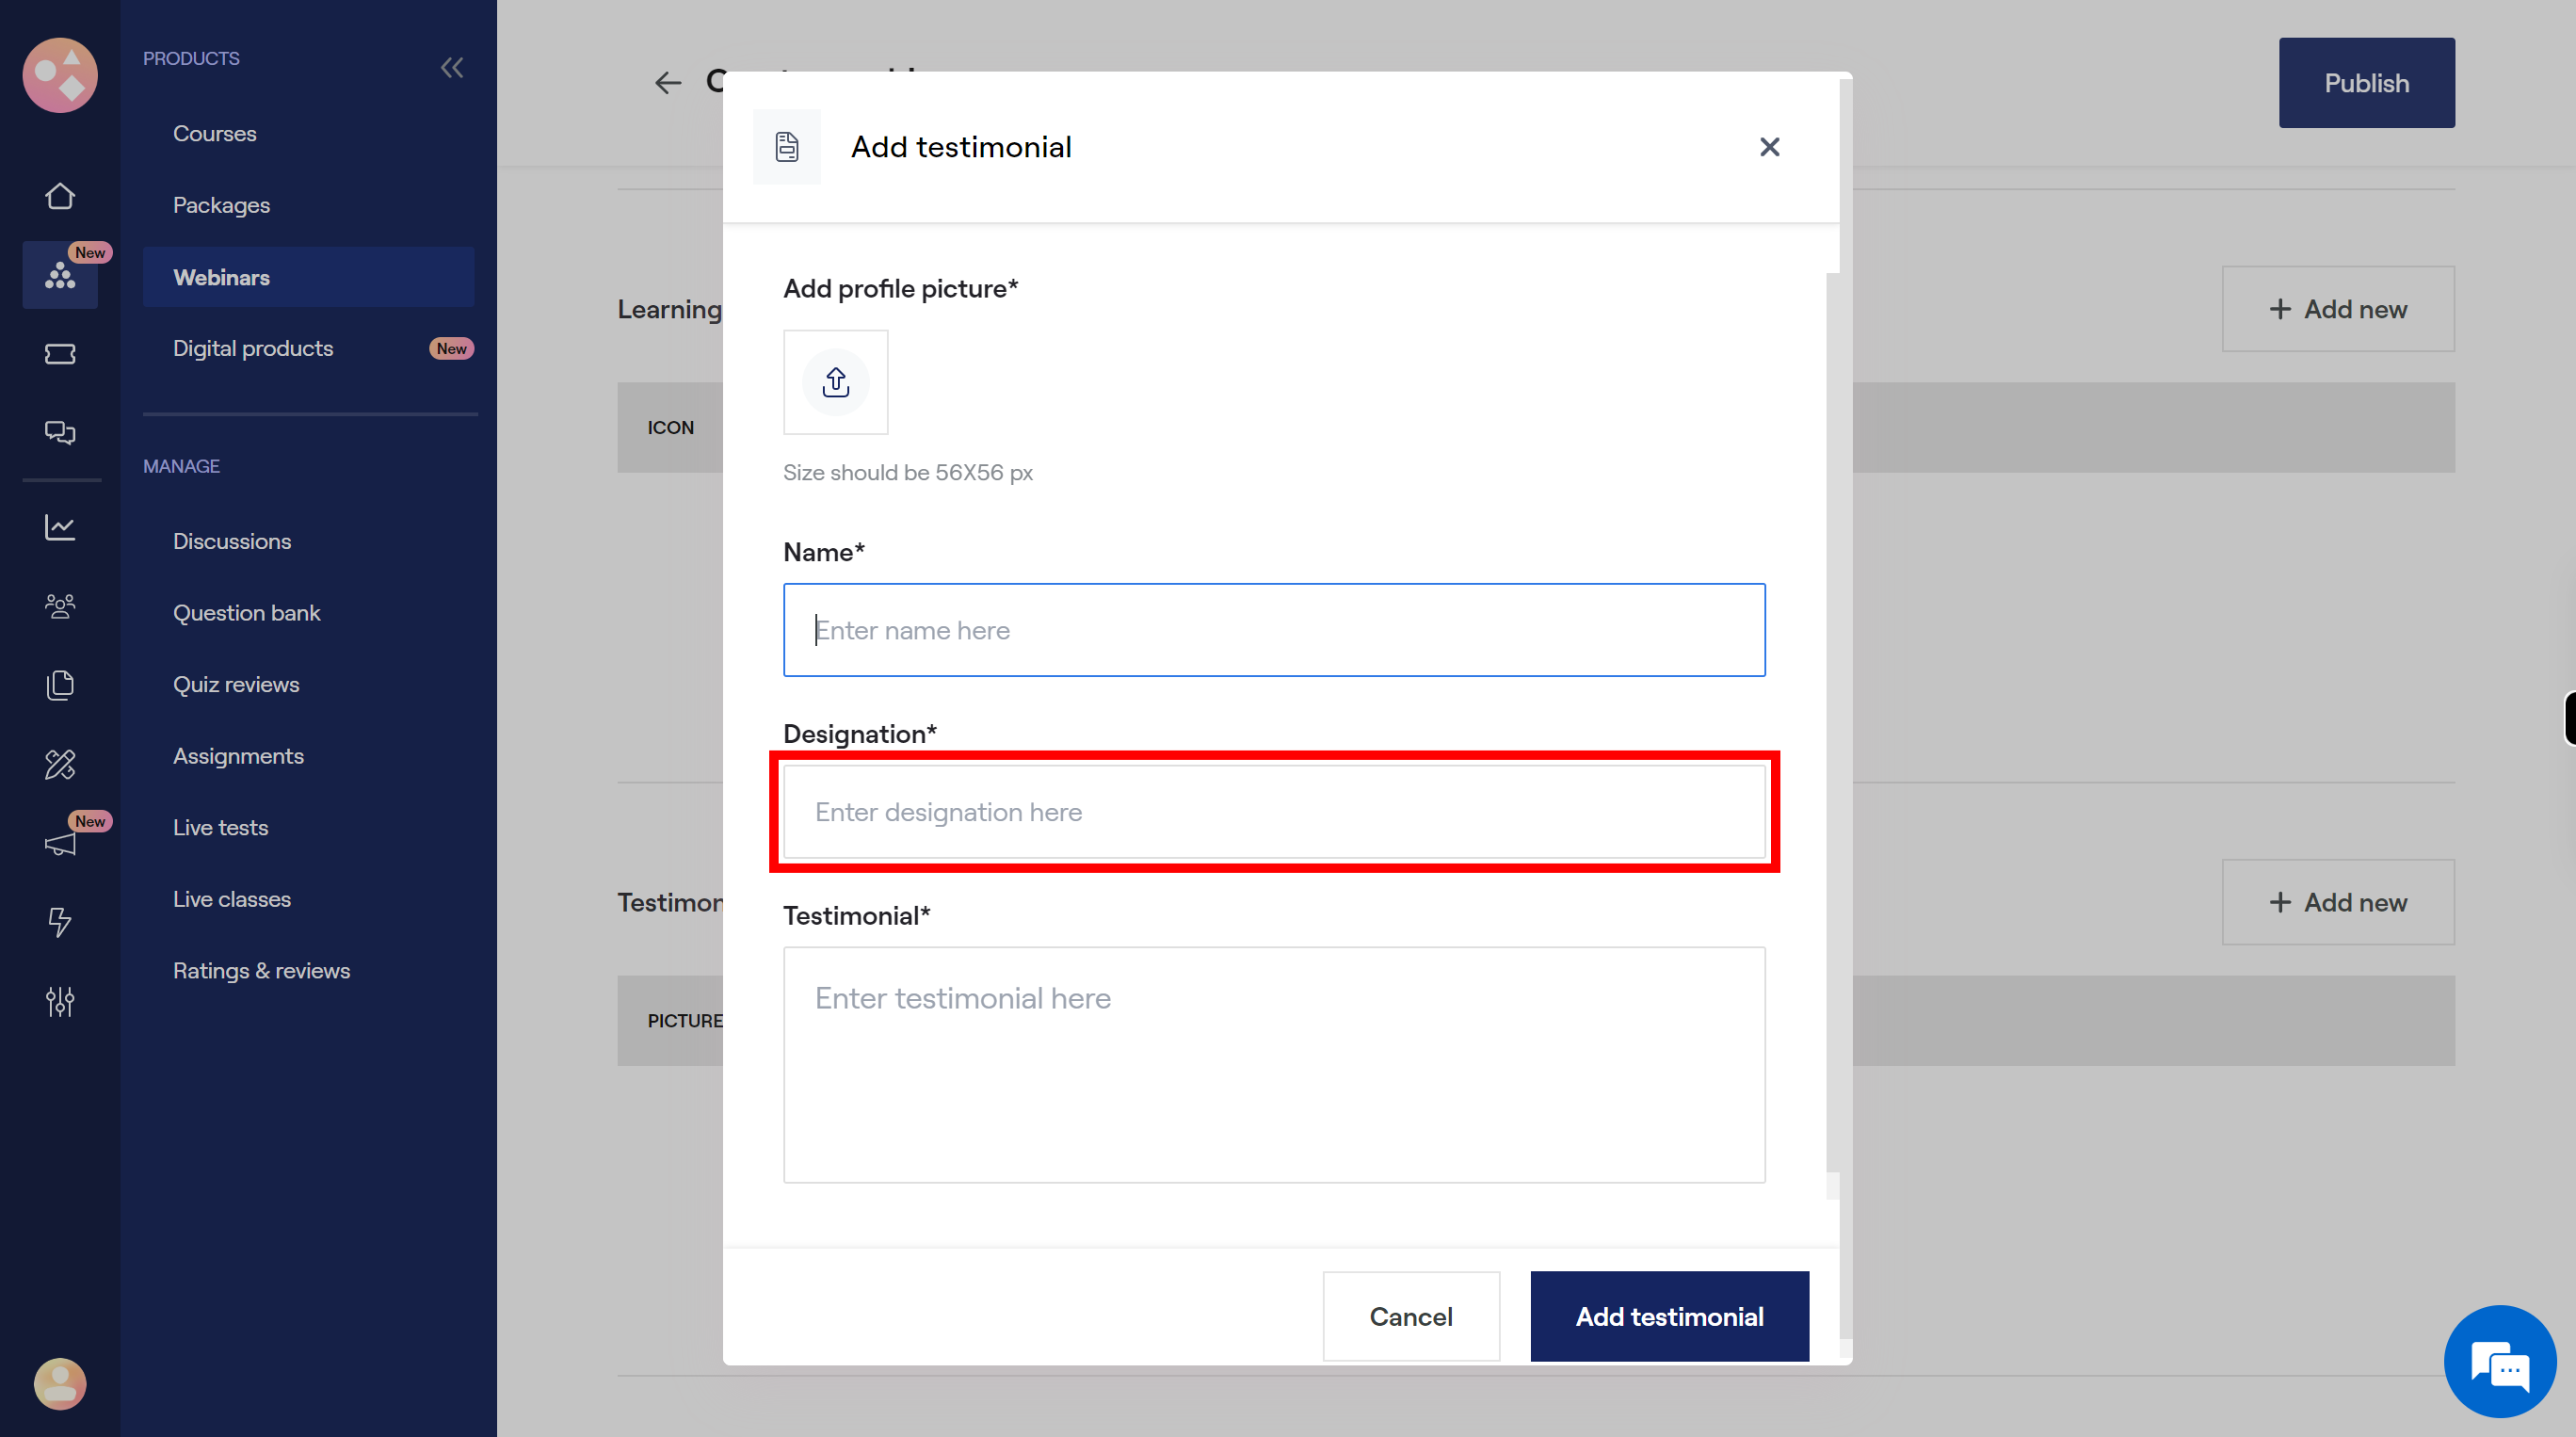
Click on the "Designation" field, enter the designation. Once done, click on the "Next" button on the Supervity instruction widget.
-
31.
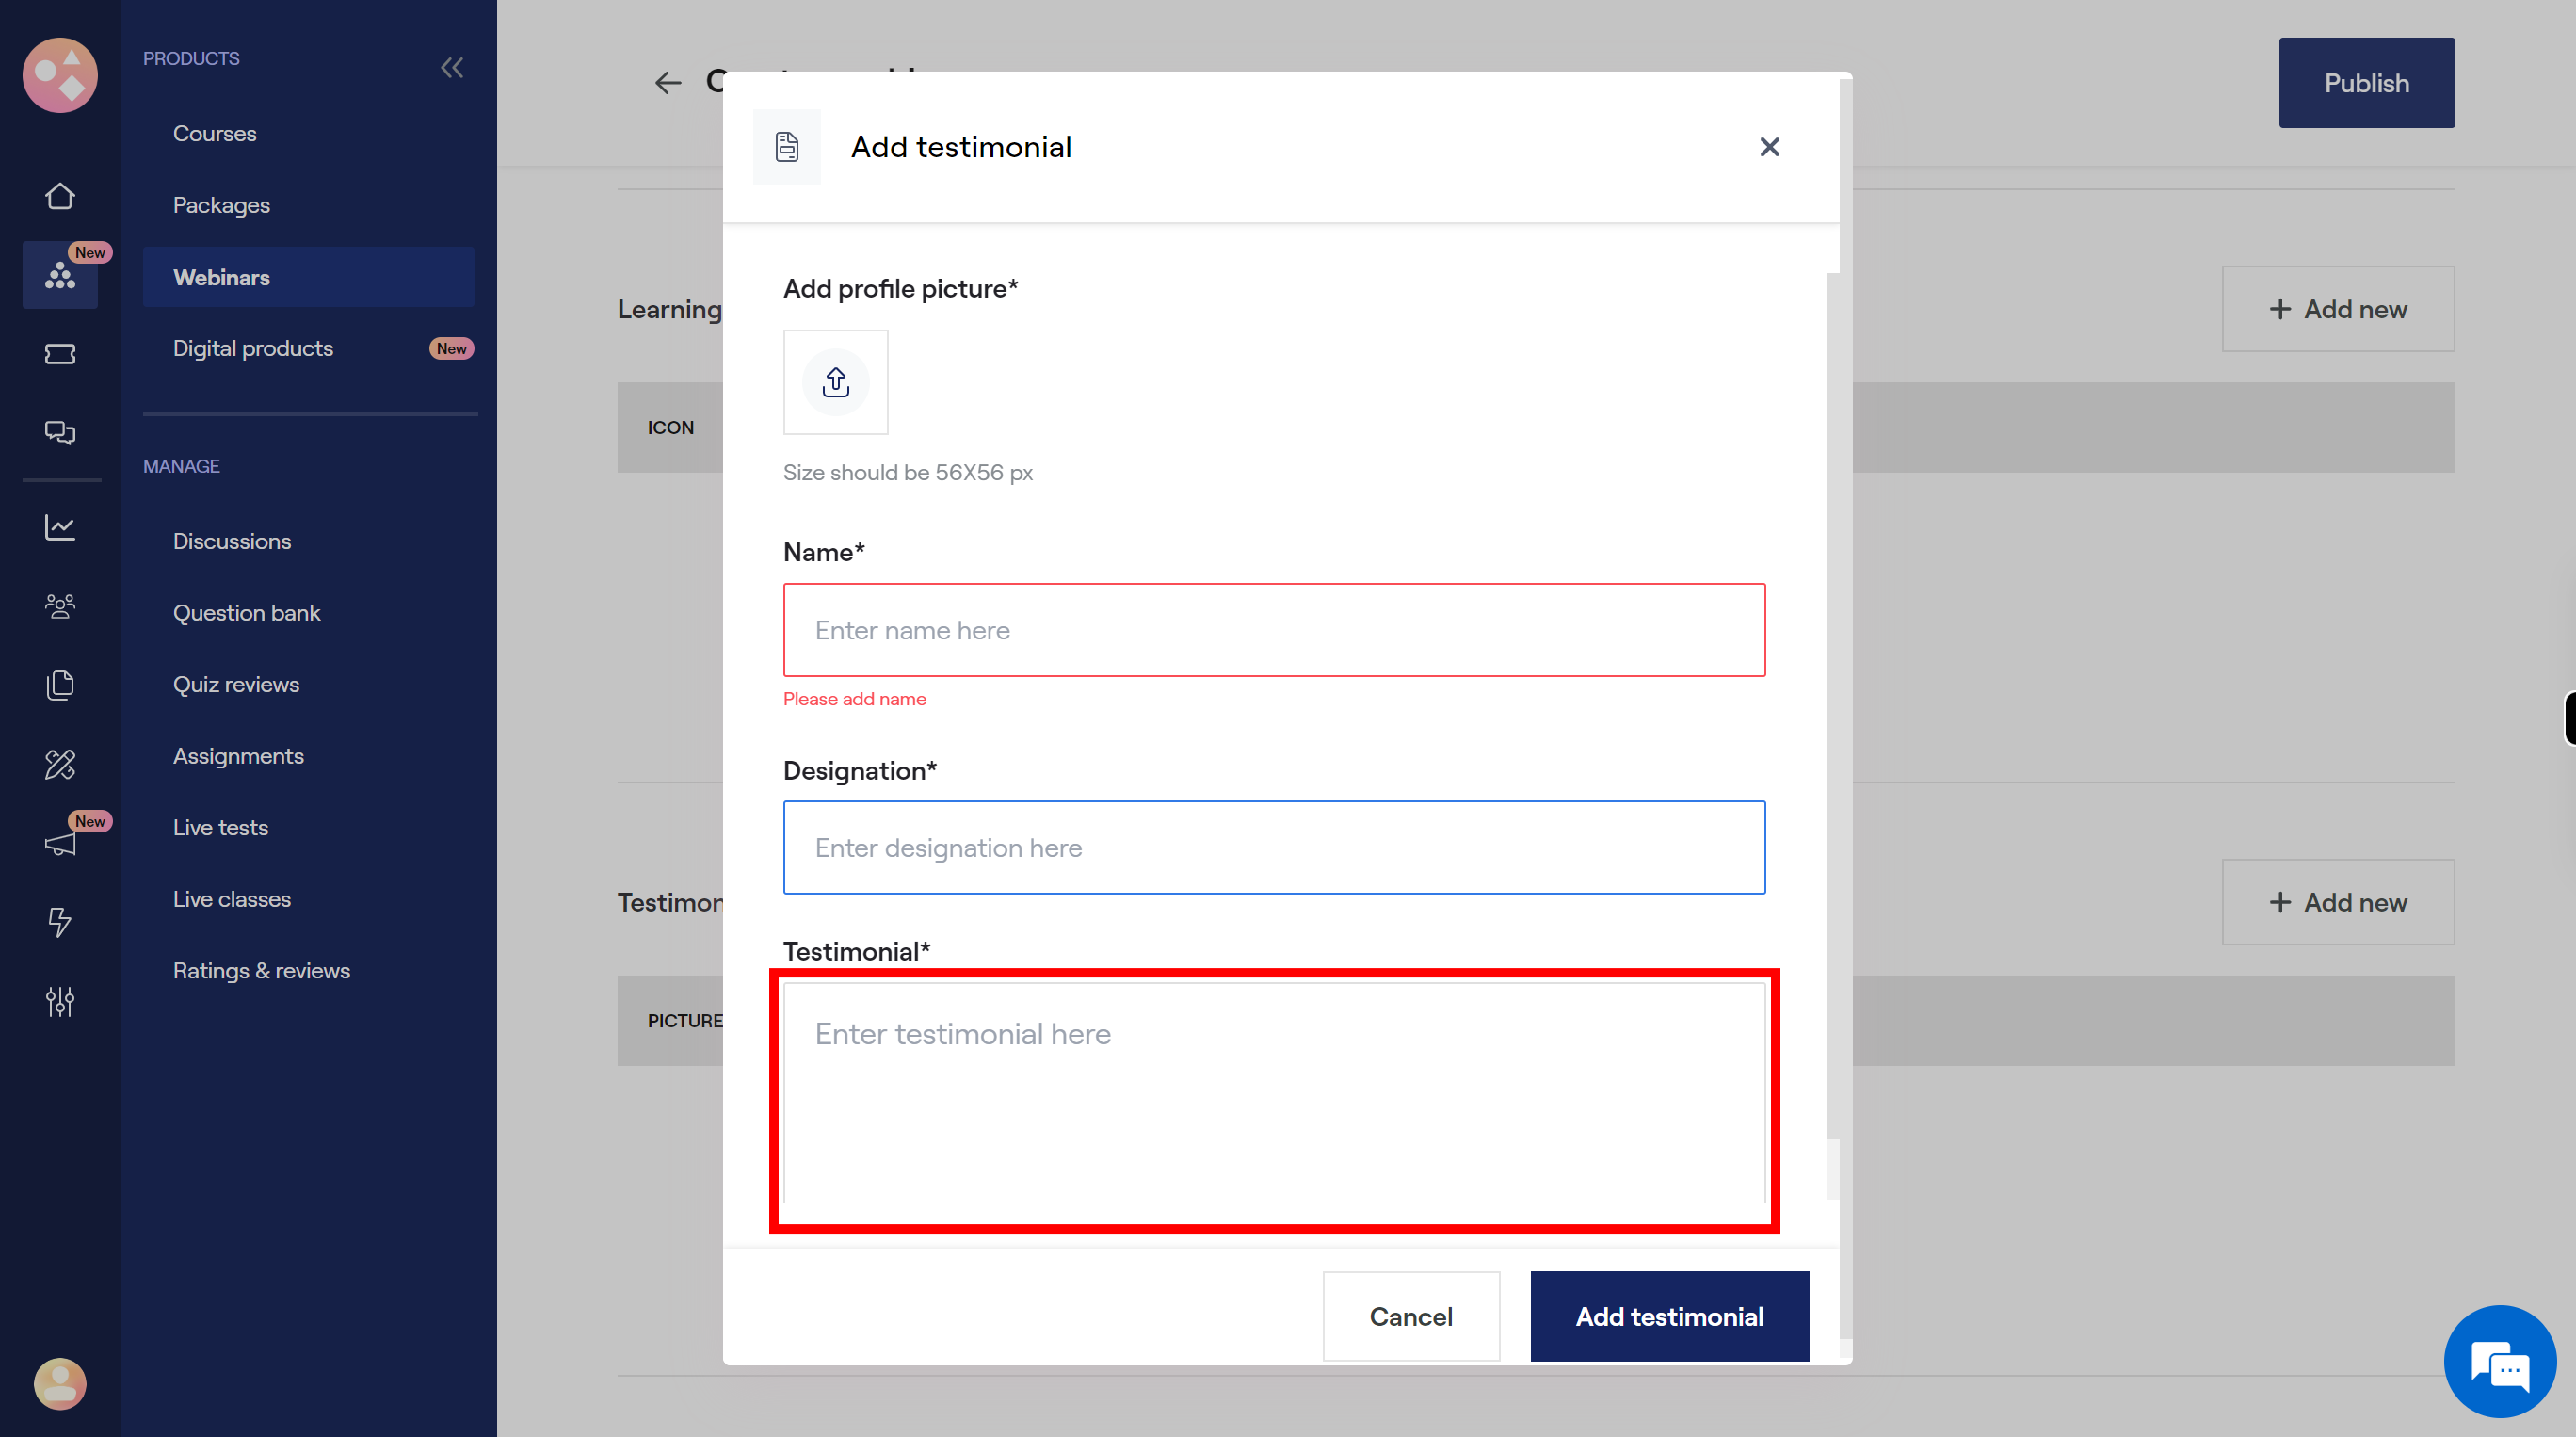
Click on the "Testimonial" field, then enter the abilities, qualities and character. Once done, click on the "Next" button on the Supervity instruction widget.
-
32.
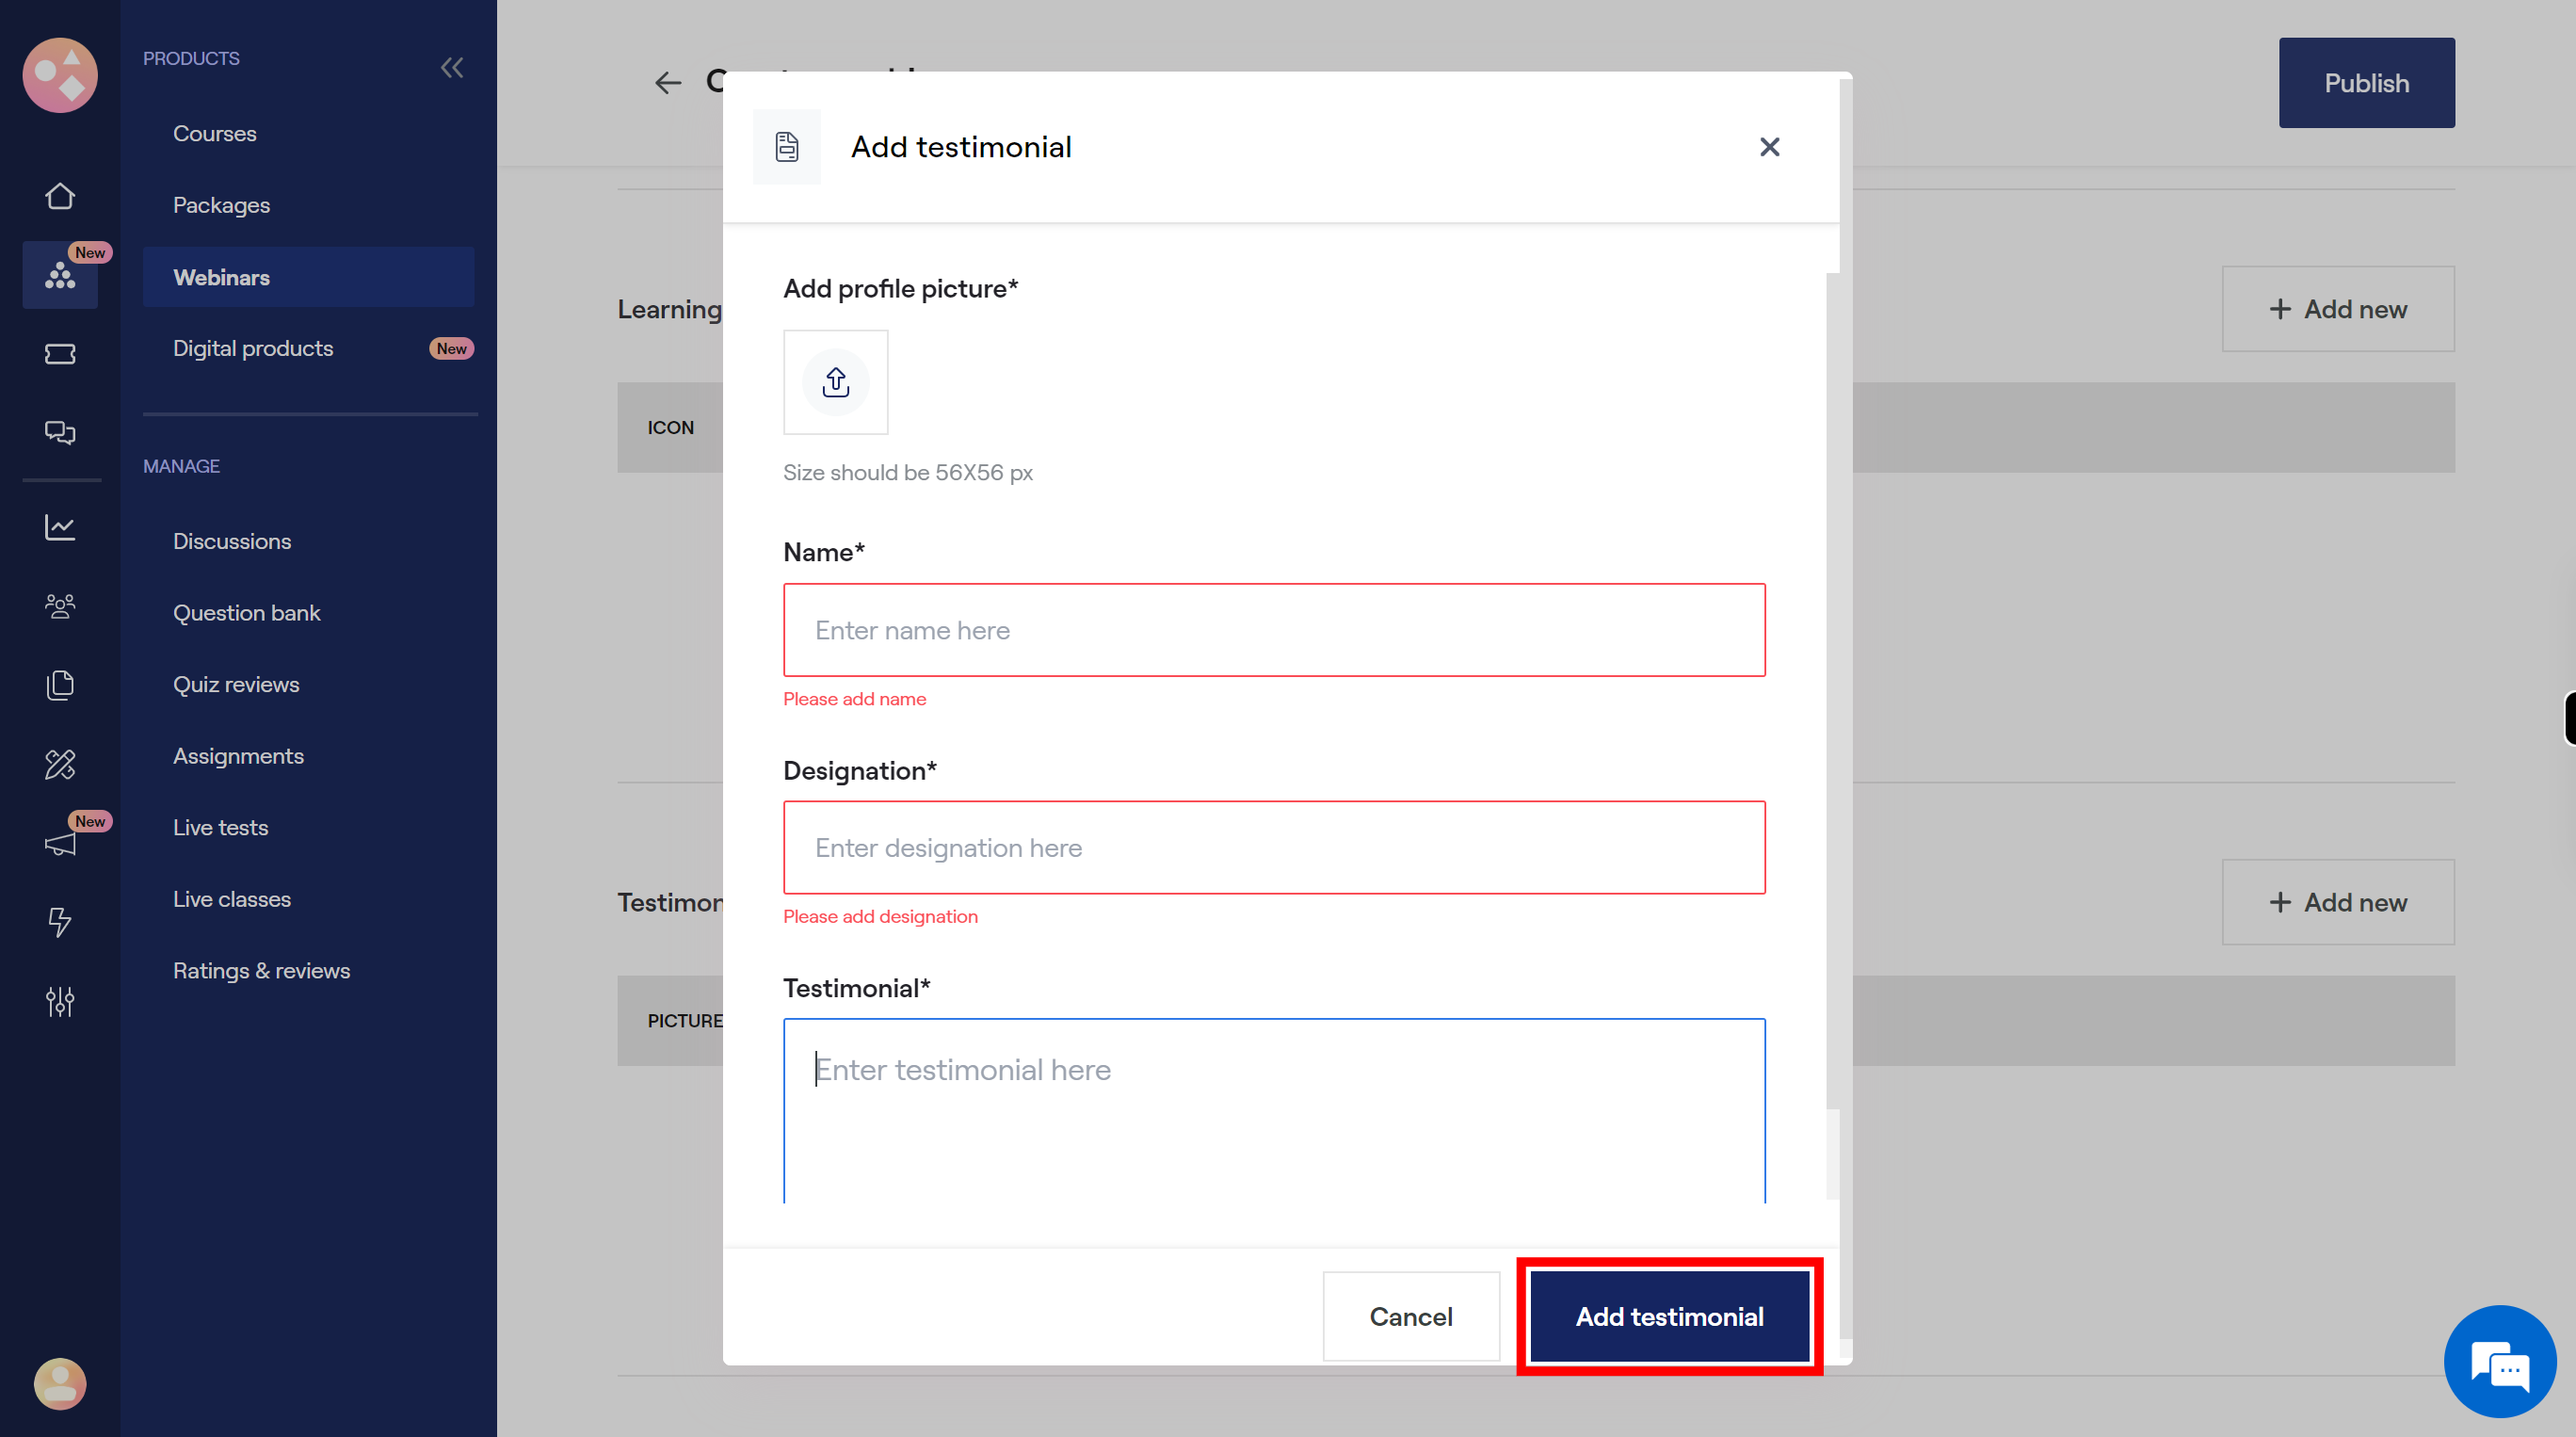
Click on the "Add testimonial" button to add the mention details.
-
33.
Click on the "Publish" button to publish
