This skill guides you in creating a new repository on GitHub. You can now start adding files to your repository, create branches, make commits, and collaborate with others on your project. NOTE: Please login into your GitHub account and then execute this skill.
-
1.
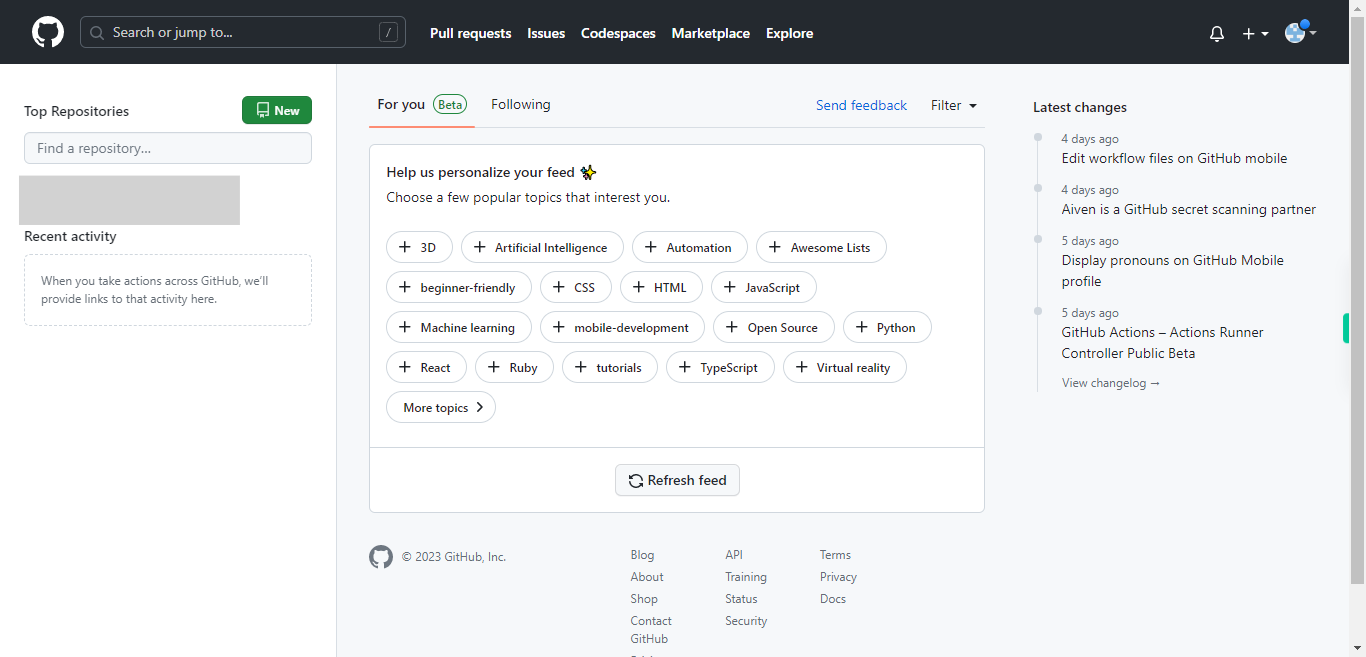
Open GitHub on the web.
-
2.
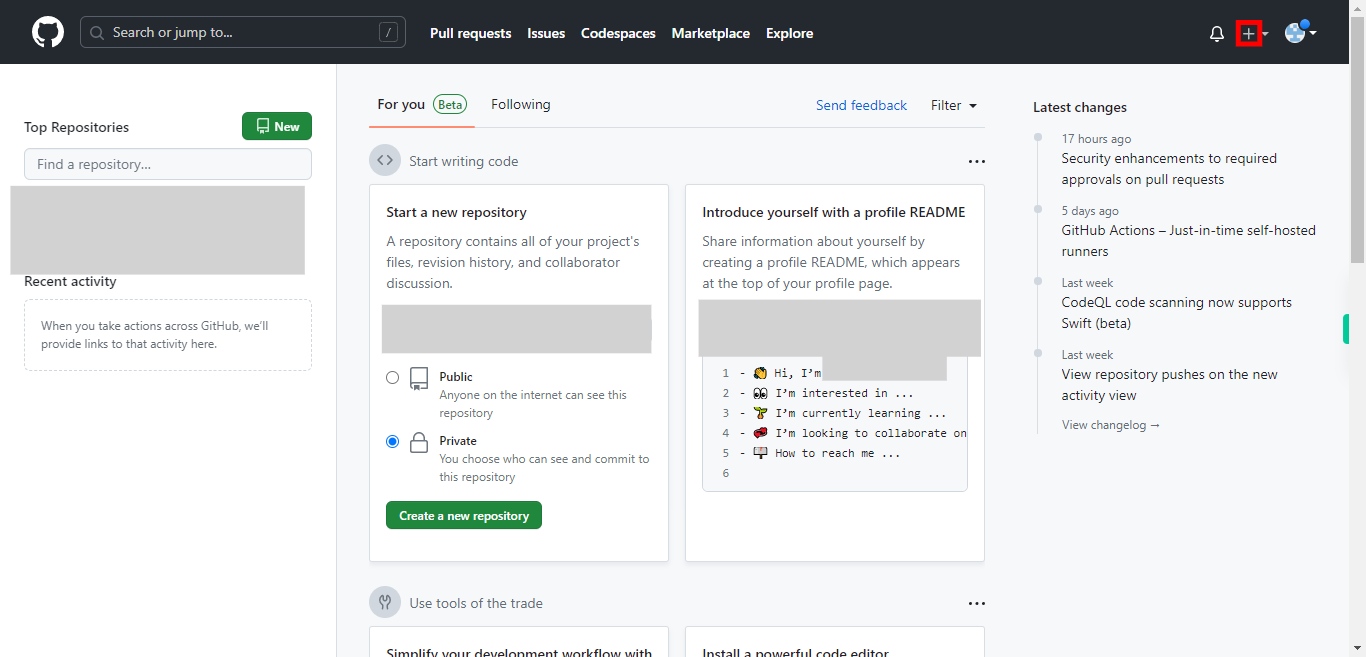
On your GitHub dashboard, click on the "+" button located in the top right corner of the page. A drop-down menu will appear.
-
3.
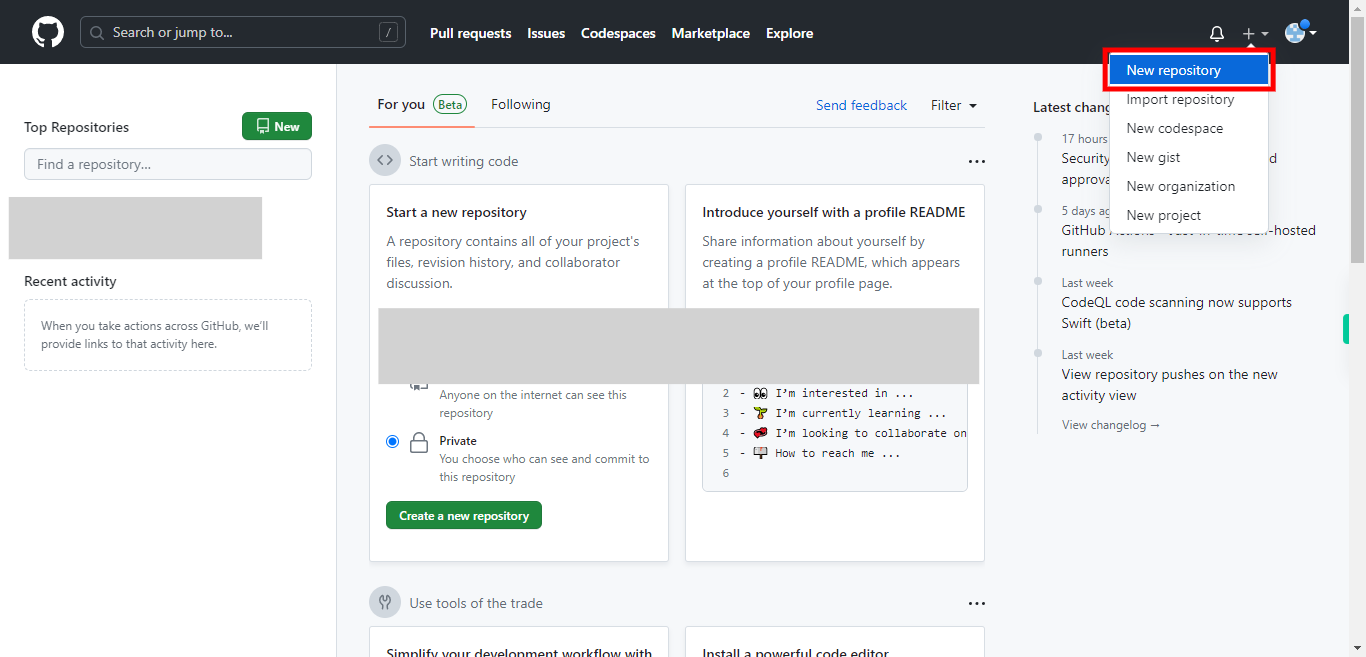
From the dropdown menu, select New repository. You will be redirected to the "Create a new repository" page.
-
4.
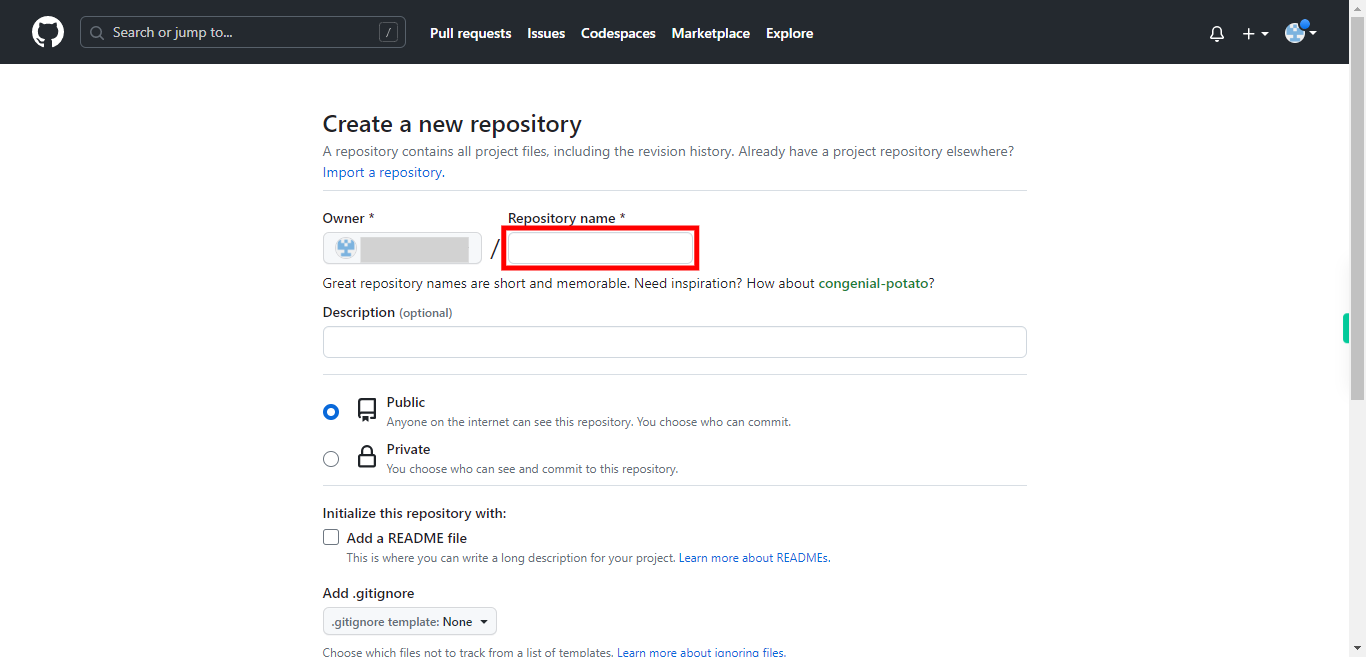
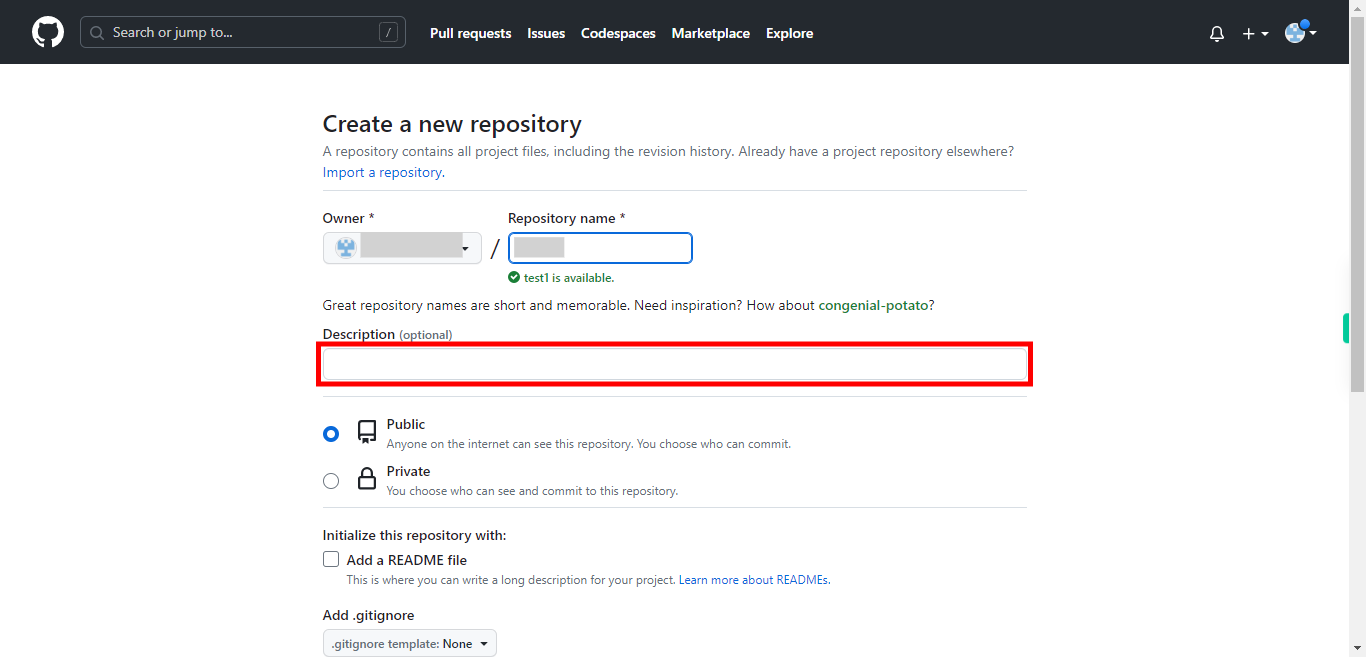
On the "Create a new repository" page, you need to provide the following information. Enter a name for your repository. Choose a descriptive name that represents the purpose or content of your project. Then click on the Next button in the Supervity instruction widget.
-
5.
Add the description of your repository. You can provide a brief description of your repository to give others an idea of what it's about. Then click on the Next button in the Supervity instruction widget. Choose whether you want your repository to be public (visible to everyone) or private (accessible only to you and the collaborators you specify).
-
6.
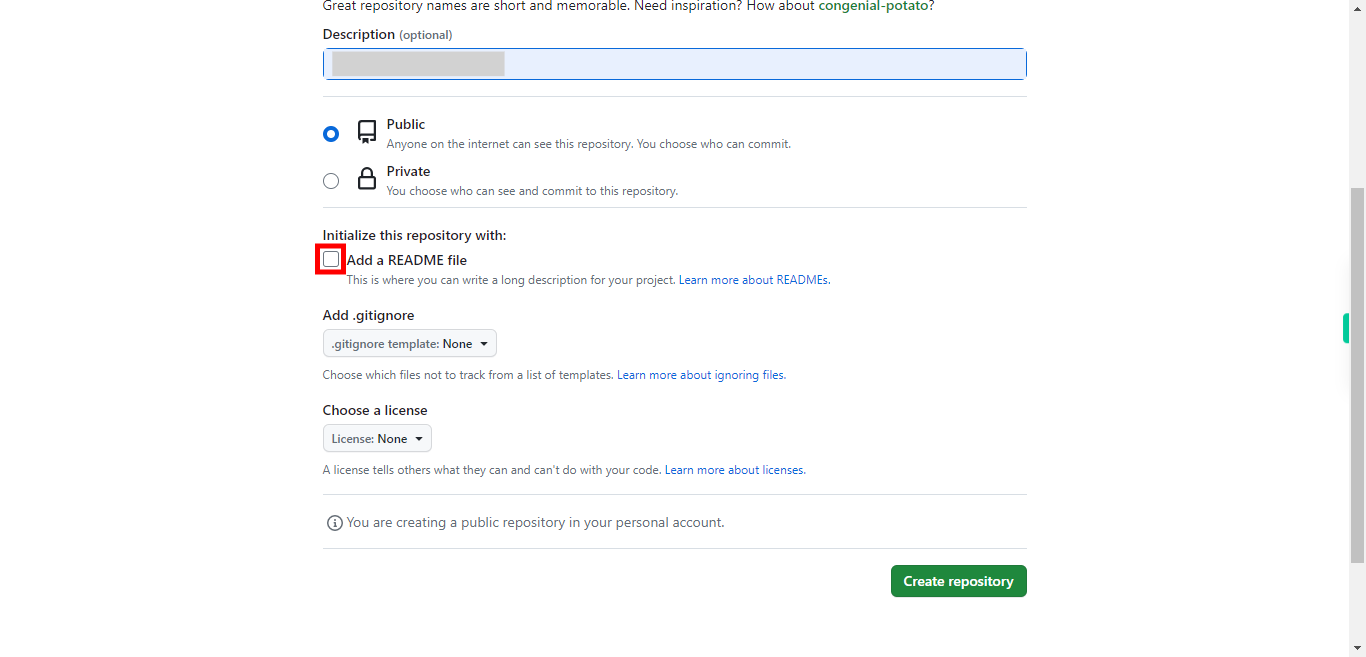
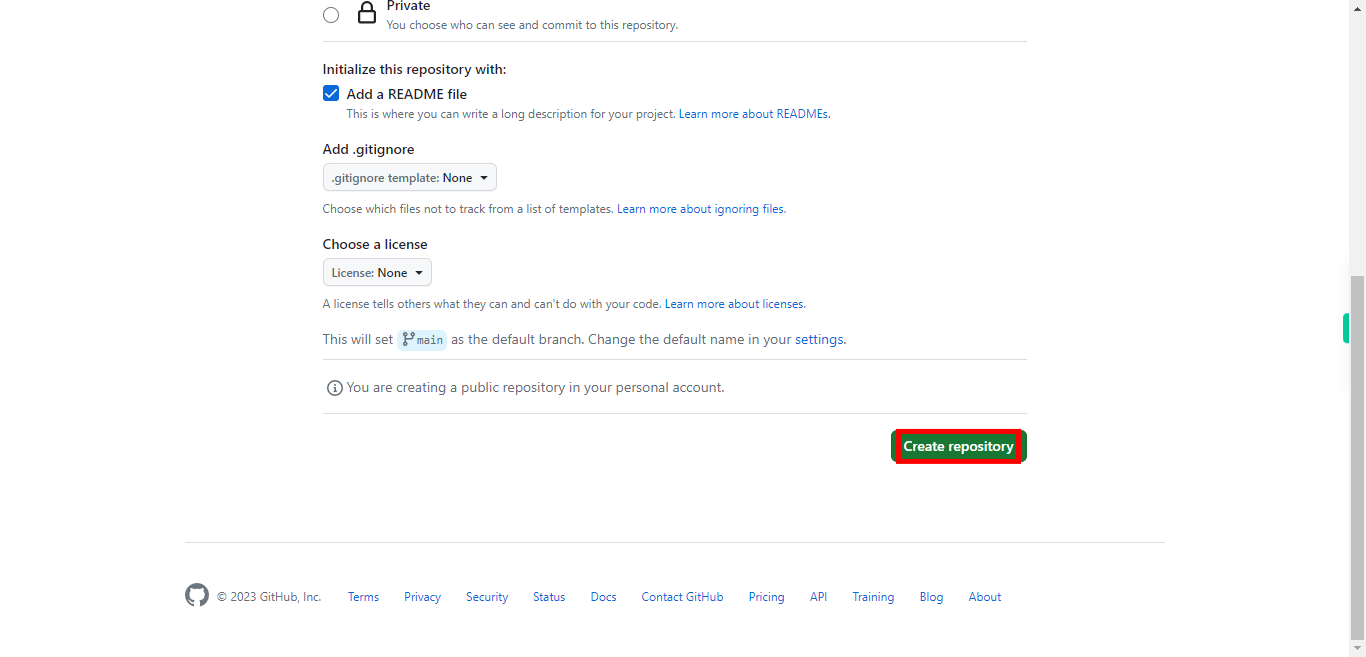
If you check this option, GitHub will automatically create a README file for your repository. It's recommended to have a README file to provide information about your project. Then click on the Next button in the Supervity instruction widget. You can select a template for a .gitignore file to exclude certain files or directories from being tracked by Git.
-
7.
Once you have filled in the necessary details, click on the Create repository button at the bottom of the page.
-
8.
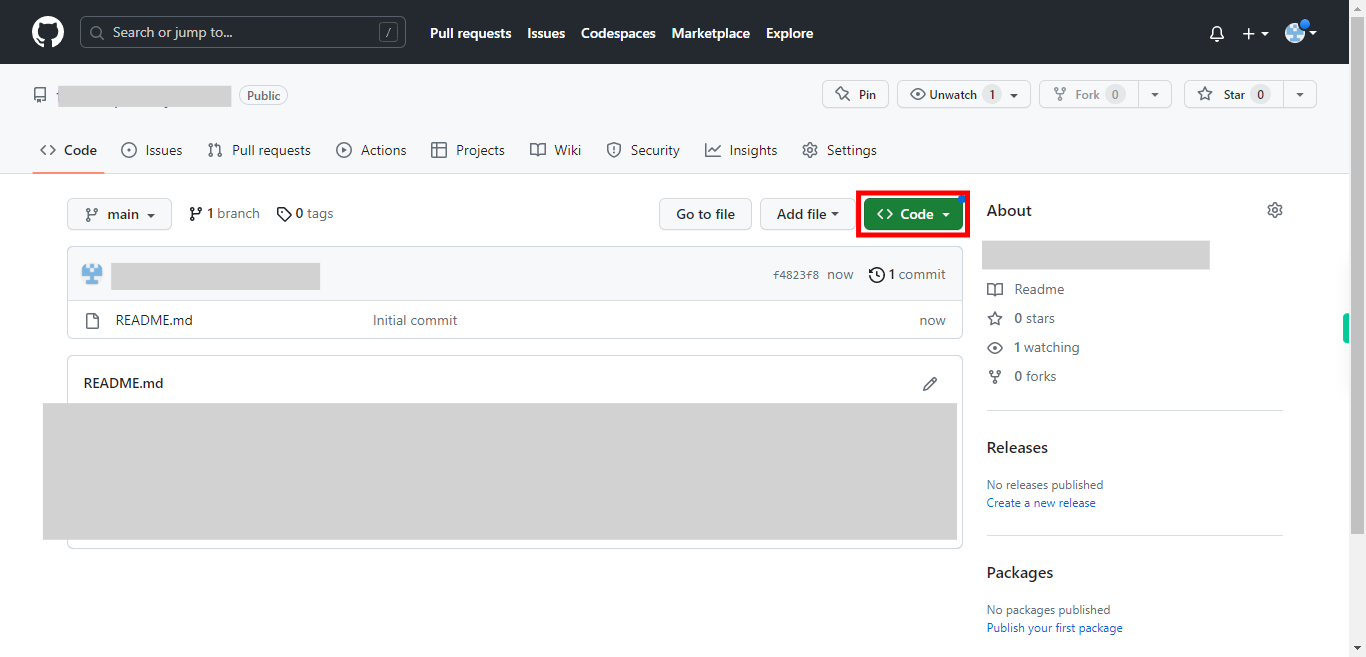
You will be redirected to the newly created repository page, where you can see options to add files, manage settings, and invite collaborators. Click on the Code drop-down icon.
-
9.
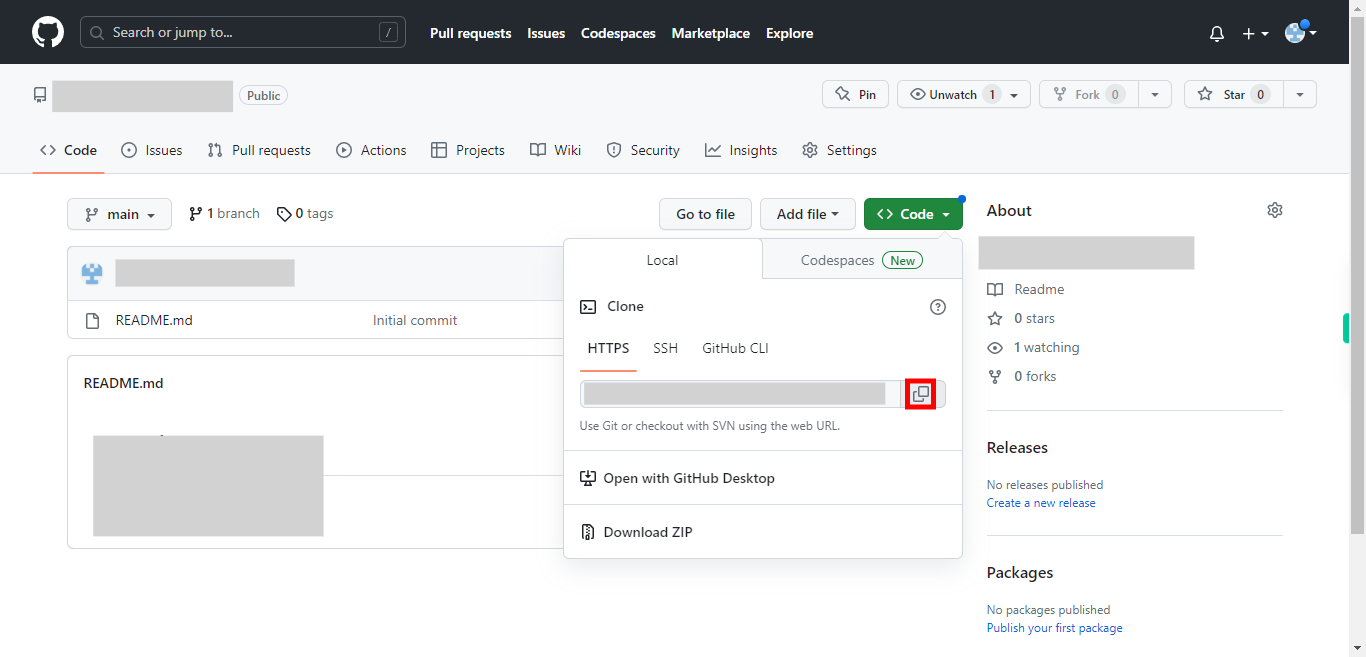
Click on the "copy" icon beside the HTTPS URL, and this will be the web URL for your repository.


