This skill guides you in creating a new folder in your Web Outlook OneDrive, Note: Make sure you are already logged into your web outlook account.
-
1.
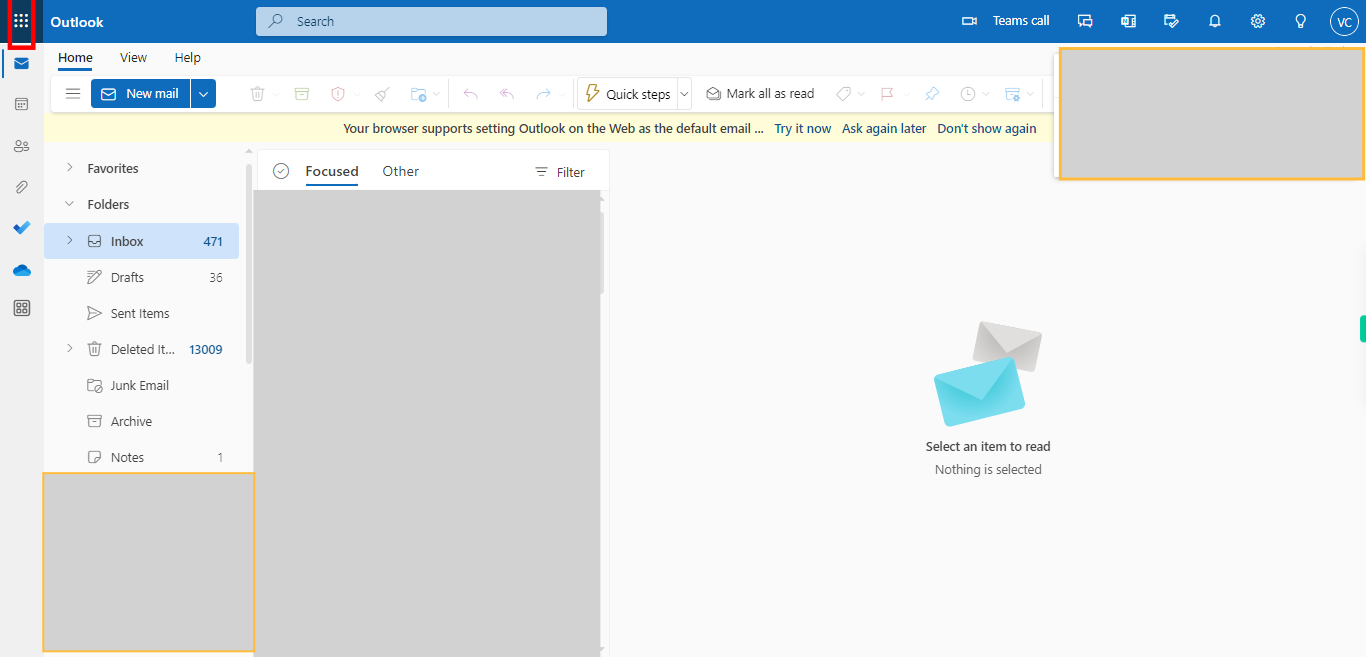
Open Web Outlook.

-
2.
1. Click on the App Launcher Icon, which is located in the top-left corner of the Outlook interface. The app launcher icon looks like a square grid or a set of small dots. By clicking on the app launcher icon, you can access various Microsoft applications and services, such as Calendar, People, OneDrive, and more, depending on your Outlook setup and configuration.
-
3.
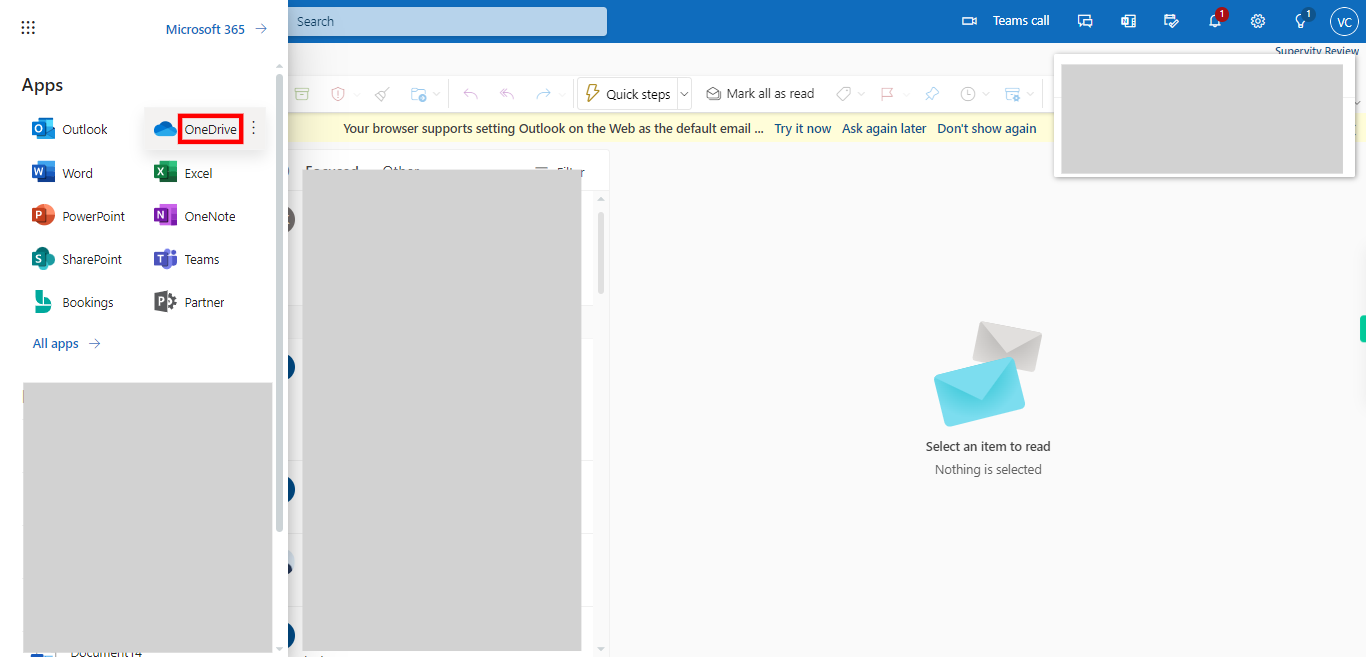
2. First, click on the Next button in the Supervity instruction widget. Next, click or tap on the OneDrive option from the list of available apps. This will typically be represented by the OneDrive logo, which is a cloud-shaped icon with a blue background.
-
4.
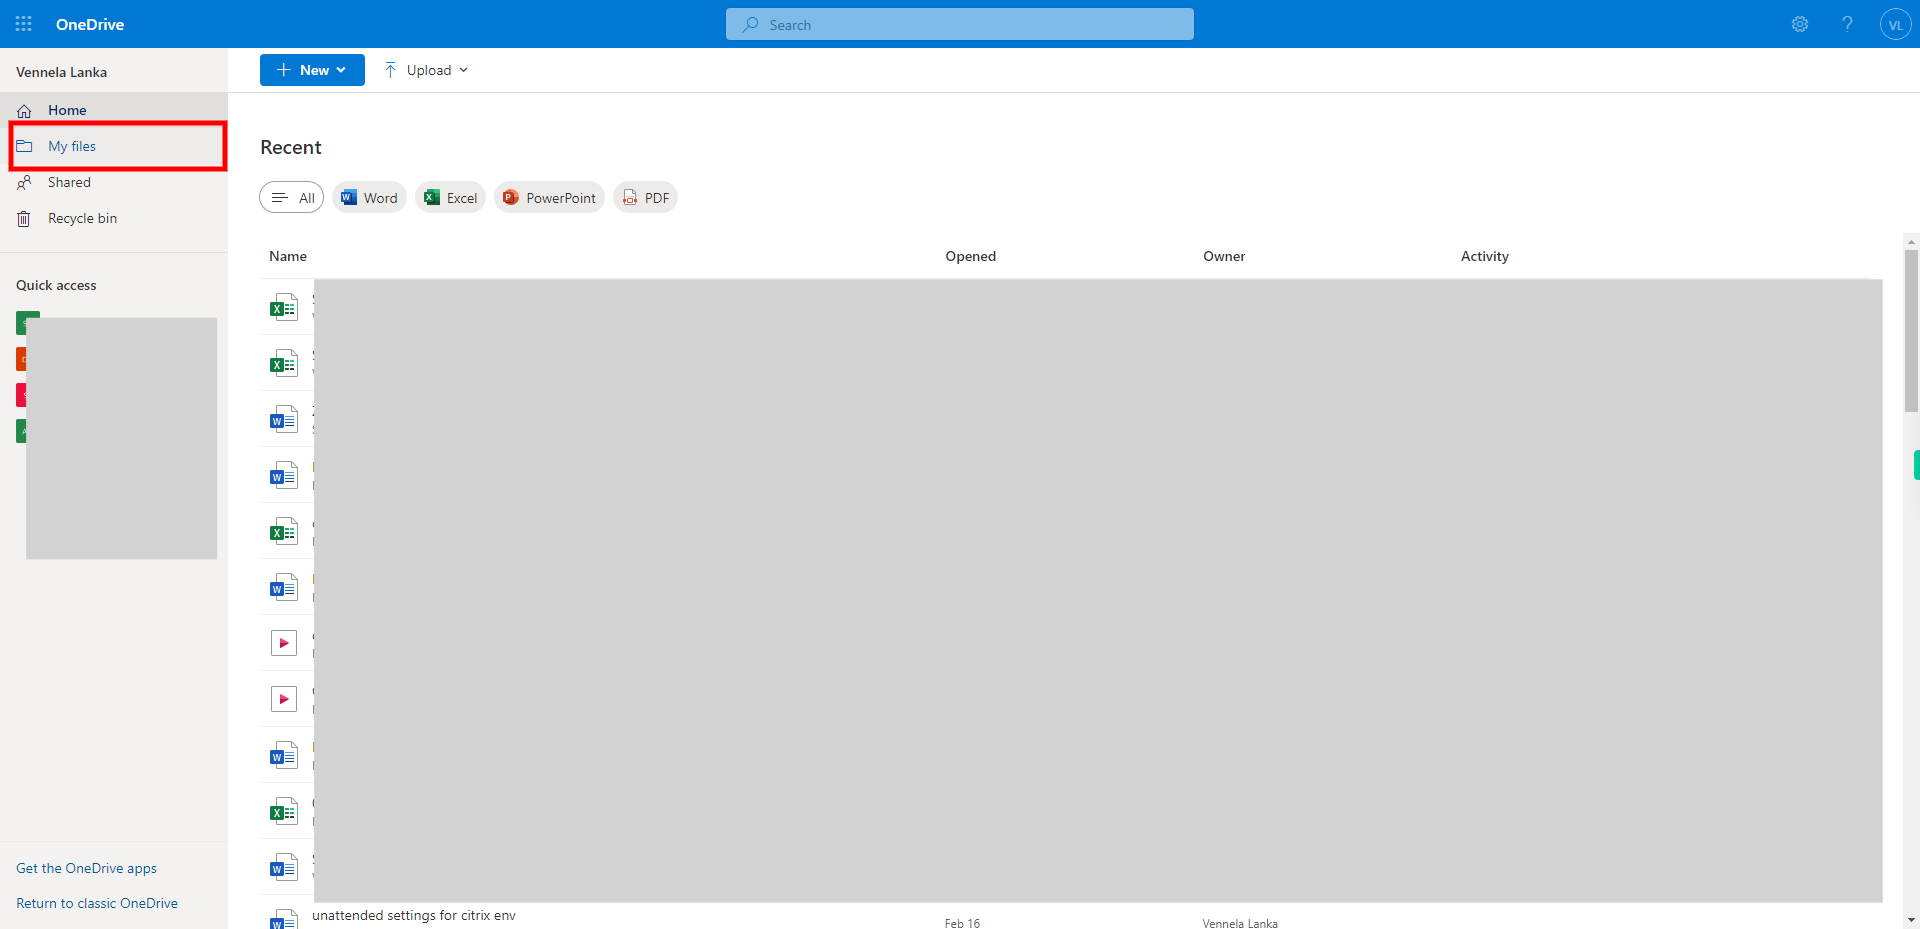
3. Once you are redirected to your OneDrive account, you will see a navigation panel or menu on the left-hand side of the screen. Click on the "My Files" option in the navigation panel. This option is represented by a folder icon.
-
5.
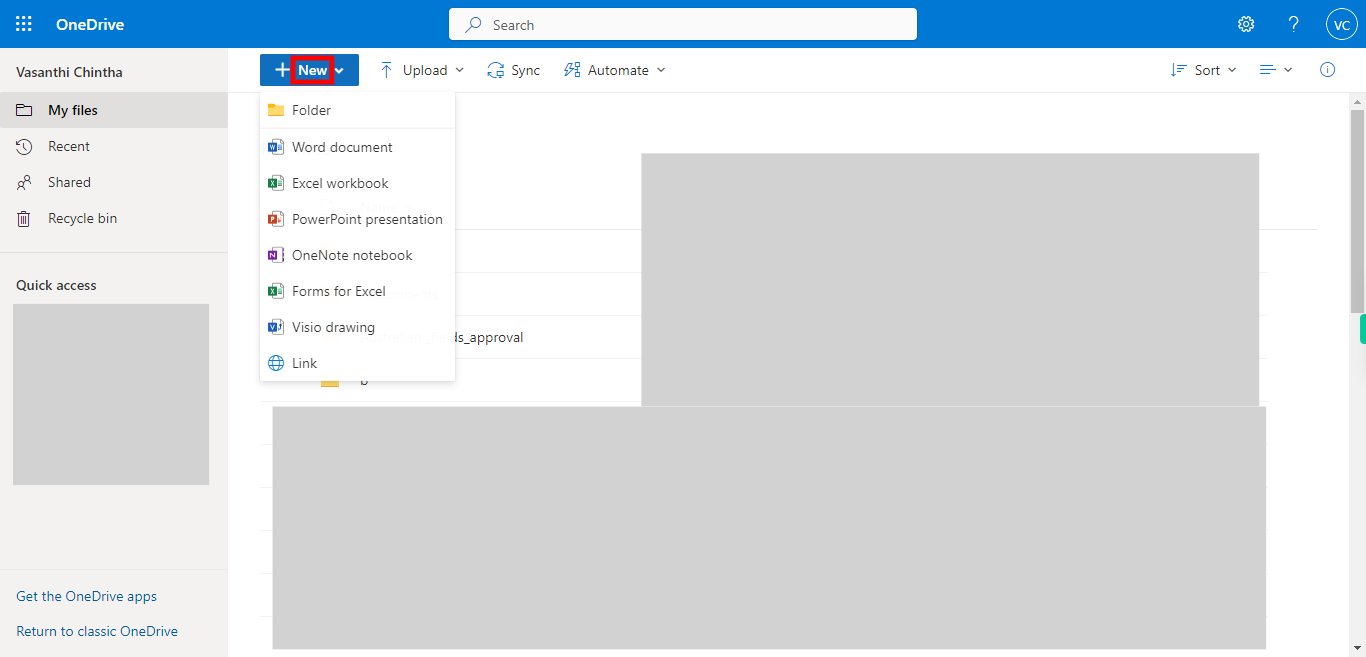
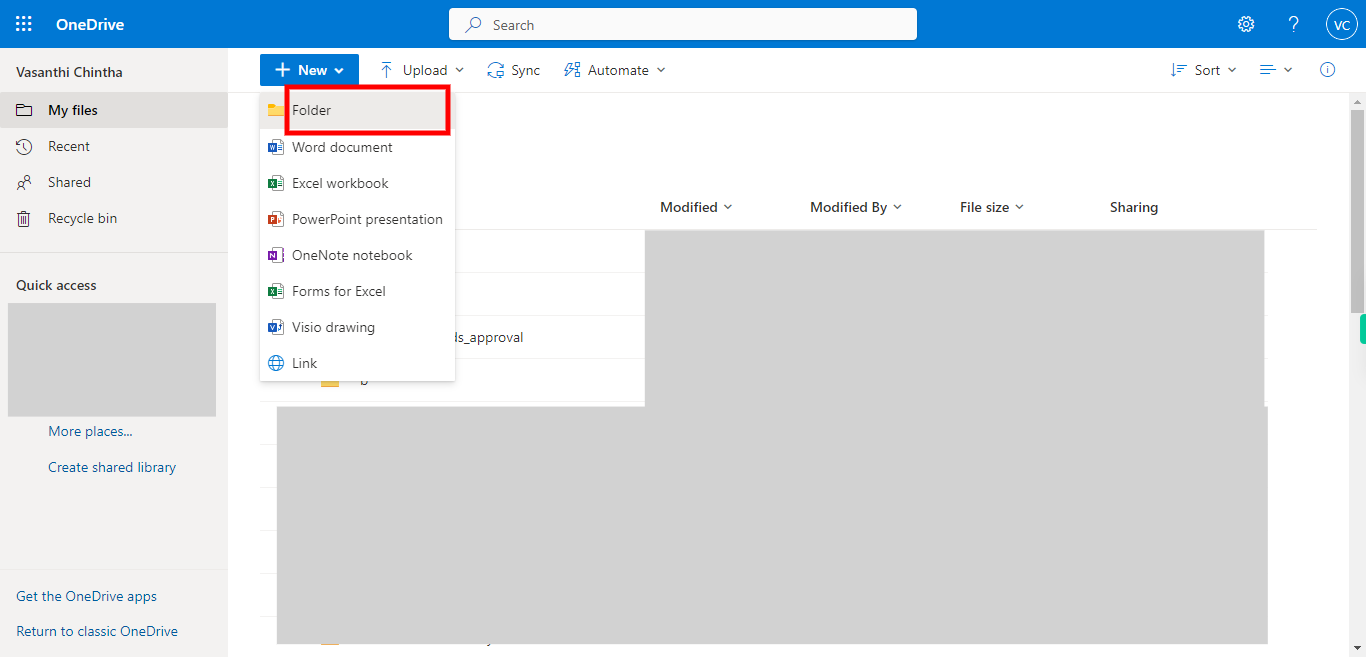
4. In the toolbar or menu, look for the "New" button. This button is represented by a plus (+) sign and has a dropdown arrow next to it. Click on the "New" button. This will display a dropdown menu with various options for creating new items.
-
6.
5. From the dropdown menu, select the "Folder" option. This will initiate the process of creating a new folder.
-
7.
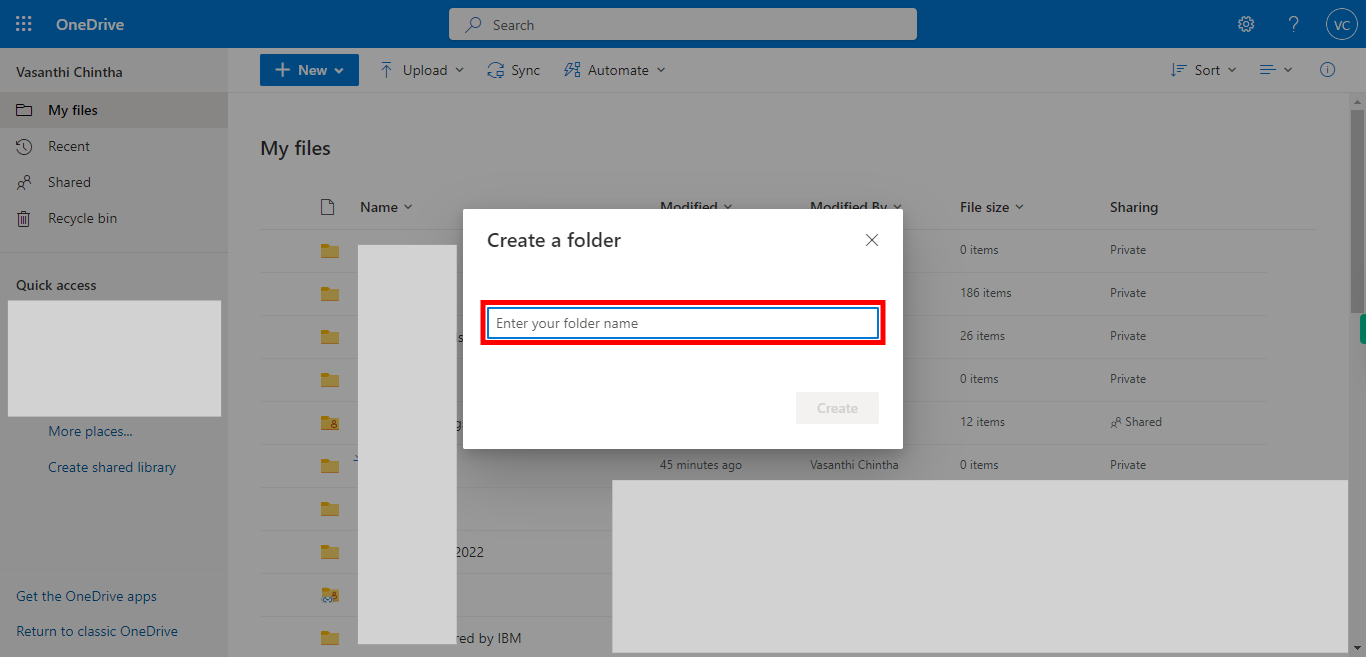
6. In the available dialog box or prompt enter the desired name for the new folder. Click on the Next button in the Supervity instruction widget.
-
8.
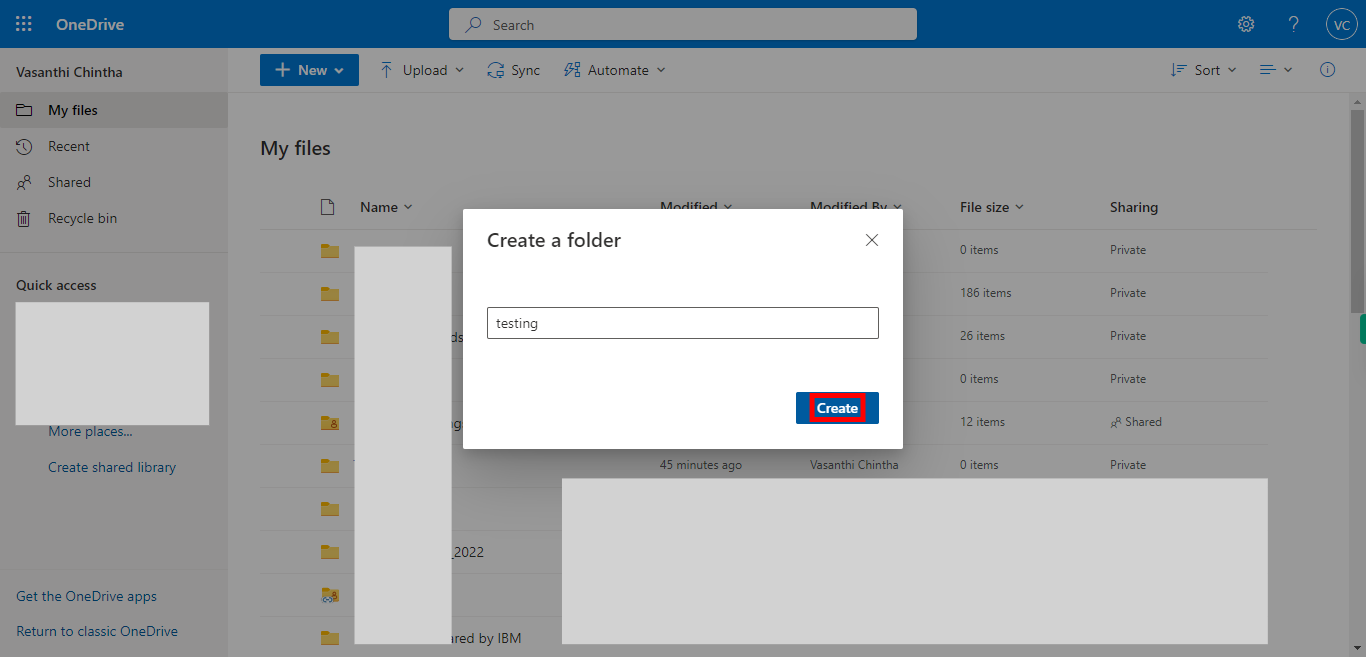
7. Click on the "Create" button which is located in the bottom-right corner of the available dialog box or prompt. Clicking on the "Create" button will initiate the creation of the folder in OneDrive with the specified name allowing you to start organizing your files within it.


