Step-by-step guide on how to utilize Outlook web signature feature which enables users to create and customize professional email signatures easily. It allows for the inclusion of personal information, job titles, contact details, and promotional elements, enhancing email communication with a polished and consistent look. Note: Please ensure that you have already logged into the Outlook application on the web before proceeding with this skill.
-
1.
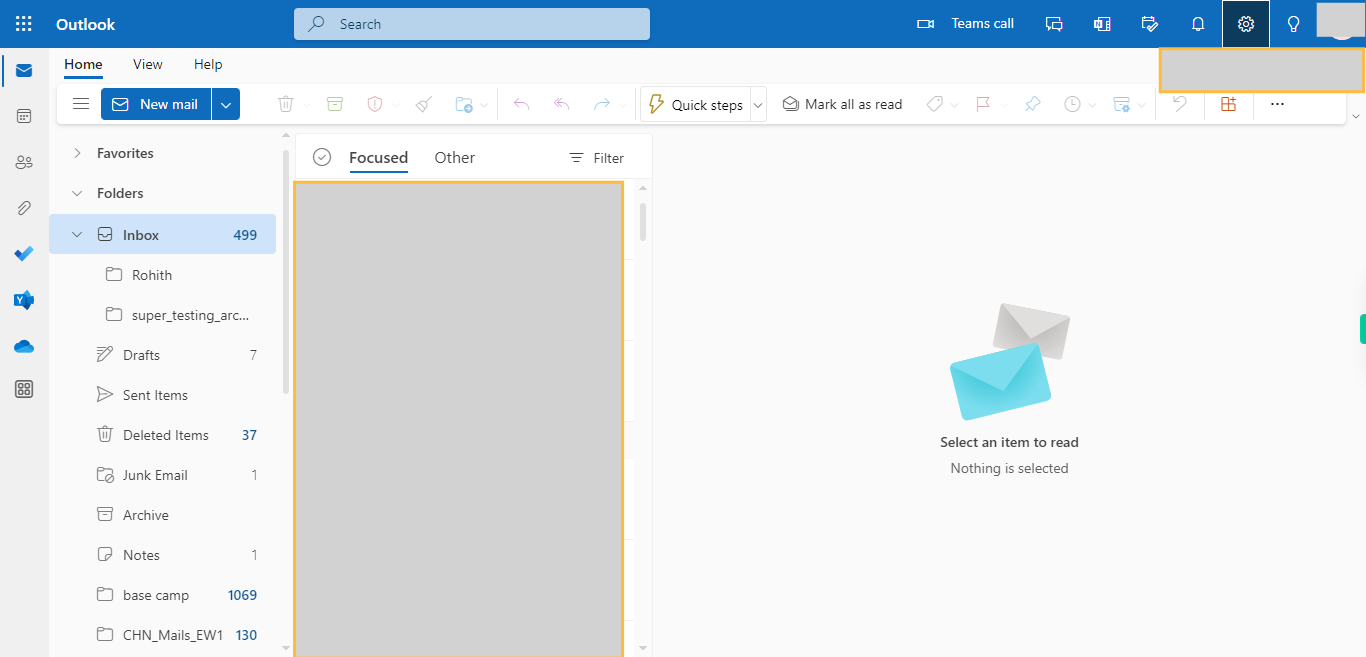
Open web Outlook account.
-
2.
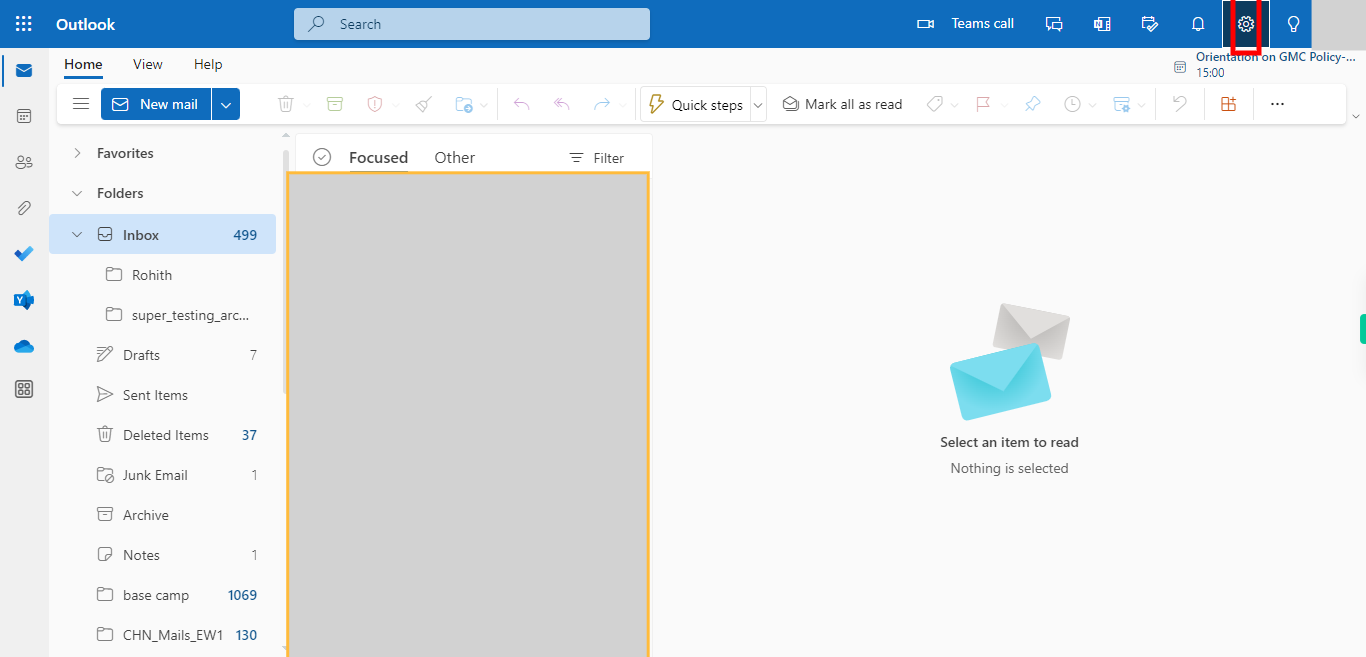
Click on the Settings icon to open the settings menu, which is represented by a gear or cogwheel. The Settings icon is usually located in the top-right corner of the Outlook interface, near your profile picture or avatar.
-
3.
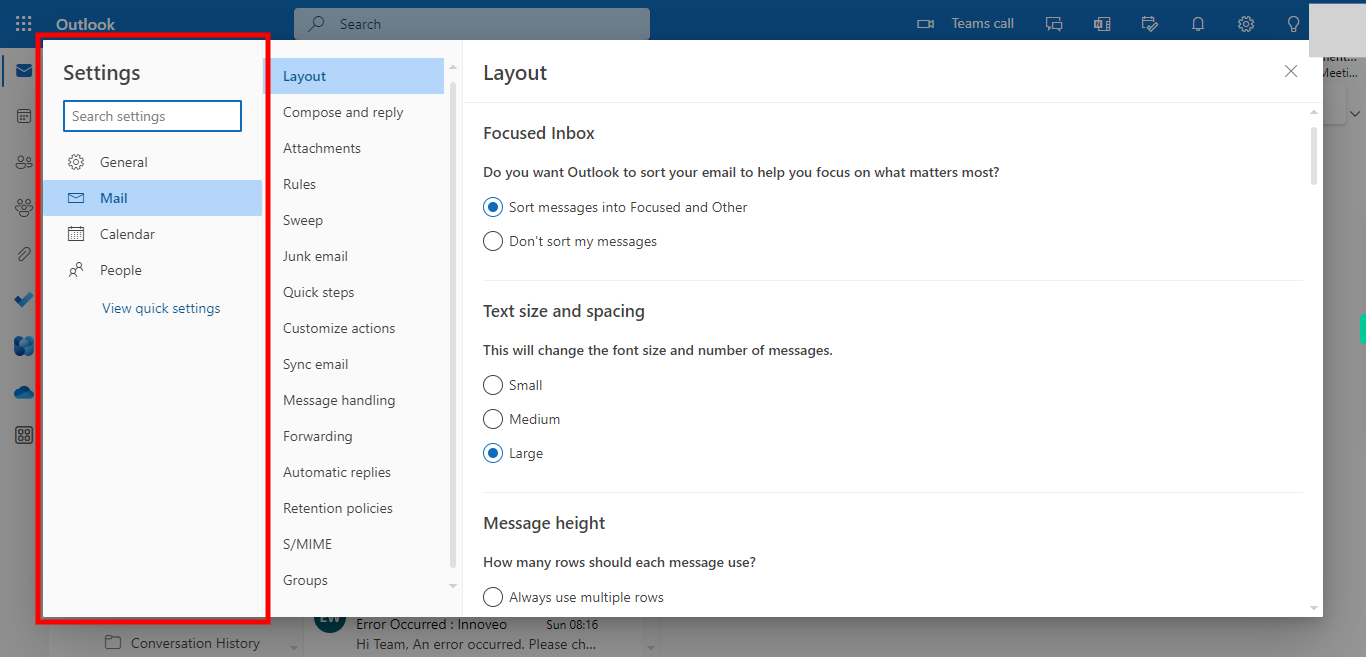
Now, on this Settings panel, click on the "Compose and reply" menu, which can be found under the "Mail" option. Click on the "Next" button on the Supervity instruction widget.
-
4.
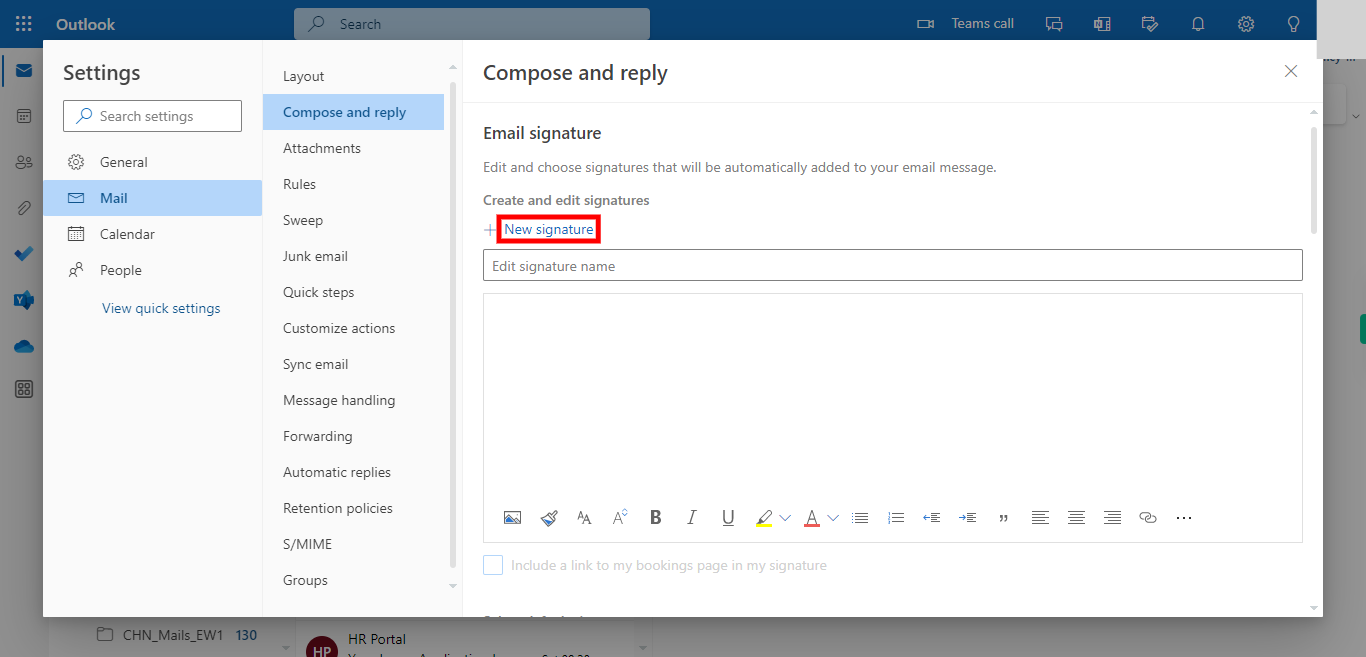
Click on the "New signature" icon to automatically add a signature to your email messages.
-
5.
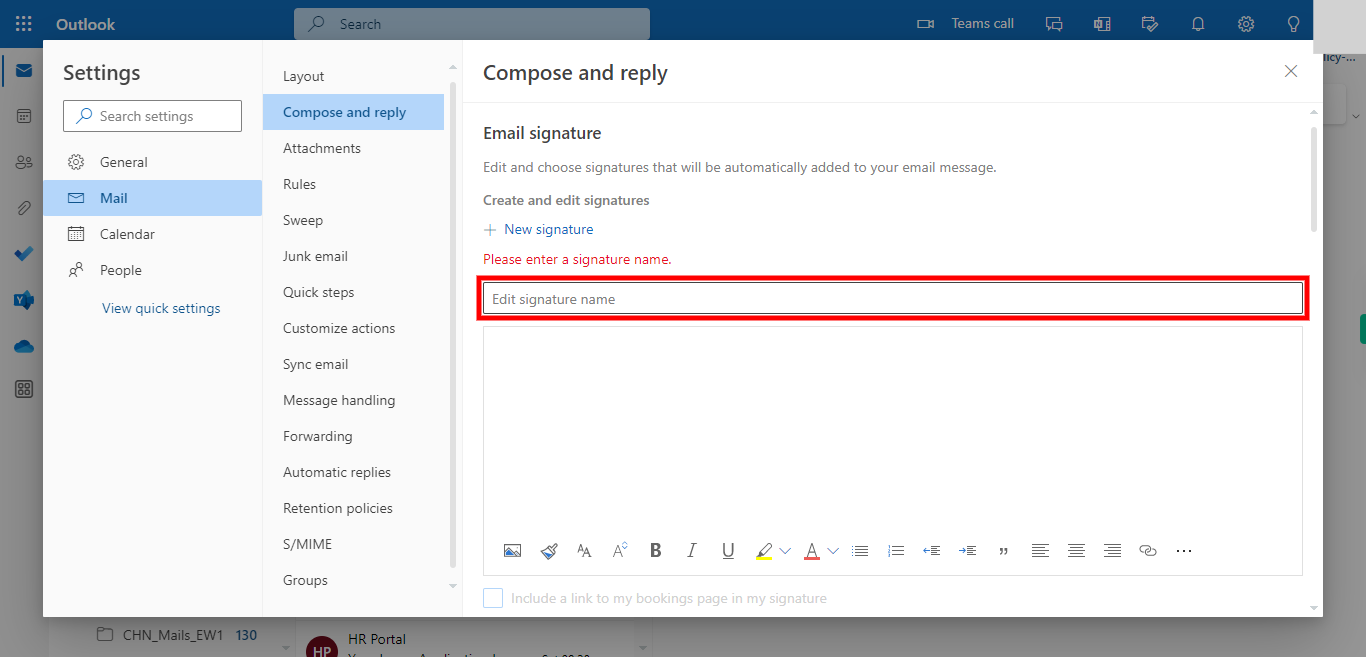
Enter a signature name, which will serve as a title for your signature. This will help you easily select this signature name from multiple signatures if you add more in the future. Once done, click on the "Next" button on the Supervity instruction widget.
-
6.
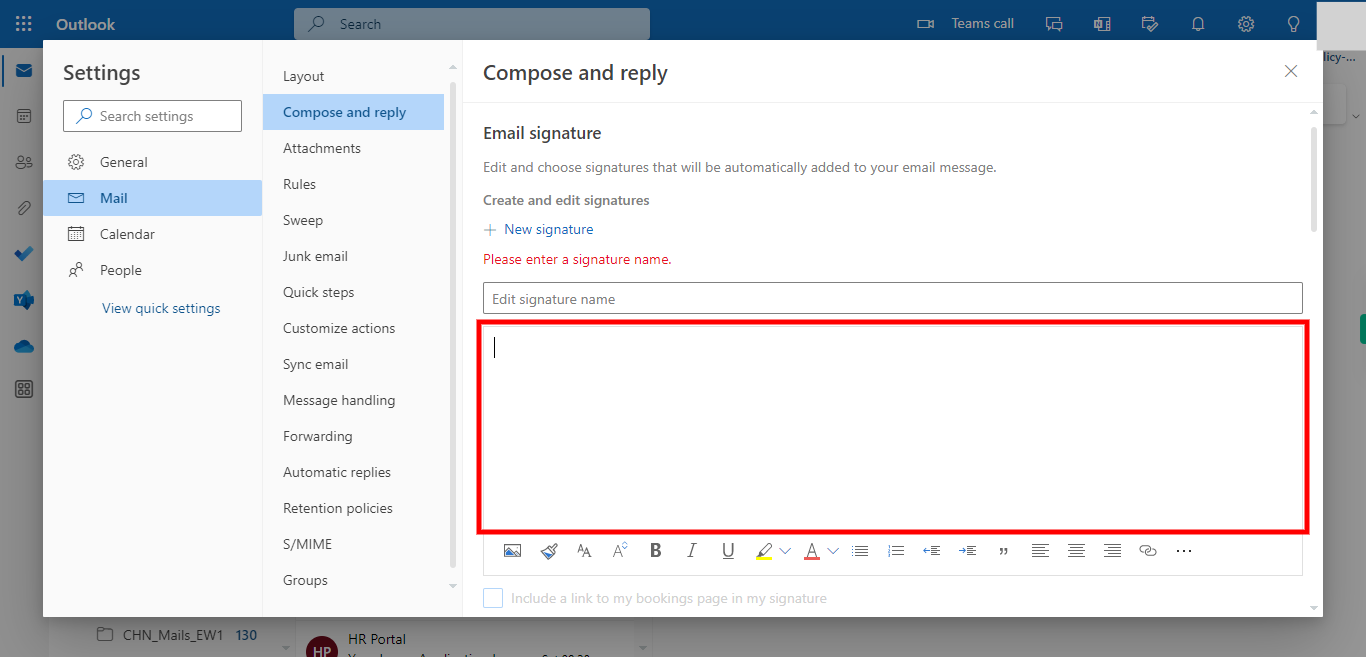
Now, enter the signature that you want to automatically display in your email messages. This signature will include your chosen text, such as your name, contact information, and any other details you wish to include. Once you have entered the signature, click on the "Next" button on the Supervity instruction widget.
-
7.
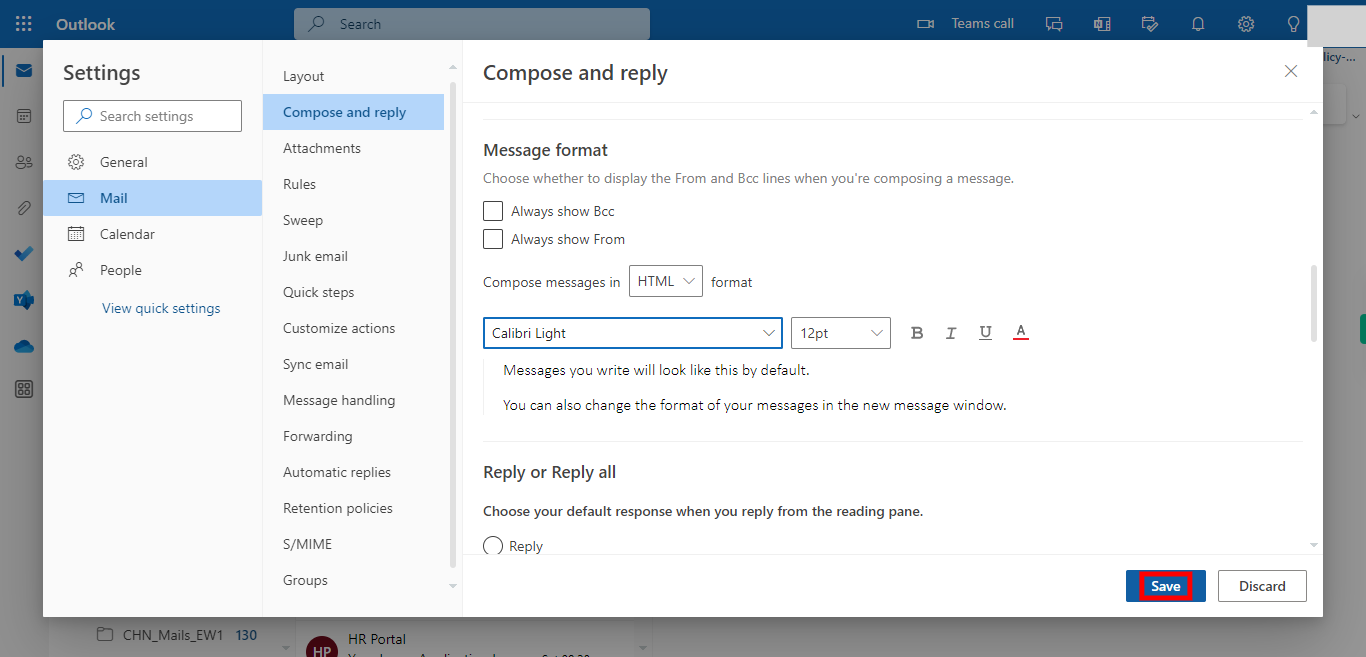
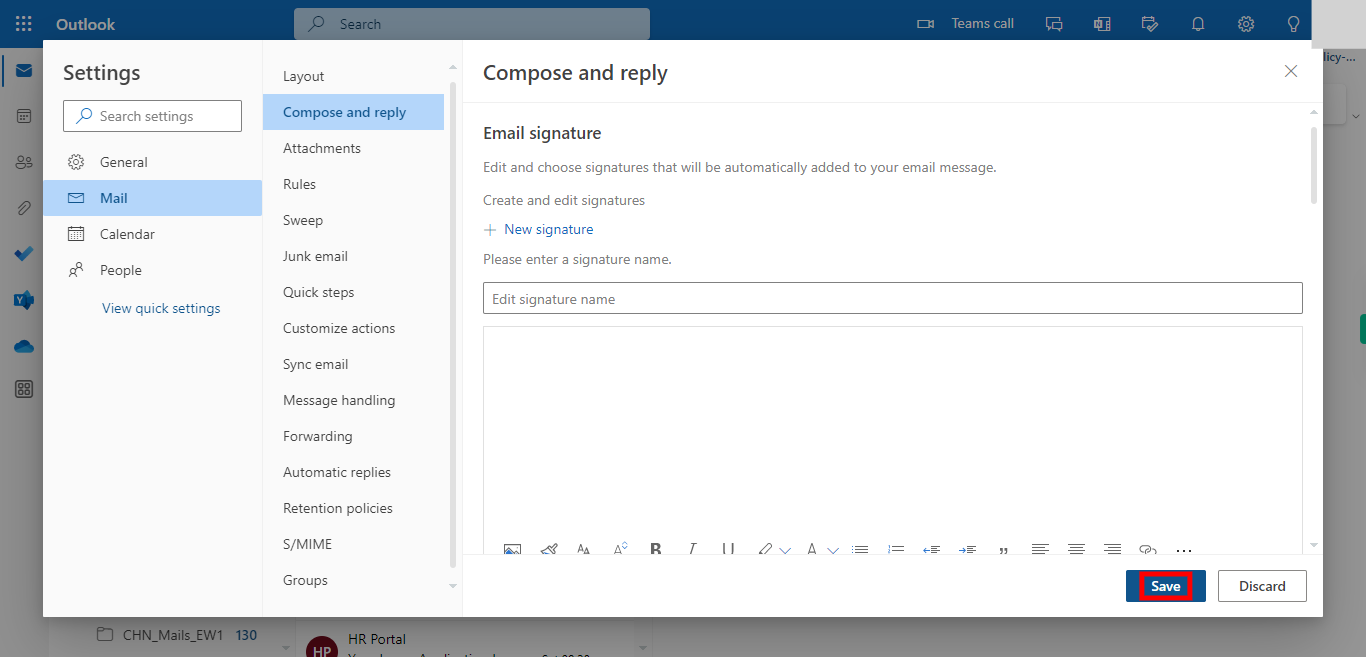
Click on the "Save" button to proceed with the process.
-
8.
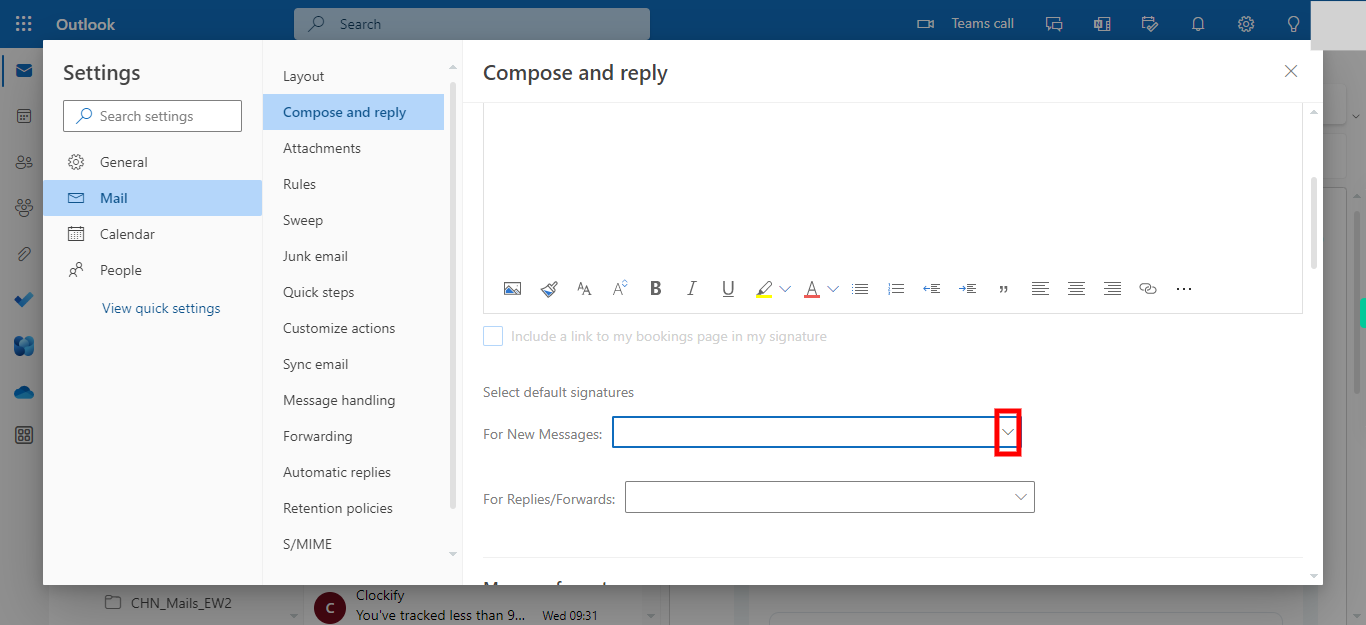
Choose the signature you have created from the drop-down menu labeled "For New Messages." This default signature for new messages refers to the signature that will be automatically added to any new email you compose. Once done, click on the "Next" button on the Supervity instruction widget.
-
9.
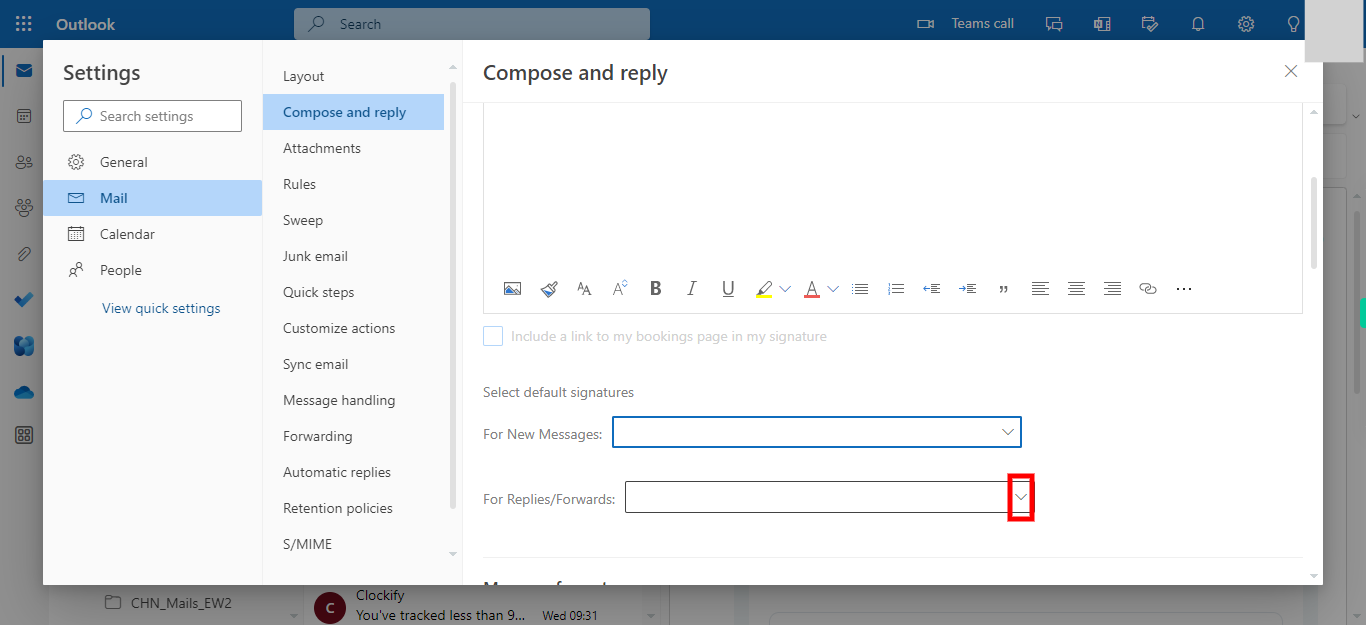
Choose the signature that you have created from the dropdown menu labeled "For Replies/Forwards". "For Replies": This option allows you to specify the selected signature that will be automatically added to any email message you reply to. "Forwards": This option allows you to specify the selected signature that will be automatically added to any email message you forward to someone. Once done, click on the "Next" button on the Supervity instruction widget.
-
10.
Click on the "Save" button to complete the process.


