This skill helps to walk you through in Creation of a fresh Azure Disk (block-level storage volumes that are managed by Azure and used with Azure Virtual Machines) by step by step assistance.
Note: Ensure you have access to a subscription in the Azure Portal with sufficient privileges to perform skill successfully.
Prerequisites: Login to portal.azure.com beforeand.
Tags: Azure, Cloud
-
1.
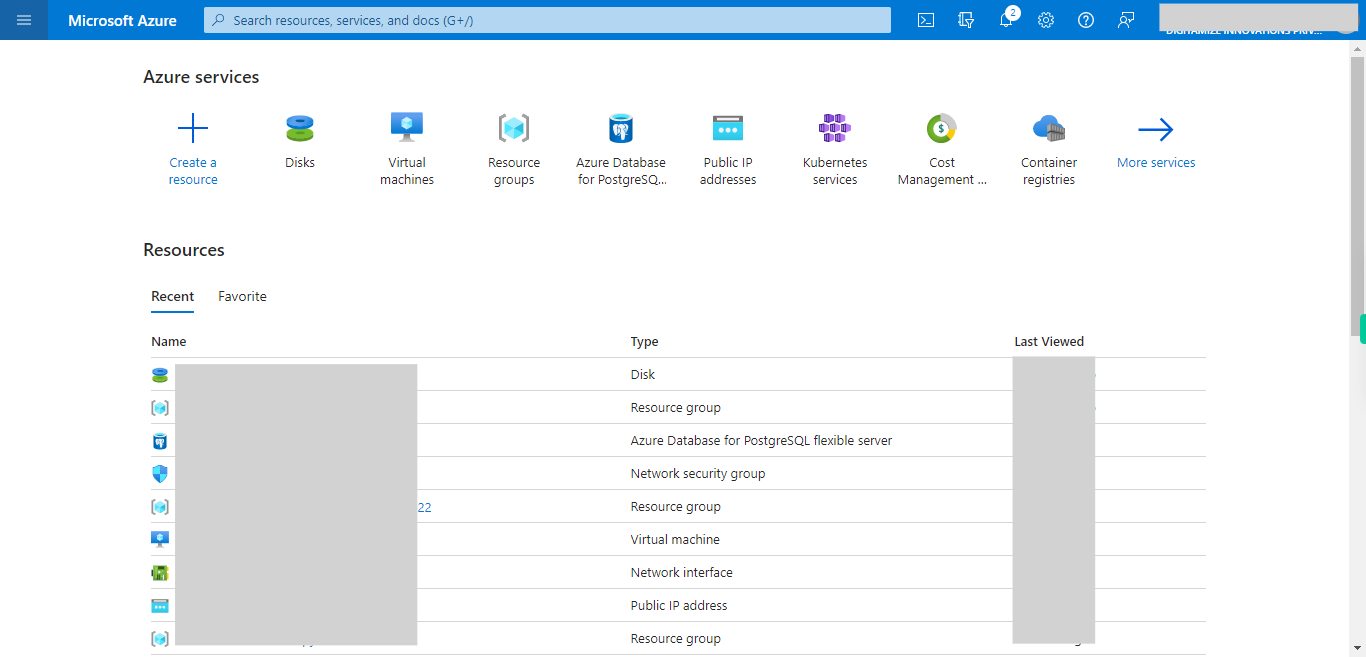
open Home - Microsoft Azure
-
2.
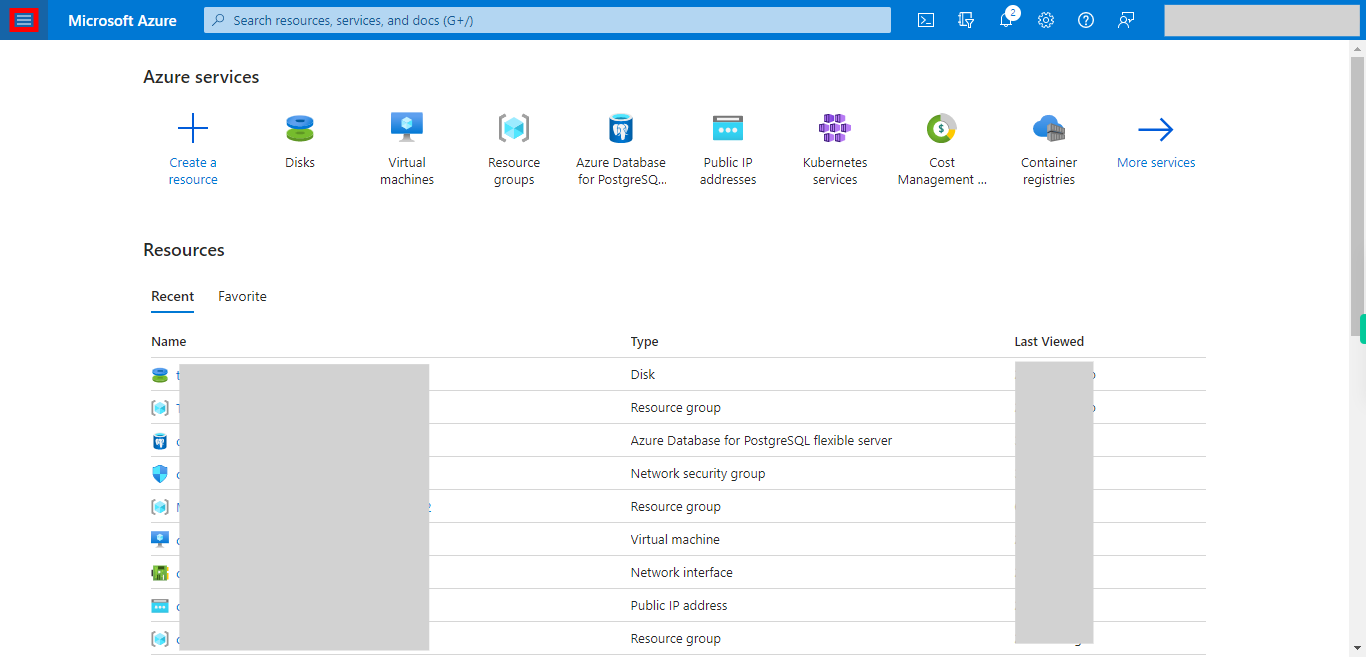
1. Click __Hamburger icon__.
-
3.
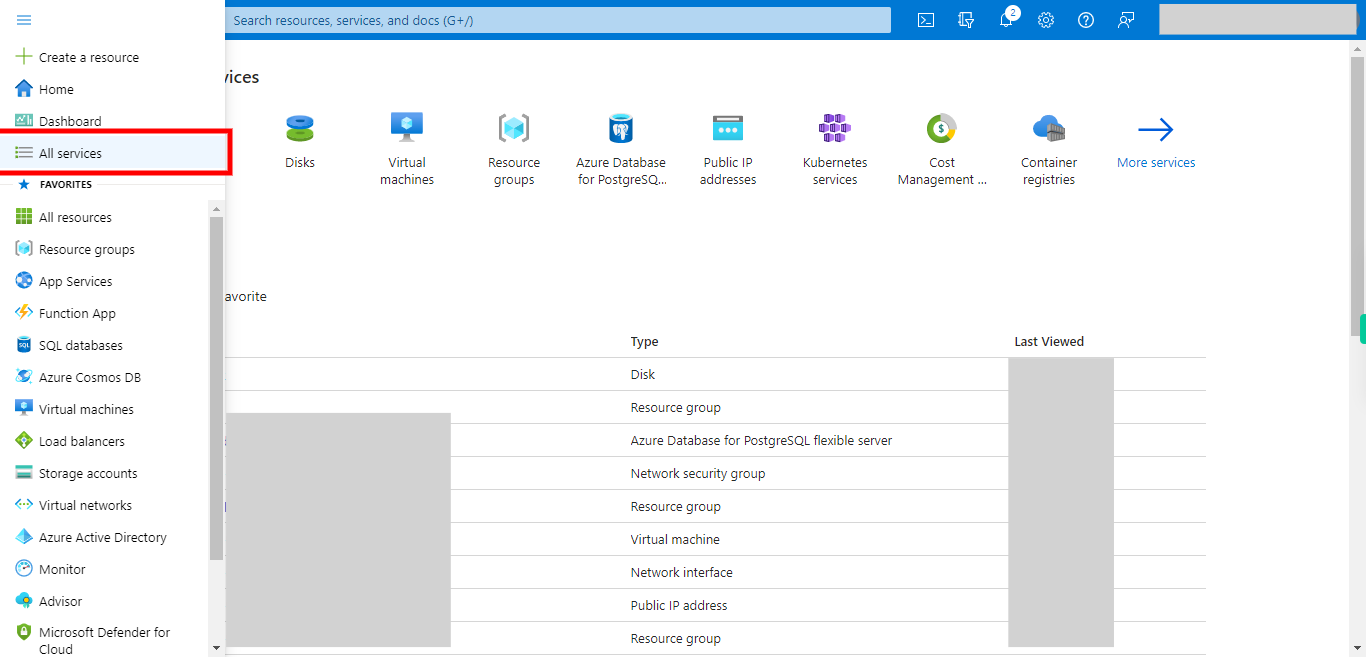
2. Click on __All services__.
-
4.
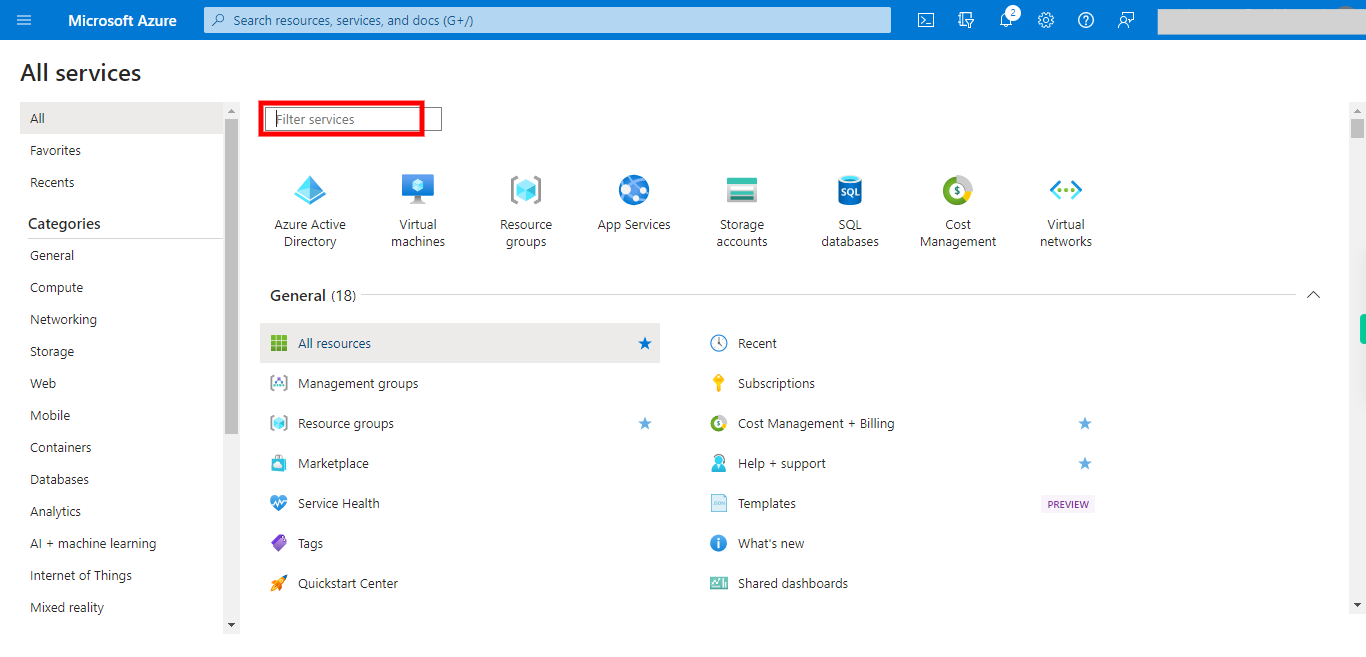
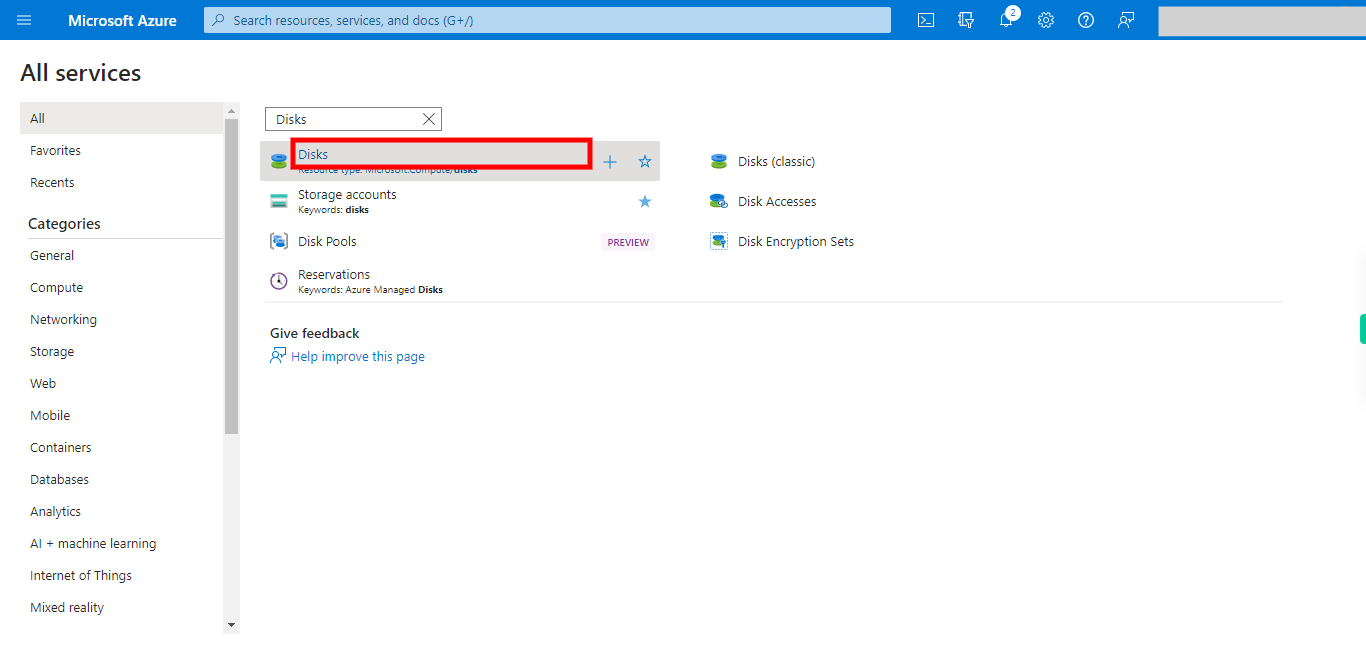
3. Use filter services to search for __Disks__. Once done, click on the Next button on the Supervity instruction widget.
-
5.
4. Click on __Disks__ from the list.
-
6.
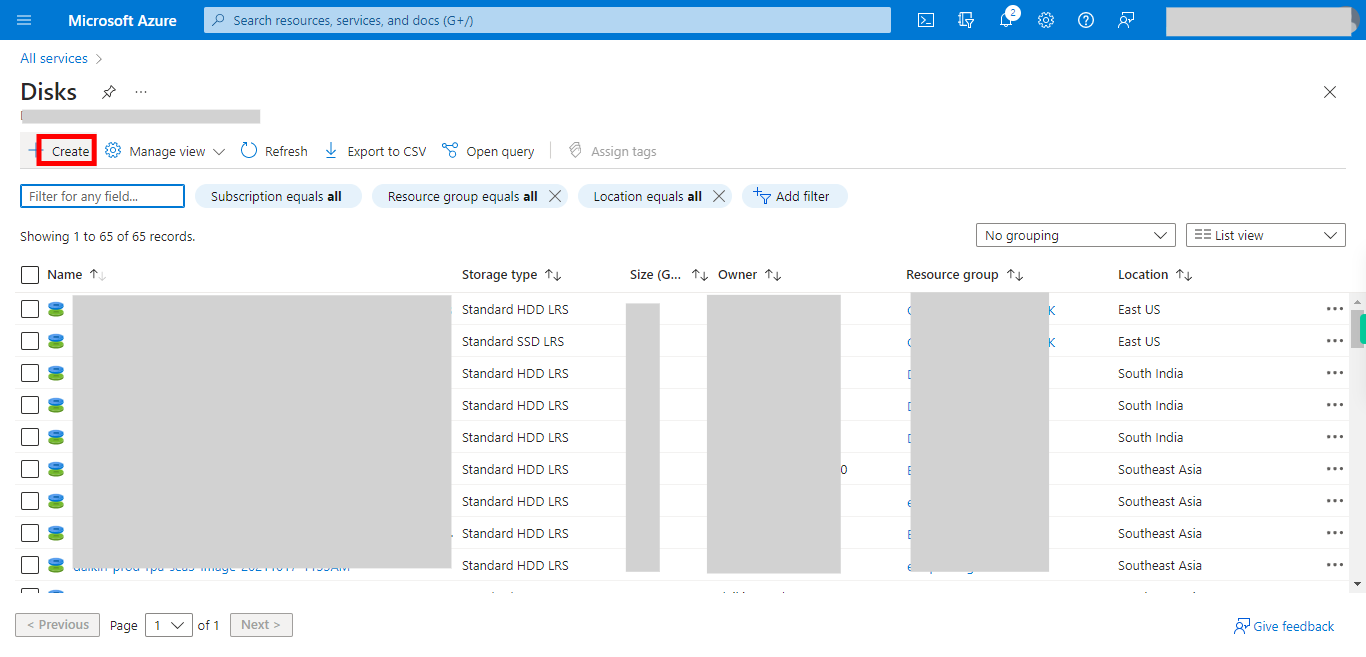
5. Click on __Create__.
-
7.
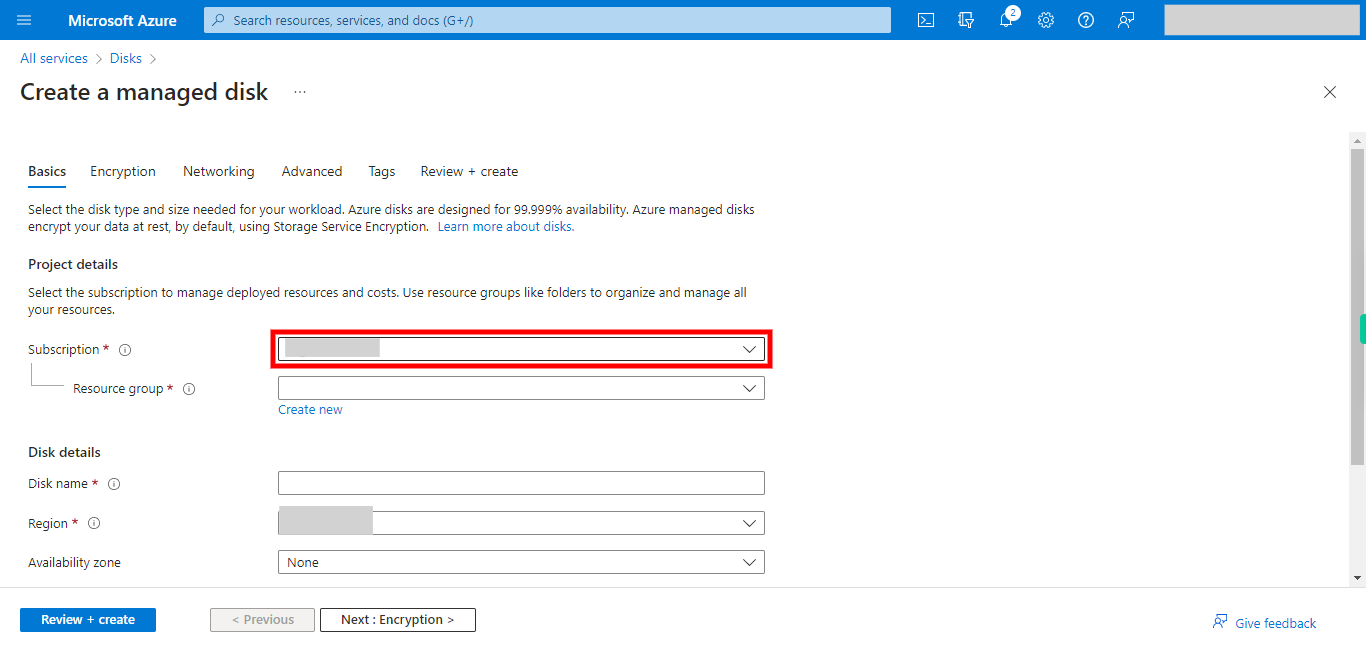
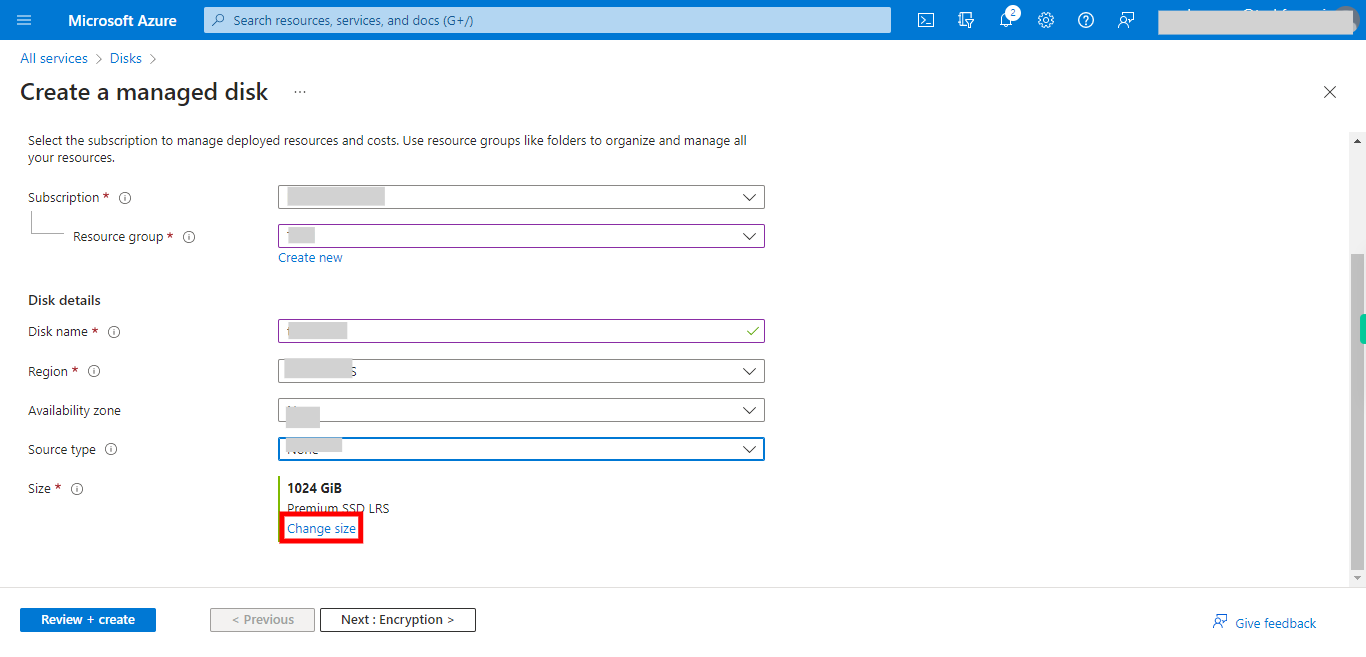
6. Click and opt desired Subscription. Once done, click on the Next button on the Supervity instruction widget.
-
8.
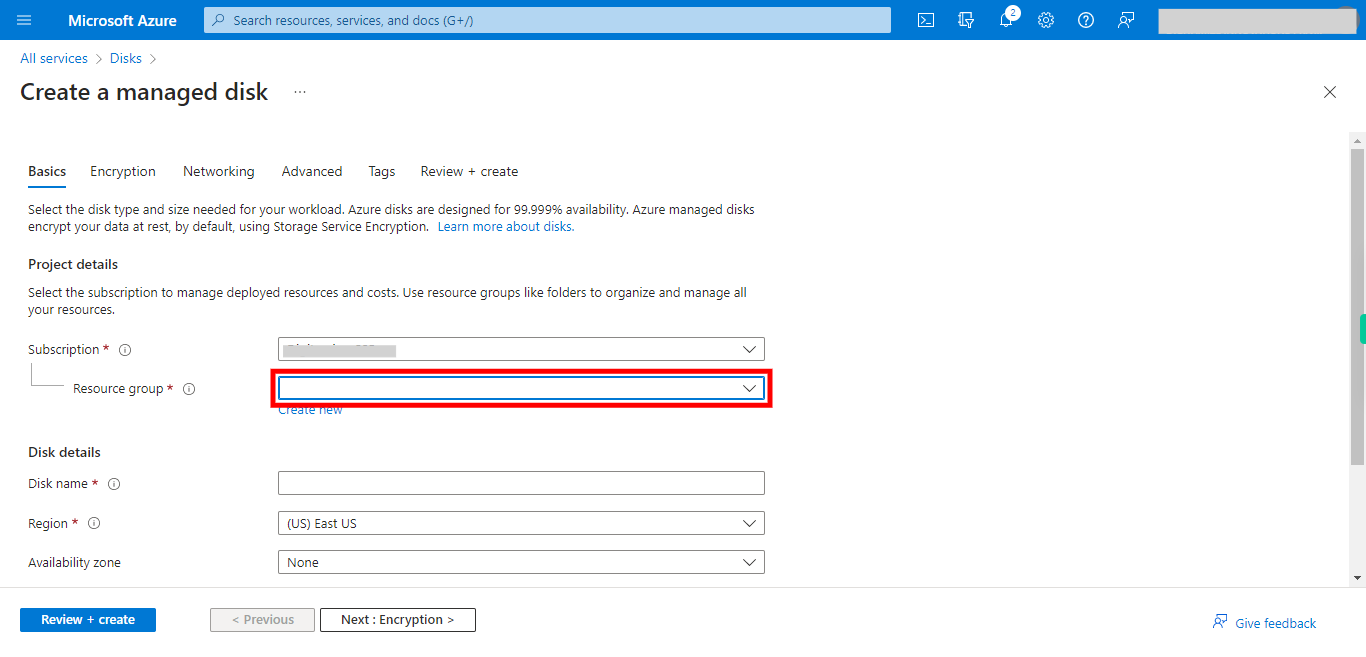
7. Click Create new or use existing Resource group. Once done, click on the Next button on the Supervity instruction widget.
-
9.
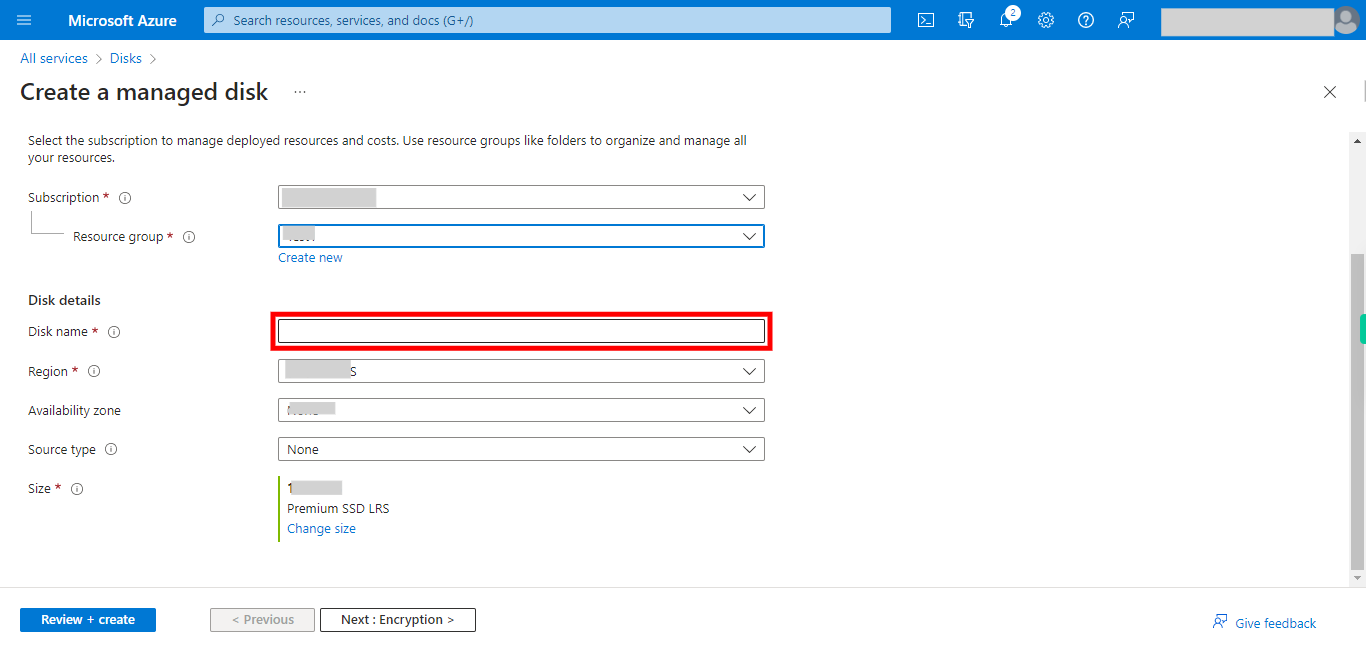
8. Enter a disk name. Once done, click on the Next button on the Supervity instruction widget.
-
10.
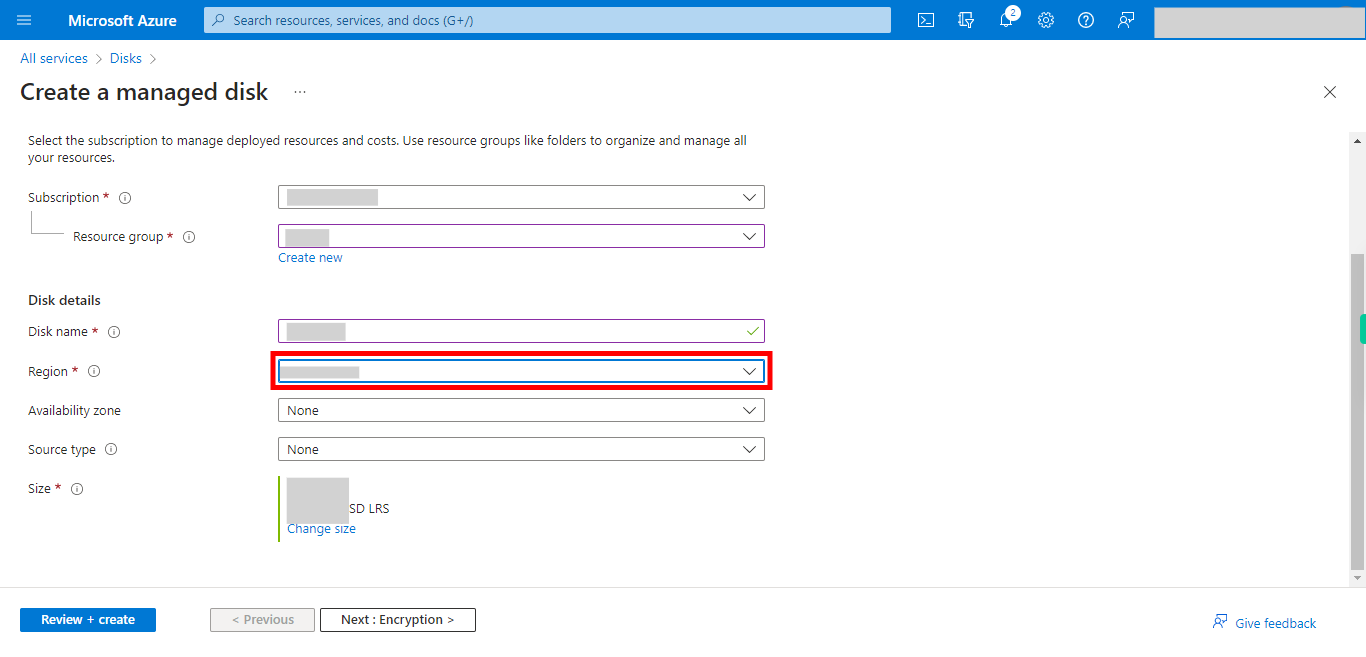
9. Opt for desired Region. Once done, click on the Next button on the Supervity instruction widget.
-
11.
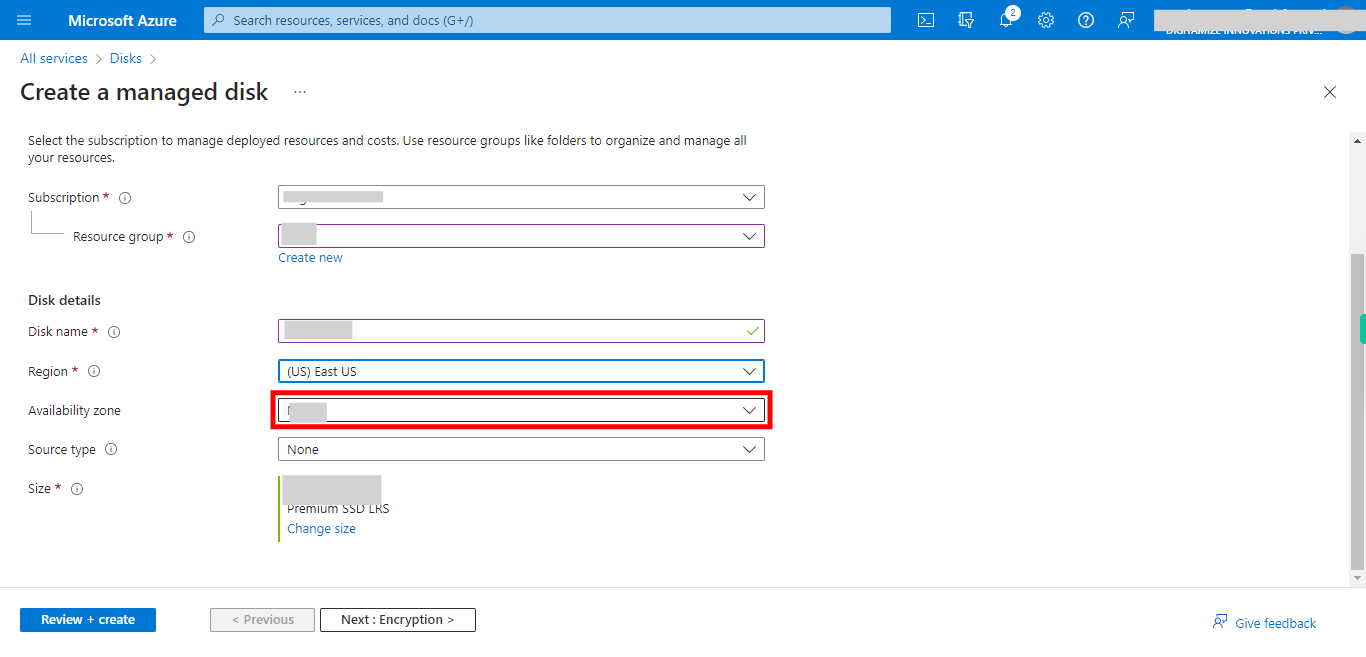
10. Select appropriate option for Availability Zone(s). Once done, click on the Next button on the Supervity instruction widget.
-
12.
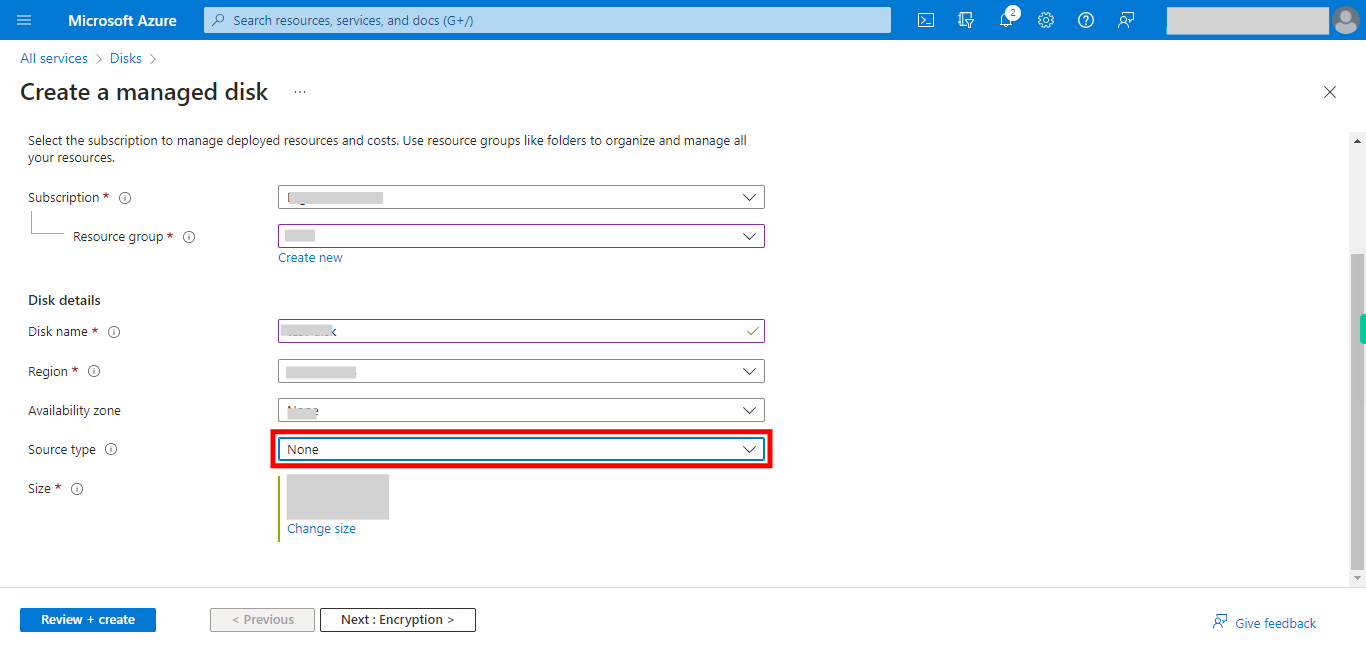
11. Choose Source type for the Disk, the options may change according to the source type you opt. Be cautious and select appropriate options. Once done, click on the Next button on the Supervity instruction widget.
-
13.
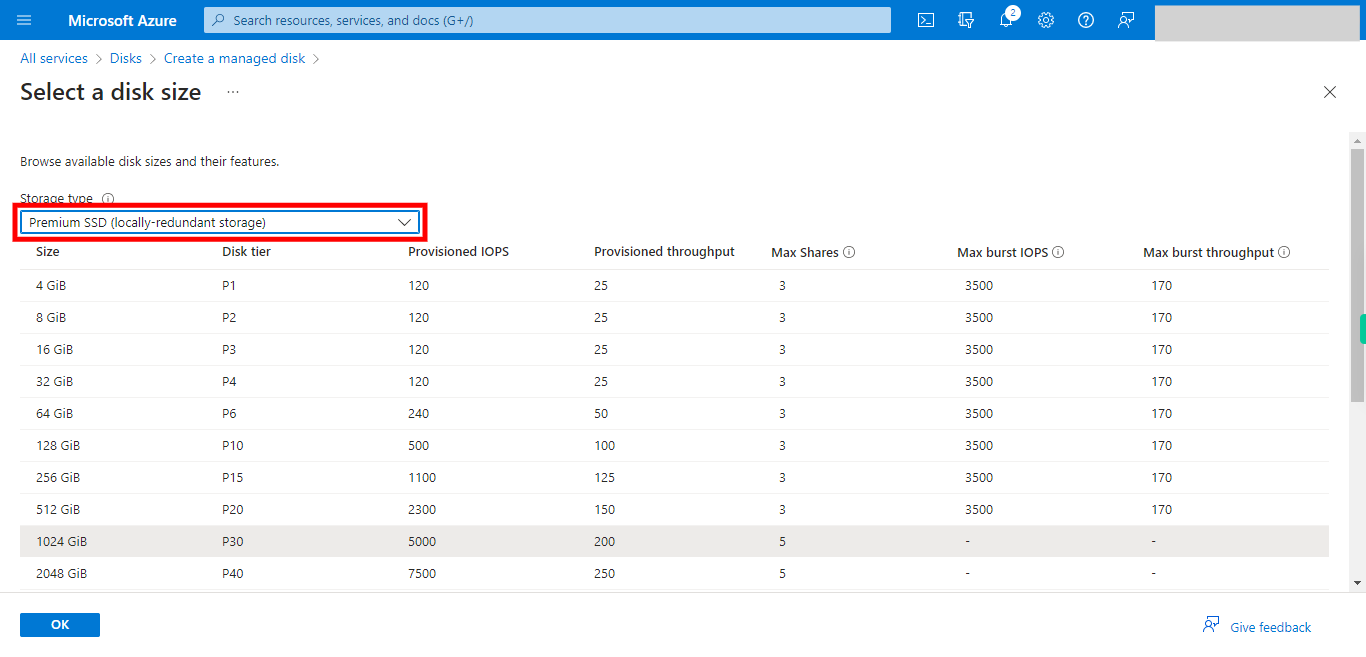
12. Select Disk size needed. This opens a new screen for more options for disk size and variants.
-
14.
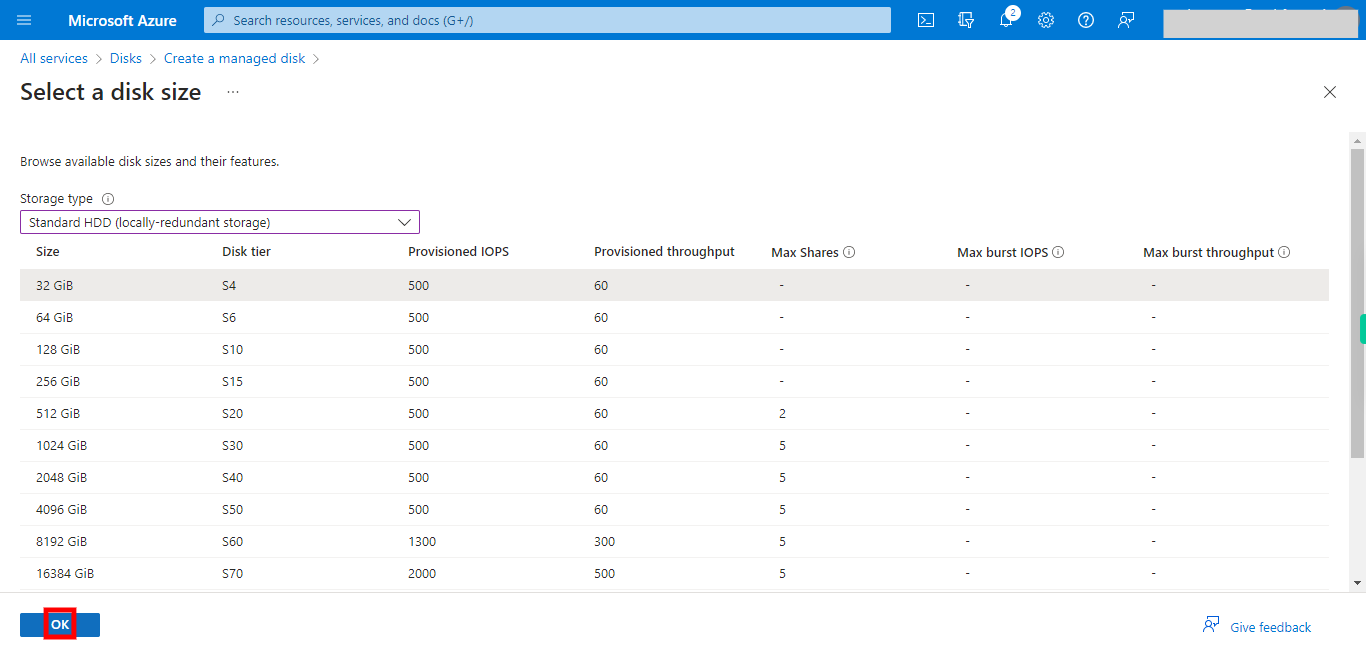
13. Select Storage Disk Type, desired Size, etc. Once done, click on the Next button on the Supervity instruction widget.
-
15.
14. Click OK to proceed further.
-
16.
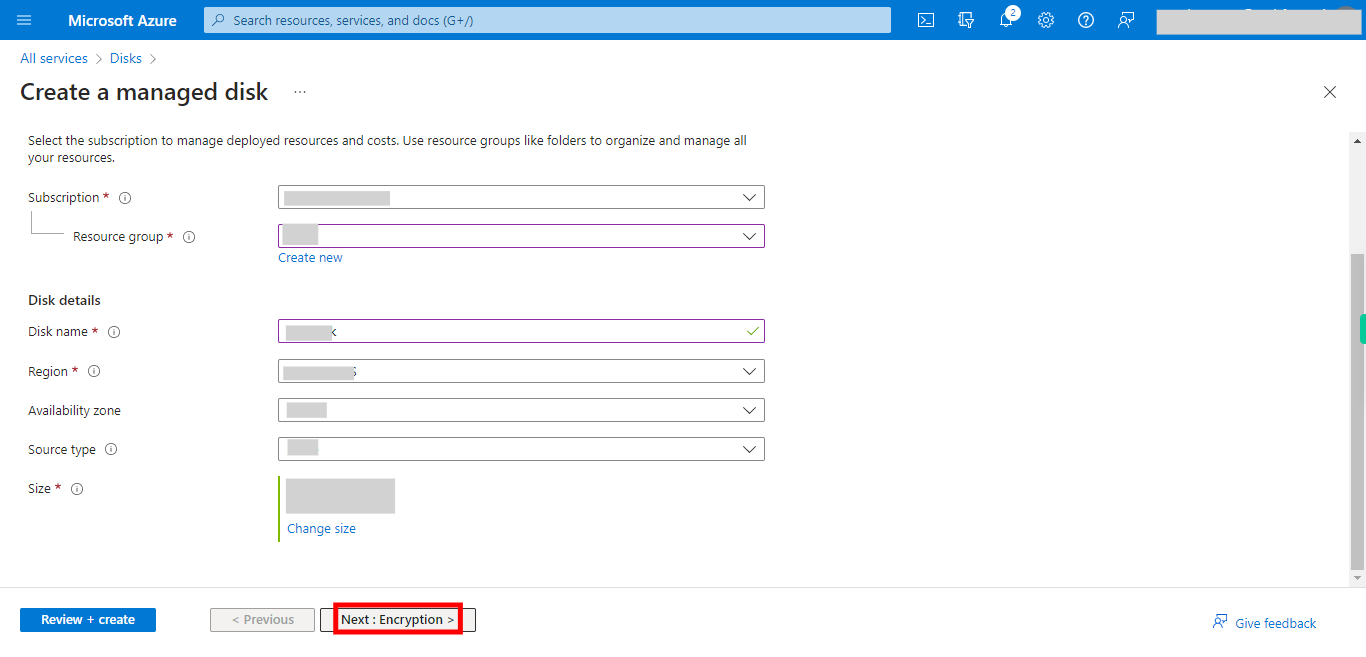
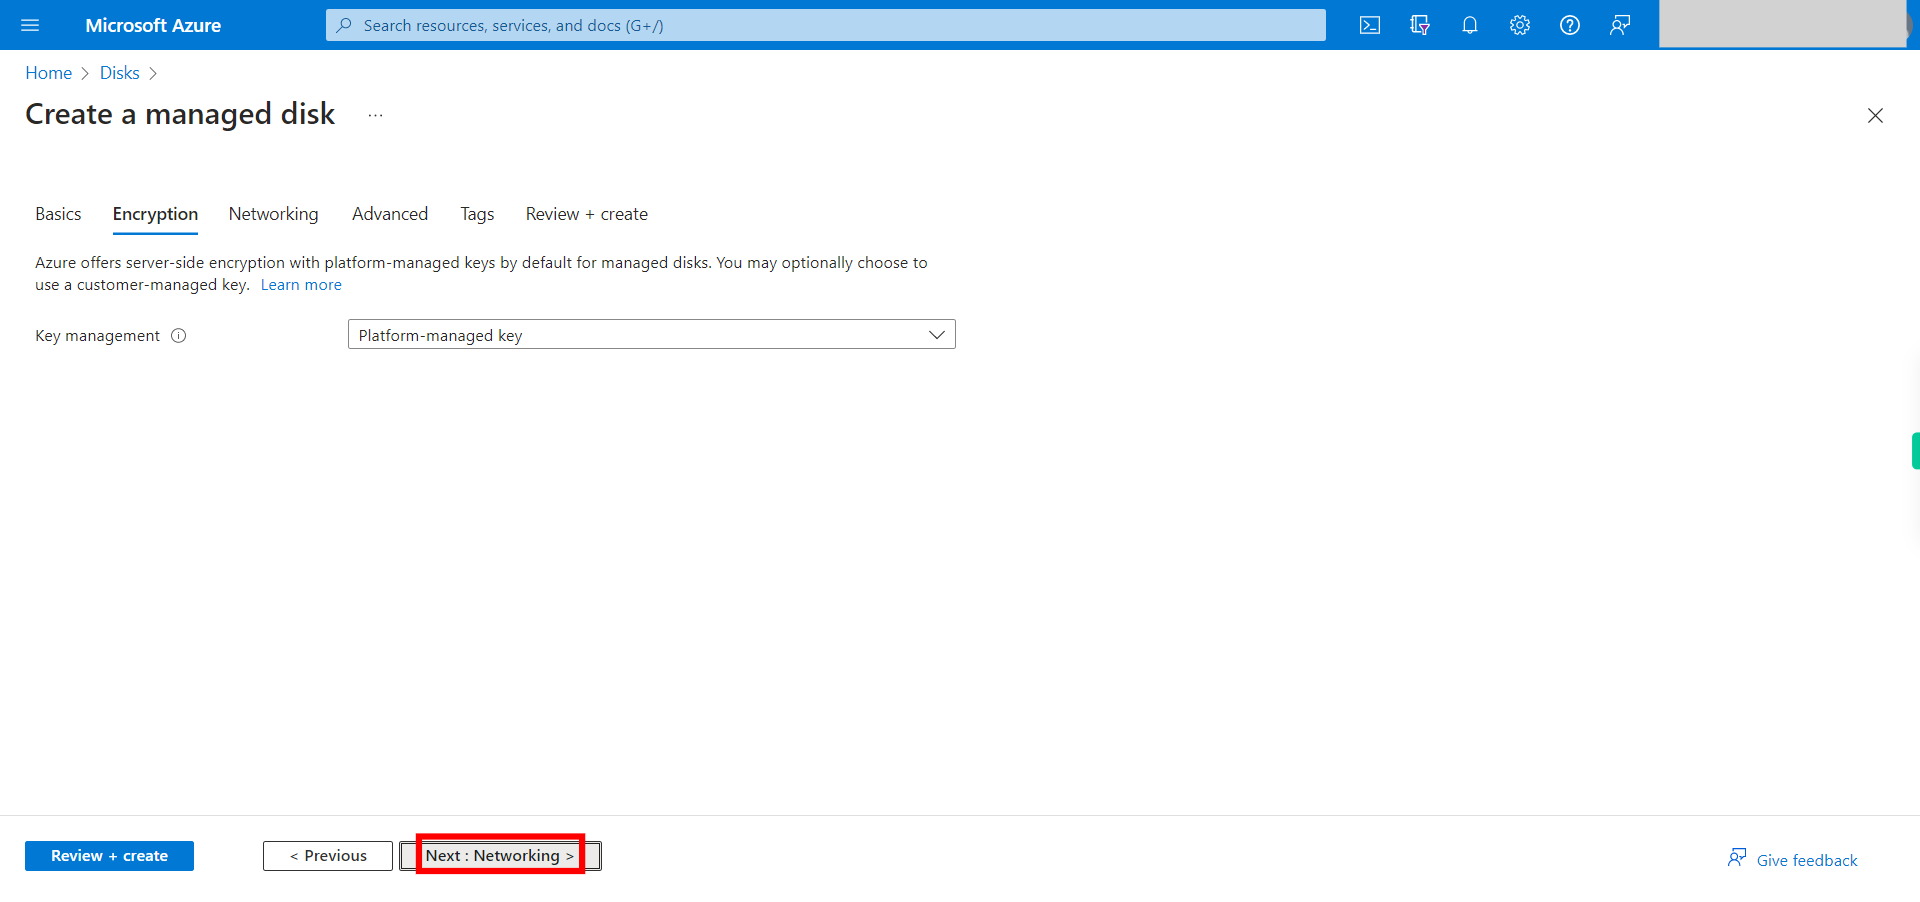
15. Click __Next : Encryption >__.
-
17.
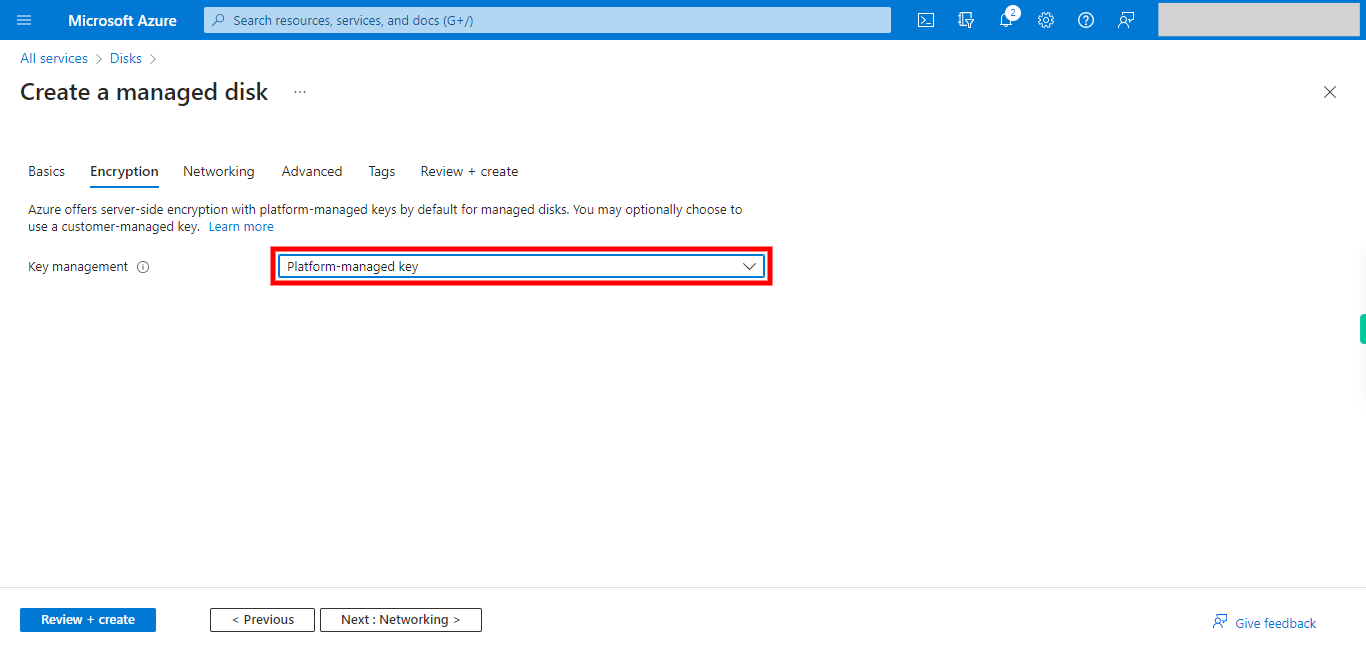
16. Select suitable Encryption option.
-
18.
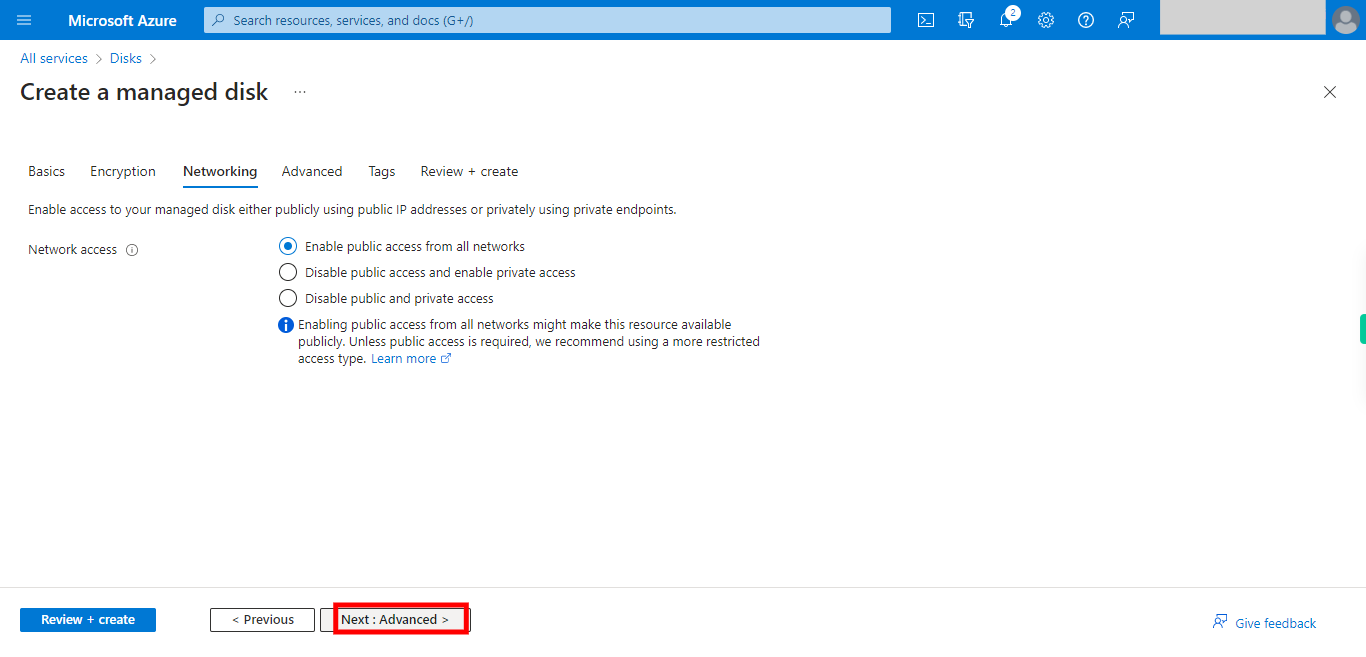
17. Click __Next : Networking >__.
-
19.
18. Select appropriate type of Network option at the top and when ready, click __Next : Advanced >__.
-
20.
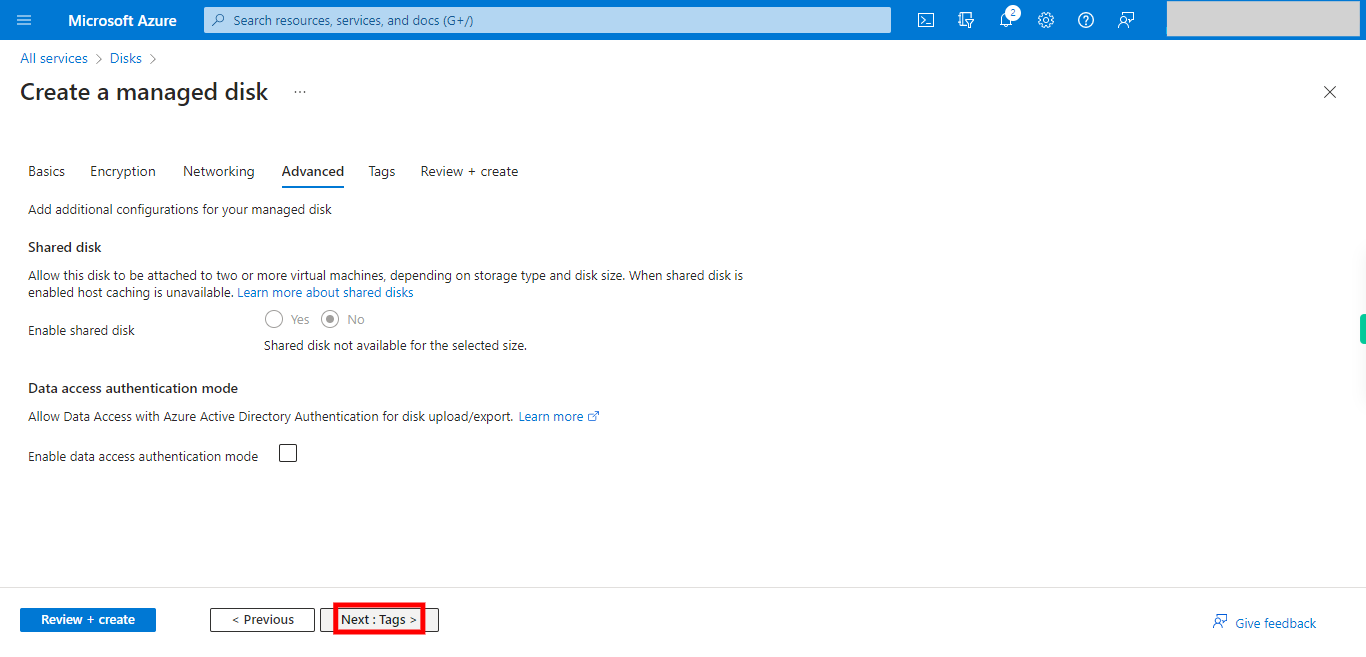
19. Select suitable options at Advanced tab and once done, click __Next : Tags >__.
-
21.
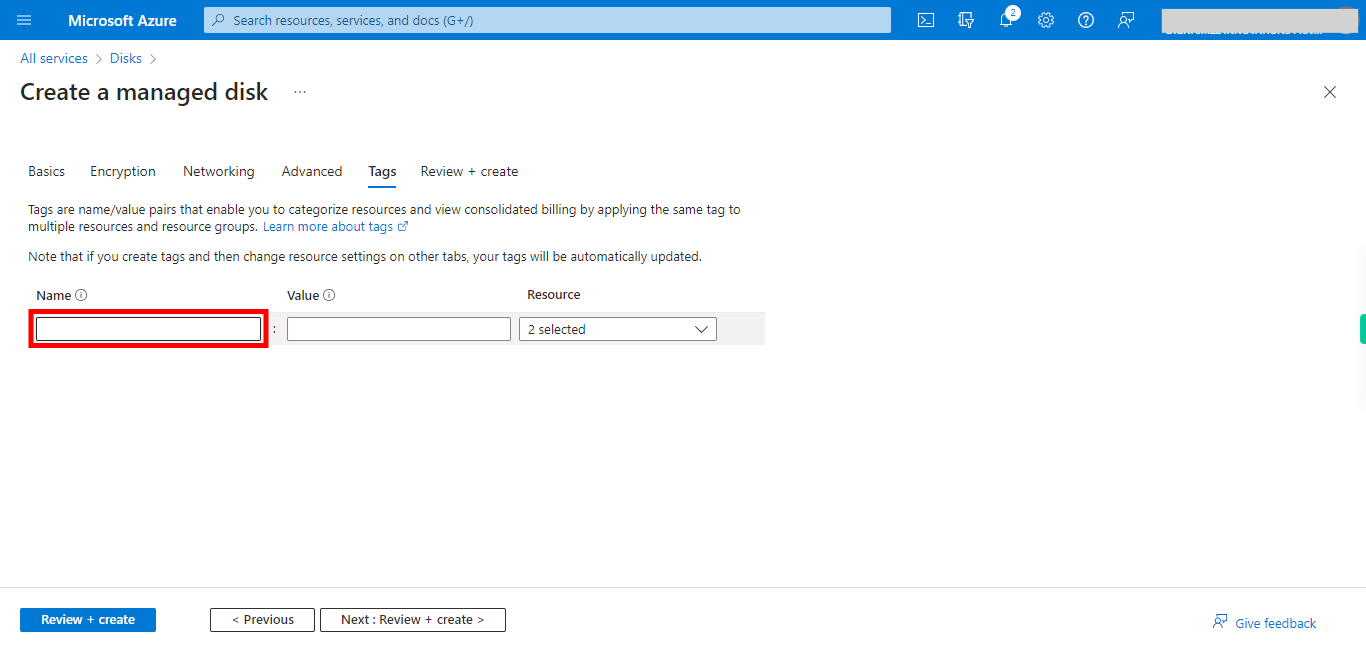
20. Enter suitable Tag(s) as Key-Value(s). Once done, click on the Next button on the Supervity instruction widget.
-
22.
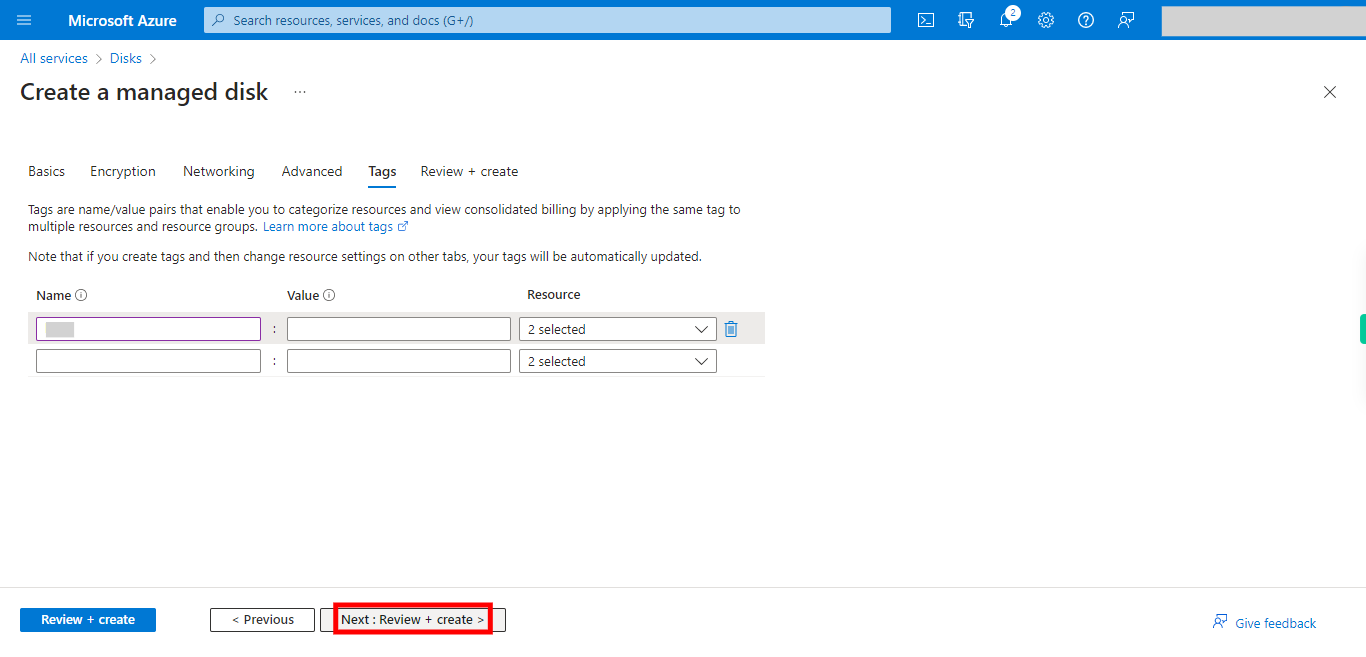
21. Click __Next : Review + create >__.
-
23.
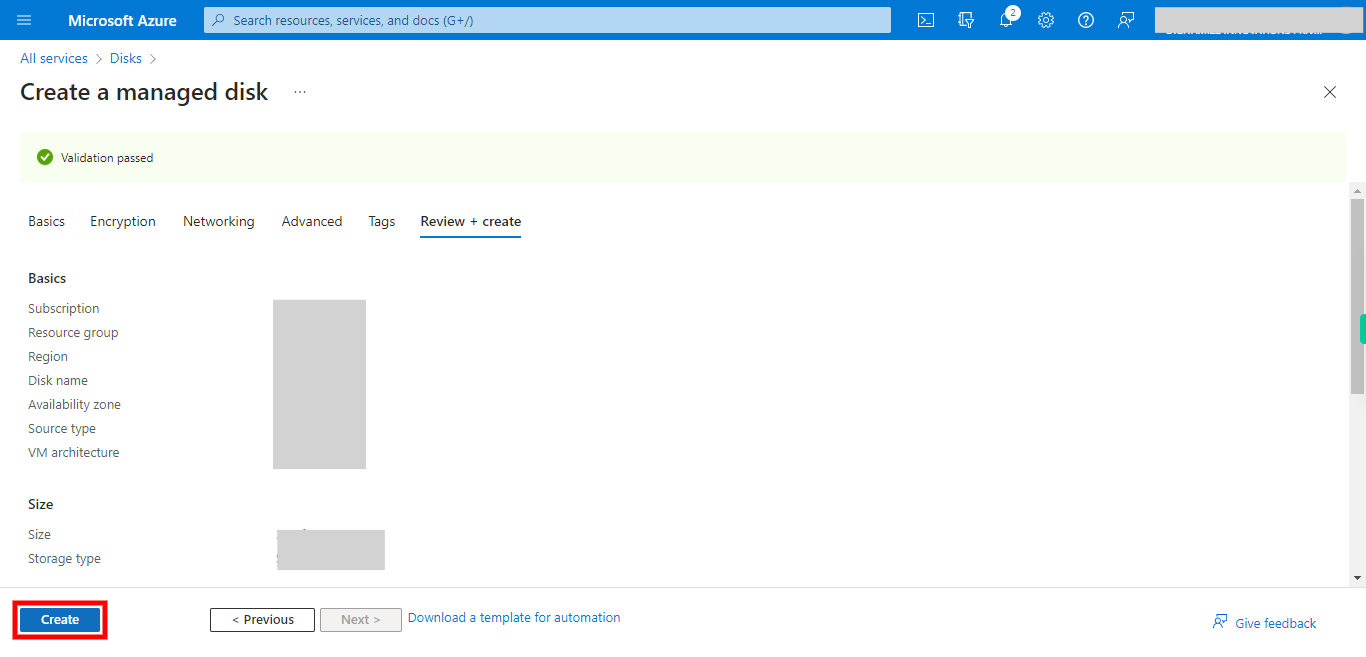
22. Click __Create__ to proceed with creation of Disk resource. The deployment will take sometime to be completed and meanwhile check the status notifications at the top right pane to be aware of deployment being successful or if it has any errors.
-
24.
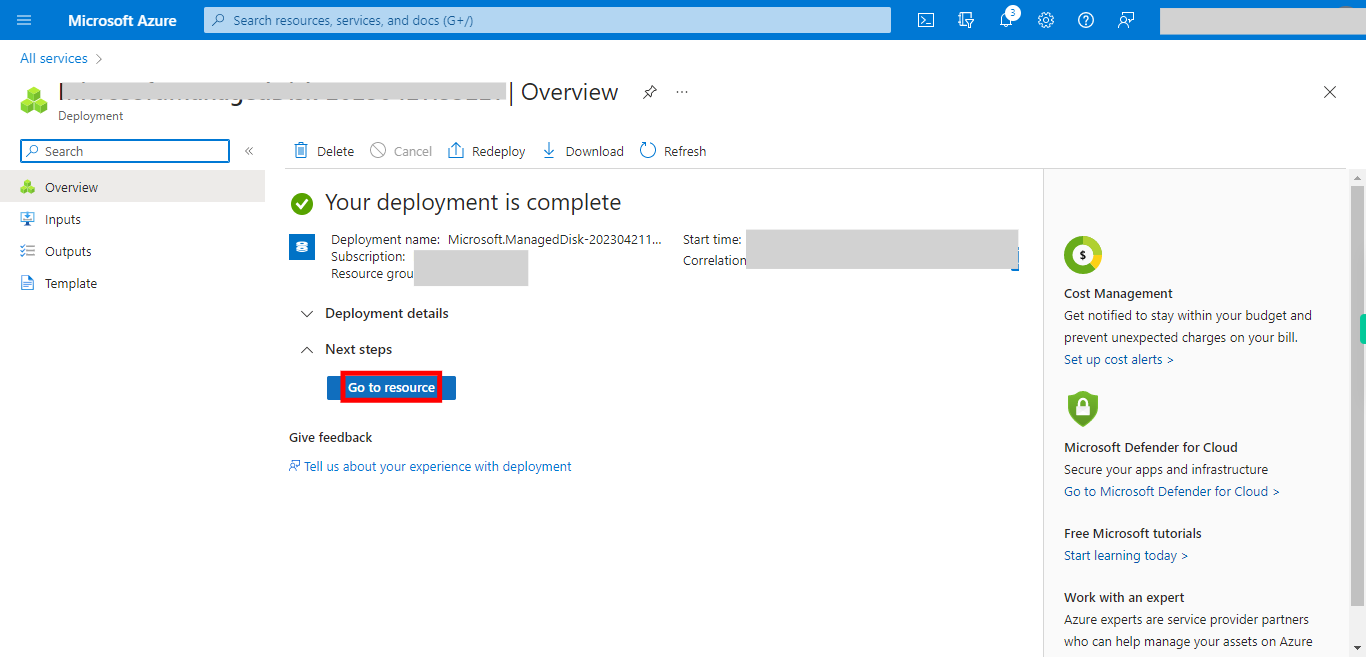
23. Click __Go to resource__.


