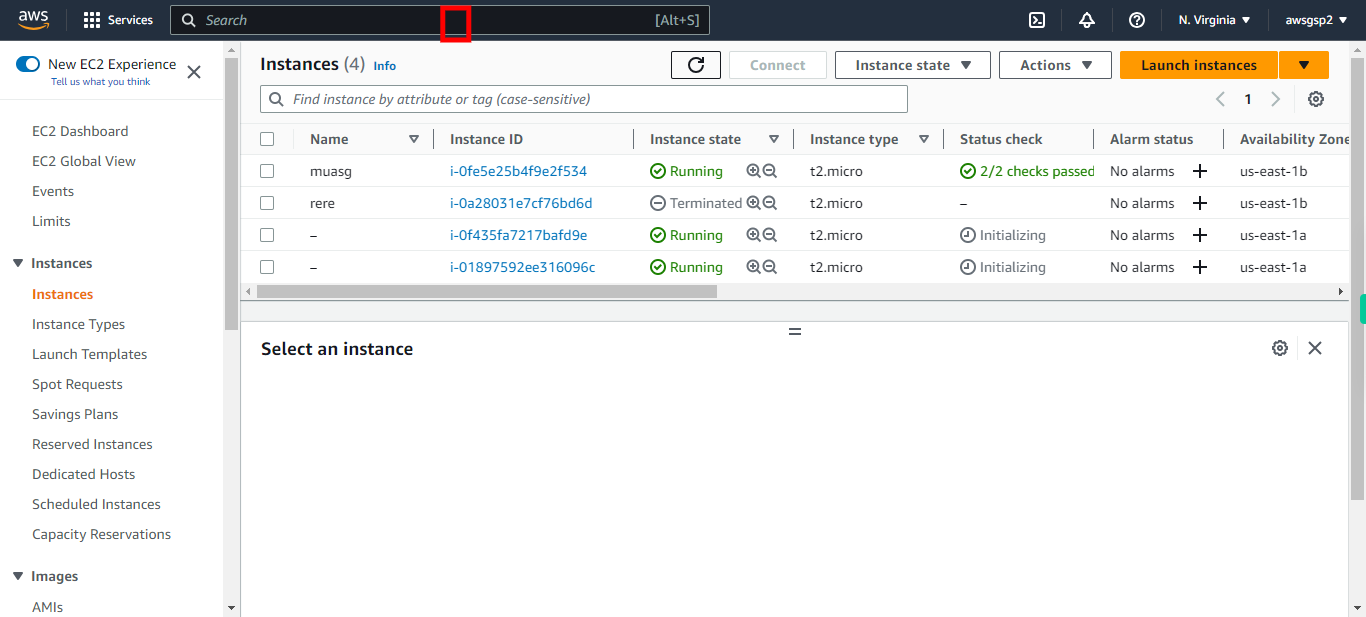
This skill helps to walk you through the configuration of AWS Auto Scaling by step by step assistance. AWS Auto Scaling is a service that helps you ensure that you have the correct number of Amazon EC2 instances available to handle the load for your application. You create collections of EC2 instances, called Auto Scaling groups. AWS Auto Scaling monitors application performance and scales AWS services resource capacity automatically
Prerequisites:
- An active AWS account
- An existing EC2 instance
- Sufficient privileges to configure autoscaling
Note:
Login to AWS Management Console beforehand.
-
1.
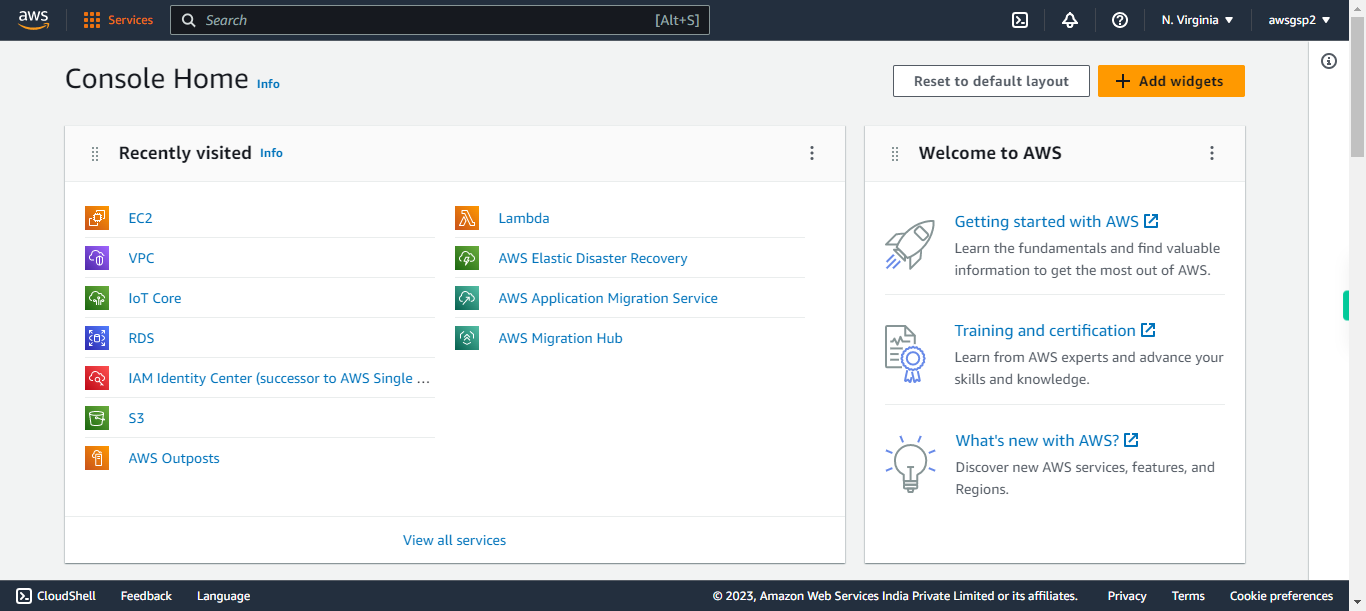
open AWS Management Console
-
2.
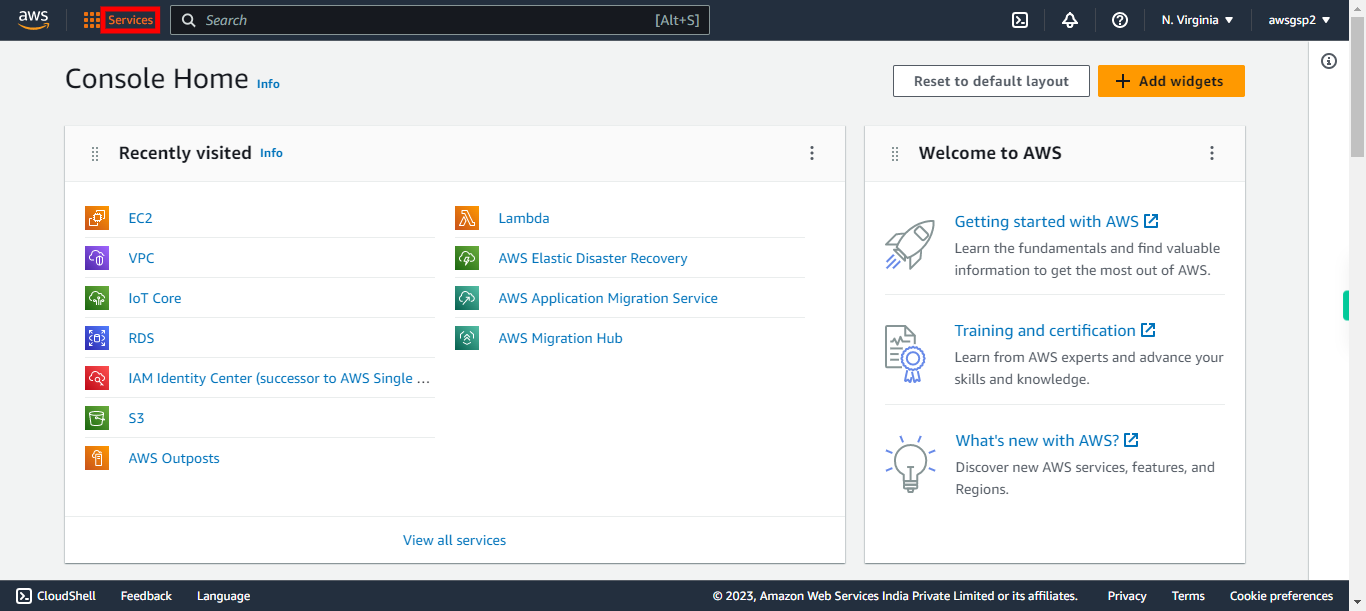
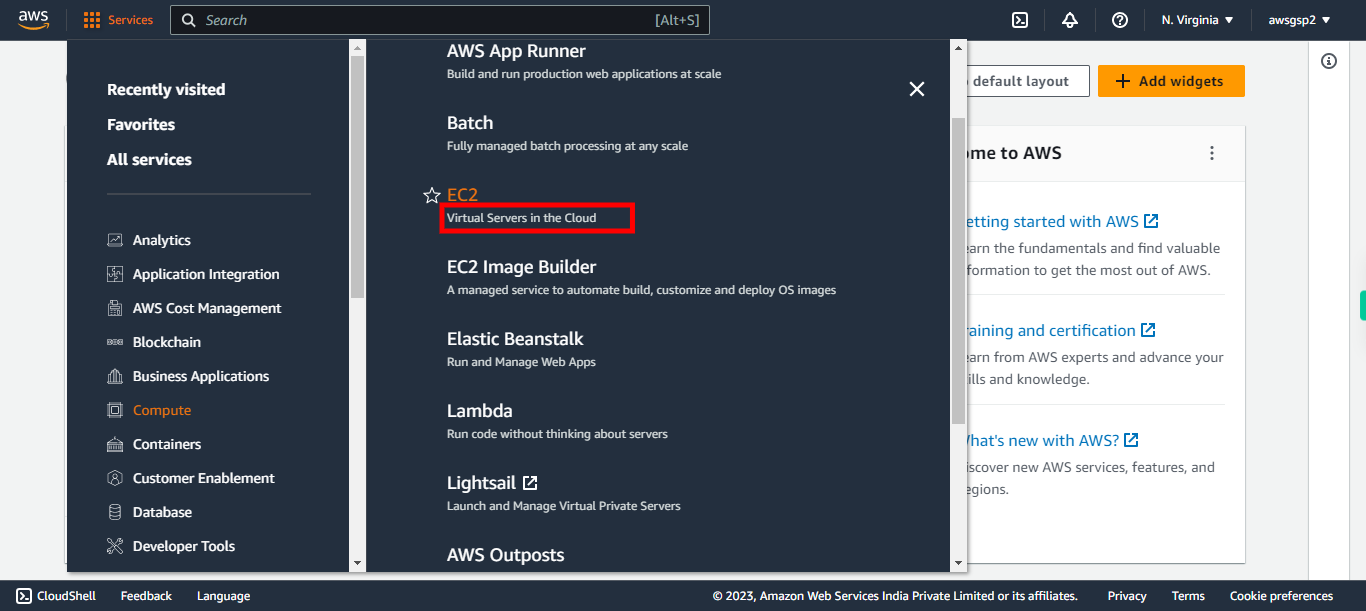
Click Services
-
3.
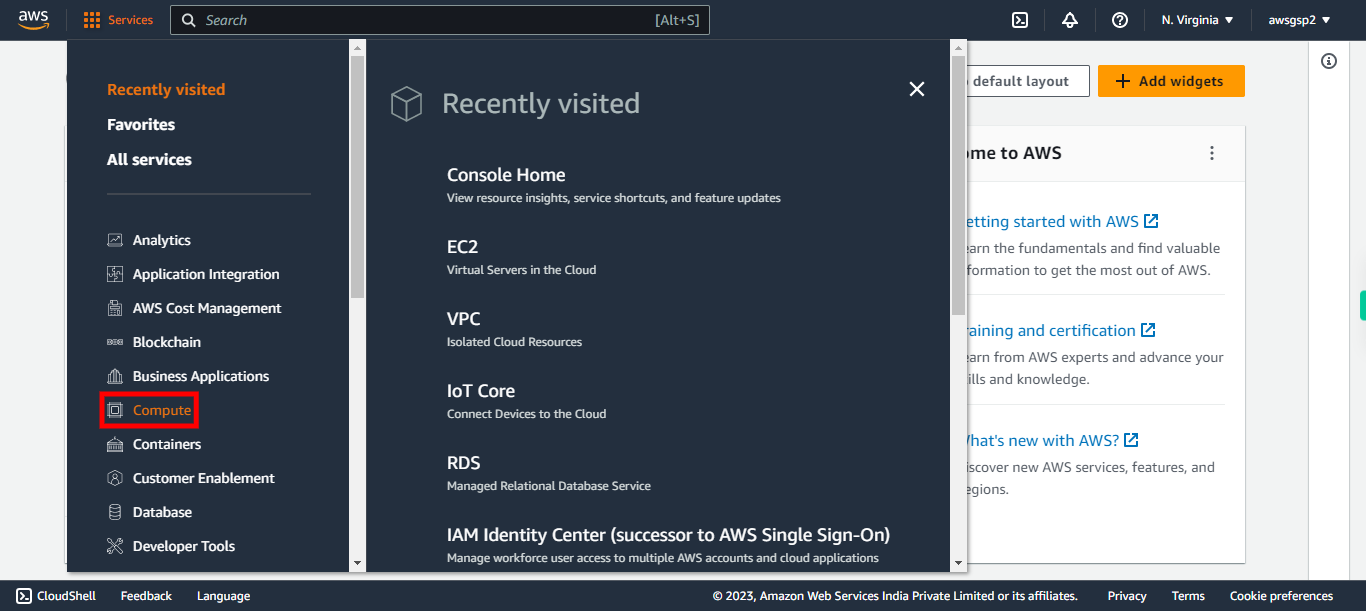
Click Compute
-
4.
Click EC2
-
5.
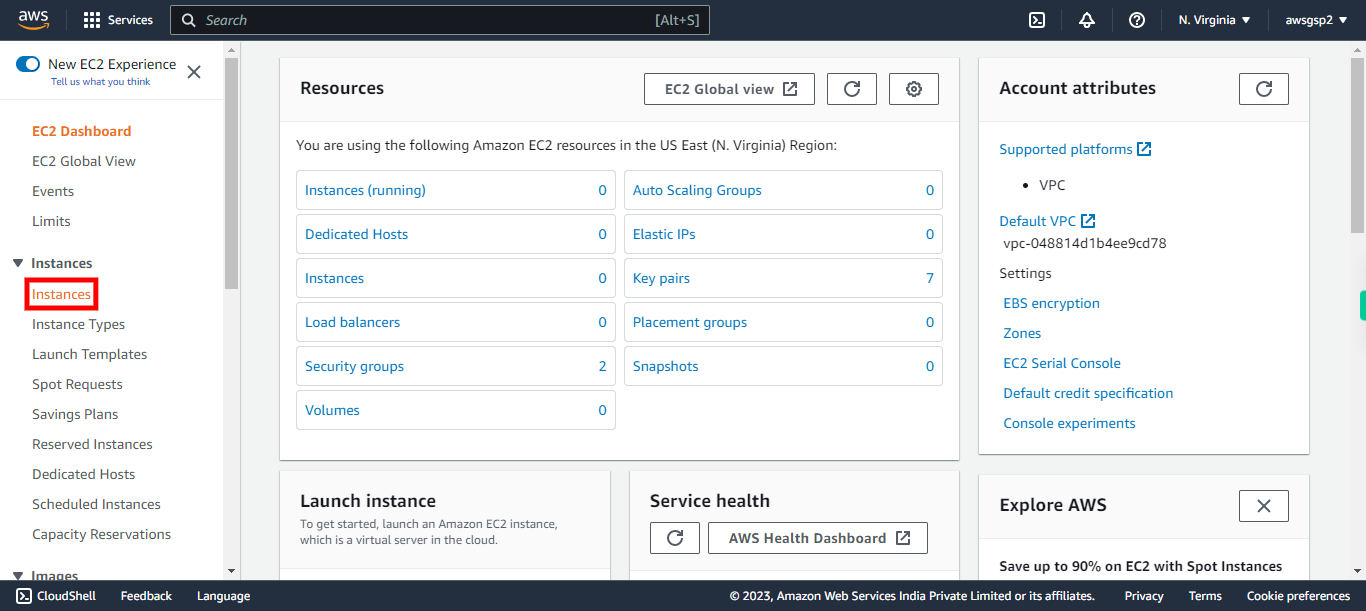
Click Instances
-
6.
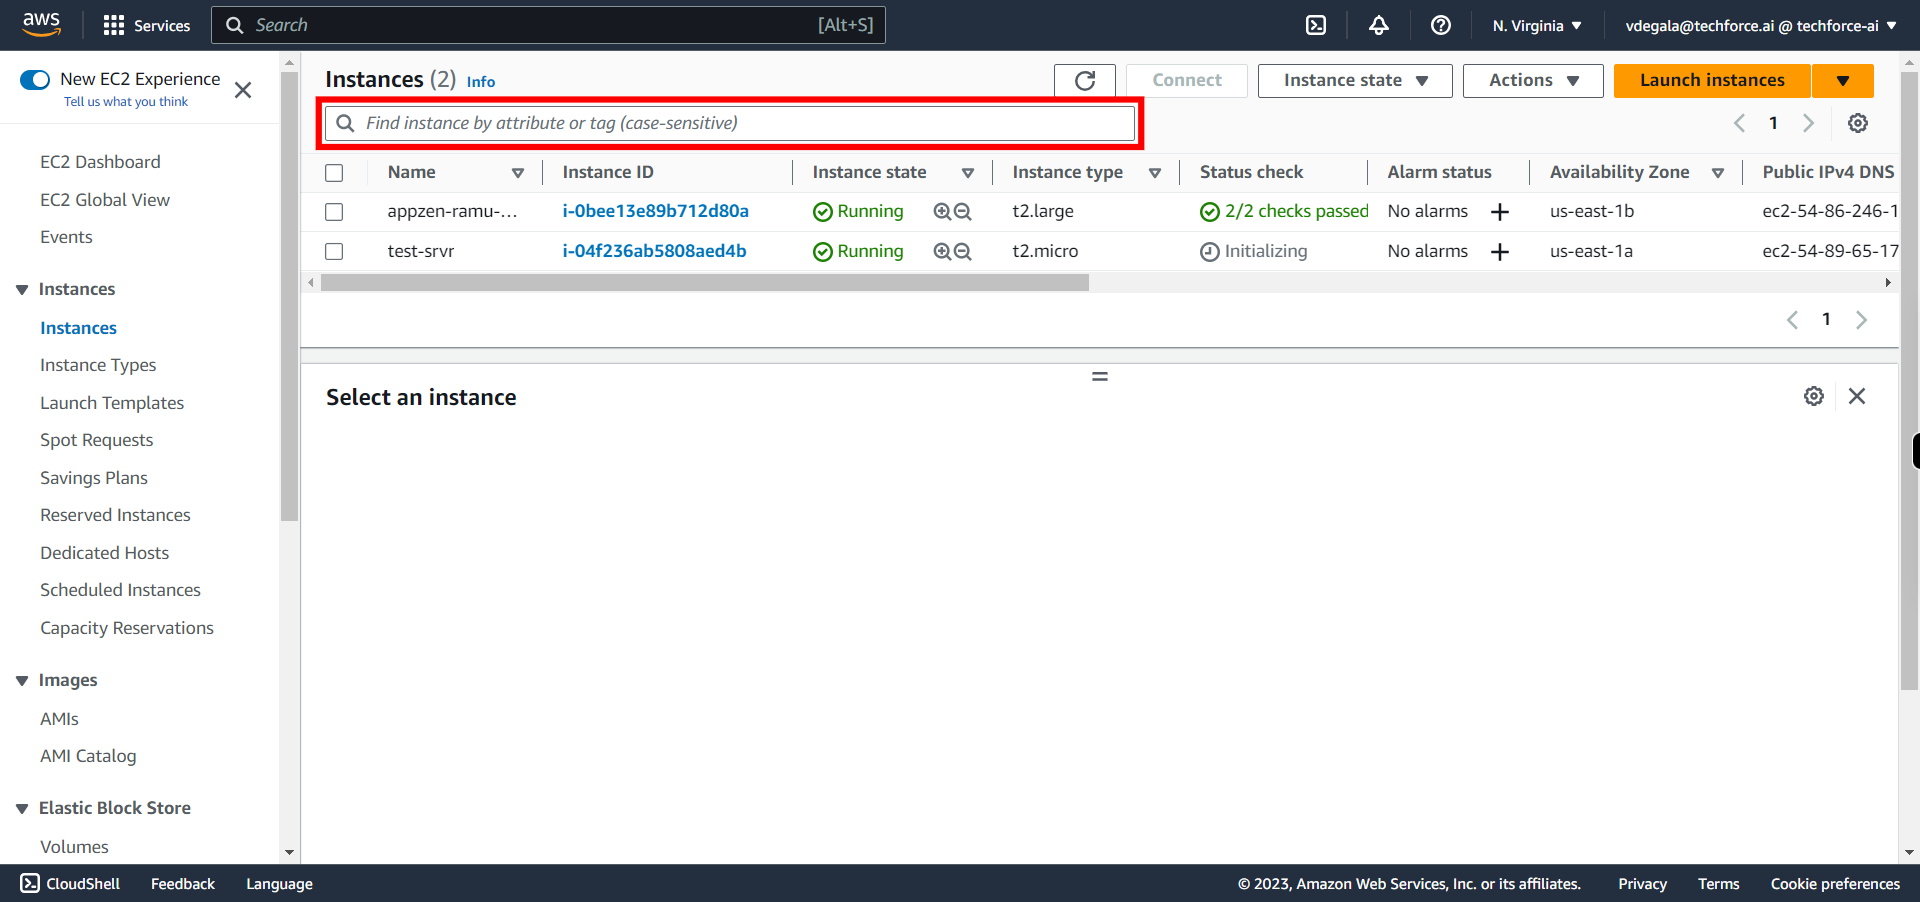
Click and search for the desired instance. Click Next in the Supervity Instruction Widget.
-
7.
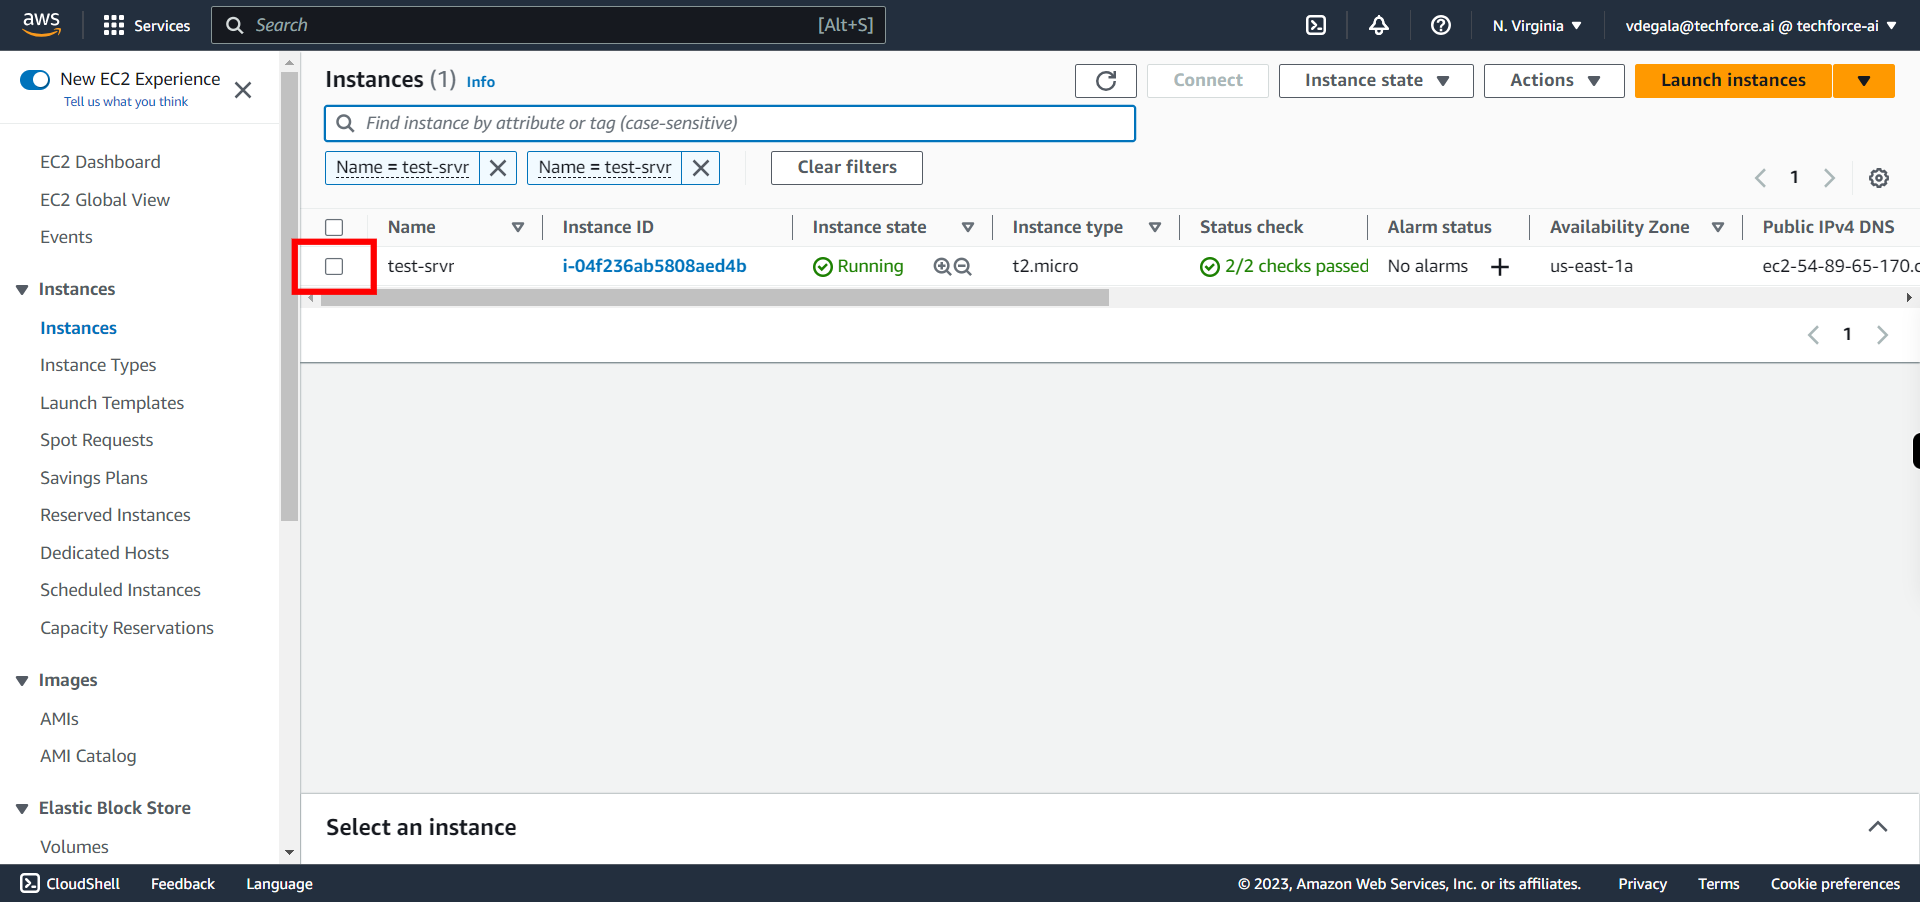
Select your instance for which you have to create an image.
-
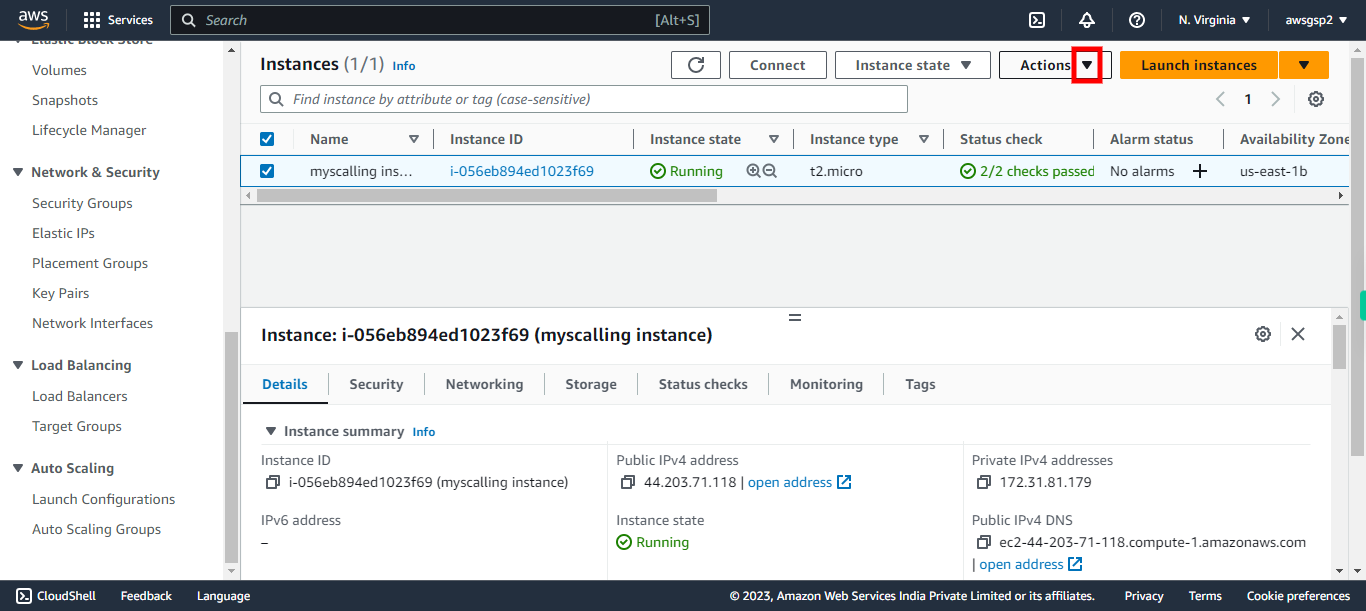
8.
Go to Action.
-
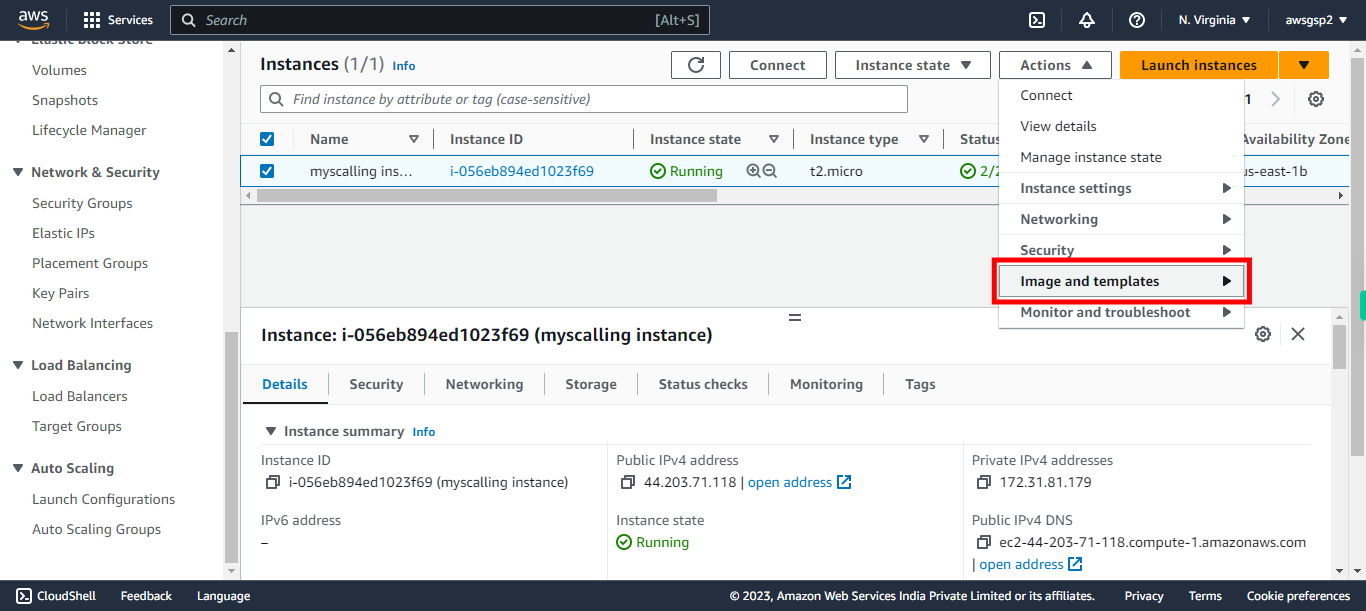
9.
Click "Image and templates"
-
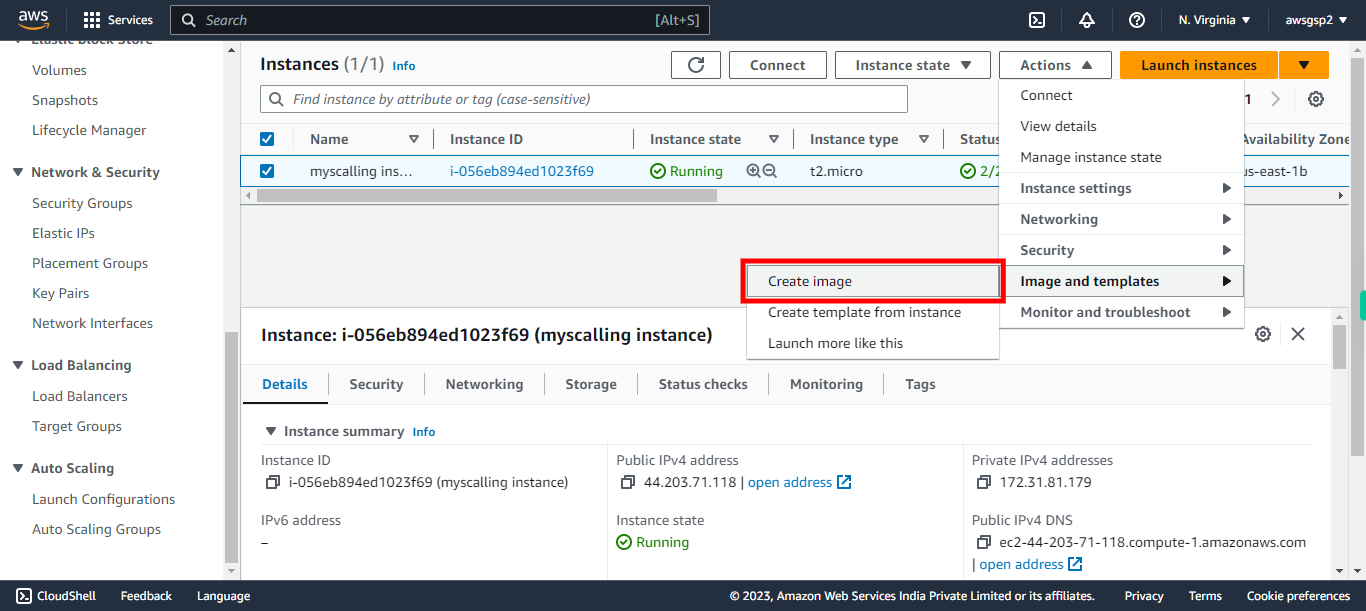
10.
Click "Create image"
-
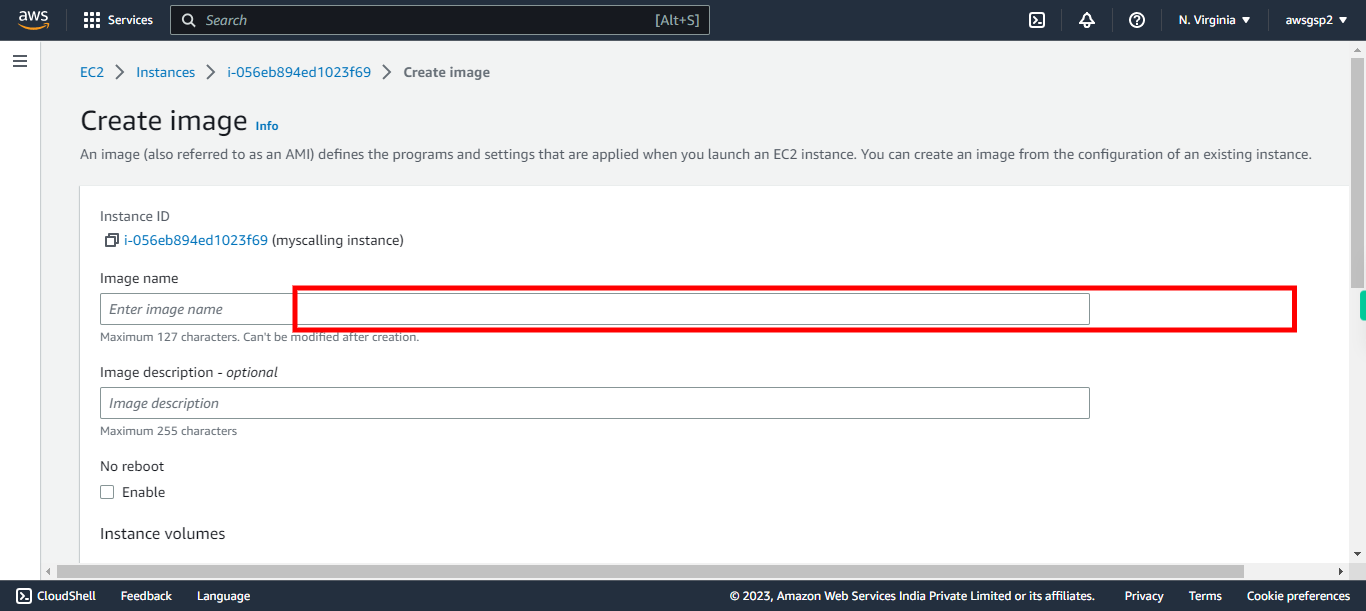
11.
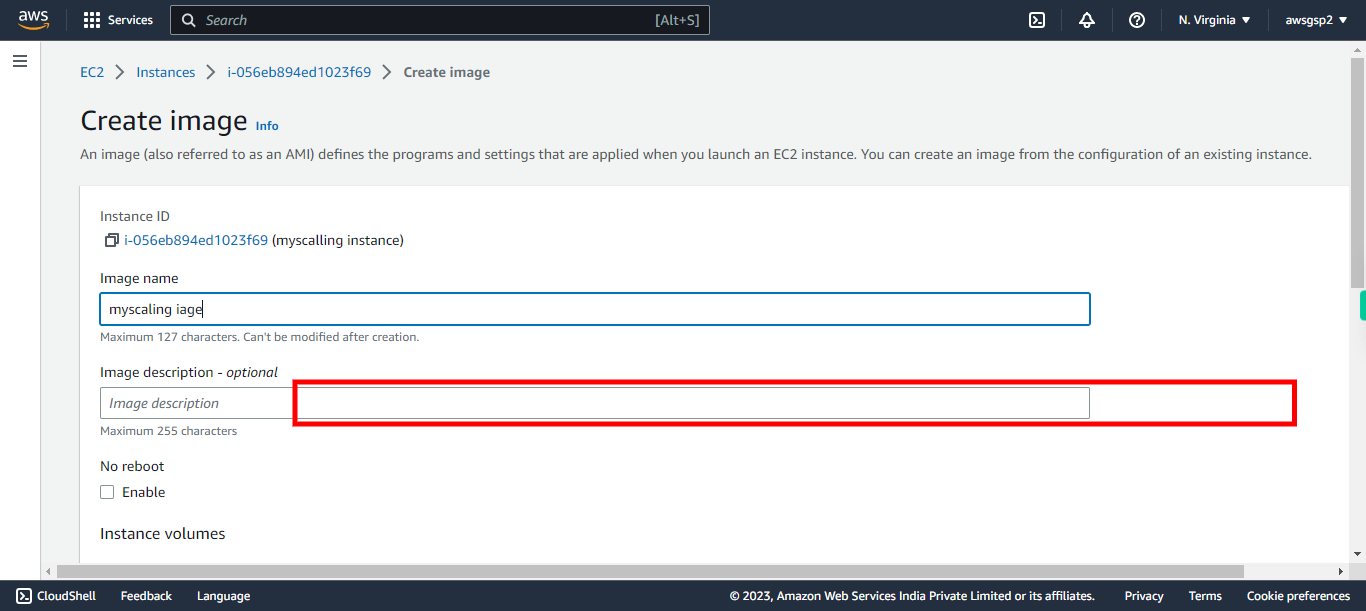
Enter a name for the image and click Next in the Supervity Instruction Widget.
-
12.
Add Image description (optional). Click Next in the Supervity Instruction Widget.
-
13.
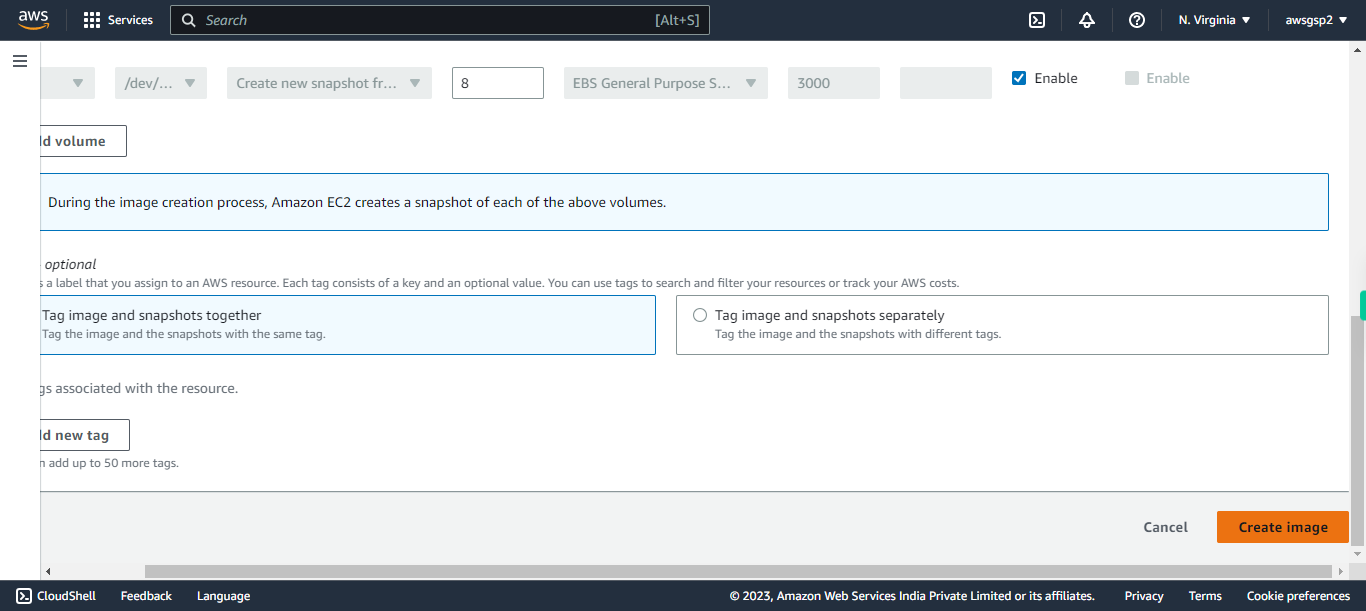
Click on "Create image"
-
14.
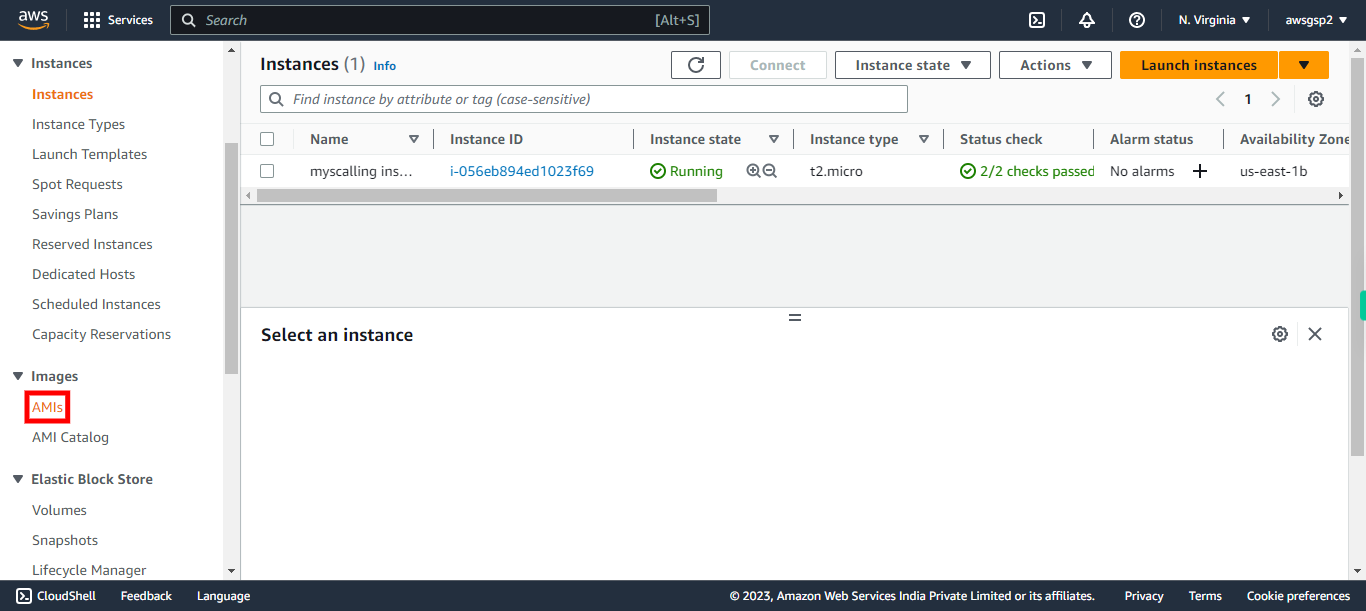
Click AMIs
-
15.
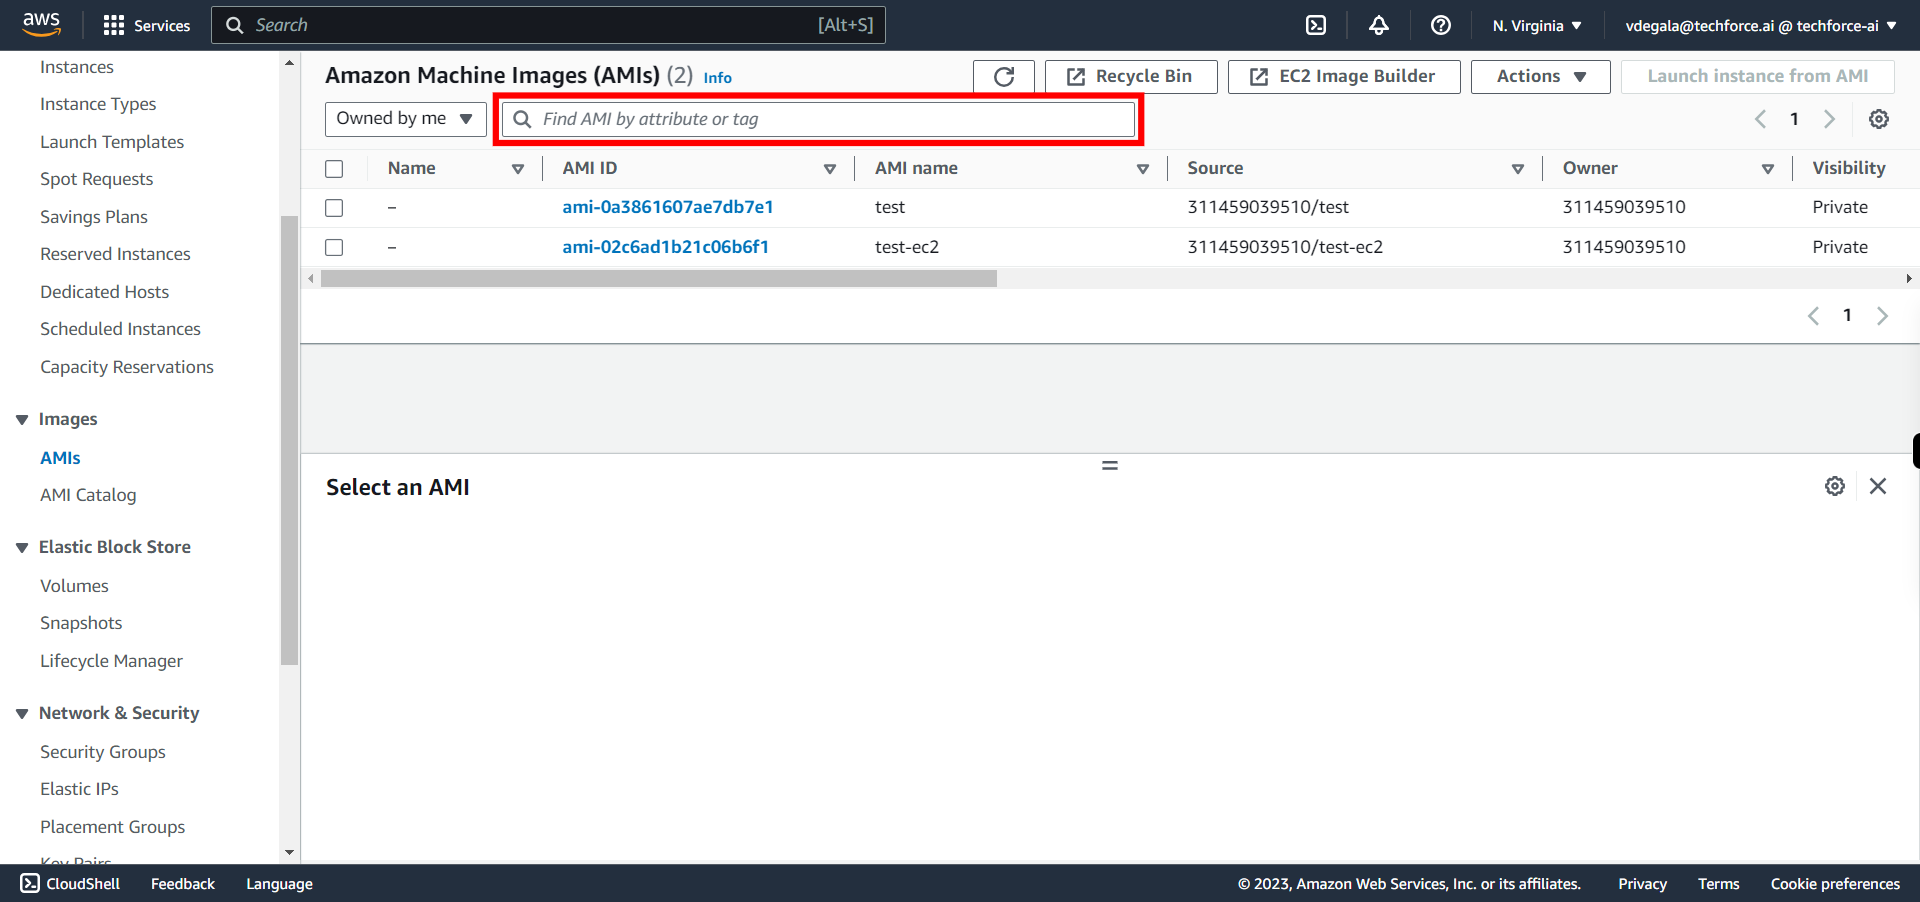
Click in Search box and filter for the image just created in the previous steps. Click Next in the Supervity Instruction Widget.
-
16.
Select the image and verify that your AMI Image created and ready. Keep refreshing at the top to check the latest status. Click Next in the Supervity Instruction Widget.
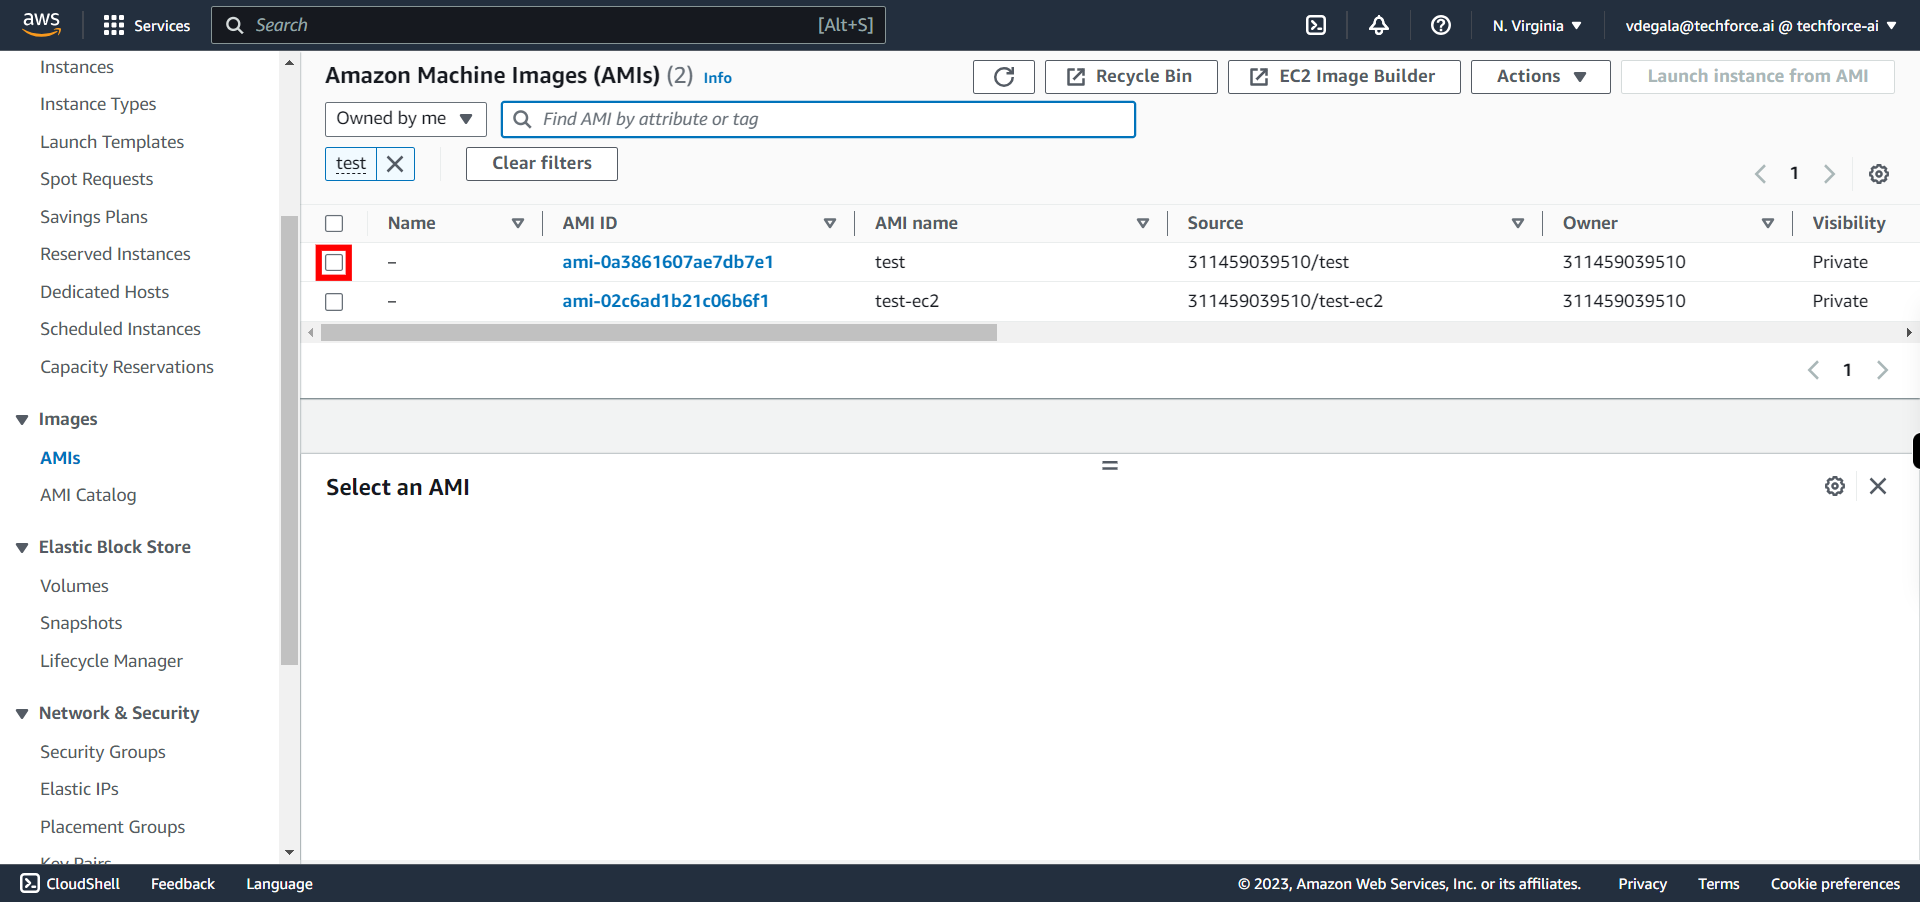
-
17.
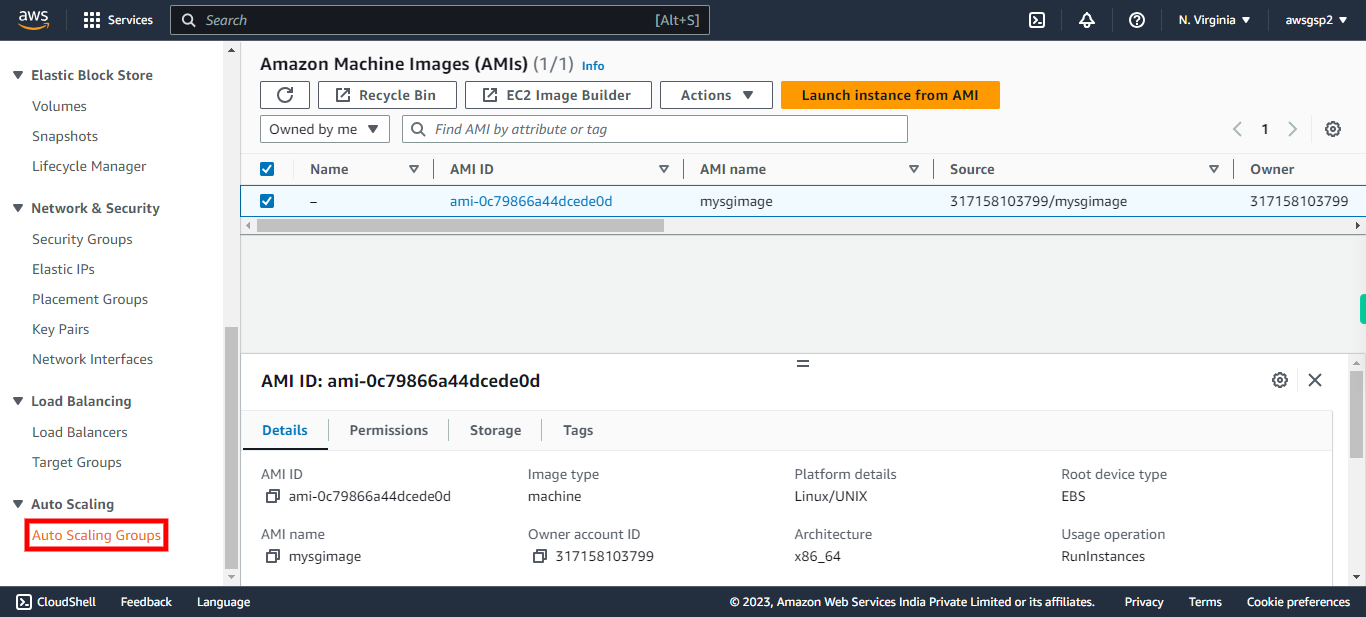
Now lets create Auto Scaling Group based on AMI Image created. Click Auto Scaling Groups
-
18.
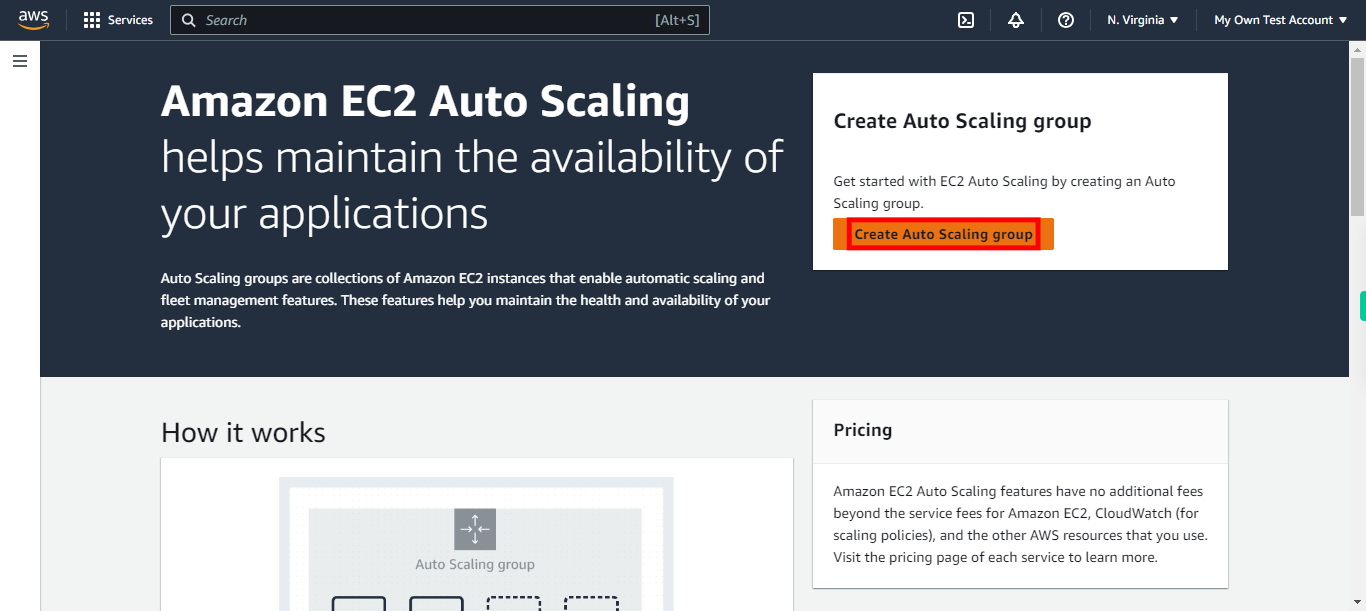
Click "Create Auto Scaling group"
-
19.
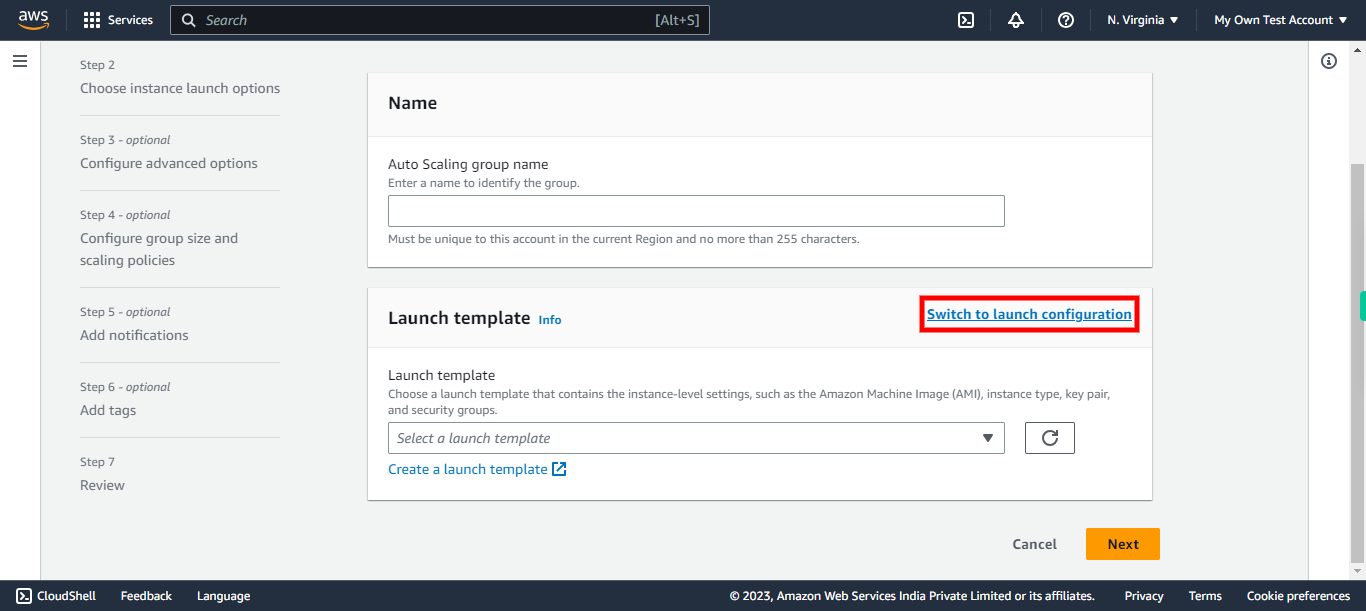
Click "Switch to launch configuration"
-
20.
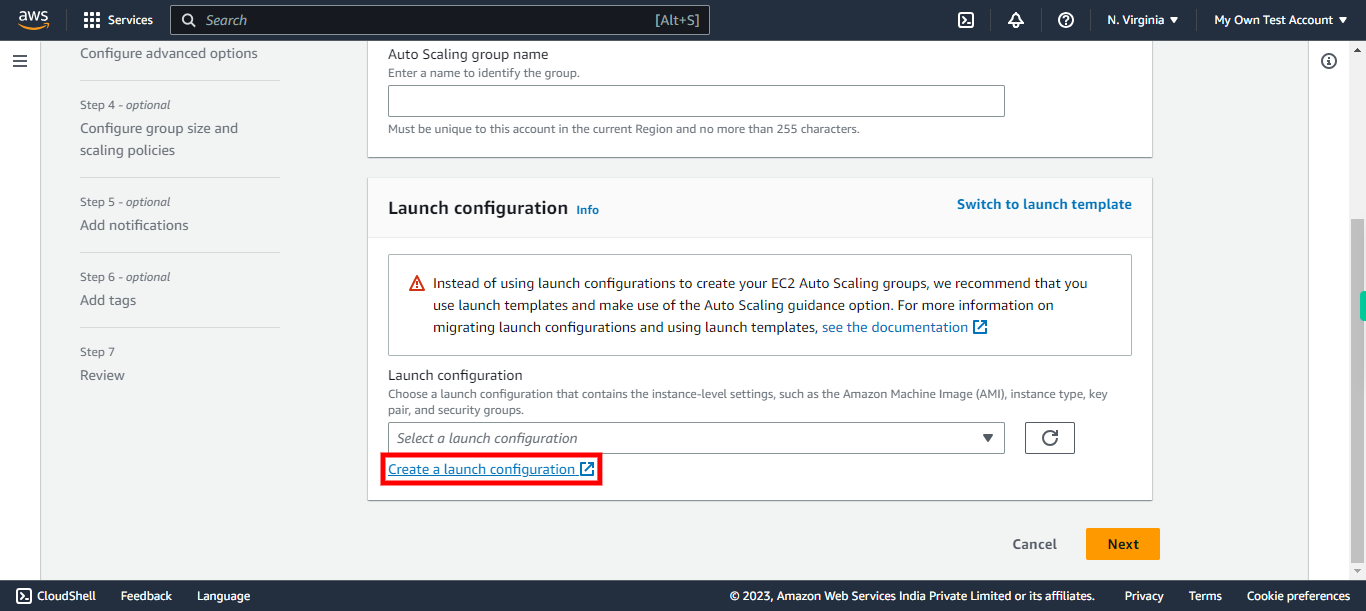
Click "Create a launch configuration". This action will open another window
-
21.
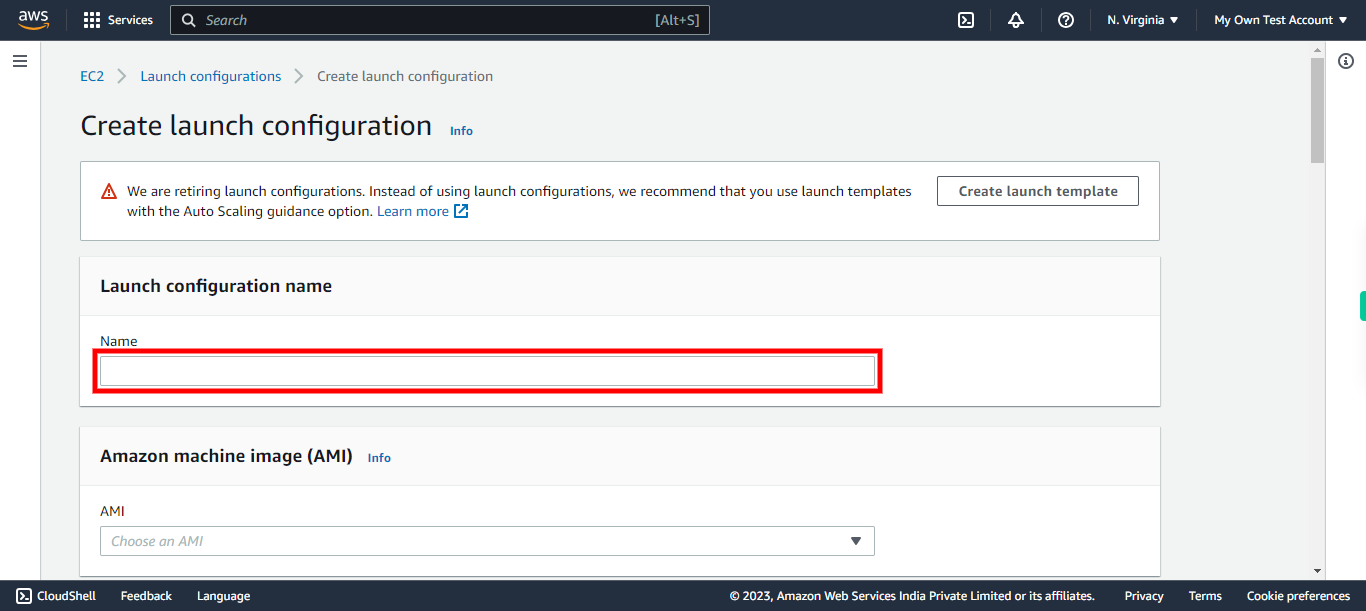
Give a Name to the launch configuration. Once done, click Next on supervity instruction widget.
-
22.
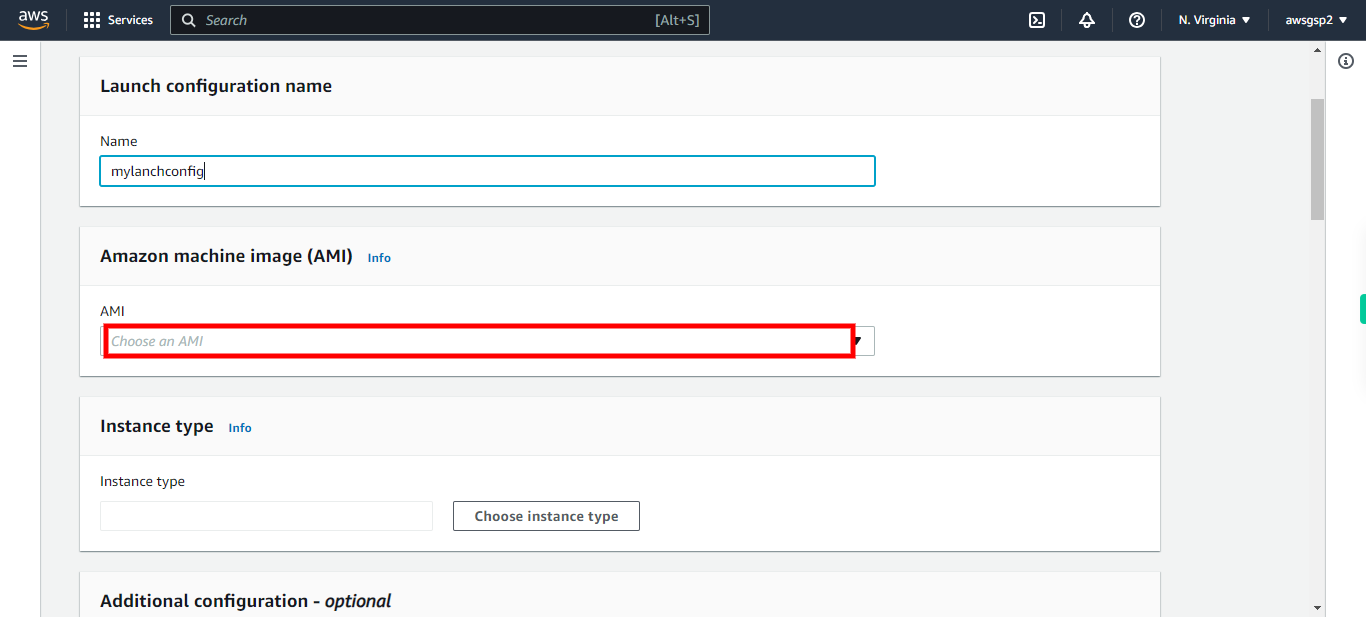
Choose your AMI image created. Once done, click Next on supervity instruction widget.
-
23.
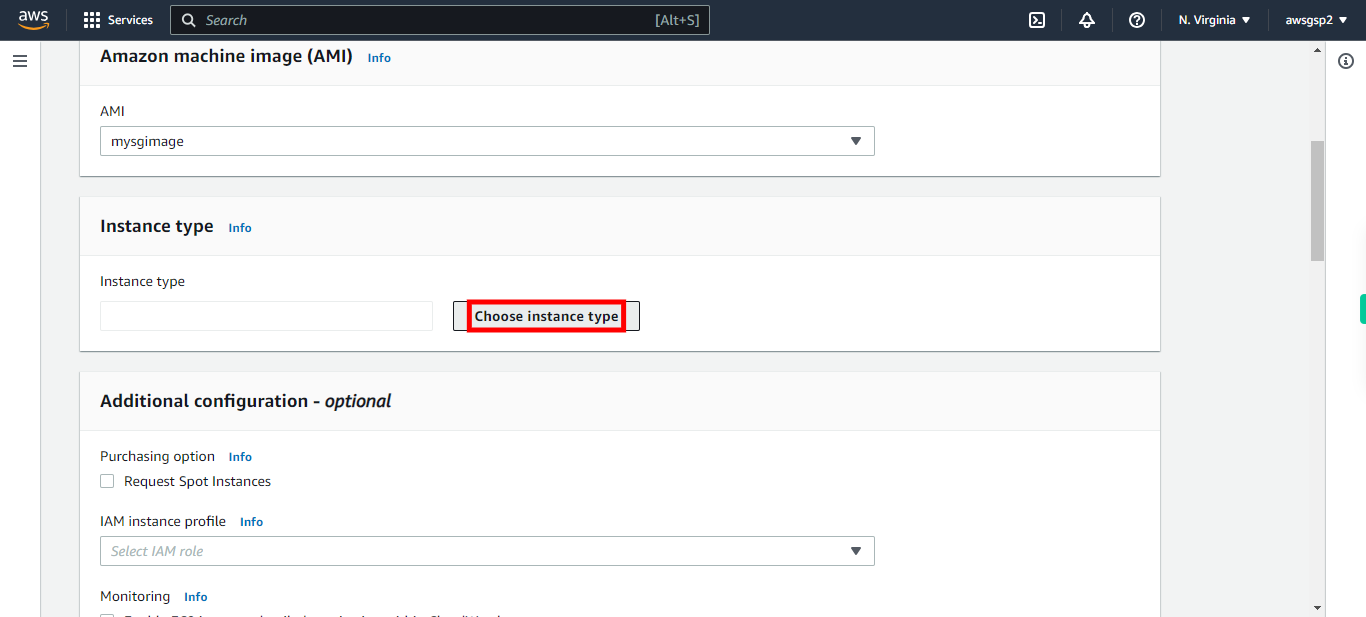
Choose instance type
-
24.
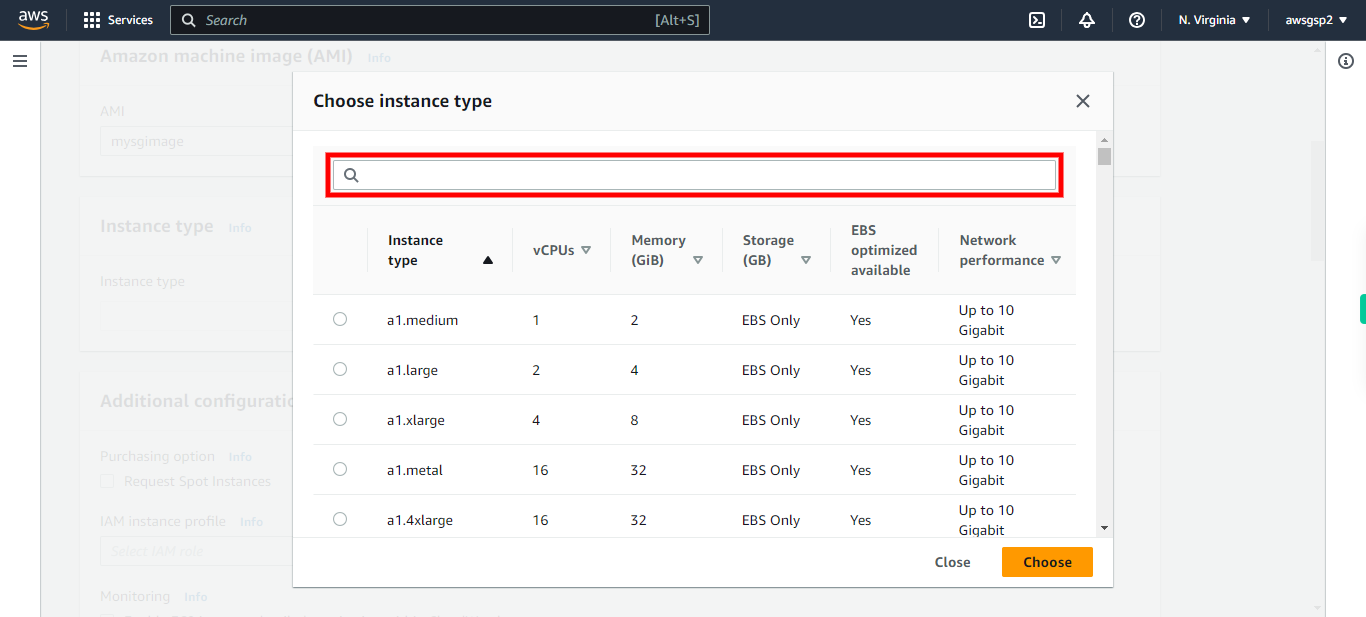
Click and search for t2.micro. Once done, click Next on supervity instruction widget.
-
25.
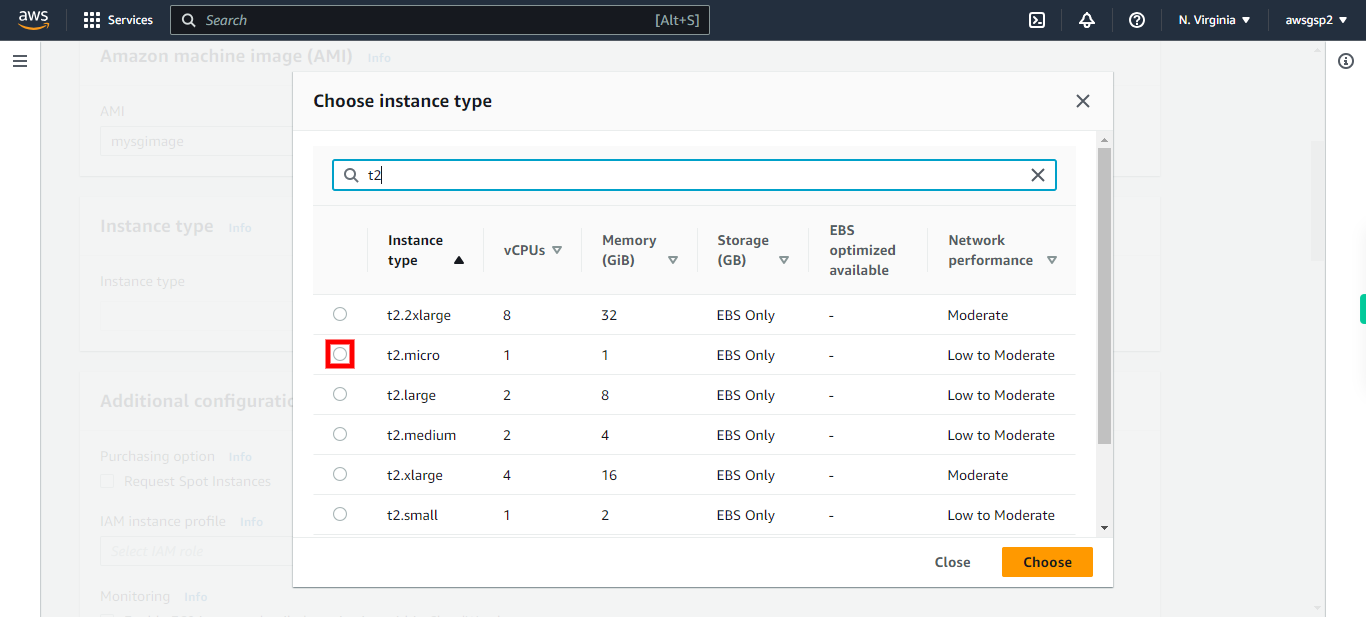
Select t2.micro instance. Once done, click Next on supervity instruction widget.
-
26.
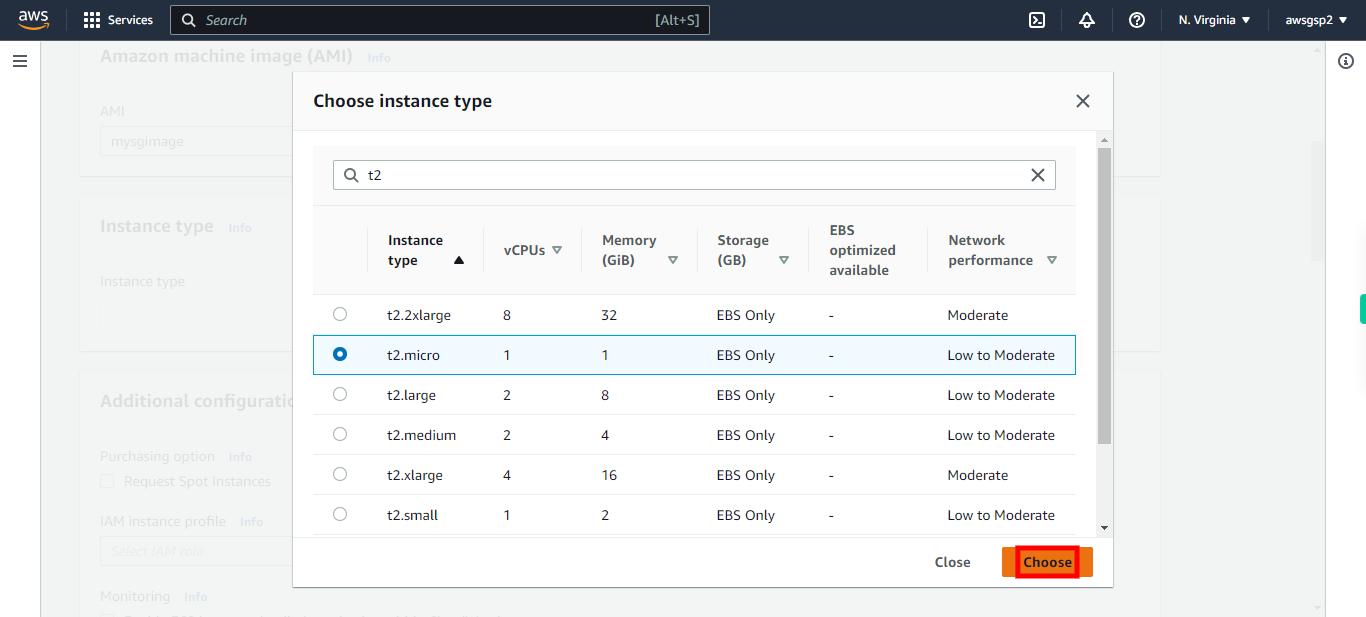
Click "Choose"
-
27.
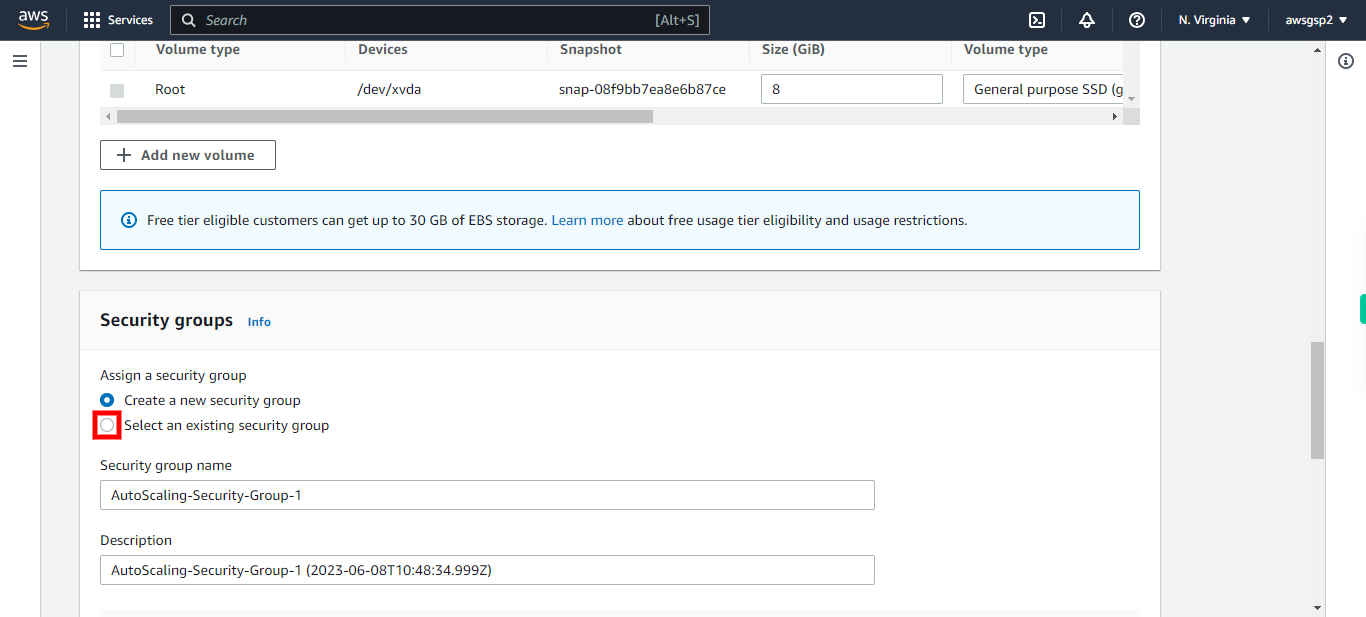
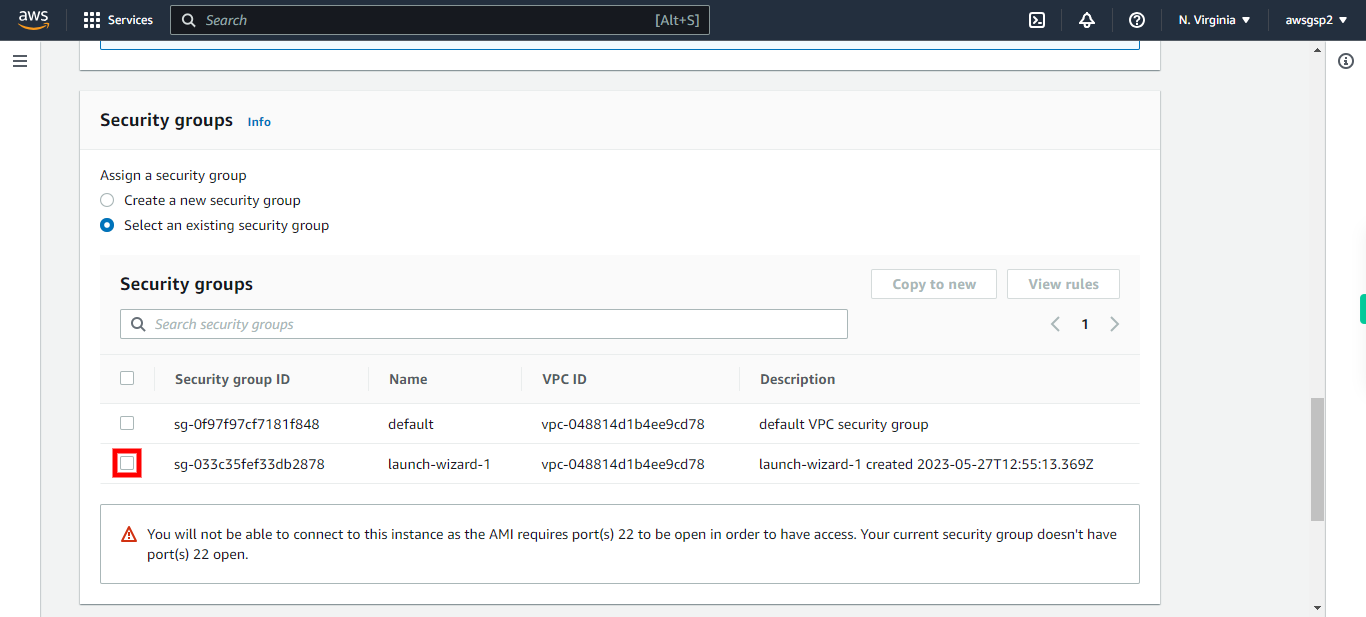
choose the option "Select an existing security group". Once done, click Next on supervity instruction widget.
-
28.
Select the security group. Once done, click Next on supervity instruction widget.
-
29.
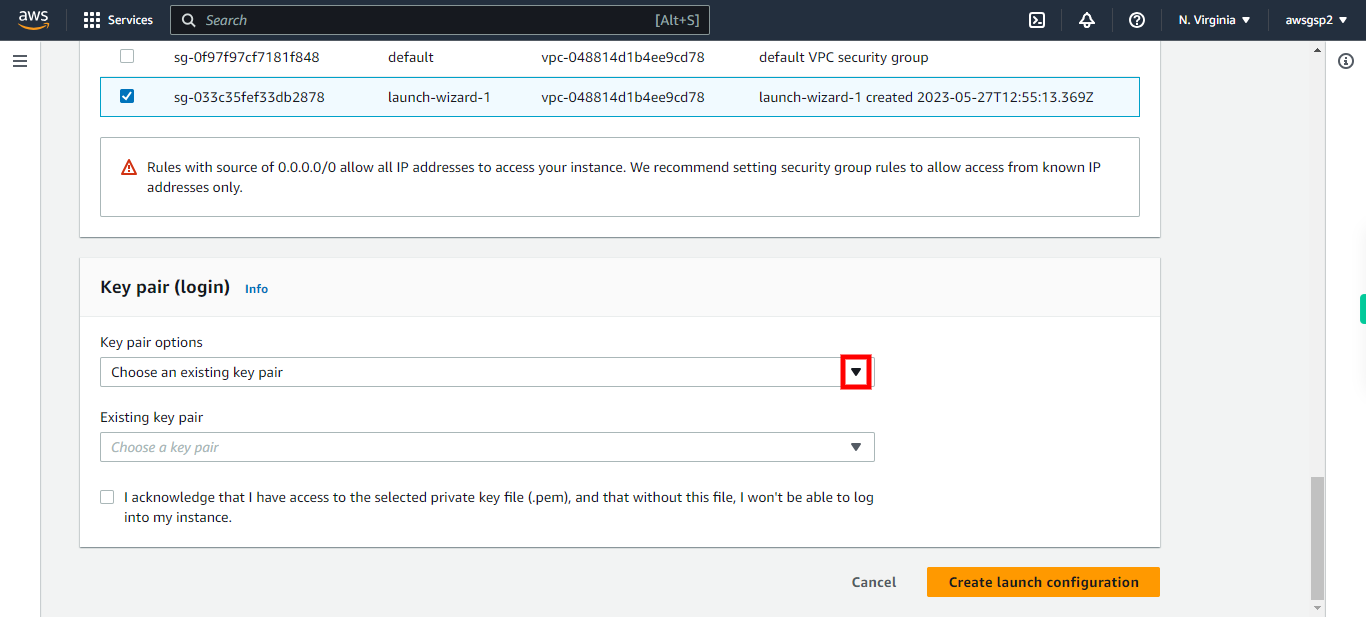
In Key Pair options Select "choose existing keypair". Once done, click Next on supervity instruction widget.
-
30.
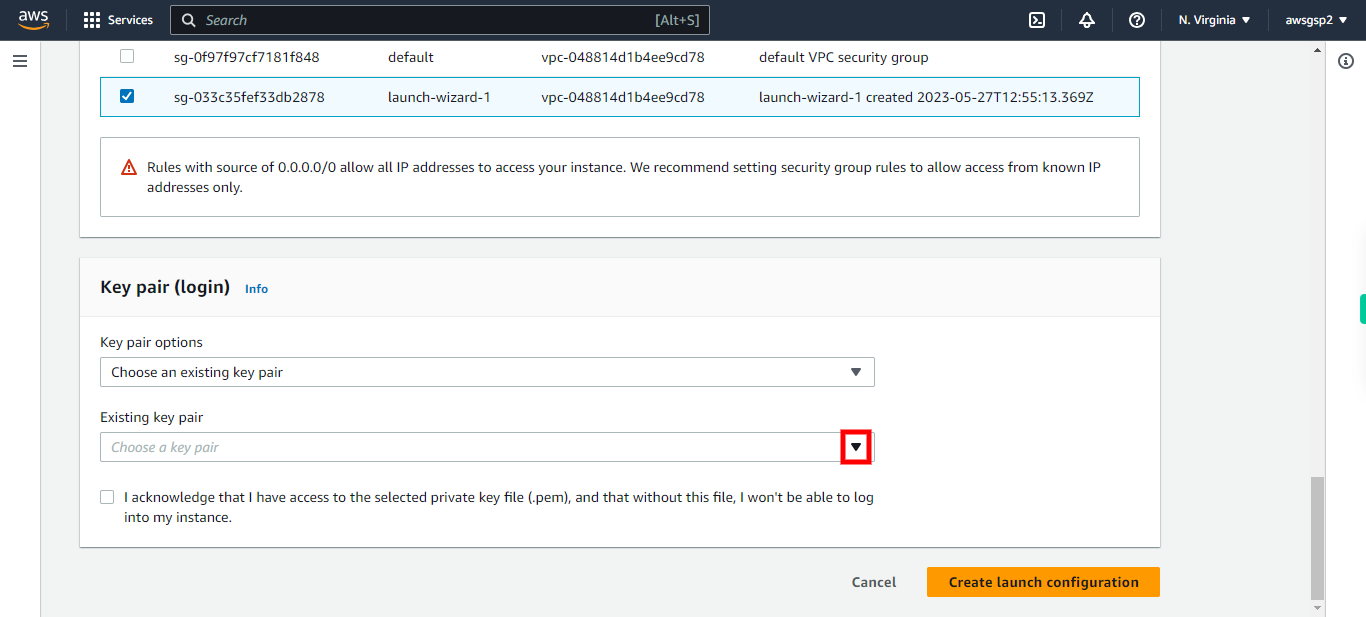
Select the existing keypair. Once done, click Next on supervity instruction widget.
-
31.
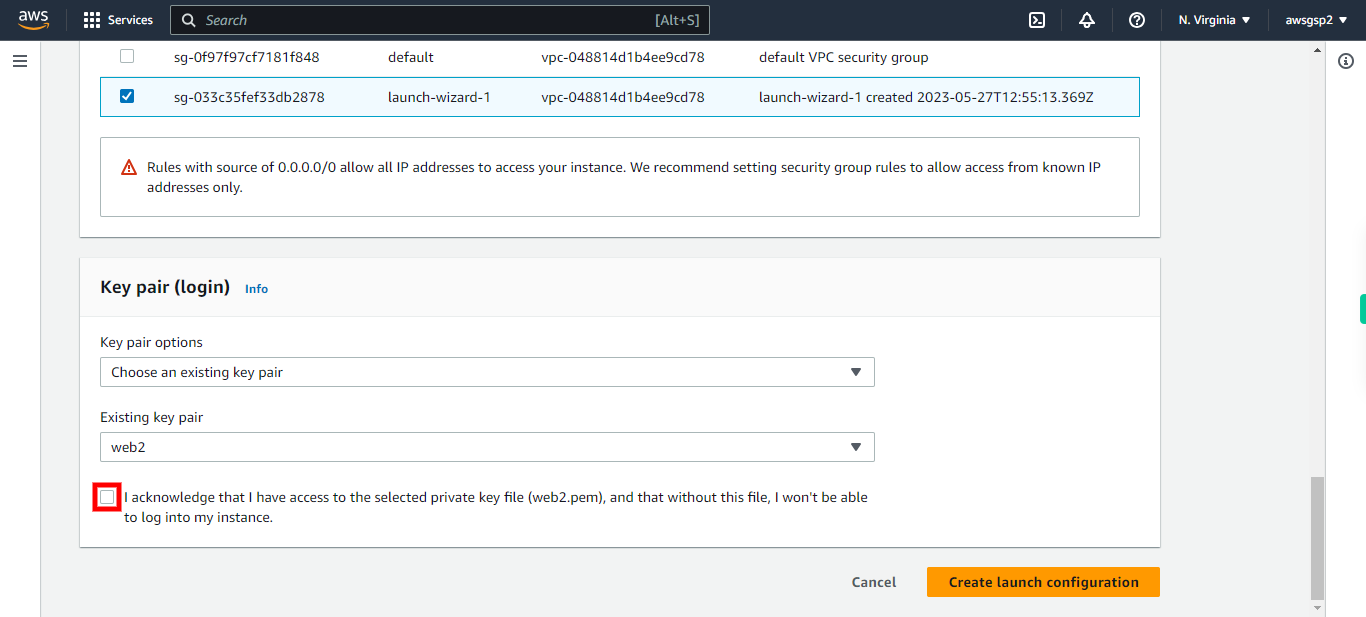
Select " i acknowledge " check box. Once done, click Next on supervity instruction widget.
-
32.
Click Create launch configuration
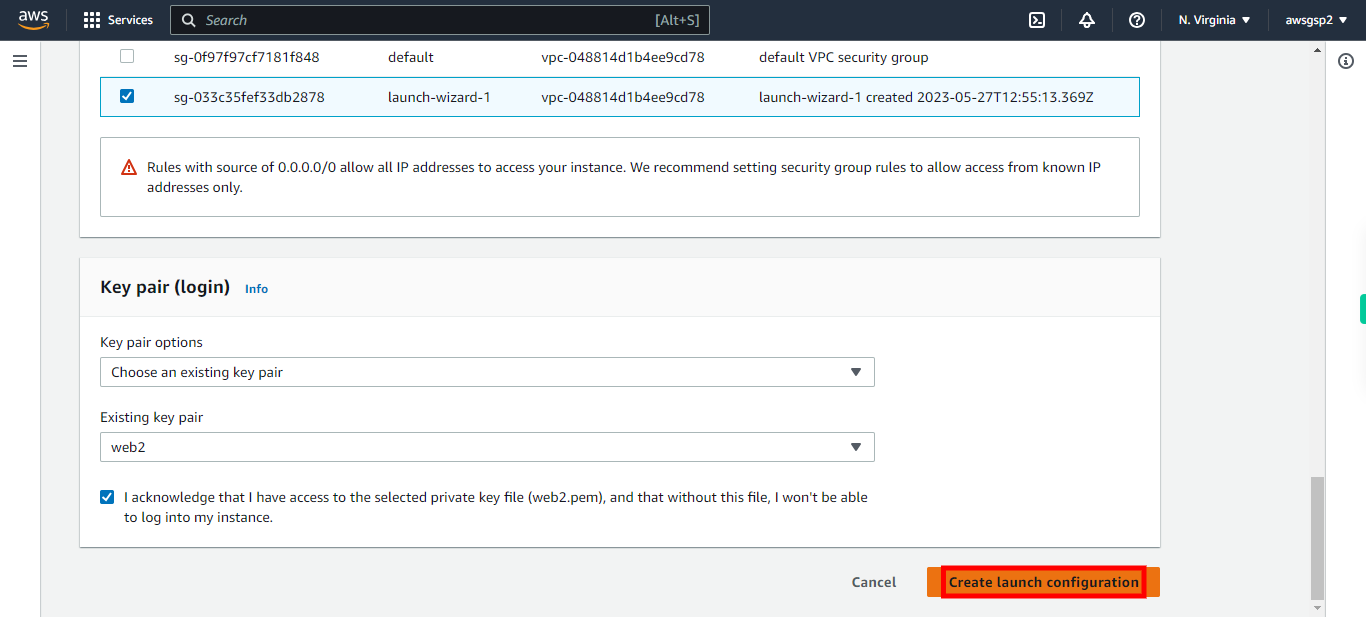
-
33.
Click View launch configurations
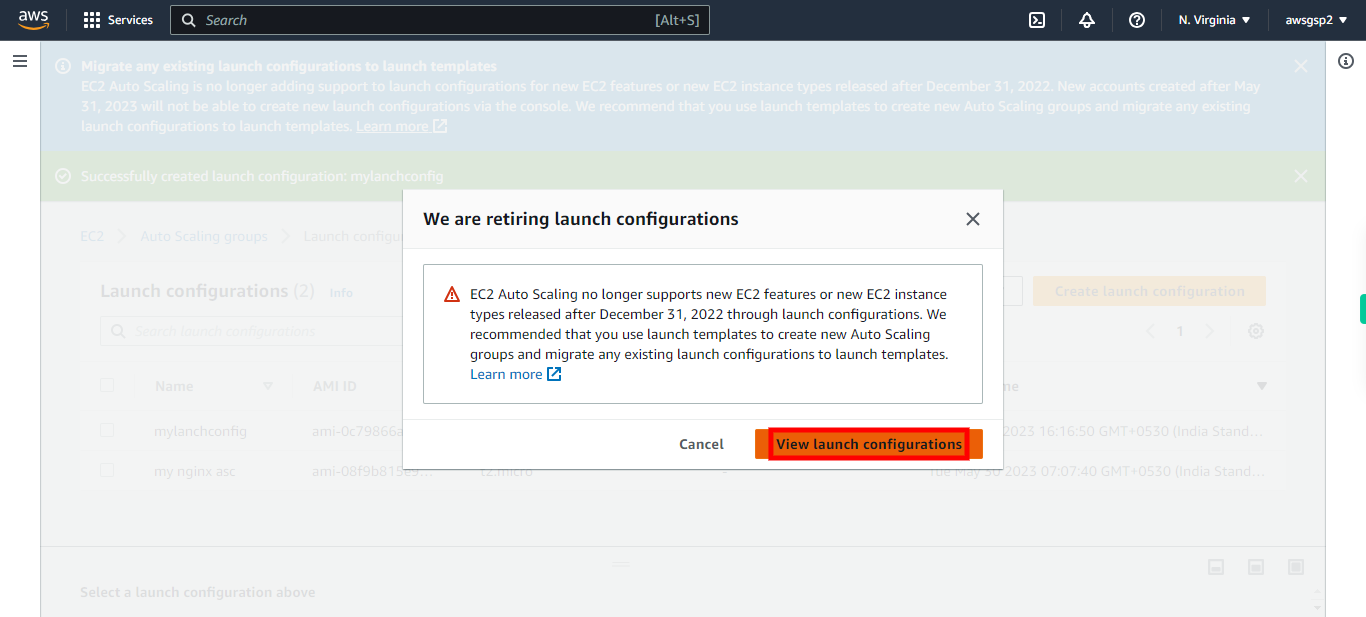
-
34.
Click Auto Scaling groups
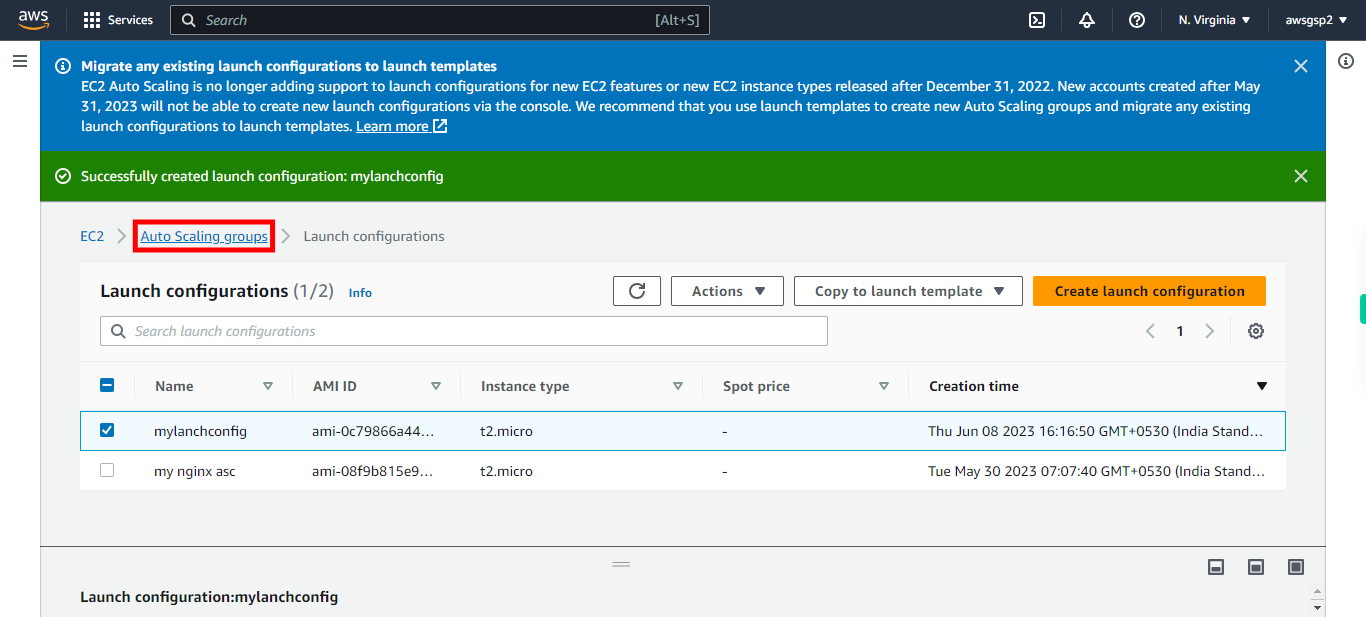
-
35.
Click Create Auto Scaling group
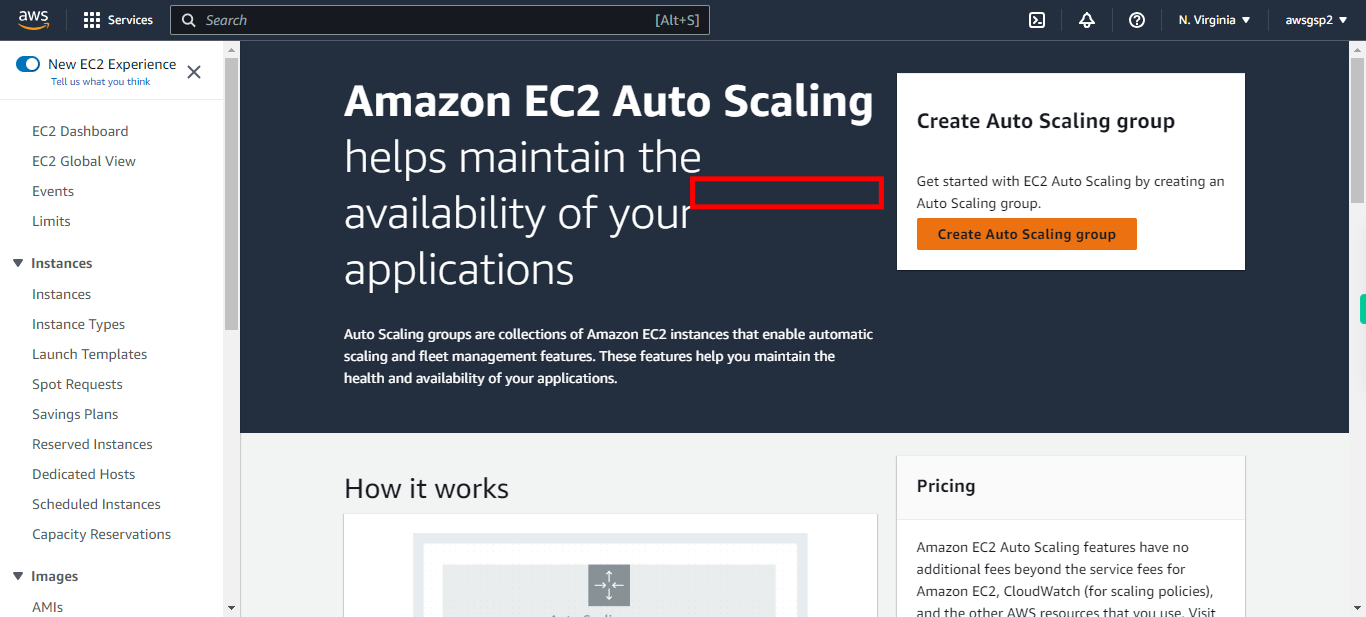
-
36.
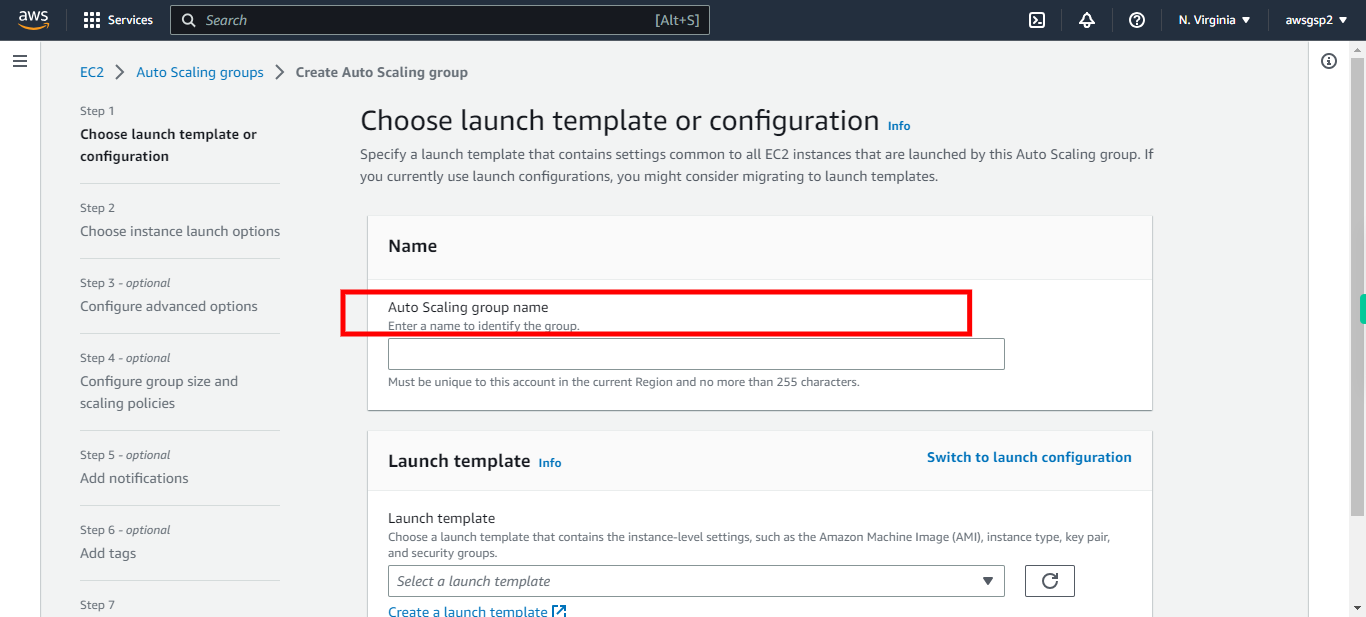
Type Auto Scaling group name. Once done, click Next on supervity instruction widget.
-
37.
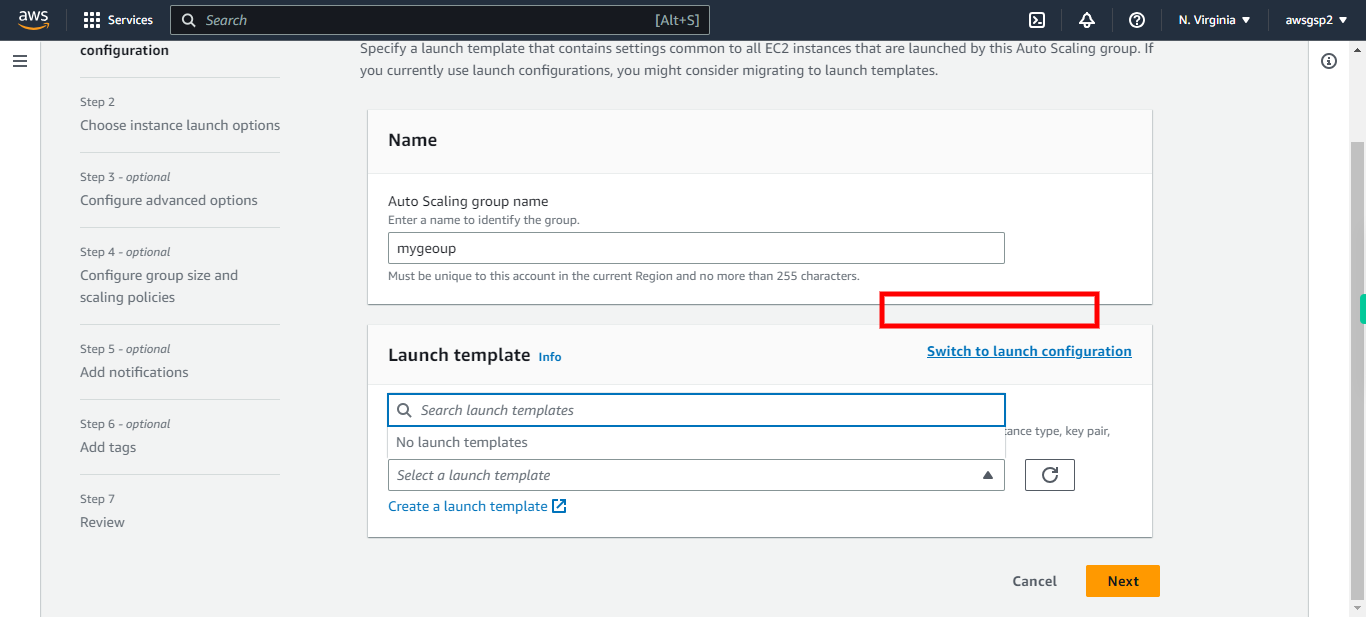
Click "Switch to launch configuration"
-
38.
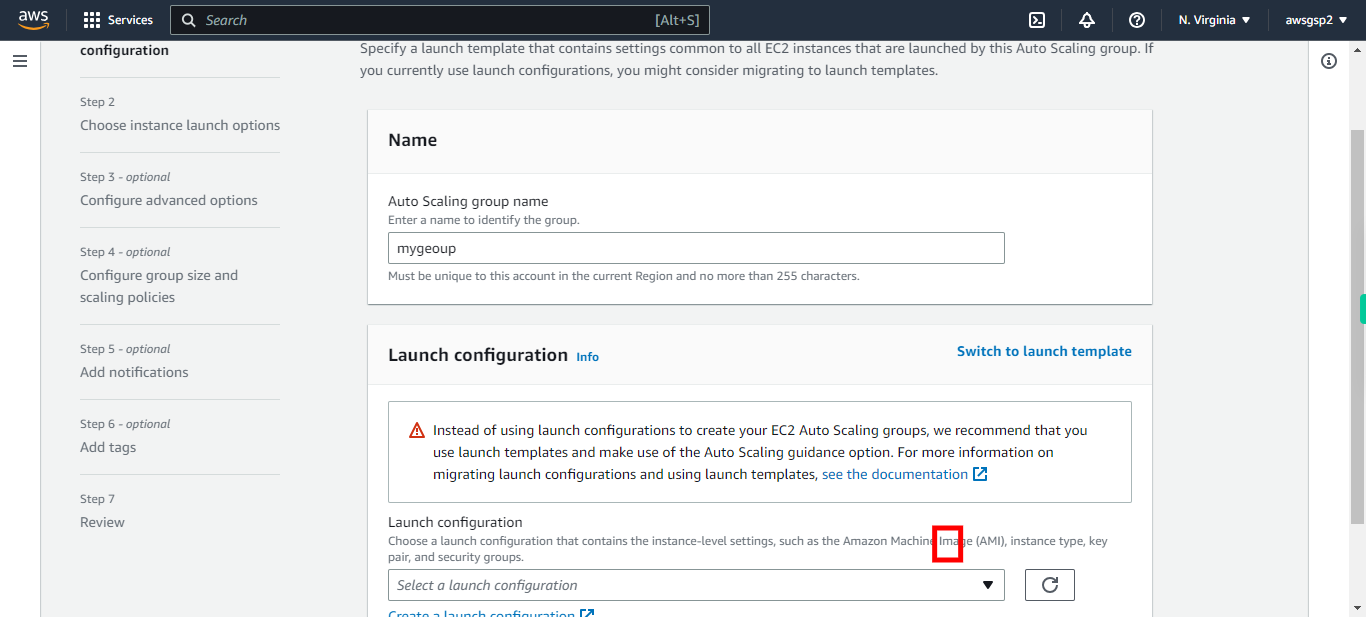
Select Launch configuration created. Once done, click Next on supervity instruction widget.
-
39.
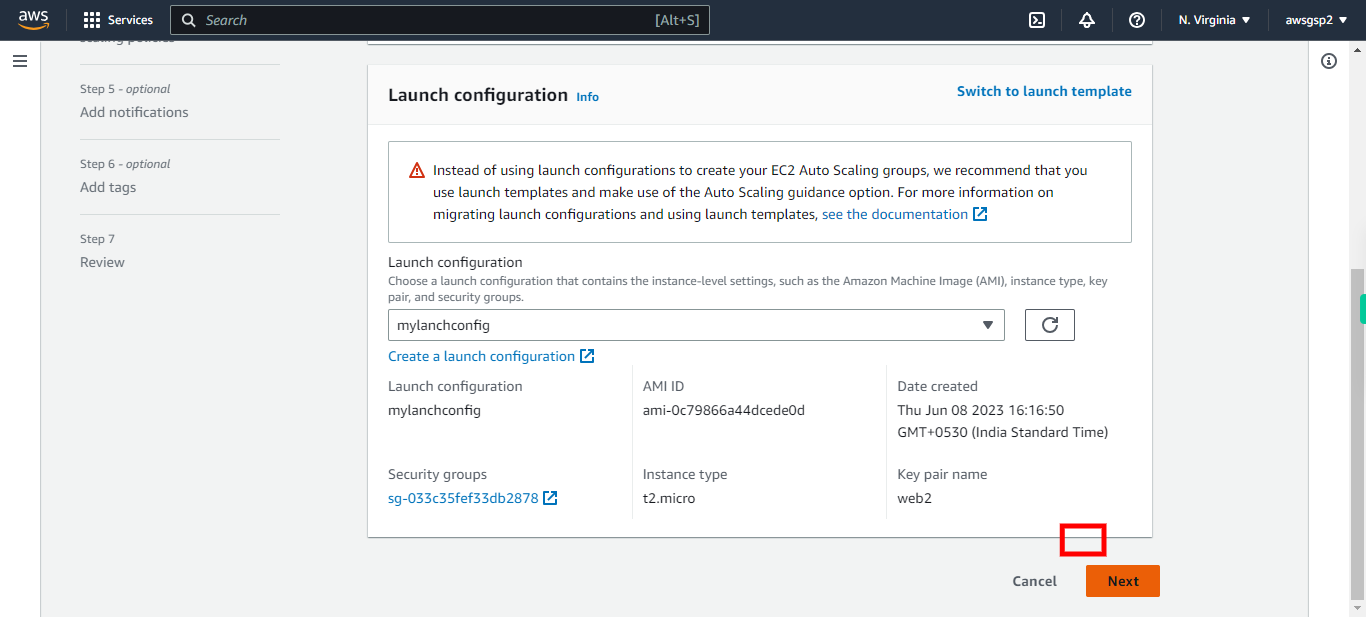
Click Next
-
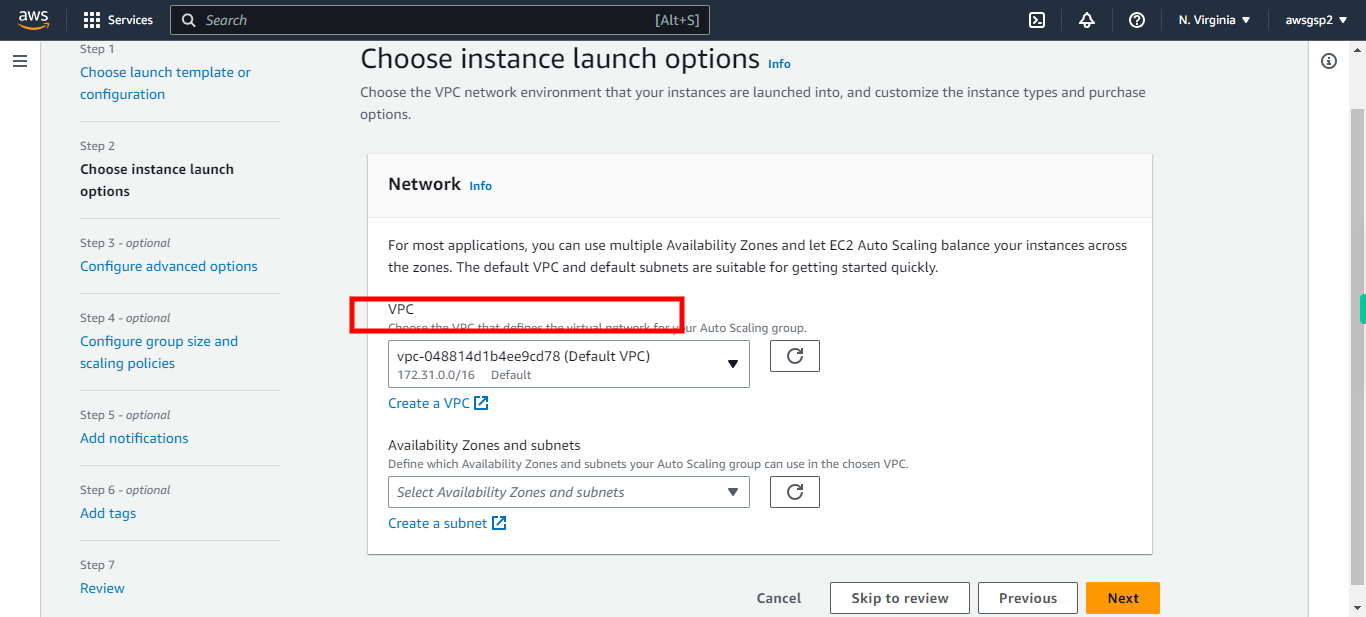
40.
Select your VPC. Once done, click Next on supervity instruction widget.
-
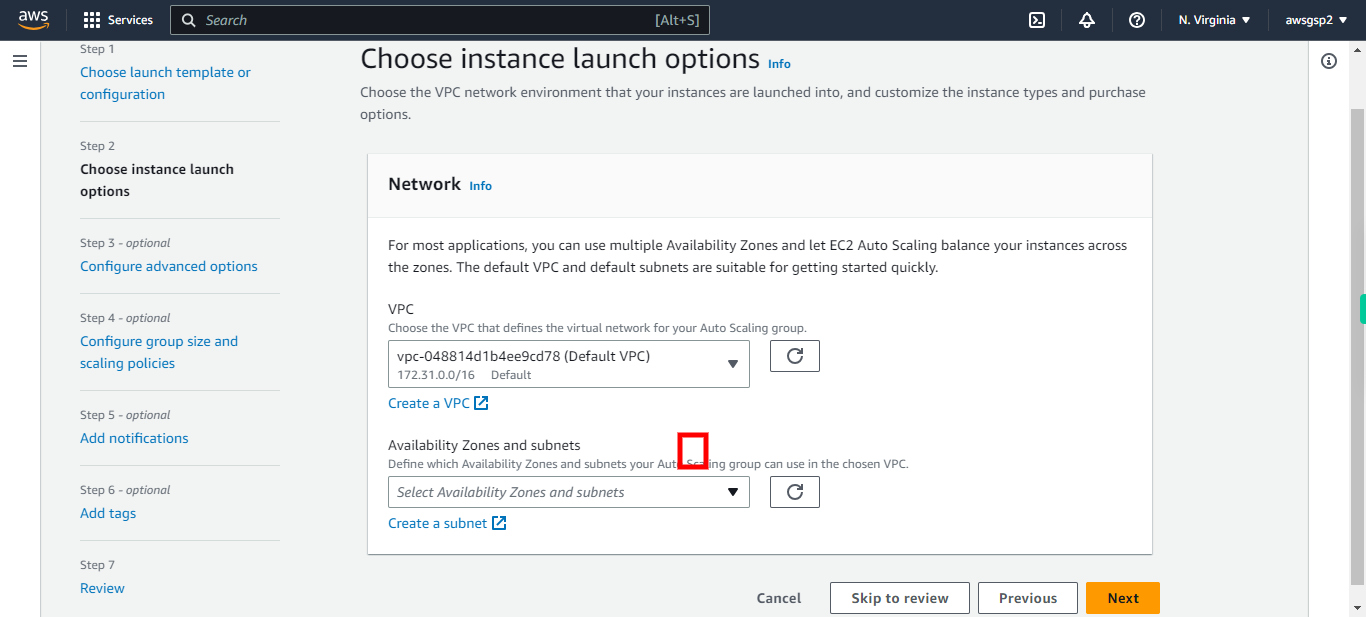
41.
Select Availability Zone. Once done, click Next on supervity instruction widget.
-
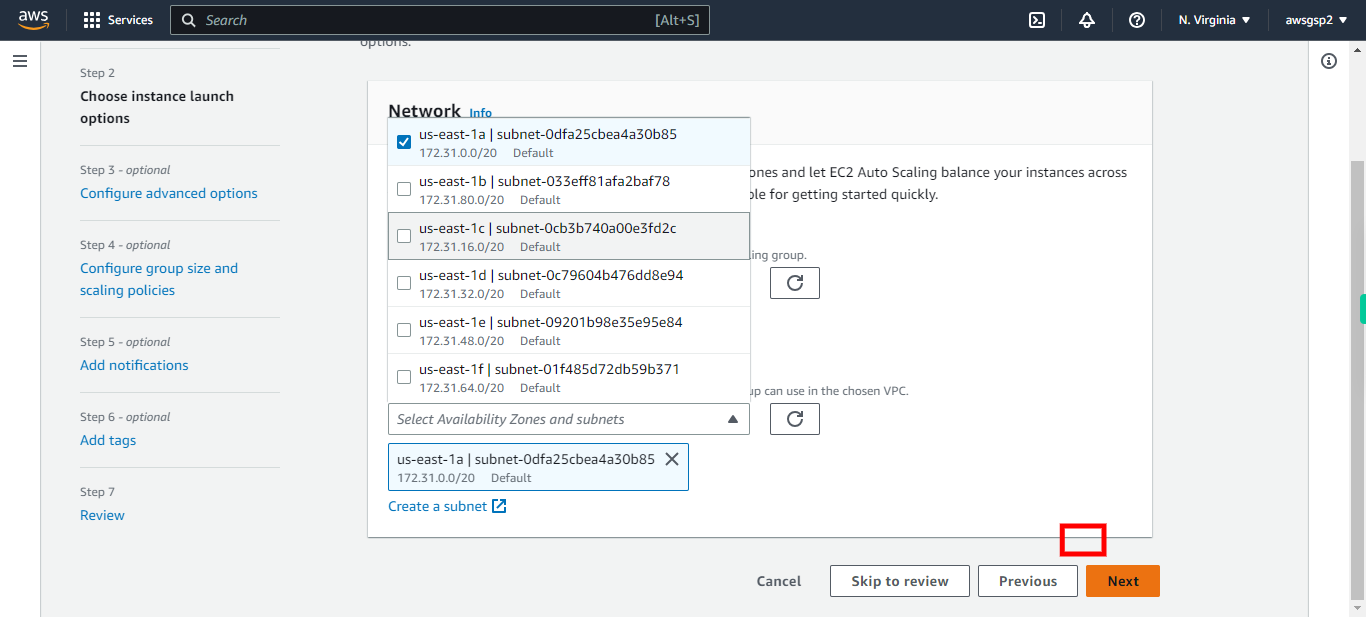
42.
Click Next
-
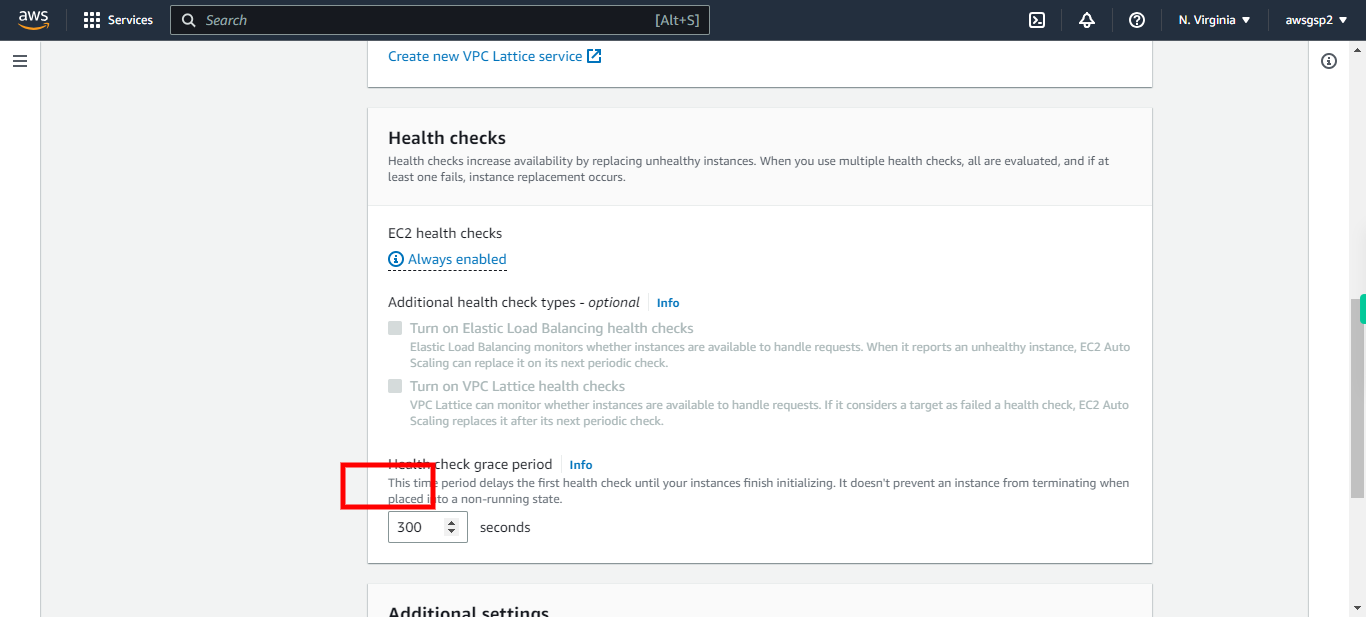
43.
Change the health check to required time ex.30 Sec. Once done, click Next on supervity instruction widget.
-
44.
Click Next
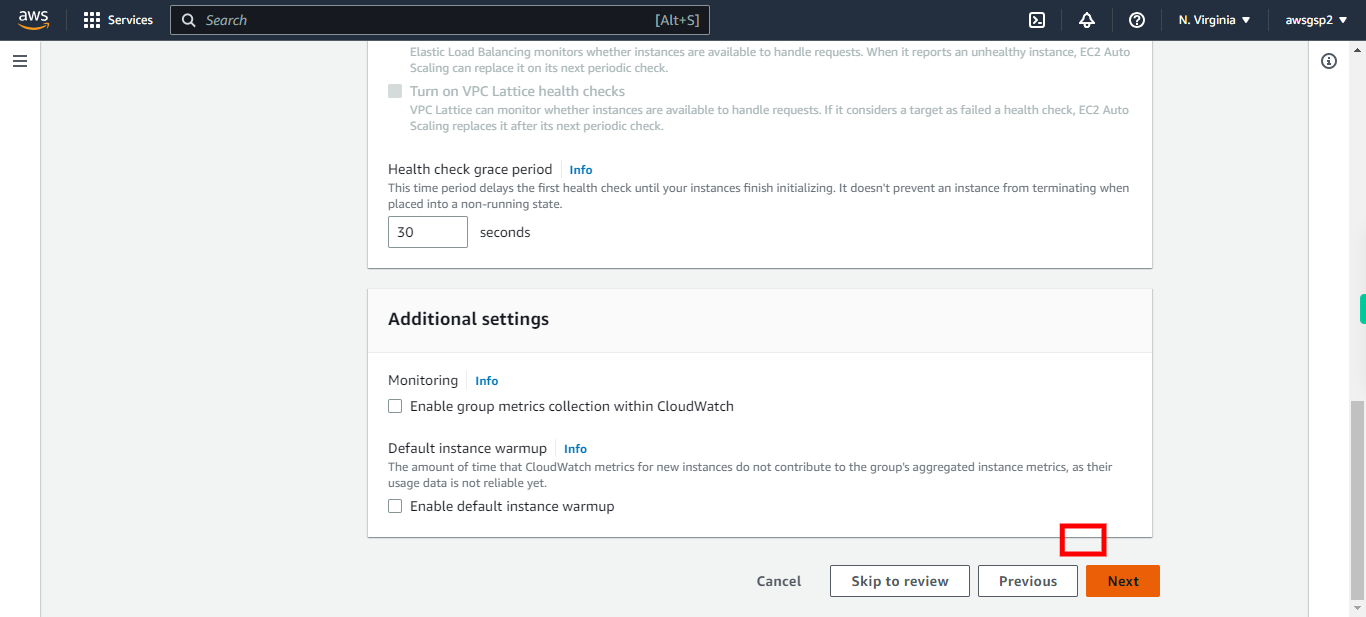
-
45.
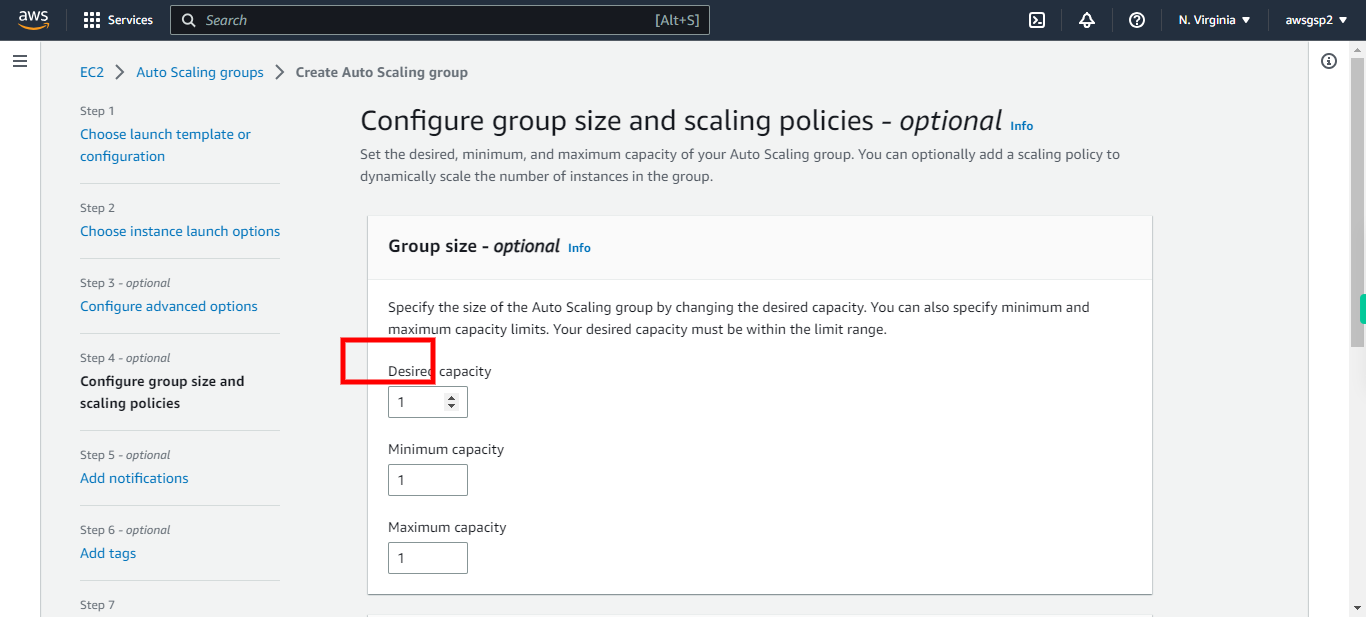
In Configuration group , Specify desired capacity, Ex.2. Once done, click Next on supervity instruction widget.
-
46.
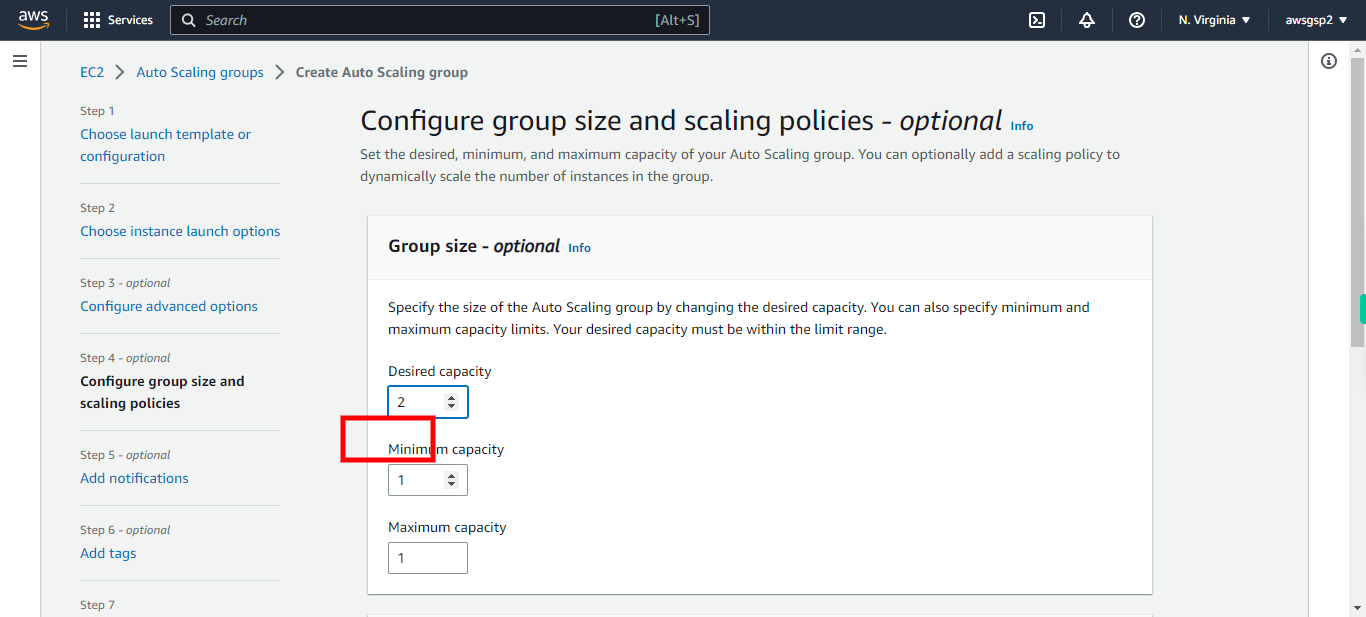
Specify the minimum capacity Ex.2. Once done, click Next on supervity instruction widget.
-
47.
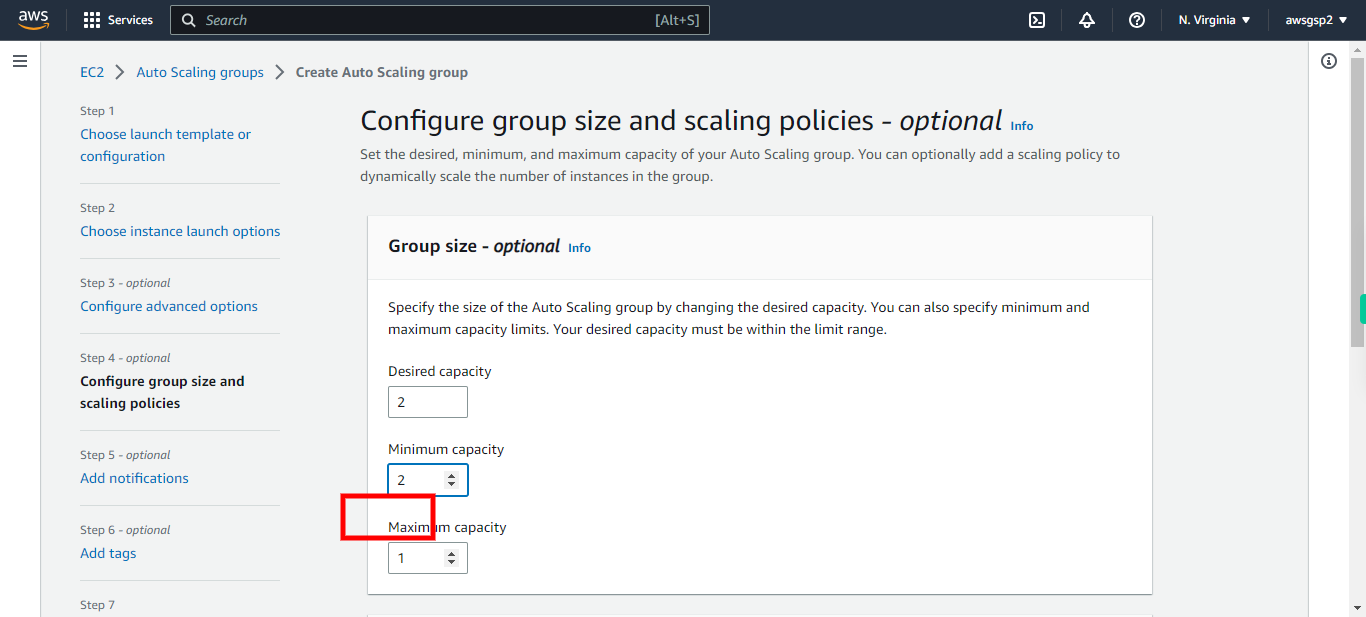
Specify the Maximum Capacity Ex.3. Once done, click Next on supervity instruction widget.
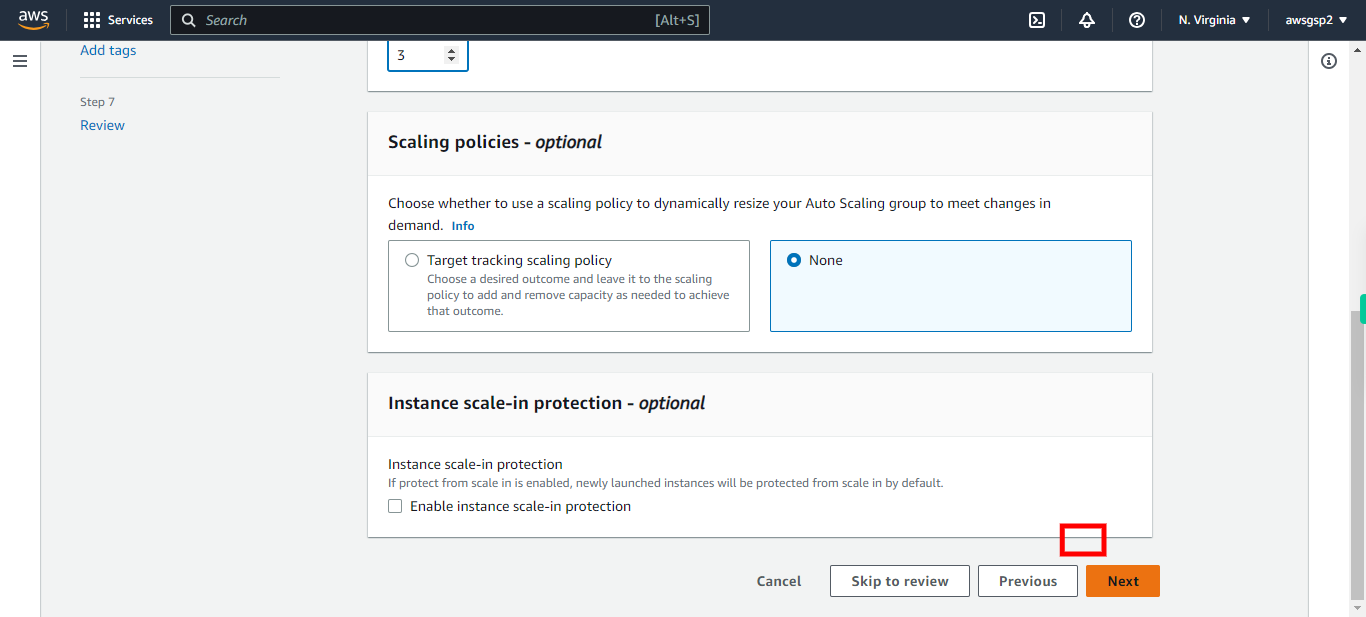
-
48.
Click Next
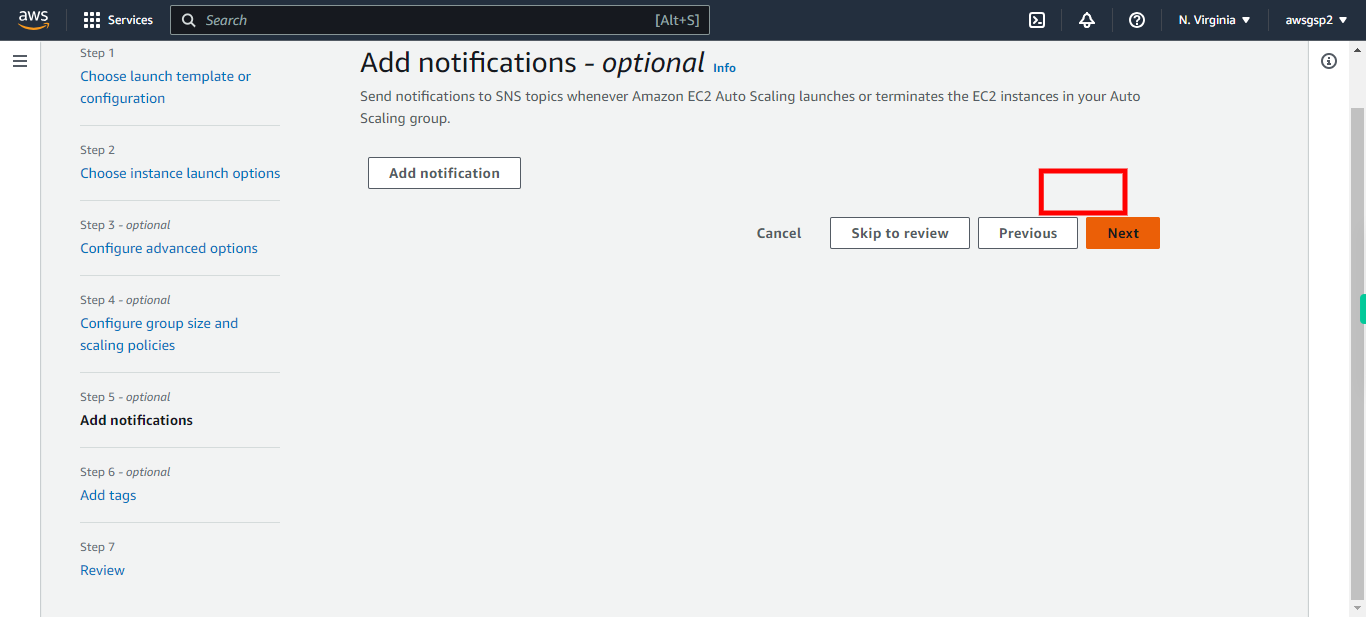
-
49.
Click Next
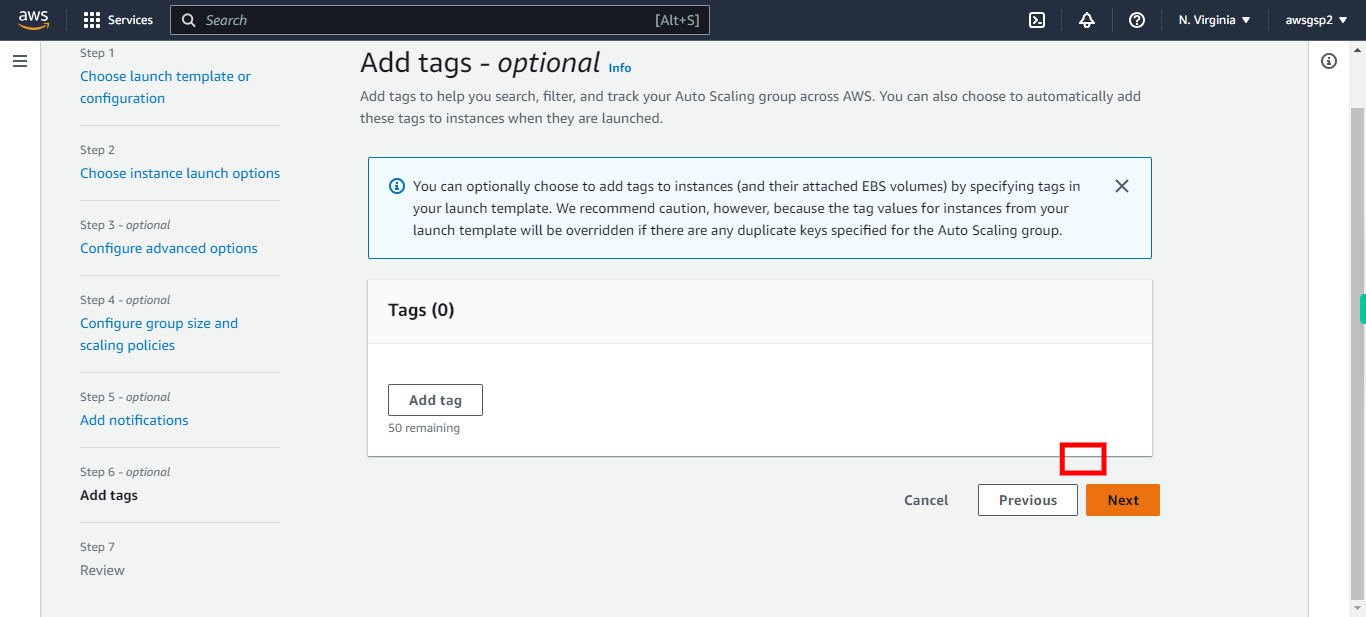
-
50.
Click Next
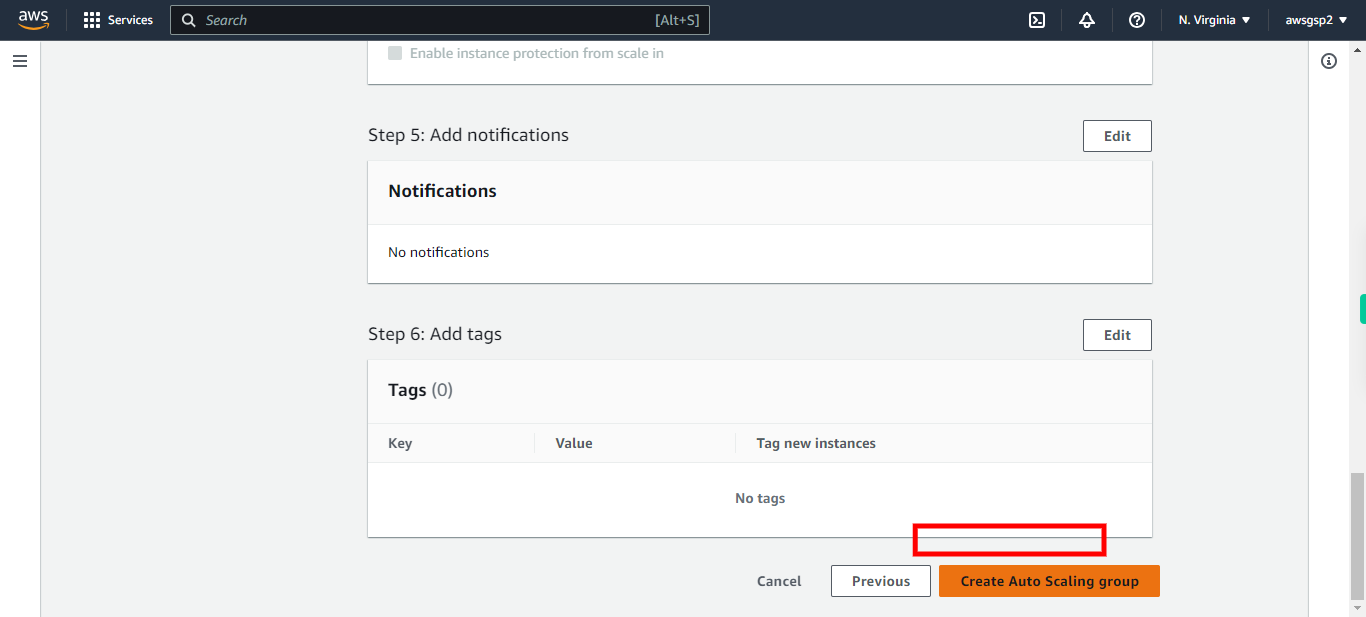
-
51.
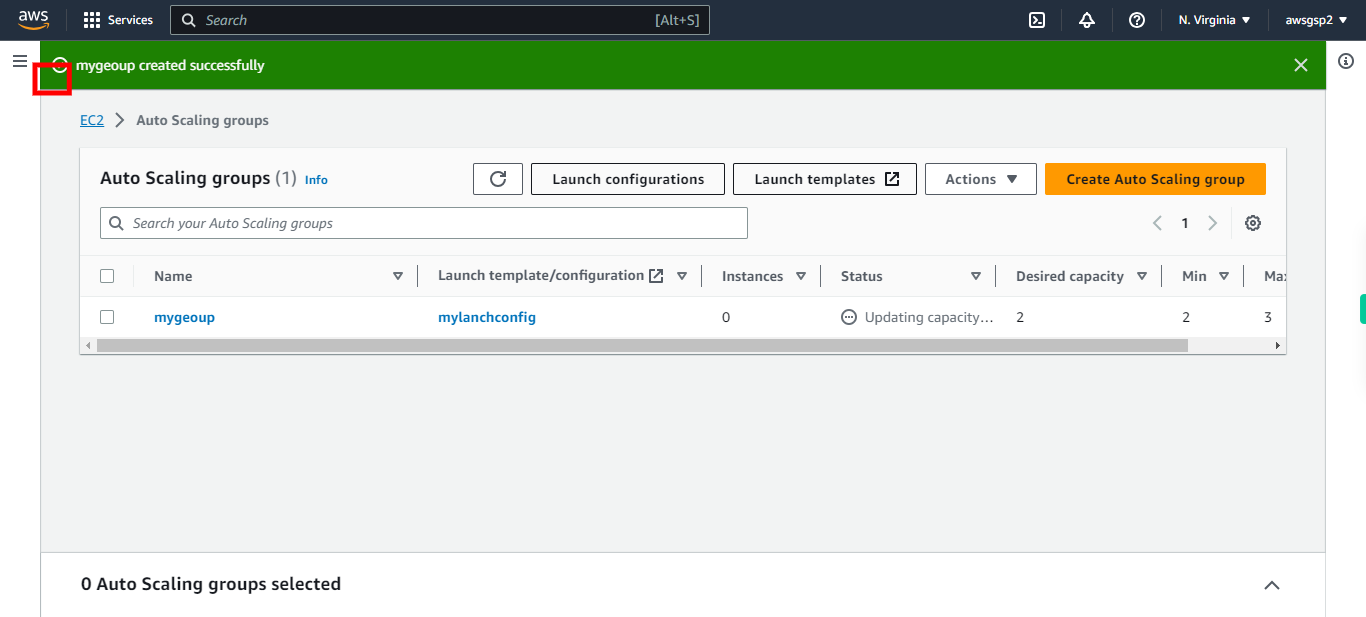
Click Create Auto Scaling group
-
52.
Click EC2
-
53.
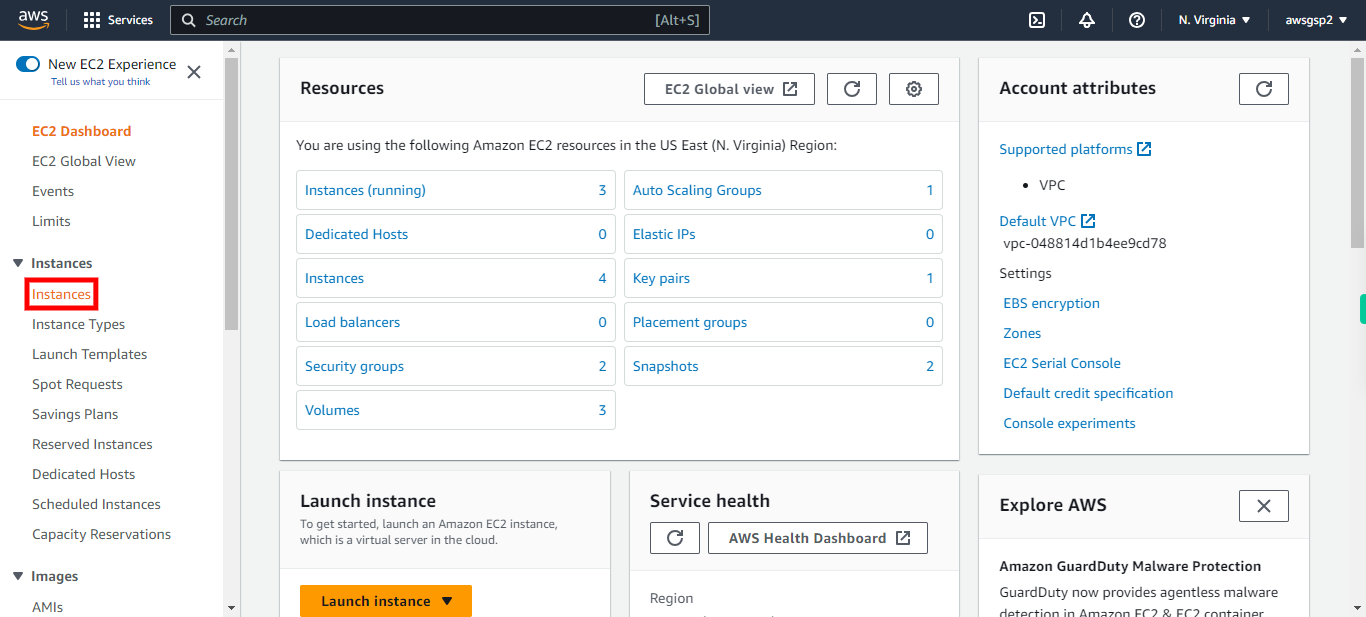
Click Instances
-
54.
If minimum instances are running as described in configuration, it indicates that your Auto Scaling is working. Once done, click Close on supervity instruction widget.
