This skill guides you to automate the process of marking Outlook emails as read and flagging them as complete using Power Automate, saving you time and helping you stay organized. Pre-Requisites: Make sure that the Microsoft Power Platforms are accessible and that you have the necessary permissions and access rights to both your Outlook and Microsoft Teams accounts to set up this integration successfully. NOTE: Please sign in to your web Microsoft 365 account and then execute this skill.
-
1.
Open Microsoft Power Automate on the web
-
2.
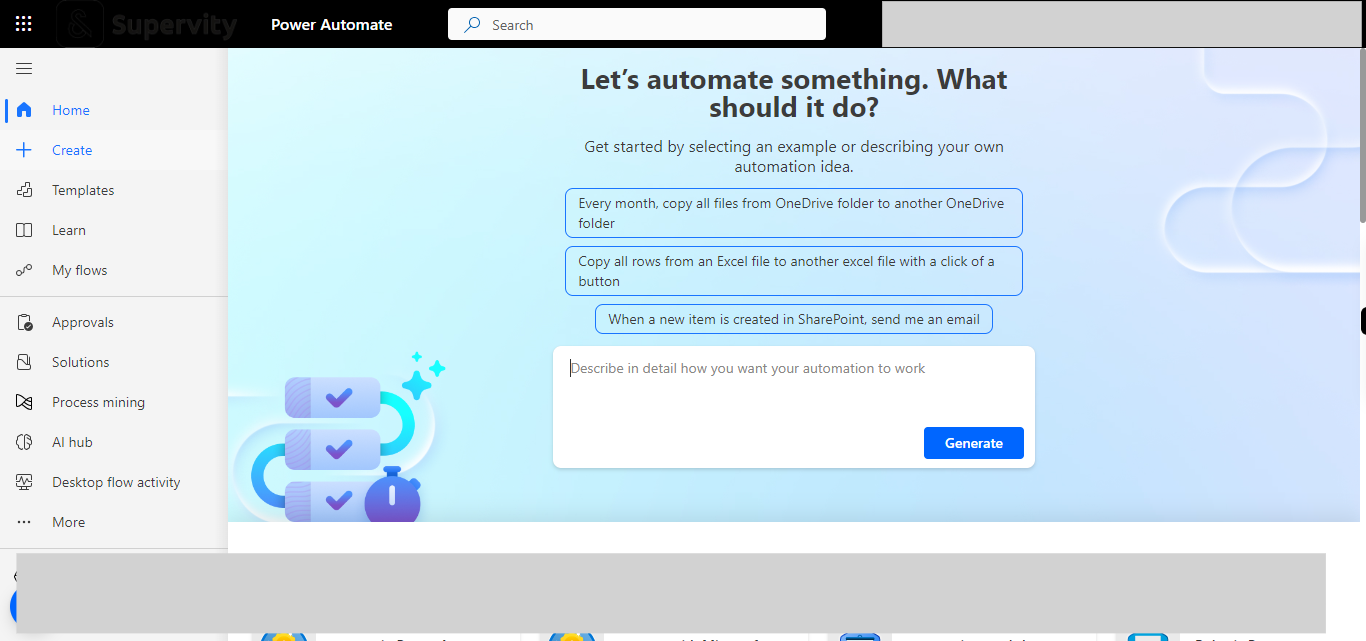
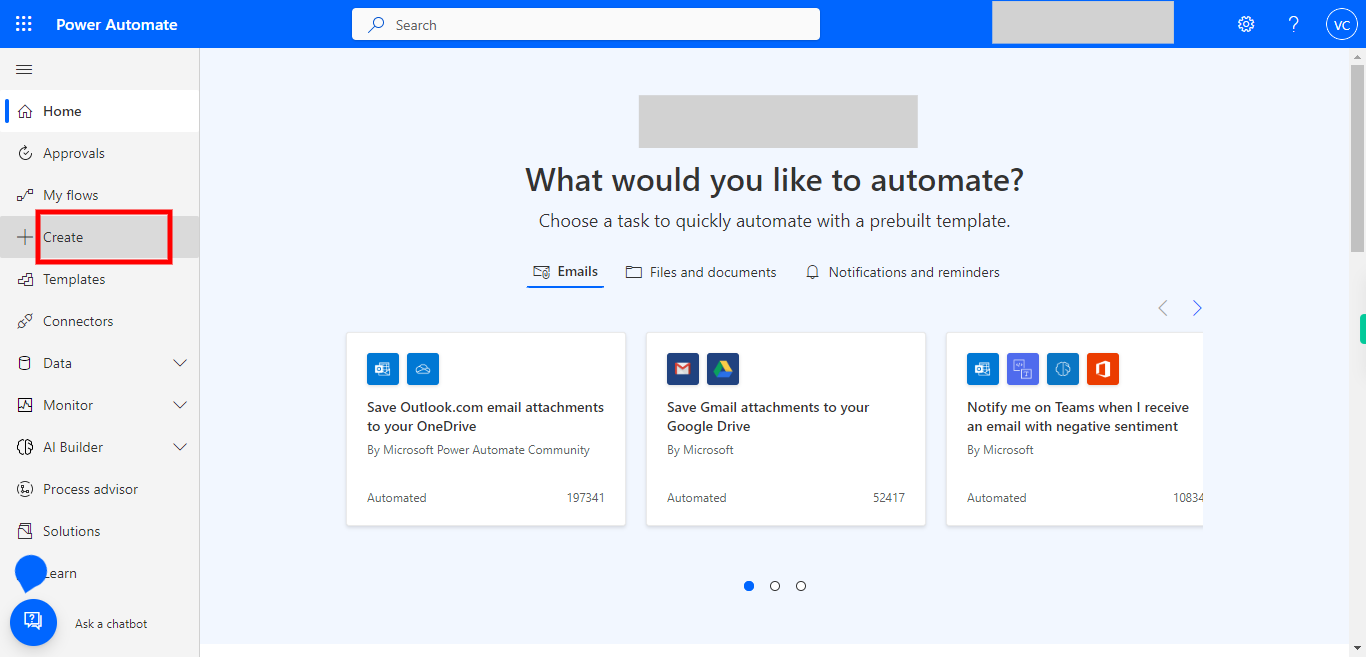
1. If you don't find the below screen please sign in and then execute, once you are on the page, click on Create to develop an automated flow.
-
3.
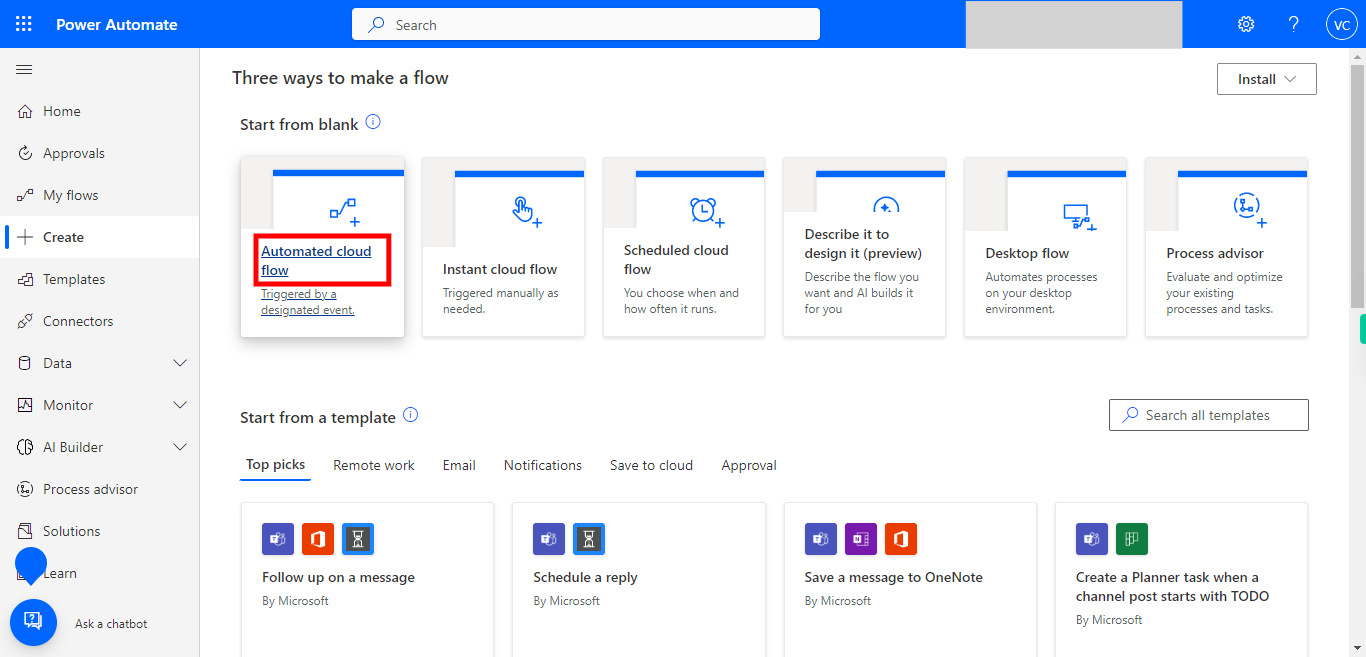
2. Click on Automated cloud flow to start developing flow, and this suits best for this flow.
-
4.
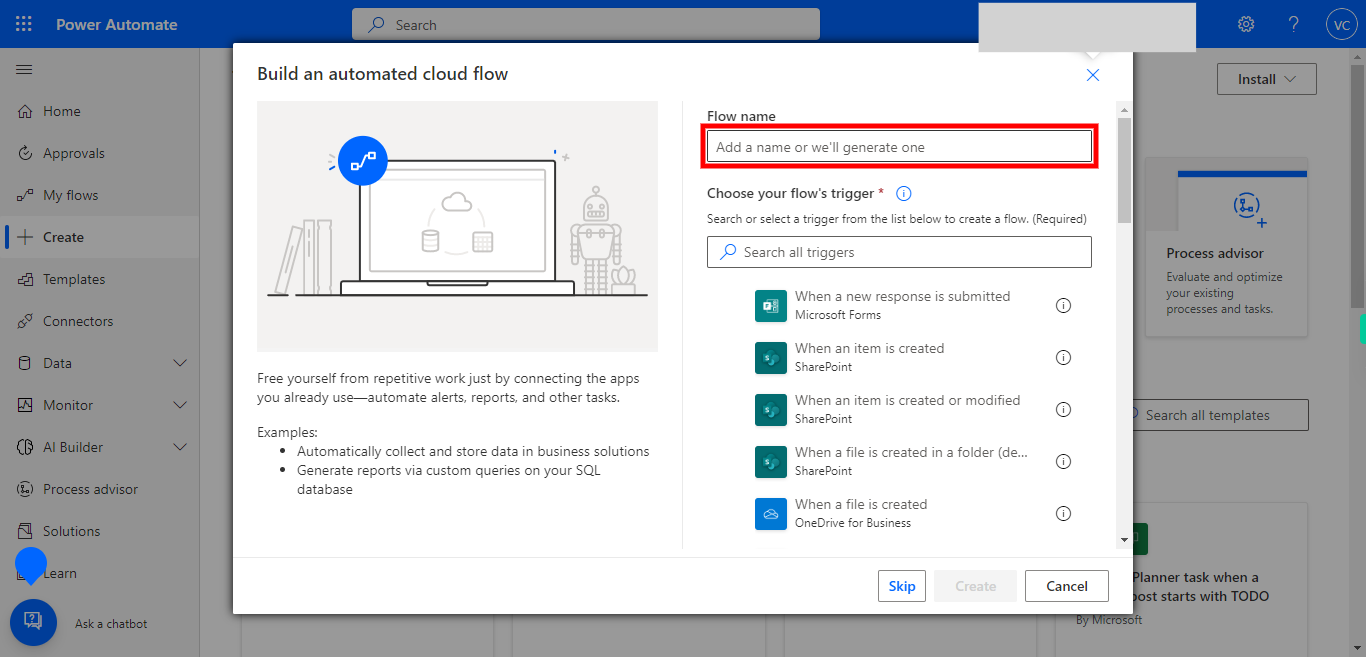
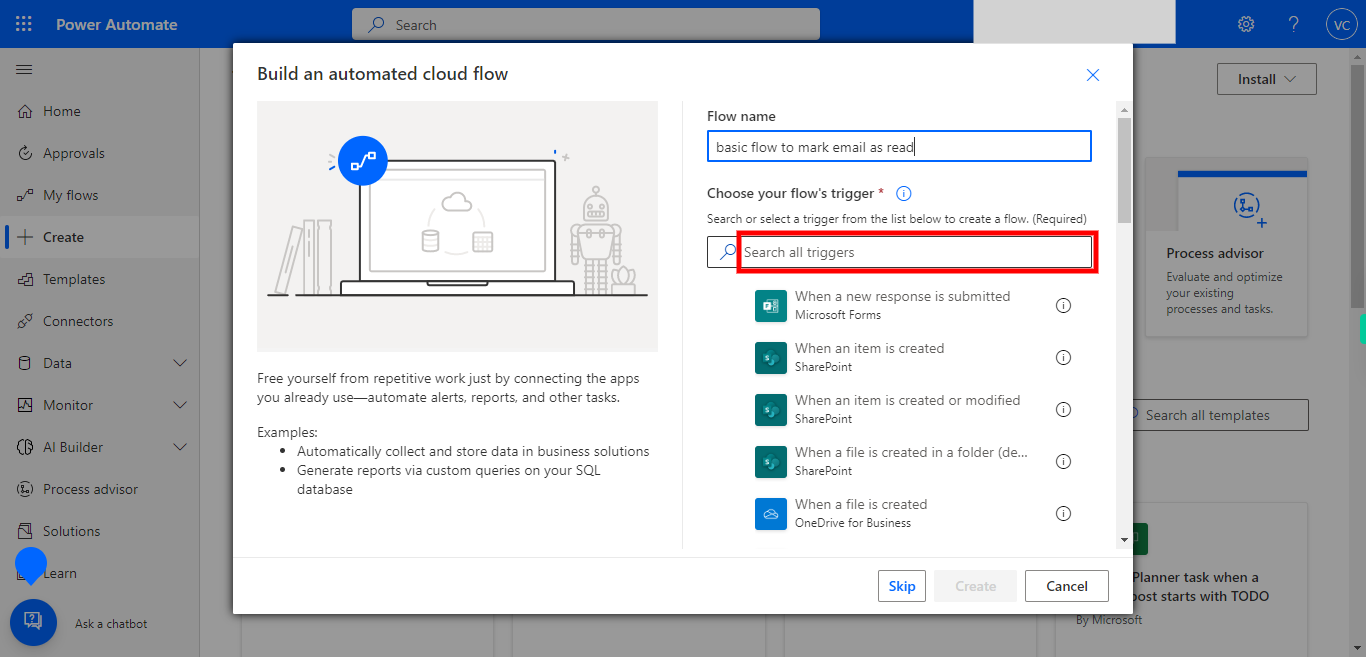
3. Provide a name to your flow, and then click on the Next button in the Supervity instruction widget.
-
5.
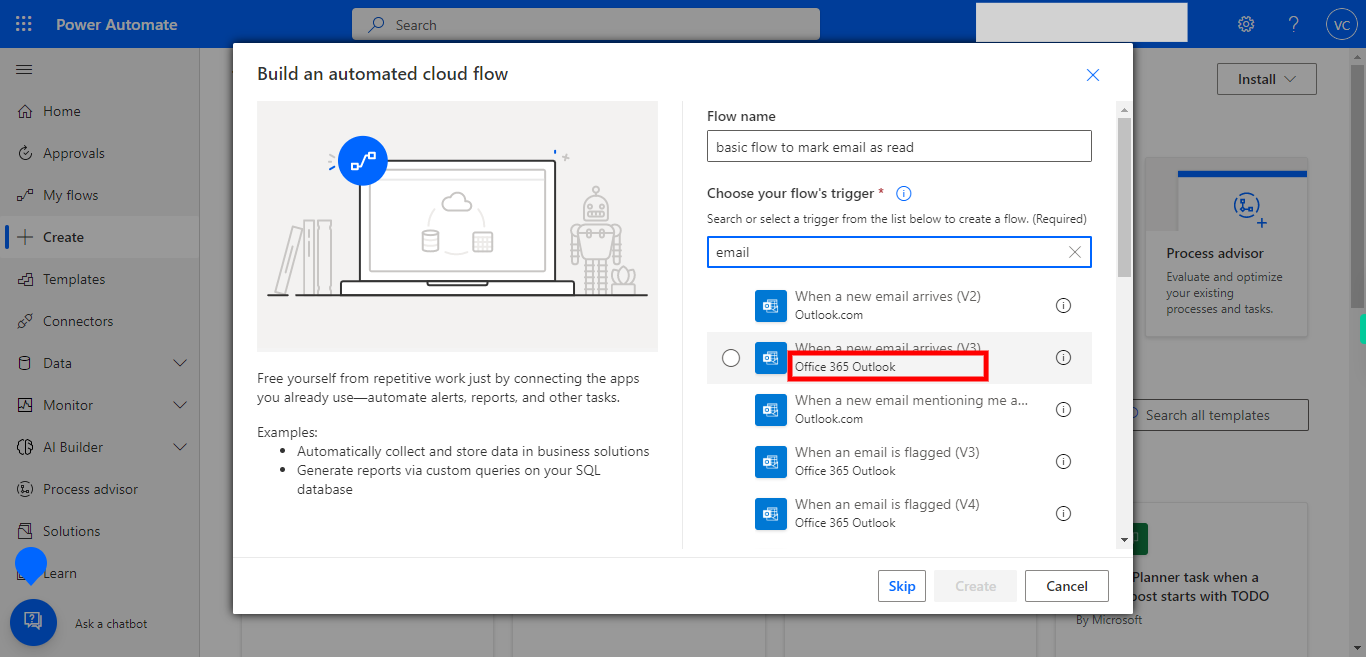
4. Type the text email and click on the Next button in the Supervity instruction widget.
-
6.
5. First click on the Next button in the Supervity instruction widget, and then select the text when email arrives (V3) in outlook 365.
-
7.
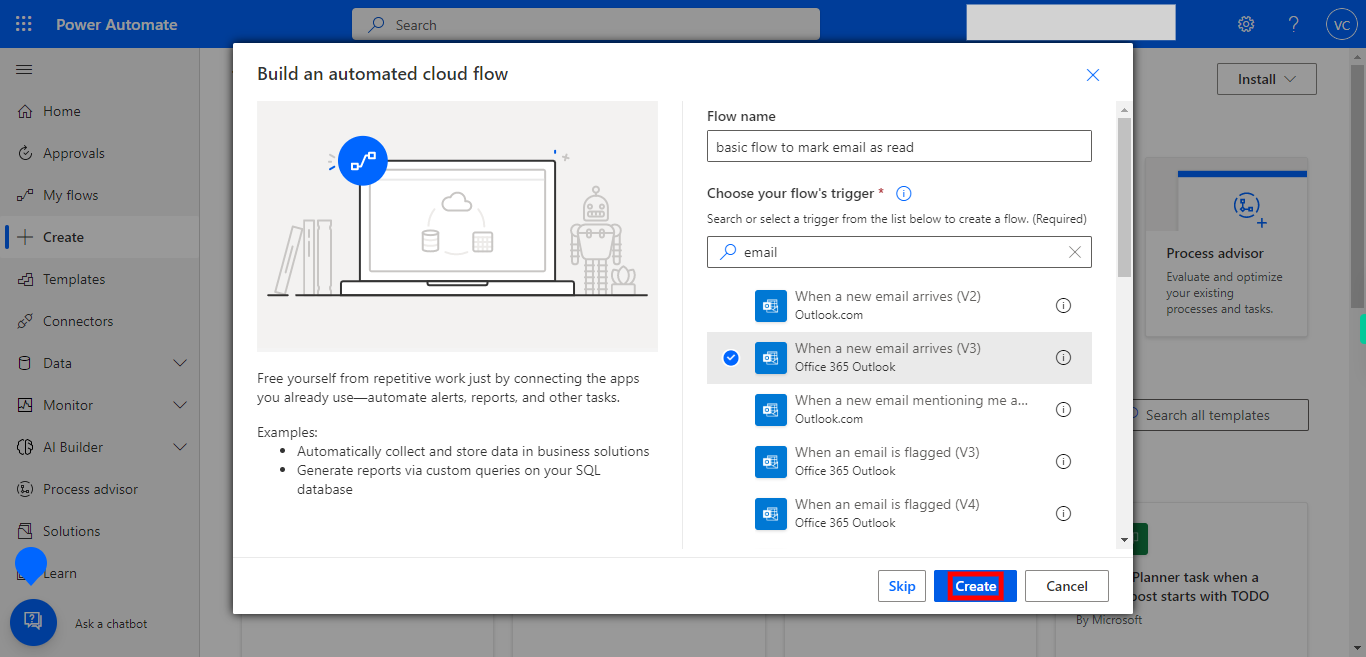
6. Click on the Create button at the right bottom to go to the development panel.
-
8.
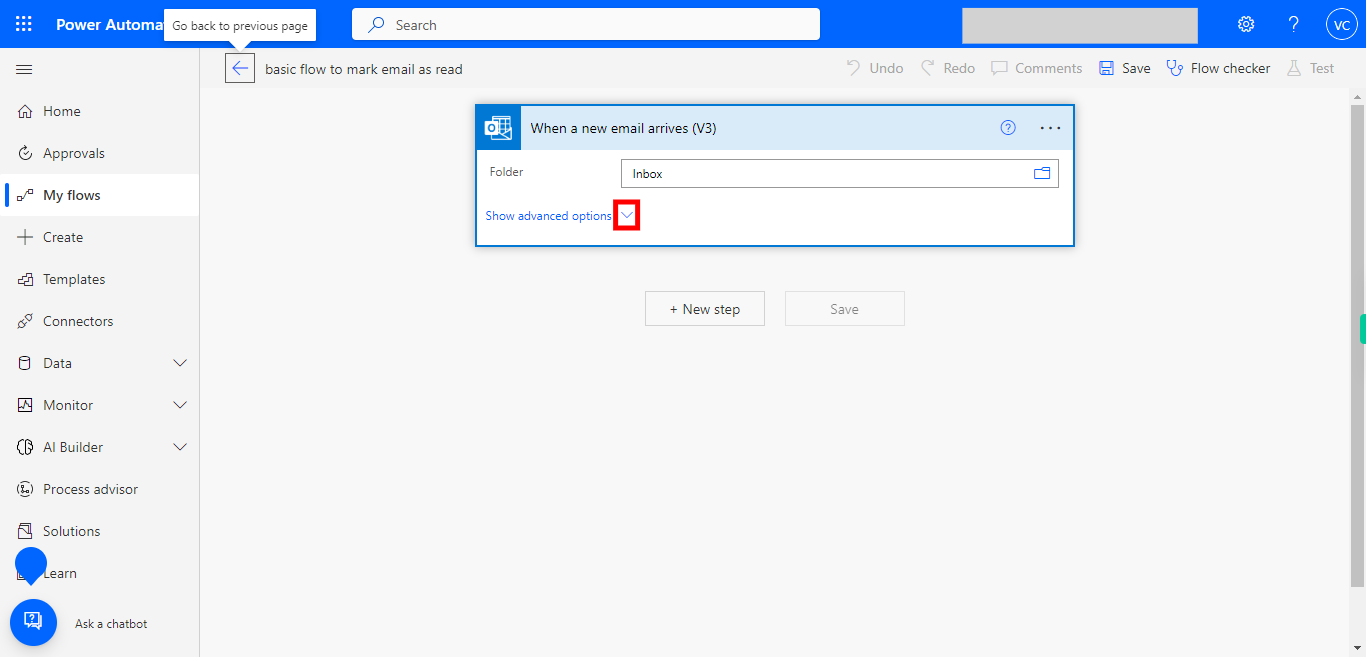
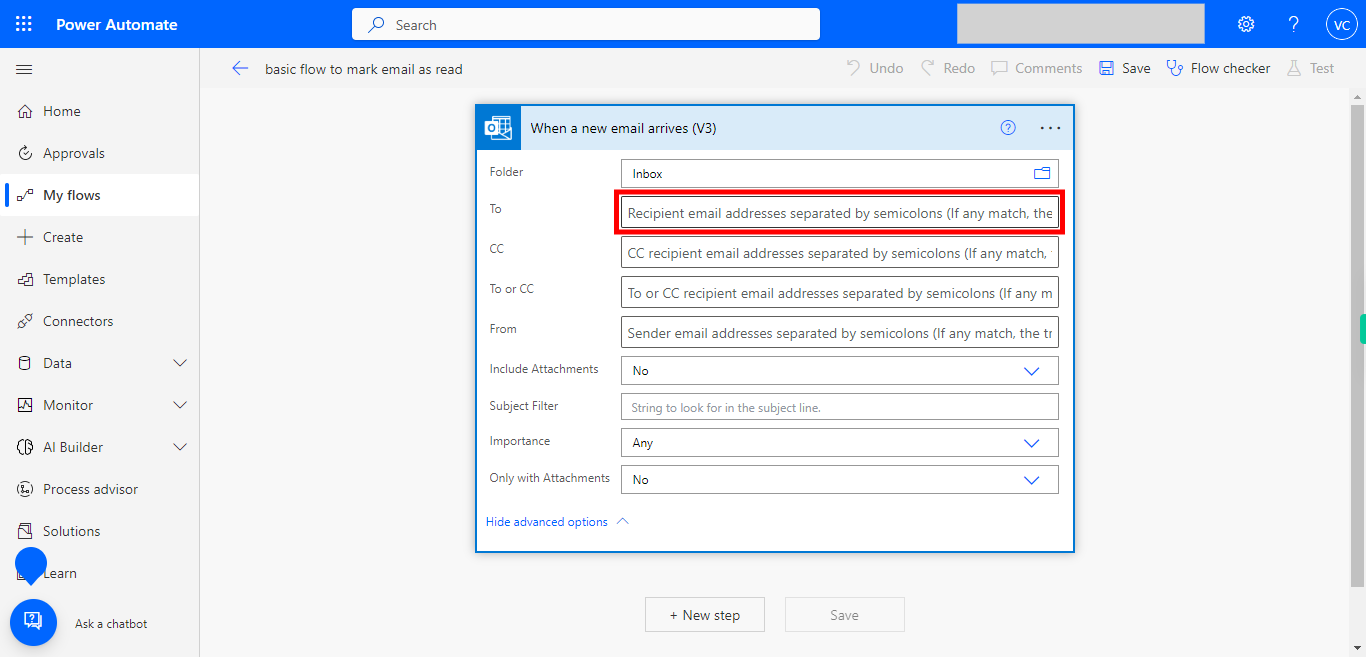
7. To achieve this screen check on the top right corner of the page whetherNew Designer is enabled, if enabled please toggle or disable it, and then the screen appears. Click on the "Show advanced options" dropdown icon for advanced settings.
-
9.
8. Provide your email address in the "To" tab, and then click on the Next button in the Supervity instruction widget.
-
10.
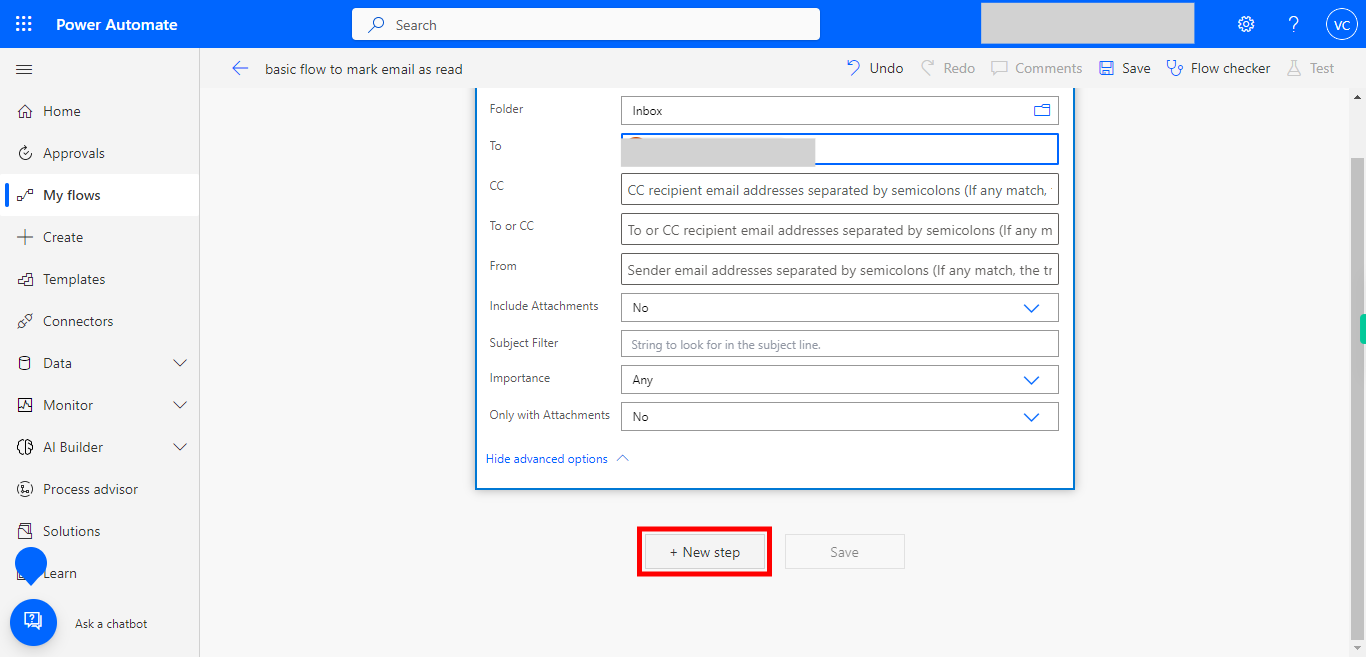
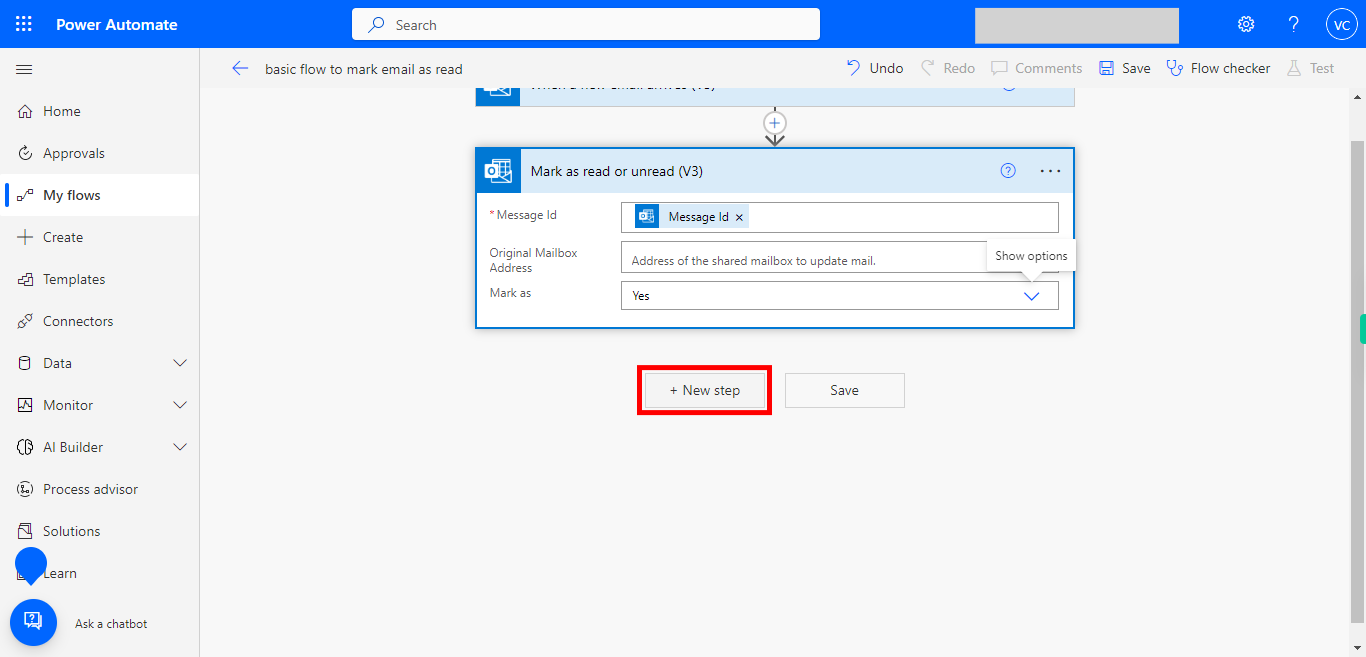
9. Click on the + New step to add new action.
-
11.
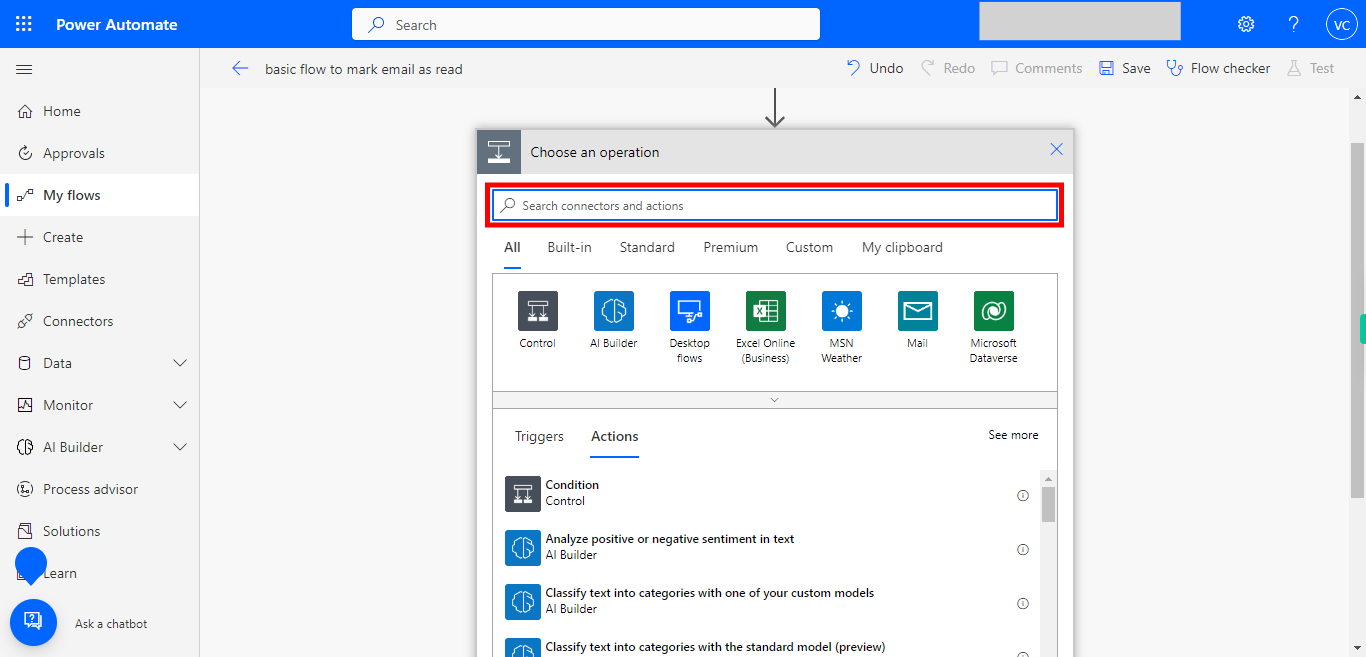
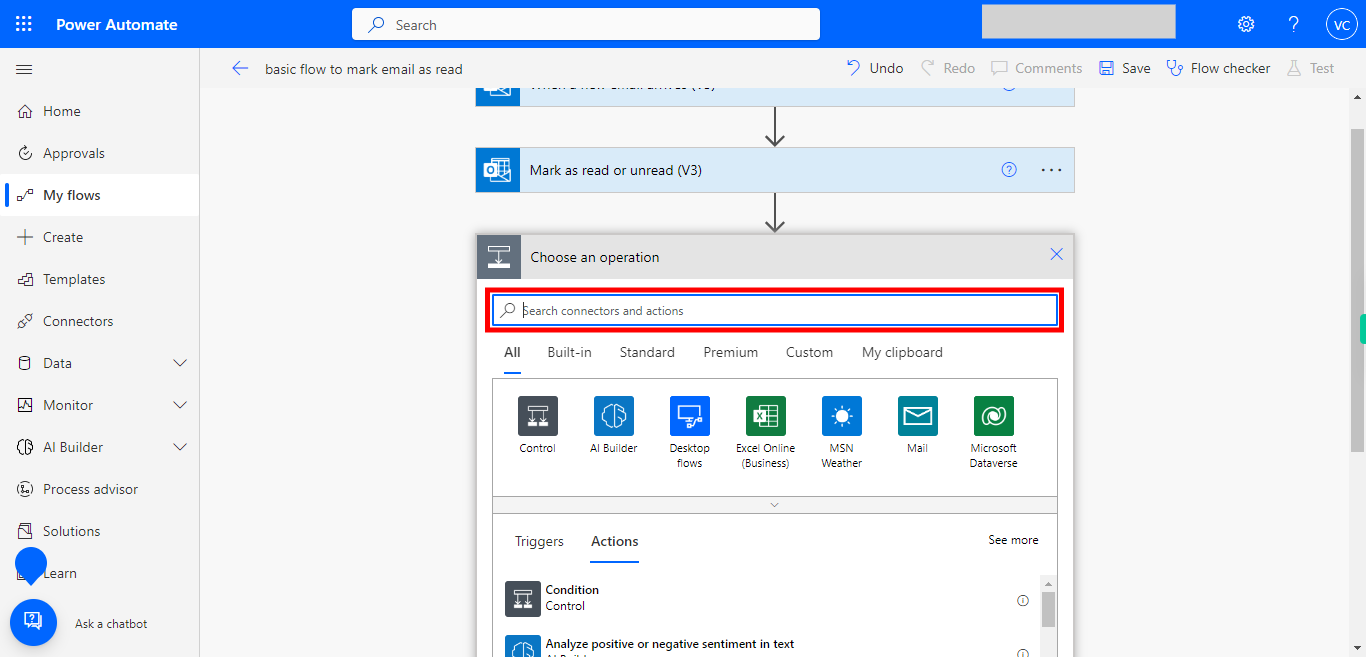
10. Type the text read and then click on the Next button in the Supervity instruction widget.
-
12.
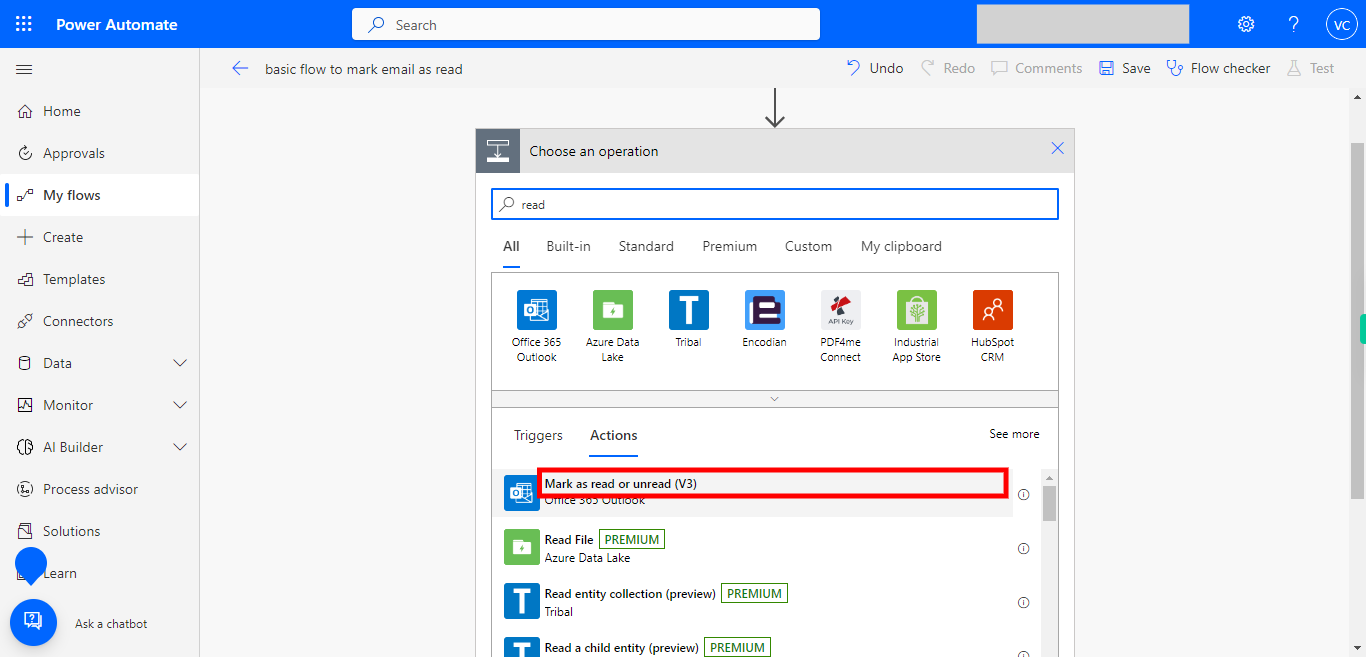
11. Select Mark as read or unread (V3) Office 365 Outlook. Ensure you select only Office 365 Outlook connector.
-
13.
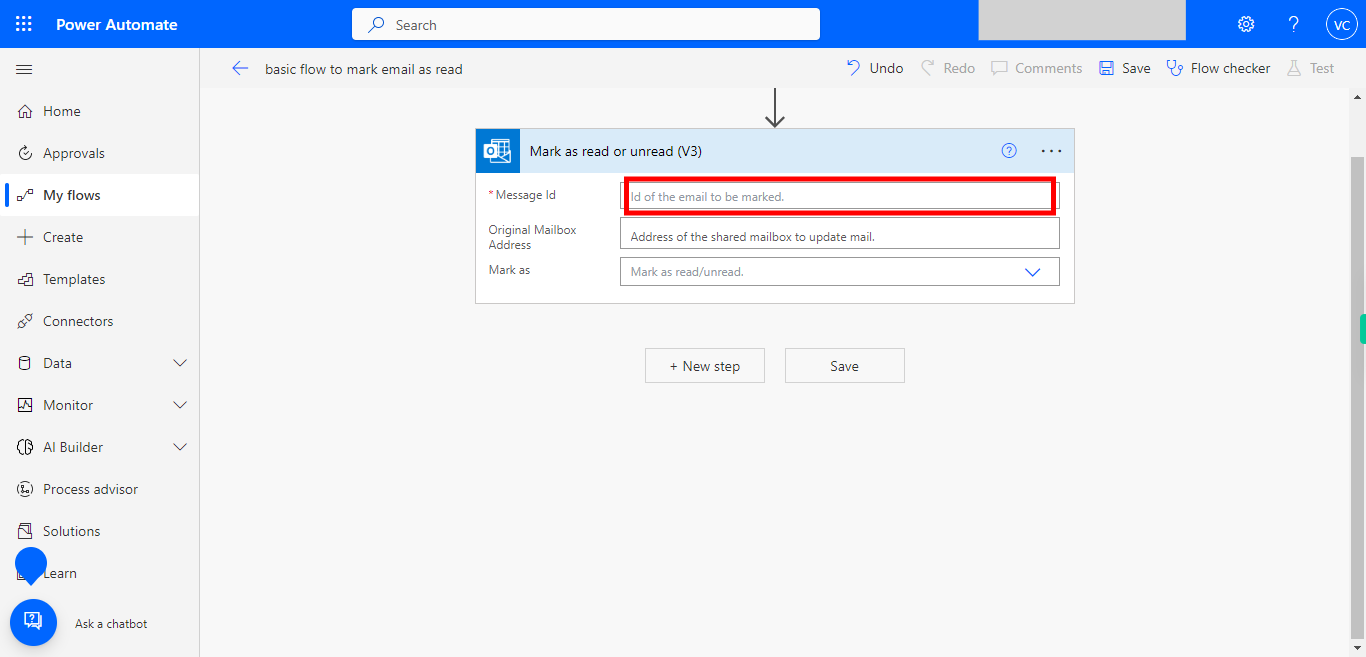
12. Click on Message id to select id.
-
14.
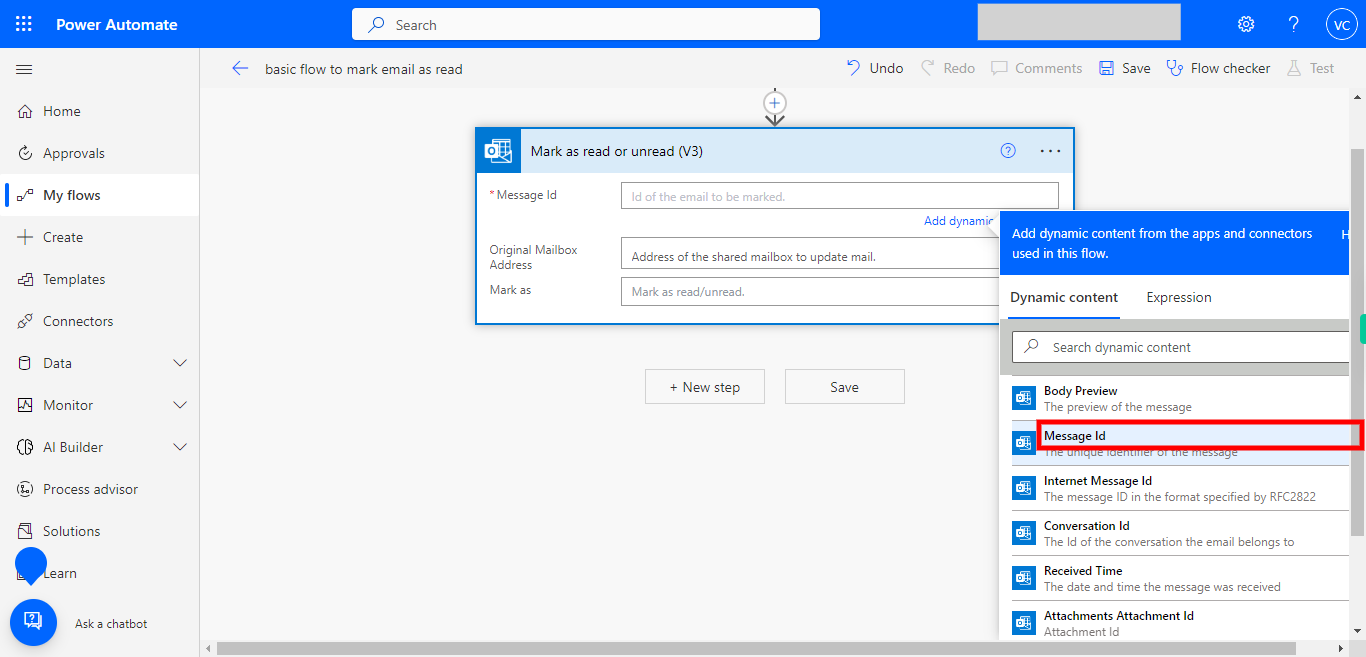
13. Select Message Id from the dynamic content list displayed.
-
15.
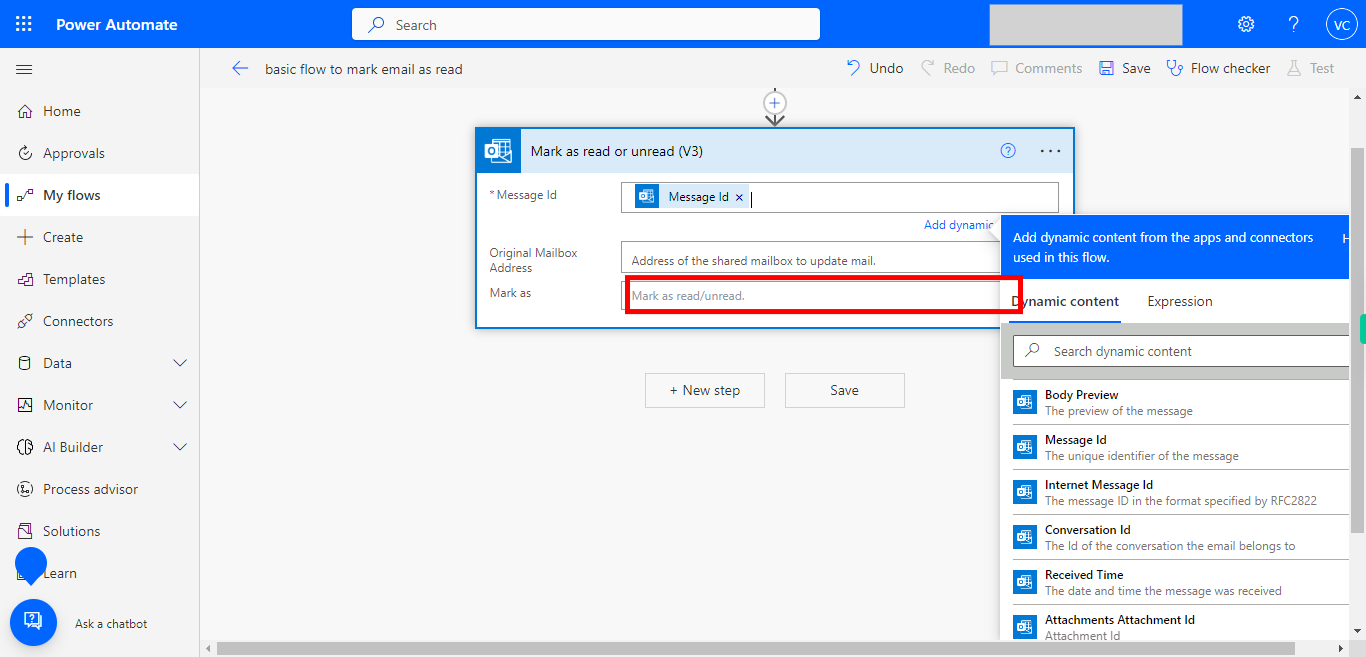
14. Click on Mark as the dropdown icon.
-
16.
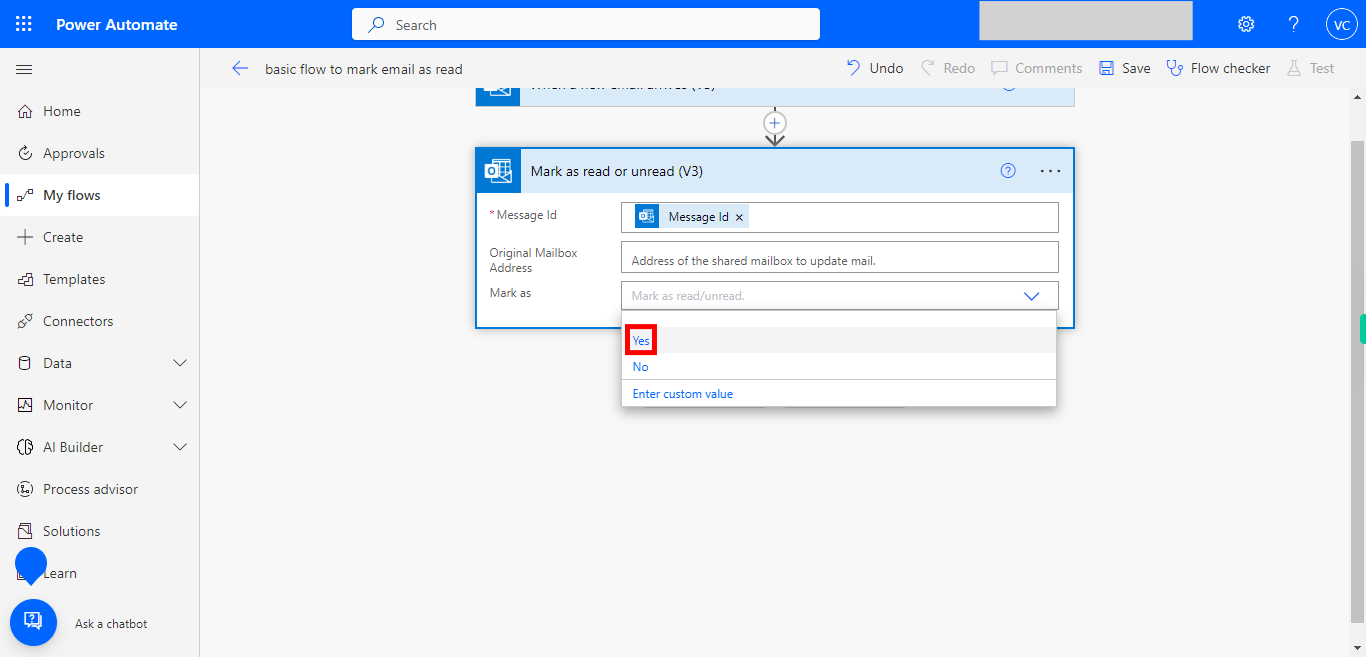
15. Select Yes, this makes to mark the email as Read.
-
17.
16. Click on the + New step to add a new flow.
-
18.
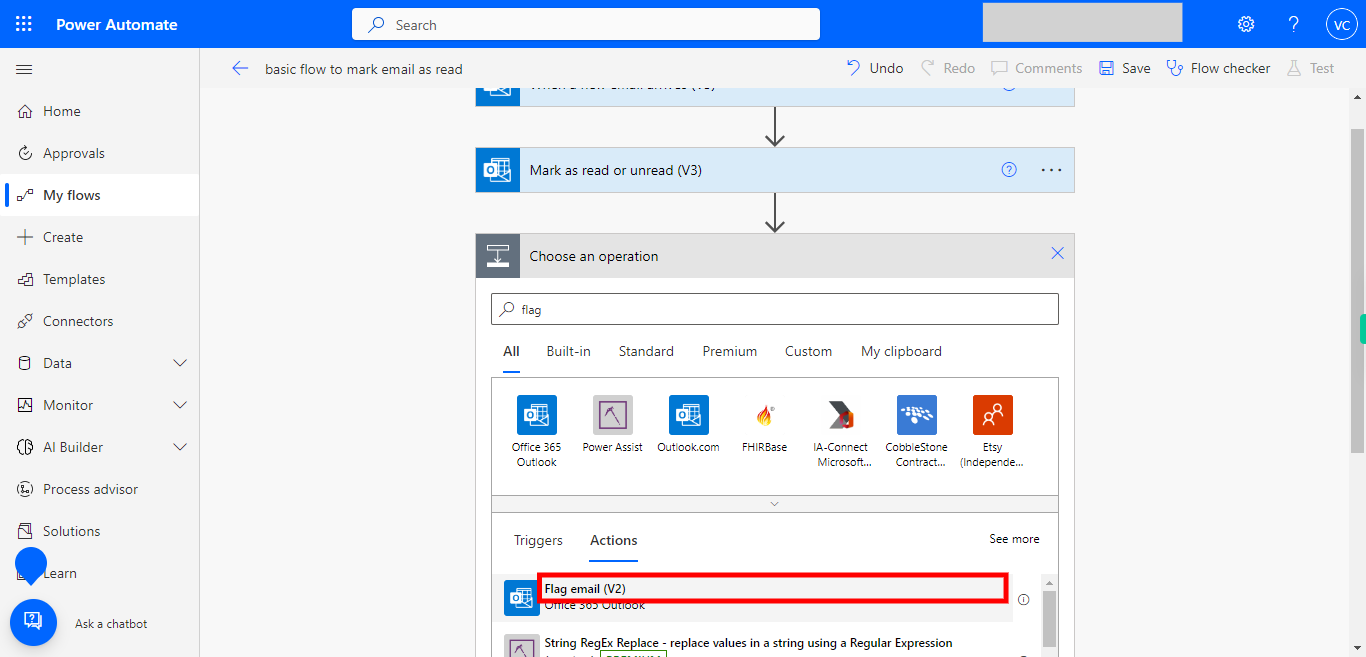
17. Type the text flag and click on the Next button in the Supervity instruction widget.
-
19.
18. Select Flag email (V2) Office 365 Outlook. Ensure you select only Office 365 connector.
-
20.
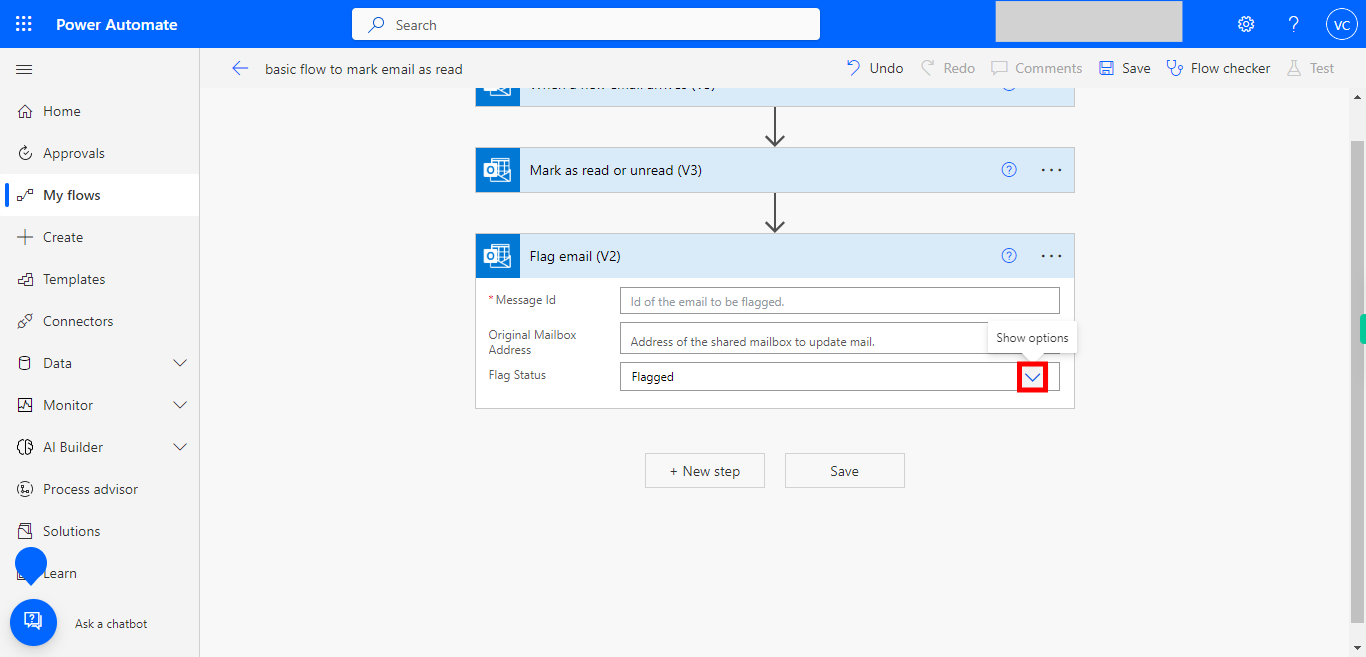
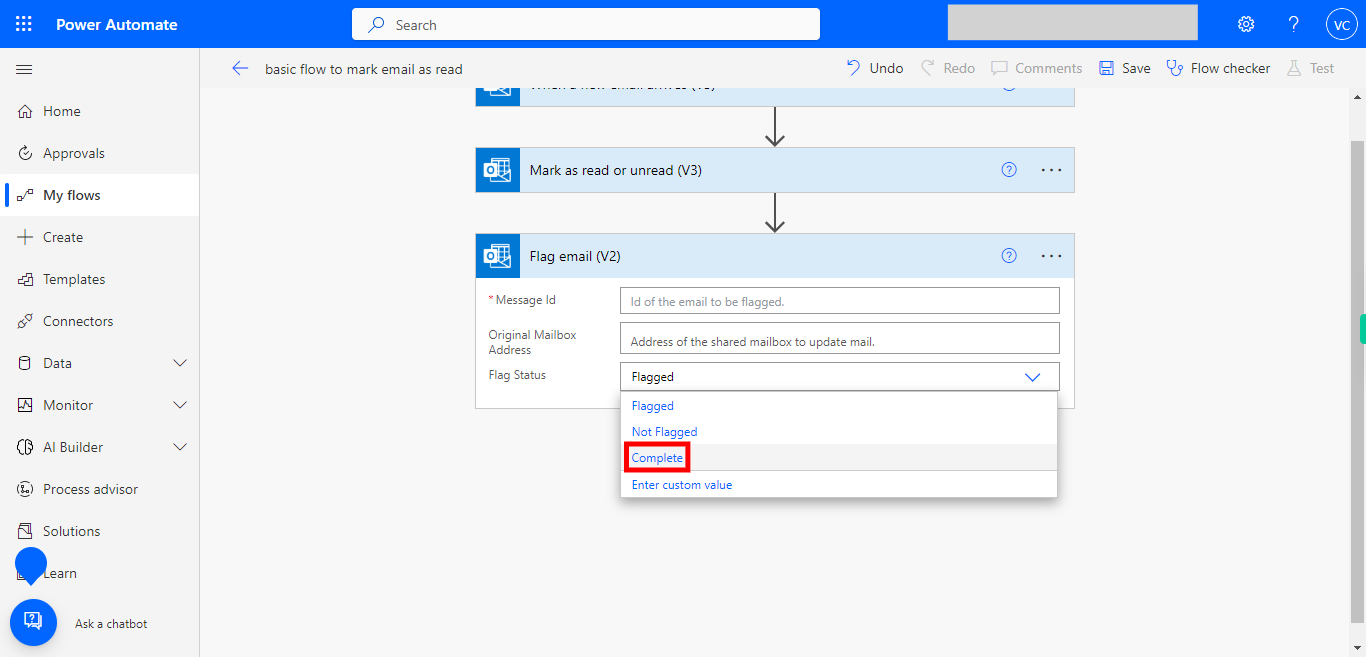
19. Click on the Flag Status dropdown to select the Flag status.
-
21.
20. Select Complete from the list, so that every mail will be flagged as complete.
-
22.
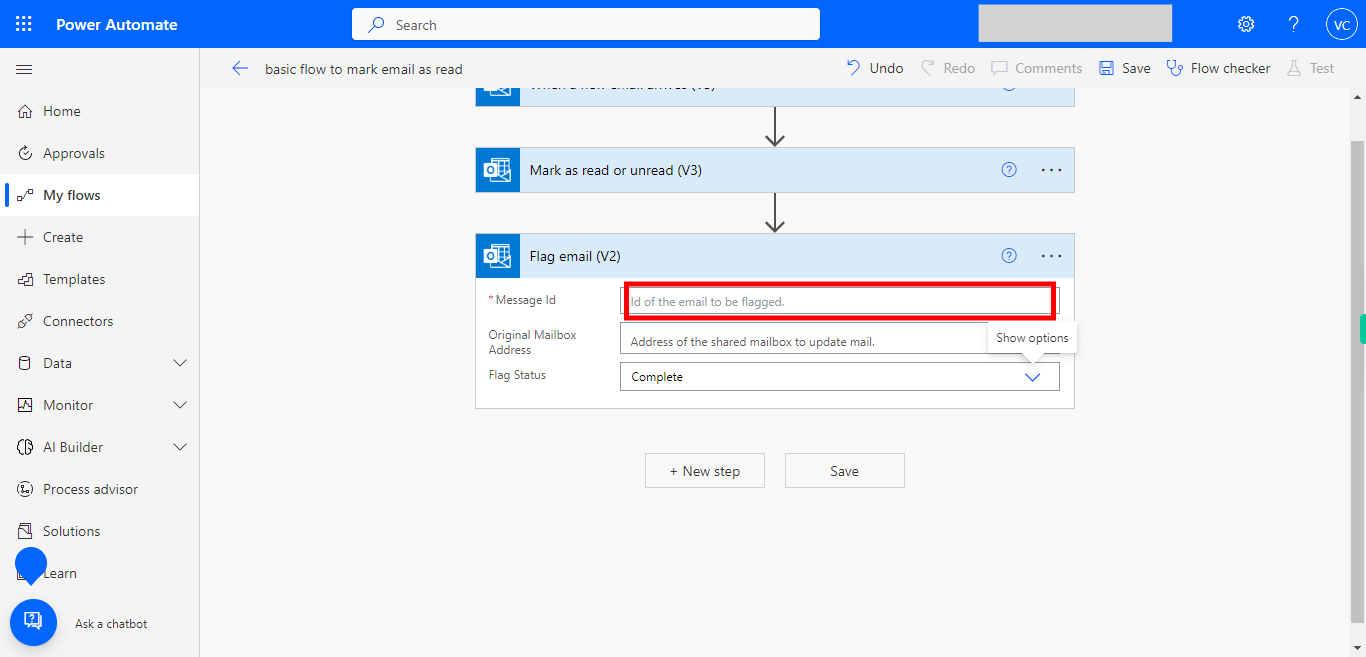
21. Click on the "Message-id" tab, to select the id
-
23.
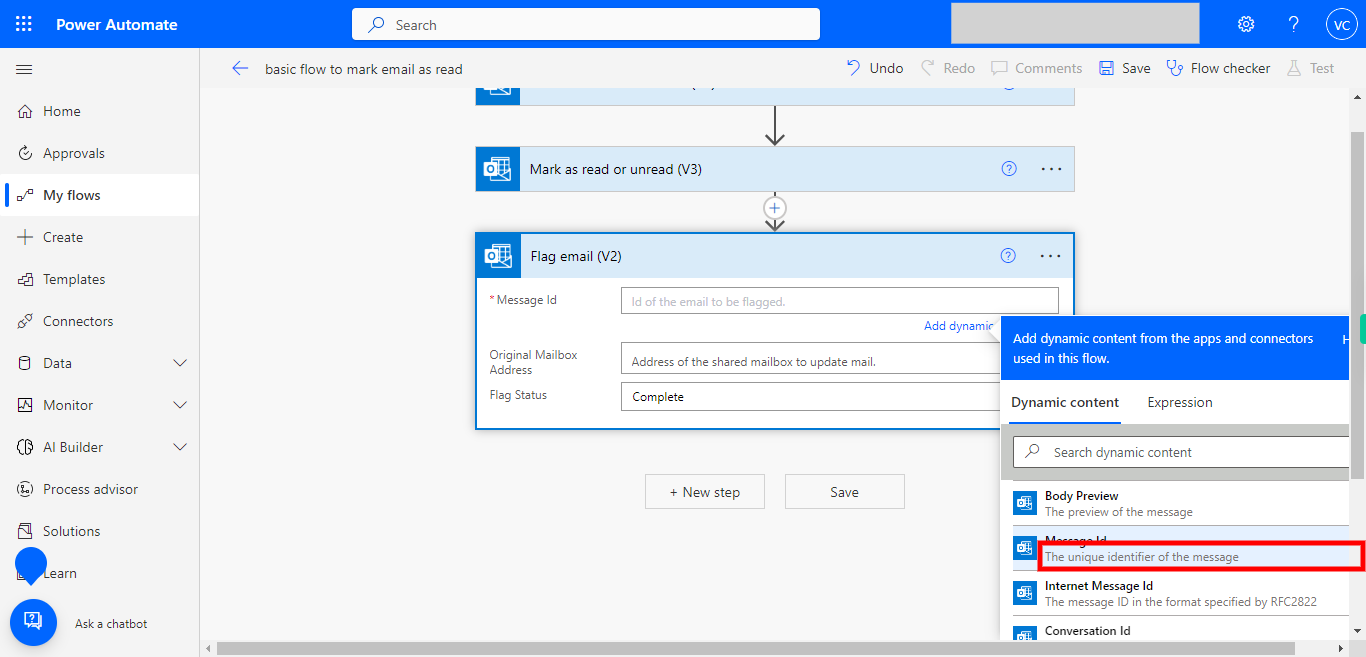
22. Select Message Id from the displayed dynamic content list.
-
24.
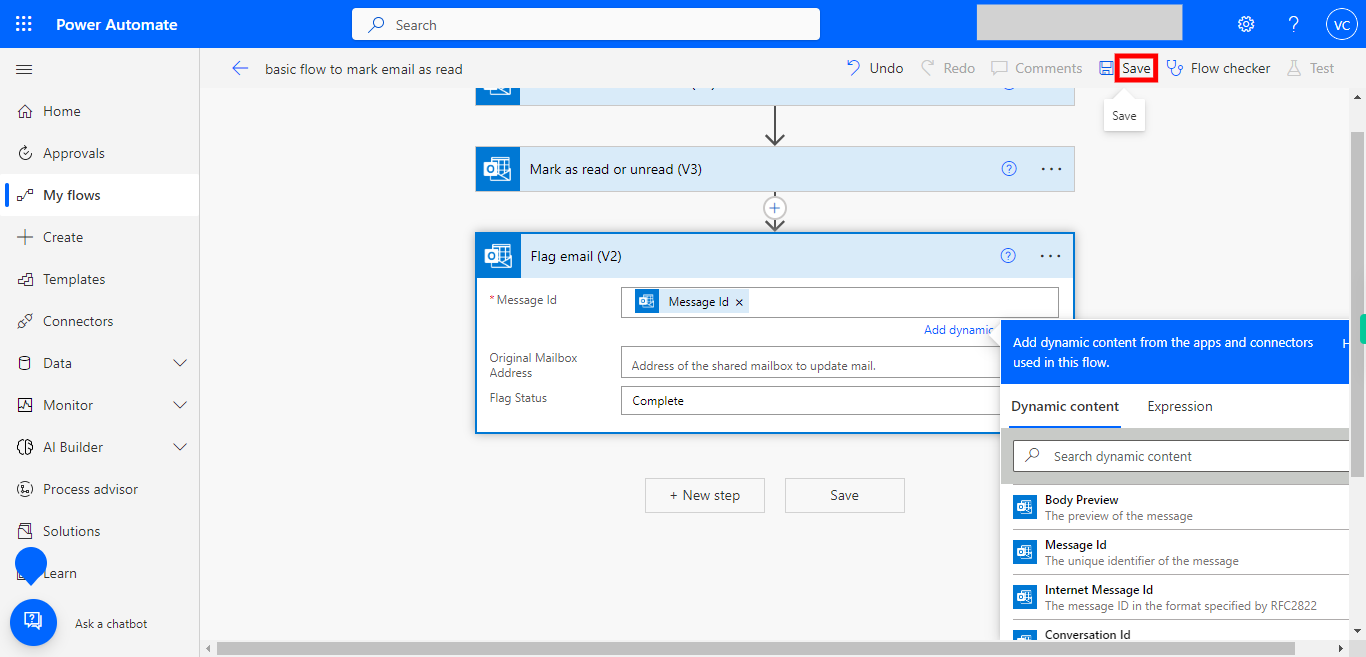
23. Click on the Save at the top right corner. and your Flow or Trigger now is ready to test. Now, whenever a new email arrives in the configured Outlook folder that meets your specified criteria, Power Automate will trigger the flow and update the email, marking it as read and flagging it as complete.
-
25.
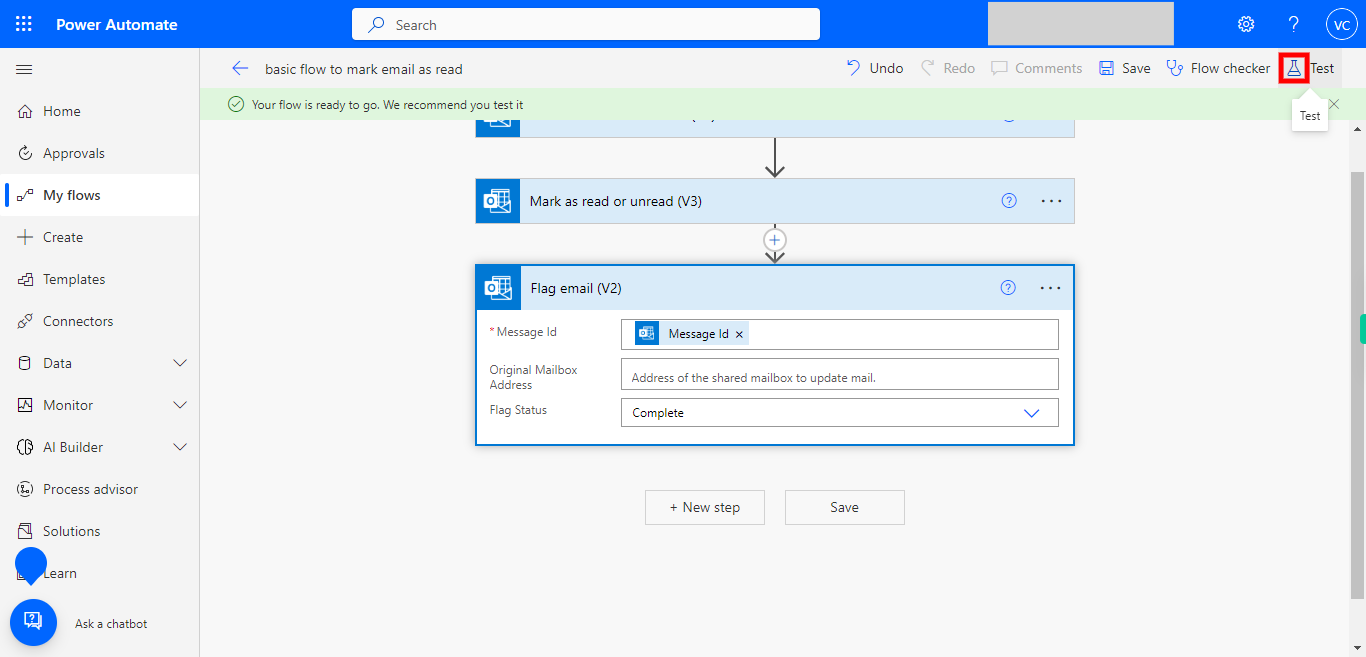
24. Click on the "Test" icon, to test the flow.
-
26.
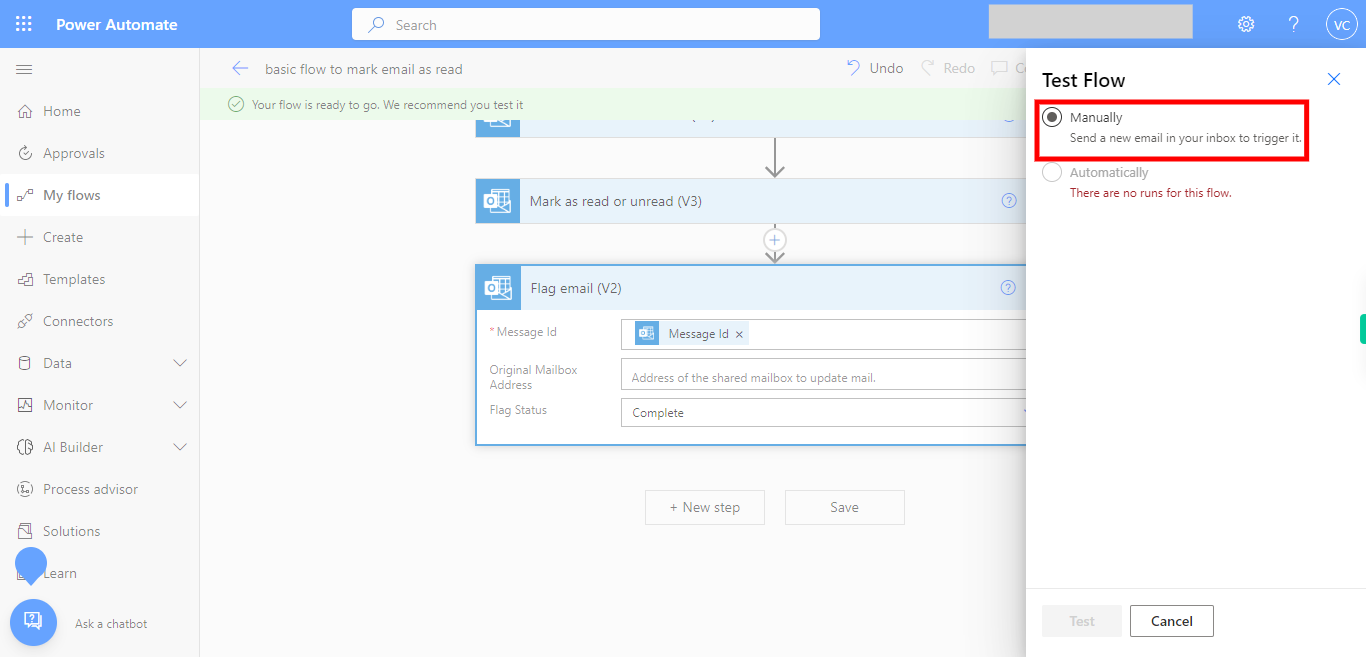
25. Select "Manually" and send a new email to your inbox to trigger it.
-
27.
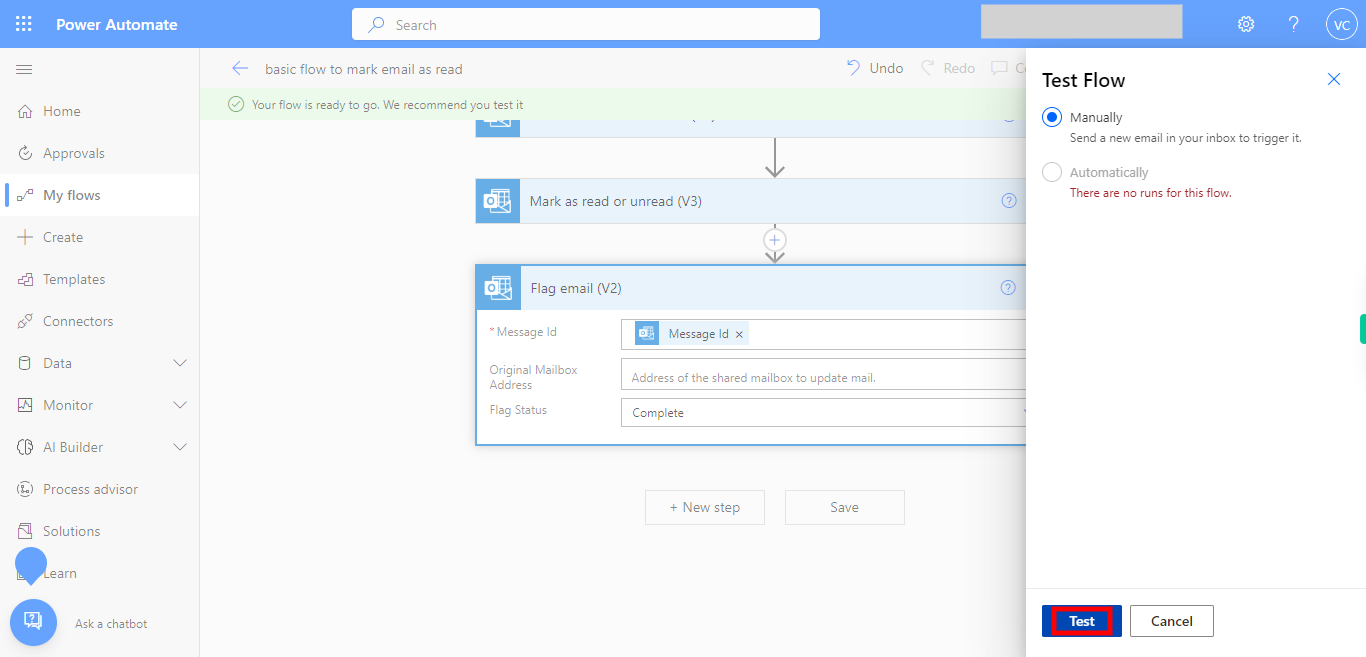
26. Finally click on Test button at the right bottom corner.


