This skill helps to set up a Power Automate flow to extract Outlook emails and store them in SharePoint, automating the process and ensuring that important emails are saved in a central location for easy access and collaboration, Pre-Requisites: Make sure that you can access Microsoft Power platform. Ensure that you have a SharePoint site and library ready to store the extracted emails. Create a new SharePoint library or identify an existing one where you want to save the emails. NOTE: Please sign in to your web Microsoft account before executing this skill.
-
1.
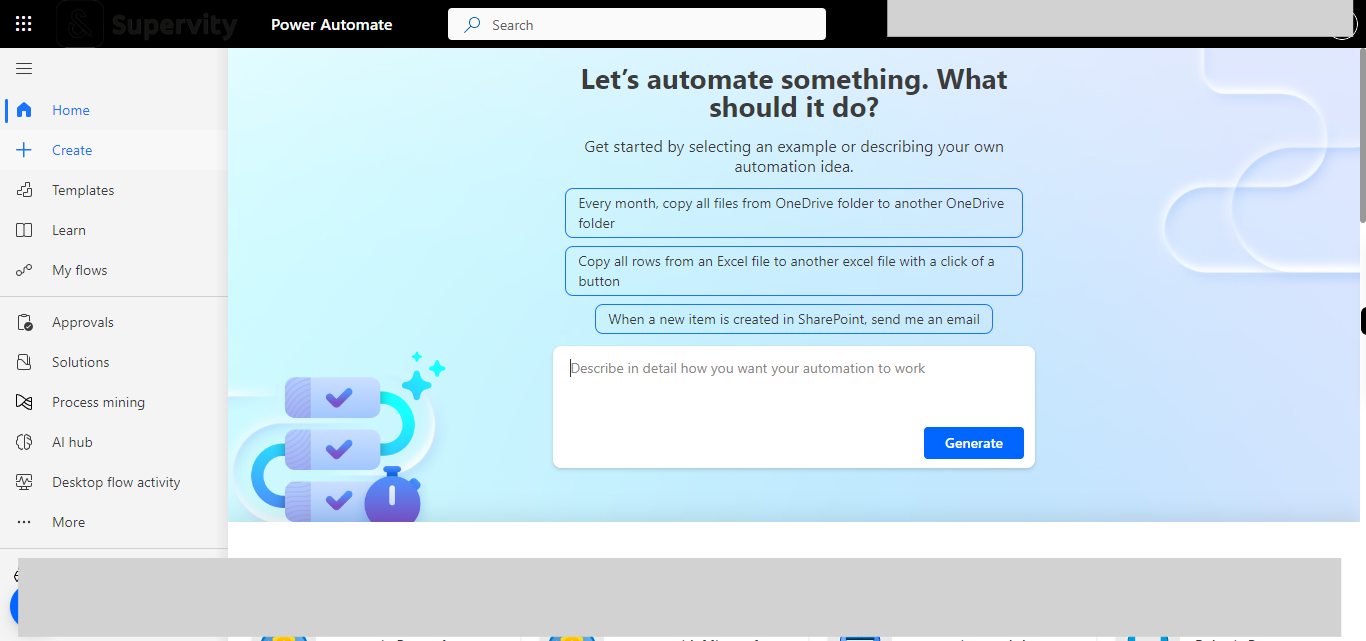
Open Microsoft Power Automate on the web
-
2.
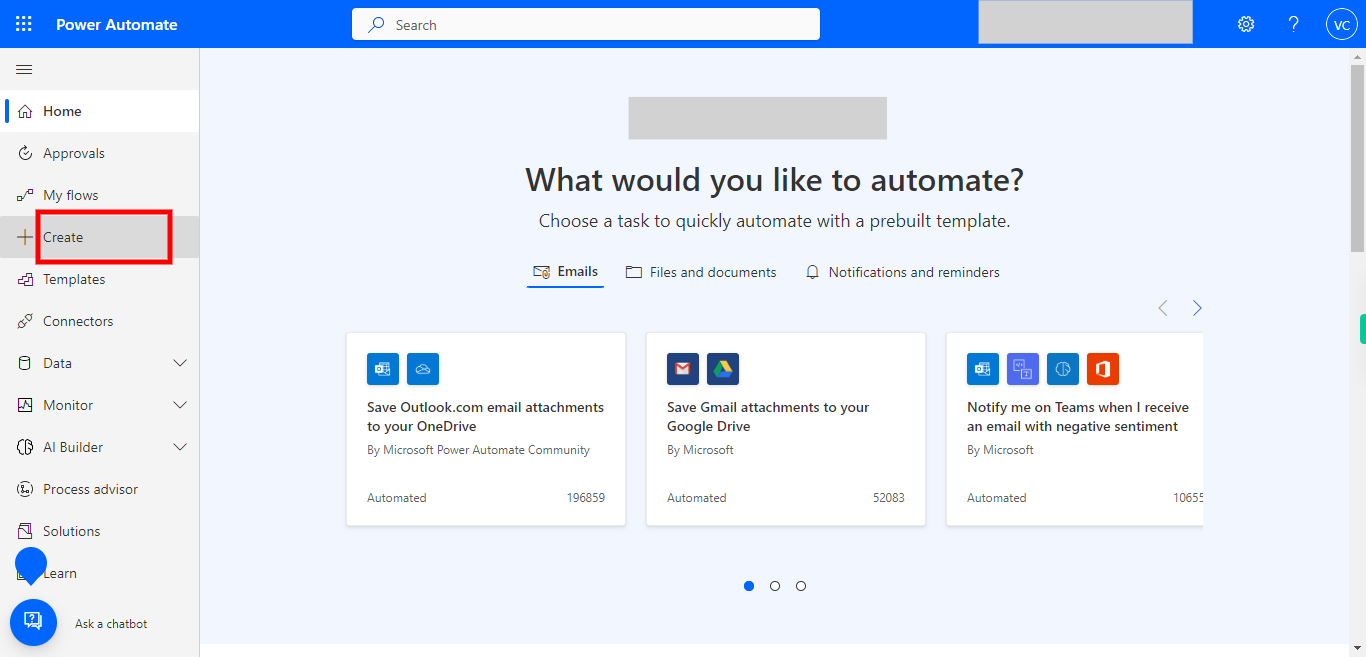
1. If not directed to the below page, sign in and then execute to navigate to this screen. Once done click on the "Create" to start building a new flow.
-
3.
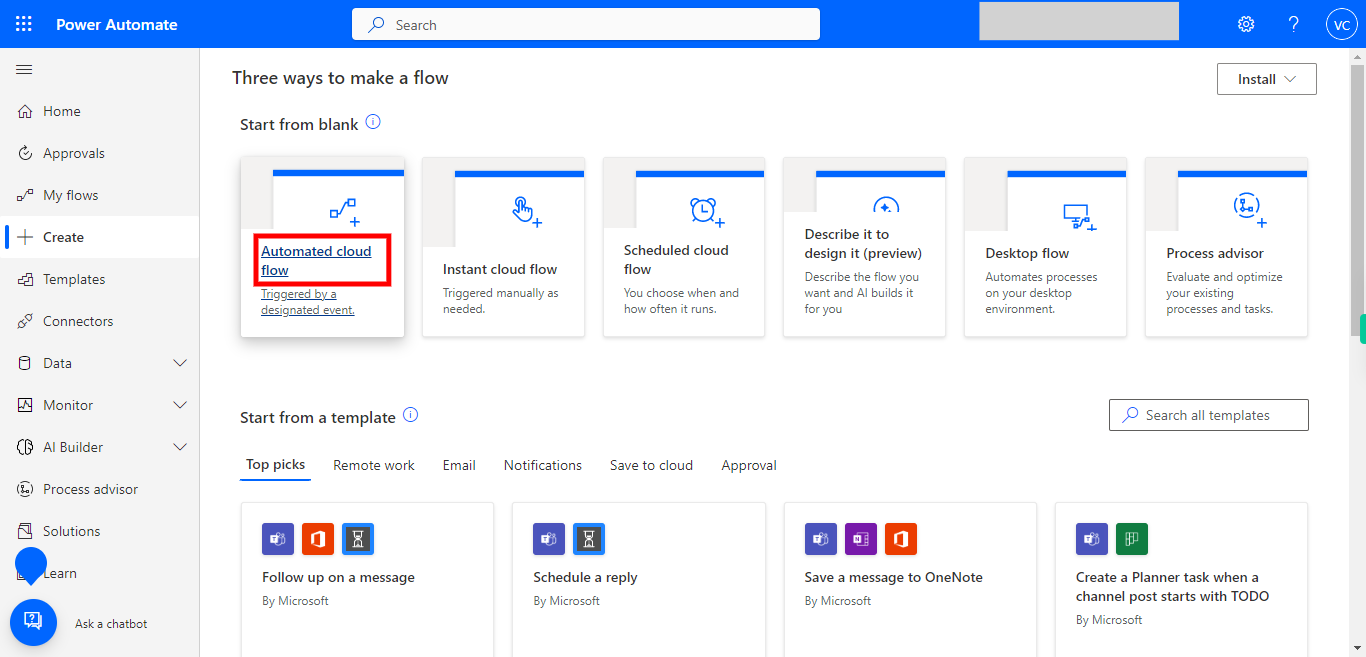
2. Click on "Automated cloud flow". For this scenario, an "Automated cloud flow" is more suitable as it triggers based on specified conditions.
-
4.
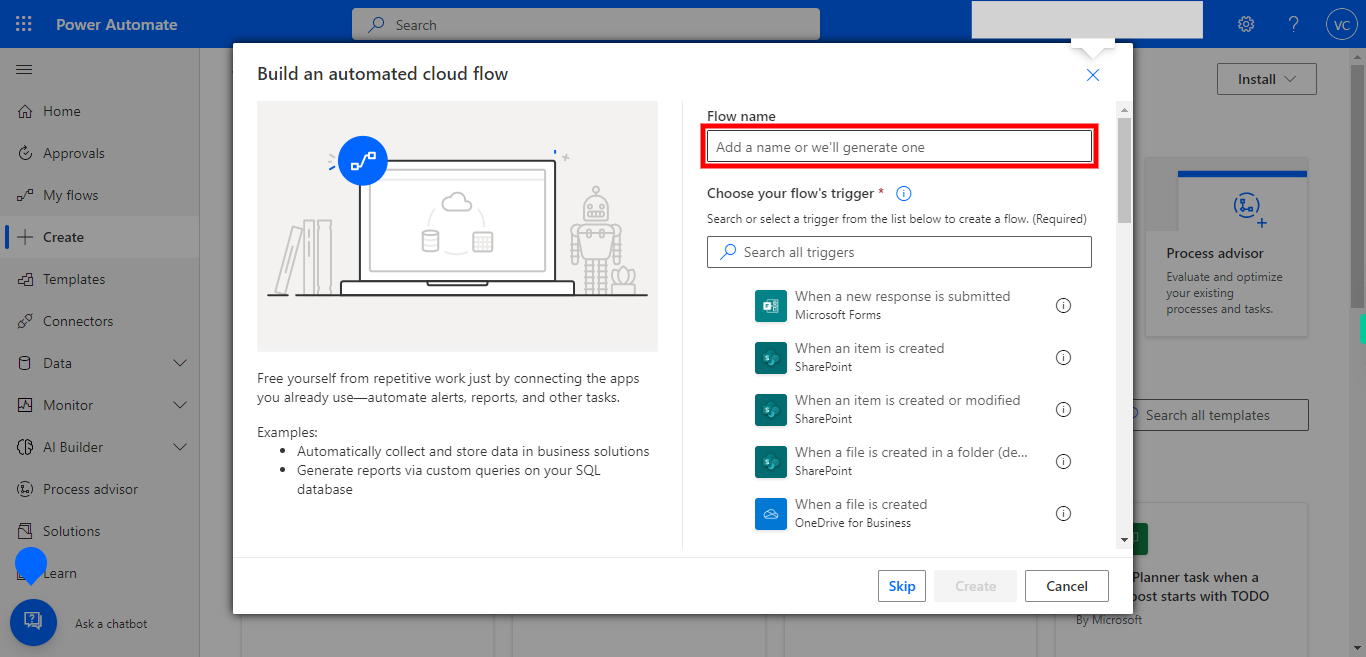
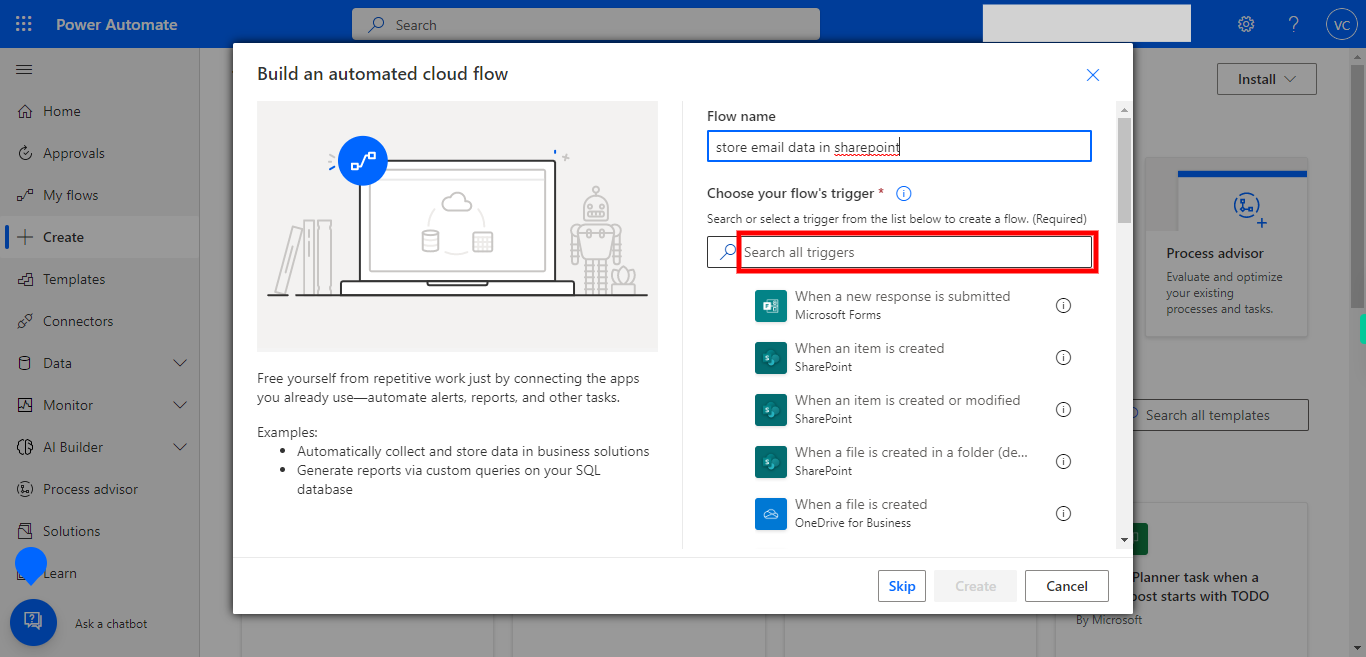
3. Type your flow name, and then click on the Next button in the Supervity instruction widget.
-
5.
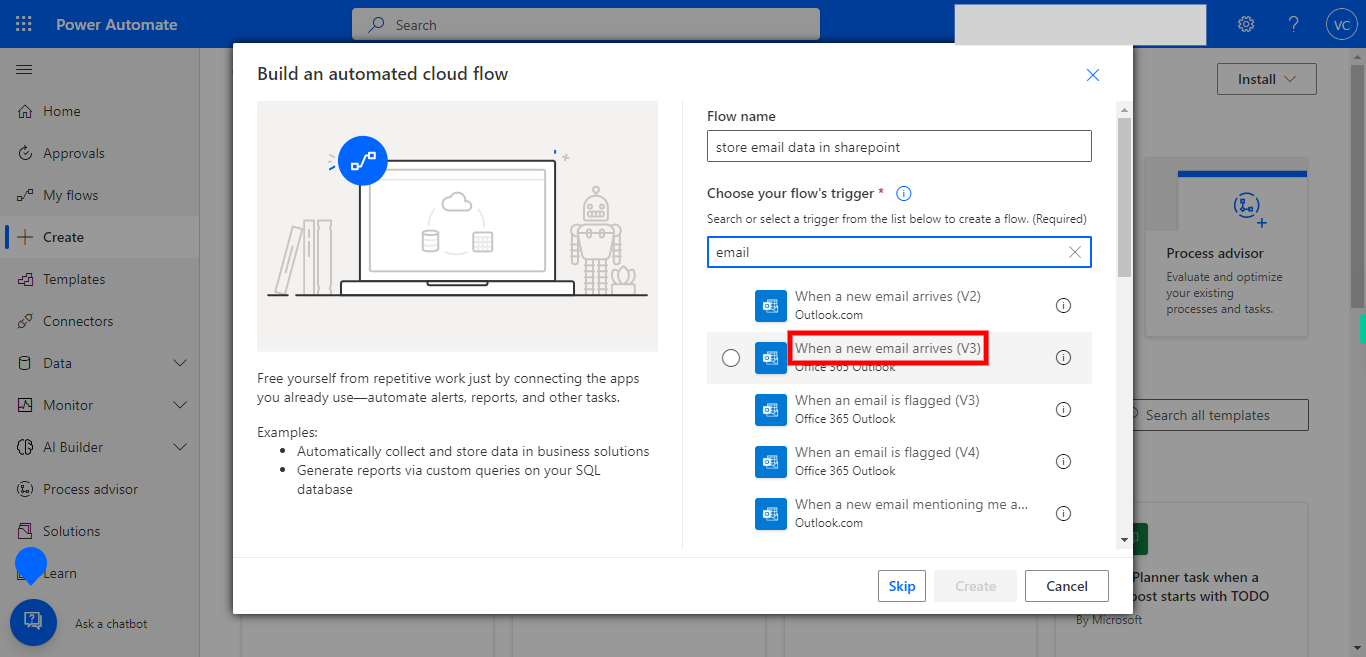
4. Type email and click on the Next button in the Supervity instruction widget, so that all actions regarding emails will be listed.
-
6.
5. First click on the Next button in the Supervity instruction widget, and then click on the text "When a new email arrives (V3) Office 365 Outlook"
-
7.
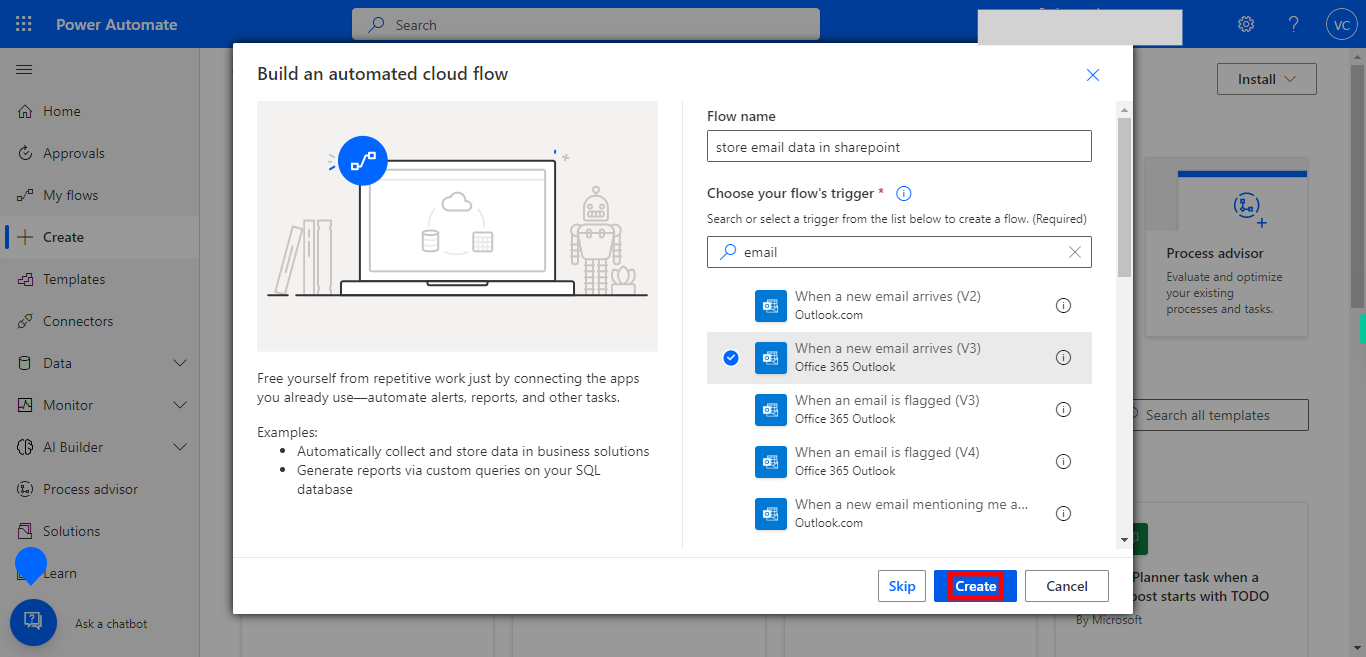
6. Click on the "Create" button.
-
8.
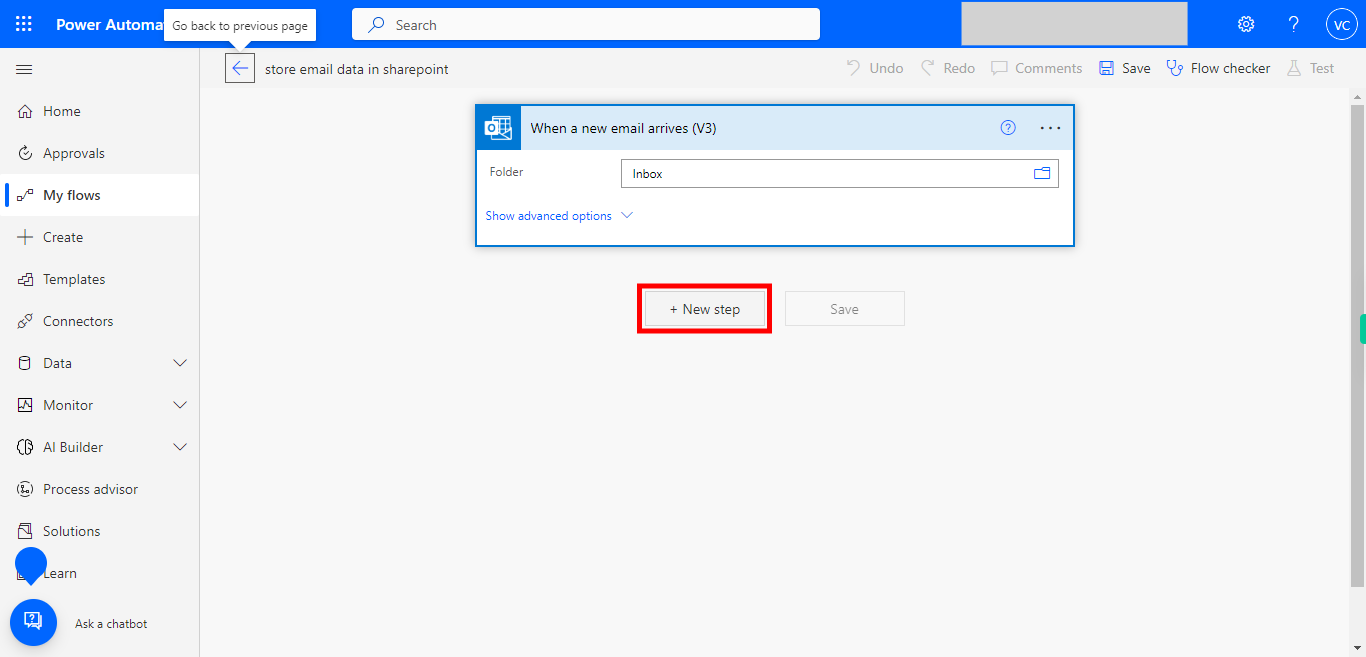
7. To achieve this screen check on the top right corner of the page whetherNew Designer is enabled, if enabled please toggle or disable it, and then the screen appears. Here the default folder will be inbox, if you want you can browse other folders by clicking on the folder icon, also can add to and from options by clicking on the show advanced options highlighted in blue. here this is a generic approach. Click on the "+ New Step" button to add a new action step in the flow.
-
9.
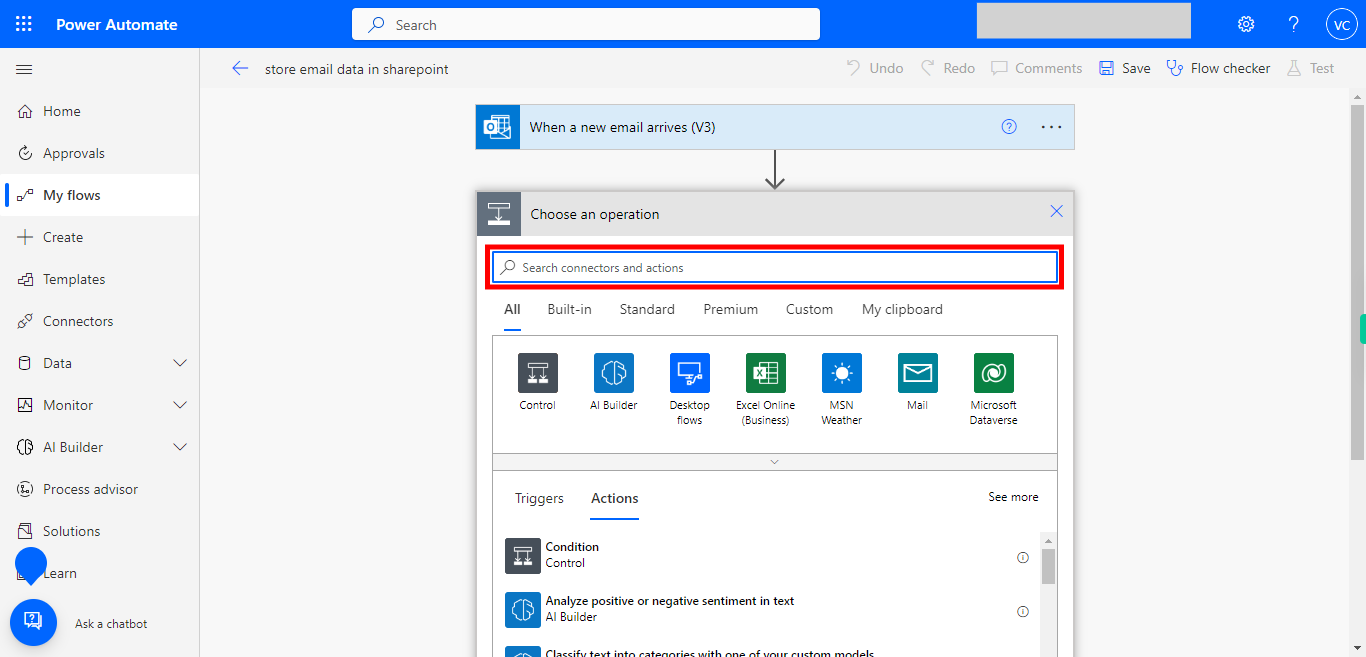
8. Type export email, and then click on the Next button in the Supervity instruction widget.
-
10.
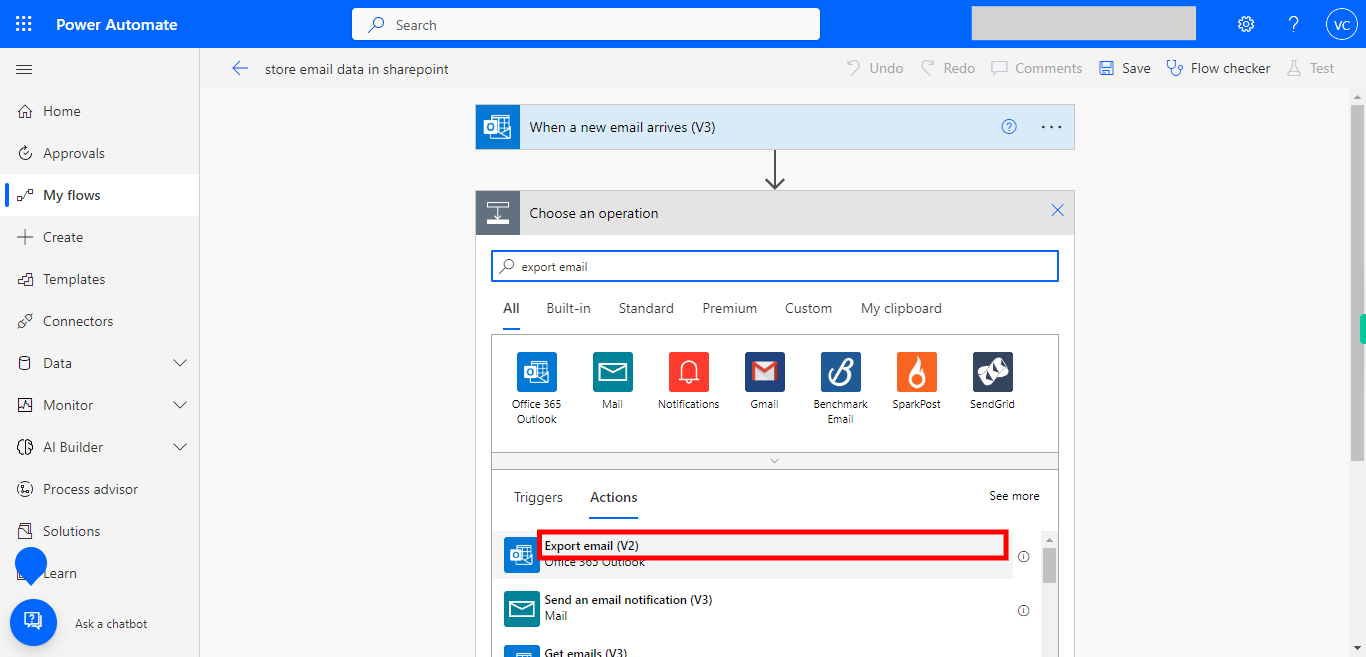
9. Select the text "Export email (V2)" from the listed email actions.
-
11.
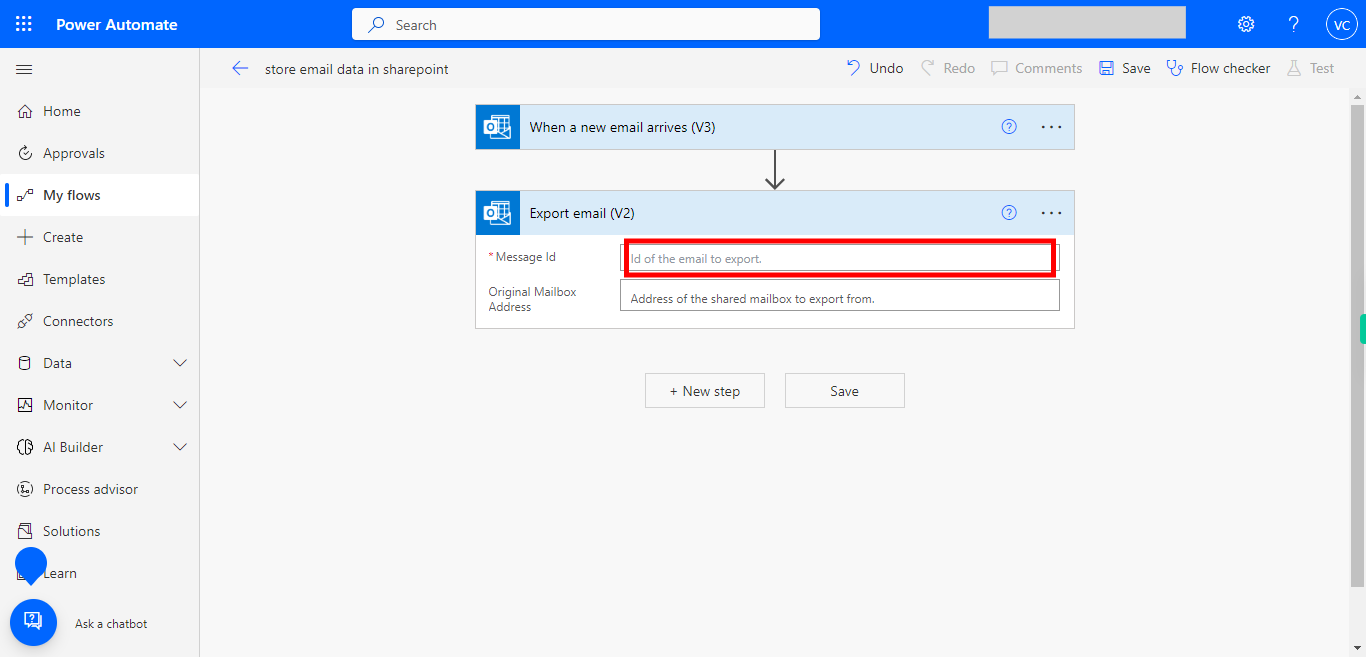
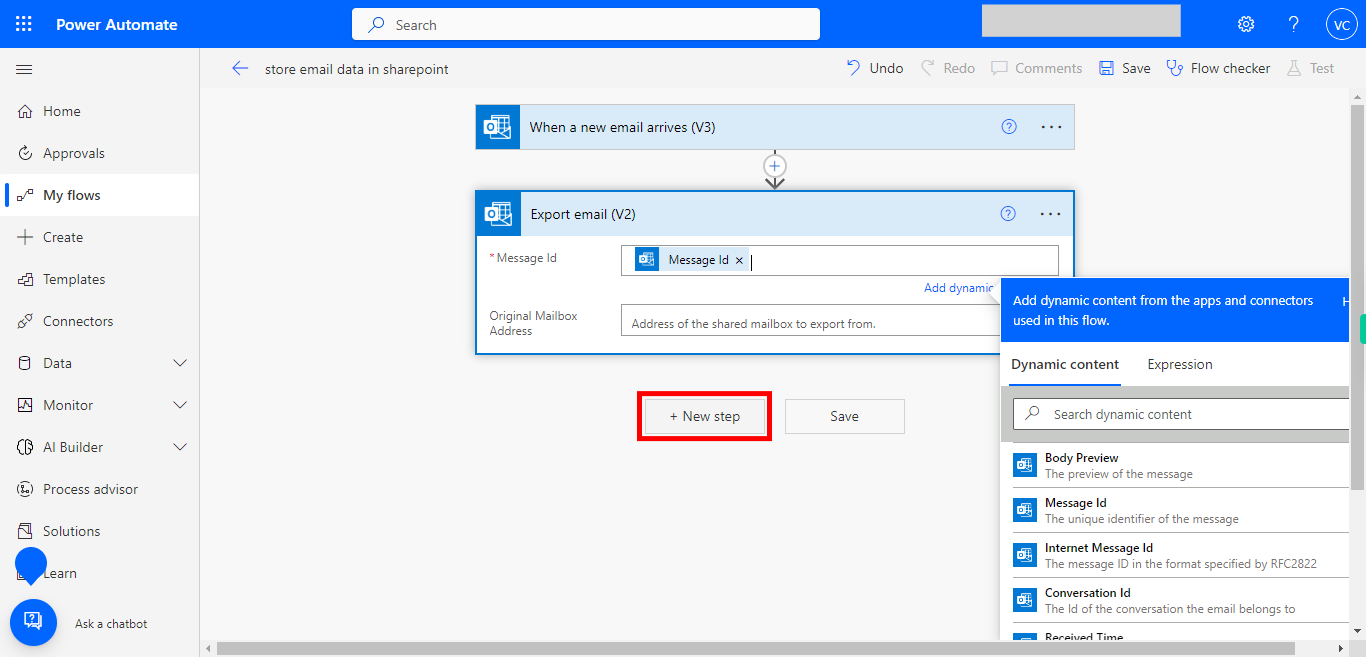
10. Click on Message Id tab.
-
12.
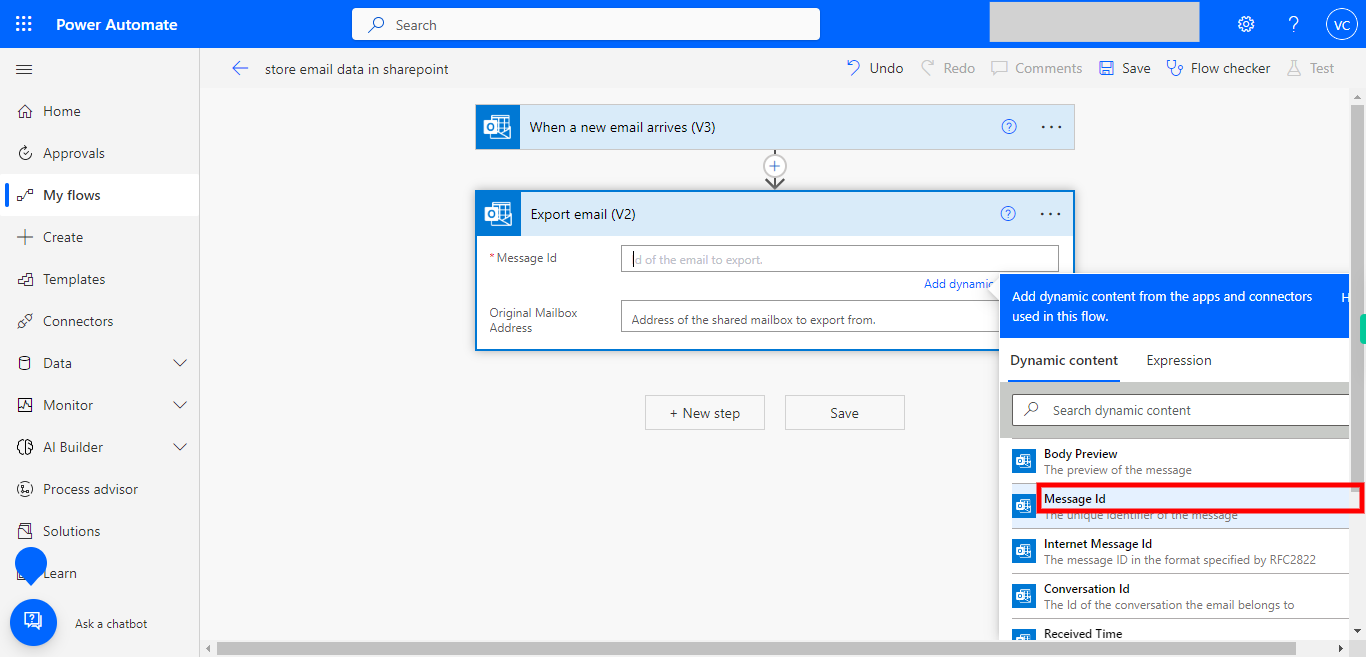
11. Select "Message Id" from the dynamic content list available.
-
13.
12. Click on the "+ New Step" button to add a new action step in the flow.
-
14.
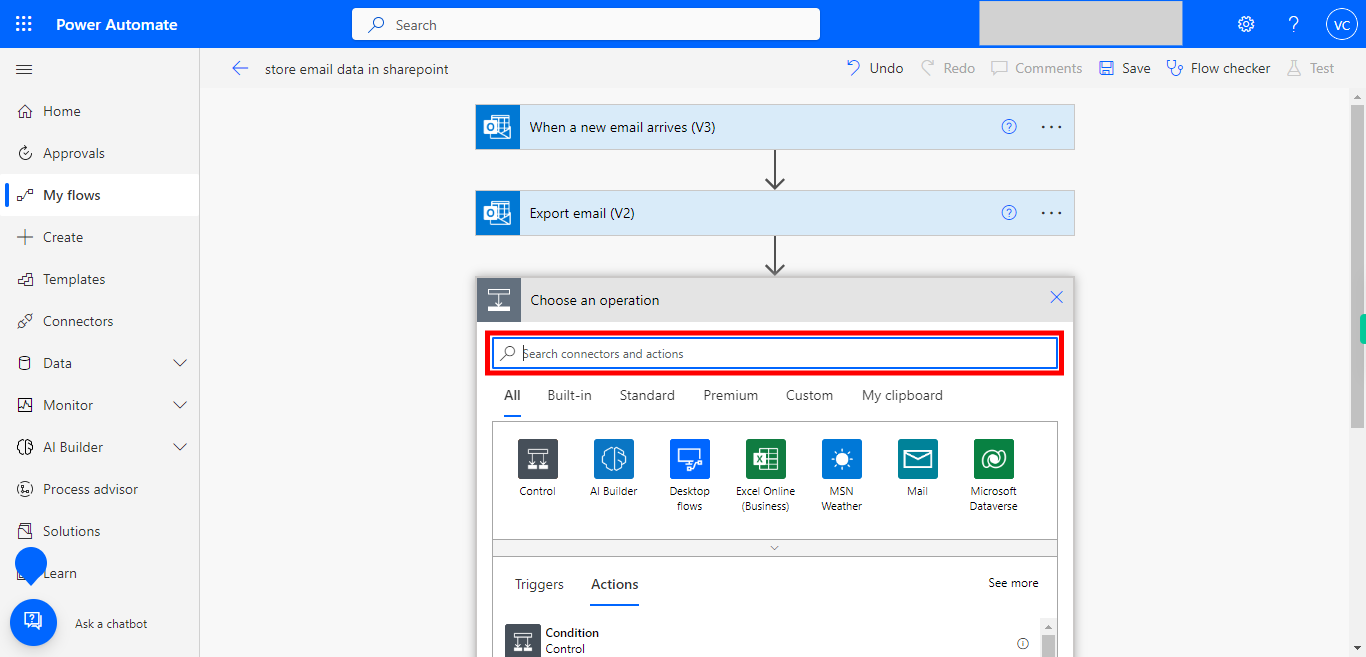
13. Type Sharepoint and then click on the Next button in the Supervity instruction widget.
-
15.
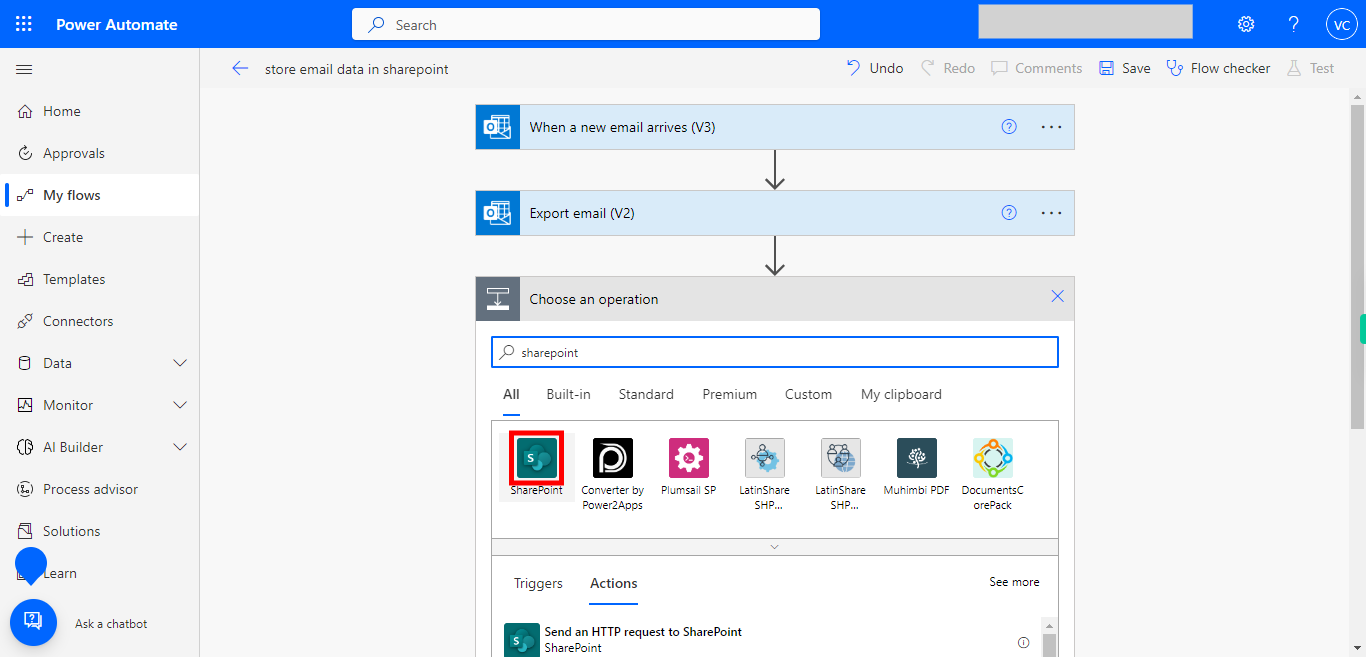
14. Click on the Sharepoint icon.
-
16.
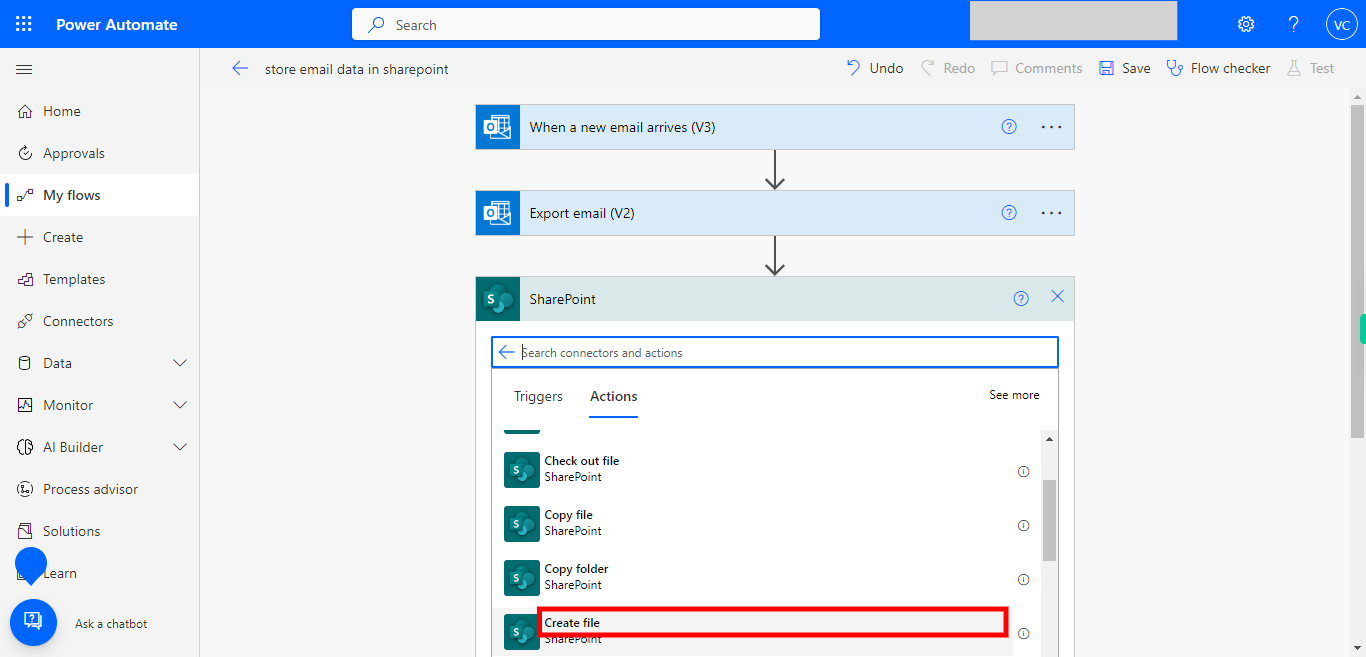
15. Select the "Create file" text from the listed sharepoint actions.
-
17.
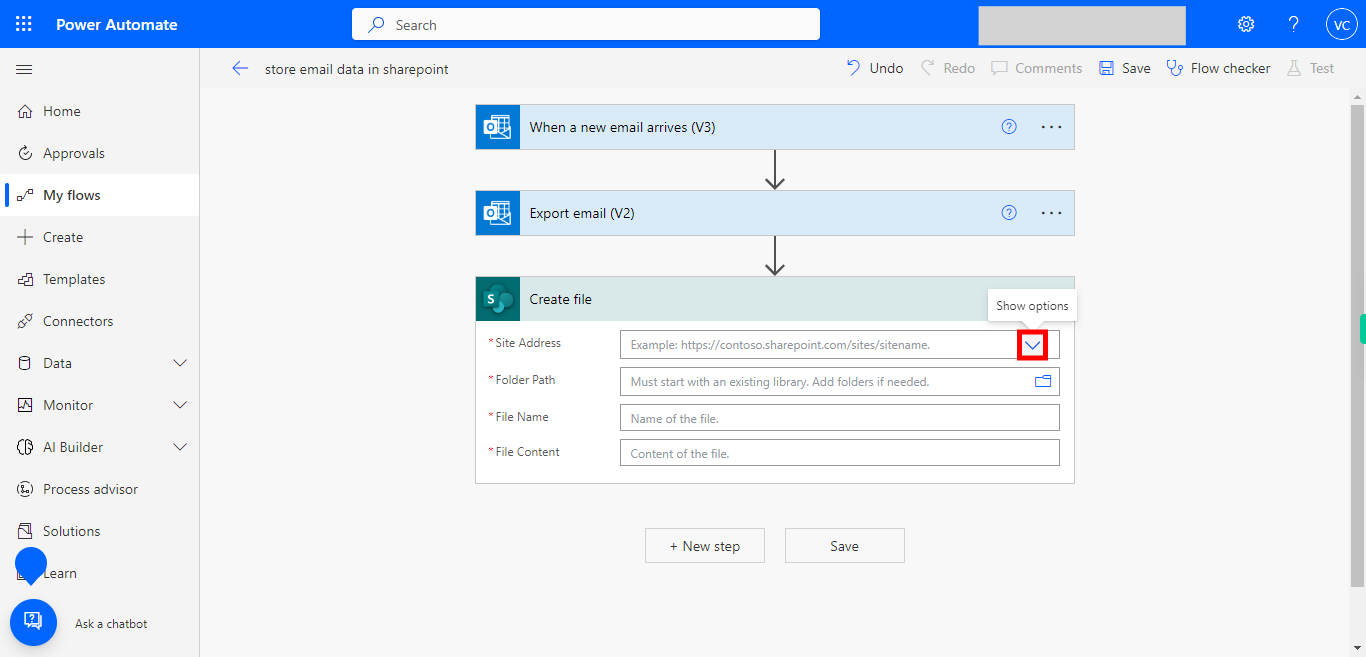
16. Click on the dropdown icon and select the path from the list shown. and then click on the Next button in the Supervity instruction widget.
-
18.
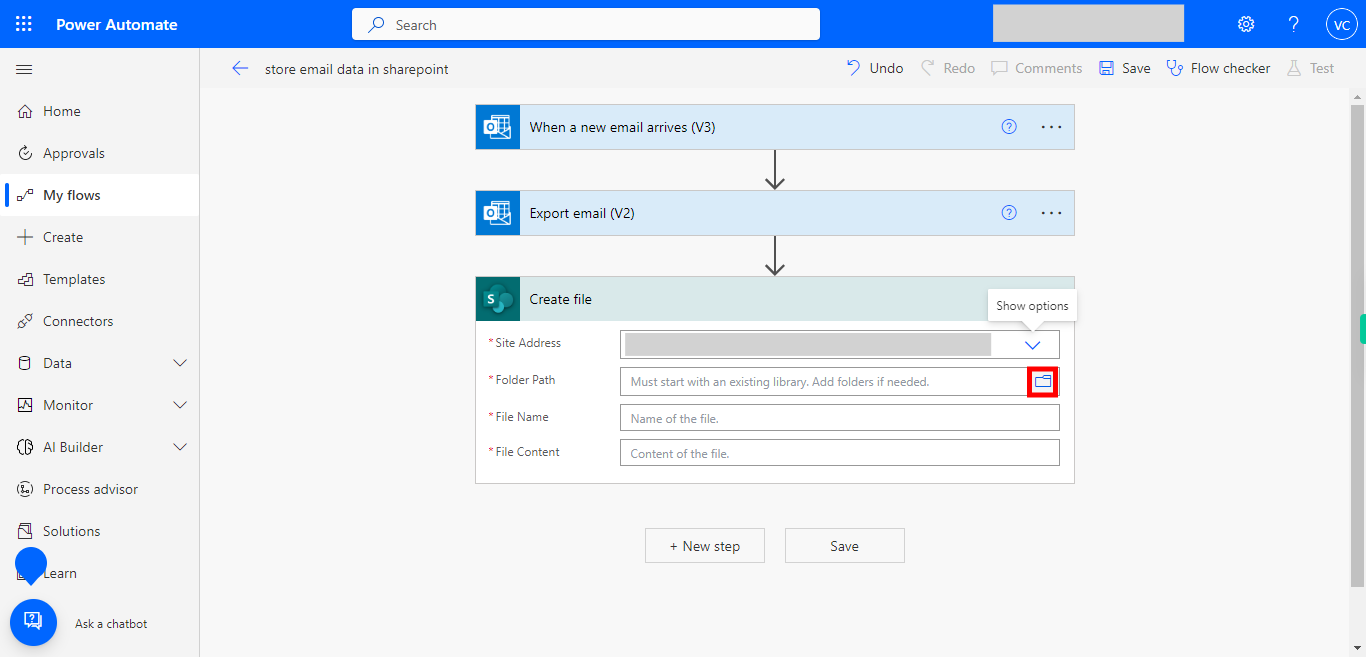
17. Select the folder by clicking on the dropdown icon and then click on the Next button in the Supervity instruction widget.
-
19.
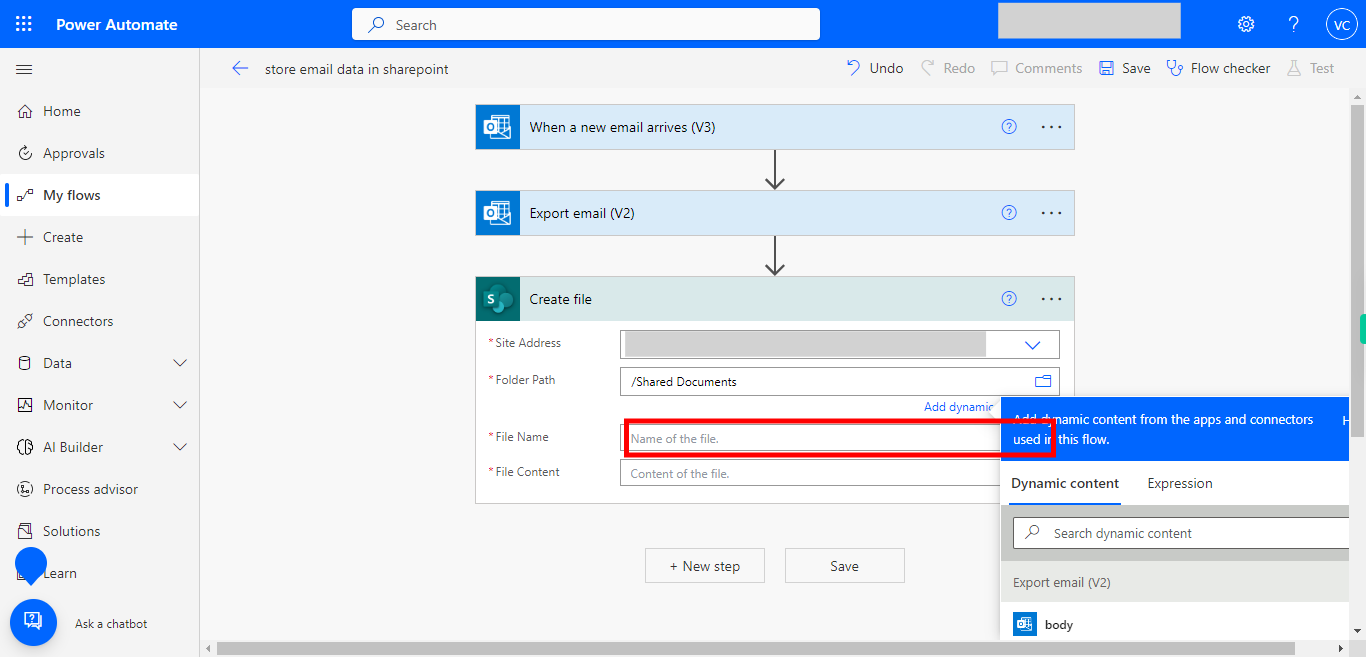
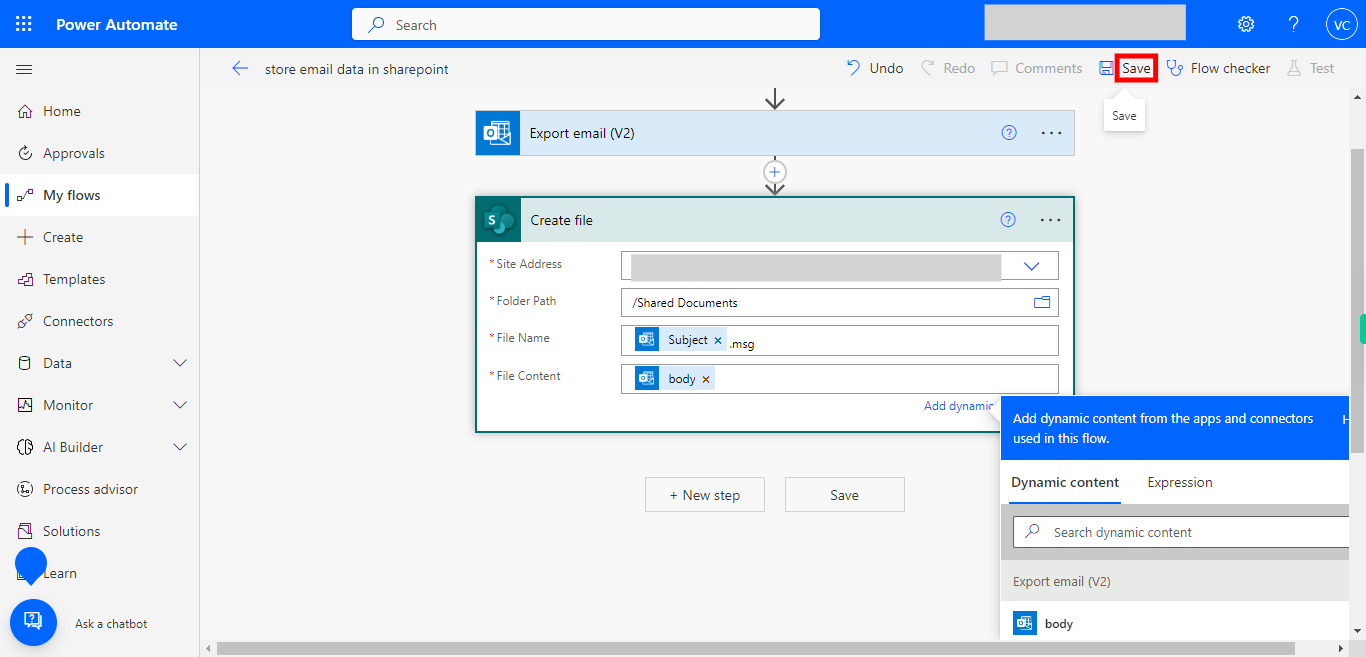
18. Here you can type the file name or else select any specific thing from dynamic list like subject or from but the extension should be .msg...and then click on the Next button in the Supervity instruction widget.
-
20.
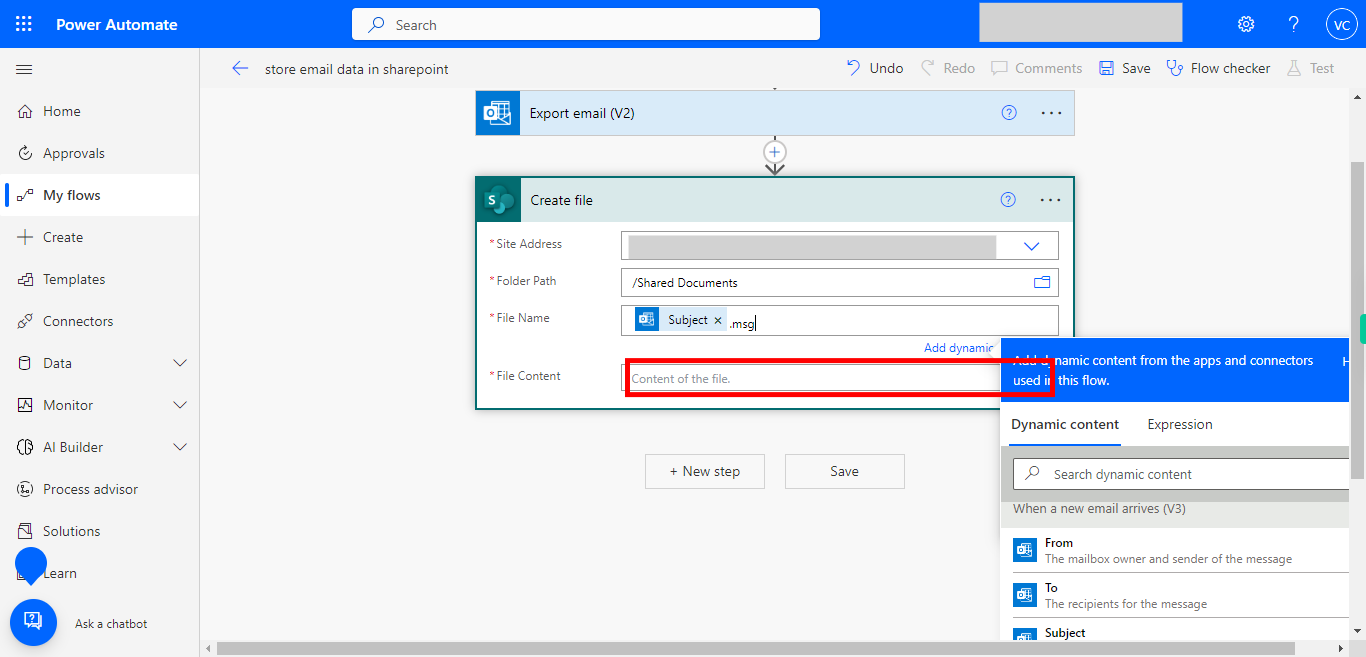
19. Select the content that you want to be in file from the dynamic list. and then click on the Next button in the Supervity instruction widget.
-
21.
20. Click on the save option once after adding all the mandatory fields.
-
22.
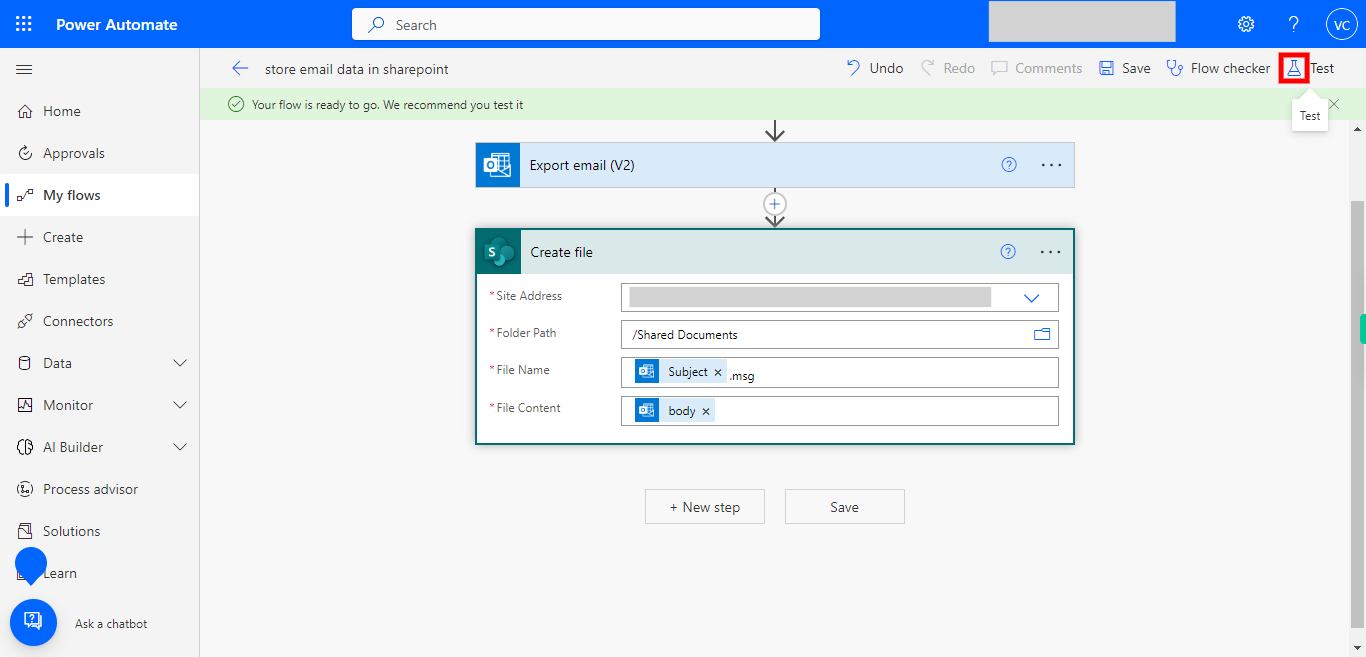
21. Your flow is ready and can start testing by clicking on the test icon. You can then run a test by triggering the flow using a sample email that meets the defined criteria. Verify that the data is extracted correctly from the email and stored in the desired SharePoint list.
-
23.
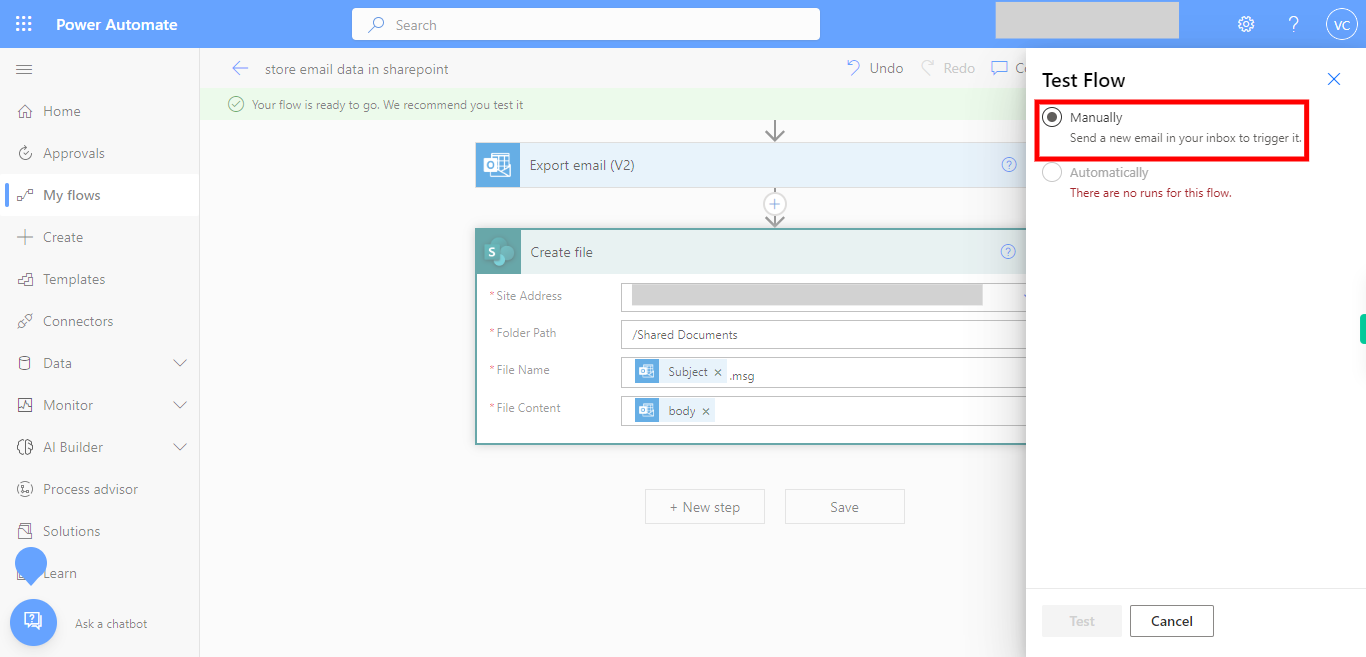
22. Click Manually and send a new email in your inbox to trigger it.
-
24.
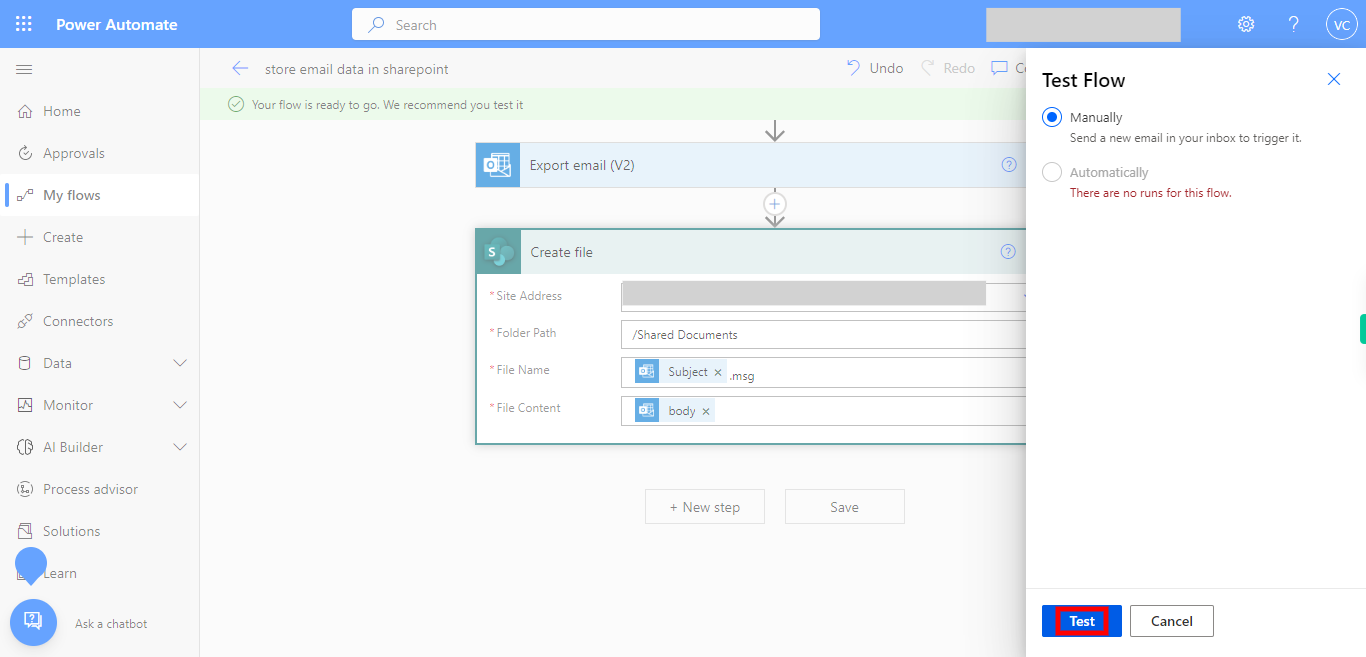
23. Finally click on the "Test" button.


