This skill helps you in creating a flow in Power Automate to create Outlook tasks from Microsoft Forms responses. Whenever a new response is submitted in the specified Microsoft Forms survey, the flow will trigger and create a task in Outlook based on the response details. , Pre-Requisites: Make sure that you can access Microsoft Power Platform, and ensure you have the form in your Google Forms with any question that has a generic response like Yes or No. NOTE: Please sign in to your web Microsoft 365 account and then execute this skill.
-
1.
Open Microsoft Power Automate on the web
-
2.
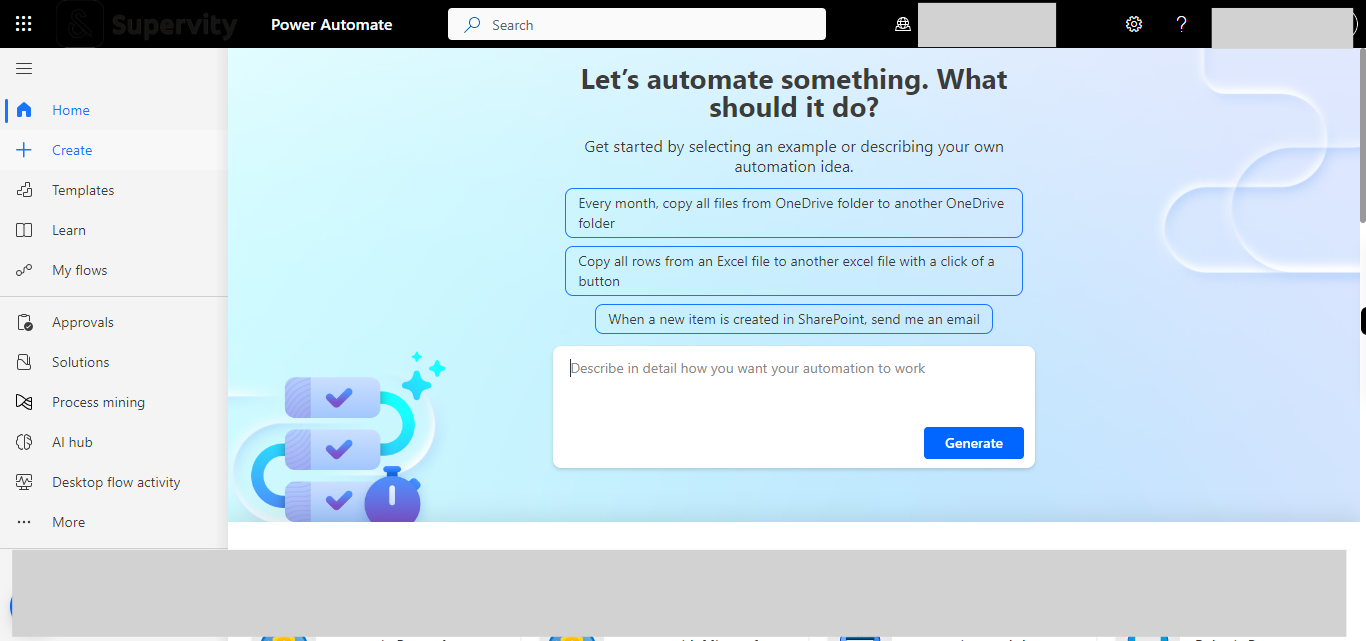
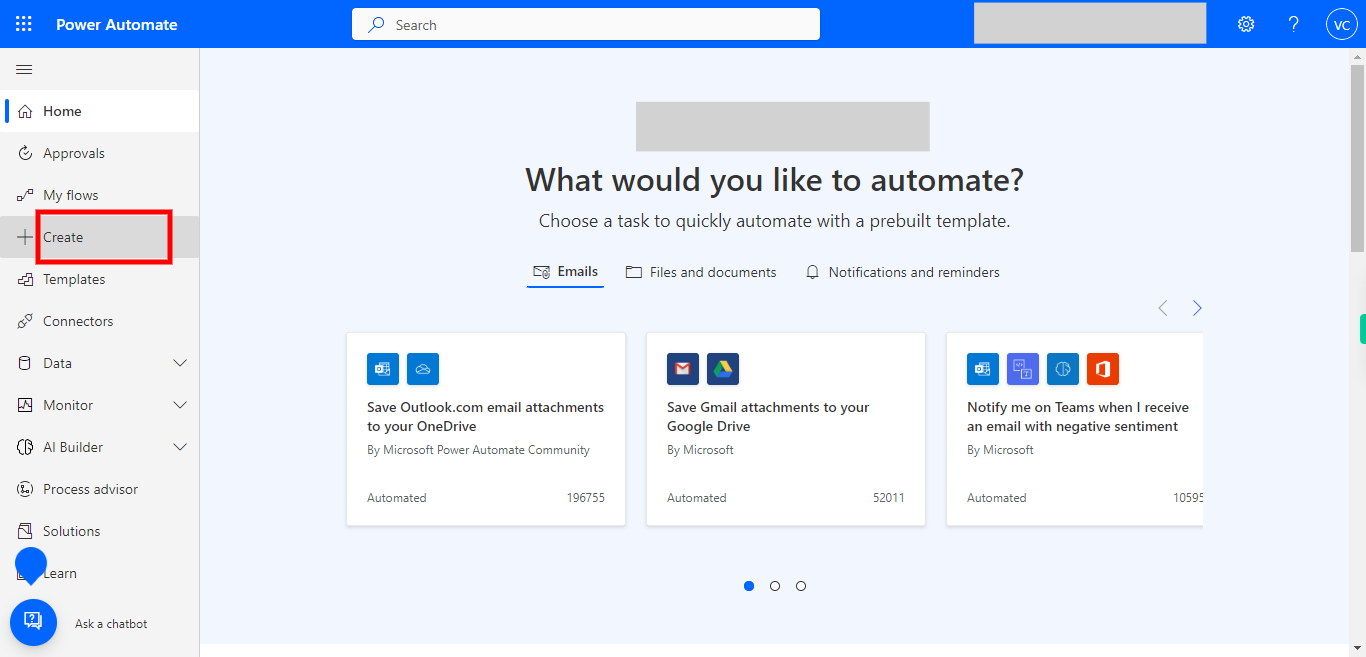
1. If you are redirected to this screen please sign in and then execute, and once the below screen appears click on Create to start building a new flow.
-
3.
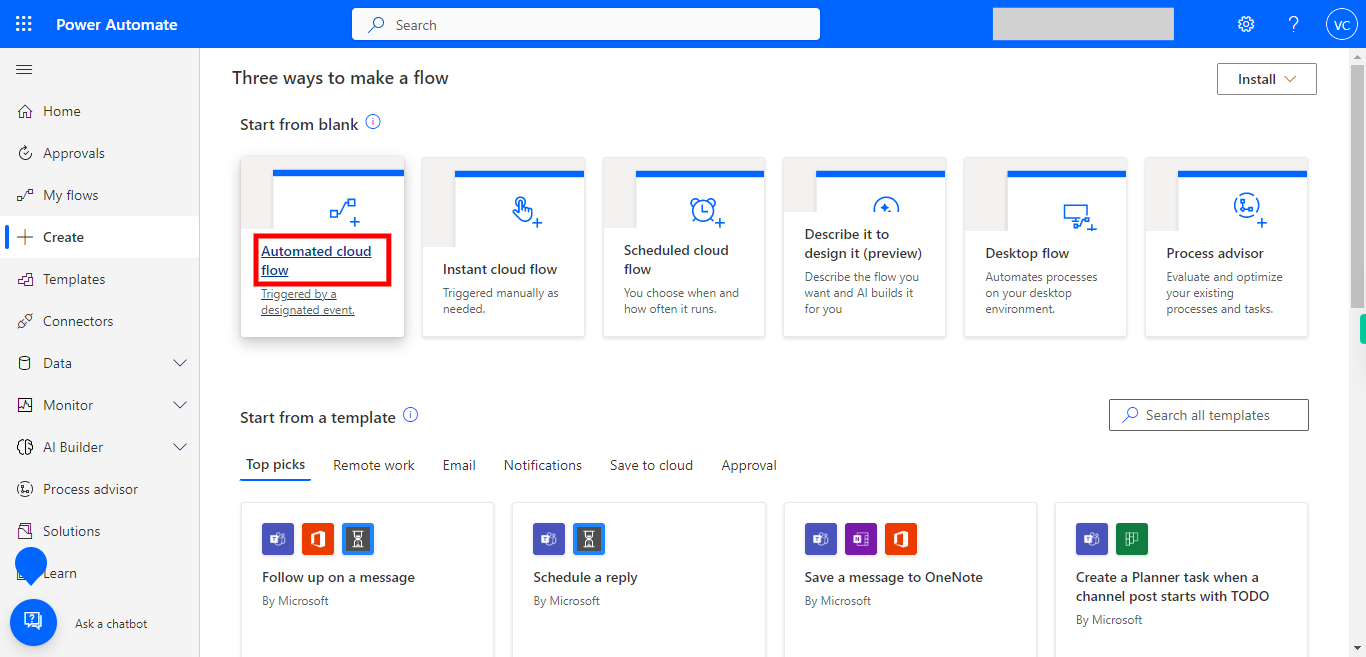
2. Click on "Automated cloud flow" to develop an automated flow, which suites best for trigger.
-
4.
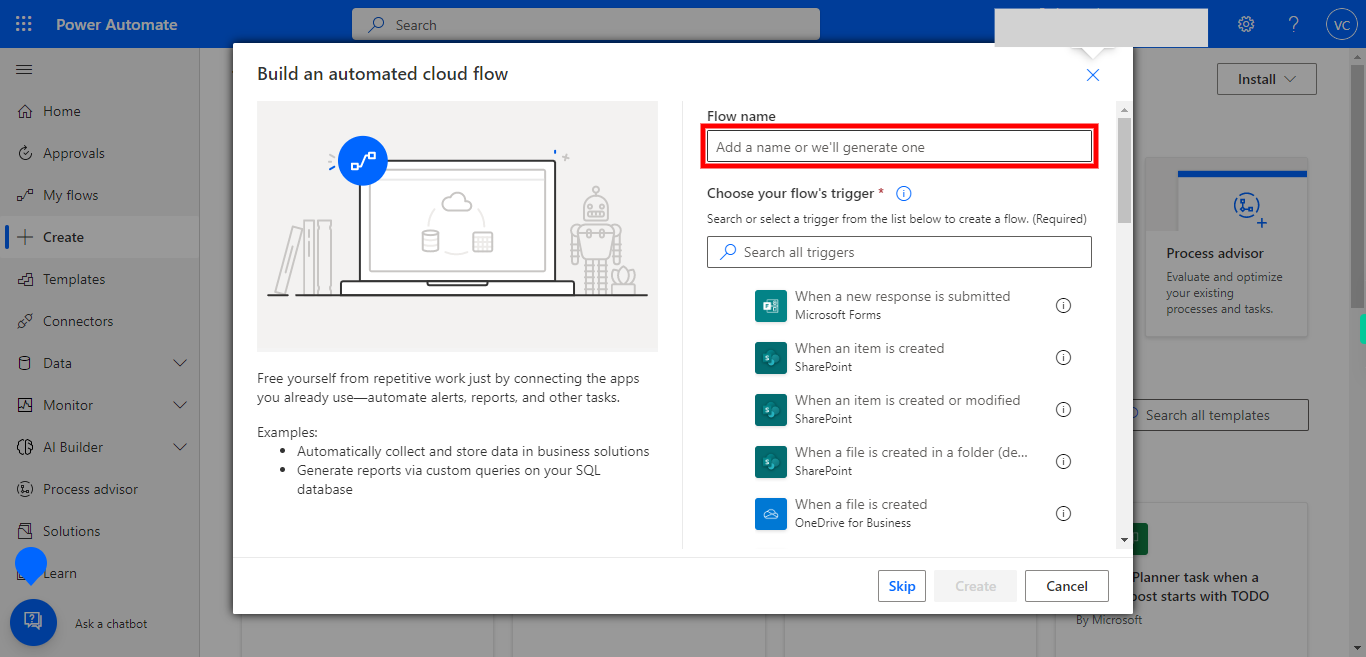
3. Type in the flow name, and then click on the Next button in the Supervity instruction widget.
-
5.
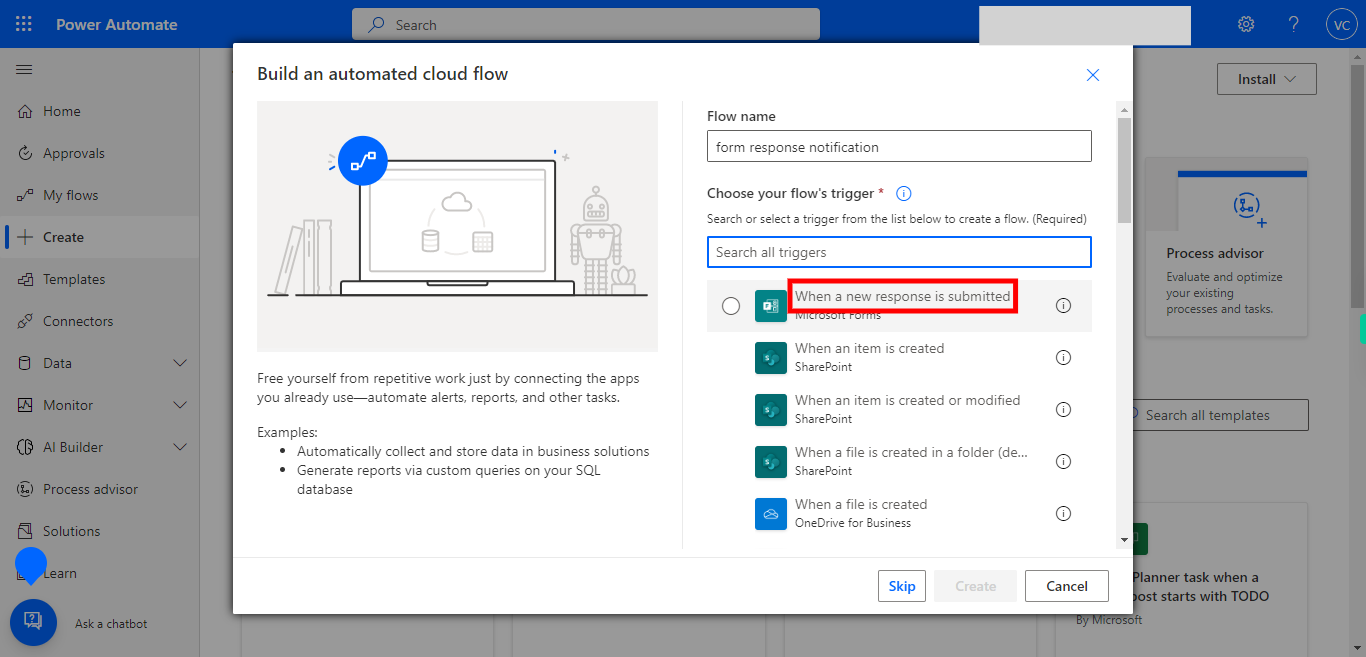
4. First click on the Next button in the Supervity instruction widget, and then search for and select the text When a new response is submitted Microsoft forms. This trigger will initiate the flow whenever a new response is submitted in your Microsoft Forms.
-
6.
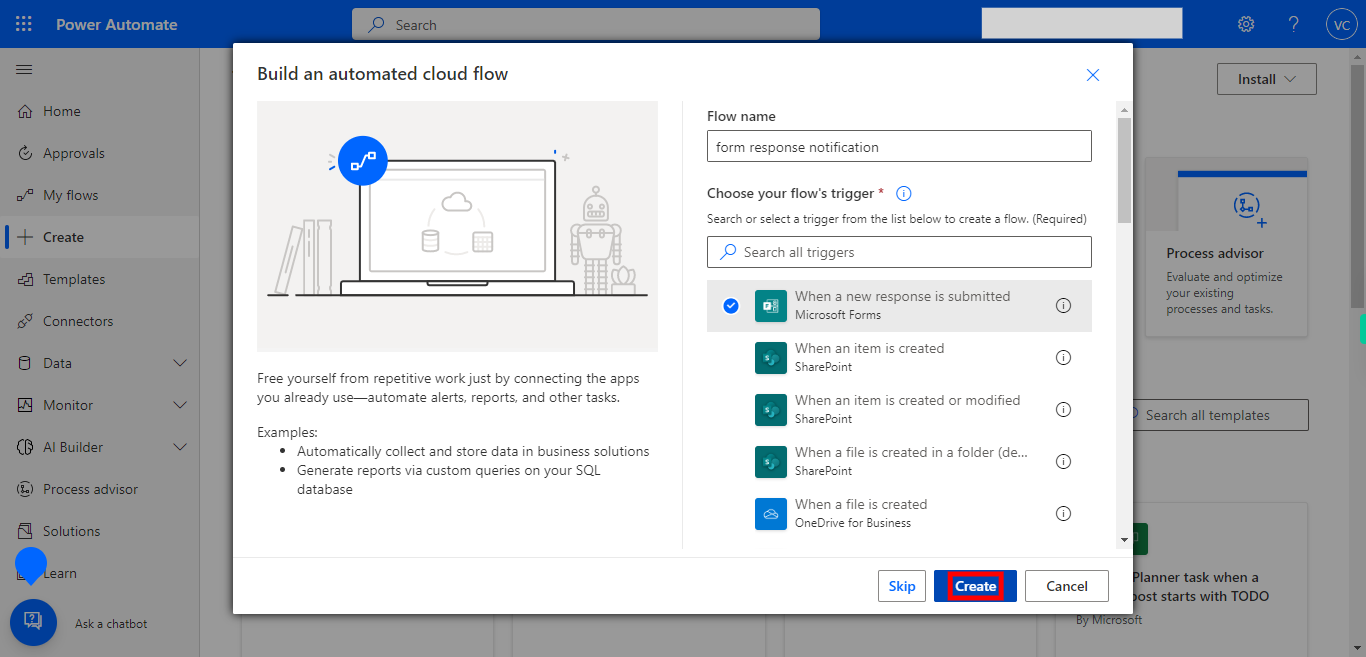
5. Click on the Create button at the bottom right corner of the page.
-
7.
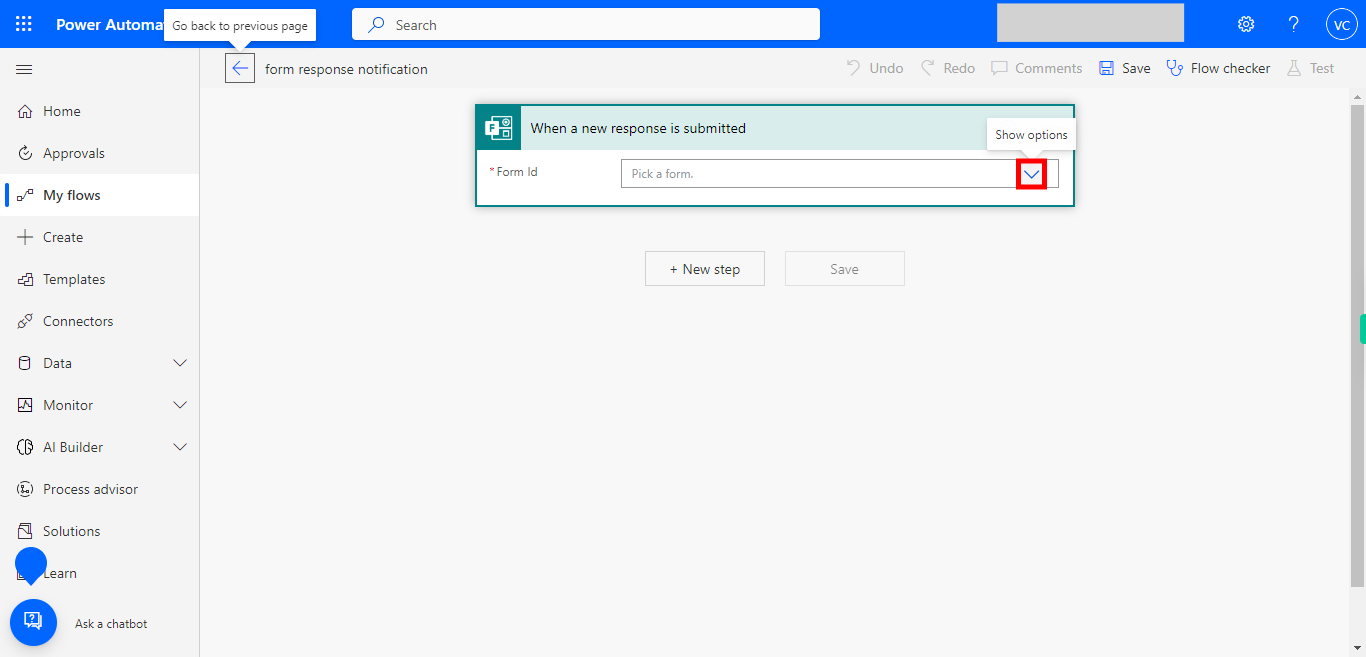
6. To achieve this screen check on the top right corner of the page whetherNew Designer is enabled, if enabled please toggle or disable it, and then the screen appears. Click on the drop-down icon, and you can see the forms present in your account. Select the form for which you want an email notification. and then click on the Next button in the Supervity instruction widget.
-
8.
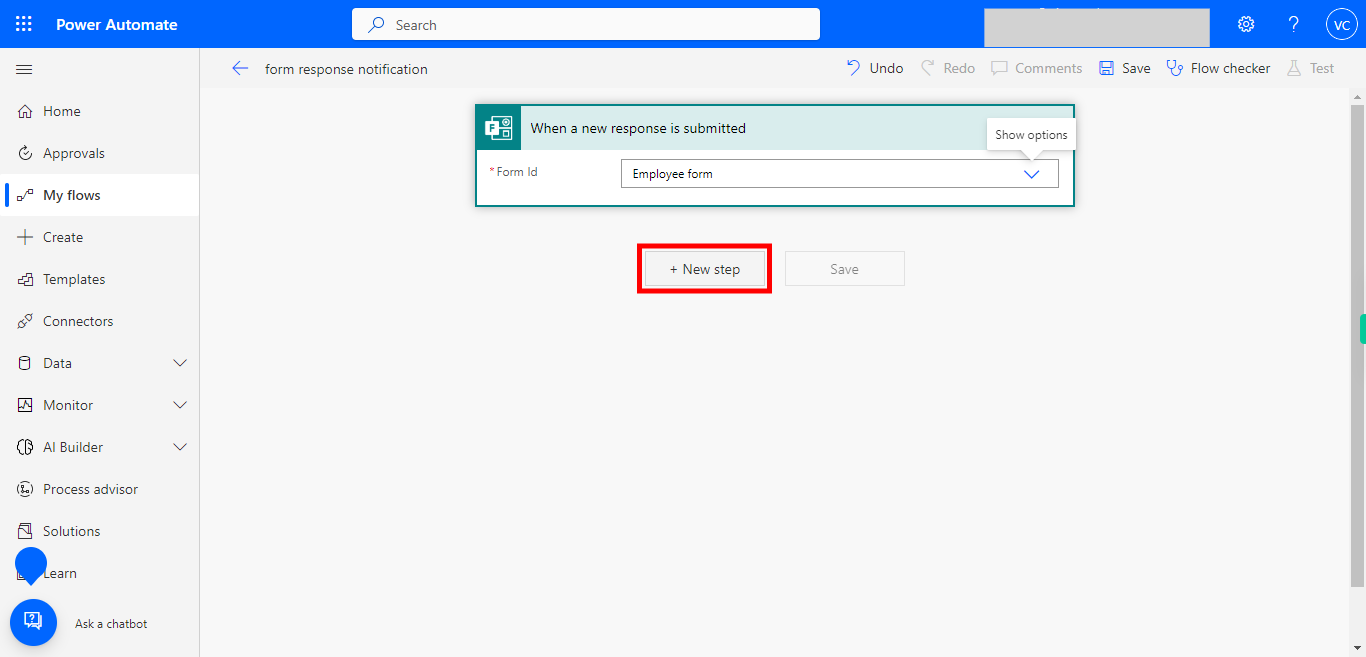
7. Click on the + New Step button to add a new action step in the flow.
-
9.
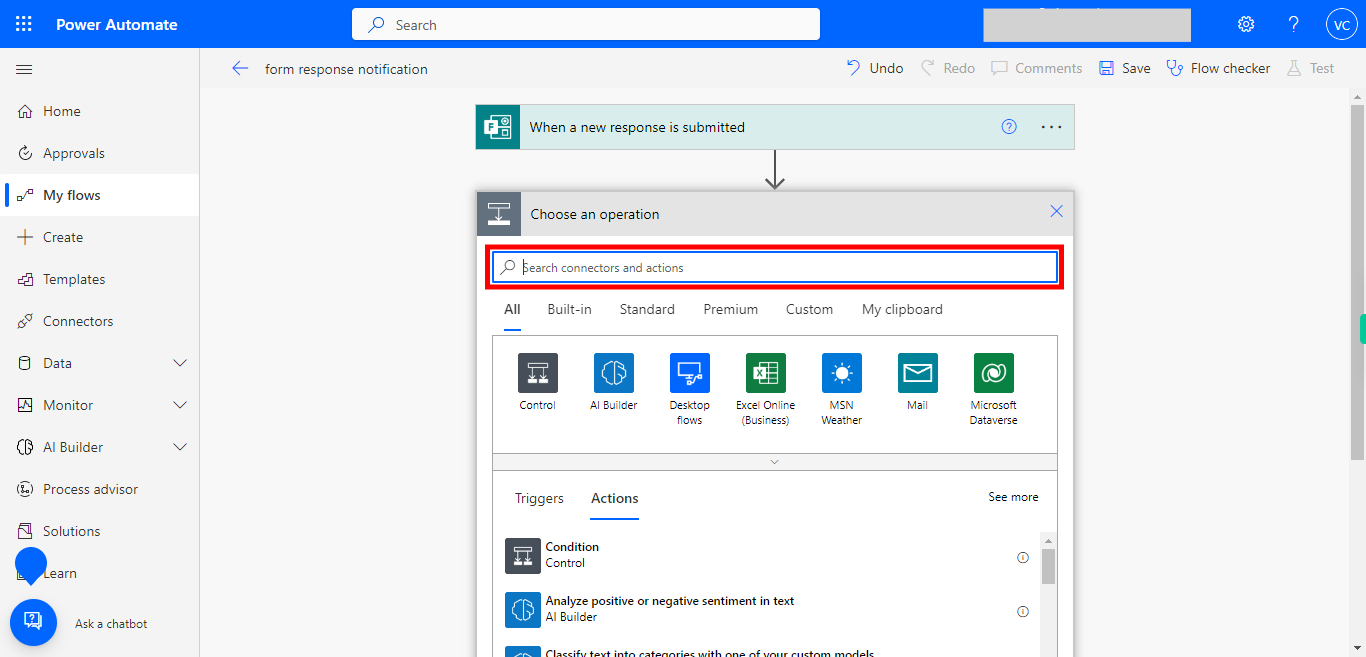
8. Type "Microsoft forms" and then click on the Next button in the Supervity instruction widget.
-
10.
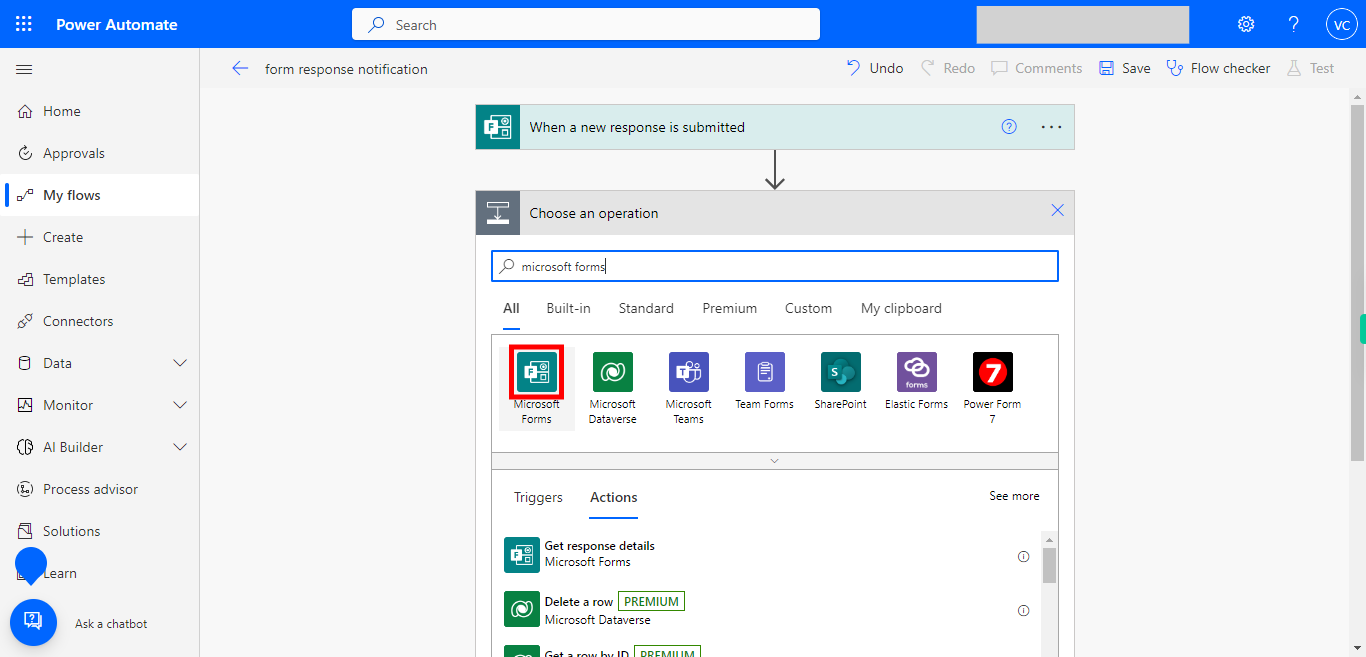
9. Click on Microsoft forms
-
11.
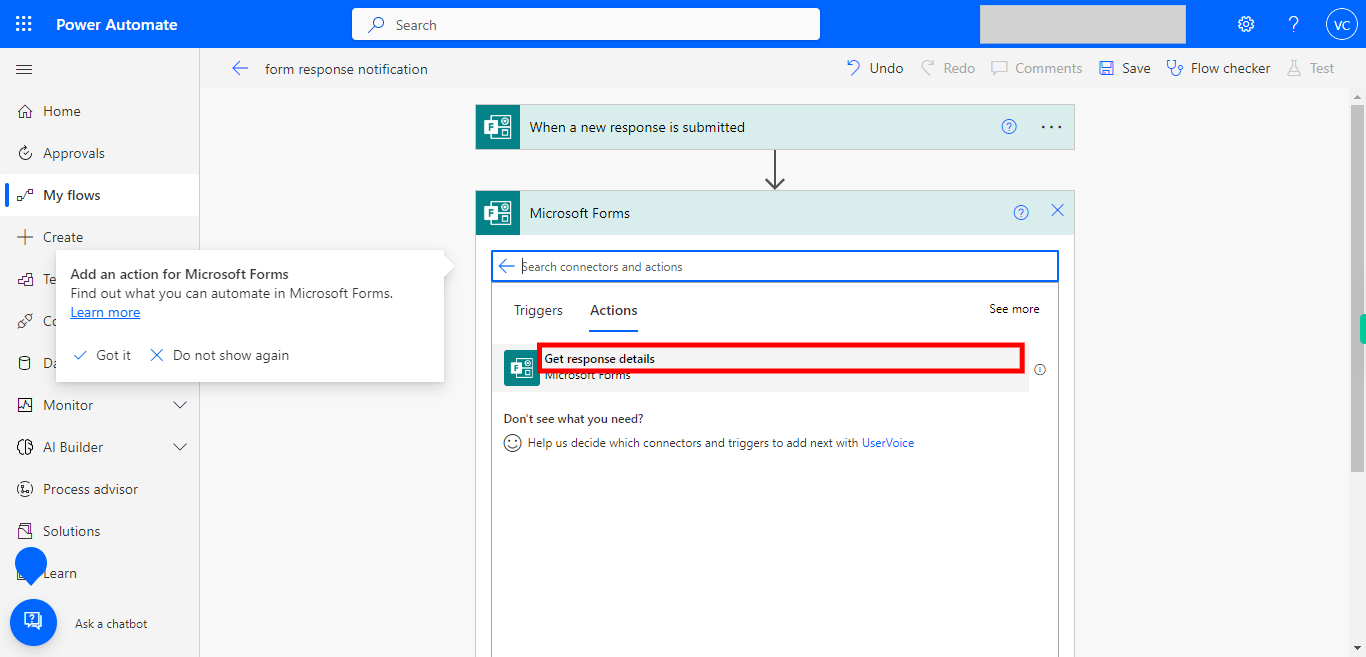
10. Click on the text "get response details"
-
12.
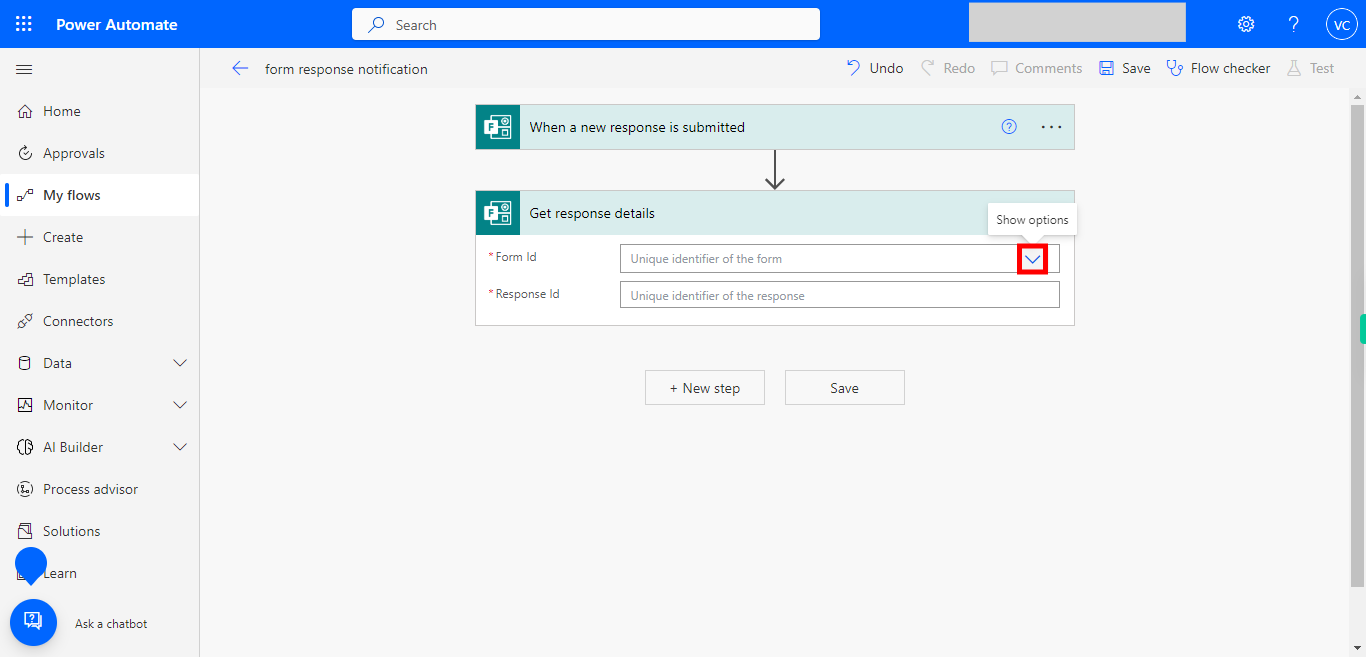
11. Click on the drop-down icon, and then choose the specific form you created earlier from the drop-down list in the trigger step. and then click on the Next button in the Supervity instruction widget.
-
13.
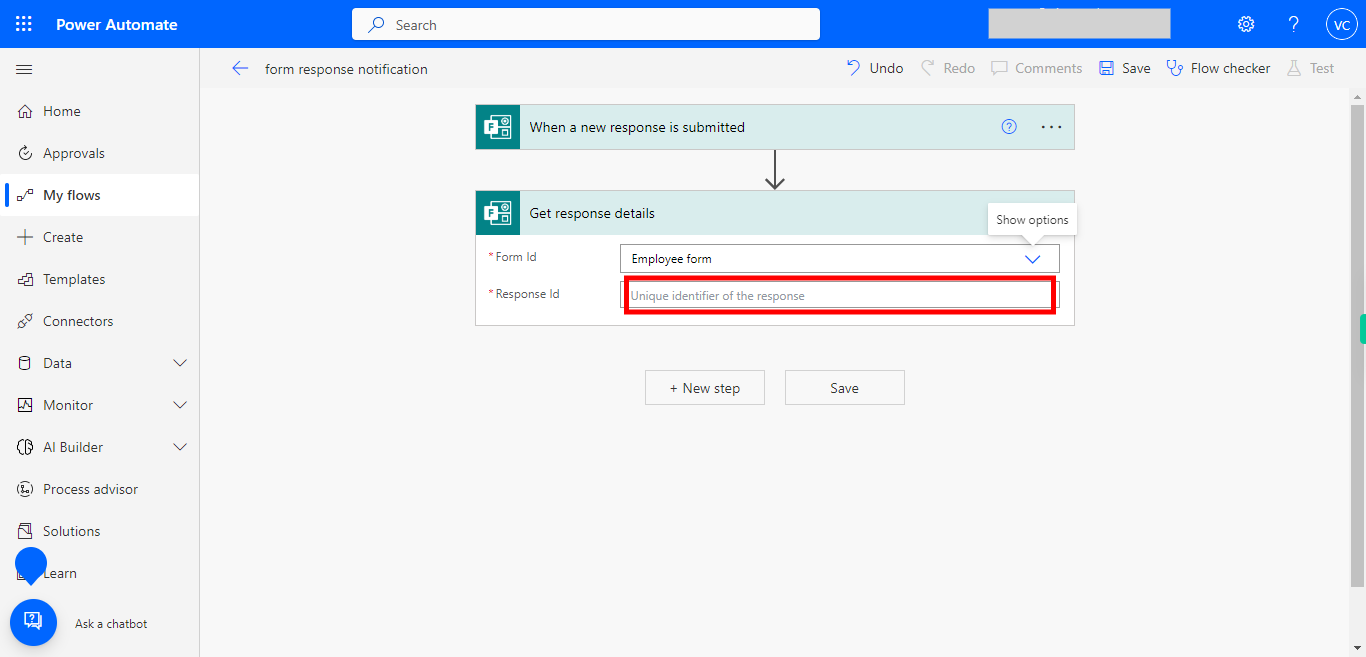
12. Click on the "Response Id" tab.
-
14.
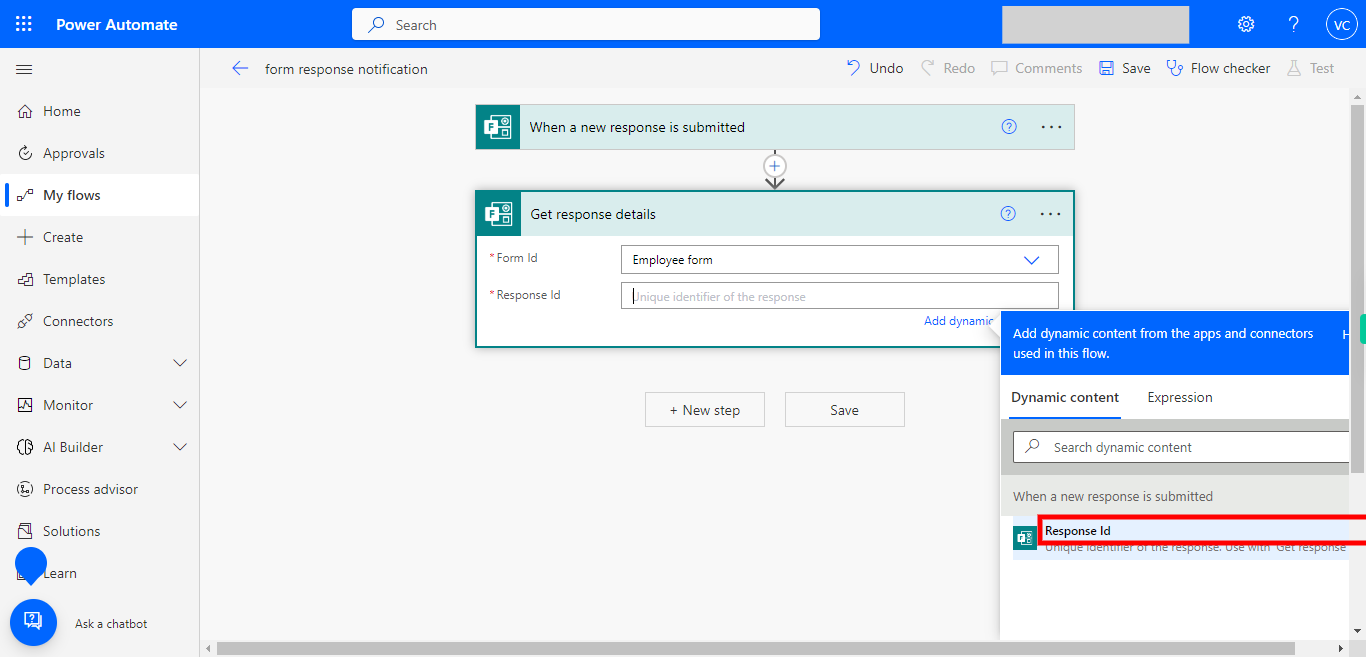
13. Select "Response Id" from the dynamic content listed.
-
15.
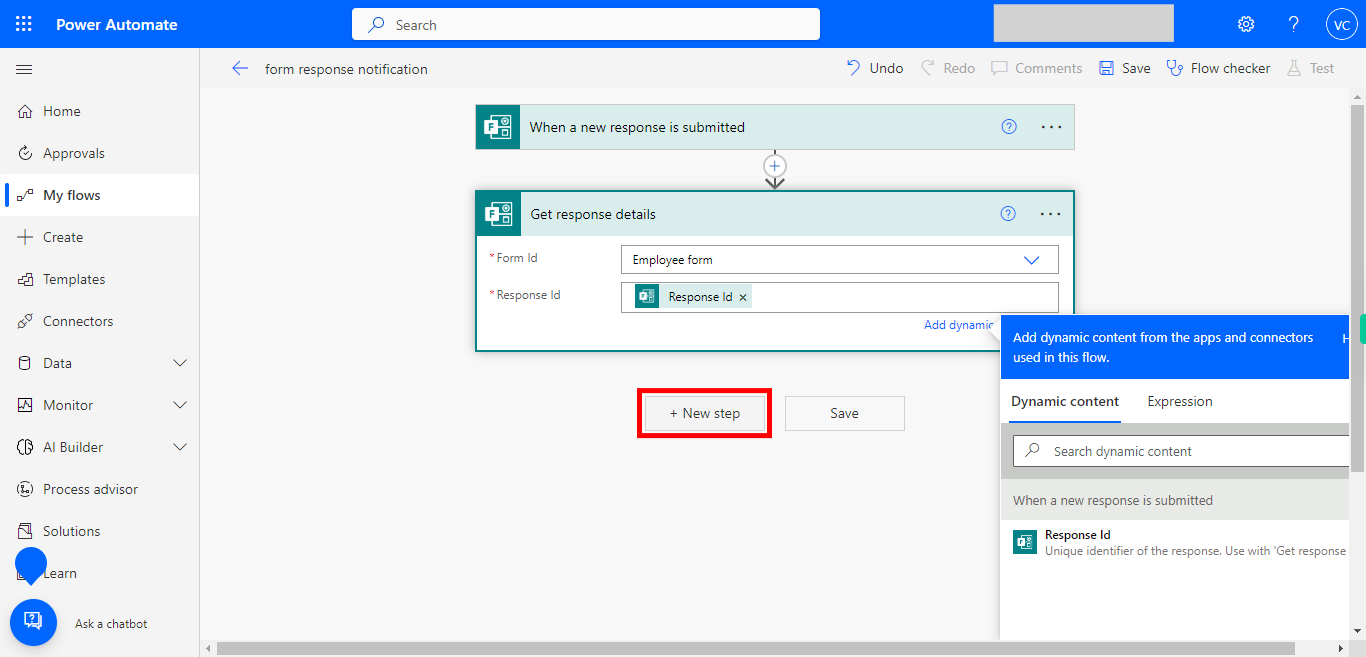
14. Click on the + New Step button to add a new action step in the flow.
-
16.
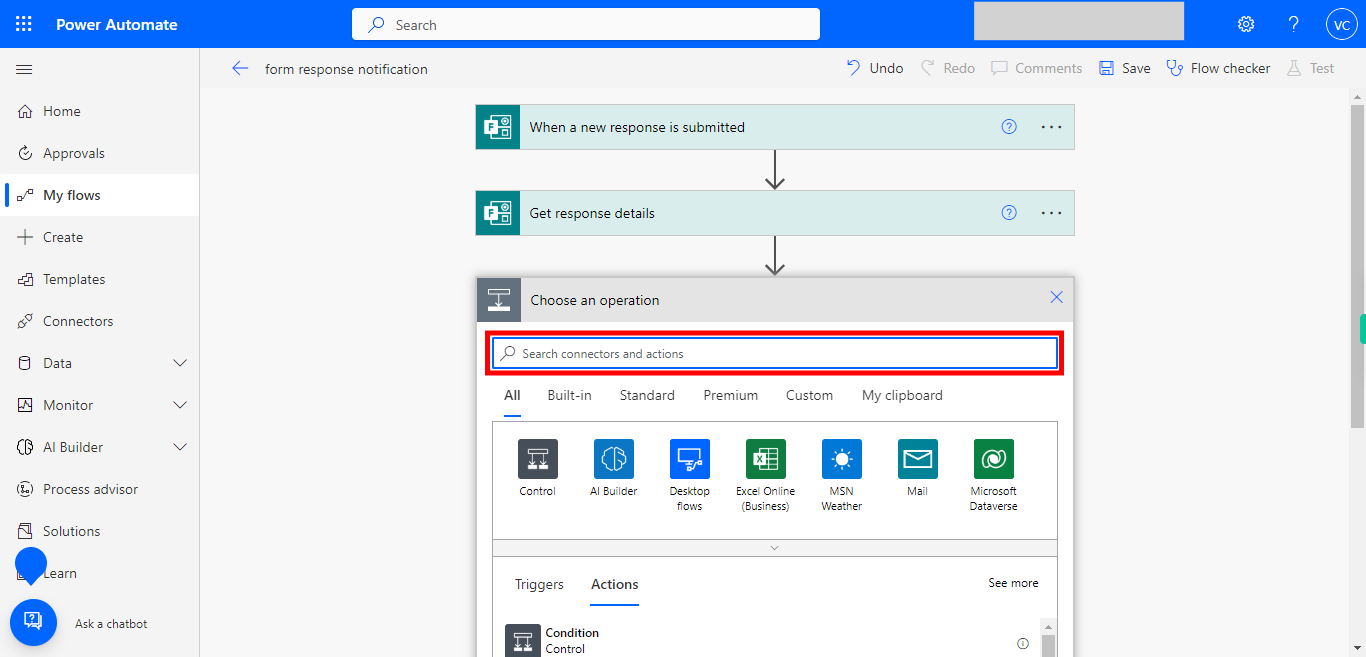
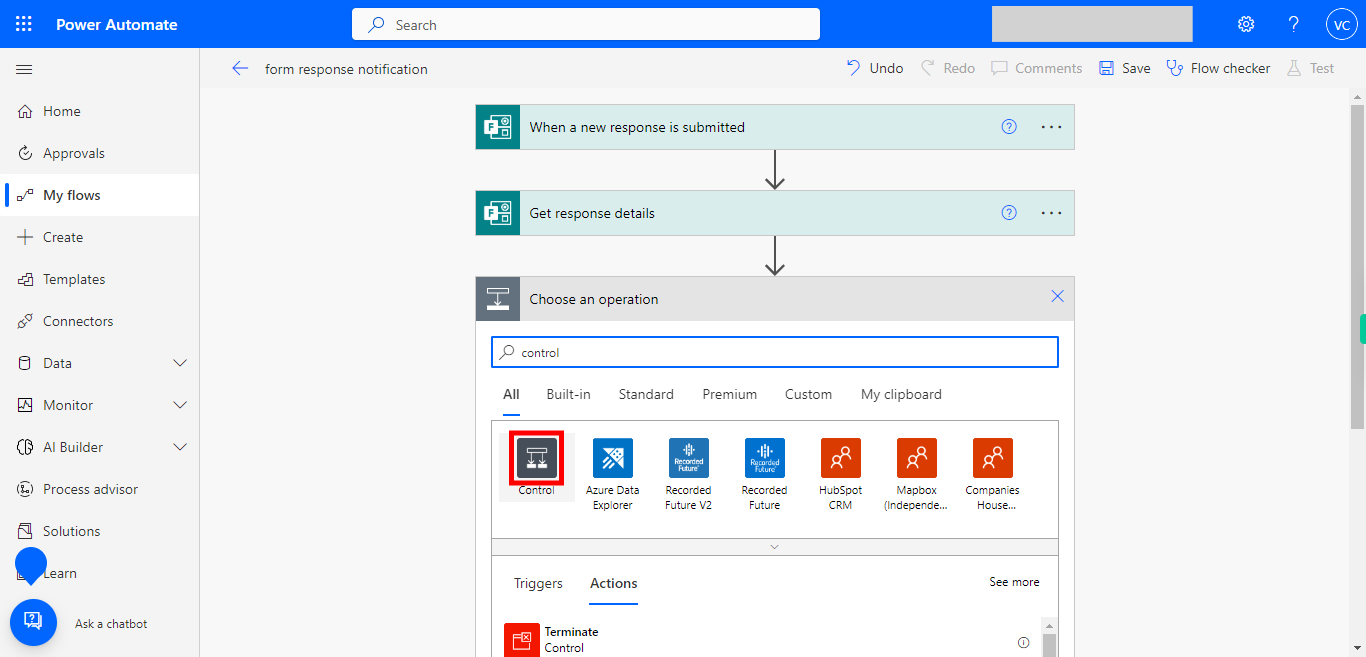
15. Type the text "control" and then click on the Next button in the Supervity instruction widget.
-
17.
16. Click on Control to add conditions to the form replies.
-
18.
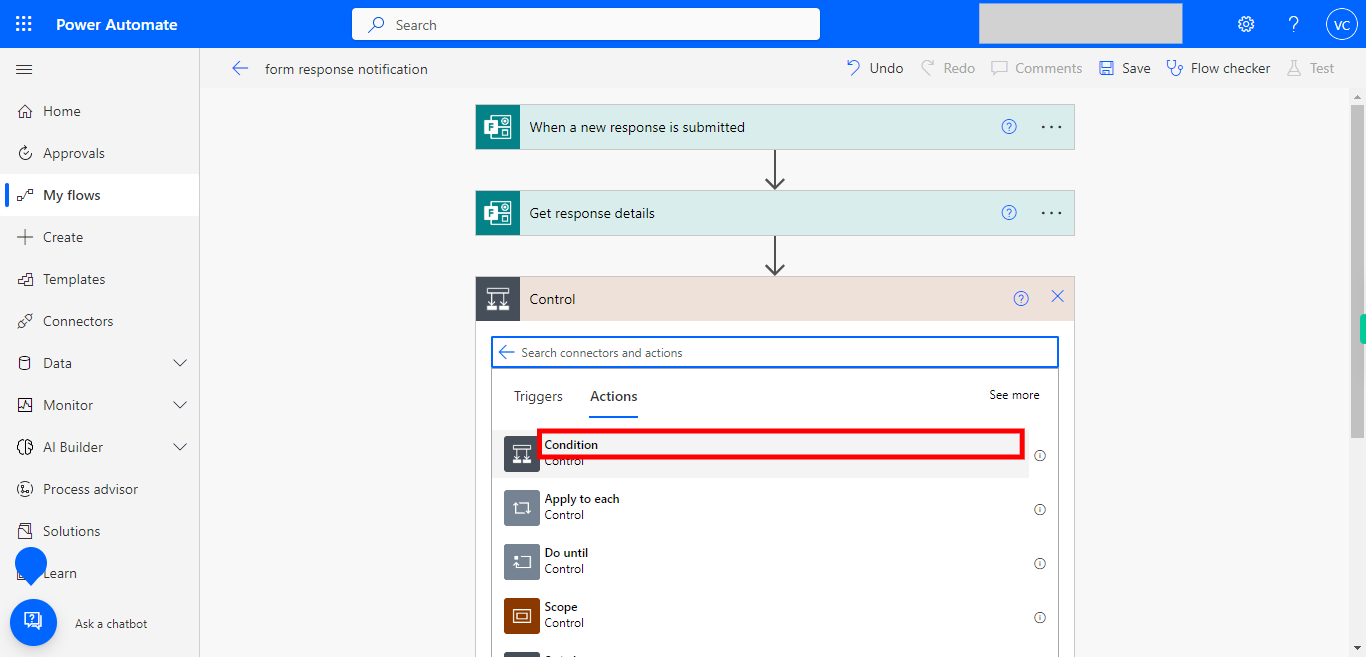
17. Select Condition in controls to add conditions based on the replies of the form.
-
19.
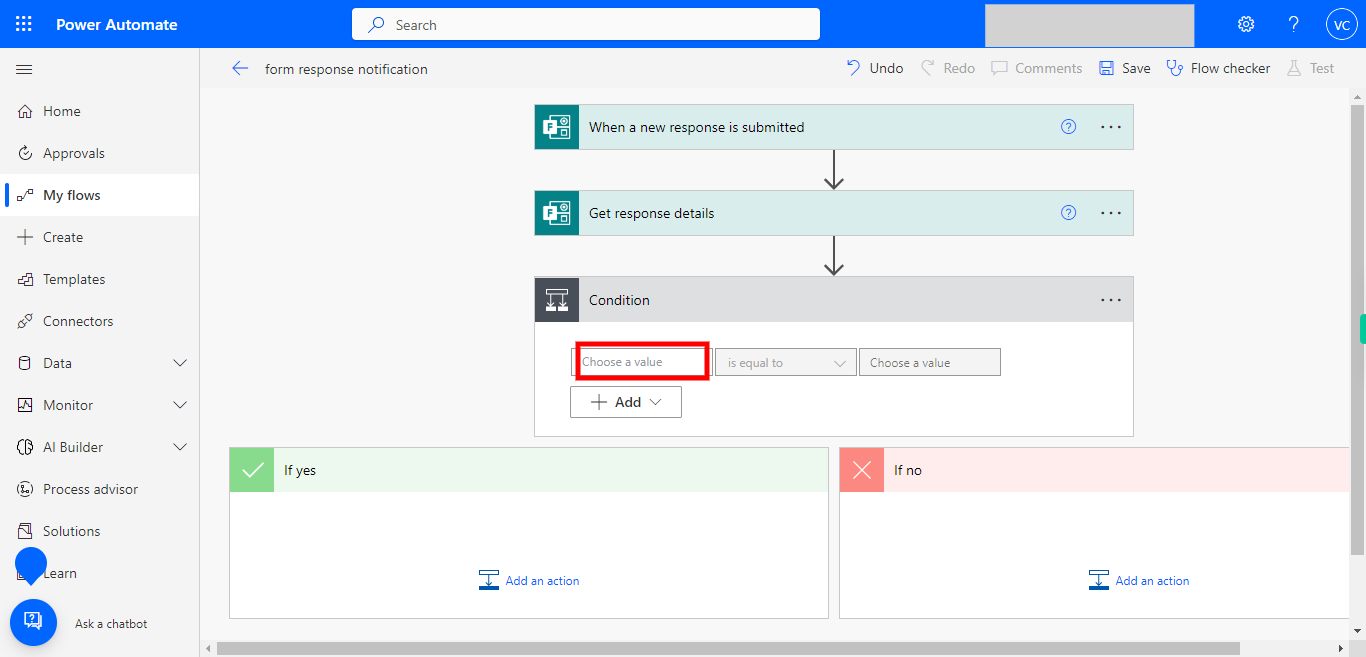
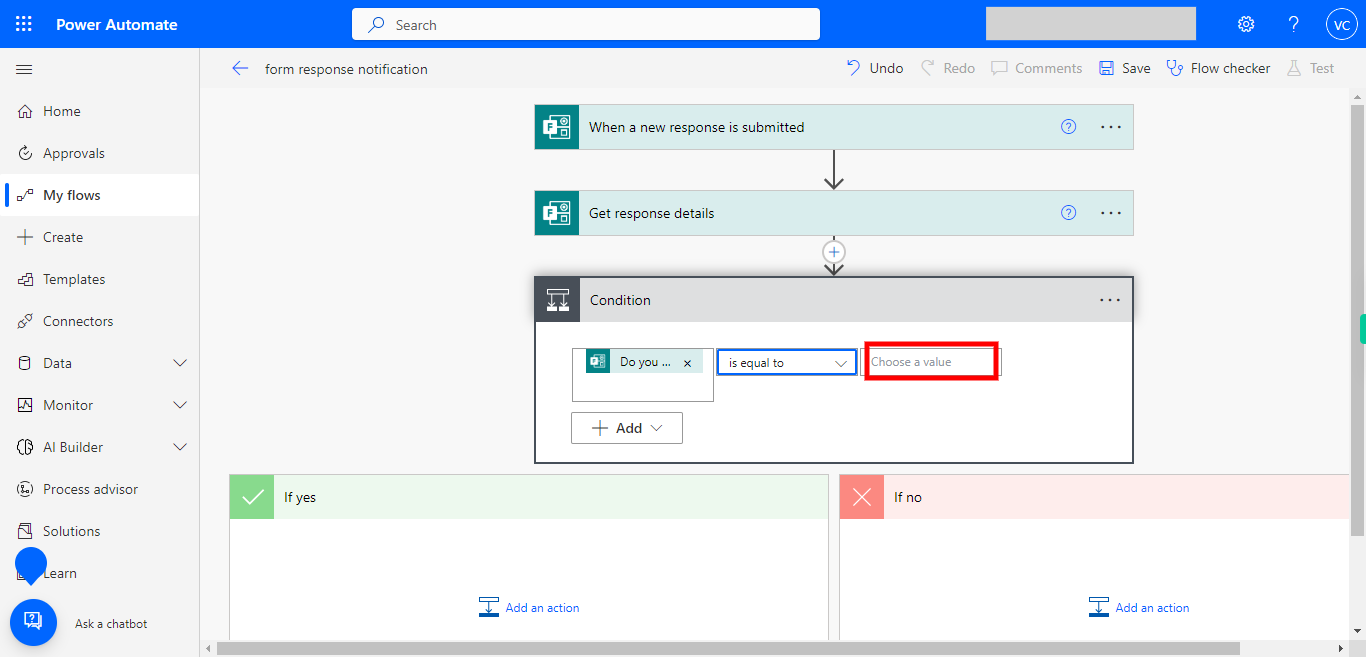
18. First in the "Choose a value" tab and select the question in the form given for example if you had any question in your form add that for which the response may be Yes or No in general. click on the Next button in the Supervity instruction widget,
-
20.
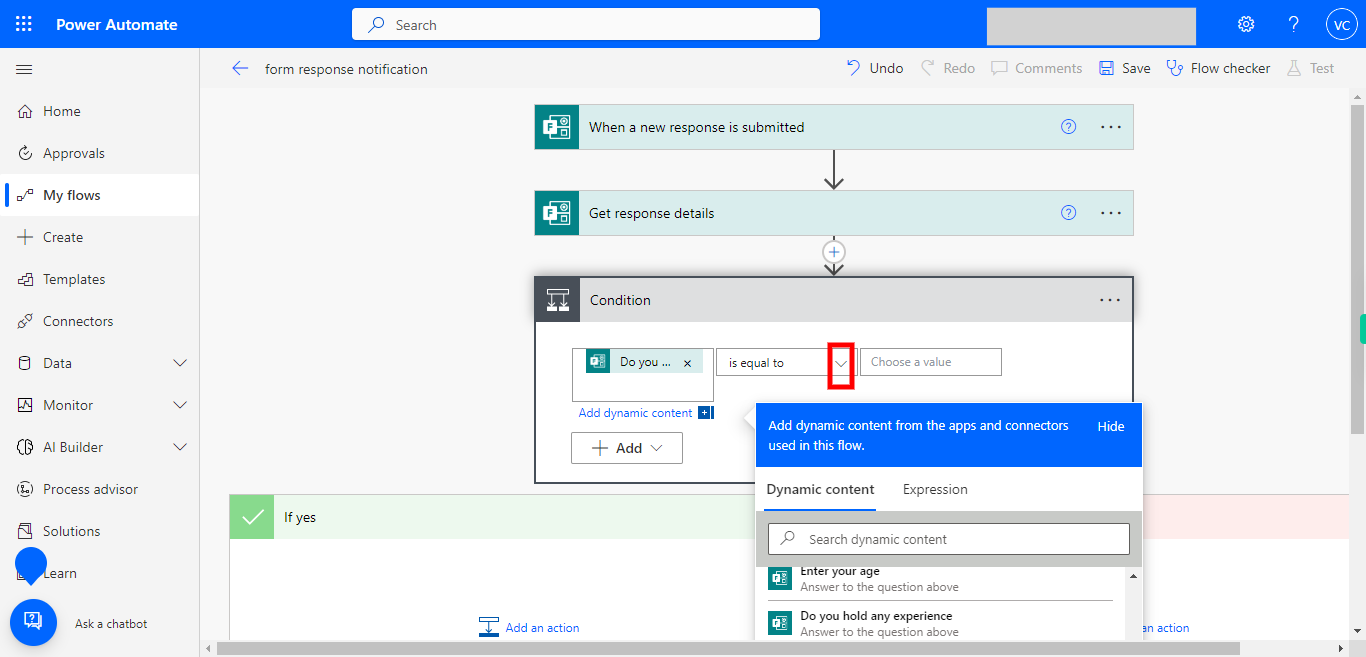
19. First click on the Next button in the Supervity instruction widget. Select a particular condition to satisfy by clicking on the dropdown icon like equals or not equals and many conditions you can see in the list and you can pick one that satisfies your requirement.
-
21.
20. Provide the choices with which we are comparing that will be the reply for the question in the form like Yes or No in general. and then click on the Next button in the Supervity instruction widget. Note: Here the value is case-sensitive so please be careful.
-
22.
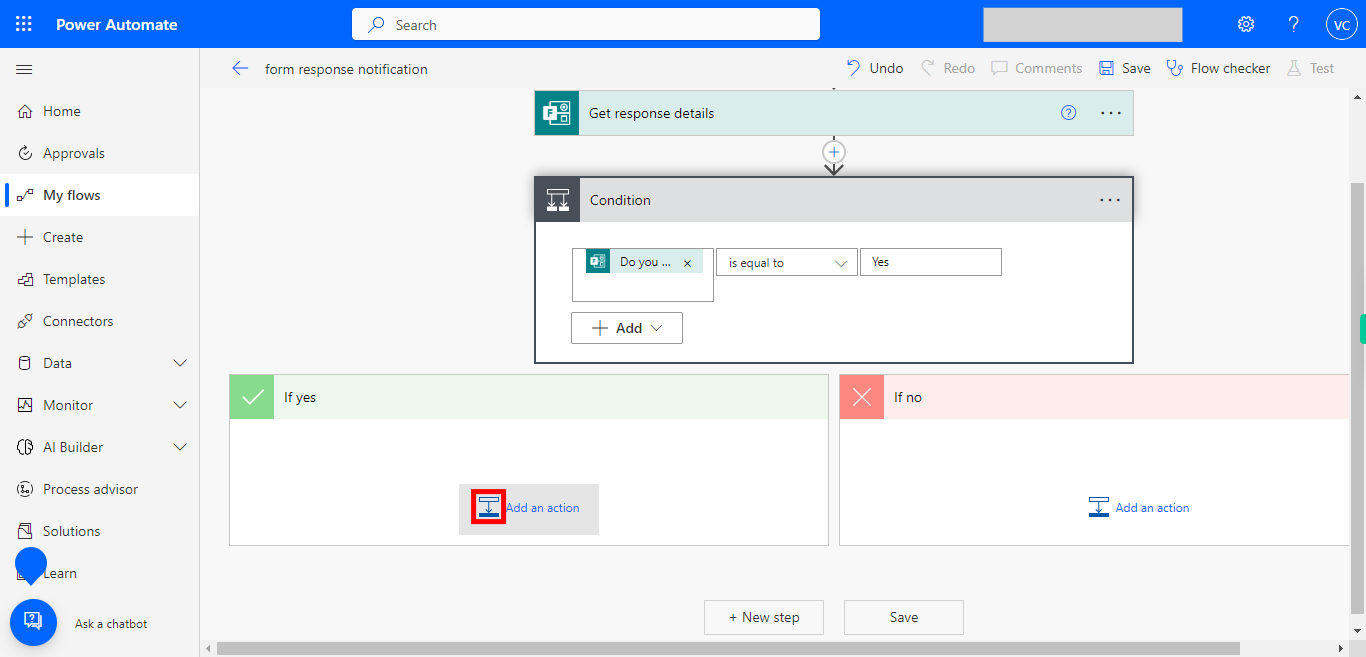
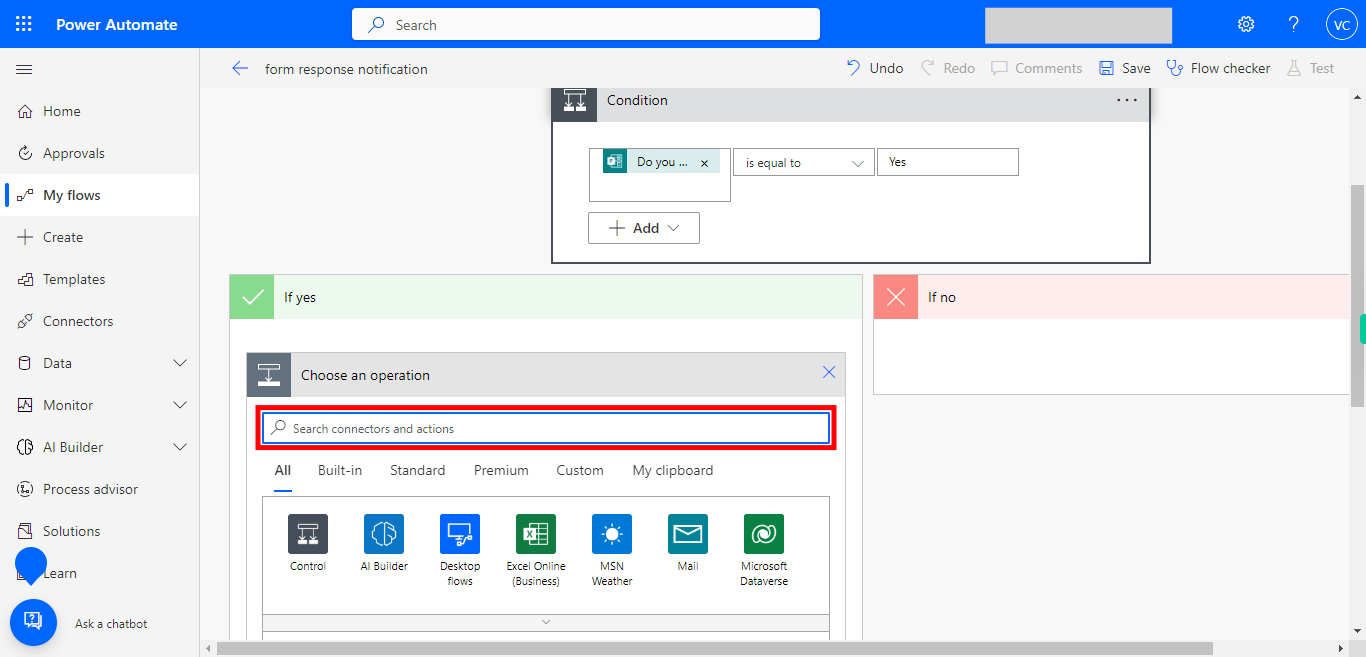
21. Click on the Add an action button. You can add actions based on the choices like if yes what actions to be configured and if No what actions to be configured.
-
23.
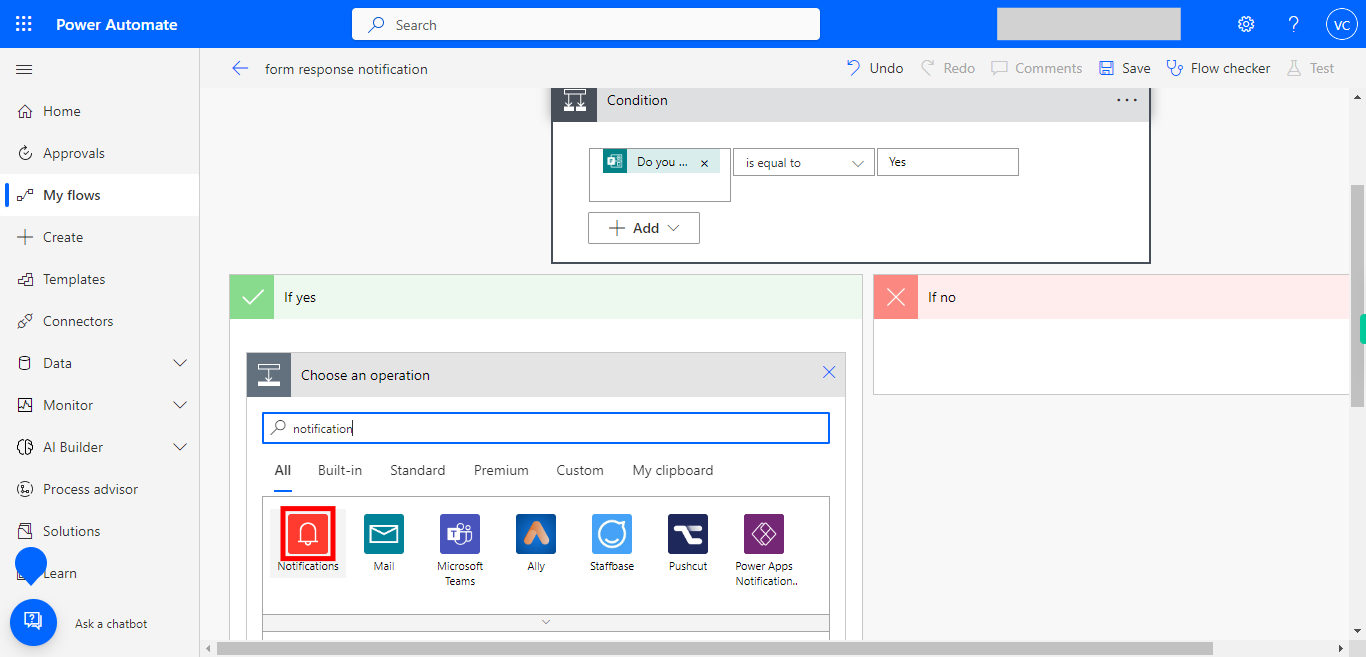
22. Type notifications, to connect notifications action and then click on the Next button in the Supervity instruction widget.
-
24.
23. Click on "Notifications".
-
25.
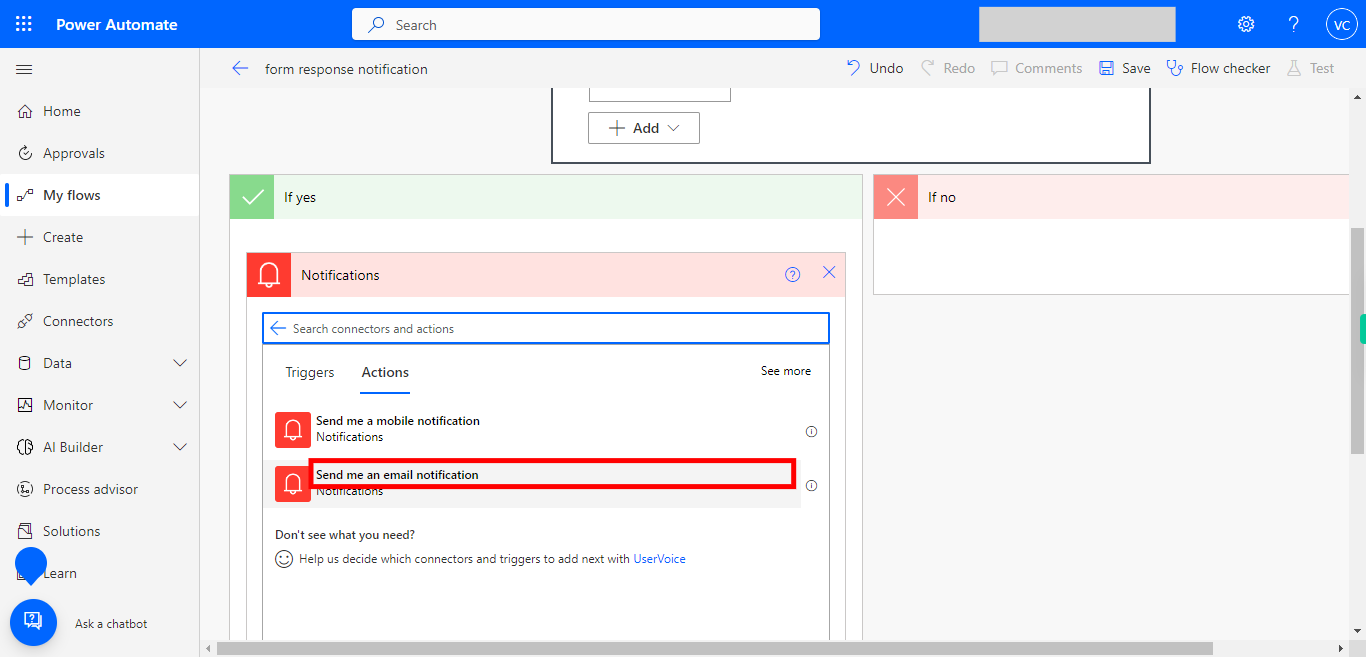
24. Now select the text "Send me an email notification".
-
26.
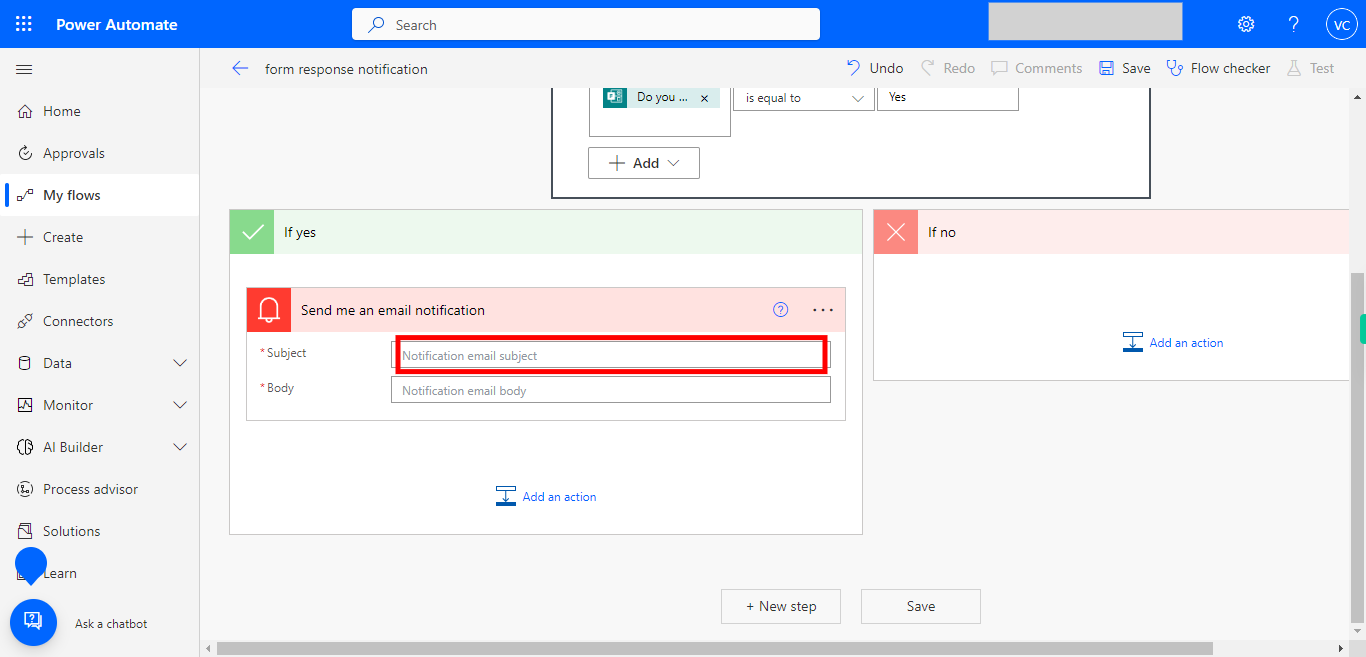
25. Add the subject of the mail under the "Subject" tab, we can select the question from the form, or response or the name, for reference in the subject, and then click on the Next button in the Supervity instruction widget.
-
27.
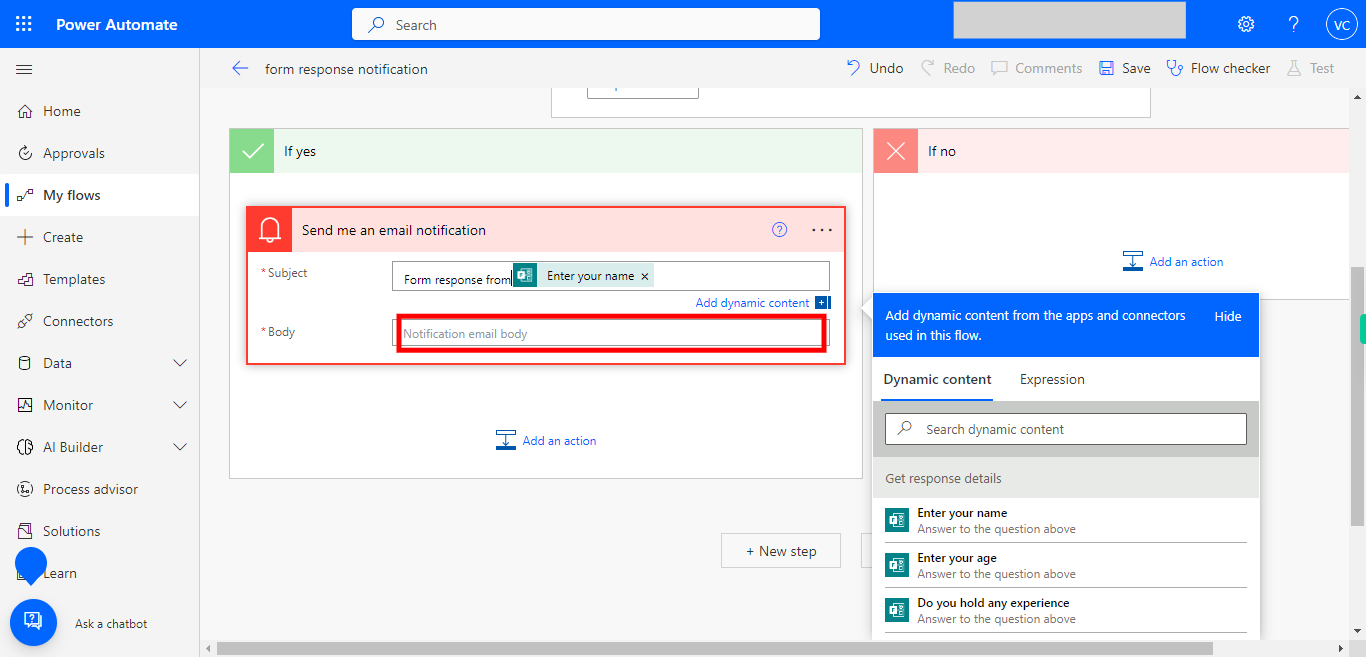
26. Add the body of the notification email in the "Body" tab, select from the dynamic list as per your requirement, and then click on the Next button in the Supervity instruction widget.
-
28.
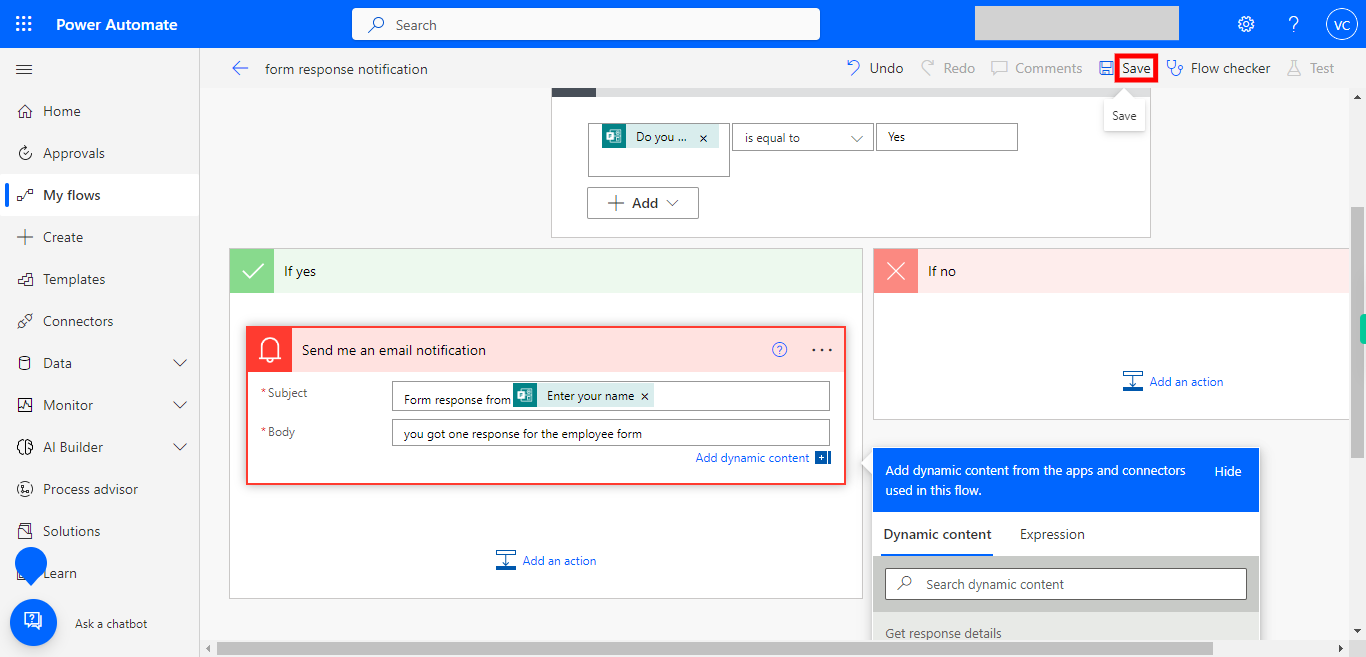
27. Click on the Save option, and your flow or trigger is ready to execute.
-
29.
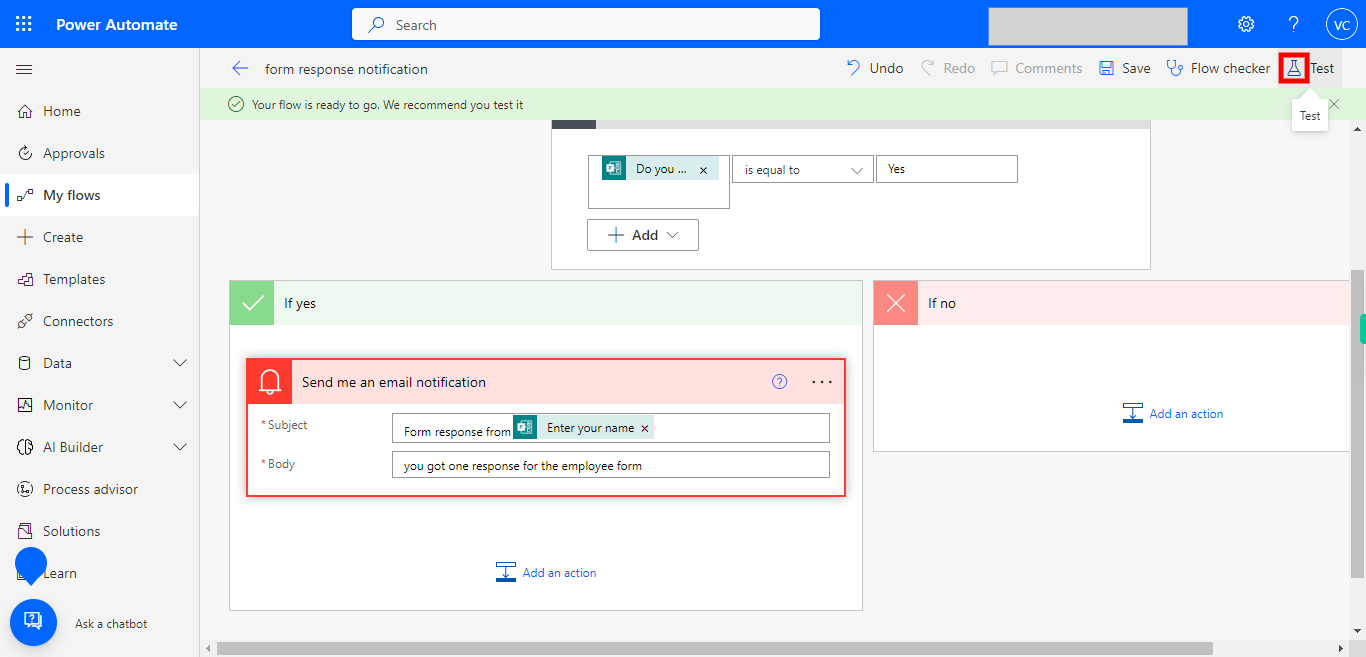
28. Now the flow is ready and we can test by clicking on the test icon.
-
30.
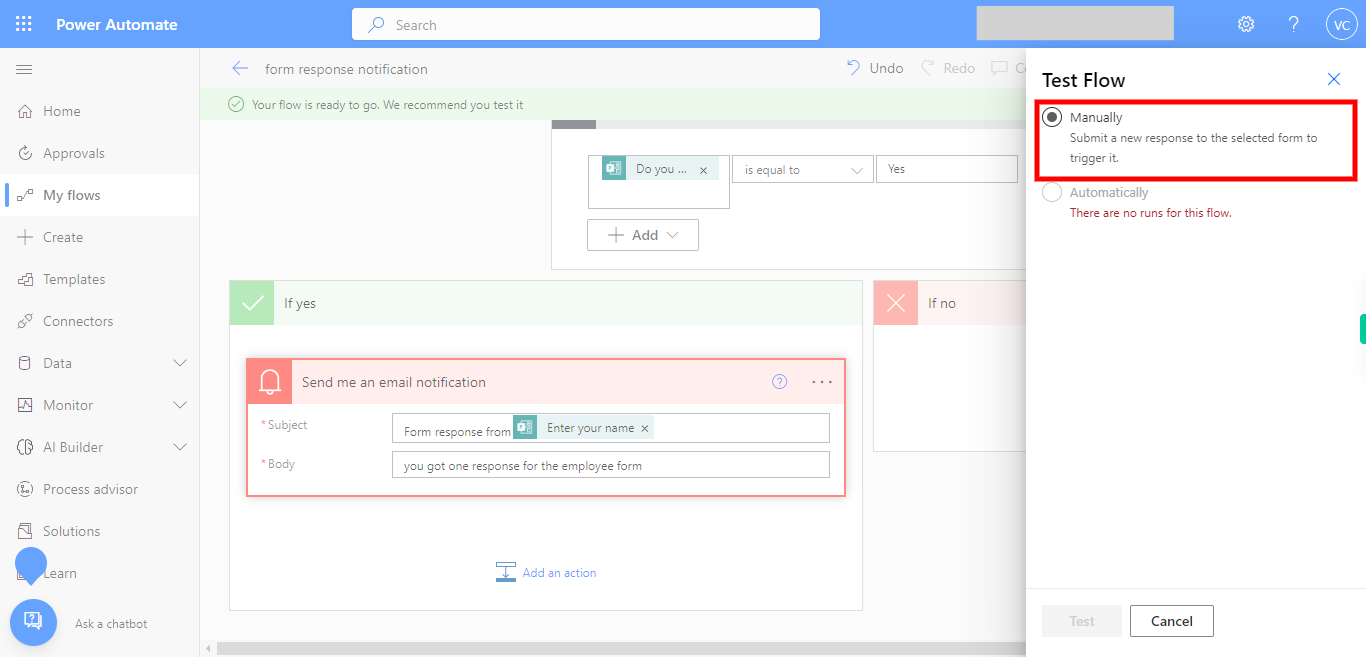
29. Select "Manually" to submit a new response to the selected form to trigger it.
-
31.
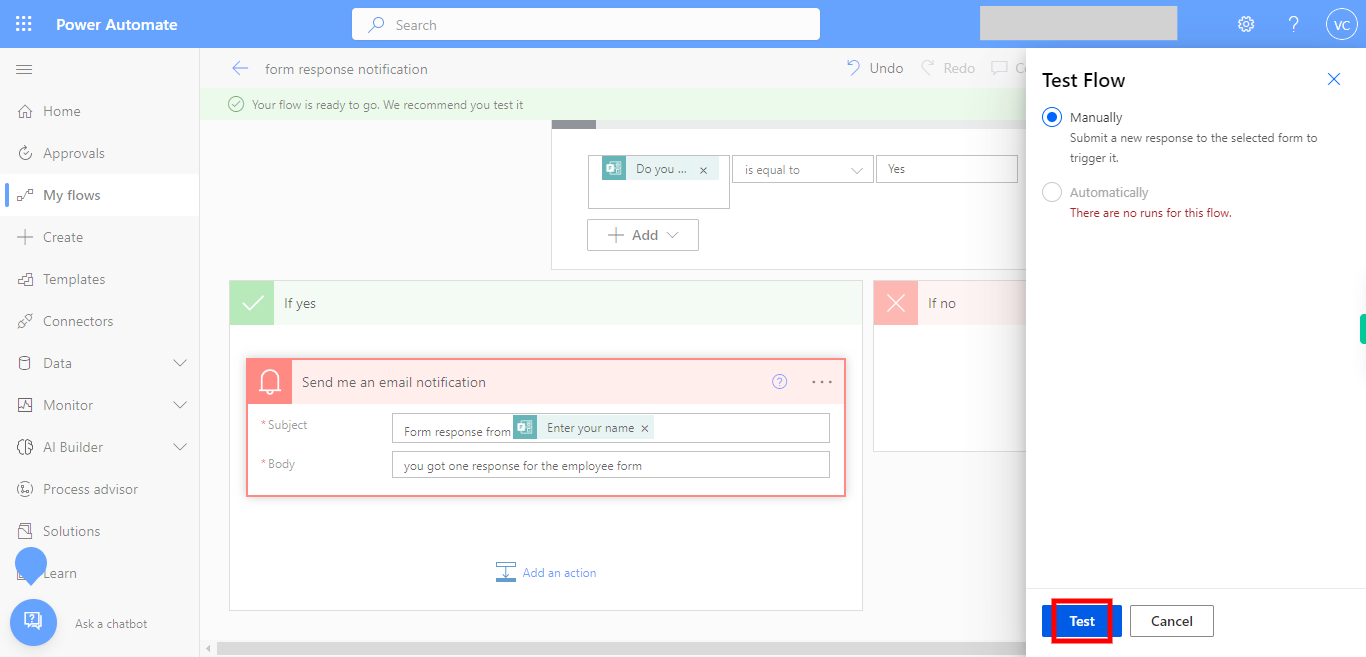
30. Click on the "Test" button.


