With this skill, users will be guided through the steps of applying a leave in greytHR. It ensures that users can easily navigate the application process, enter accurate information, and submit their leave requests efficiently. Note: Make sure you are already logged into your GreytHr account. Version: v6.3.0-prod-455
-
1.
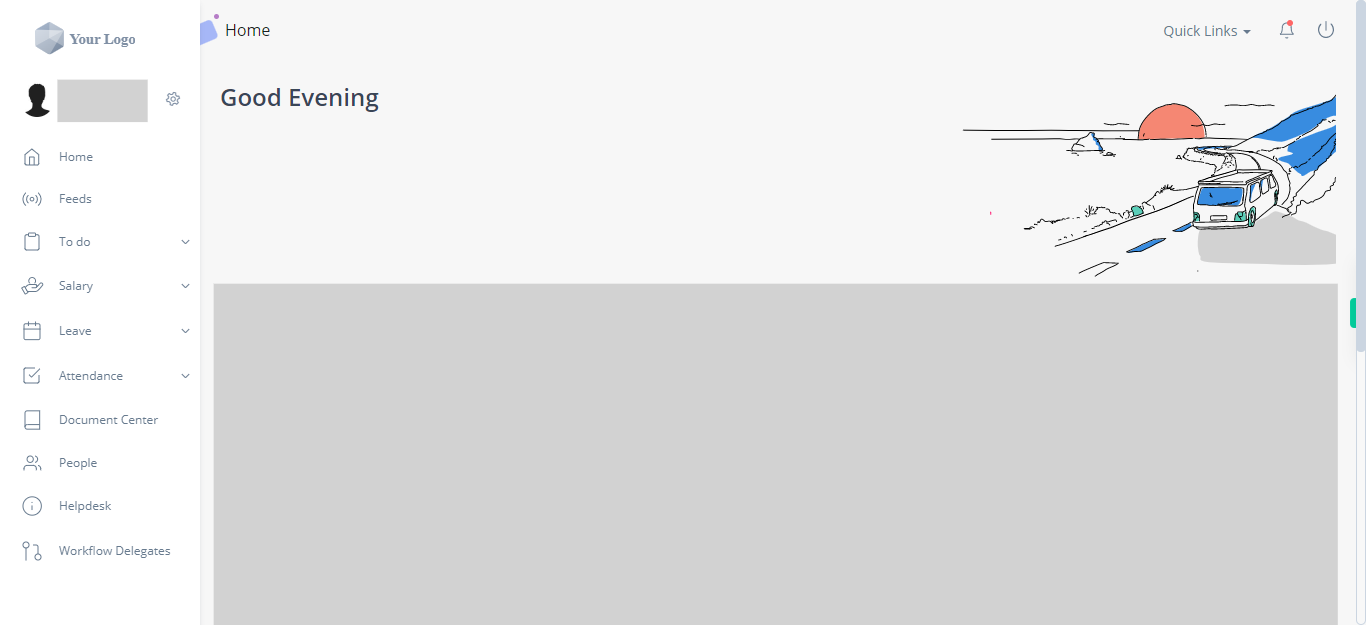
Open the greytHR web application.
-
2.
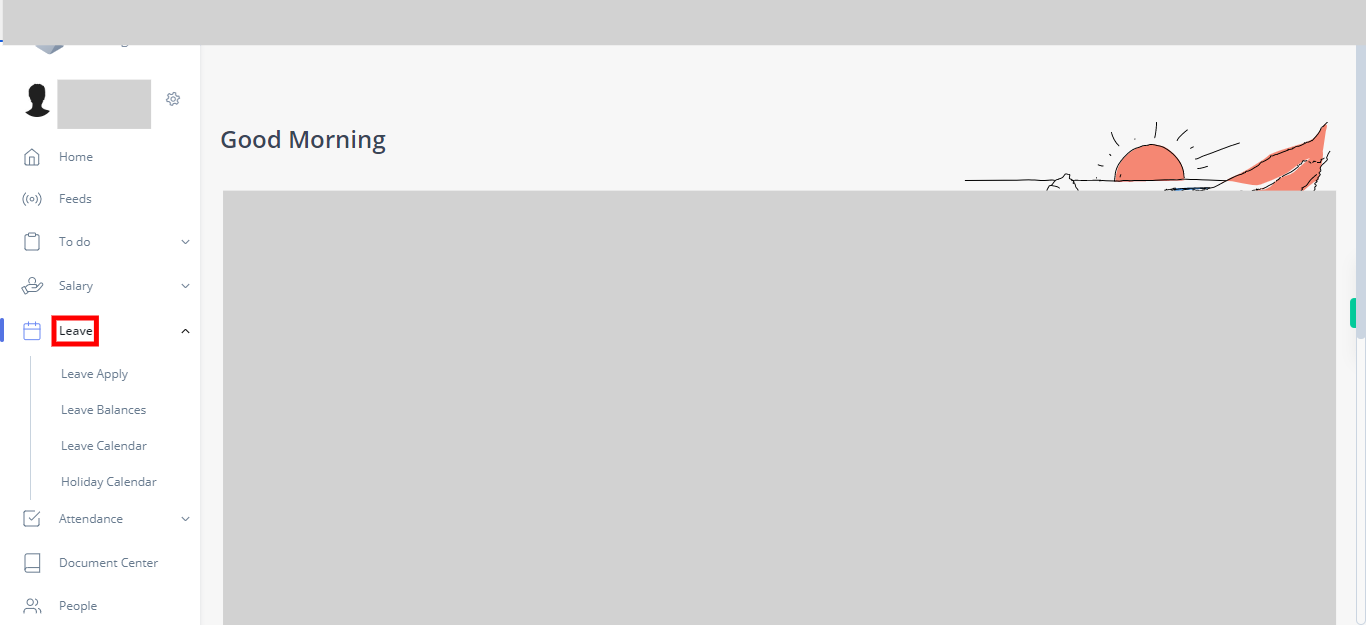
On the homepage of your greytHR account, look for the navigation menu or sidebar on the left-hand side of the screen. Click on the "Leave" option in the menu. It would be represented by a calendar icon and labeled as "Leave." Clicking on the "Leave" option will display the list of submenus available for the leave section.
-
3.
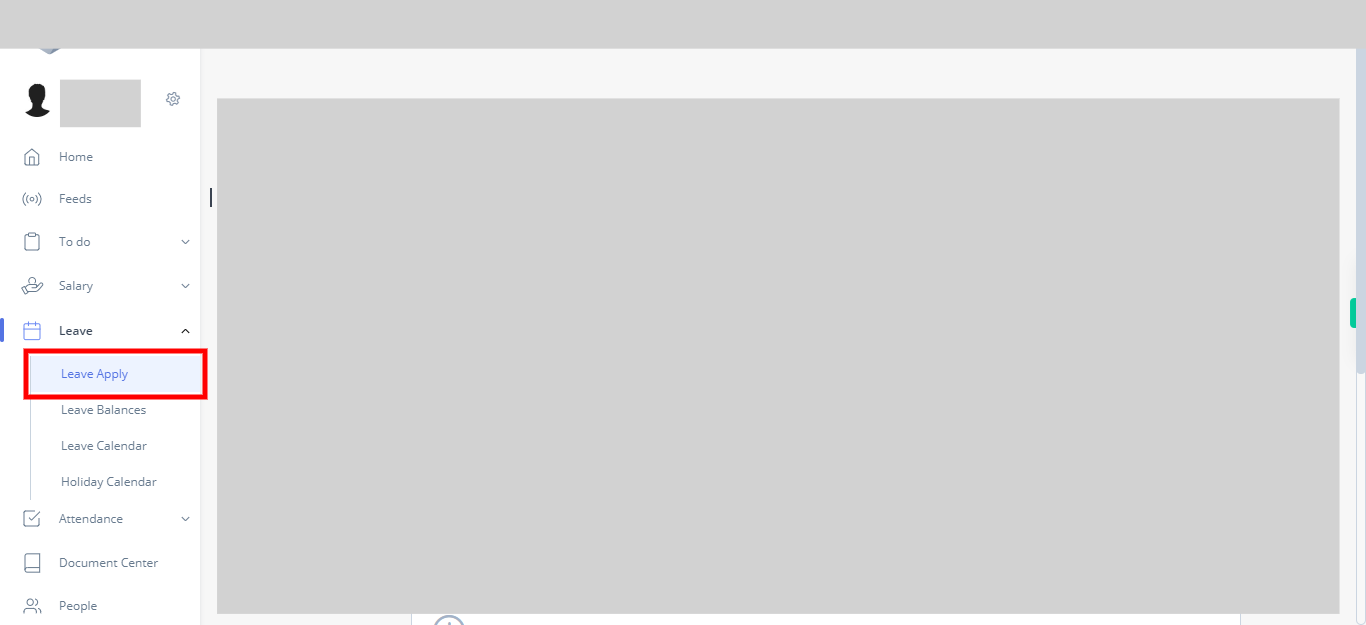
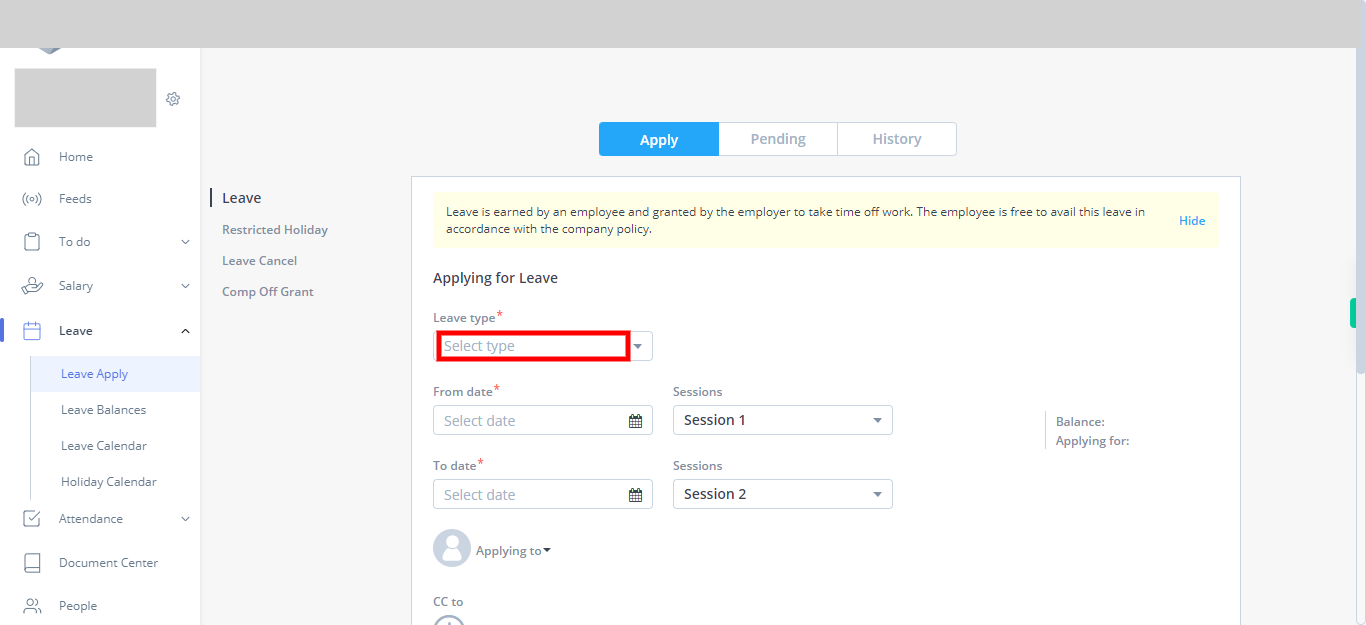
In the submenu or tabs, click on "Leave Apply". You will now be taken to the page or section where you can apply for leave. In the "Leave Apply" section, you will typically find fields and options to select the type of leave, specify the dates, enter a reason, and any other required information for your leave application.
-
4.
You will find a list of Leave types in the "Leave type" dropdown. From the list of Leave types, identify the specific type of leave you wish to apply for, such as annual leave, sick leave, or any other type offered by your organization. Once you have identified the desired Leave type, click on it to select it. After selecting the Leave type, click on the Next button on the Supervity instruction widget.
-
5.
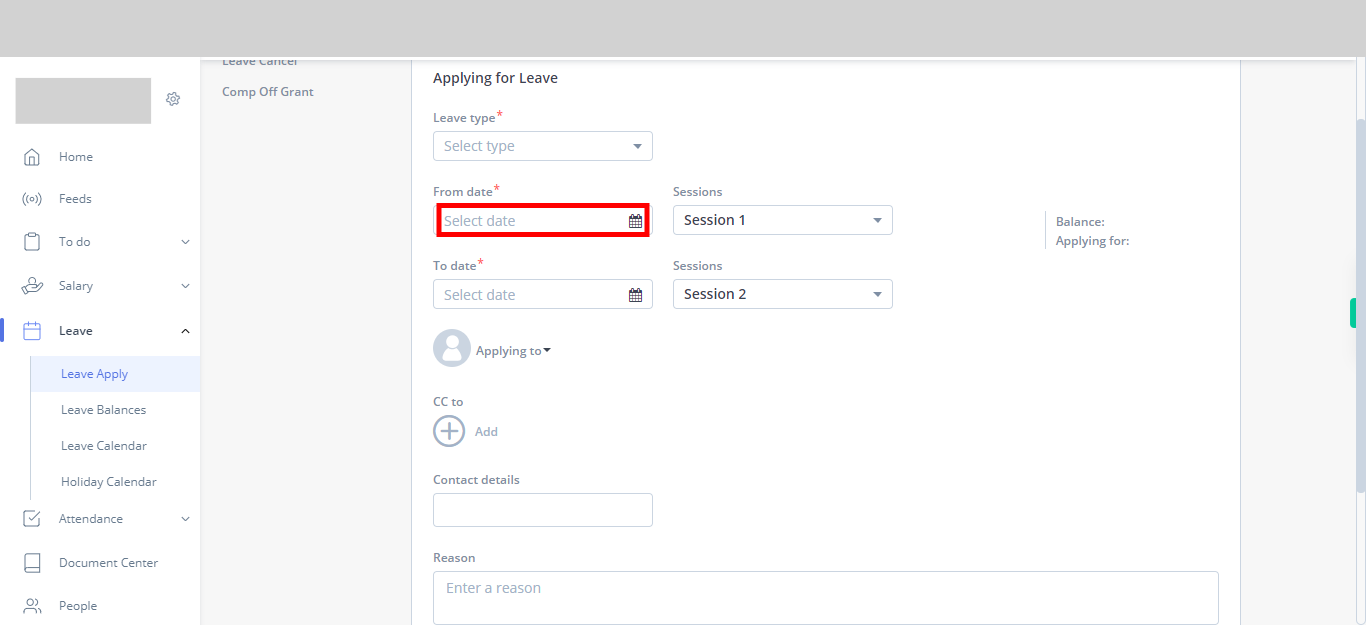
Click on the field or calendar icon to open the date selection interface. Choose the appropriate start date for your leave by clicking on it. You may be able to navigate through different months or years if needed. Once you have selected the start date, review it to ensure accuracy. Click on the Next button on the Supervity instruction widget.
-
6.
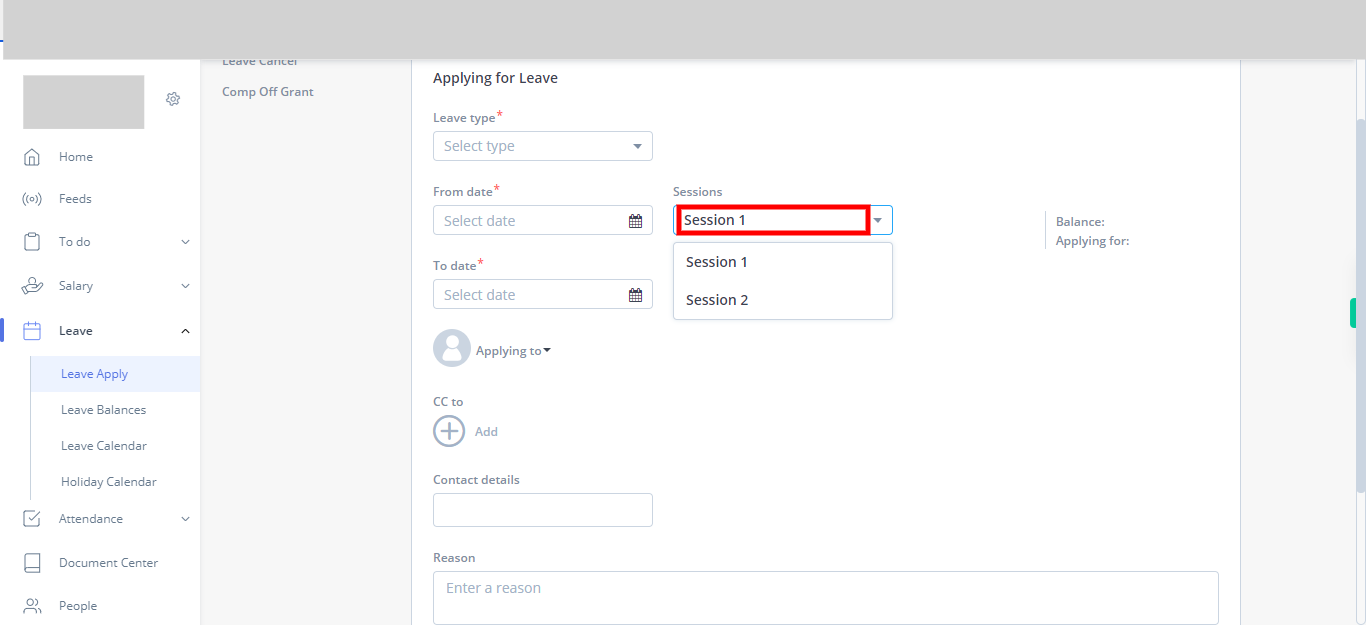
Click on the dropdown menu in the session option. The options might be labeled as "Session 1 - Morning Session" and "Session 2 - Evening Session." Choose the session that aligns with your intended leave schedule. Once done, click on the Next button on the Supervity instruction widget.
-
7.
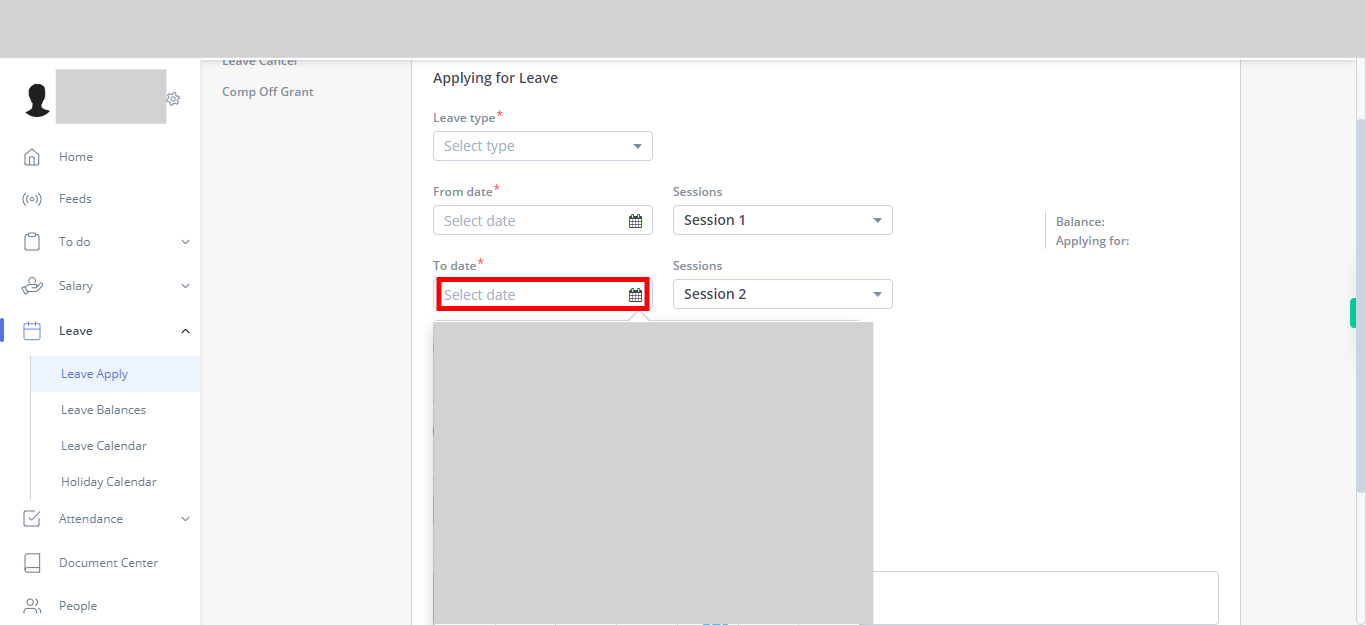
Click on the field or calendar icon to open the date selection interface. In the date selection interface, choose the appropriate end date for your leave by clicking on it. You may be able to navigate through different months or years if needed. Once you have selected the end date, review it to ensure accuracy. Click on the Next button on the Supervity instruction widget. Note: Selected end date should be a post date of the selected start date.
-
8.
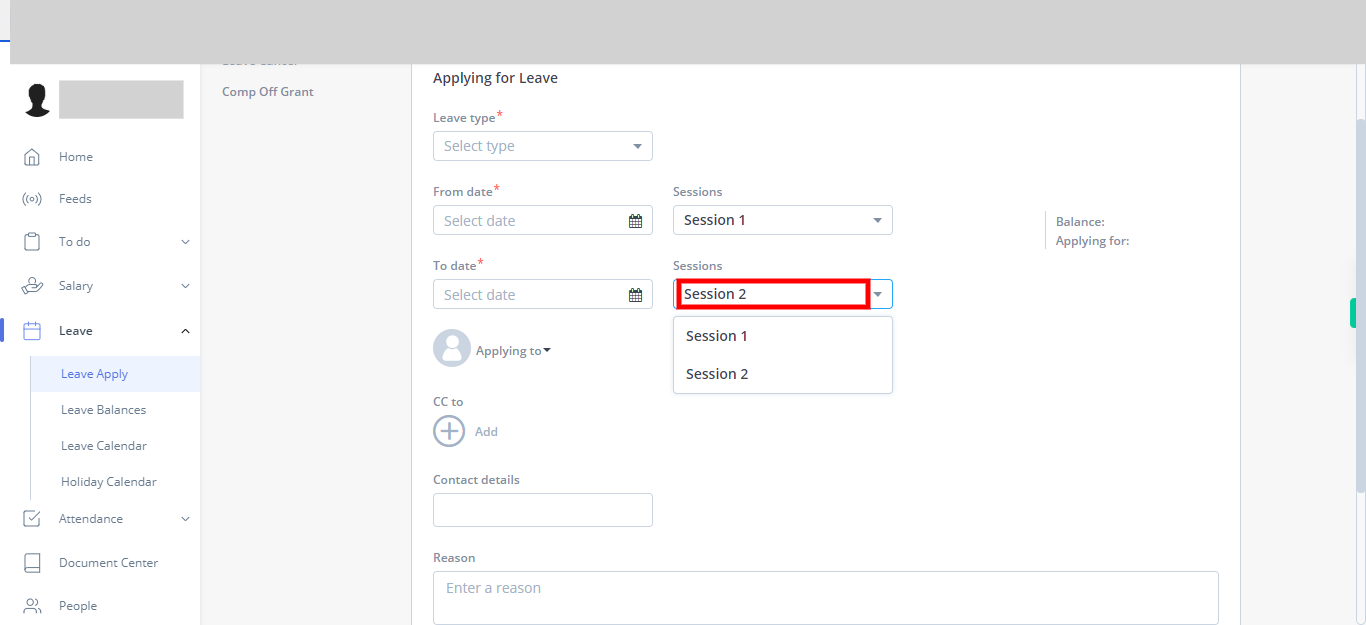
Click on the dropdown menu in the session option. The options might be labeled as "Session 1 - Morning Session" and "Session 2 - Evening Session." Choose the session that aligns with your intended leave schedule. Once done, click on the Next button on the Supervity instruction widget.
-
9.
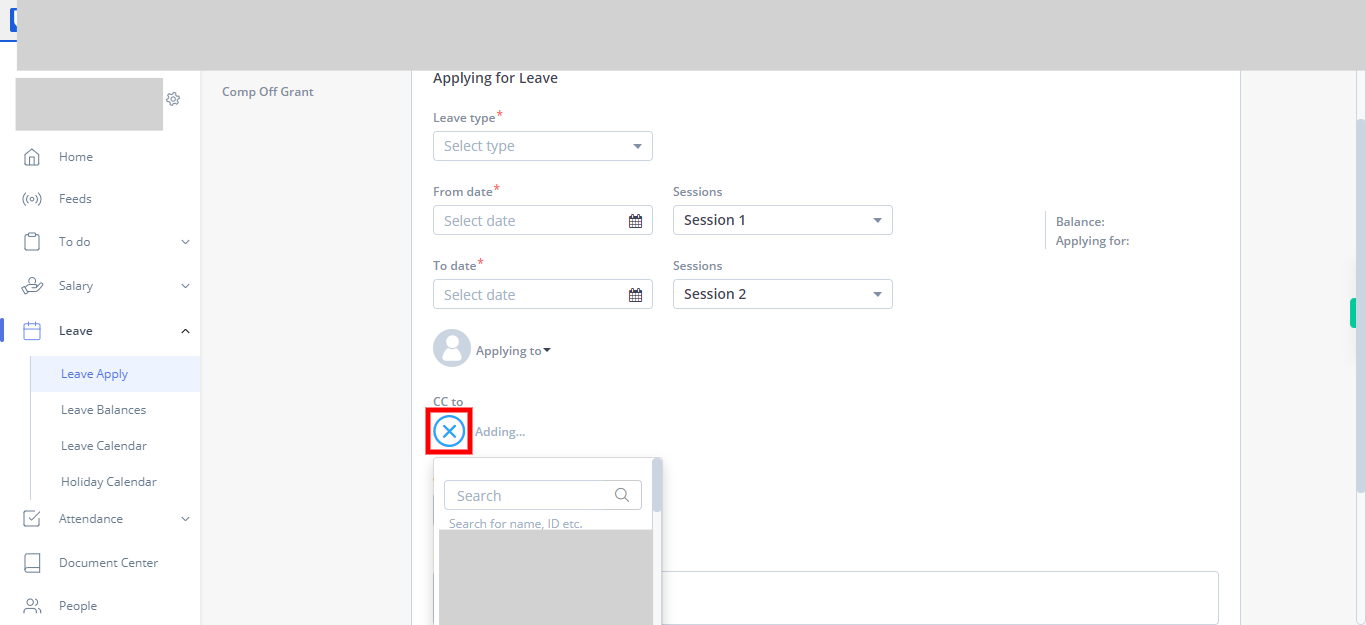
Look for a field labeled "CC" or an option to add additional recipients to your leave application. Click on the "+" icon to activate it for input or to open a dropdown menu. Enter the email addresses or names of the people you want to CC in the search box and select the check box. Multiple email addresses or names can be added to CC. Once done, click on the Next button on the Supervity instruction widget.
-
10.
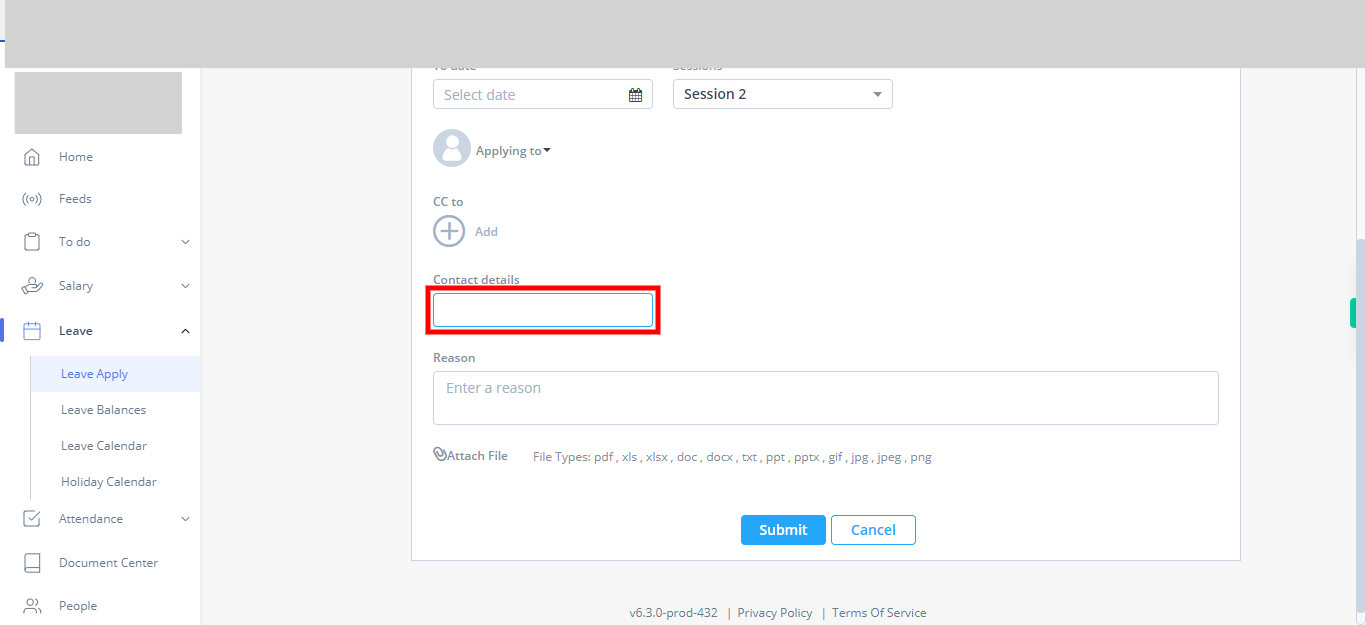
In the contact details field or input box, click on it to activate them for input. Enter your contact details or information, such as your phone number or alternate contact number, ensuring accuracy and completeness. Once done, click on the Next button on the Supervity instruction widget.
-
11.
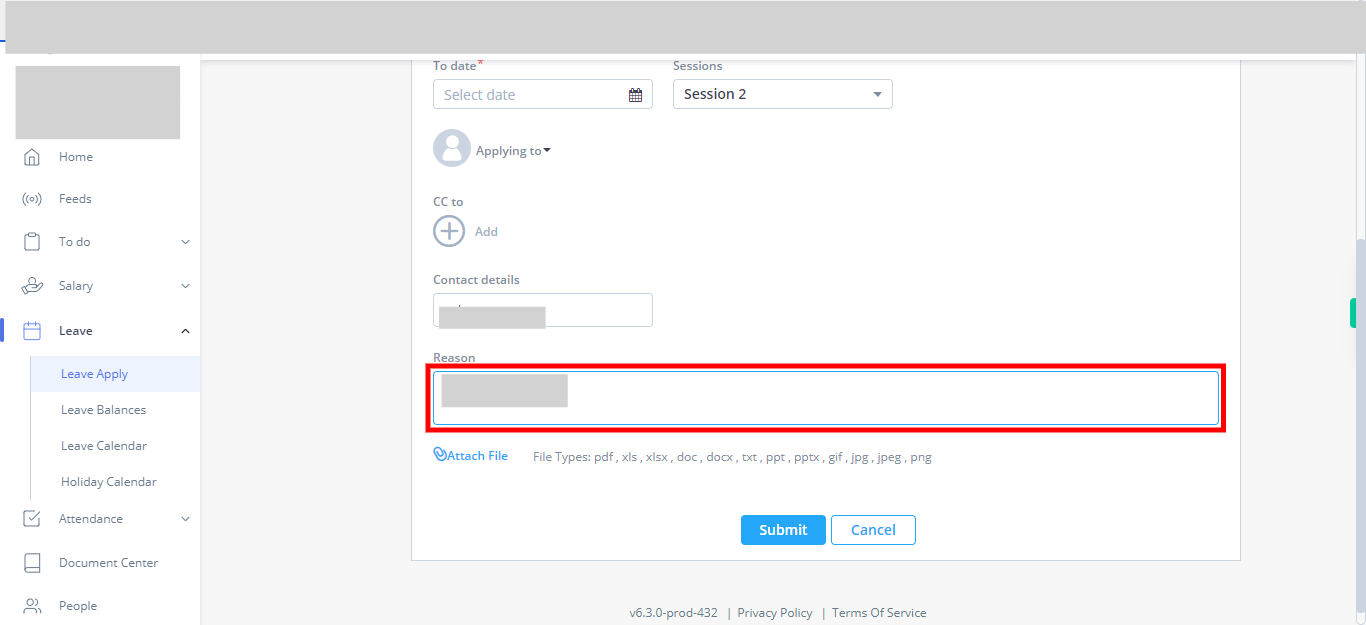
Click on the text field labeled "Reason" or "Leave Purpose." Enter the reason for which you are applying for leave in the provided text field. Provide a clear and concise explanation of your leave purpose or any relevant details required. Once you have entered the reason, review it to ensure it accurately reflects your intended leave purpose. Once done, click on the Next button on the Supervity instruction widget.
-
12.
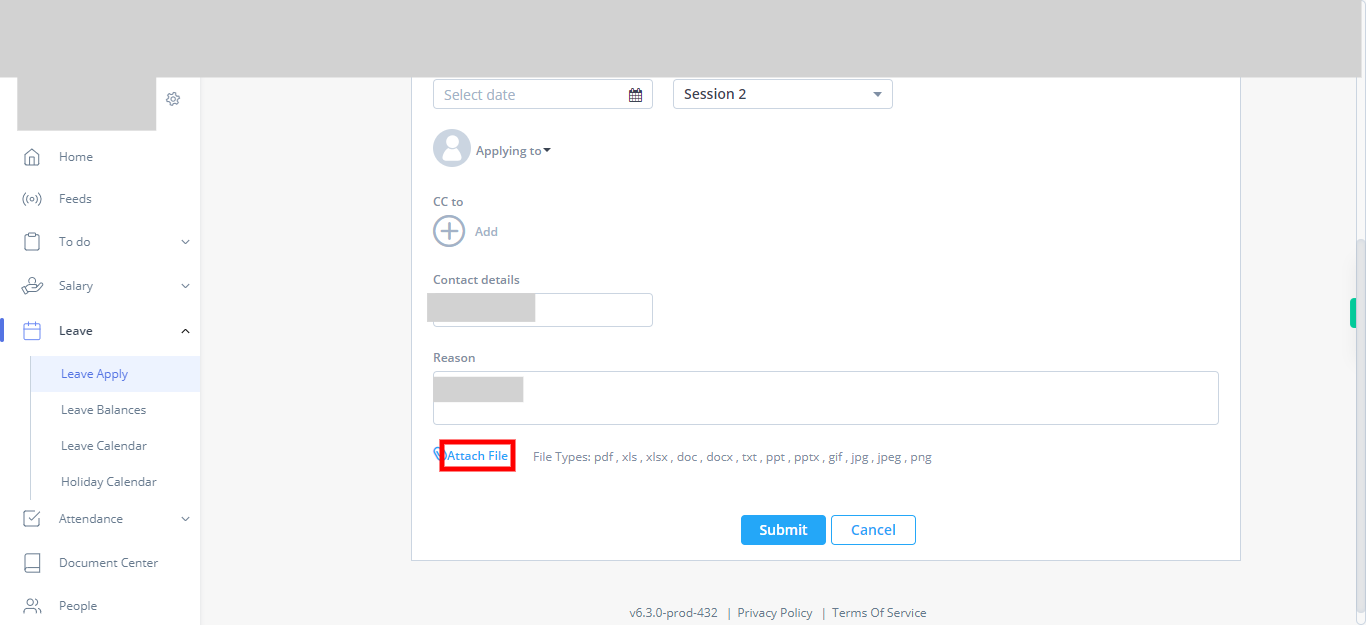
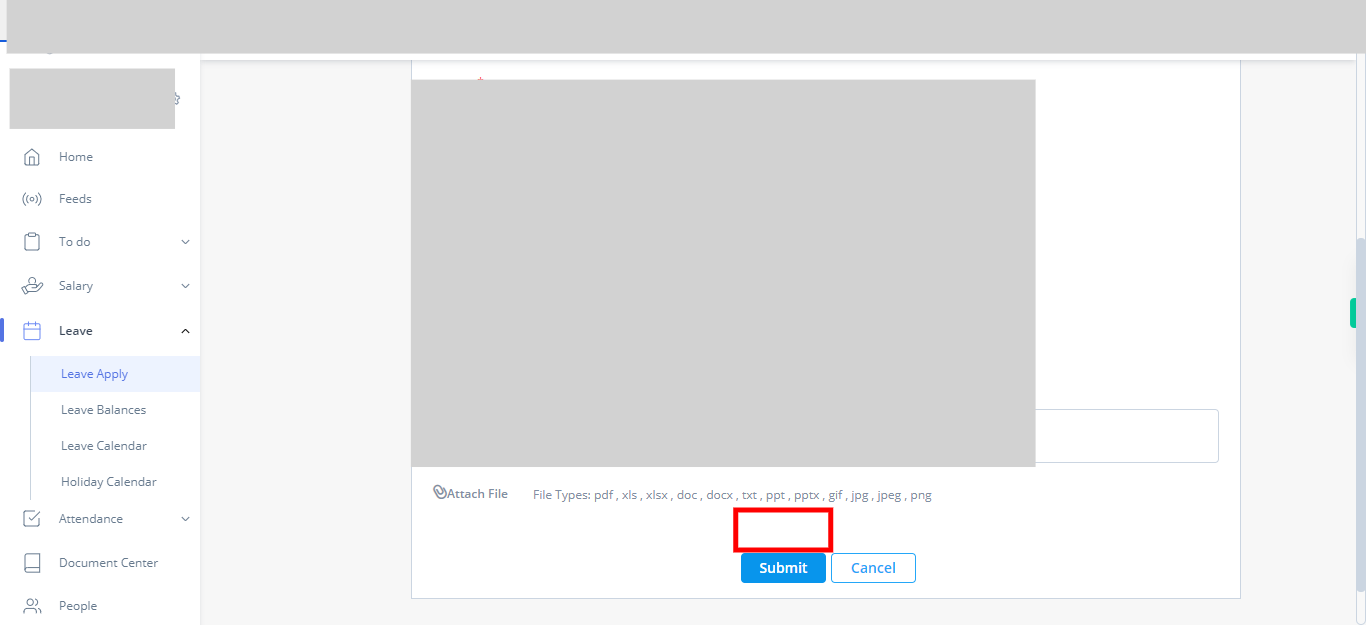
Click on the link labeled "Attach File" to open the file selection dialog or browse window. Navigate to the location where your document is stored on your computer or device. Select the document file you want to attach by clicking on it. Review the selected document to ensure it is the correct file. Once you have attached the document, you may see a confirmation or notification indicating that the attachment was successful. Once done, click on the Next button on the Supervity instruction widget.
-
13.
After completing all the necessary steps mentioned earlier, you are now ready to submit your leave application. Click on the "Submit" button to proceed with the submission of your leave application. After clicking the "Submit" button, the system may display a confirmation message indicating that your leave application has been successfully submitted. You may also receive a notification or email confirmation.


