This skill shows the steps to be followed to Send automatic replays in the specific period .[NOTE: Please make sure that log in to the Outlook web before playing the skill].
-
1.
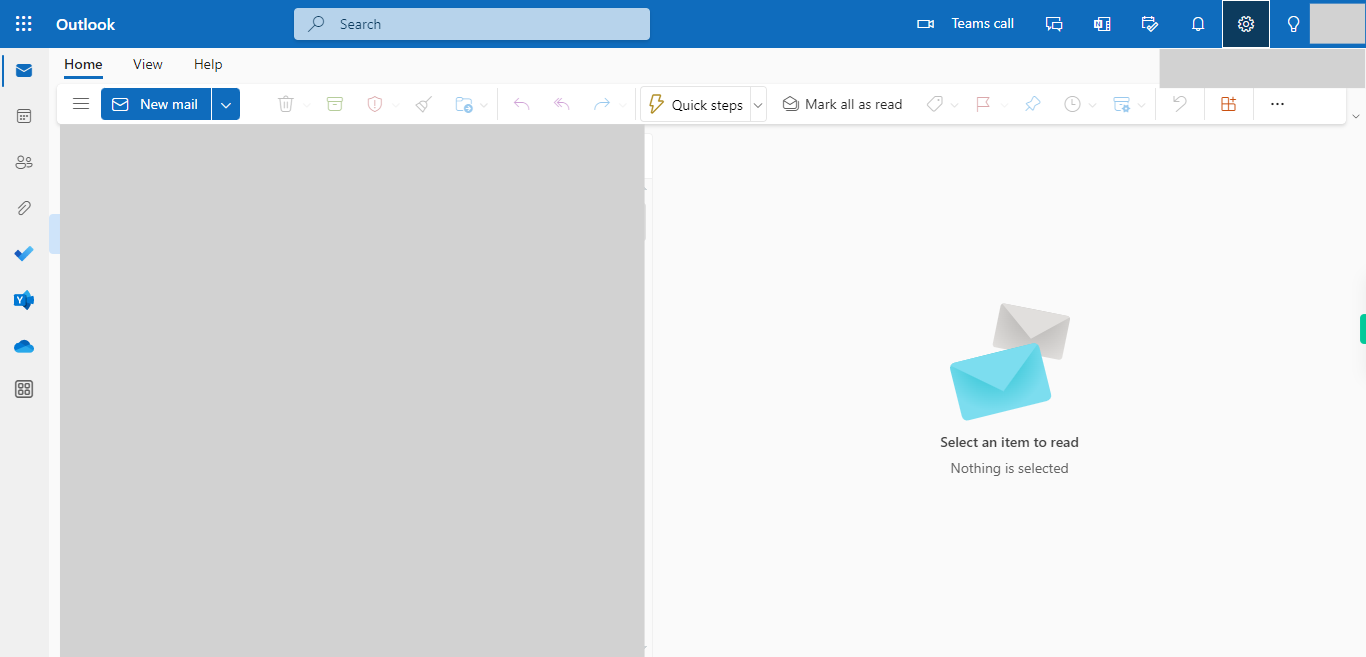
Open - Outlook Web Application.
-
2.
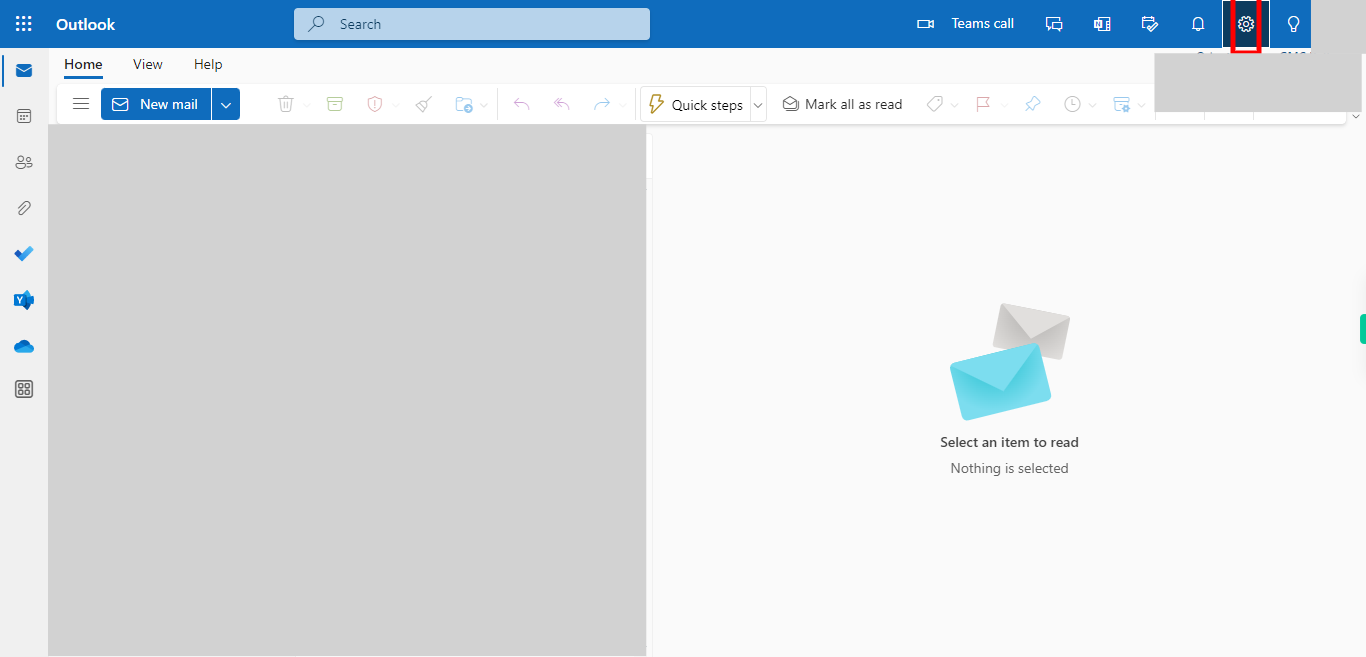
Click on the "Settings menu" represented by a gear icon at the web page's top right corner. which will redirect you to the Outlook Settings page. If the settings window is not open, click on the "View all Outlook settings" menu, which will redirect you to the Outlook Settings page.
-
3.
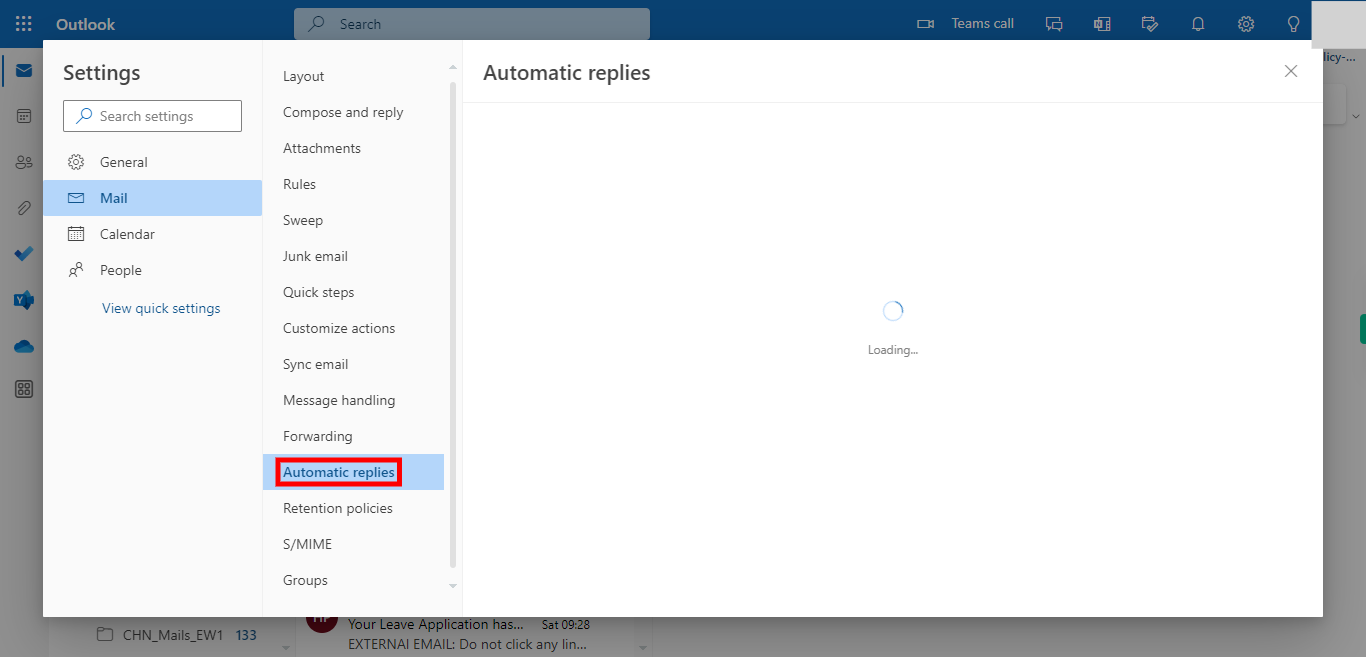
On the Settings panel, click on "Automatic replies", which is located under the "Mail" option.
-
4.
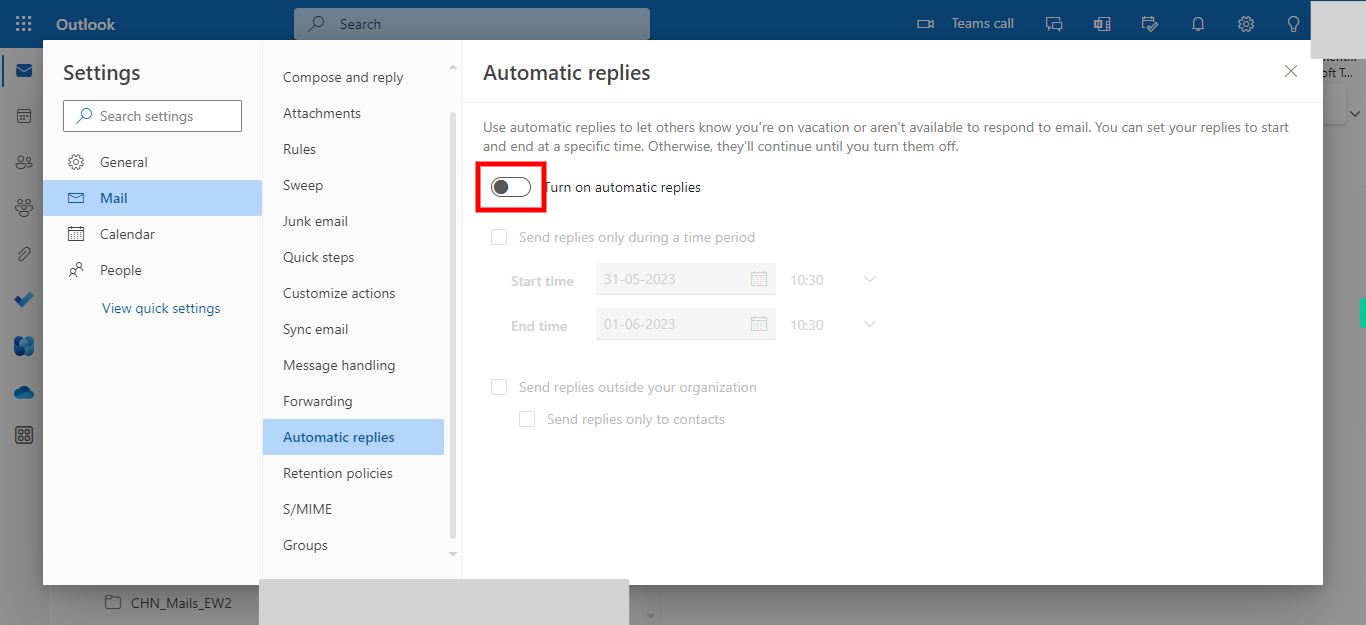
To enable Automatic replies, toggle the "Turn on automatic replies" switch to the "on" position. Once done, click on the "Next" button on the Supervity instruction widget.
-
5.
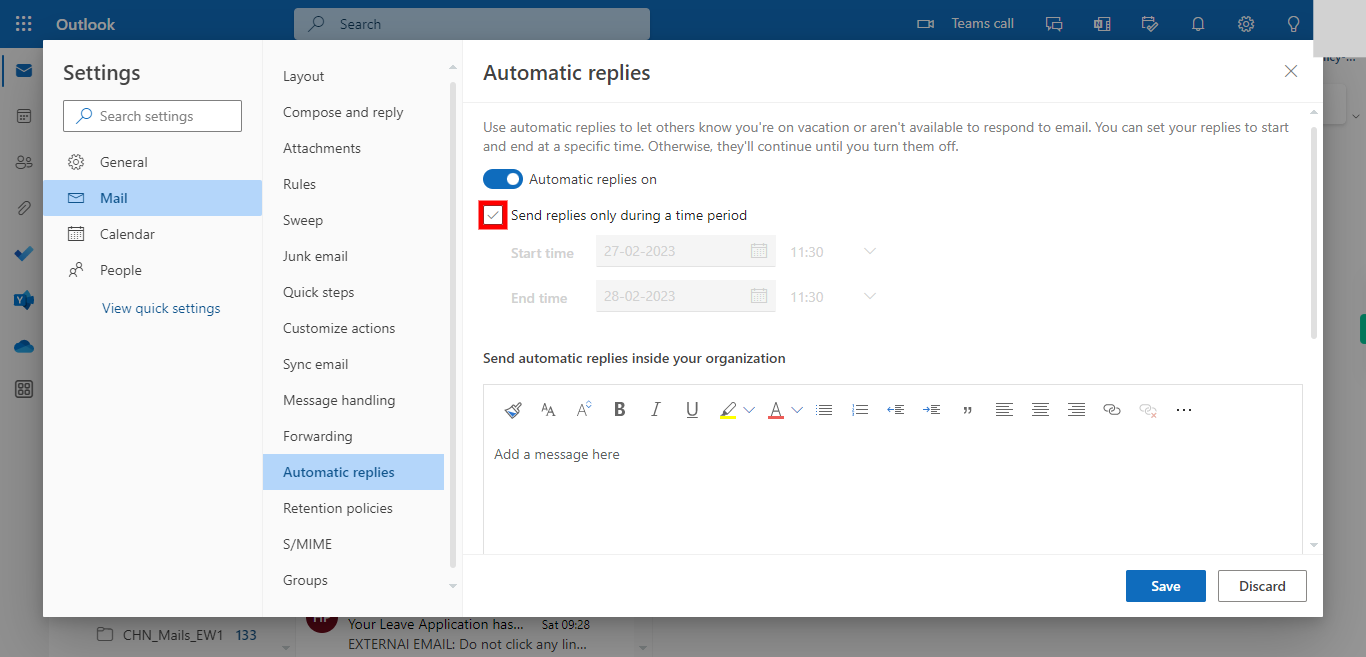
Select the checkbox labeled "Send replies only during a time period" to specify the time zone during which automatic replies will be sent to emails received in your inbox. After selecting the Date and Time, choose the preferred options provided in the checkboxes below: -"Block my calendar for this period" -"Automatically decline new invitations for events that occur during this period" -"Decline and cancel my meetings during this period" which are optional. Once done, click on the "Next" button on the Supervity instruction widget.
-
6.
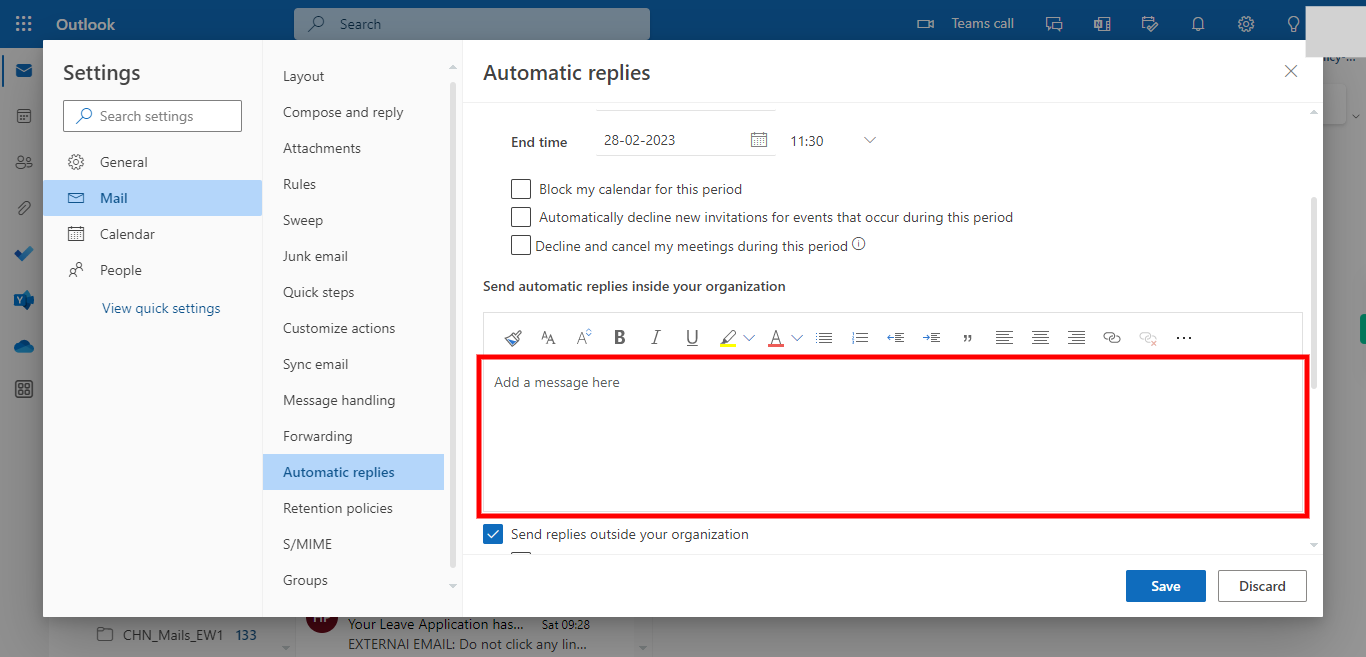
Enter the email body for the Automatic replies by clicking on the "Add a message here" field. Once done, click on the "Next" button on the Supervity instruction widget.
-
7.
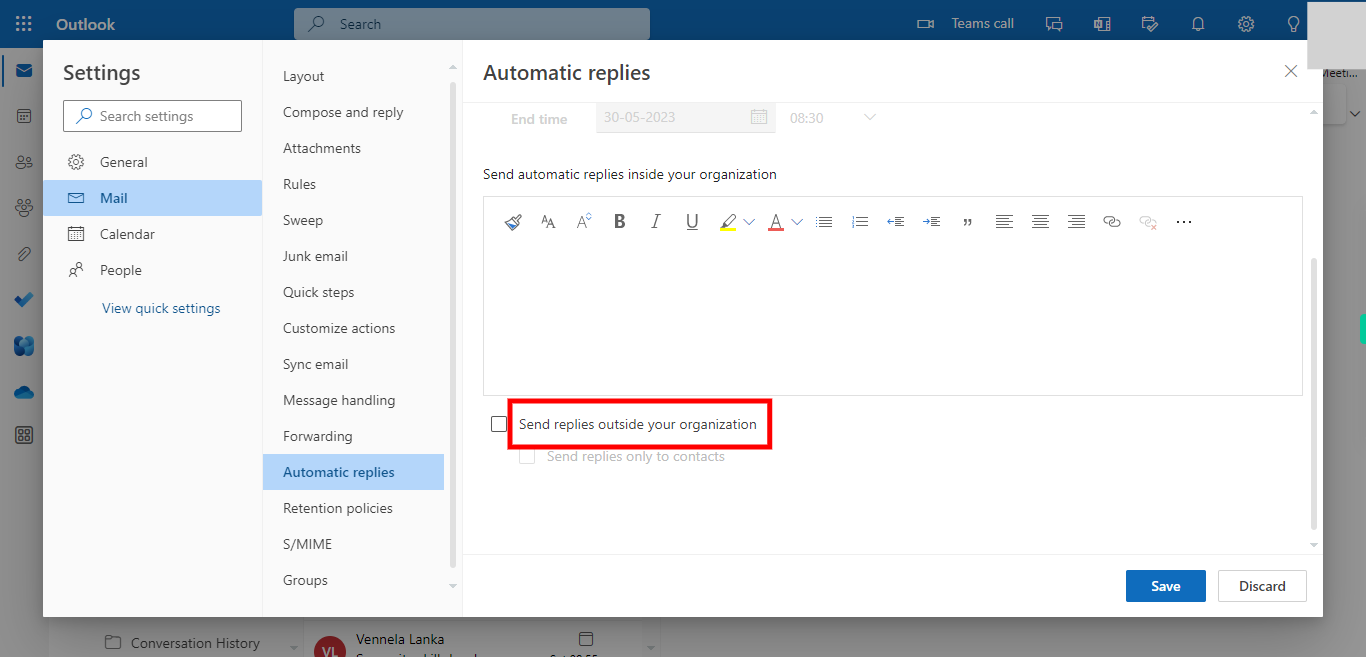
If you want to send the "Send replies outside your organization," select this checkbox and enter the required text in the mail body. You also have the option to select "Send replies to contacts." If you don't want to choose these options, click on the "Next" button on the Supervity instruction widget to continue. Otherwise, click on the "Next" button on the Supervity instruction widget after entering these details.
-
8.
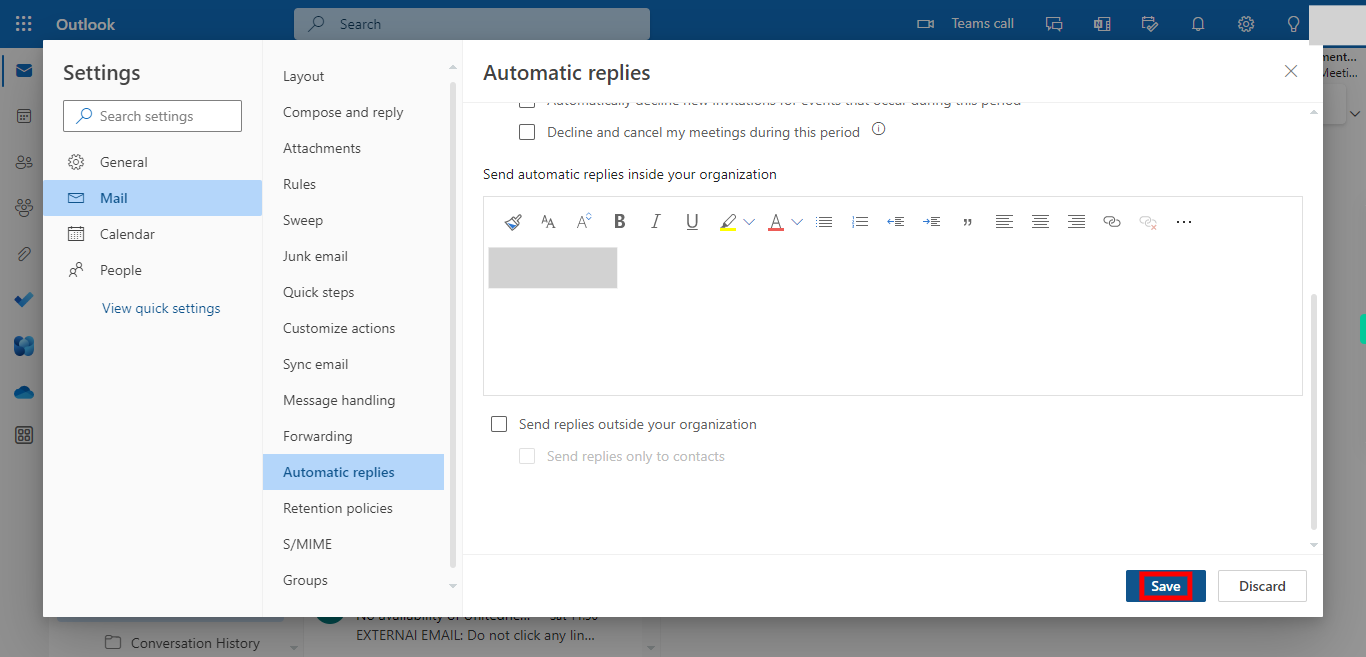
To complete the process, click on the "Save" button. You will be notified once done.


