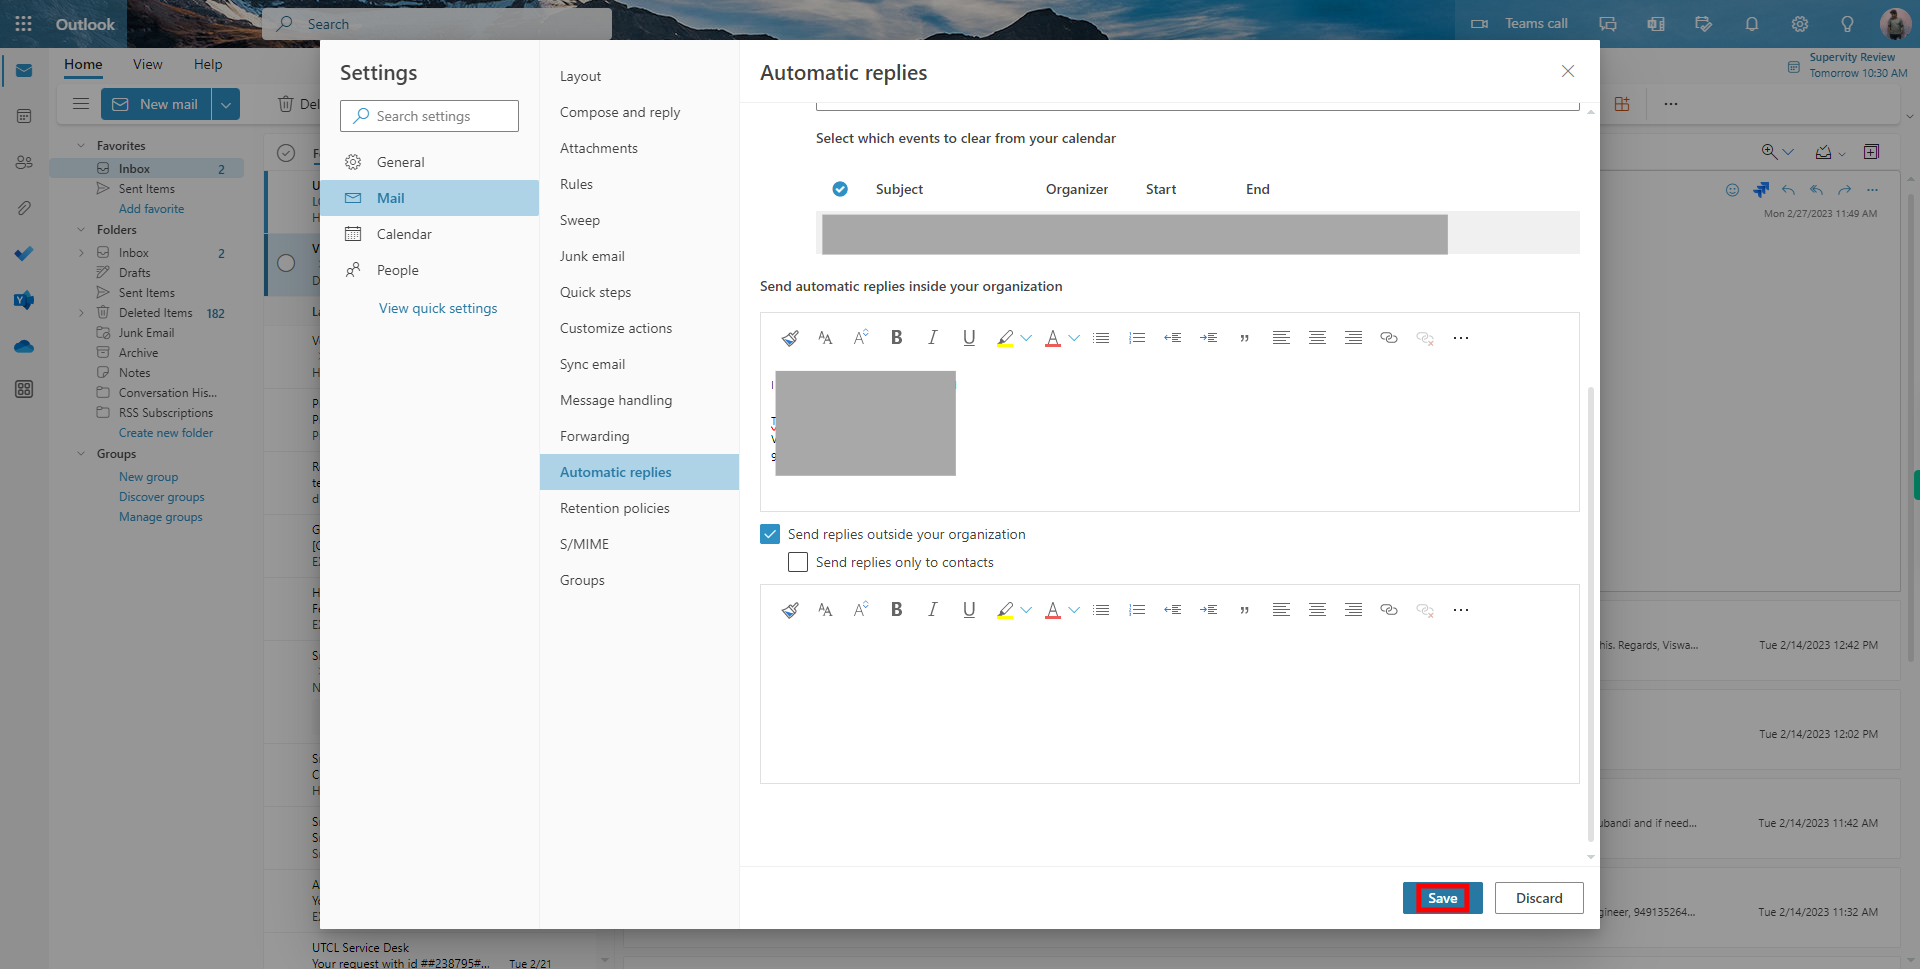
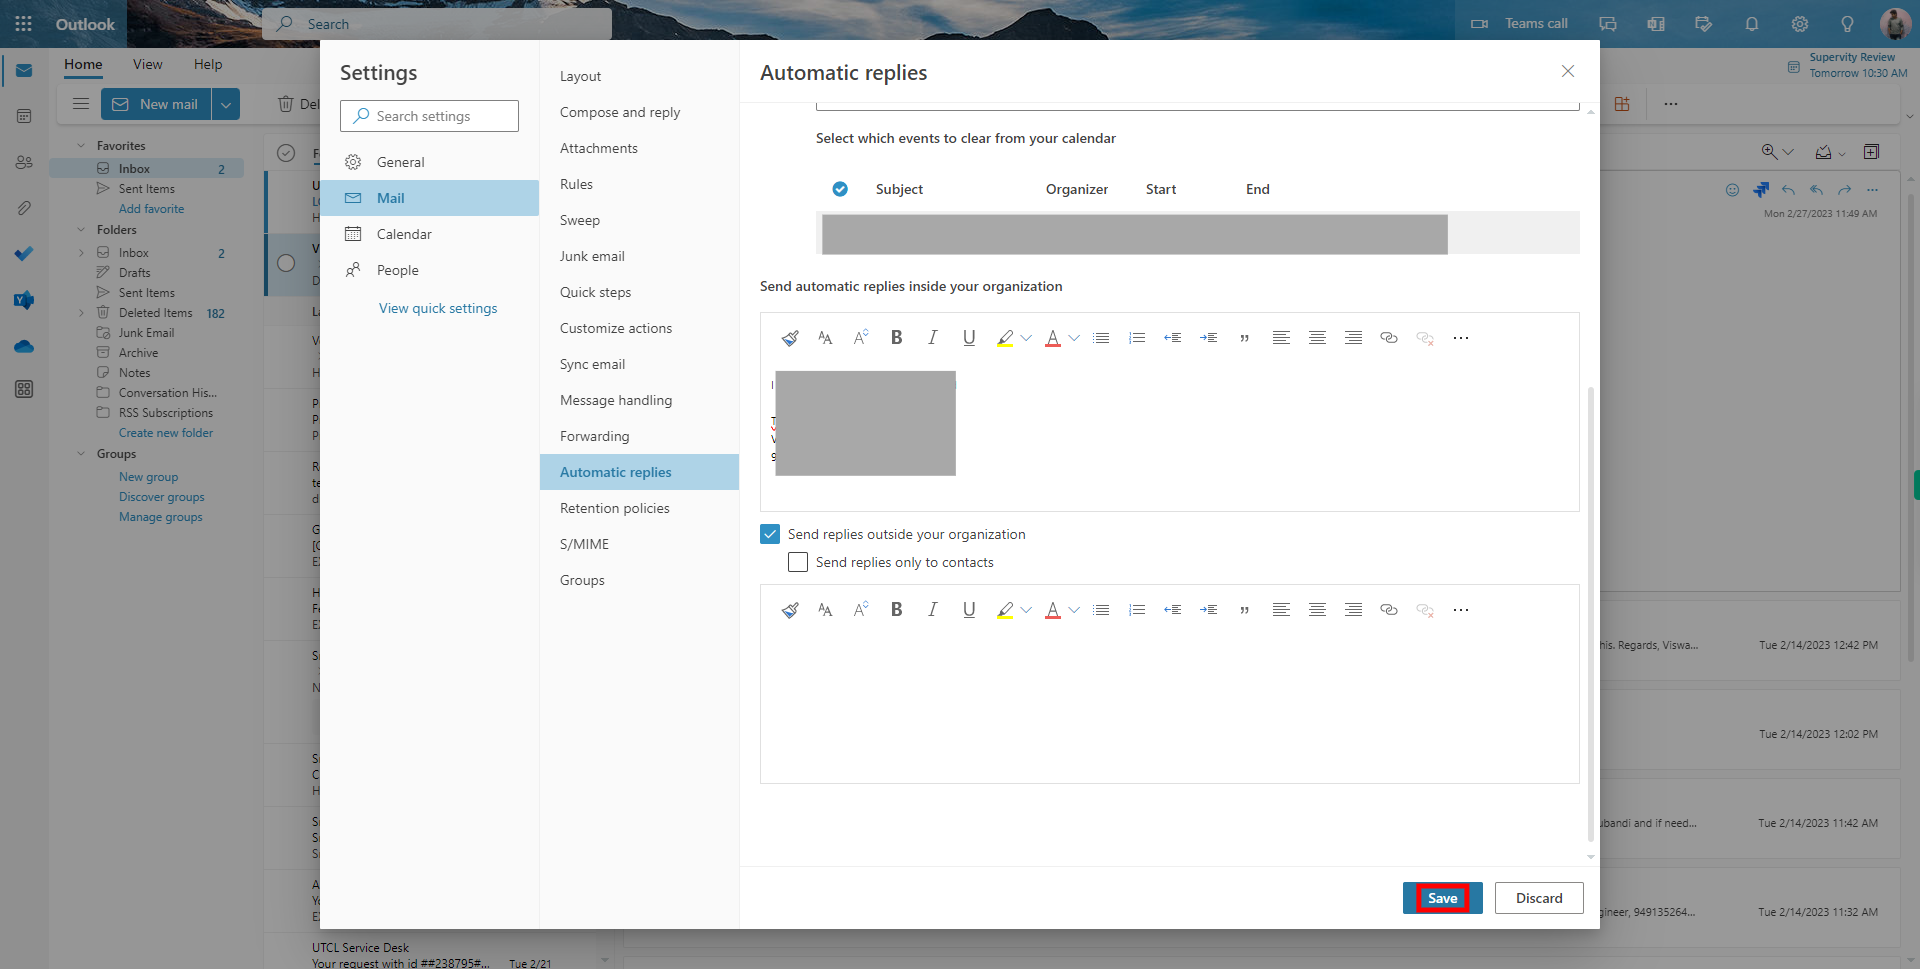
The step-by-step process for automating emails in the Outlook web application. Note: Ensure that you are already logged into the Outlook web application, and the user needs to specify the period for out-of-office.
-
1.
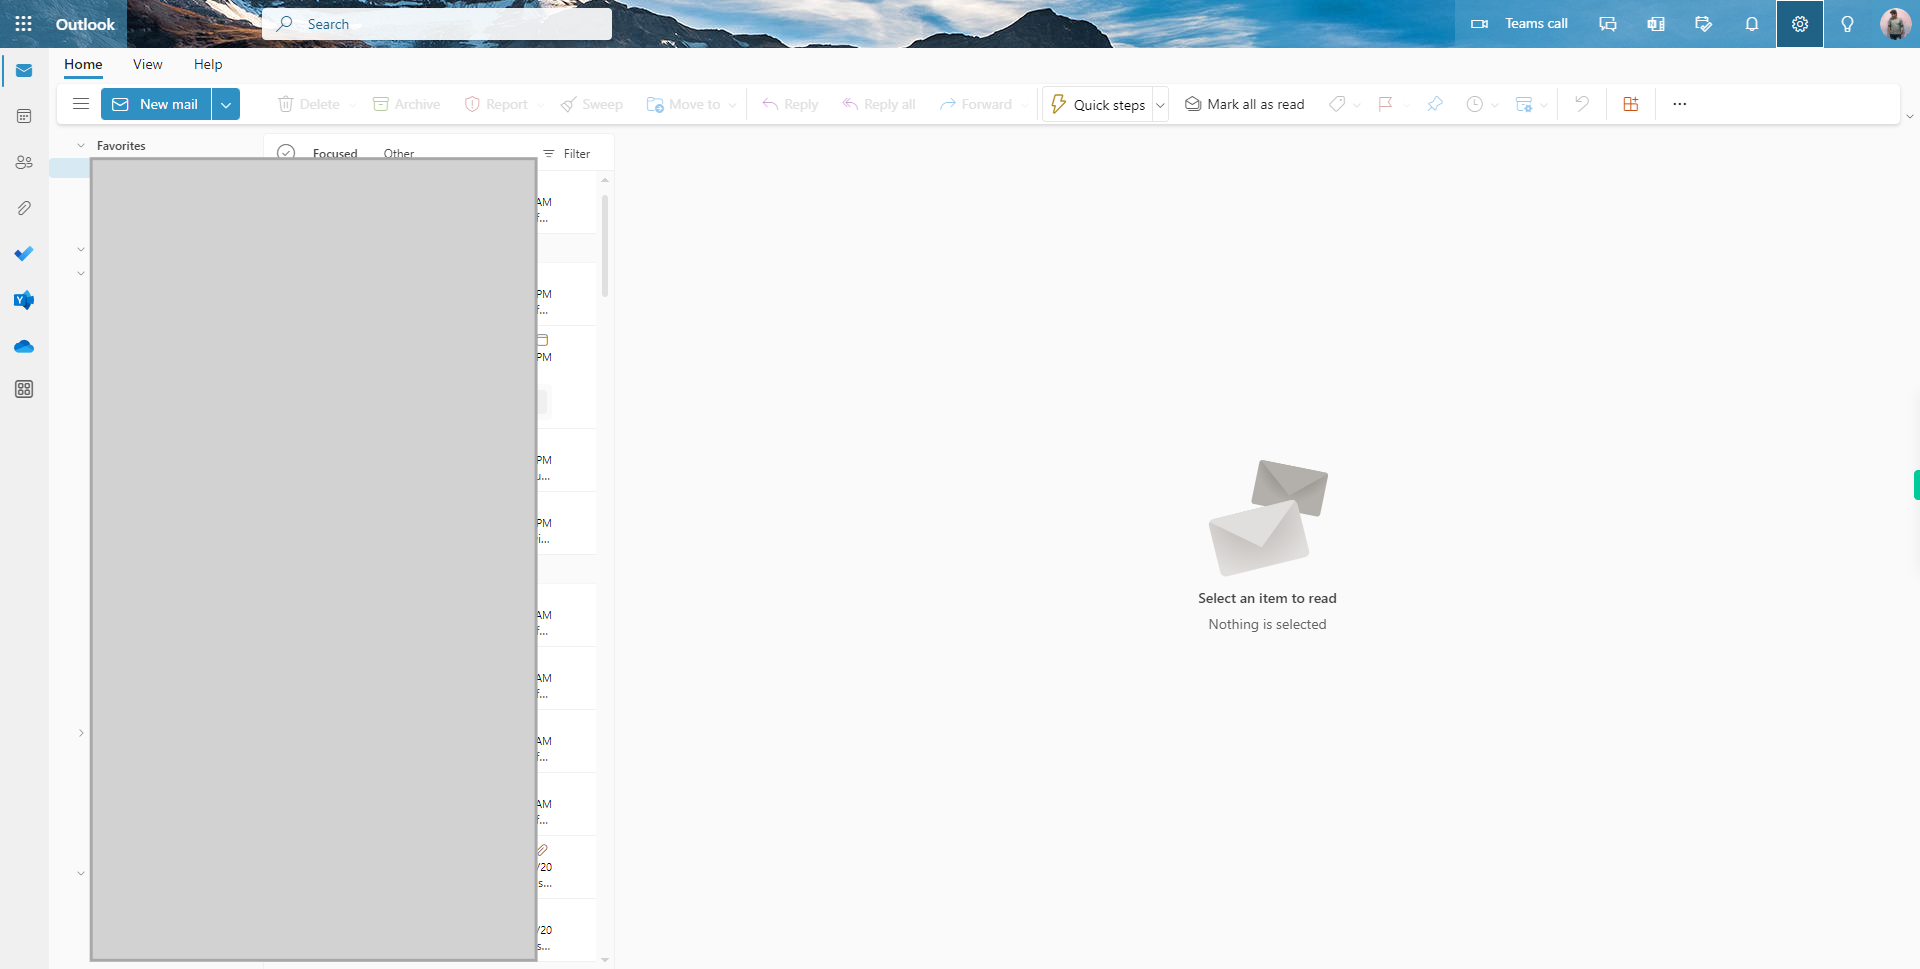
Open Outlook Web Application.
-
2.
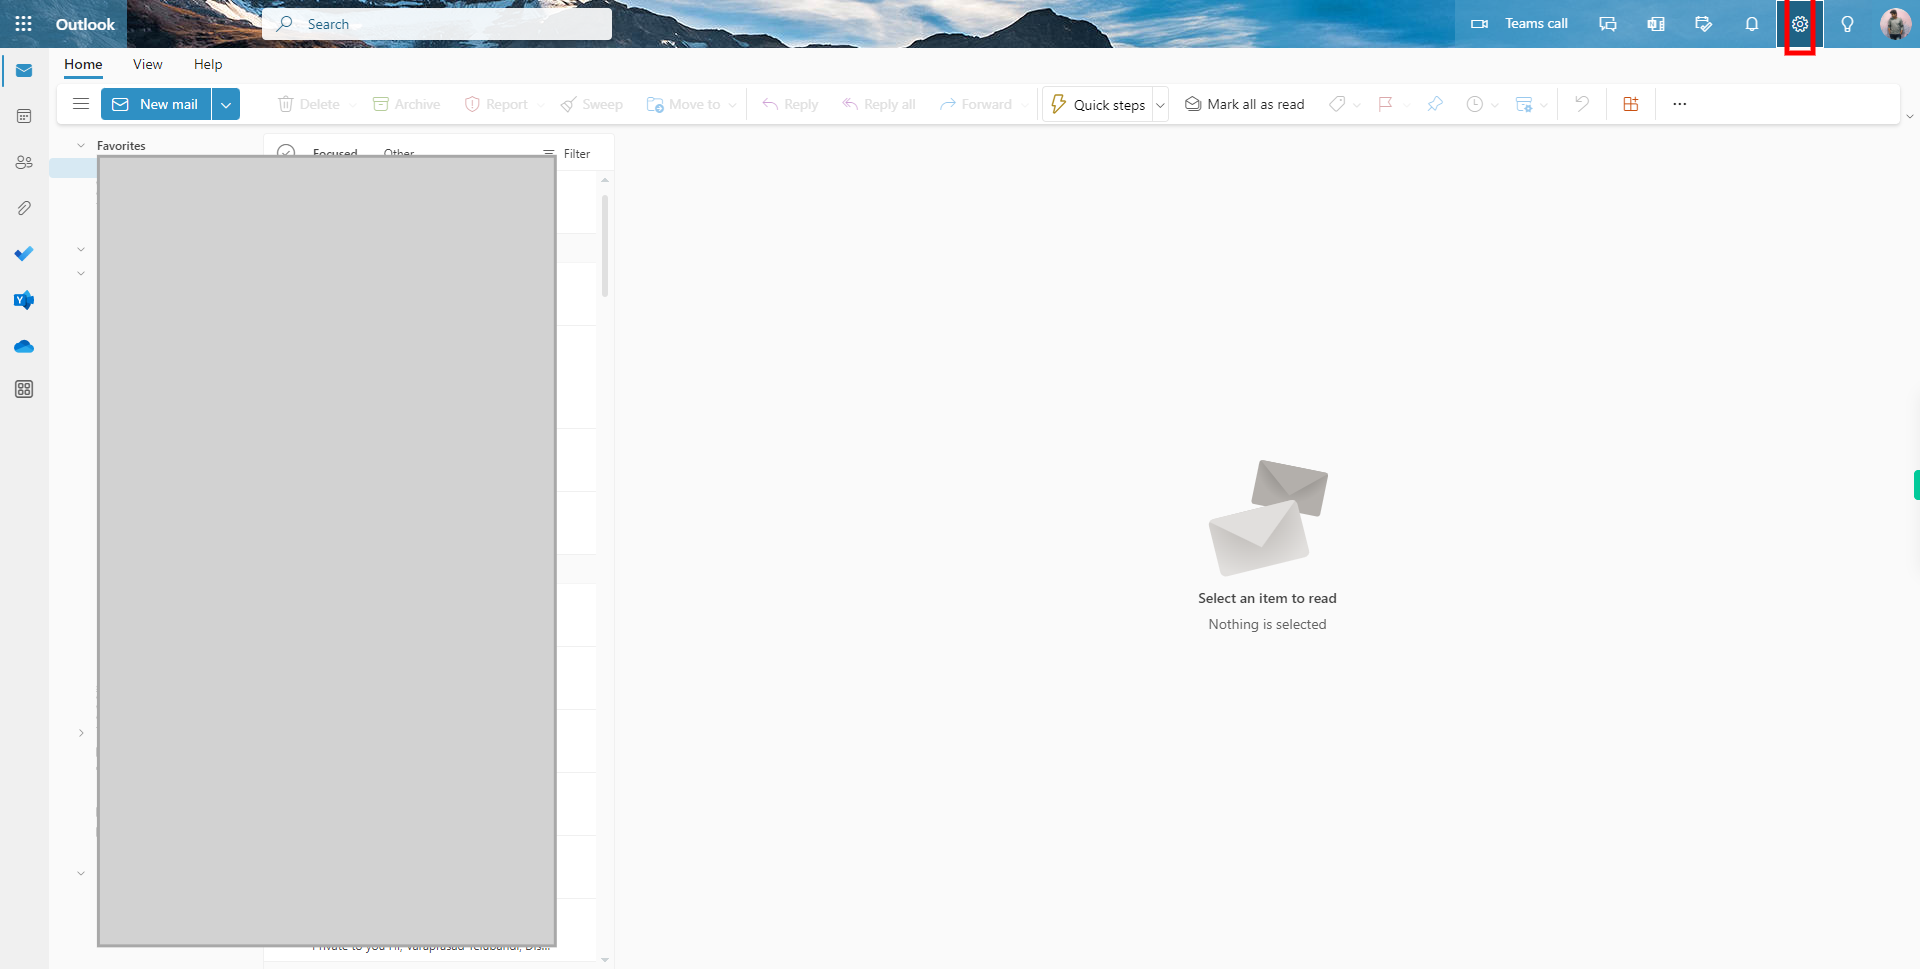
1. On the home page at the top right side of the screen click on the setting symbol. It will navigate to the settings options.
-
3.
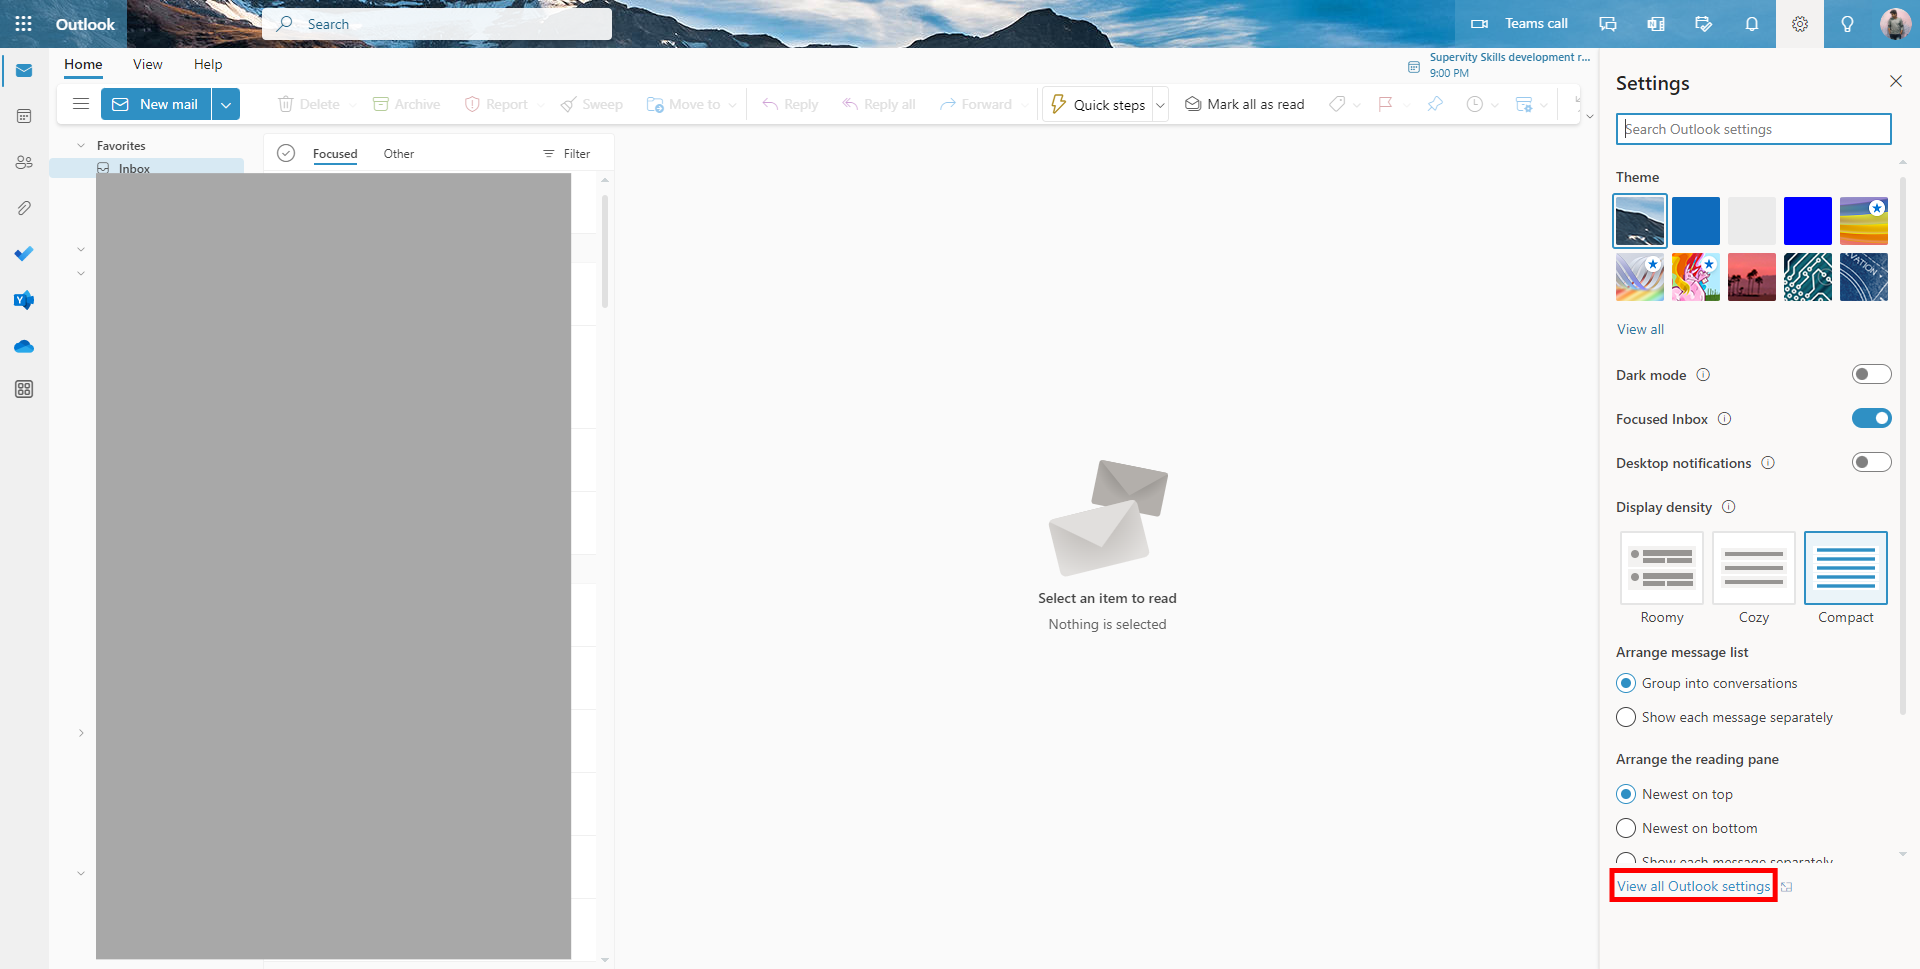
2. In the setting page click on the View all Outlook settings.
-
4.
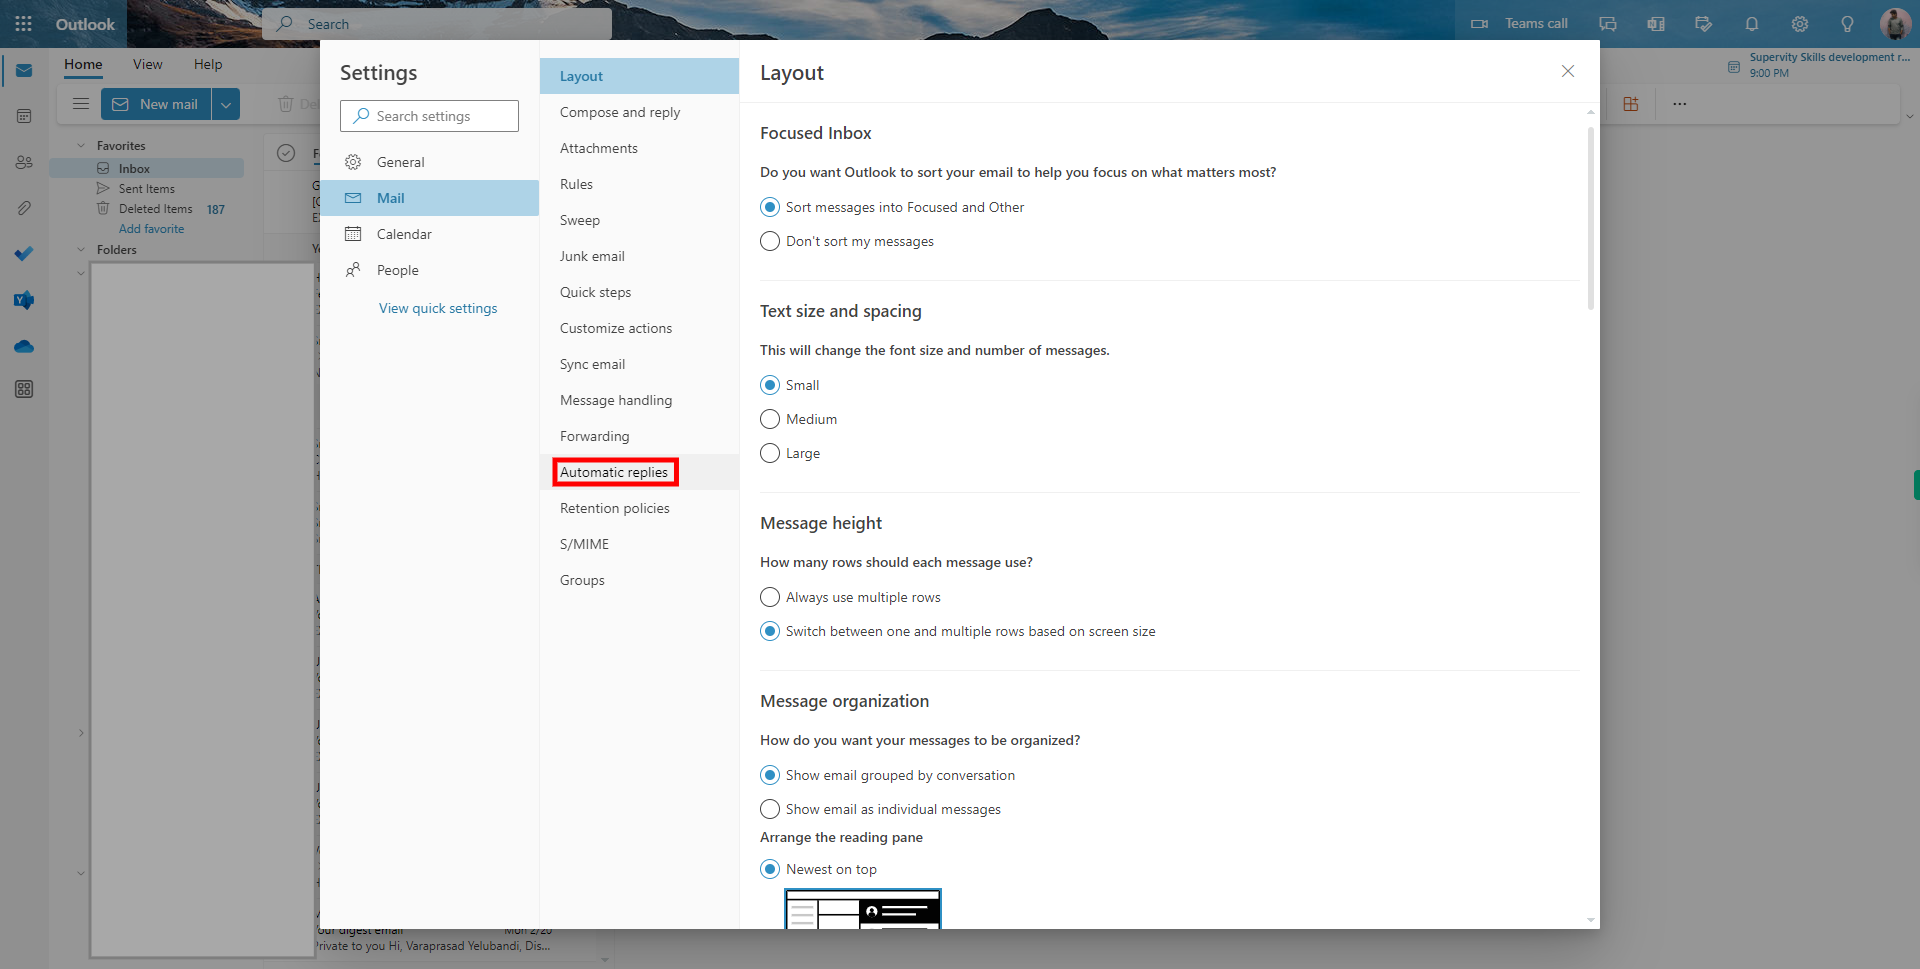
3. Click on the Automatic replies to set the OOO settings.
-
5.
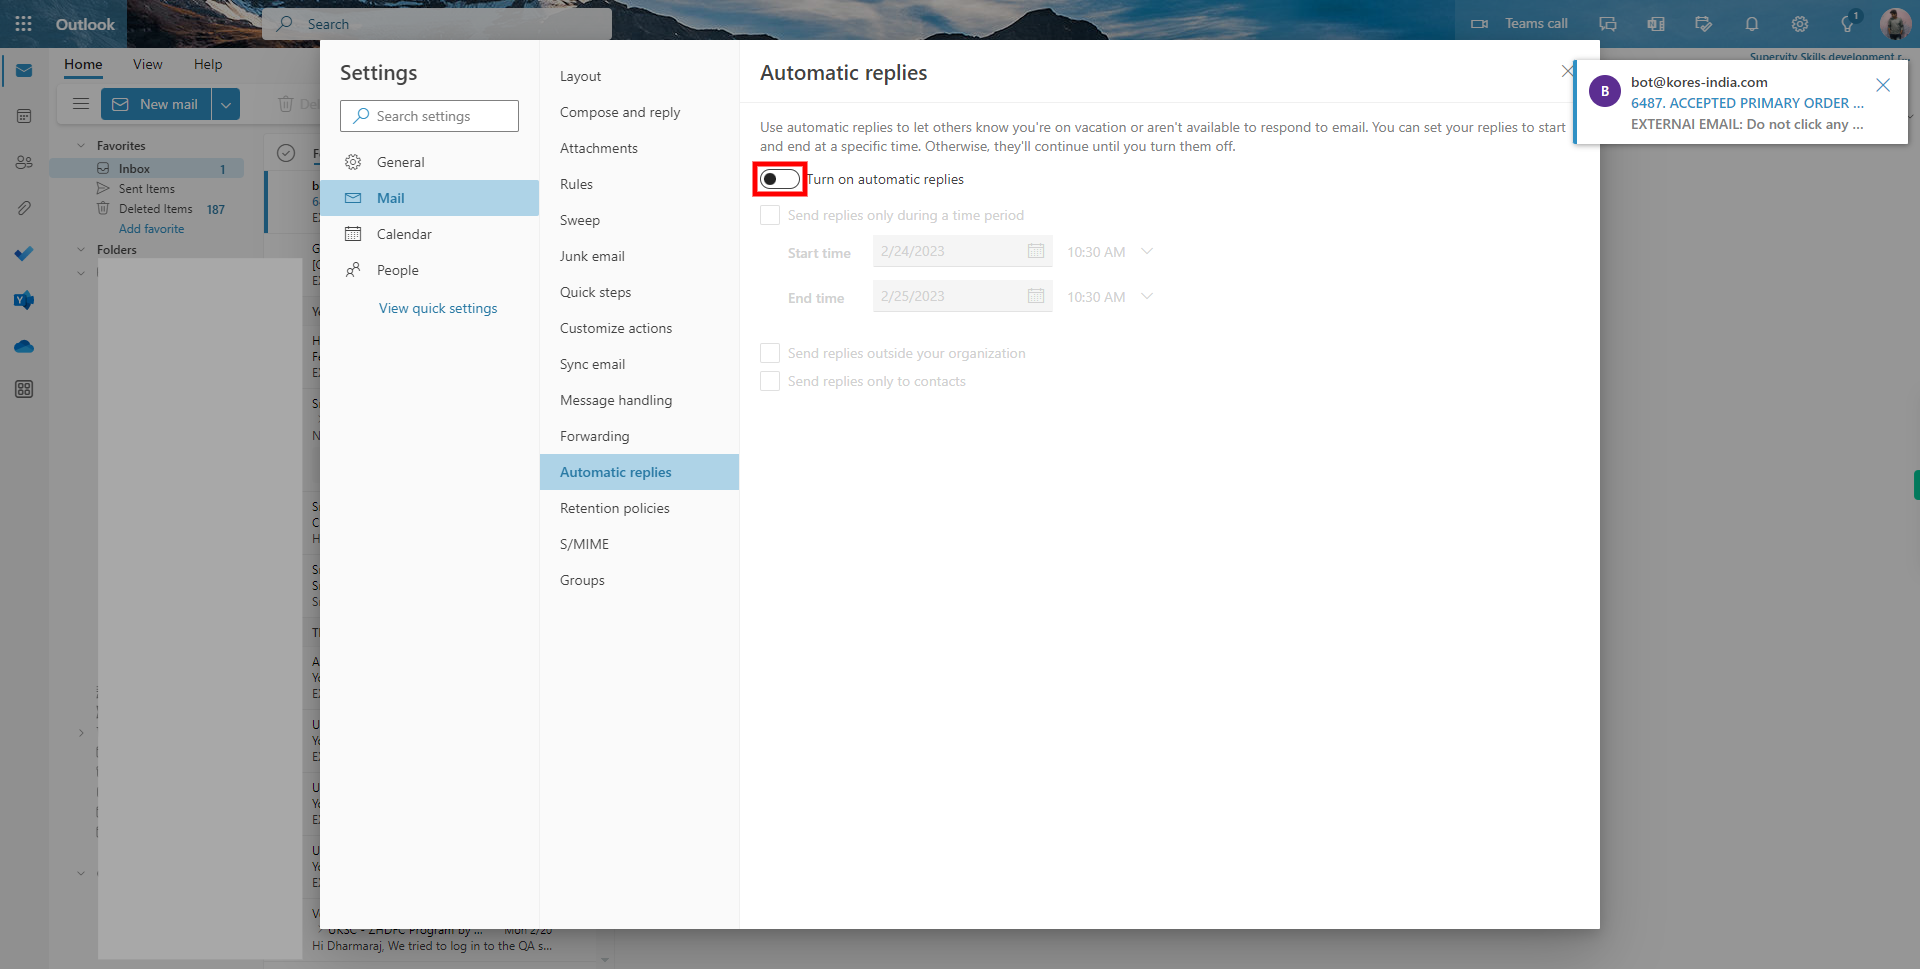
4. Click on the "Turn On" automatic replies to enable the auto Emails.
-
6.
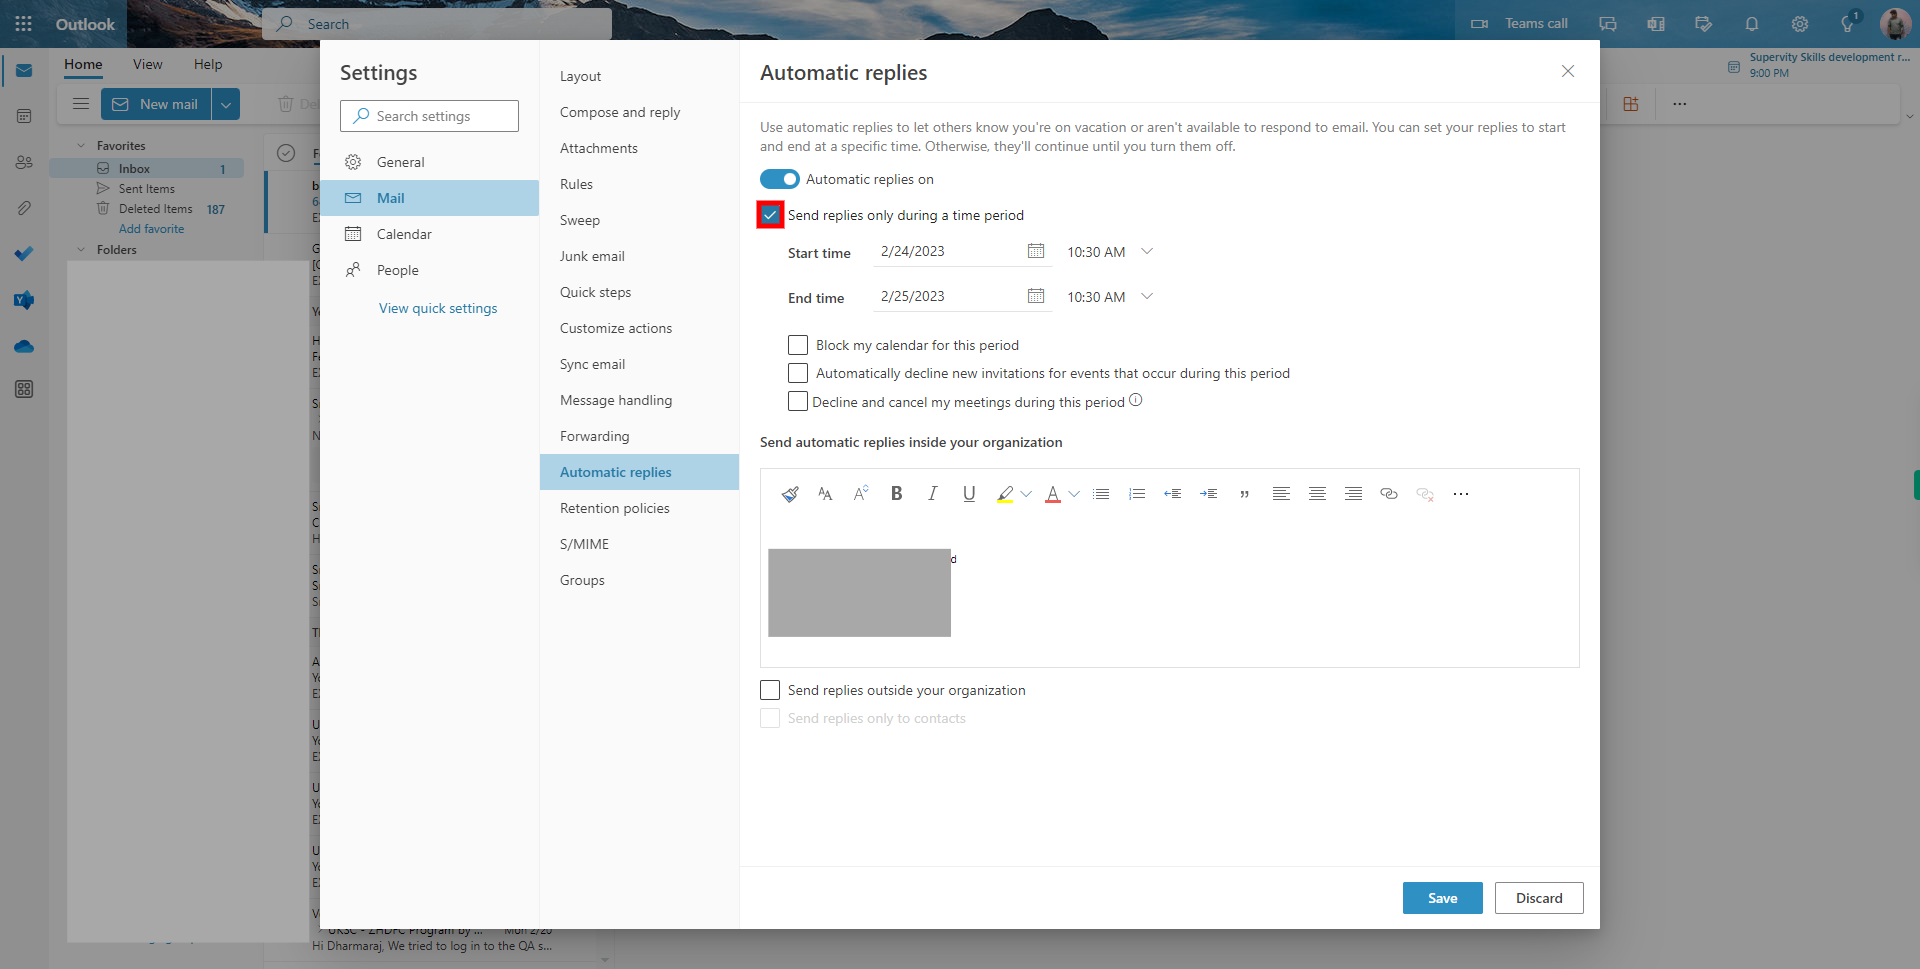
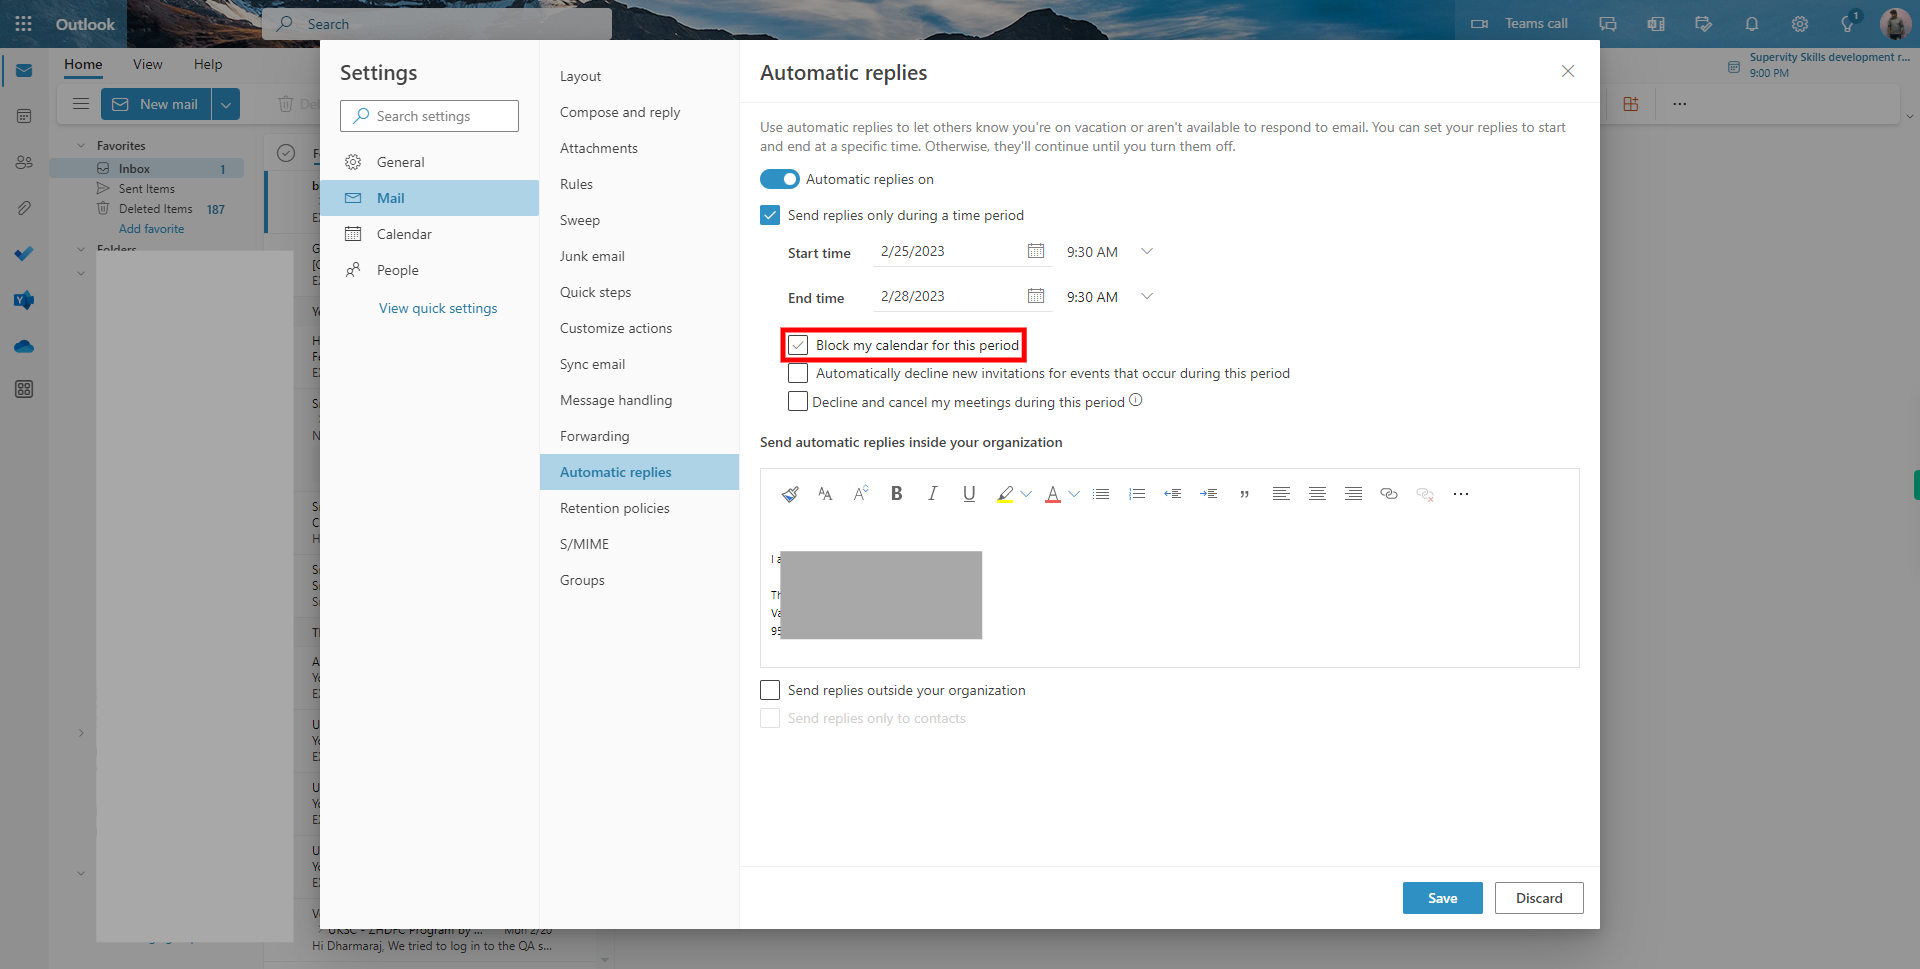
5. Select the check box to send an automatic reply in the OOO period.
-
7.
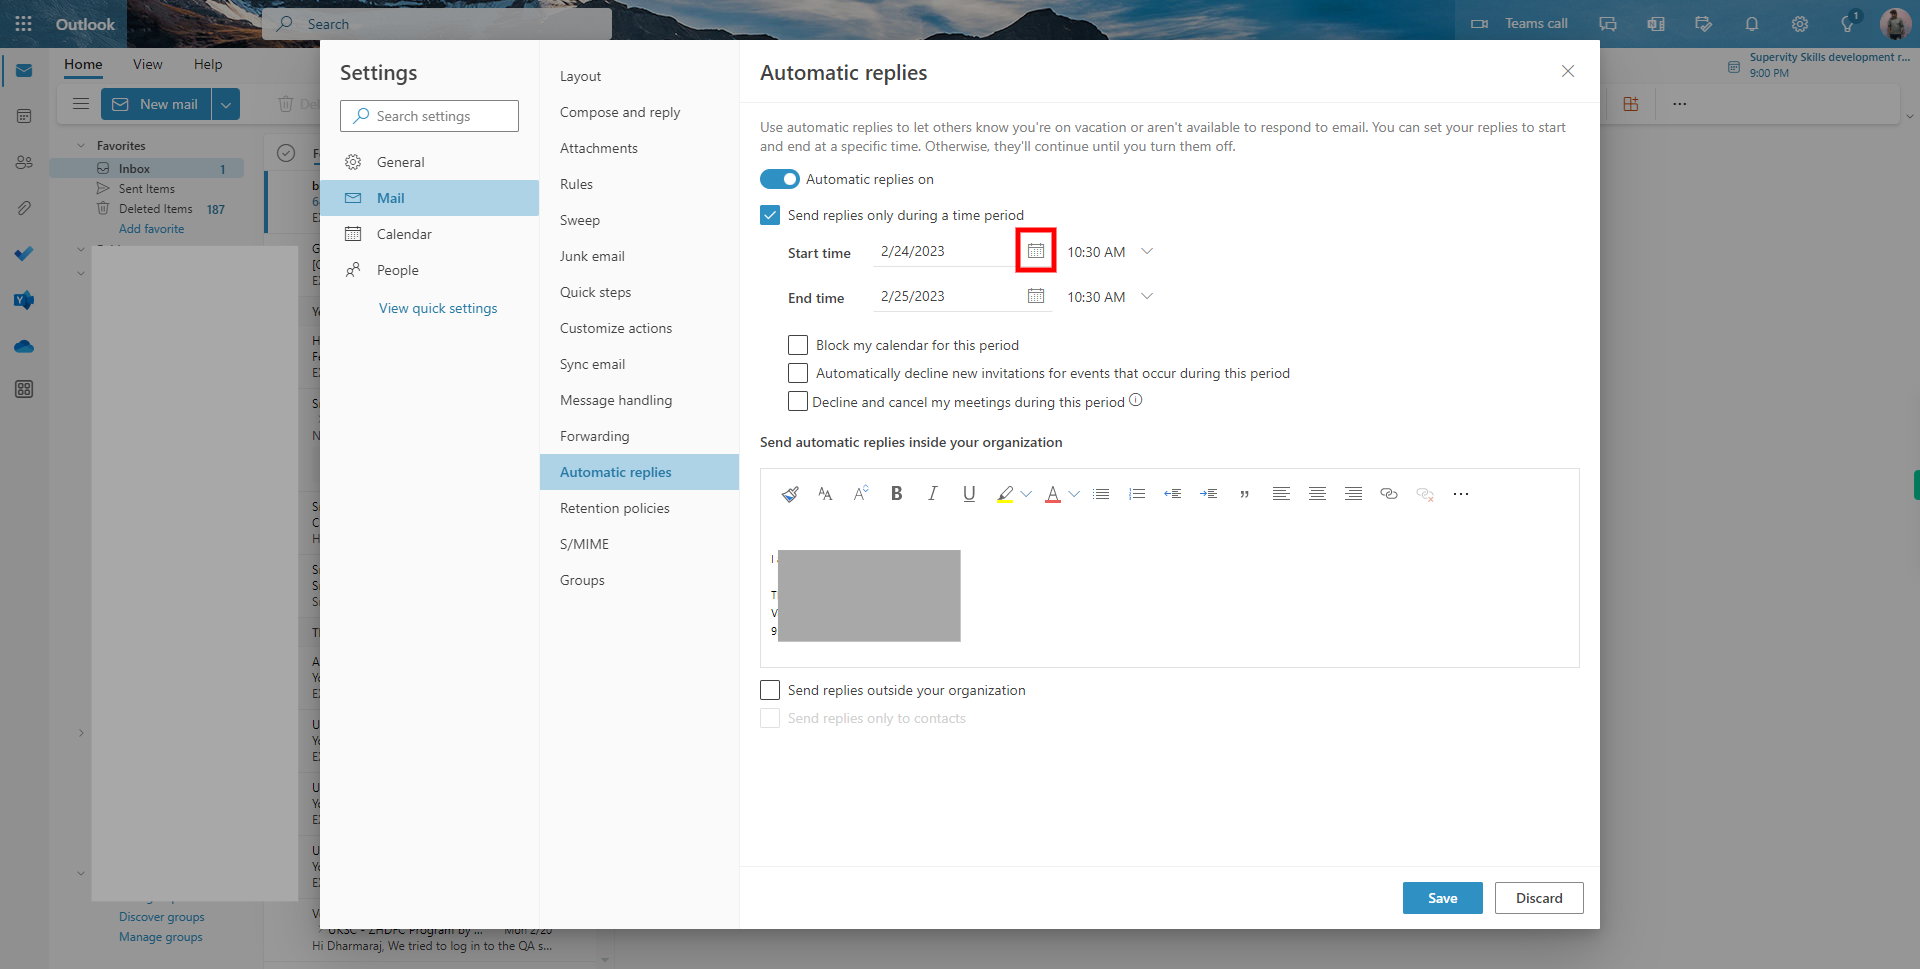
6. Click on the start date calendar to select date and time then click on NEXT
-
8.
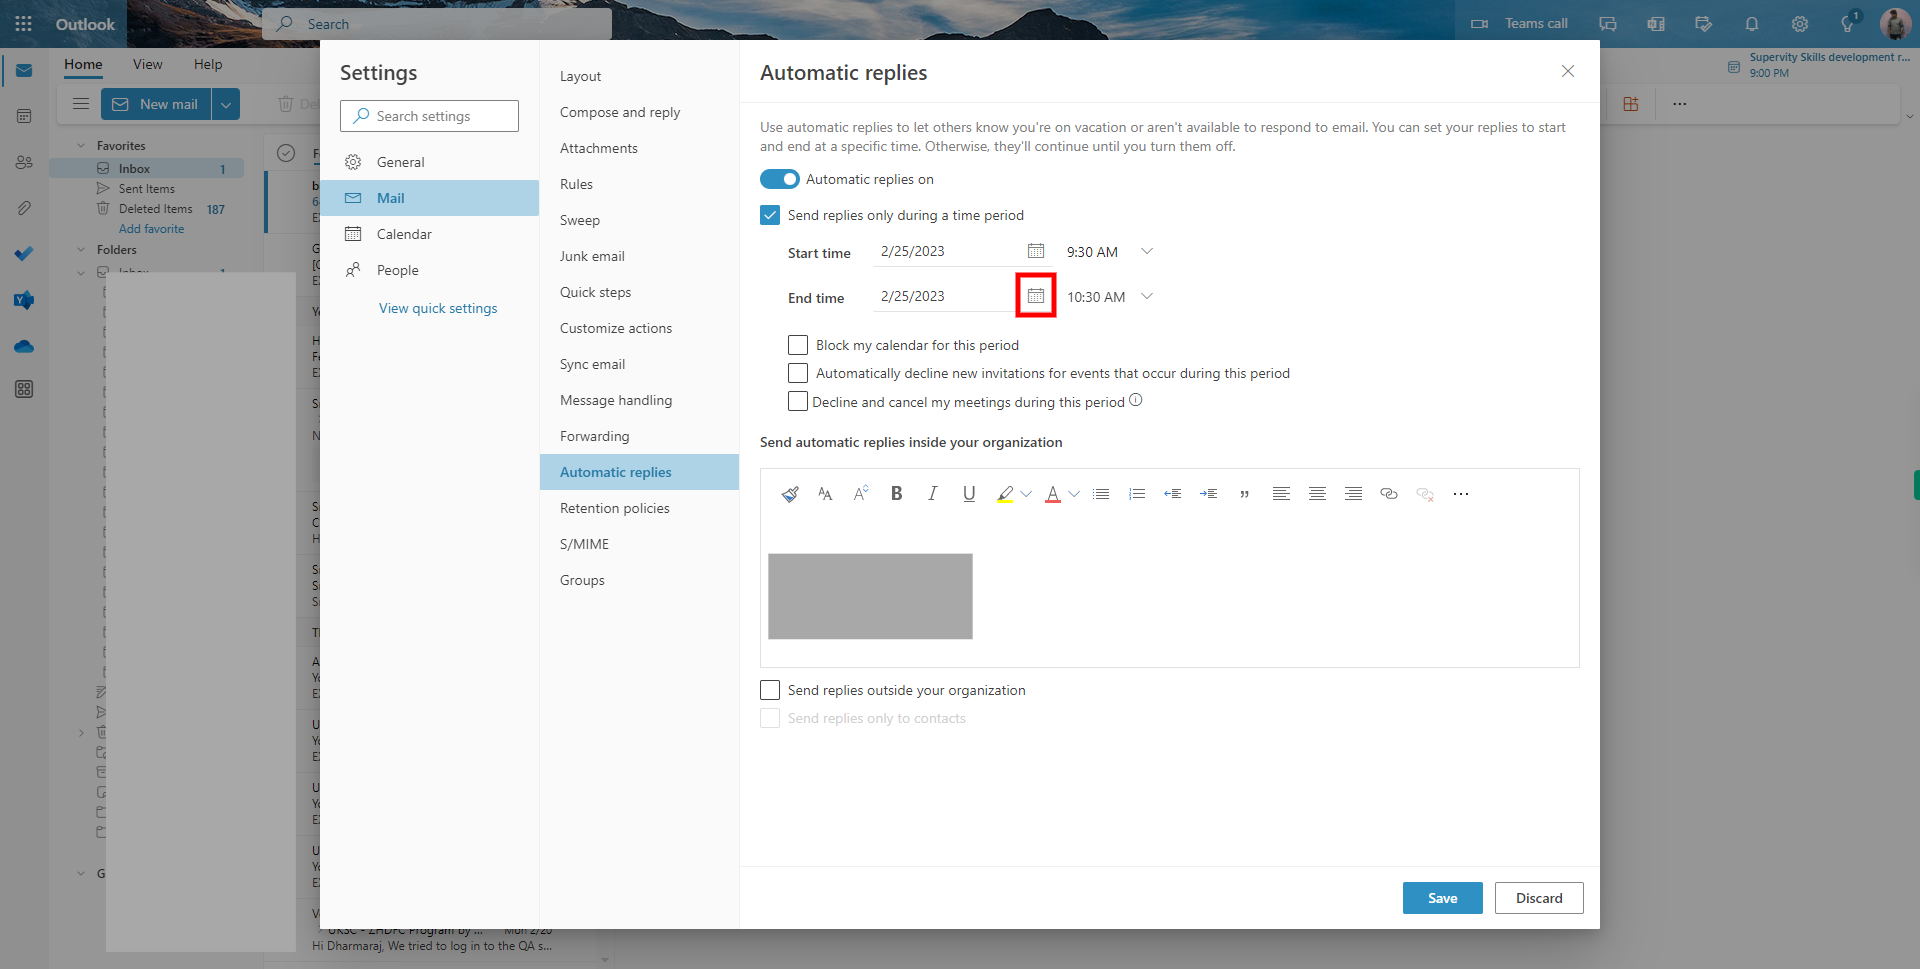
7. Click on the end date calendar to select date and time then click on NEXT
-
9.
8. Click on the check box for Block my calendar for this period
-
10.
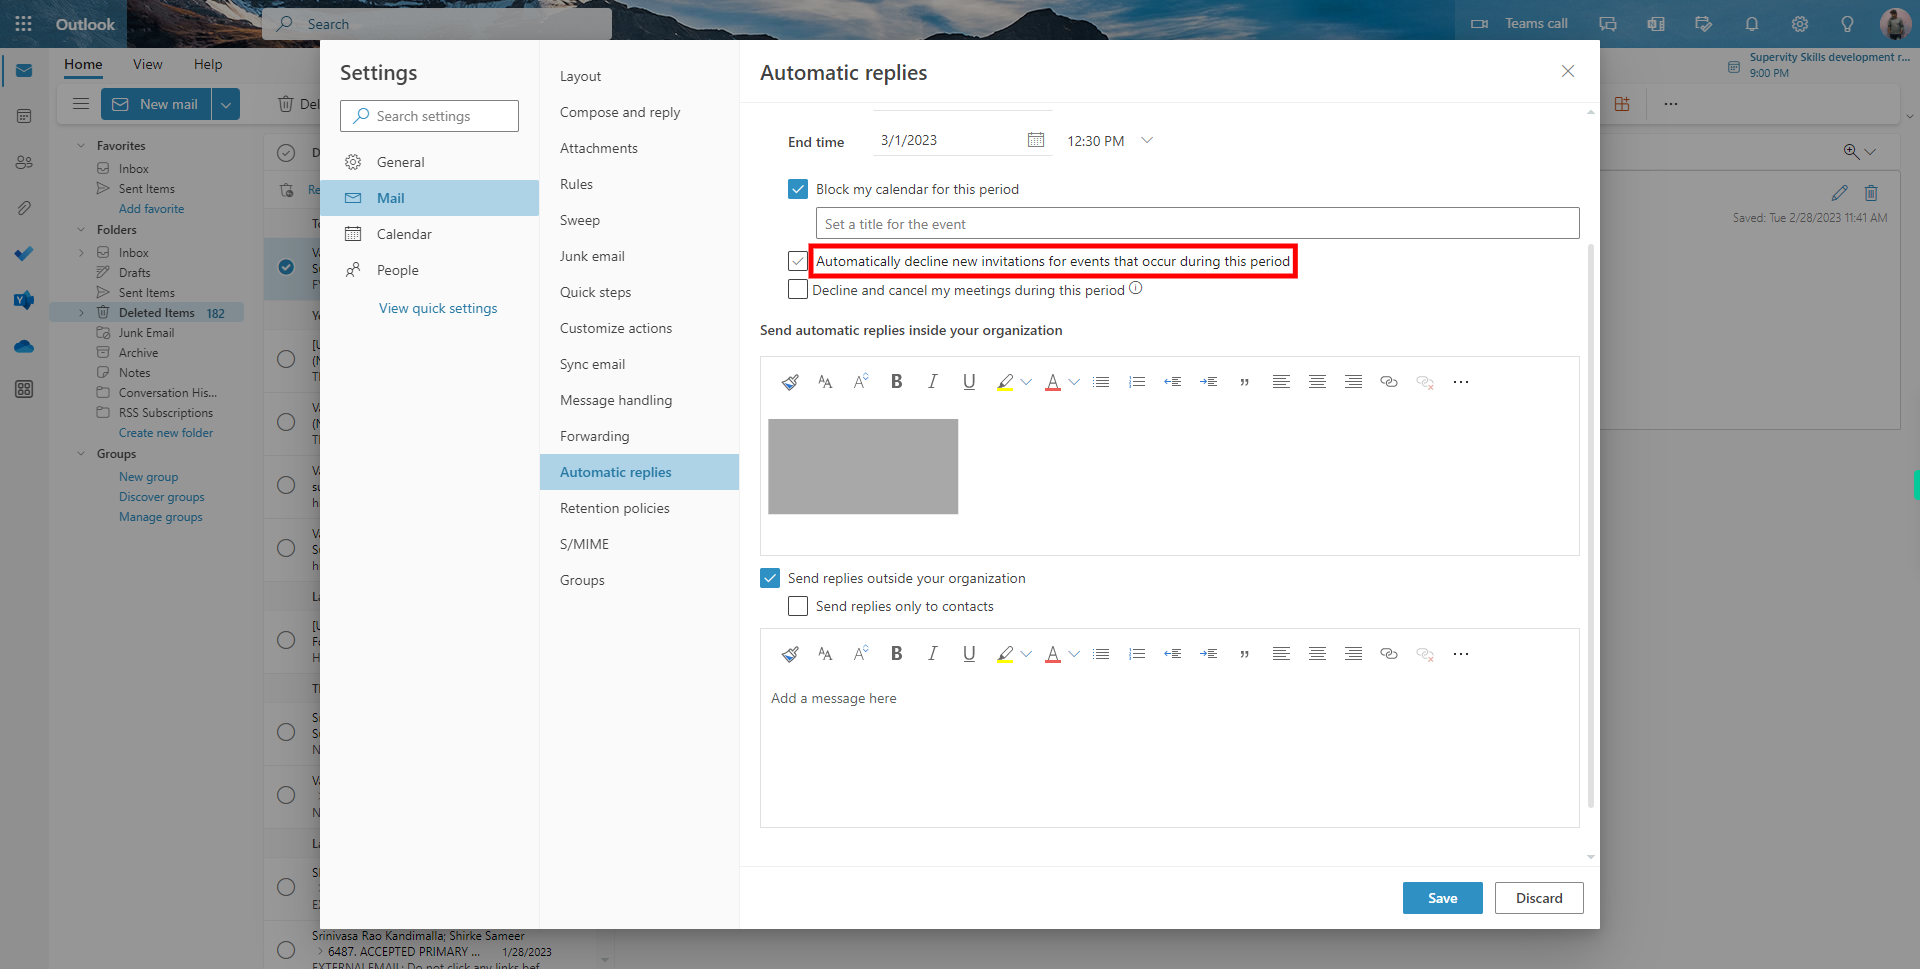
9. Click Automatically decline new invitations for events that occur during this period
-
11.
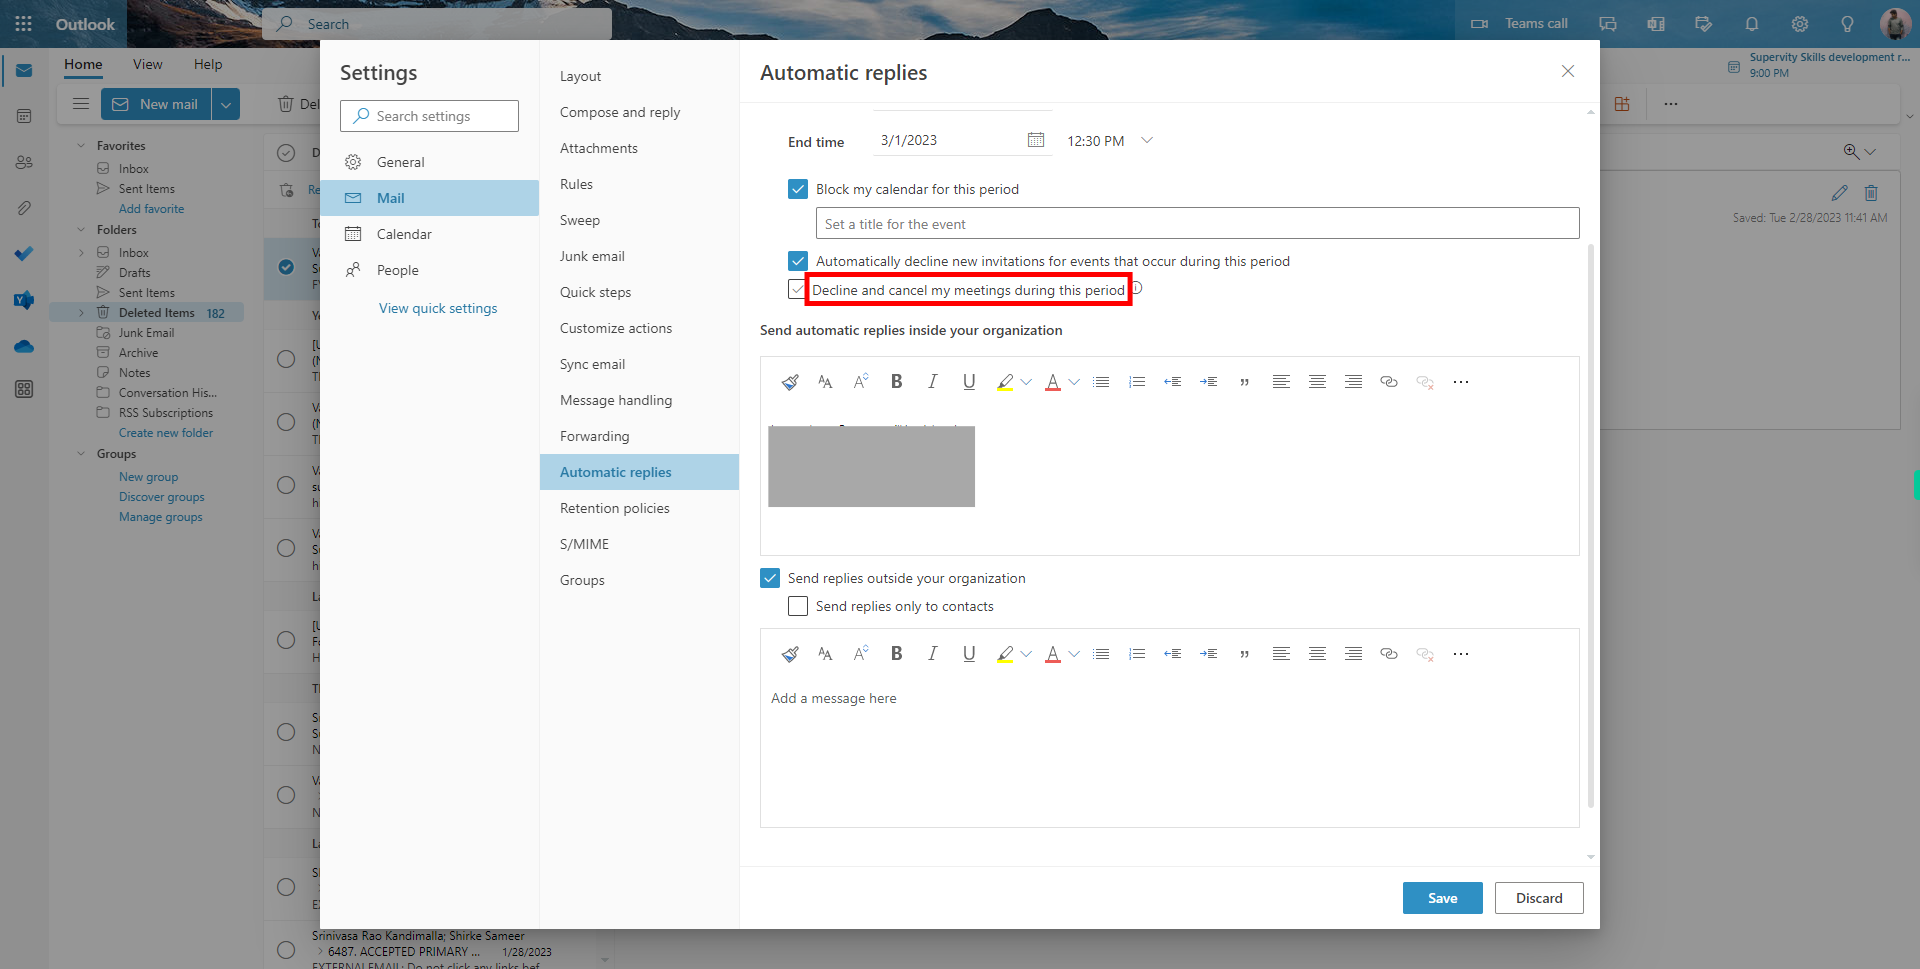
10. Click Decline and cancel my meetings during this period
-
12.
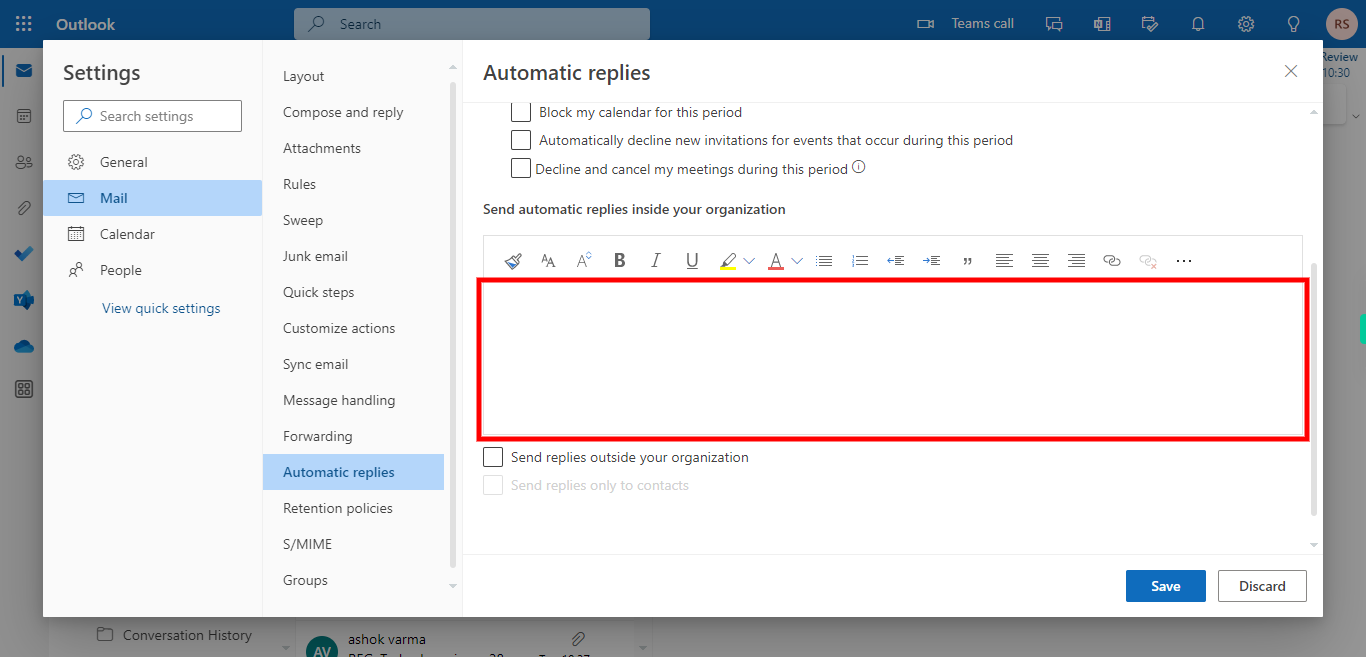
11. Click on the Add a message here.
-
13.
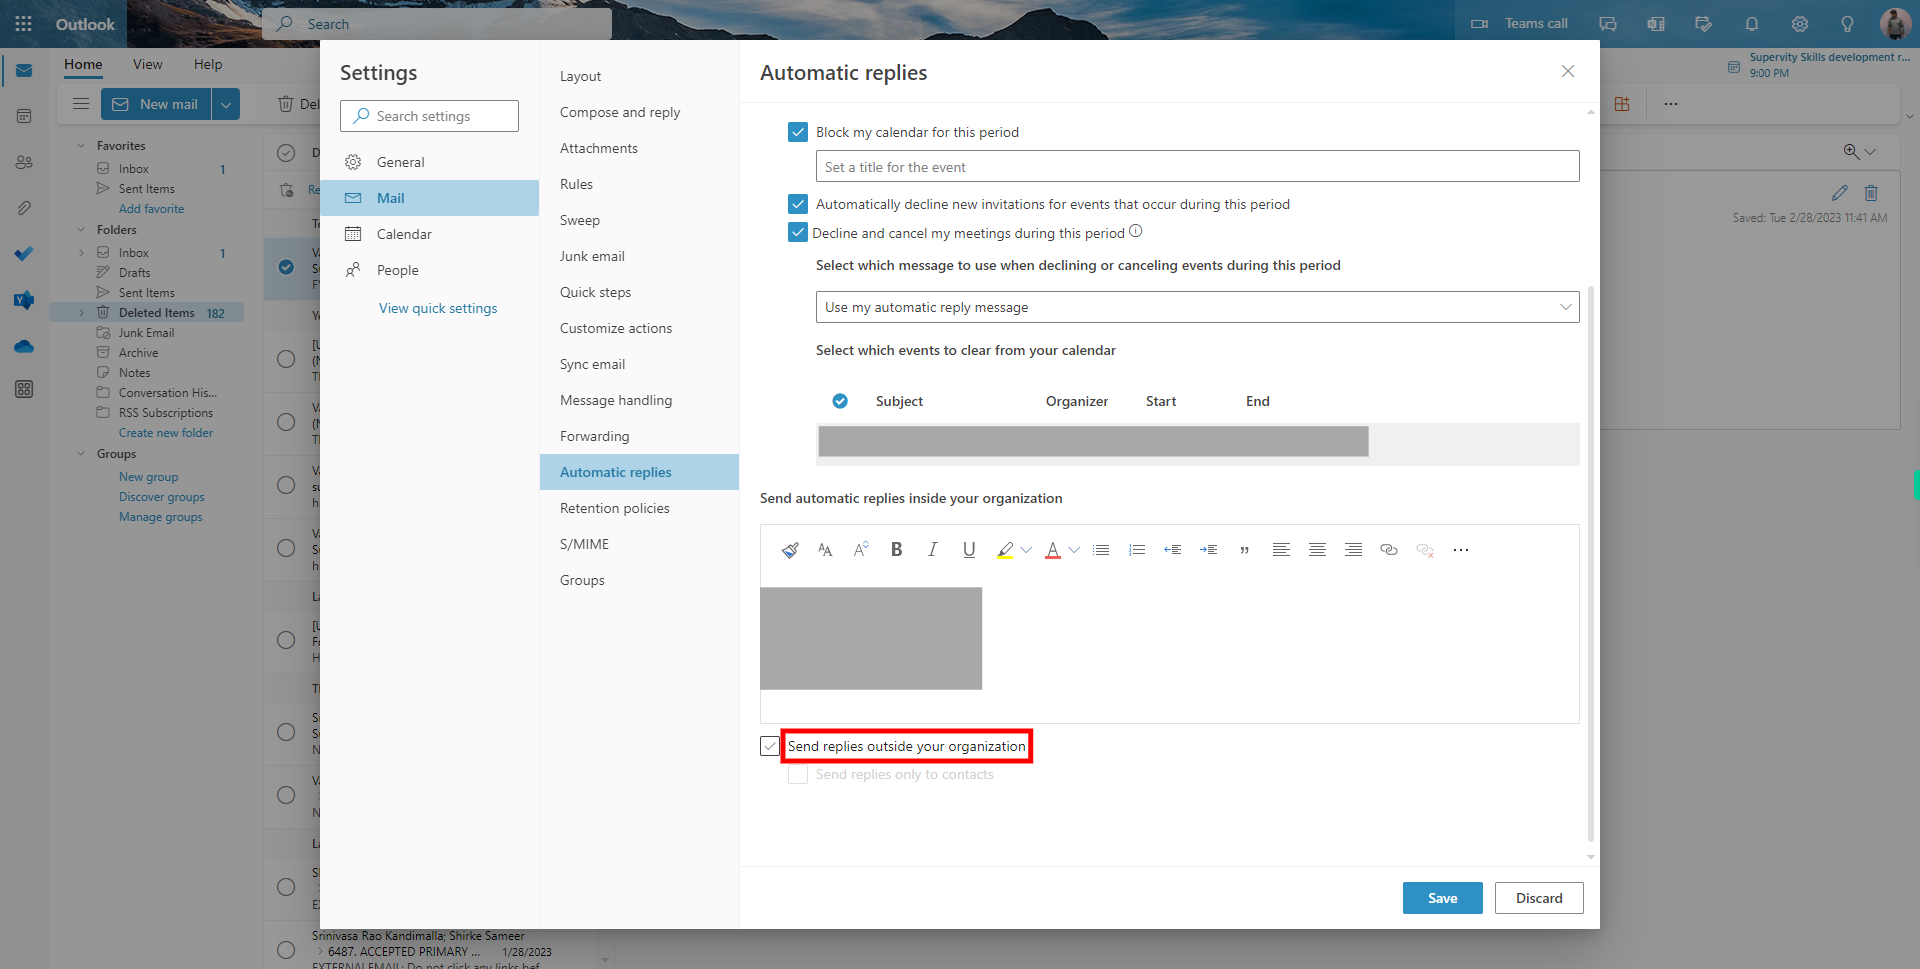
12. Click on the Send replies outside your organization
-
14.
13. Enter the required description to be added.
-
15.
14. Click on the Save button to activate the OOO auto Emails.


