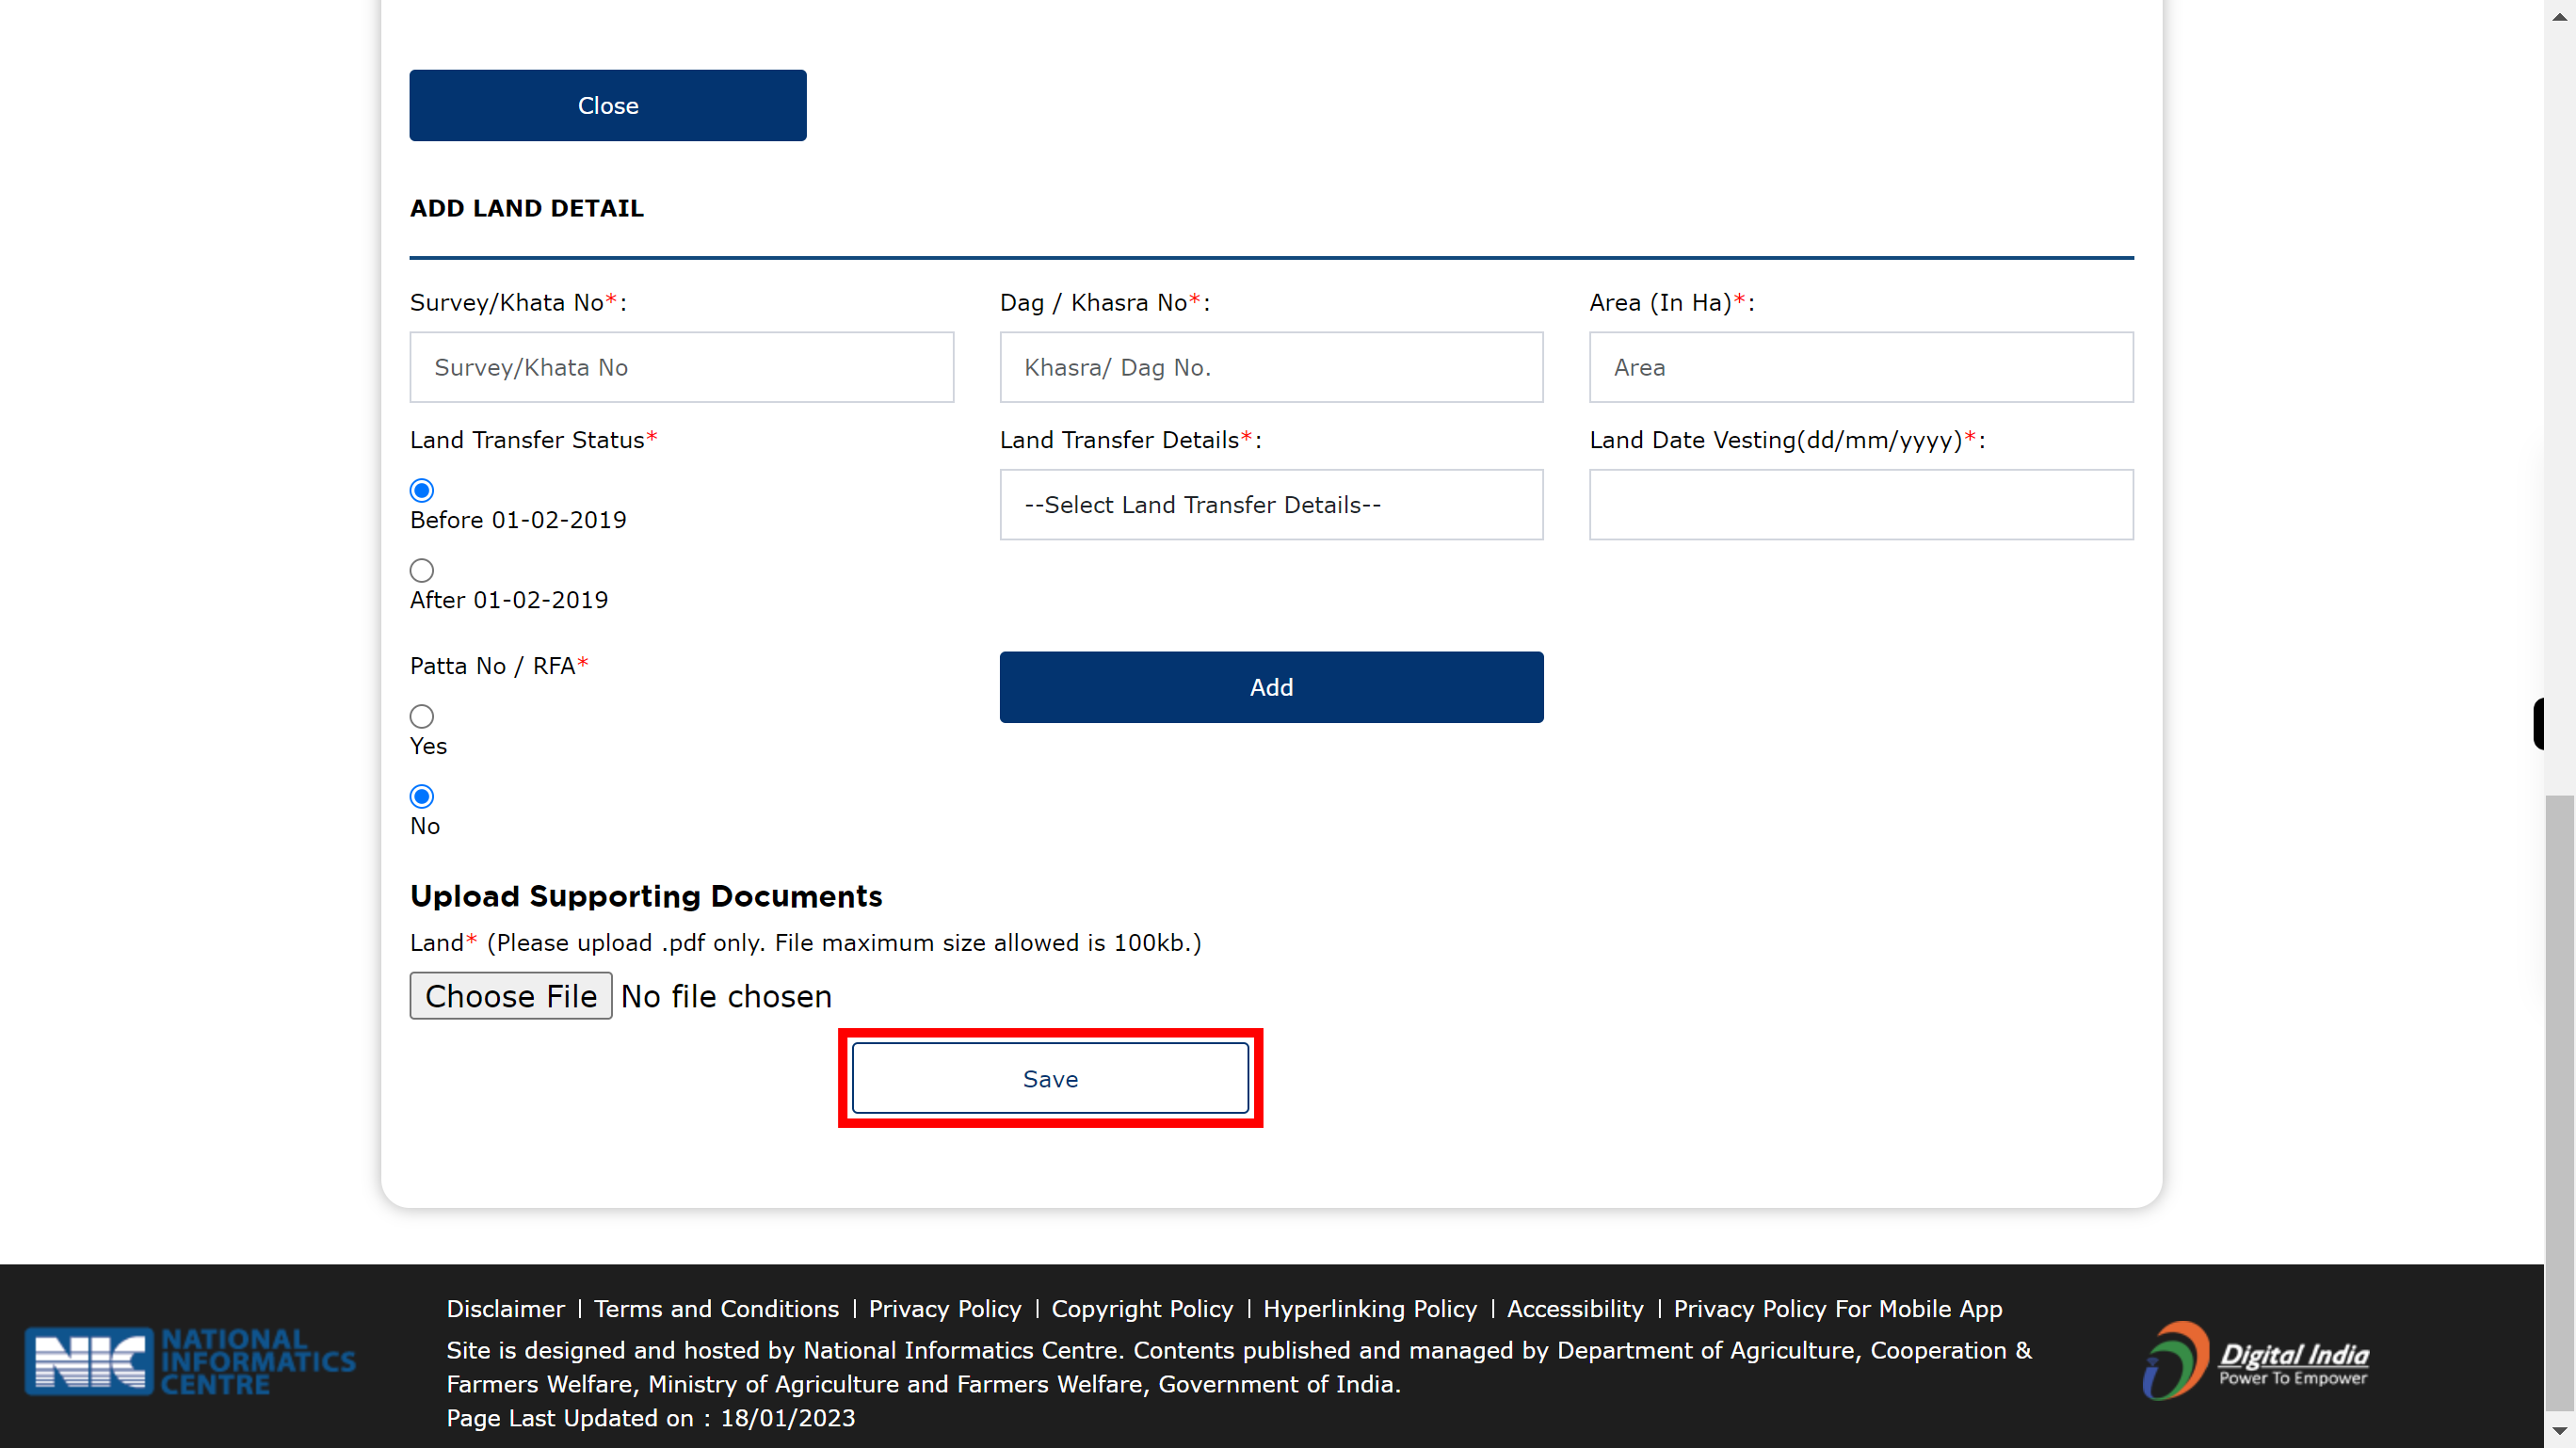
Step by step procedure for New Farmer Registration for PM Kisan Samman Nidhi to avail the benefits
-
1.
Open PM-Kisan Samman Nidhi
-
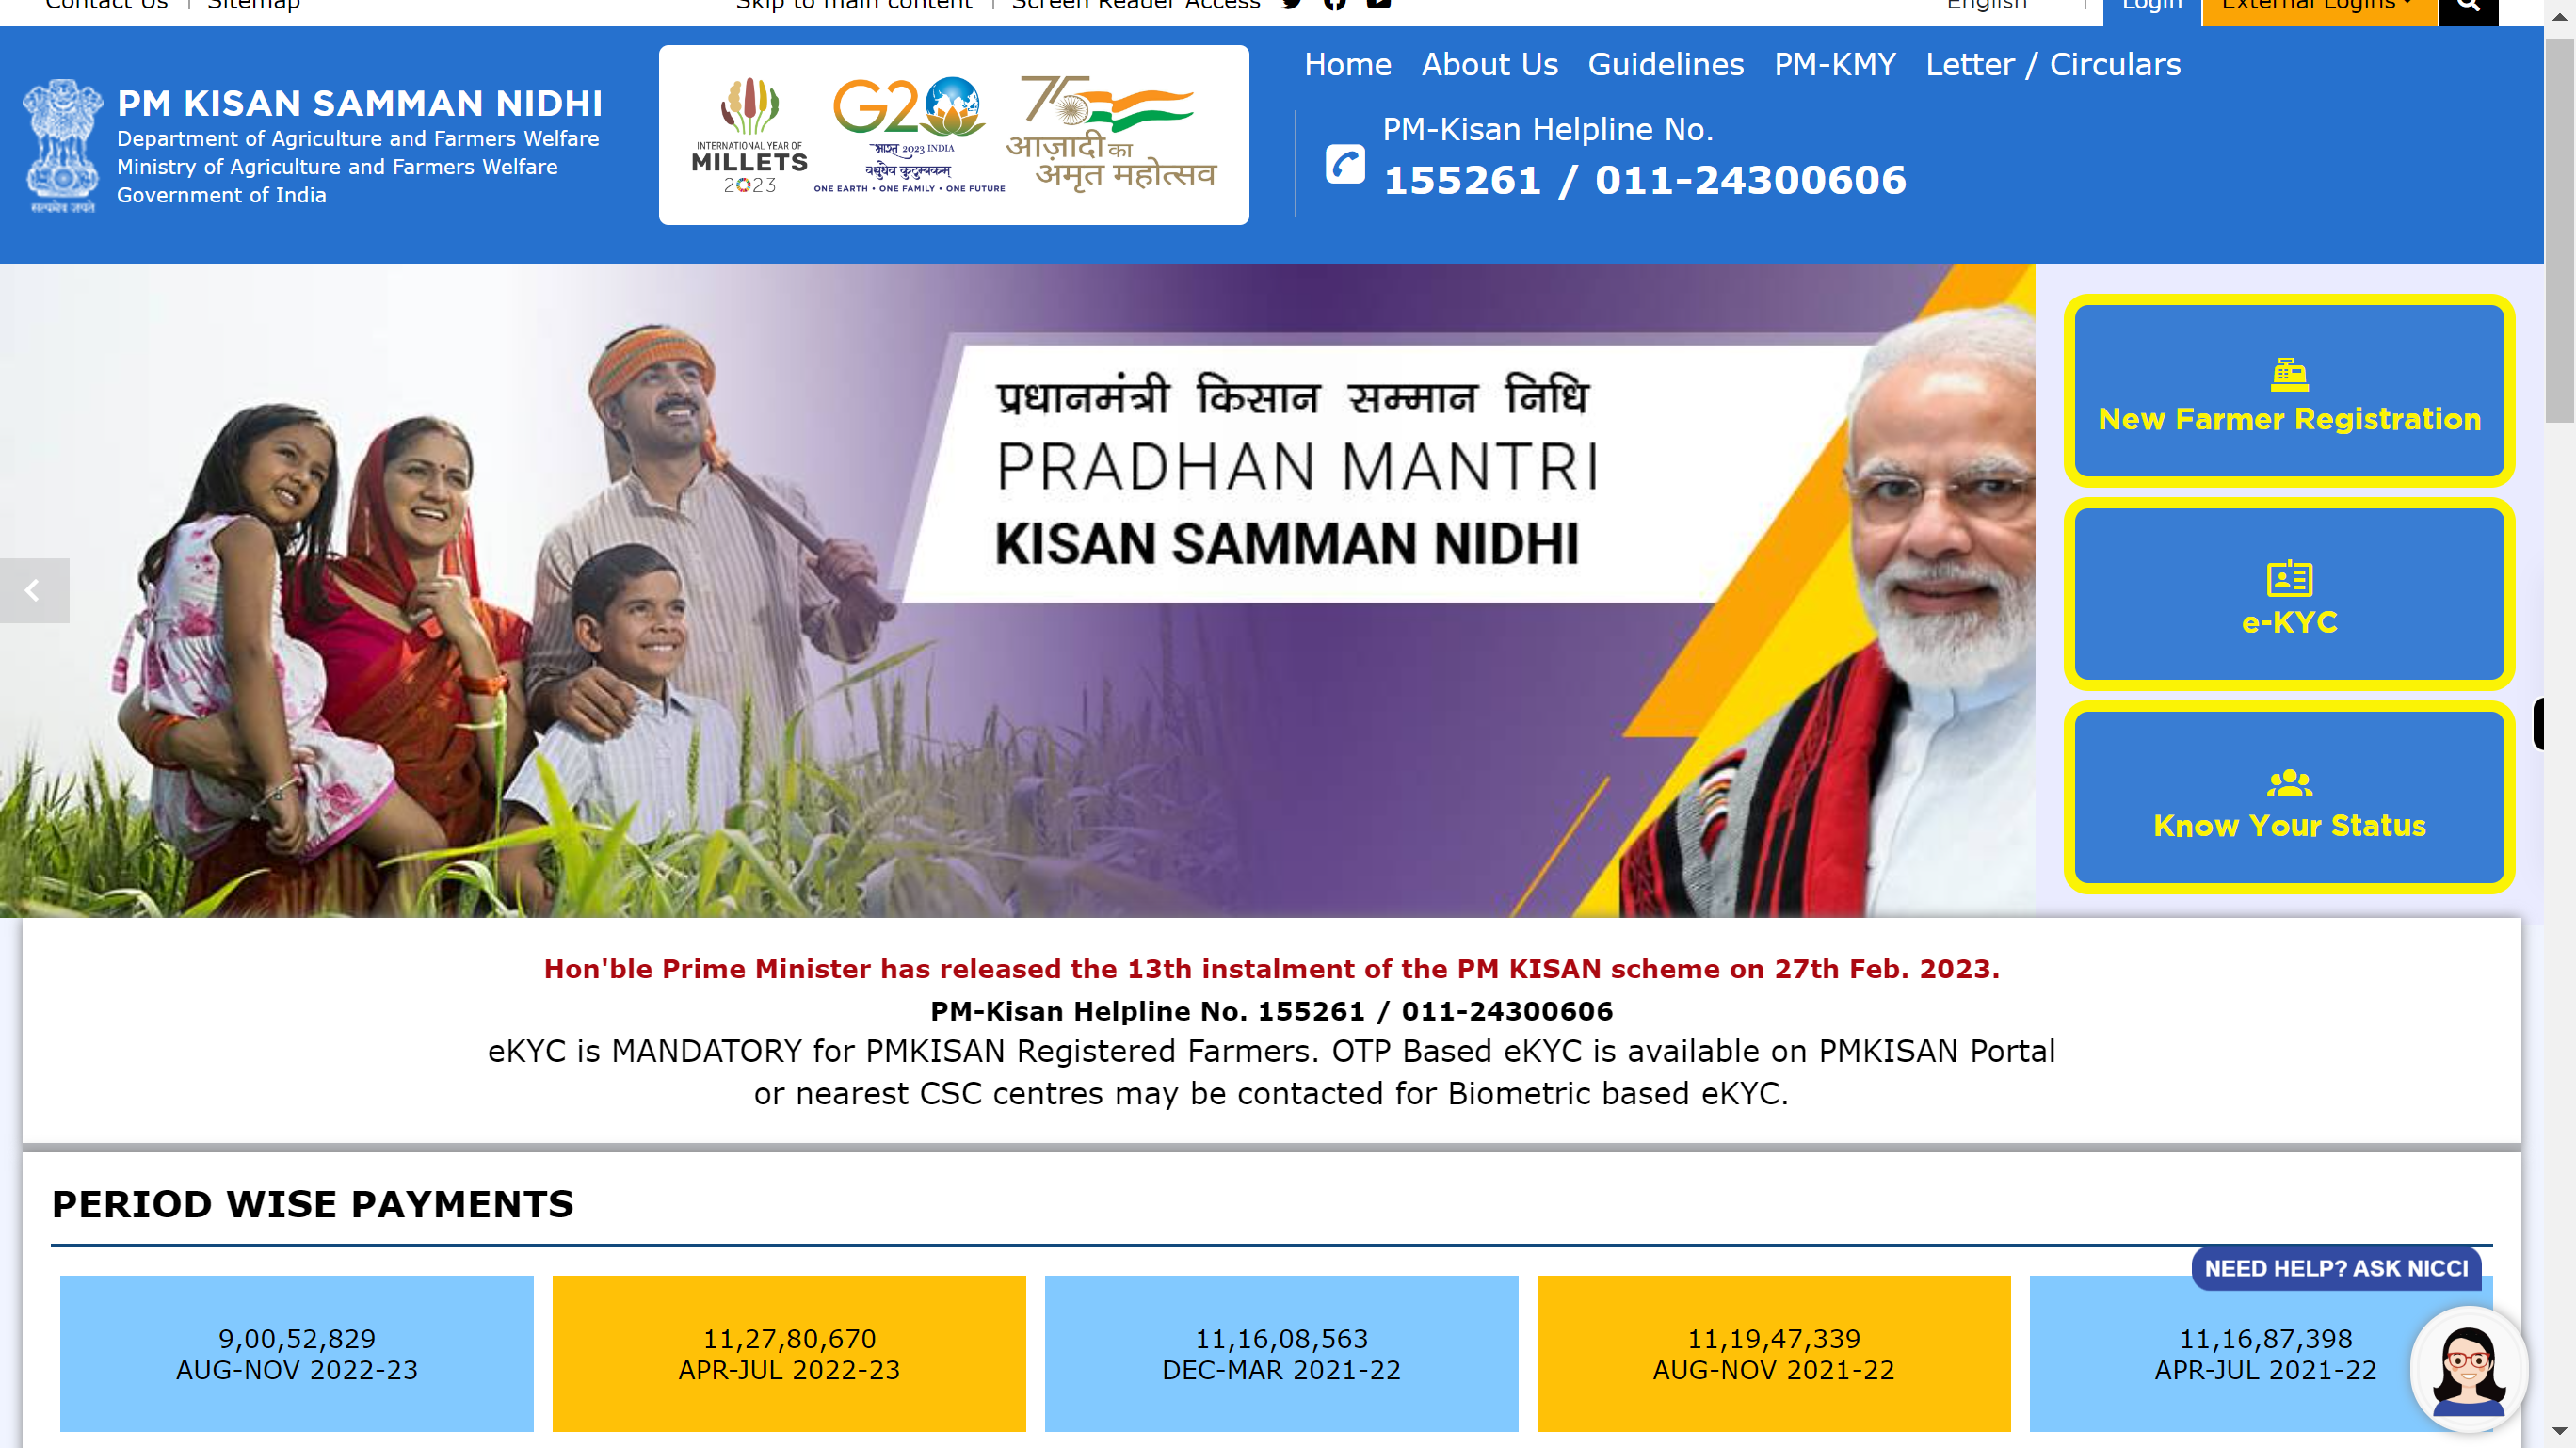
2.
Click on the 'New Farmer Registration' Using Aadhar card.
-
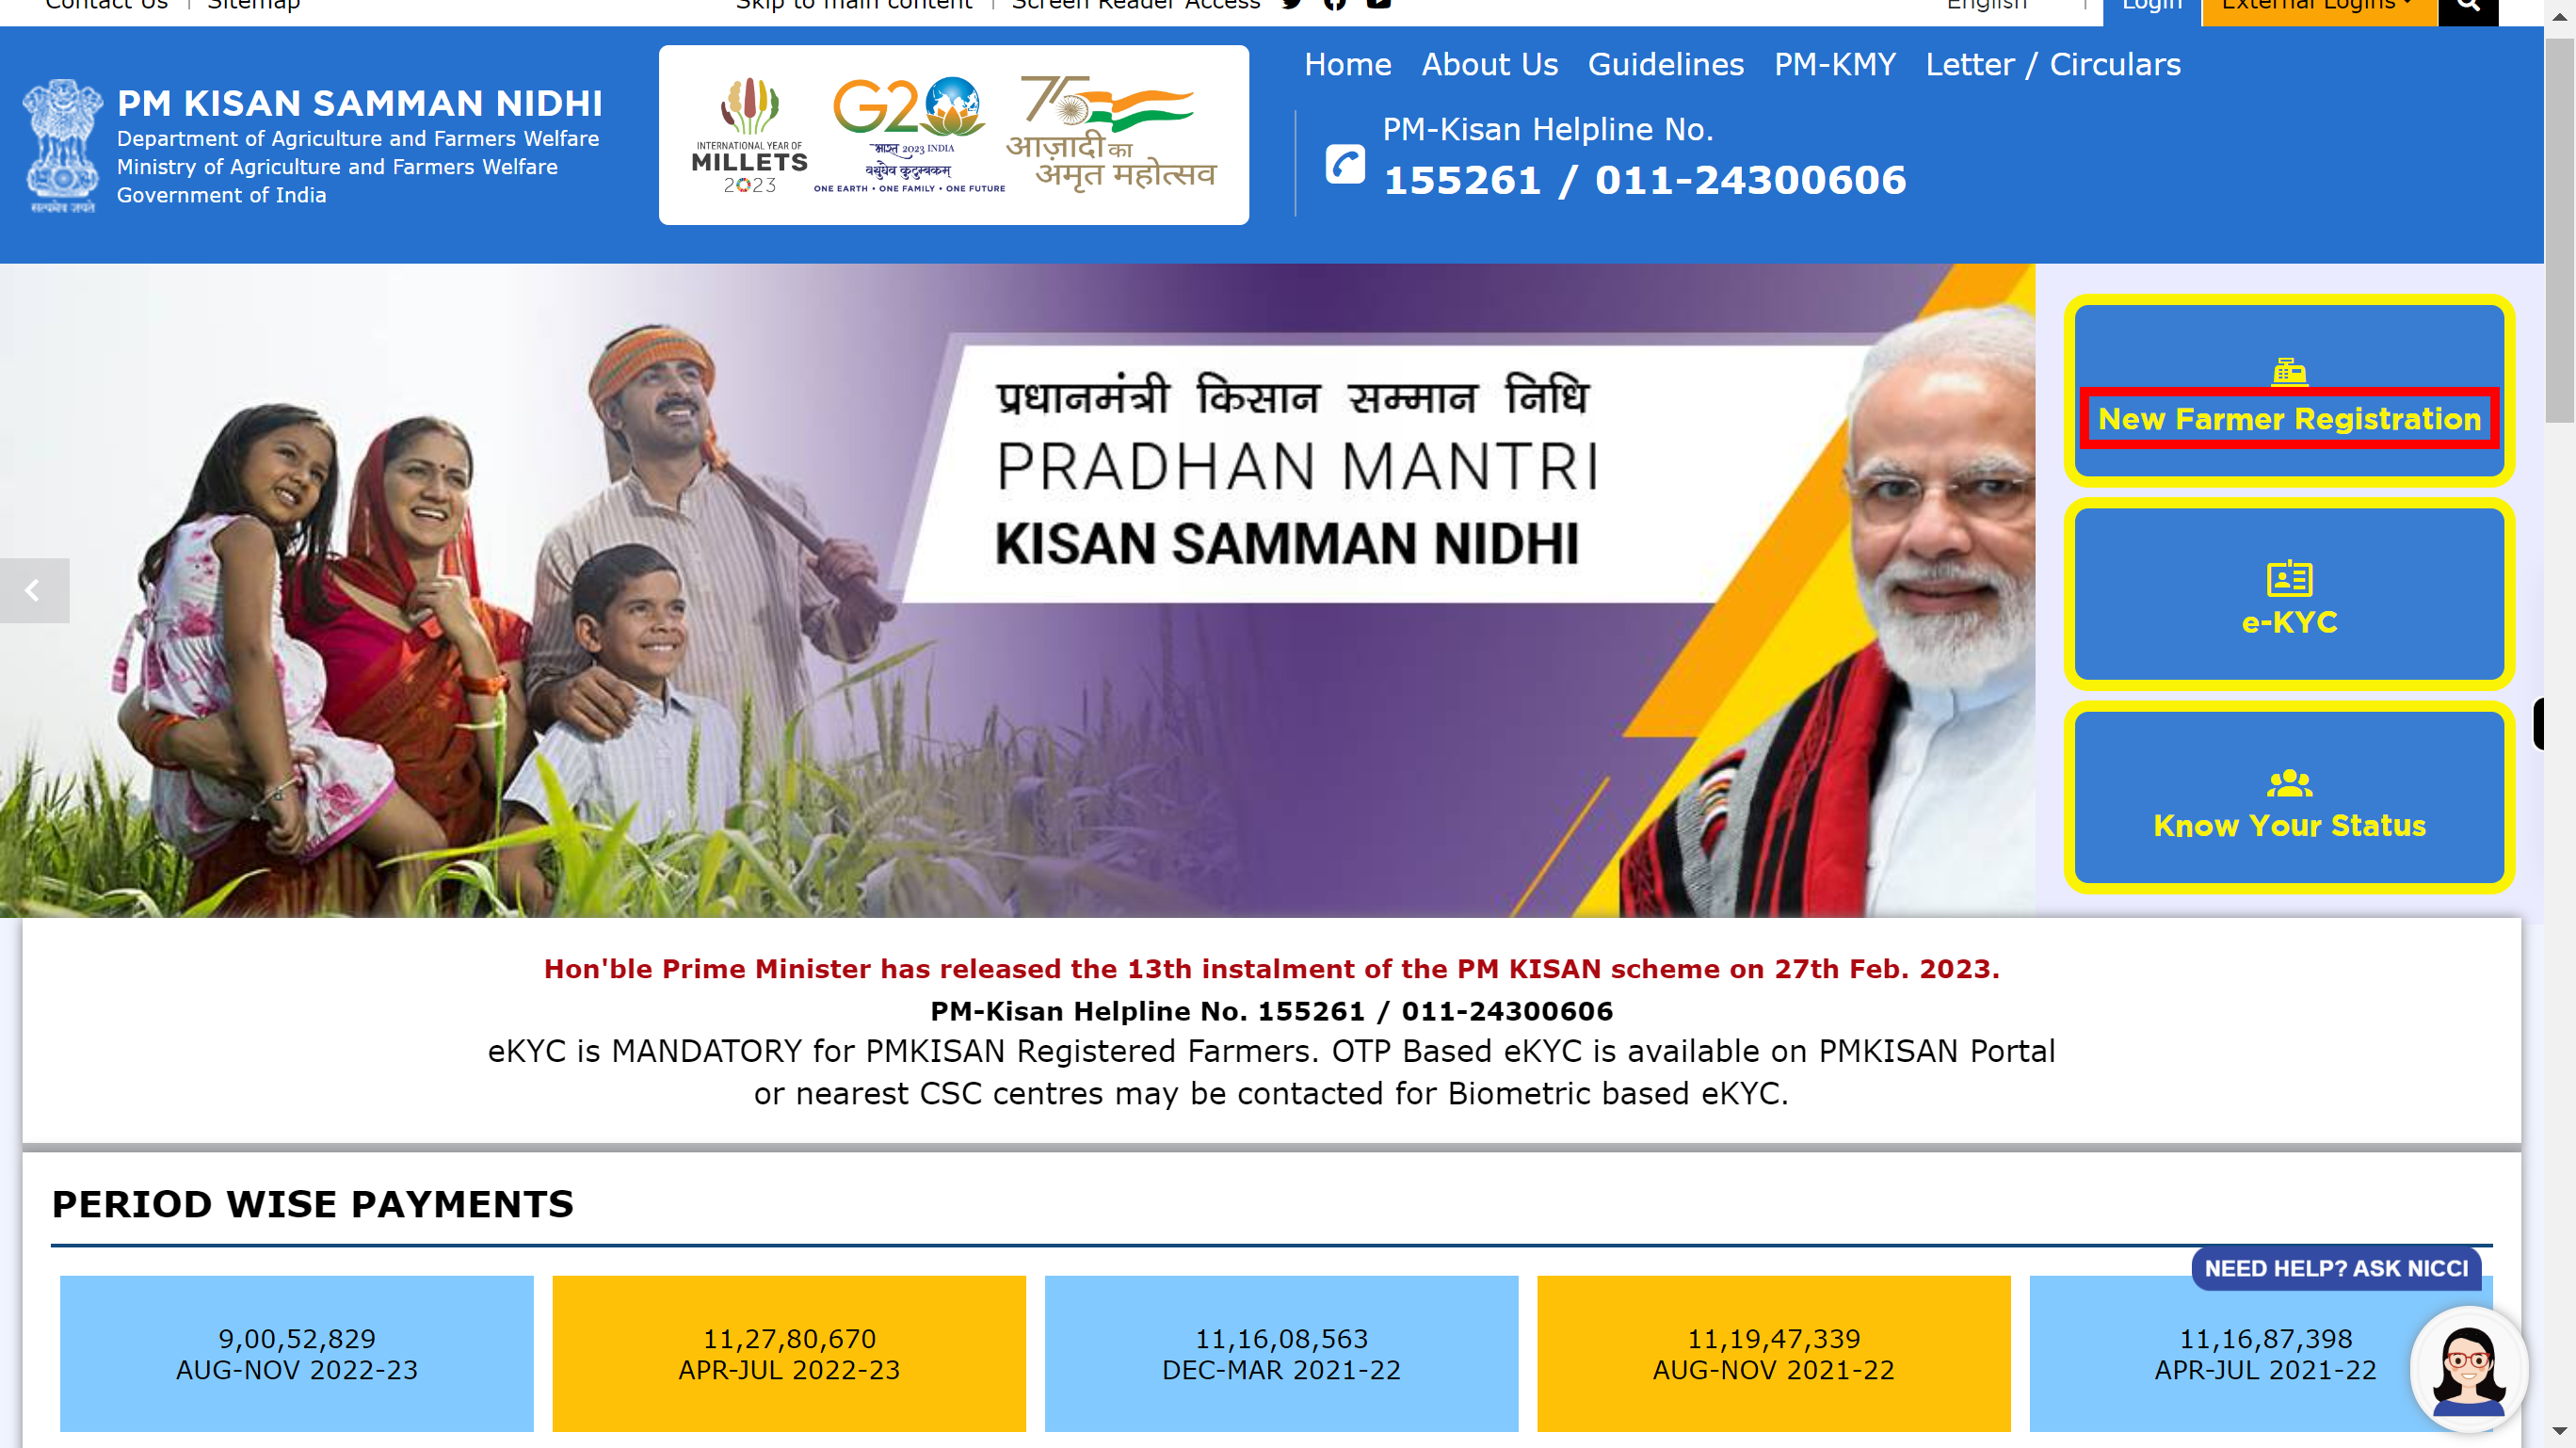
3.
Click on the 'Enter Aadhaar No' and then enter your Aadhaar number. Once done, click on the 'Next' button in the Supervity instruction widget.
-
4.
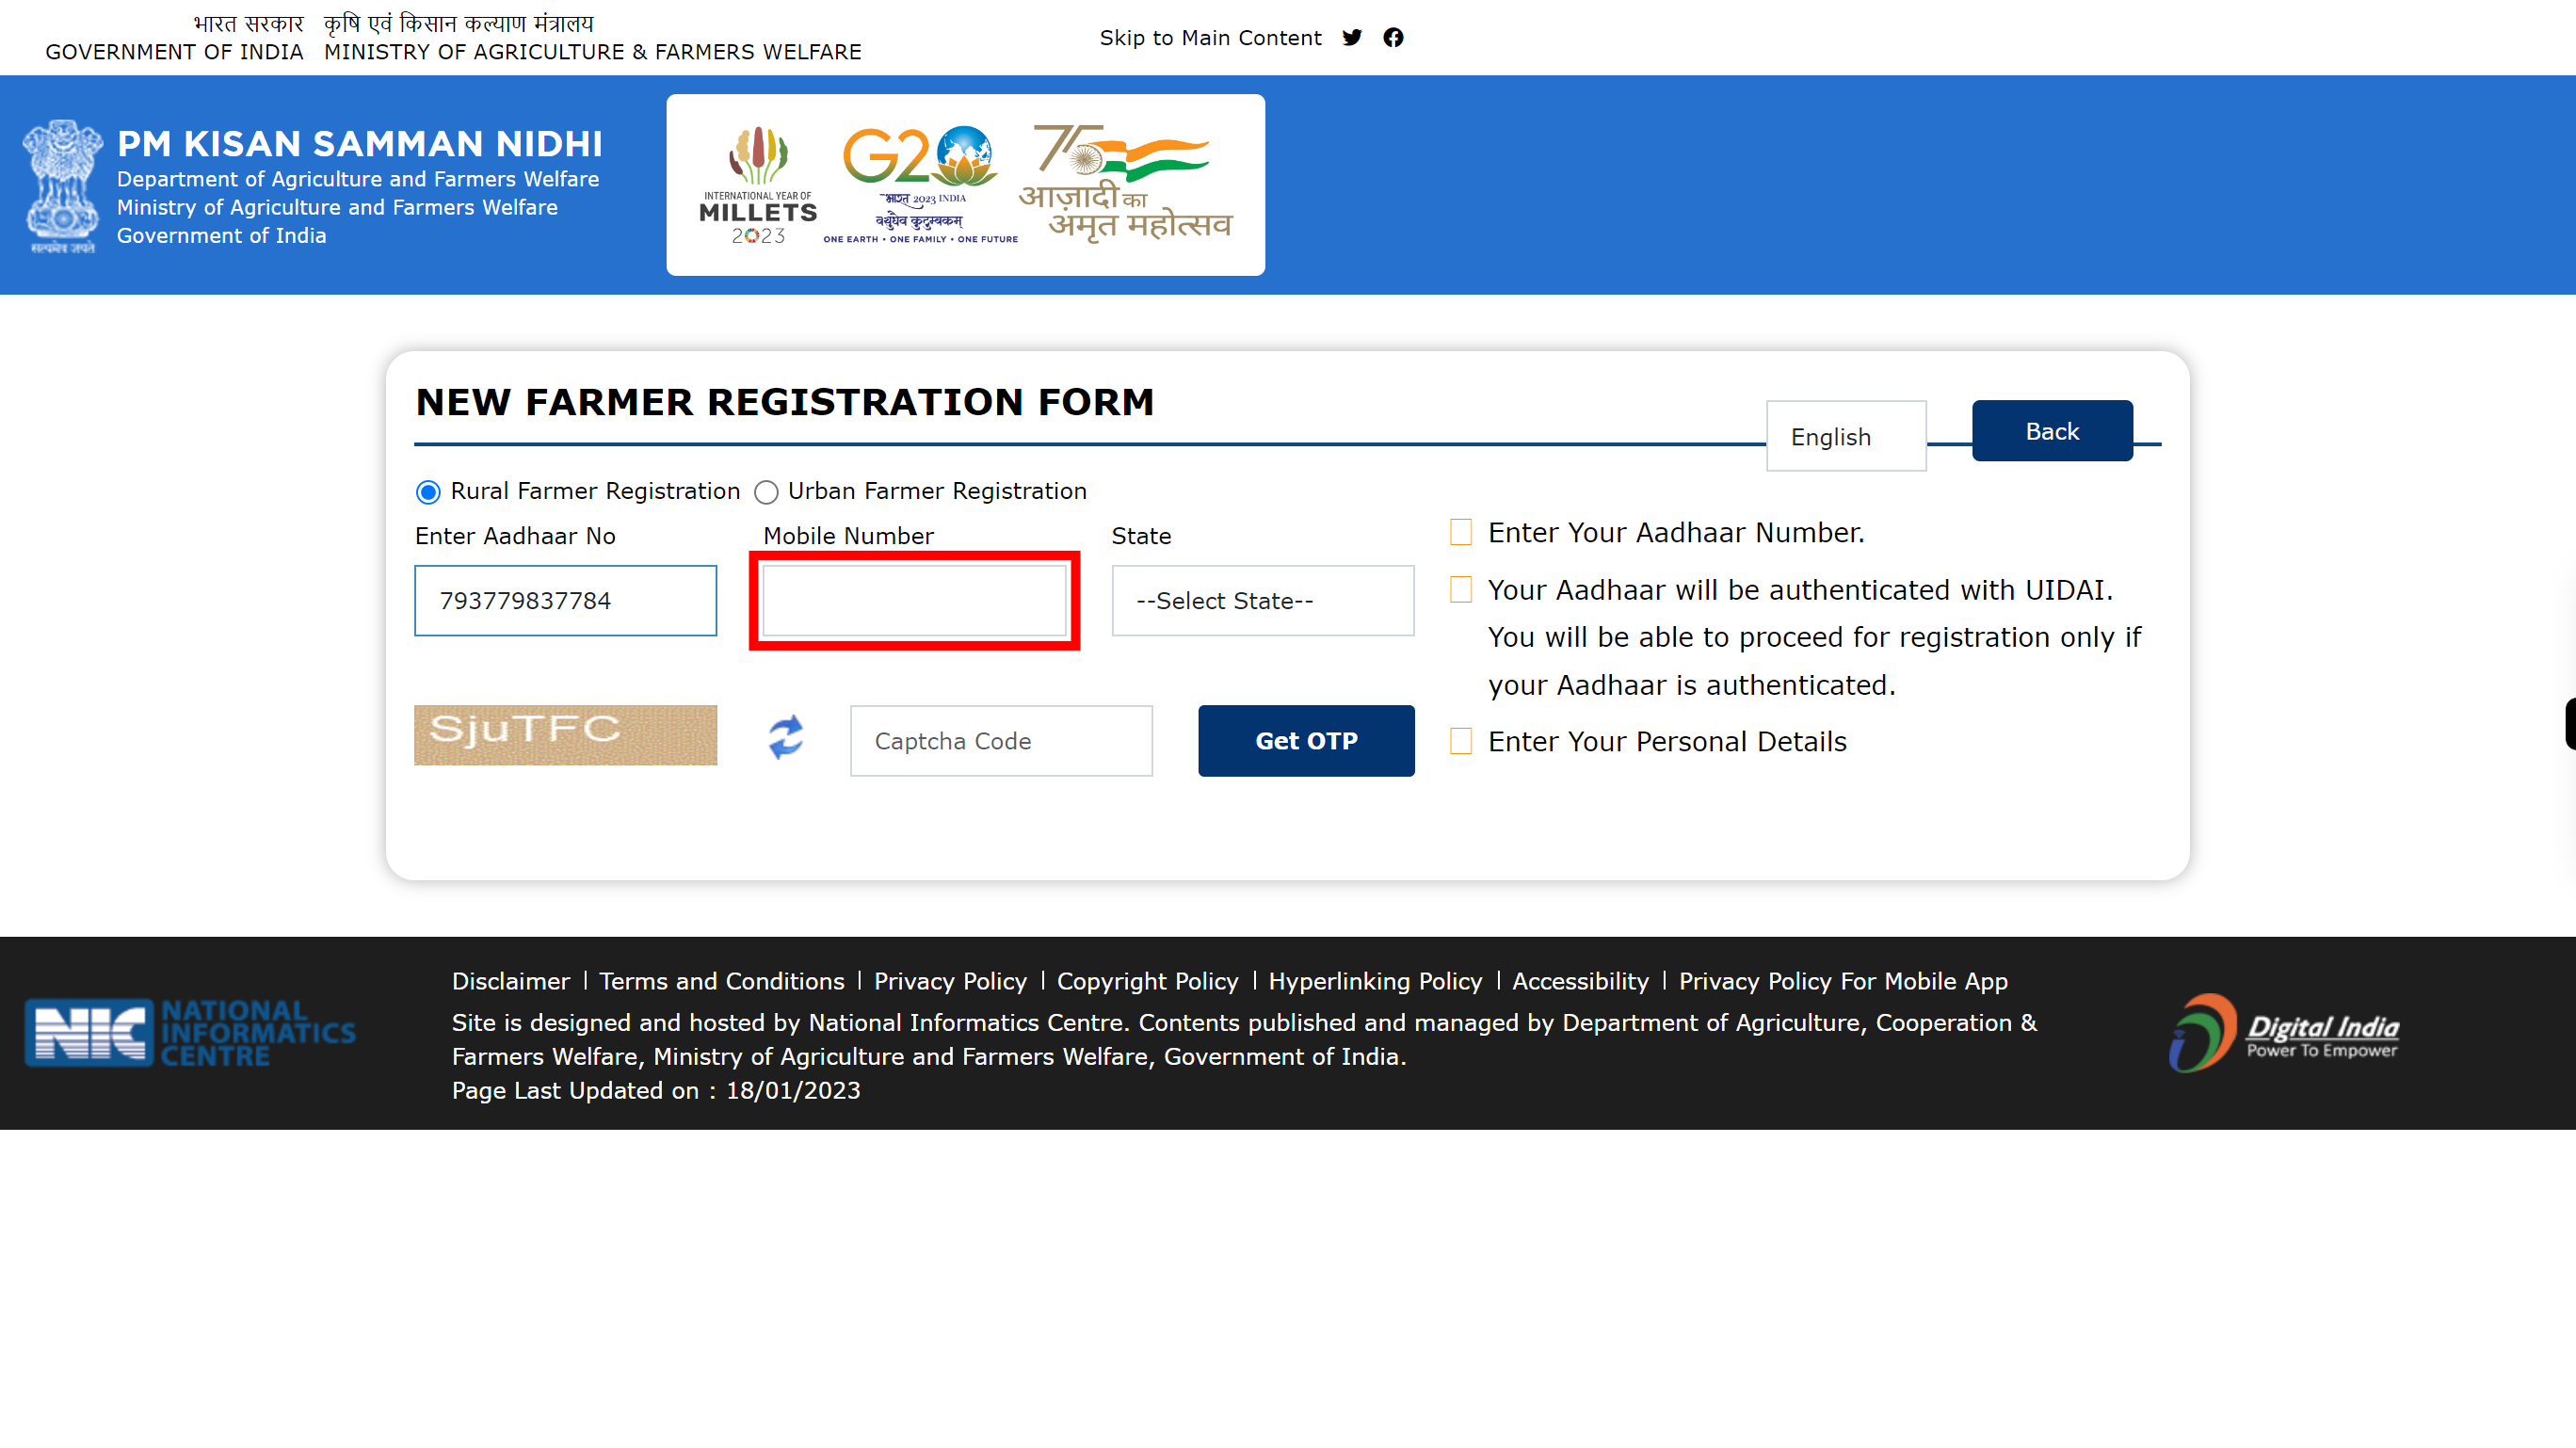
Click on the 'Mobile Number' tab and then enter the mobile number which is linked to your Aadhar number. Once done, click on the 'Next' button in the Supervity instruction widget.
-
5.
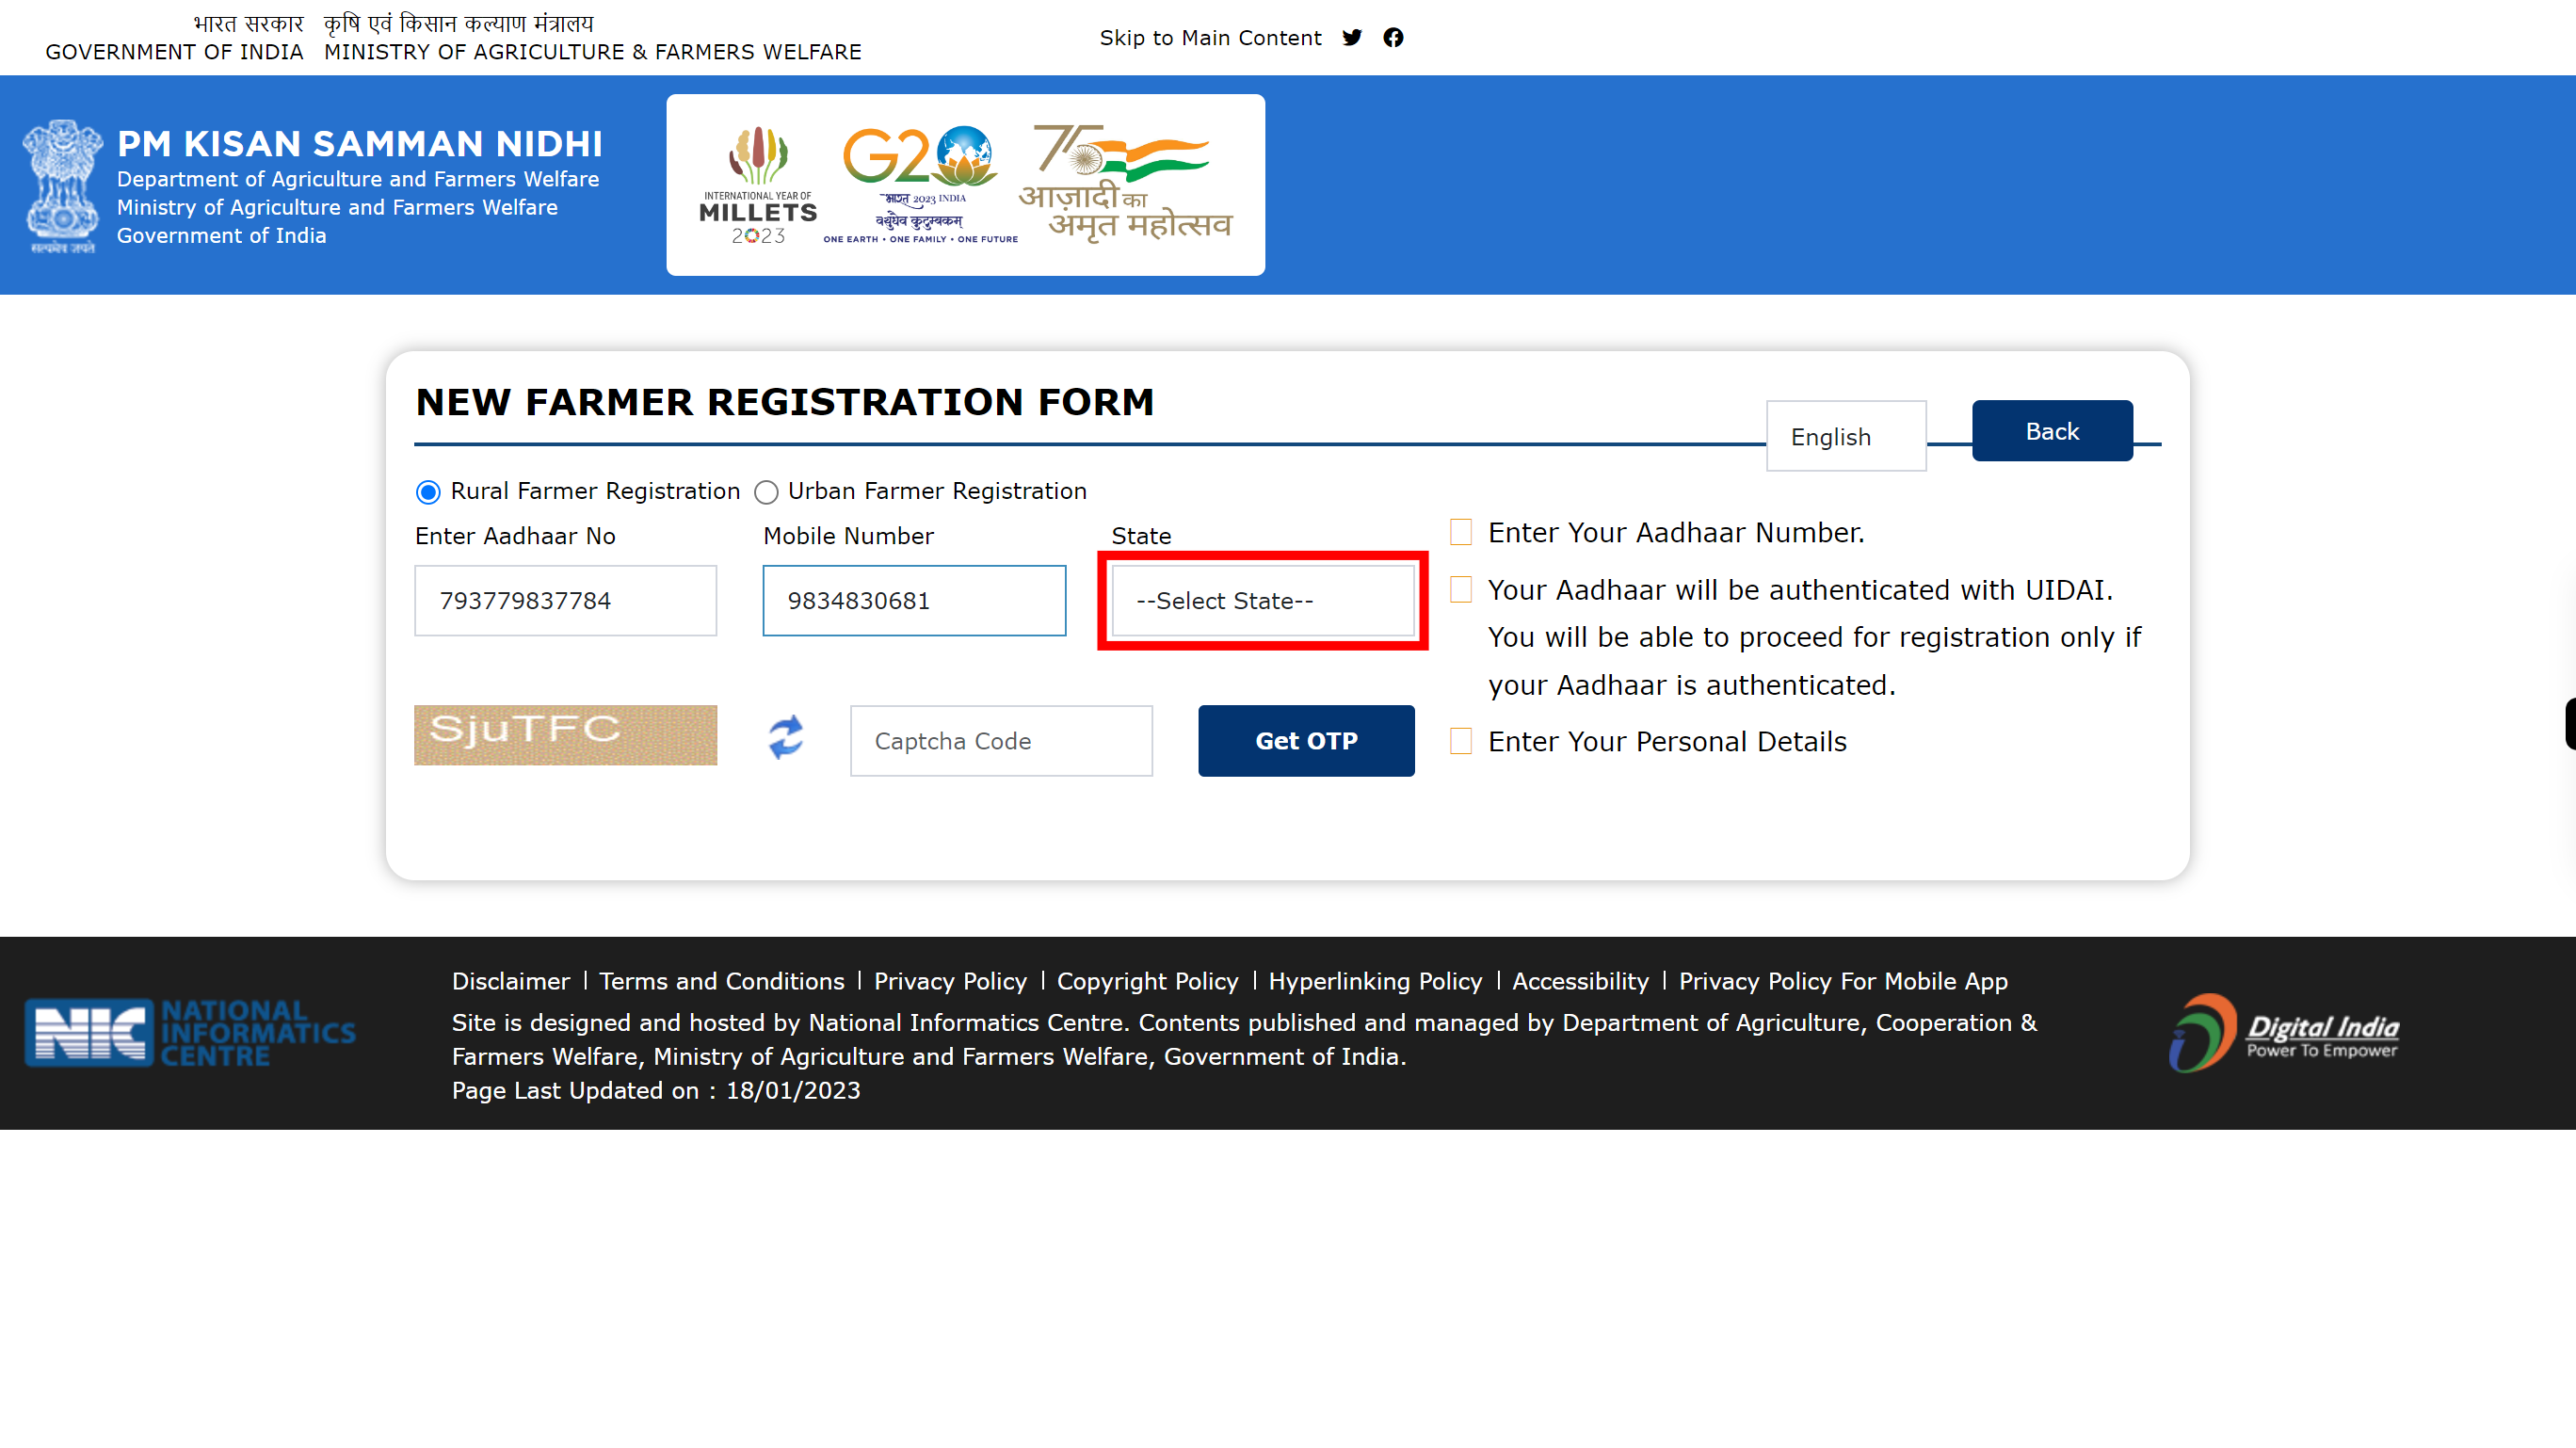
Click on the '--Select State--' icon to select state. Once done, click on the 'Next' button in the Supervity instruction widget.
-
6.
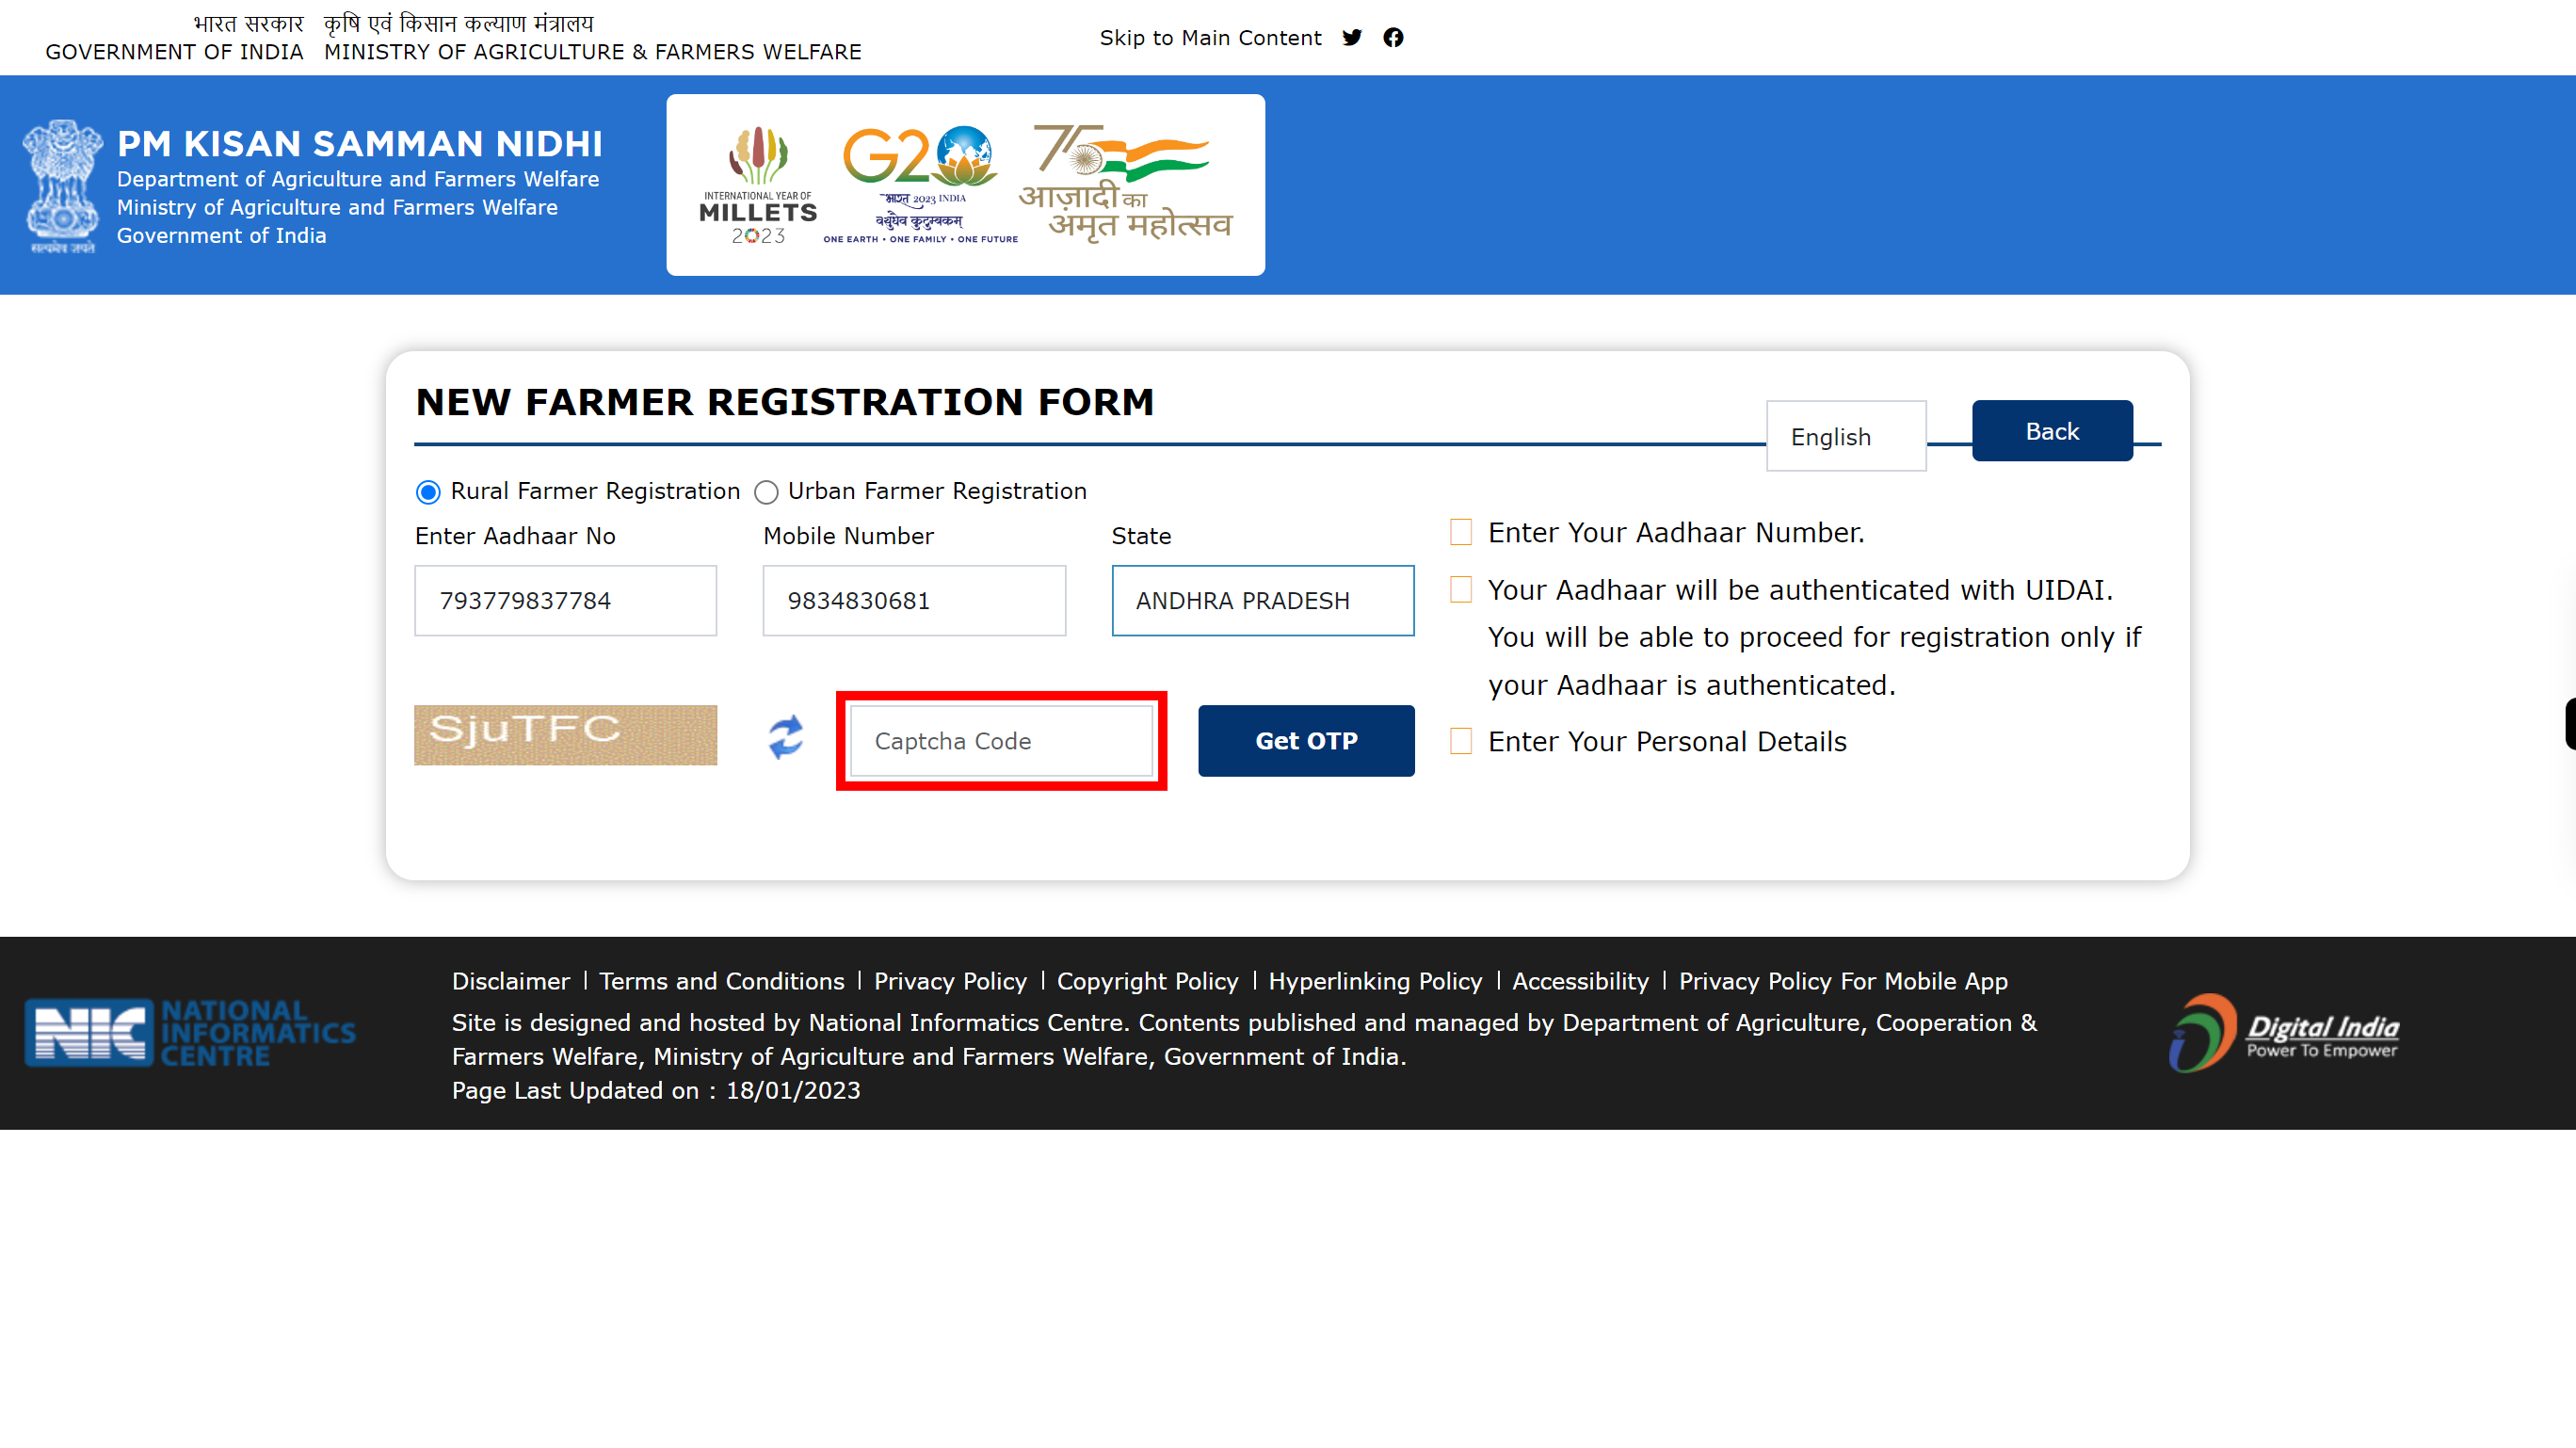
Click on the 'Captcha Code' and the enter the code given in the box. Once done, click on the 'Next' button in the Supervity instruction widget.
-
7.
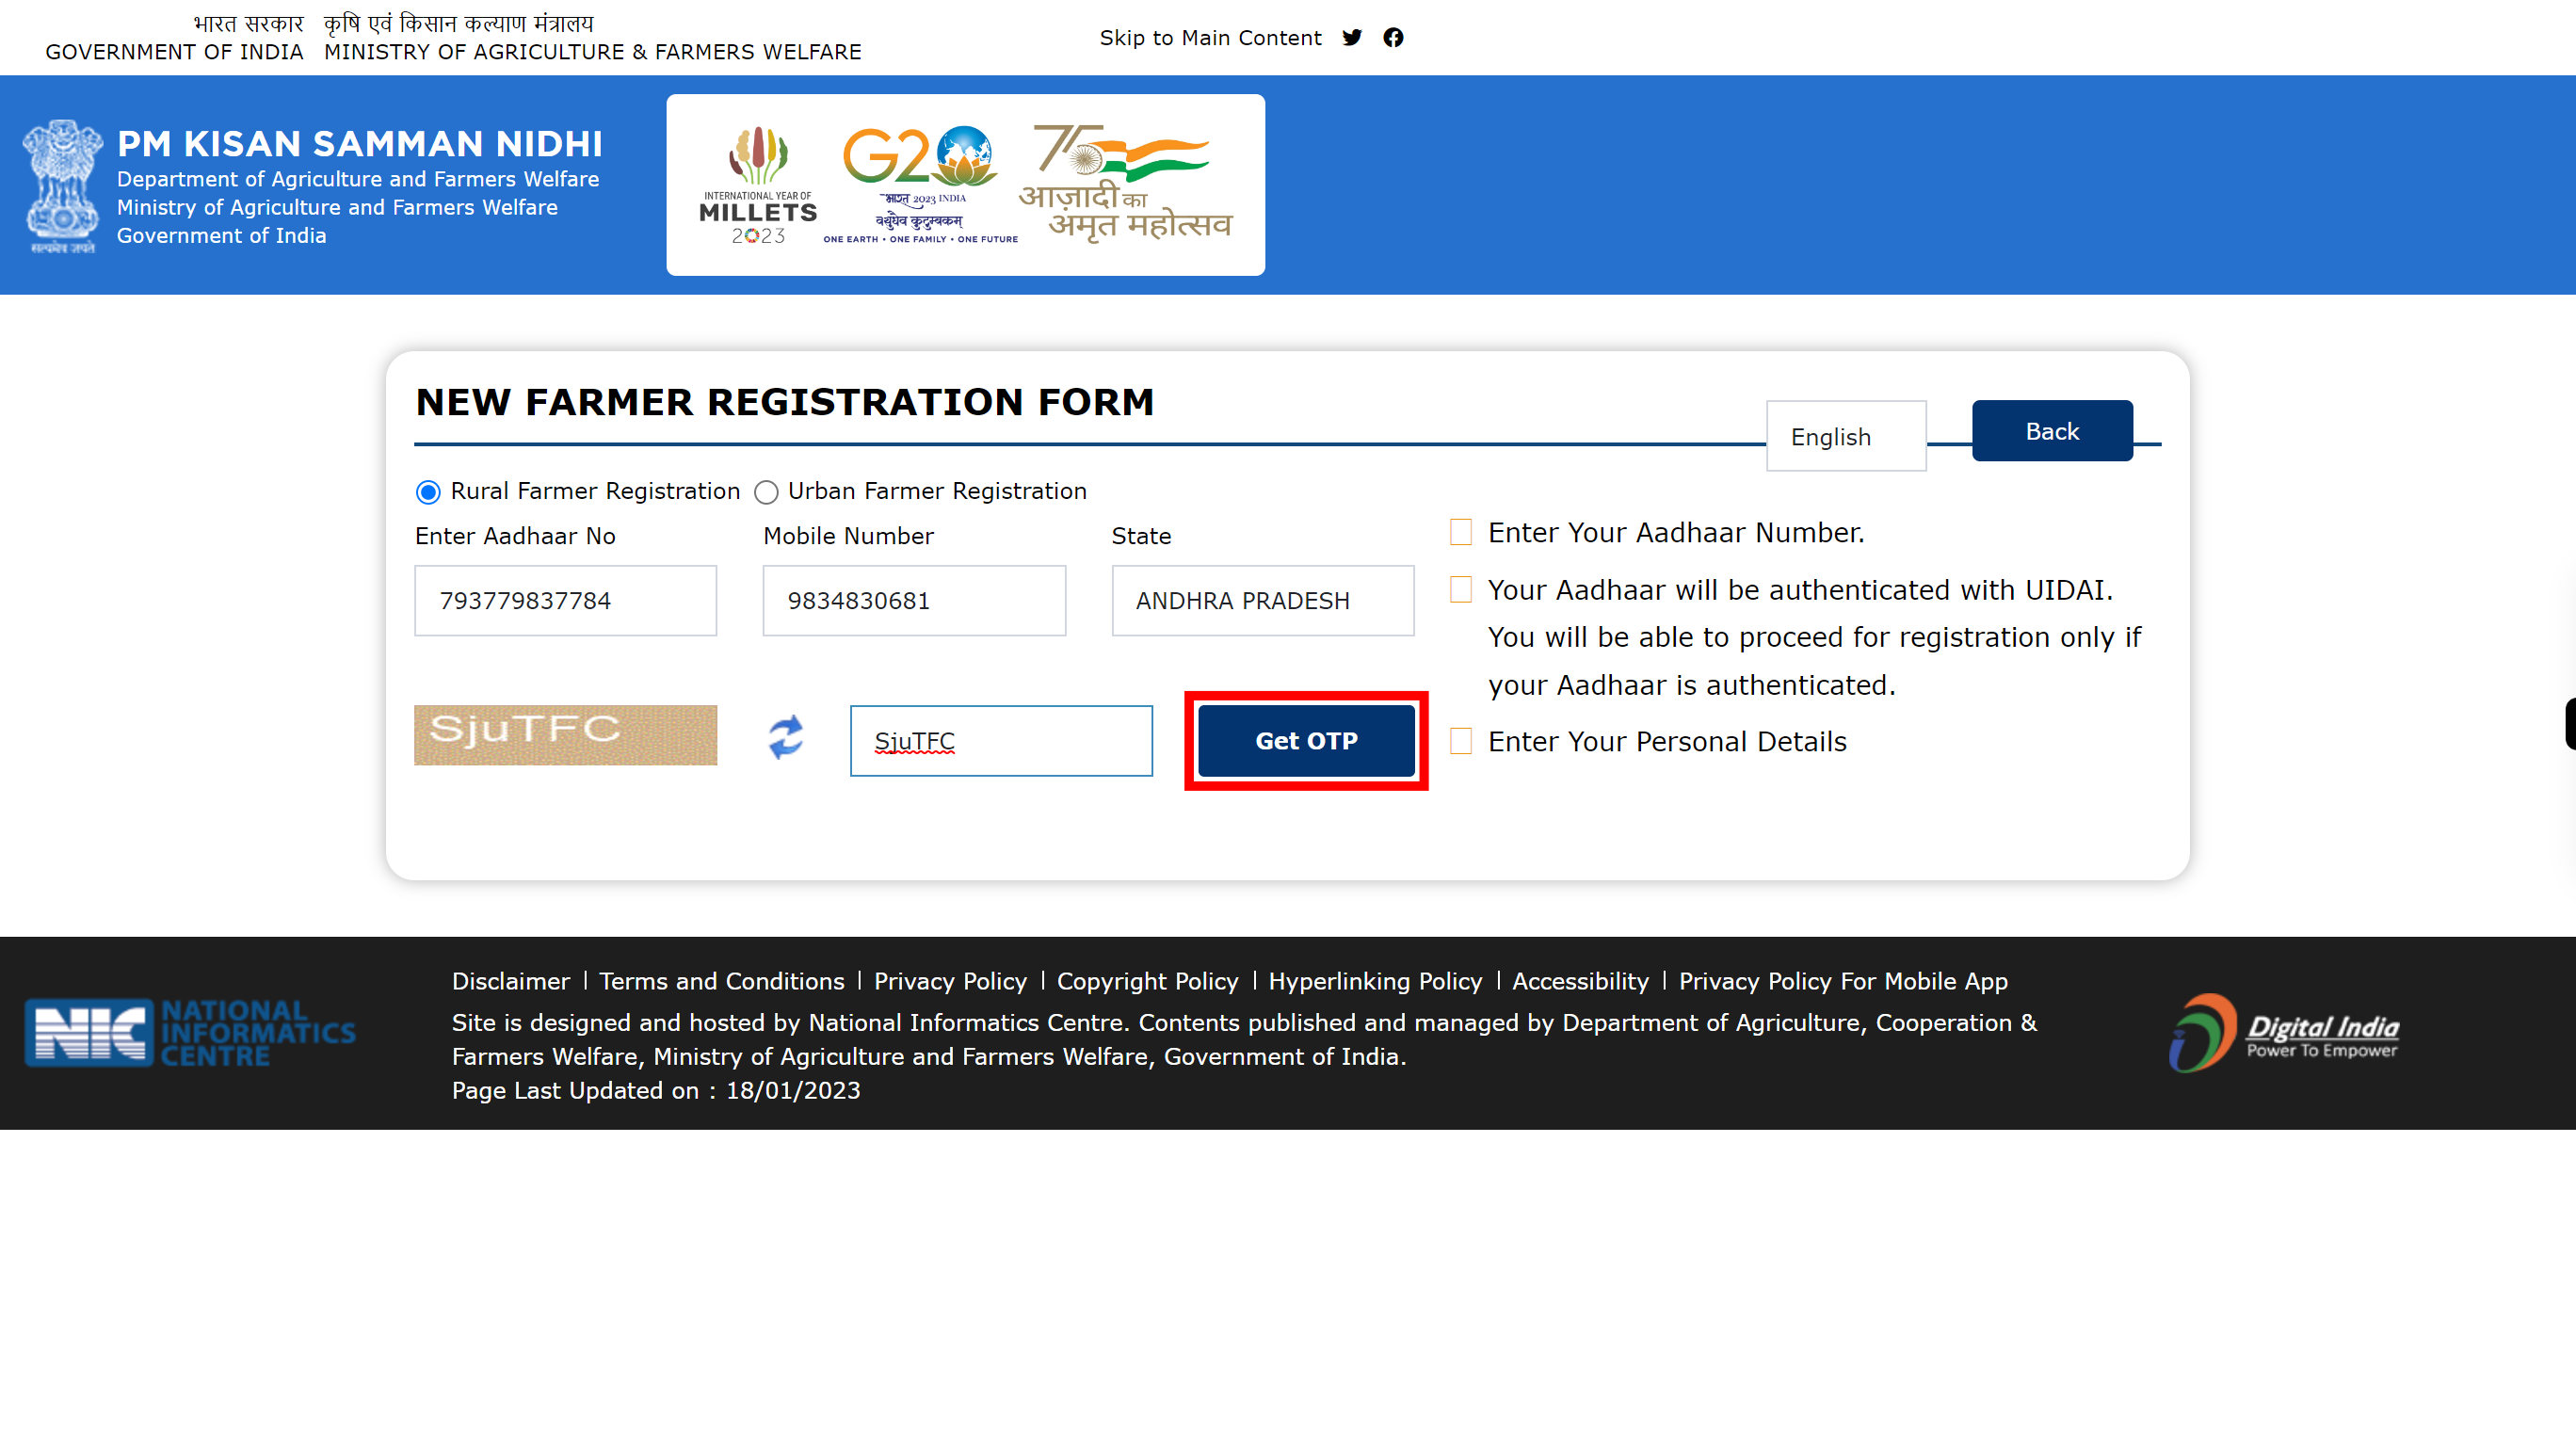
Click on the 'Get OTP' tab, then OTP is send to the your registered number.
-
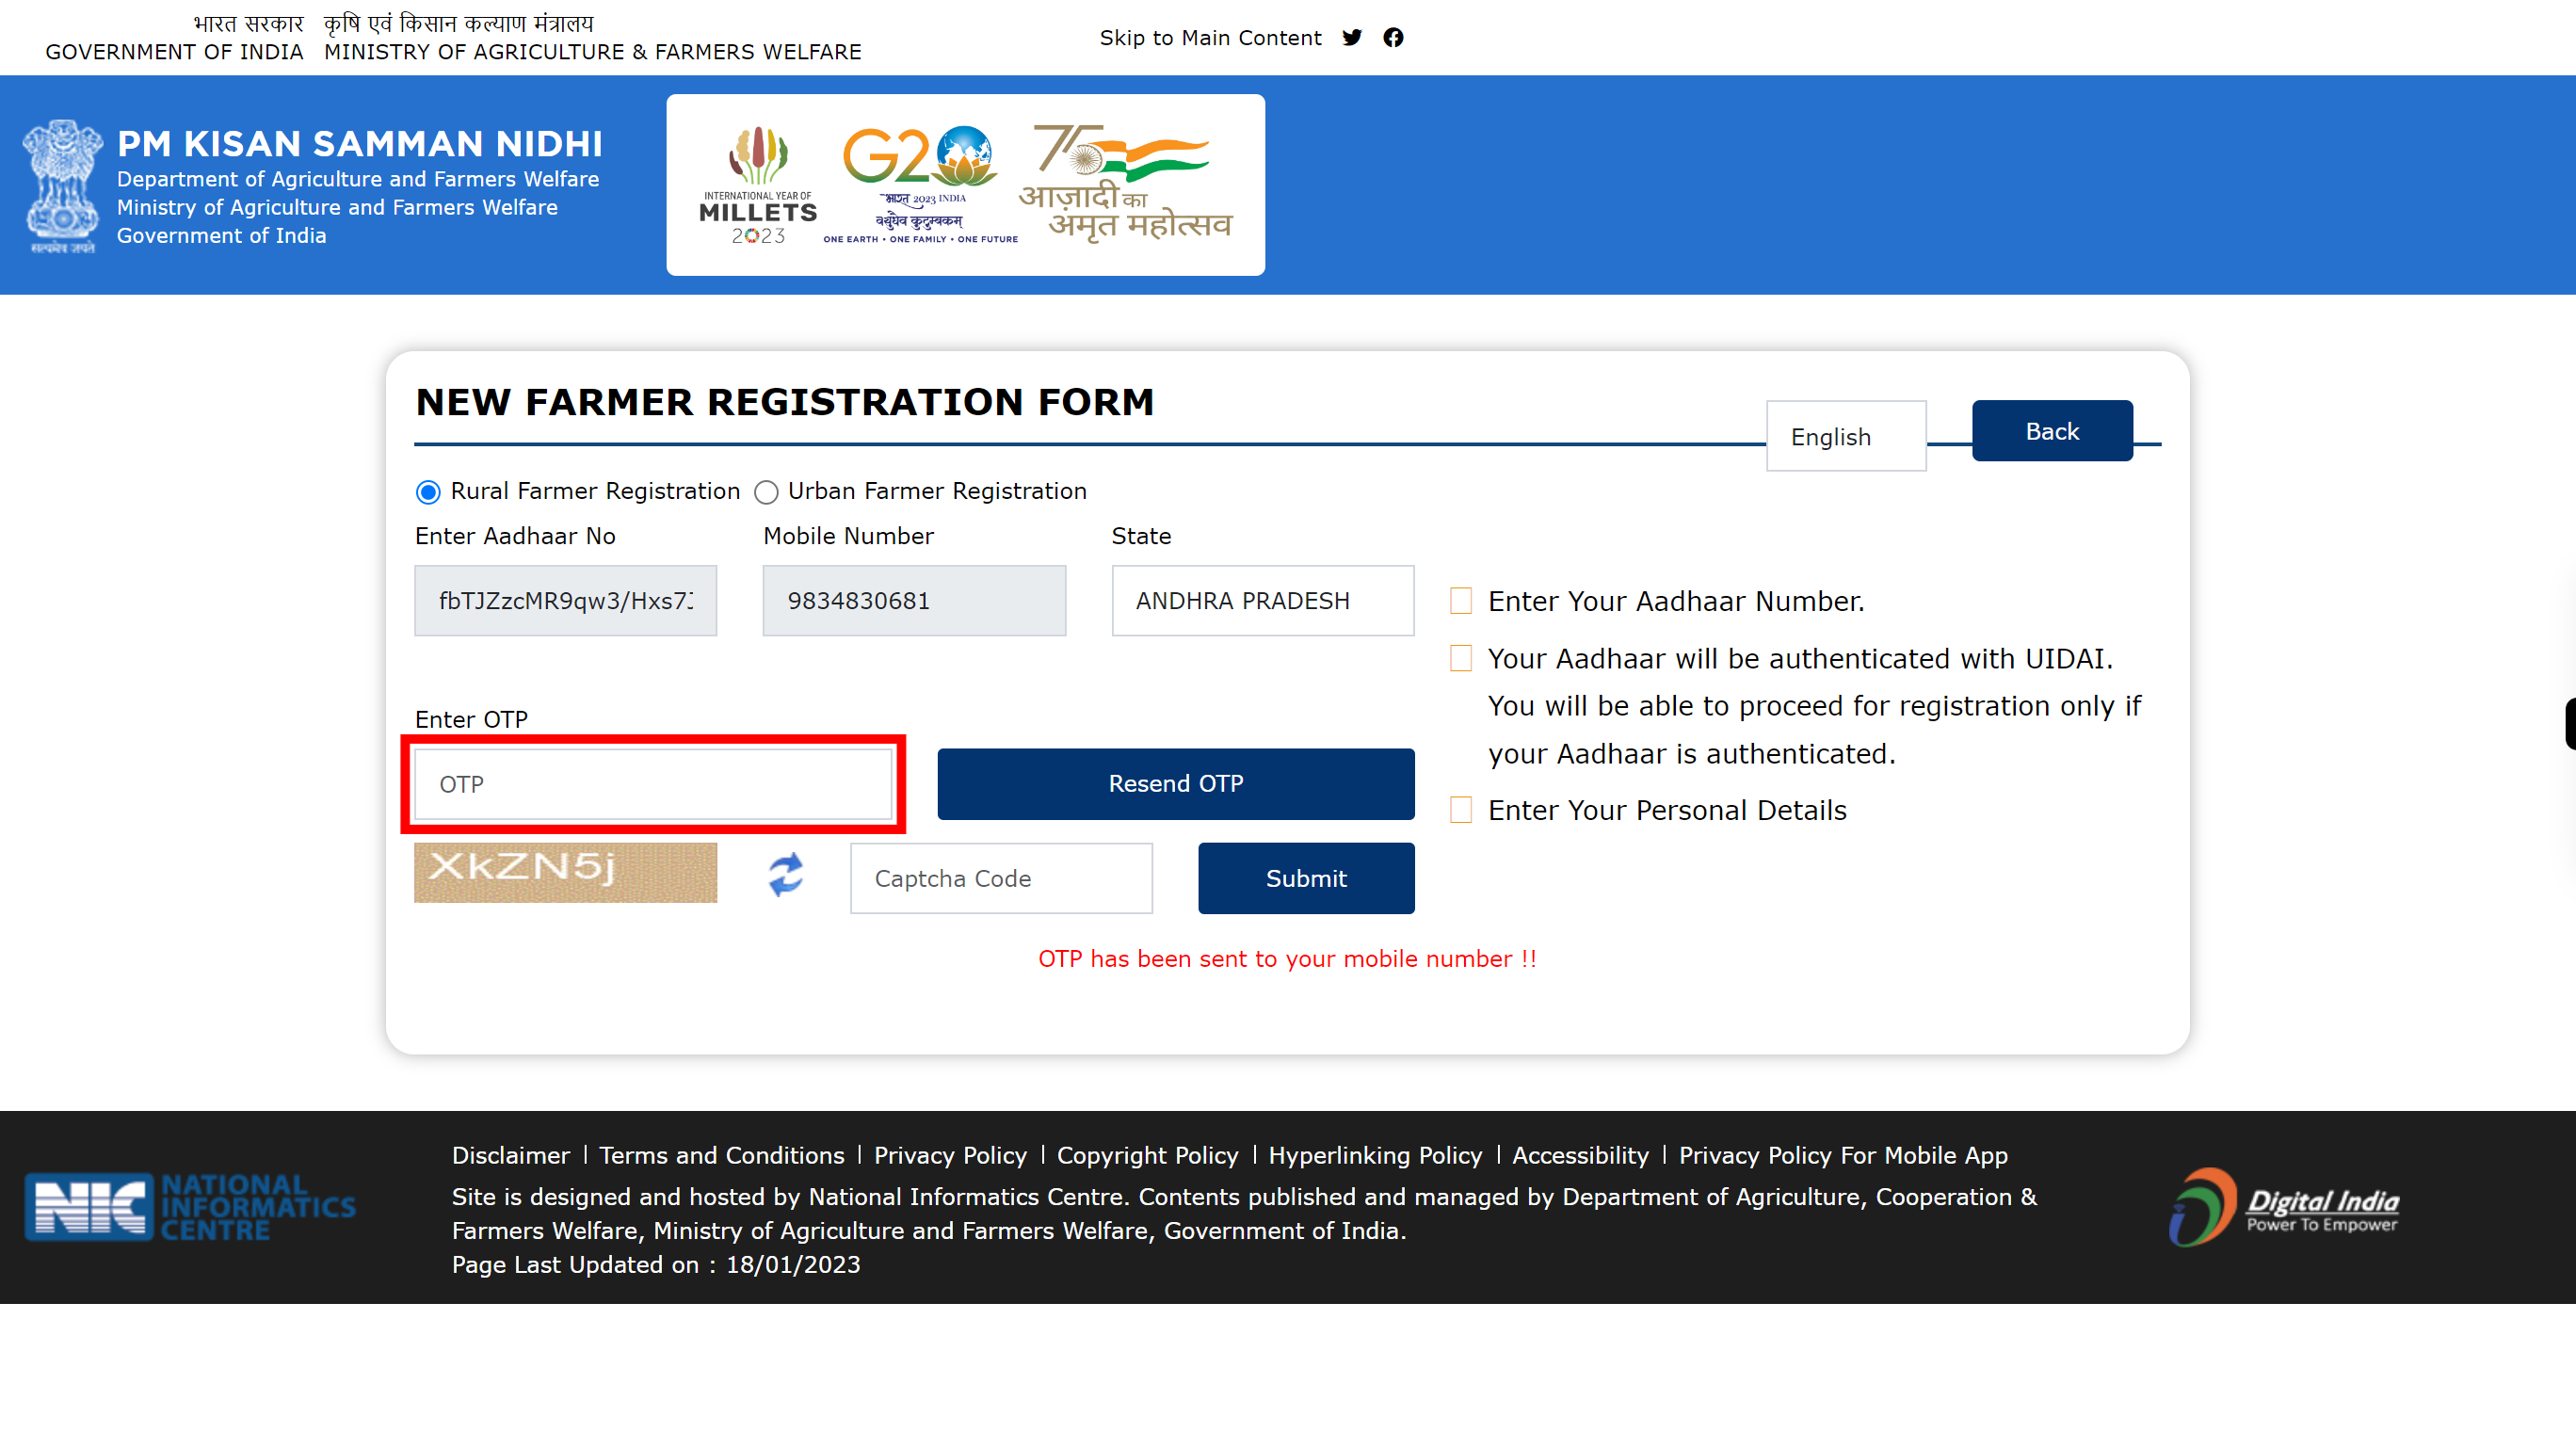
8.
Click on the 'OTP' and then enter OTP send to your mobile number. Once done, click on the 'Next' button in the Supervity instruction widget.
-
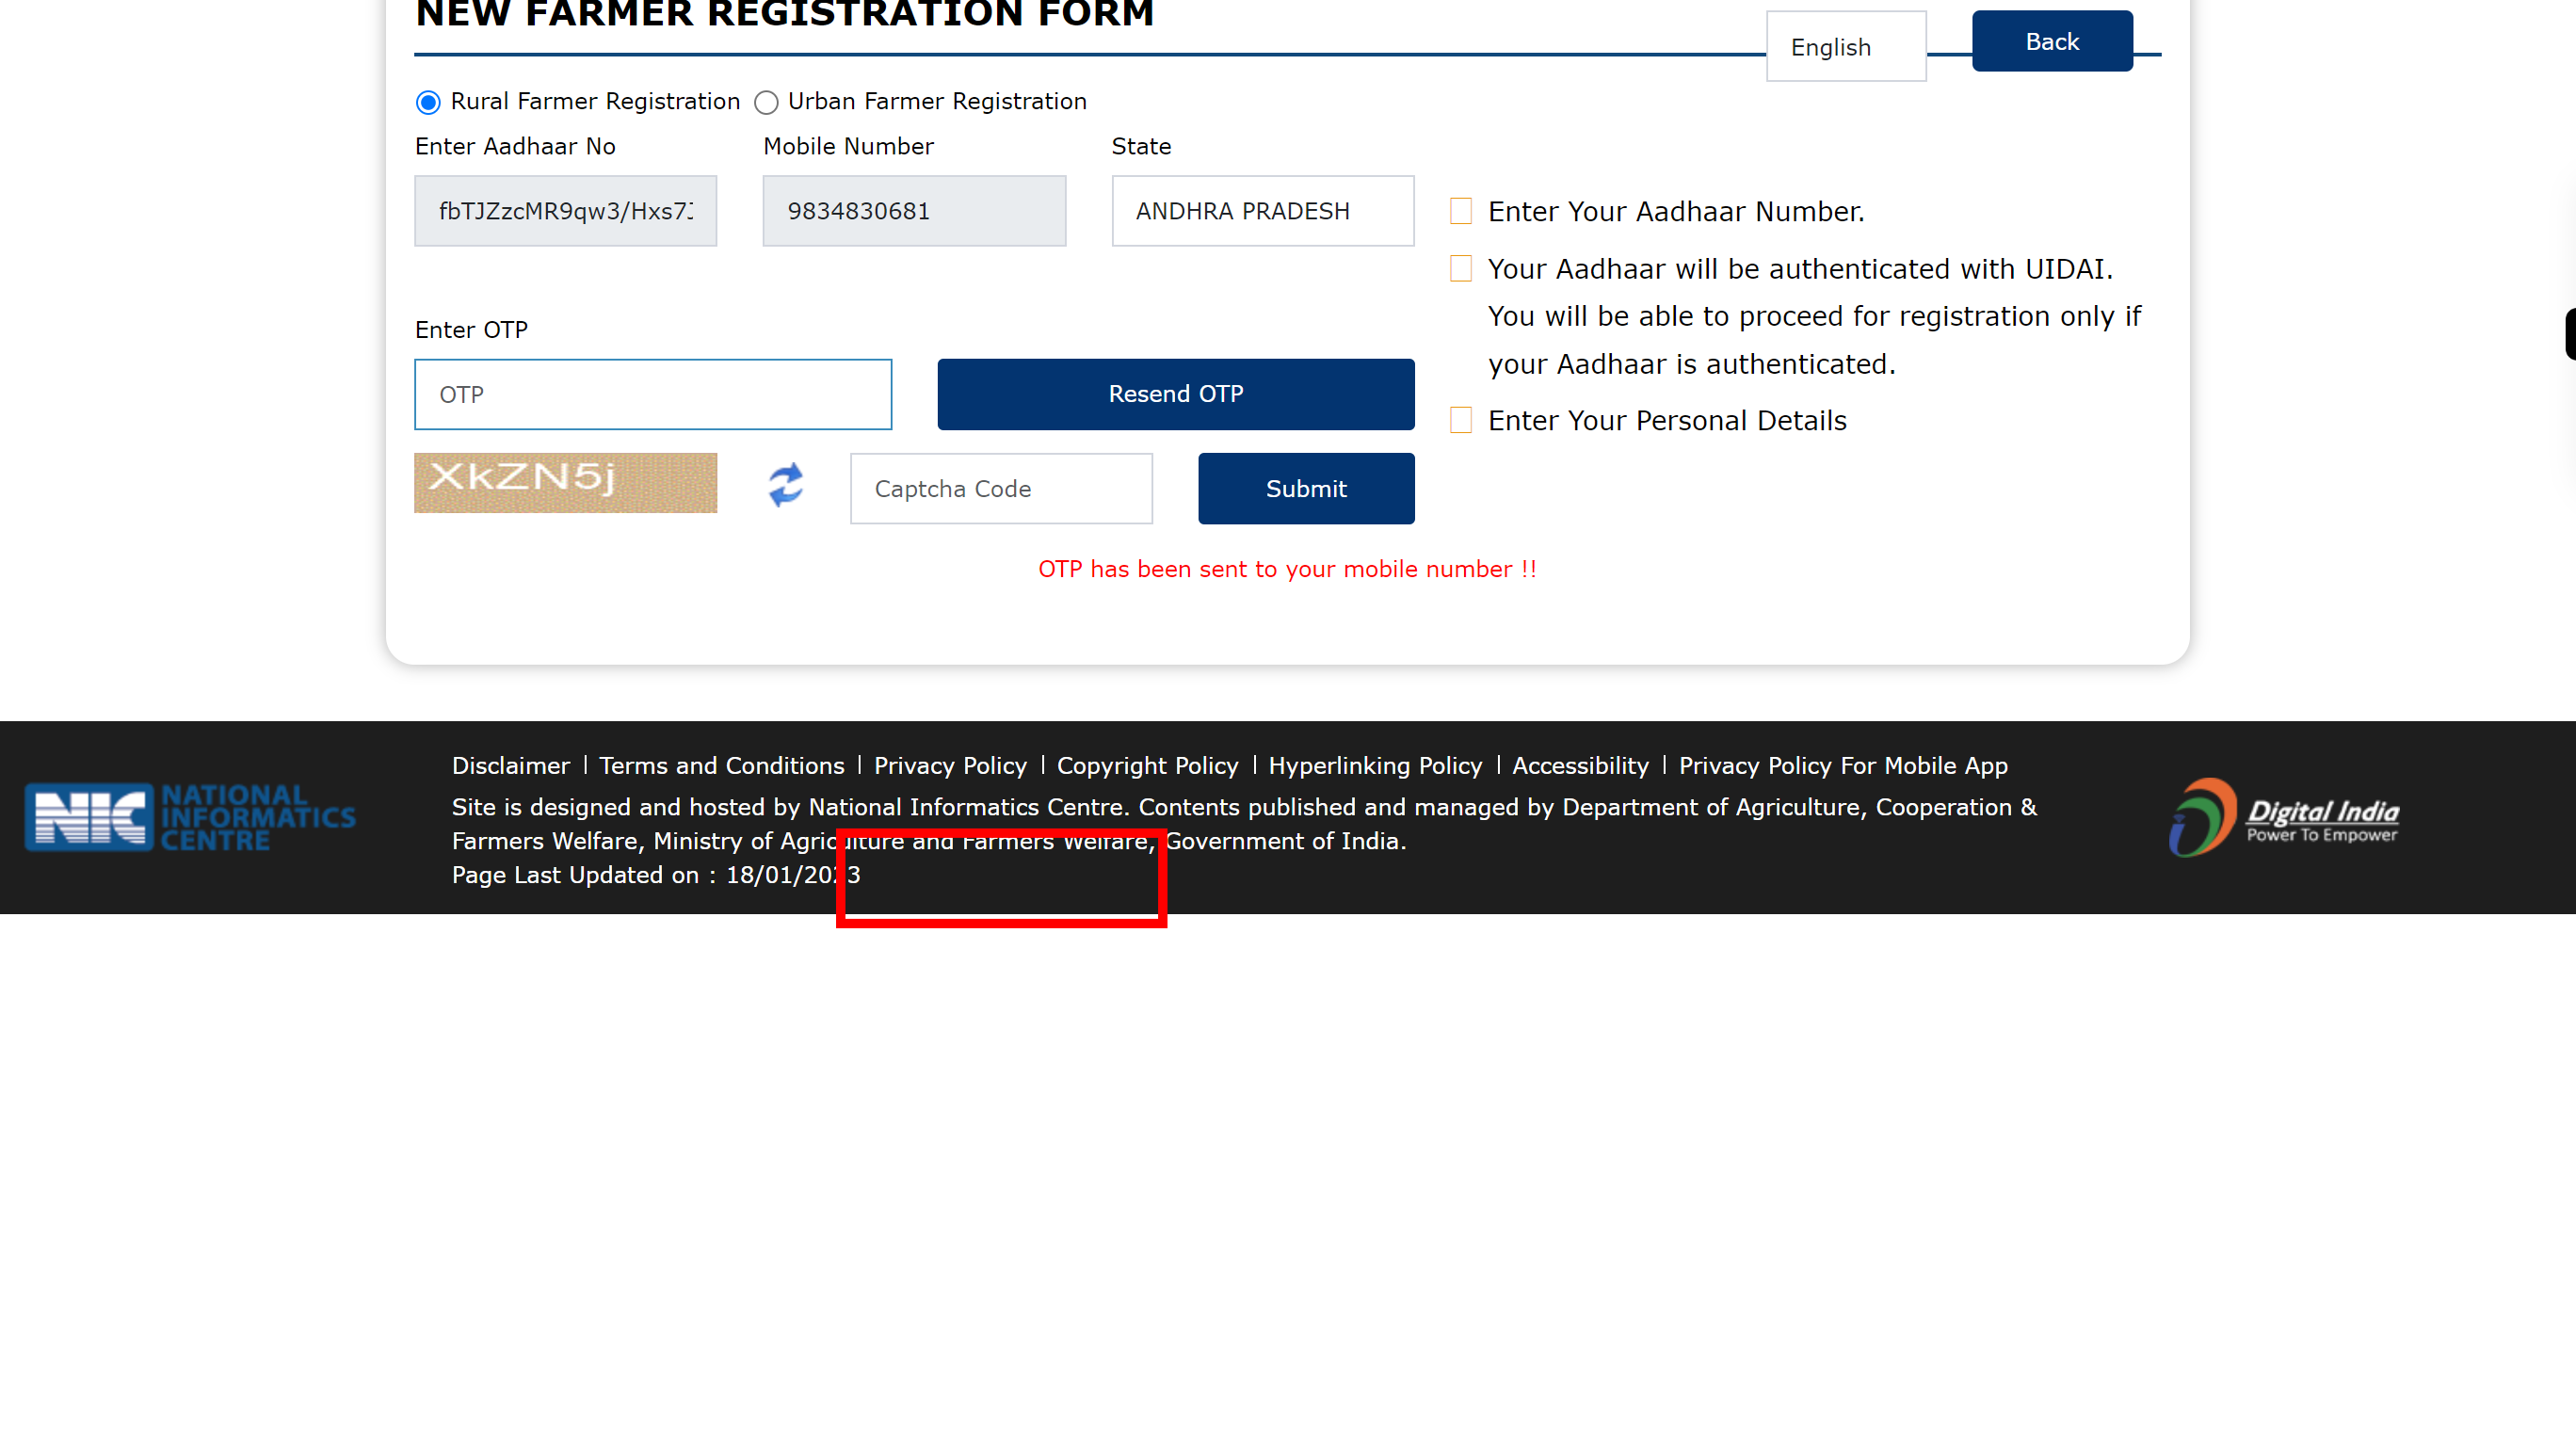
9.
Click on the 'Captcha Code' and then enter the code given in the box. Once done, click on the 'Next' button in the Supervity instruction widget.
-
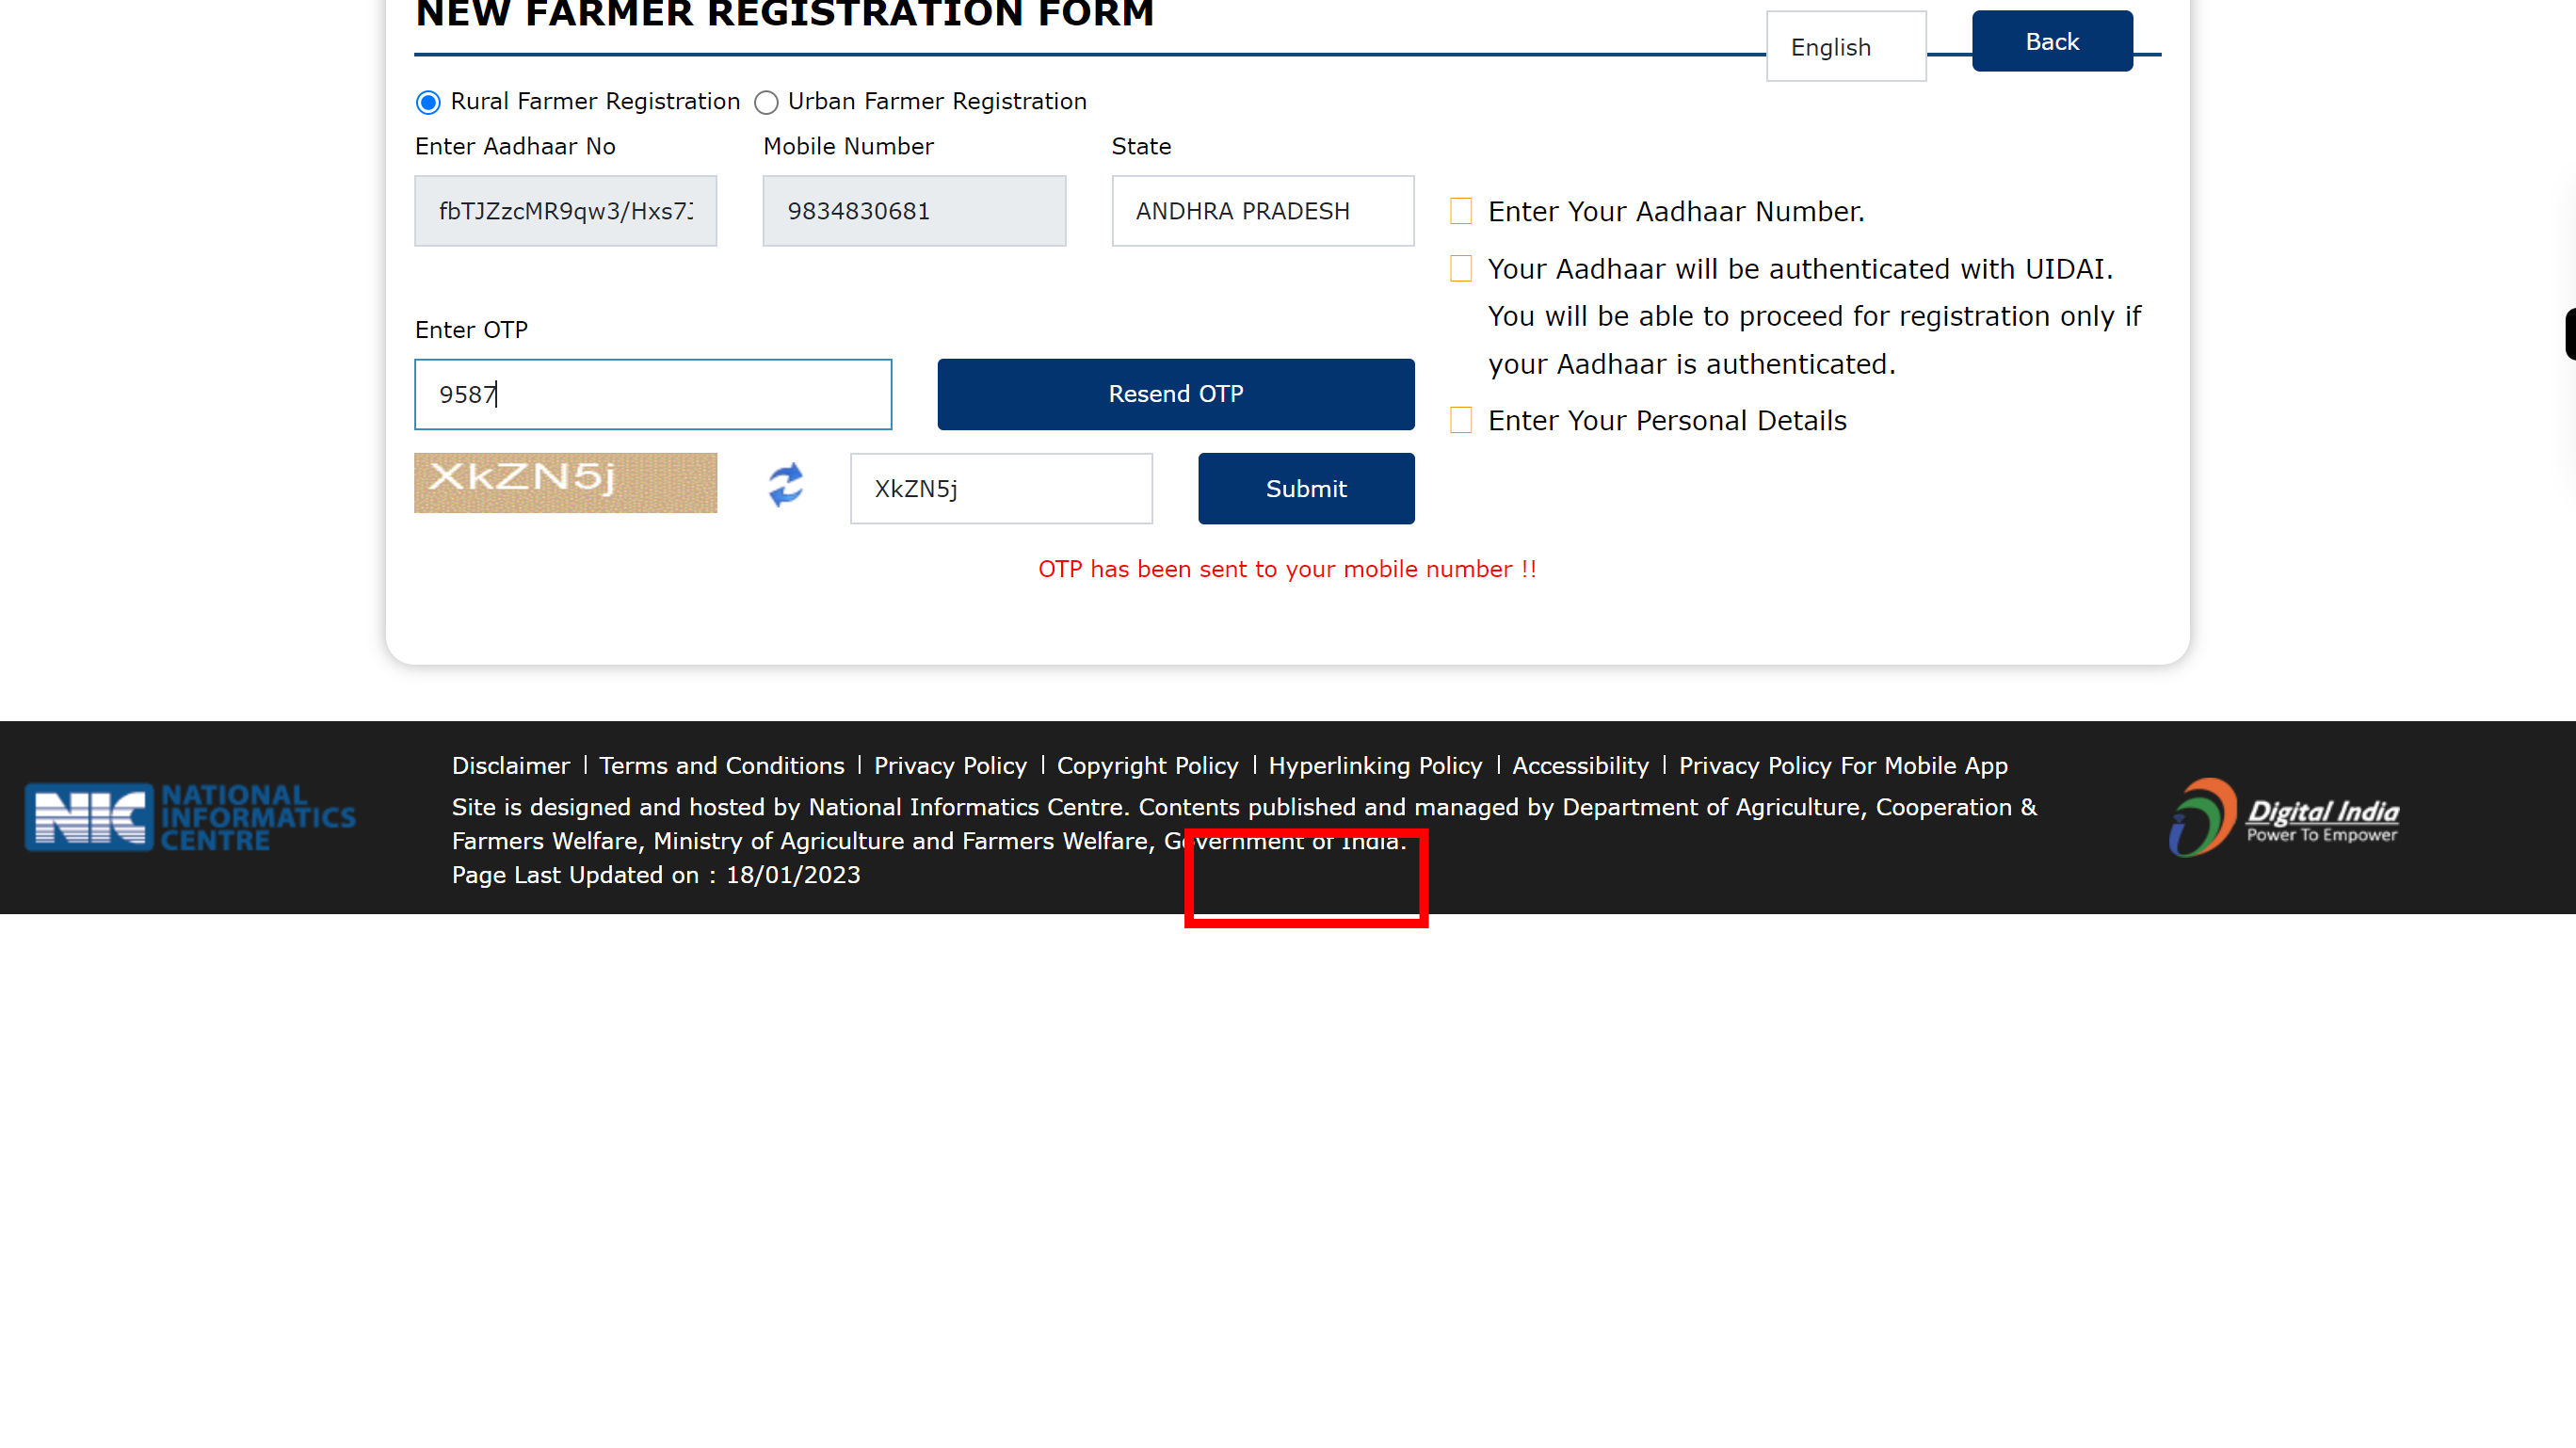
10.
Click on the 'Submit' button.
-
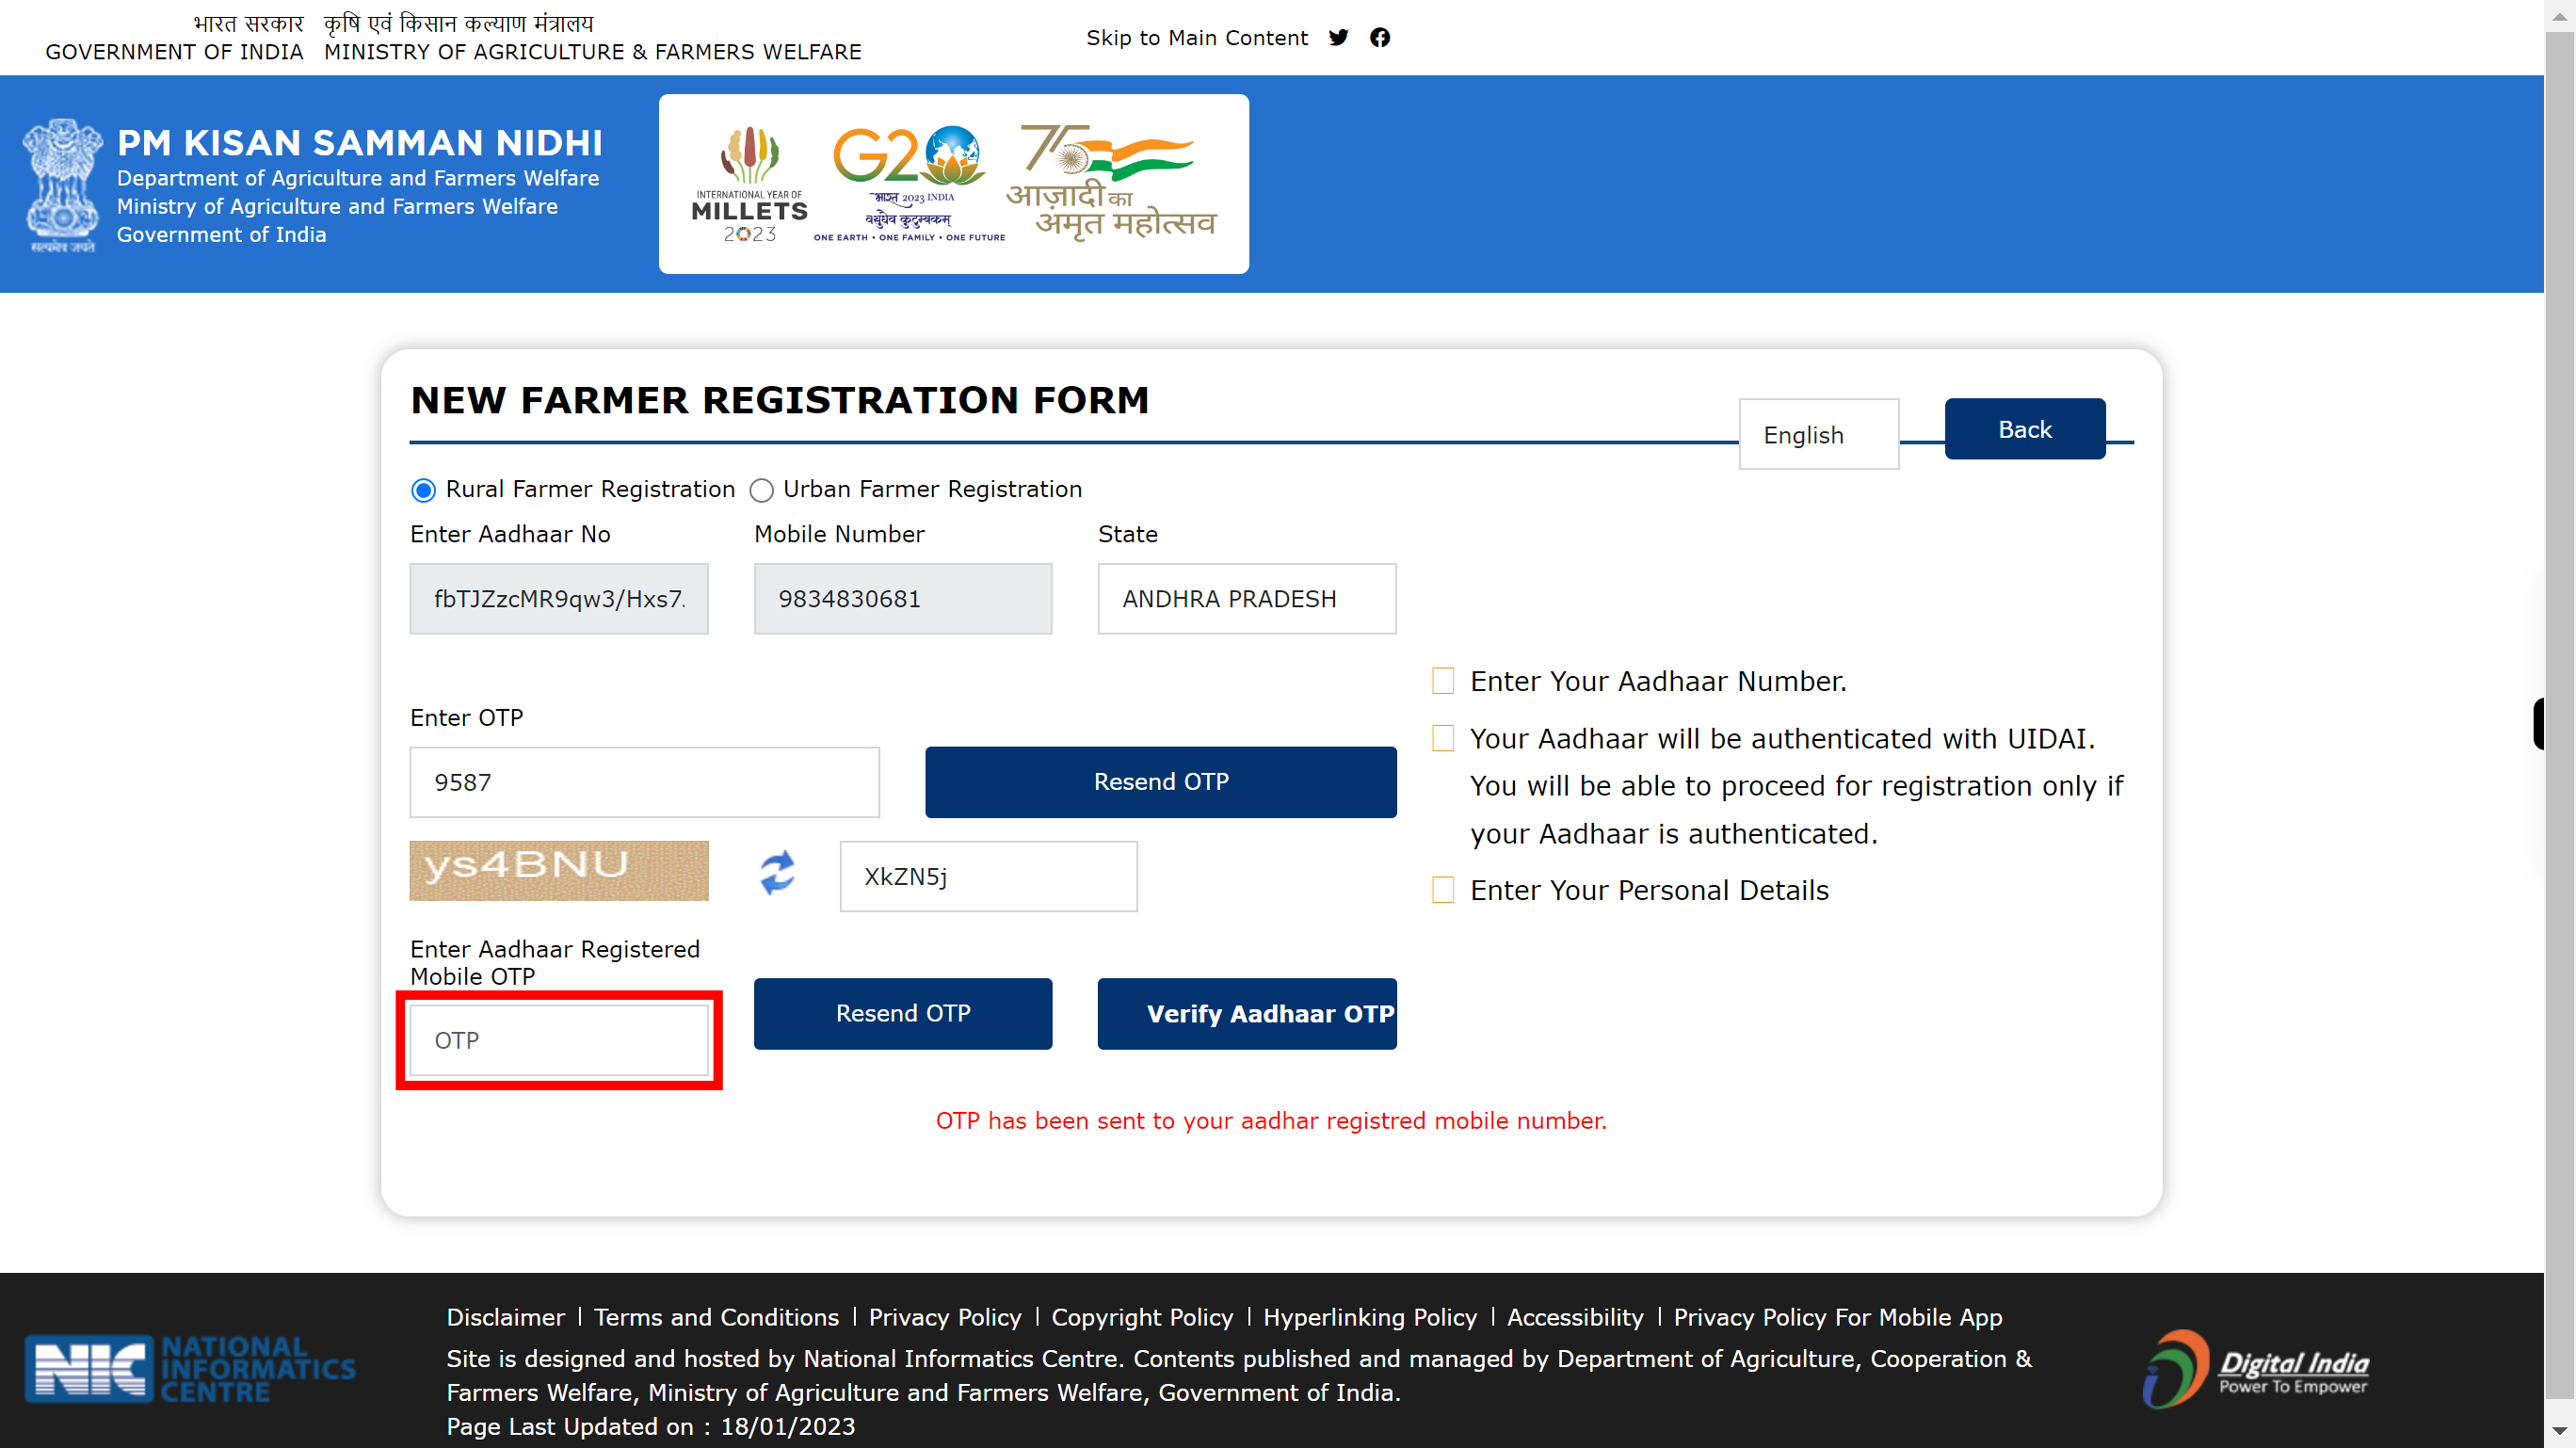
11.
Click on the 'OTP' tab and then enter Aadhar OTP send to the registered mobile Once done, click on the 'Next' button in the Supervity instruction widget.
-
12.
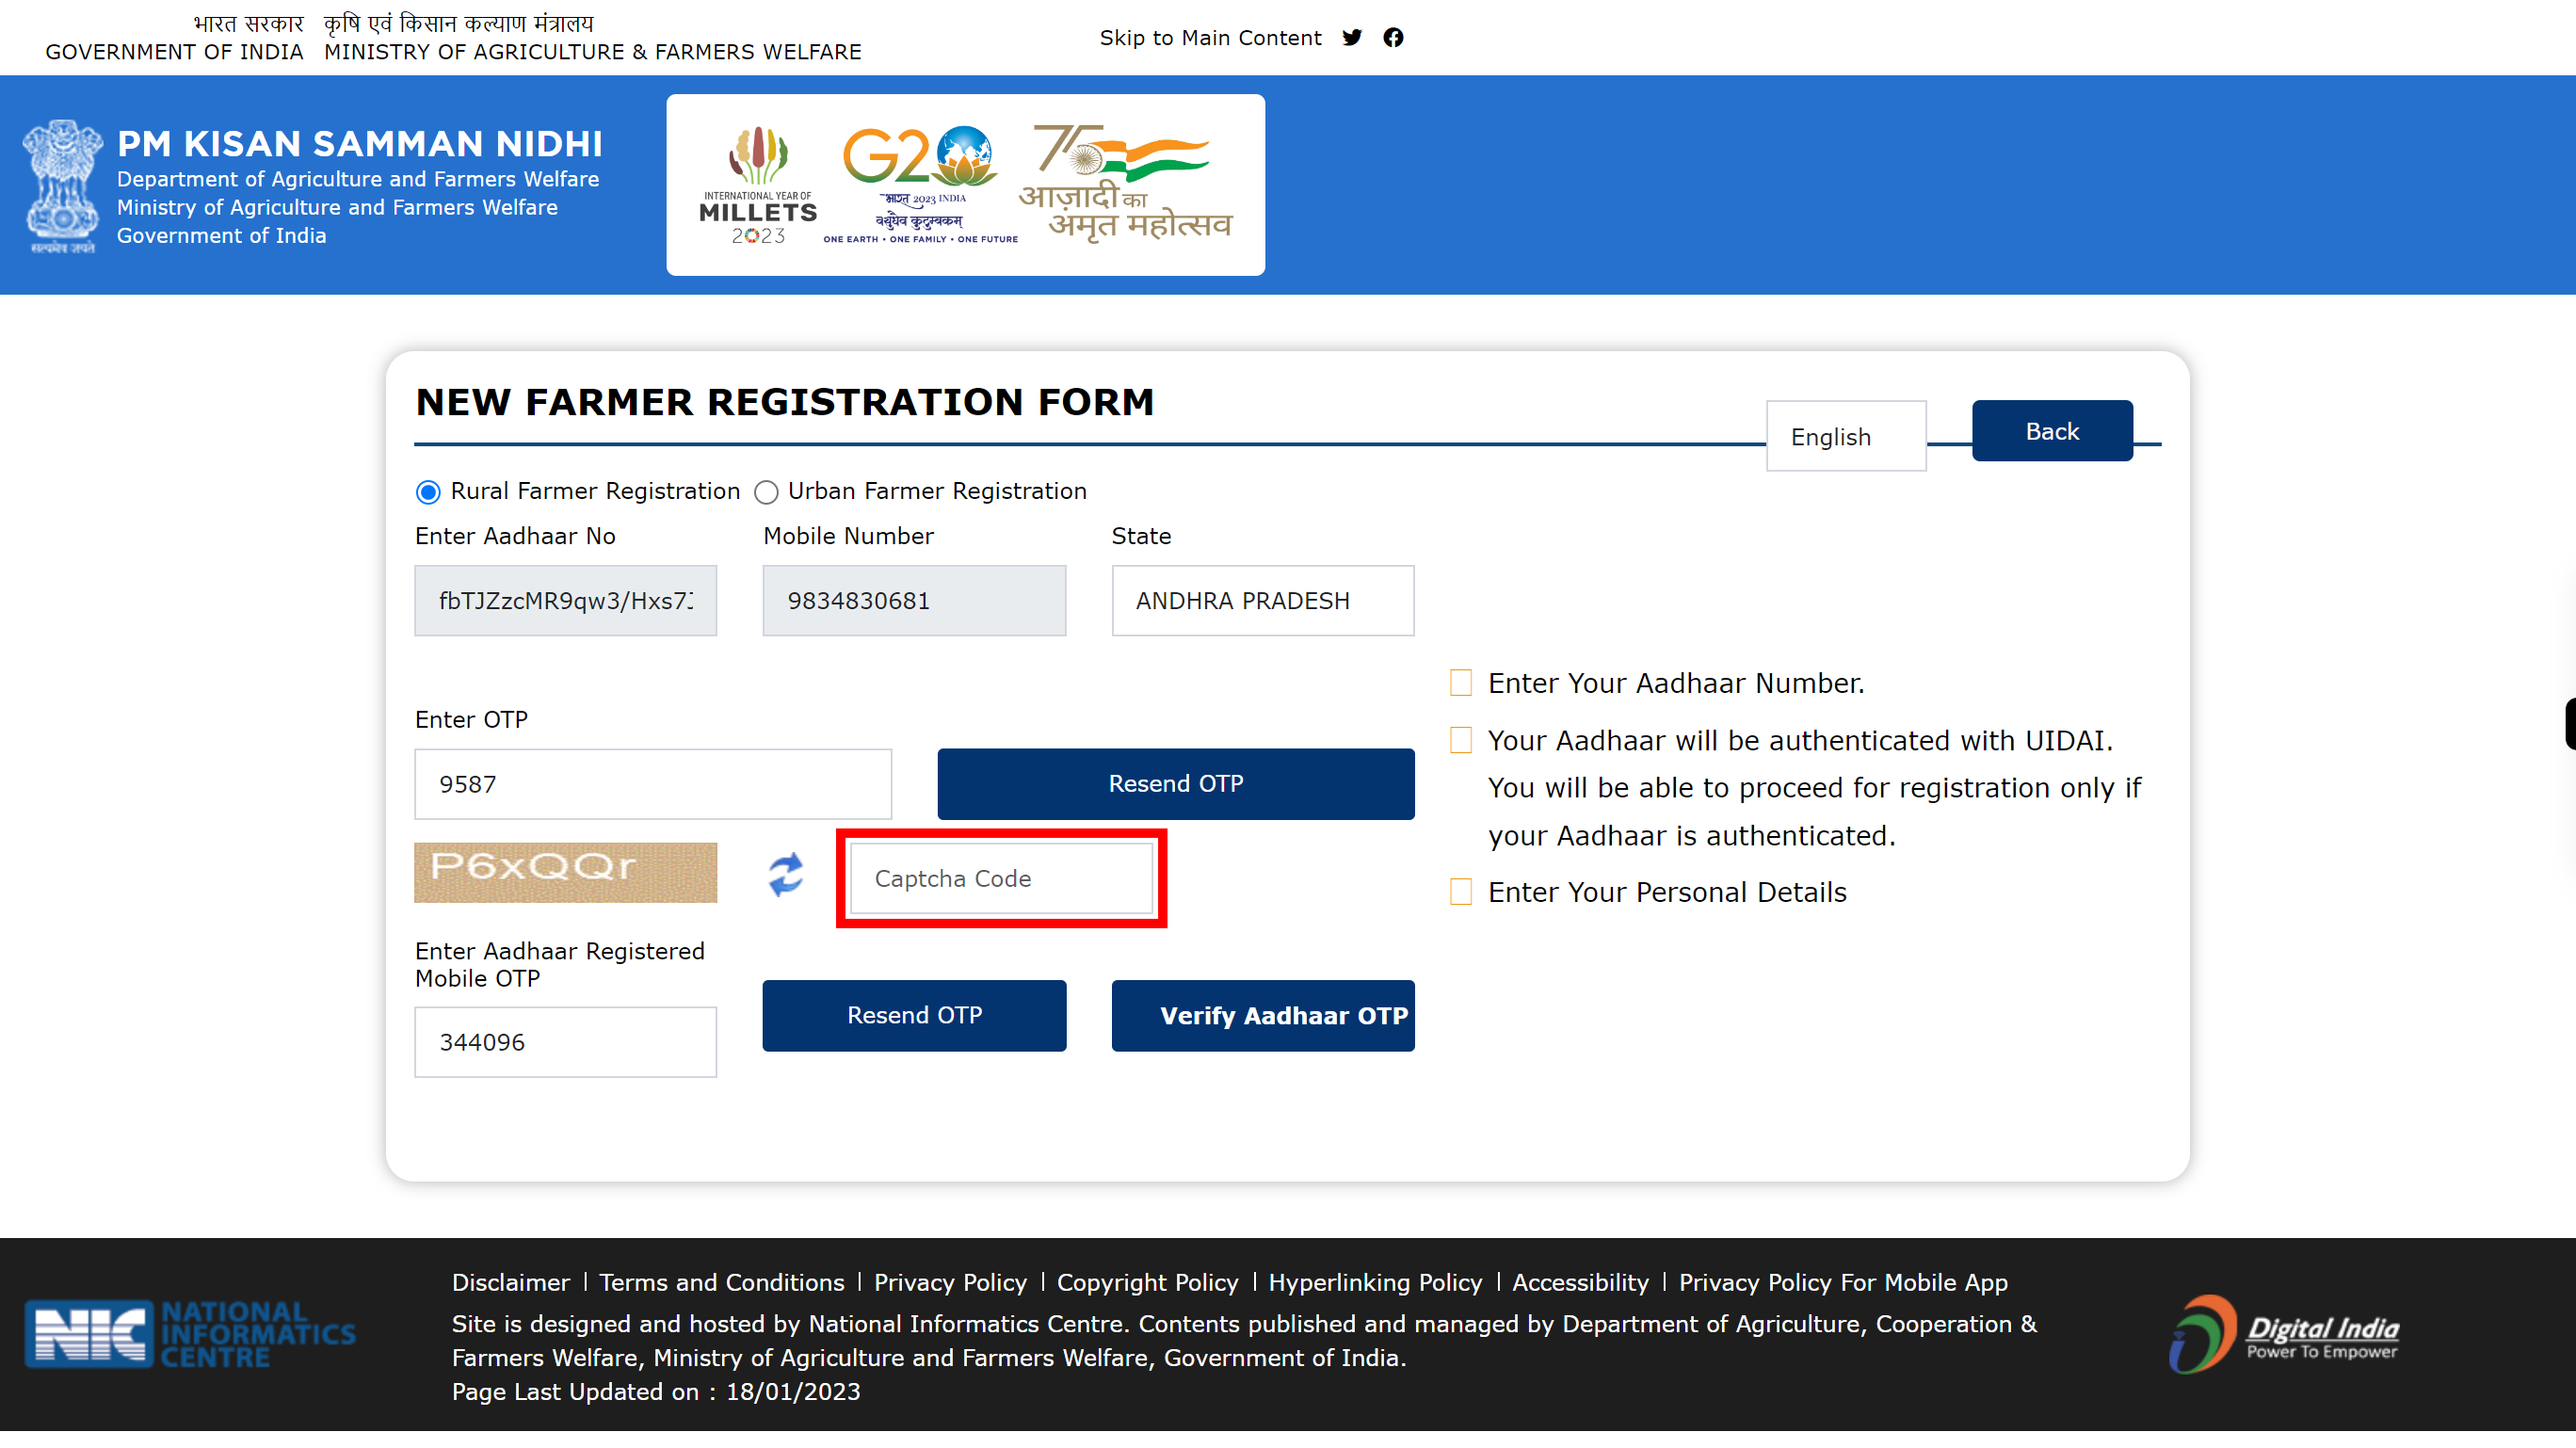
Click on the Captcha Code. Once done, click on the 'Next' button in the Supervity instruction widget.
-
13.
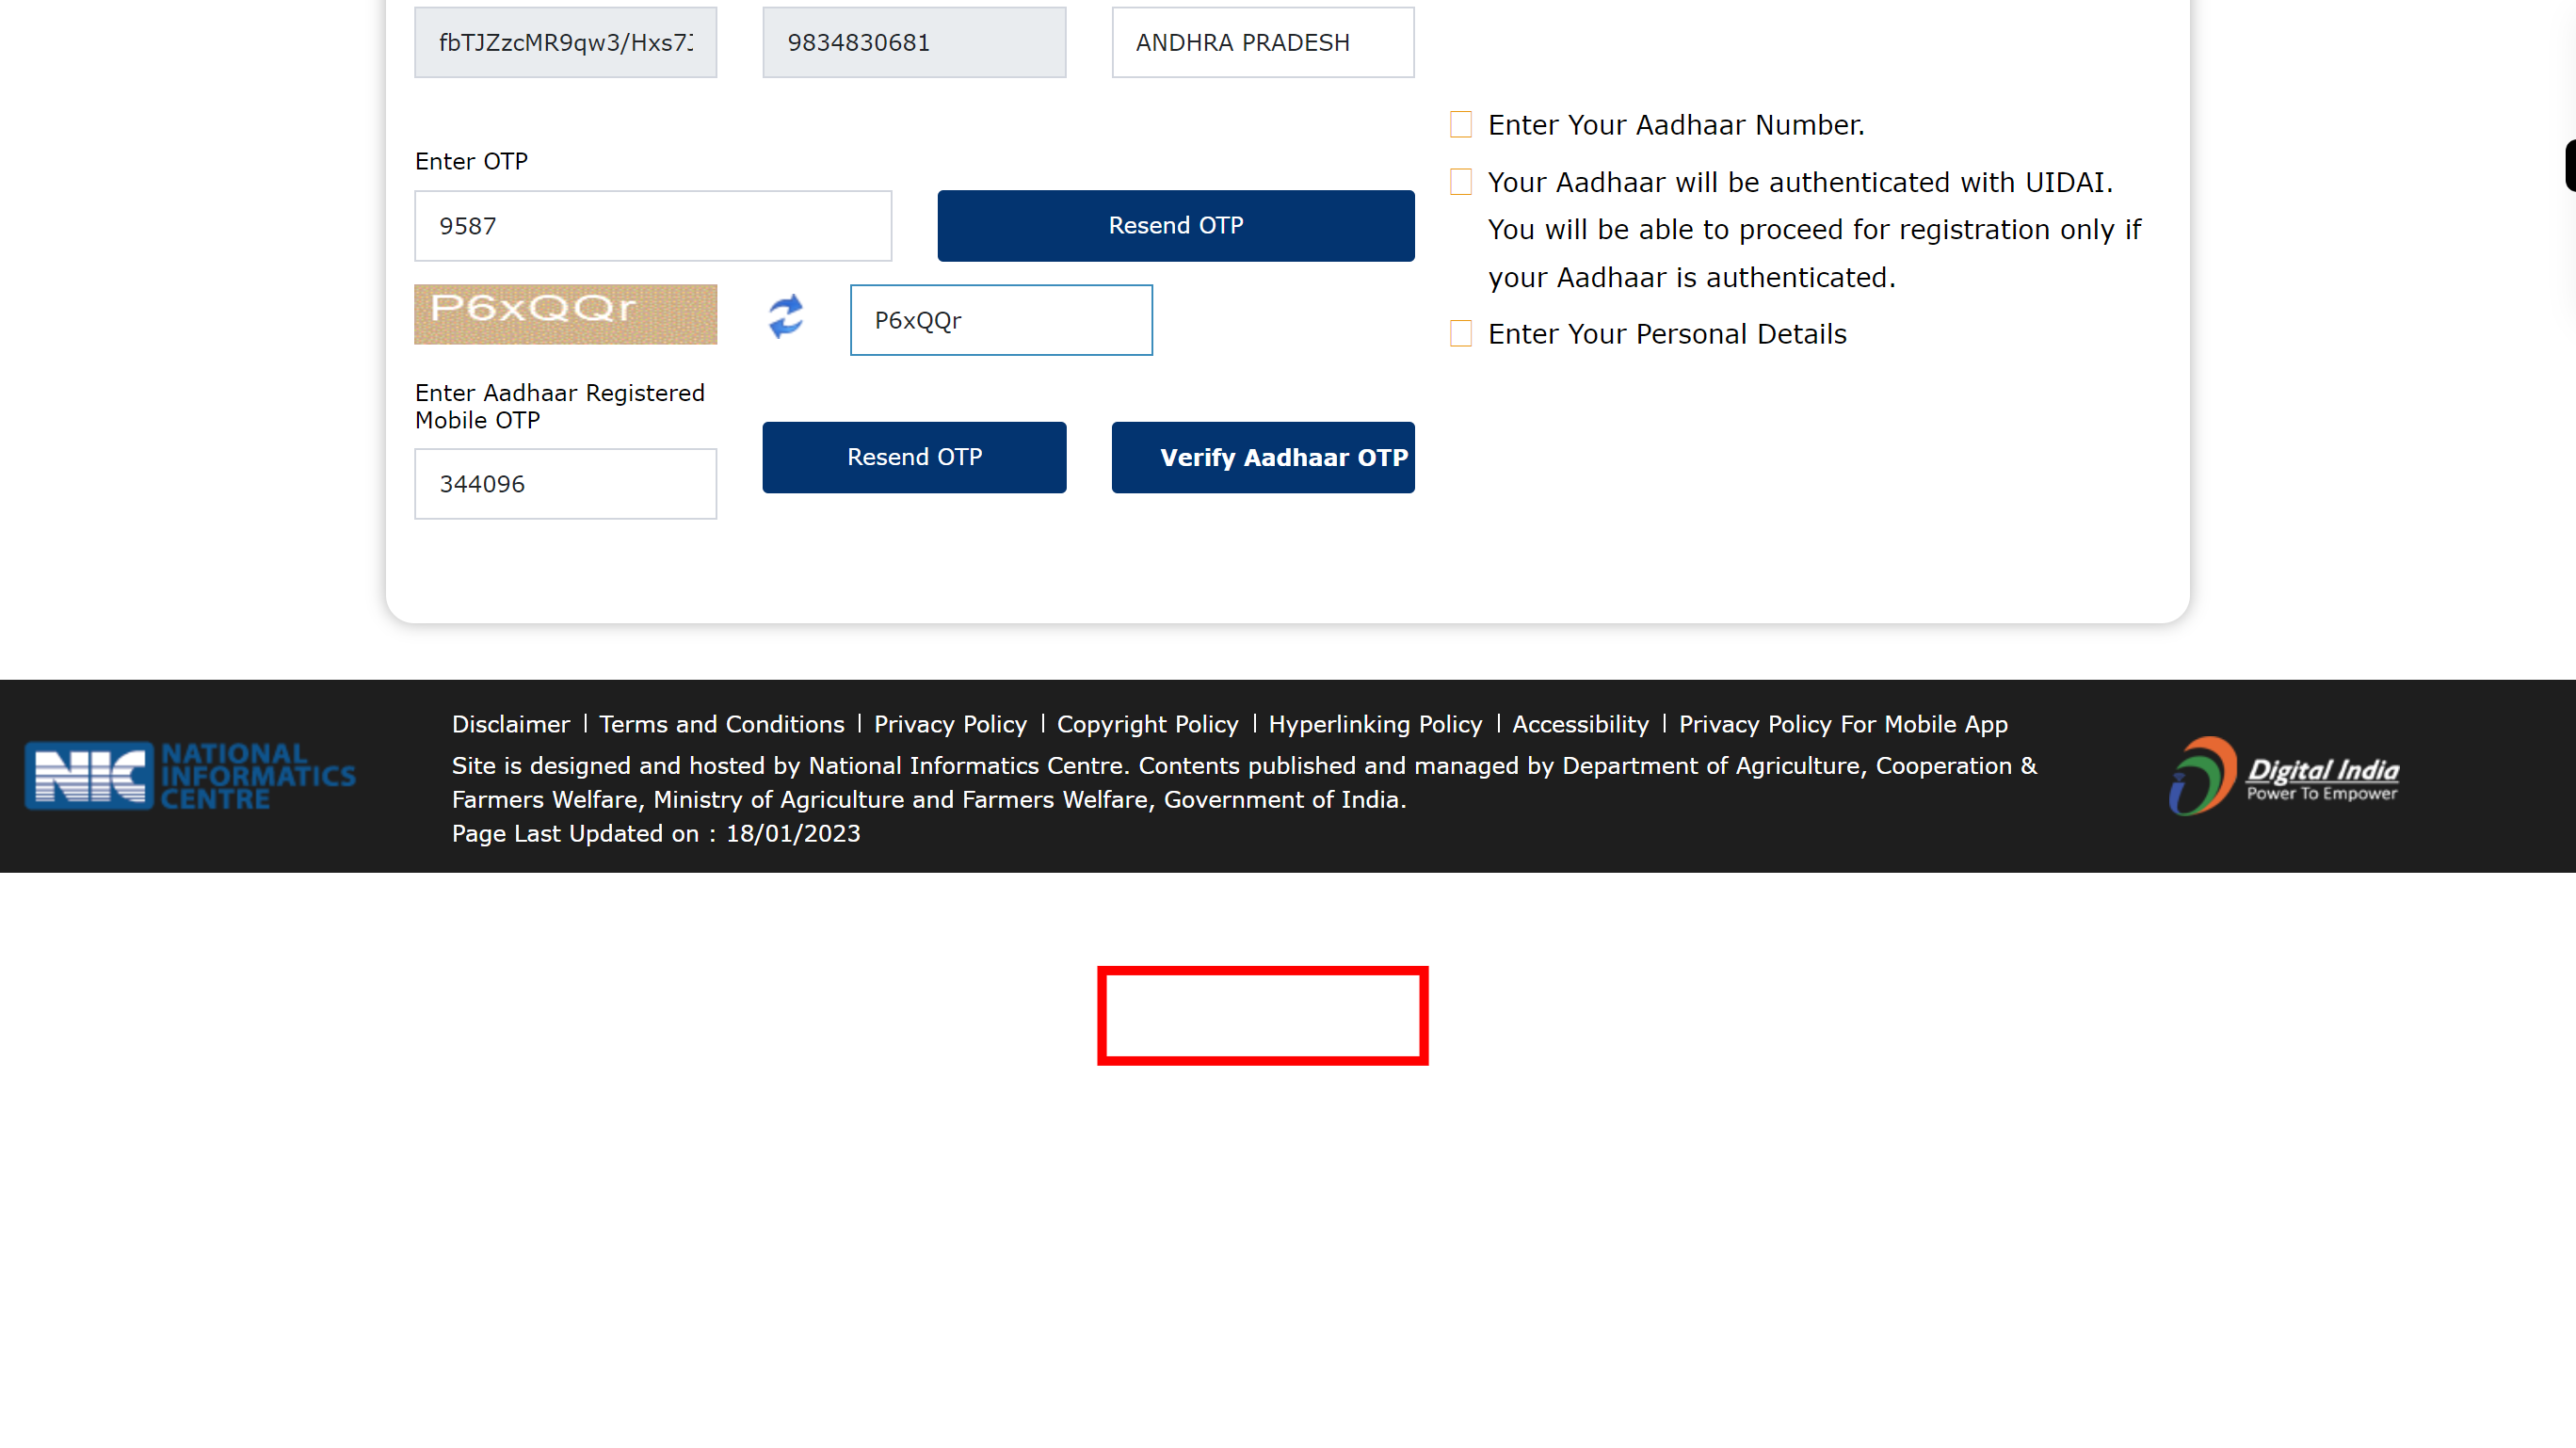
Click Verify Aadhaar OTP
-
14.
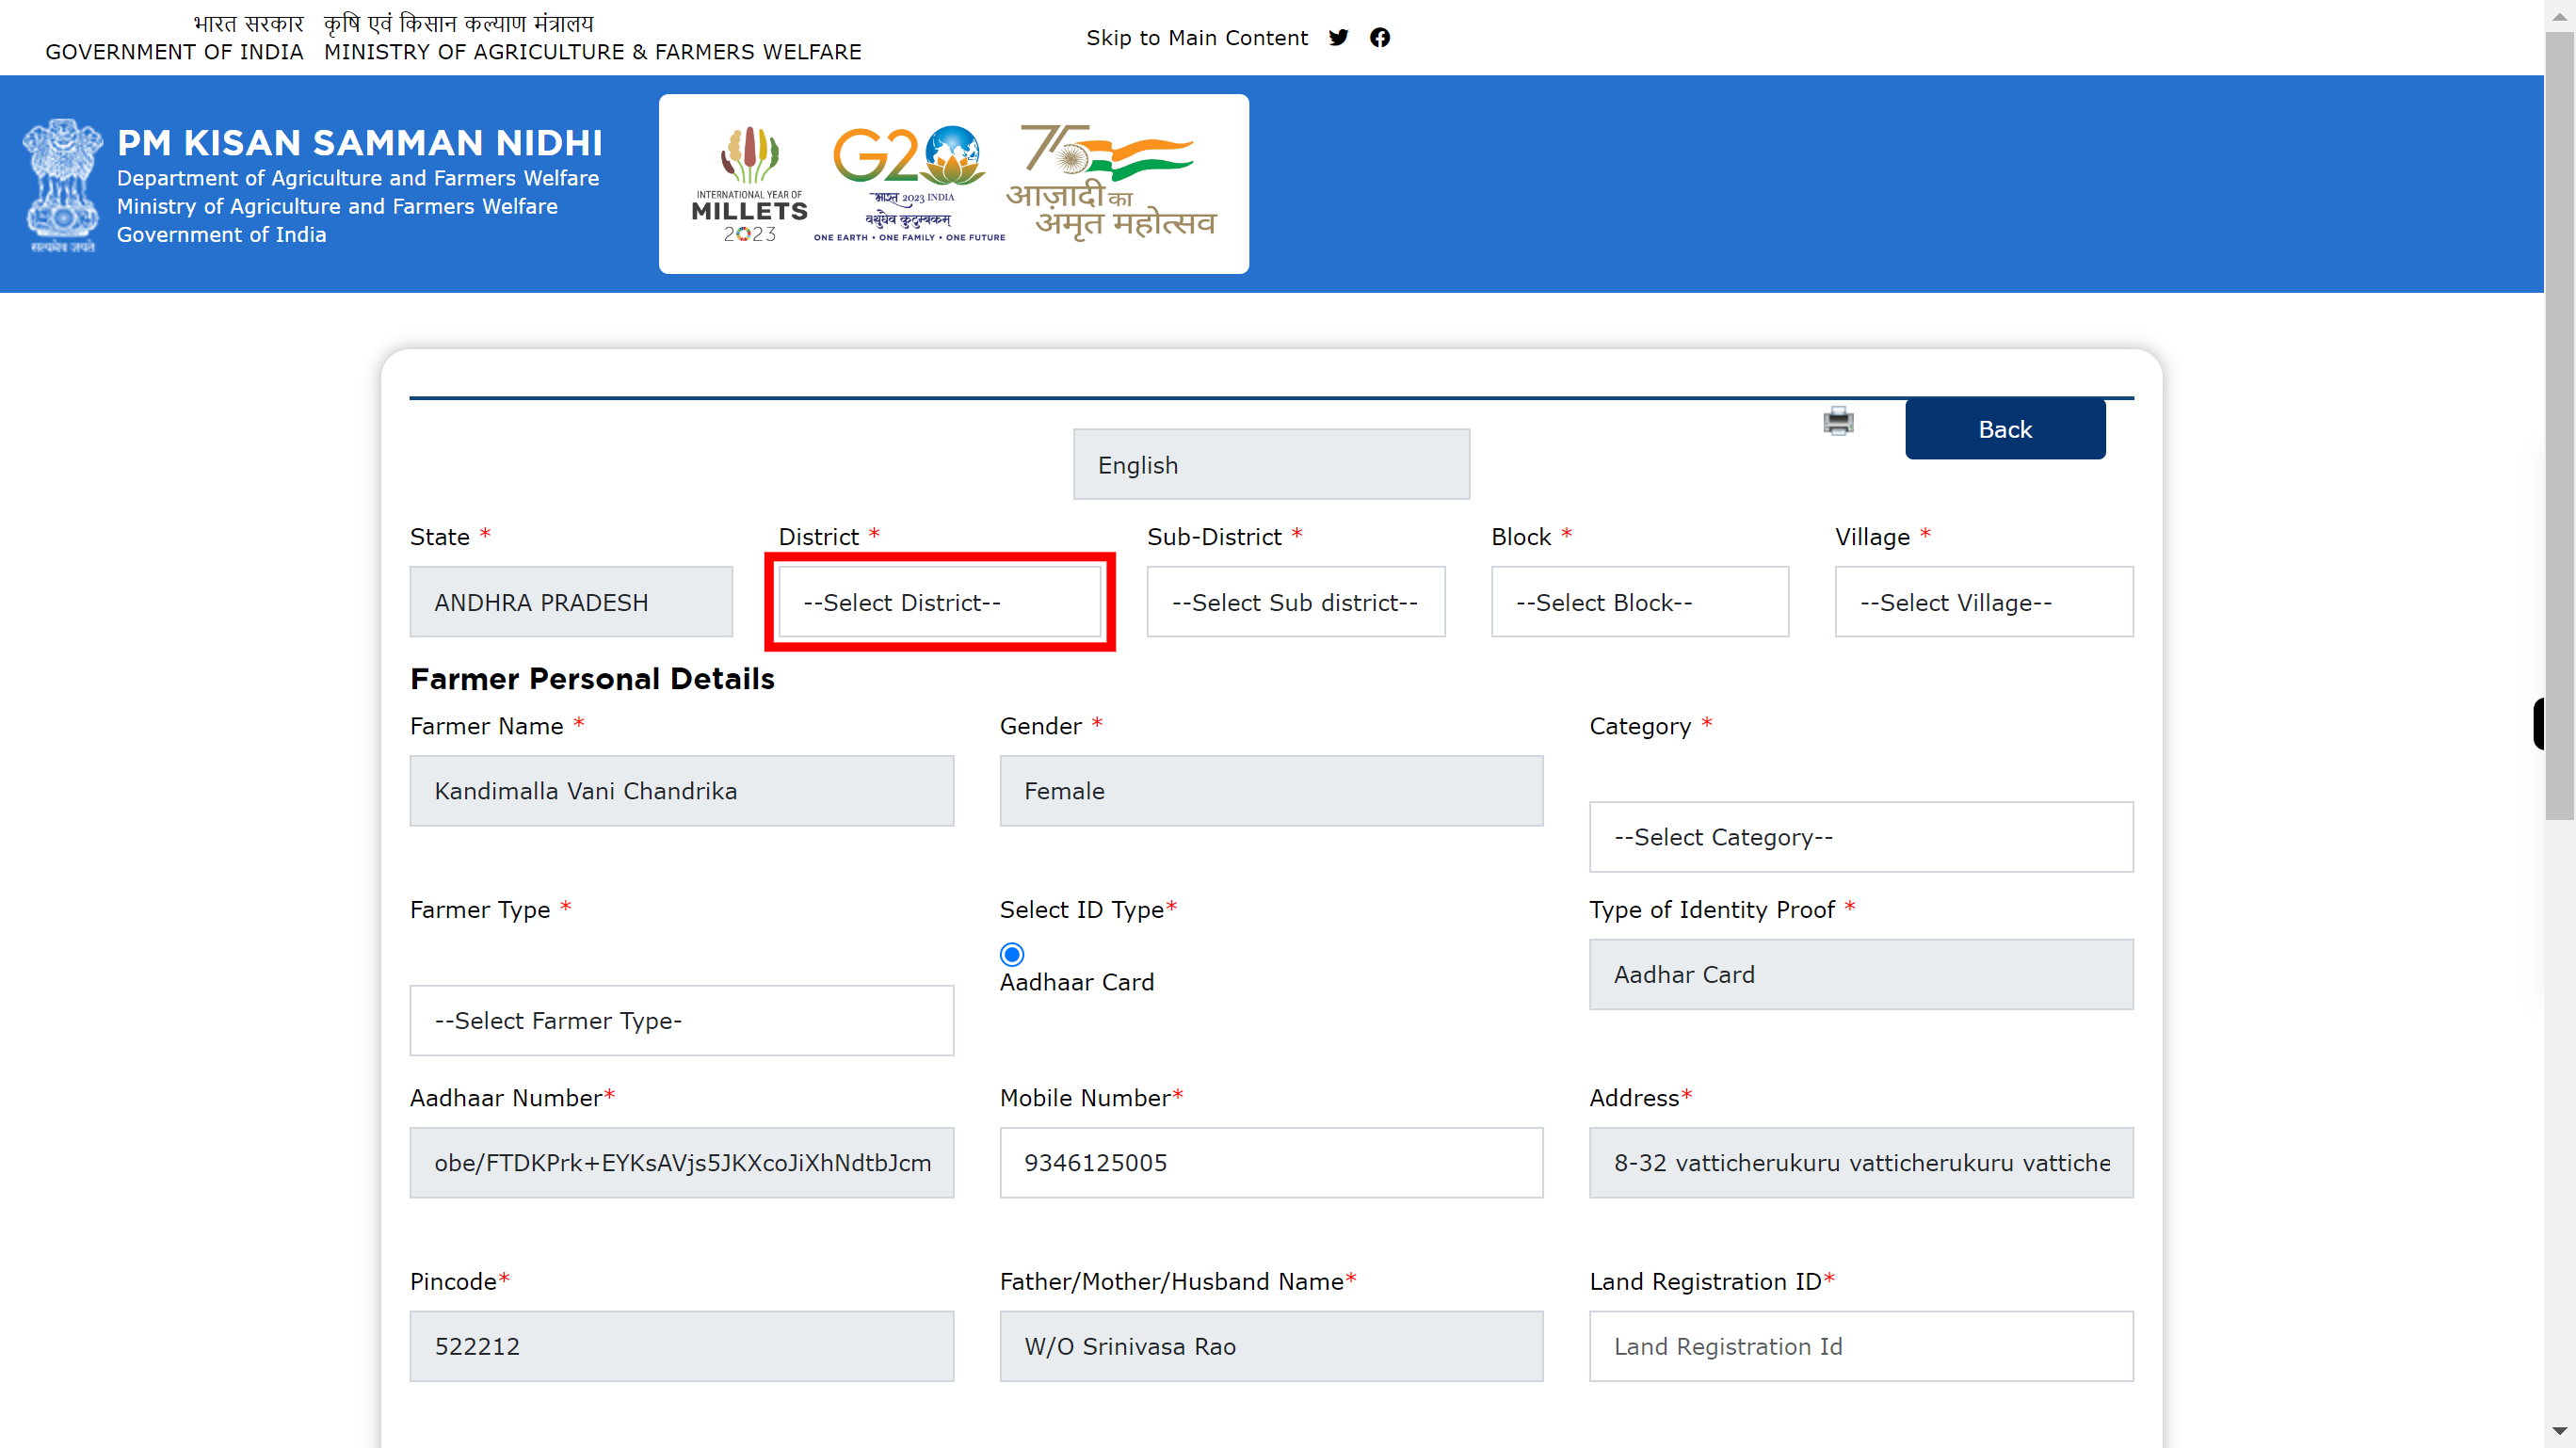
Click and select the respective District from the drop-down list. Once done, click on the 'Next' button in the Supervity instruction widget.
-
15.
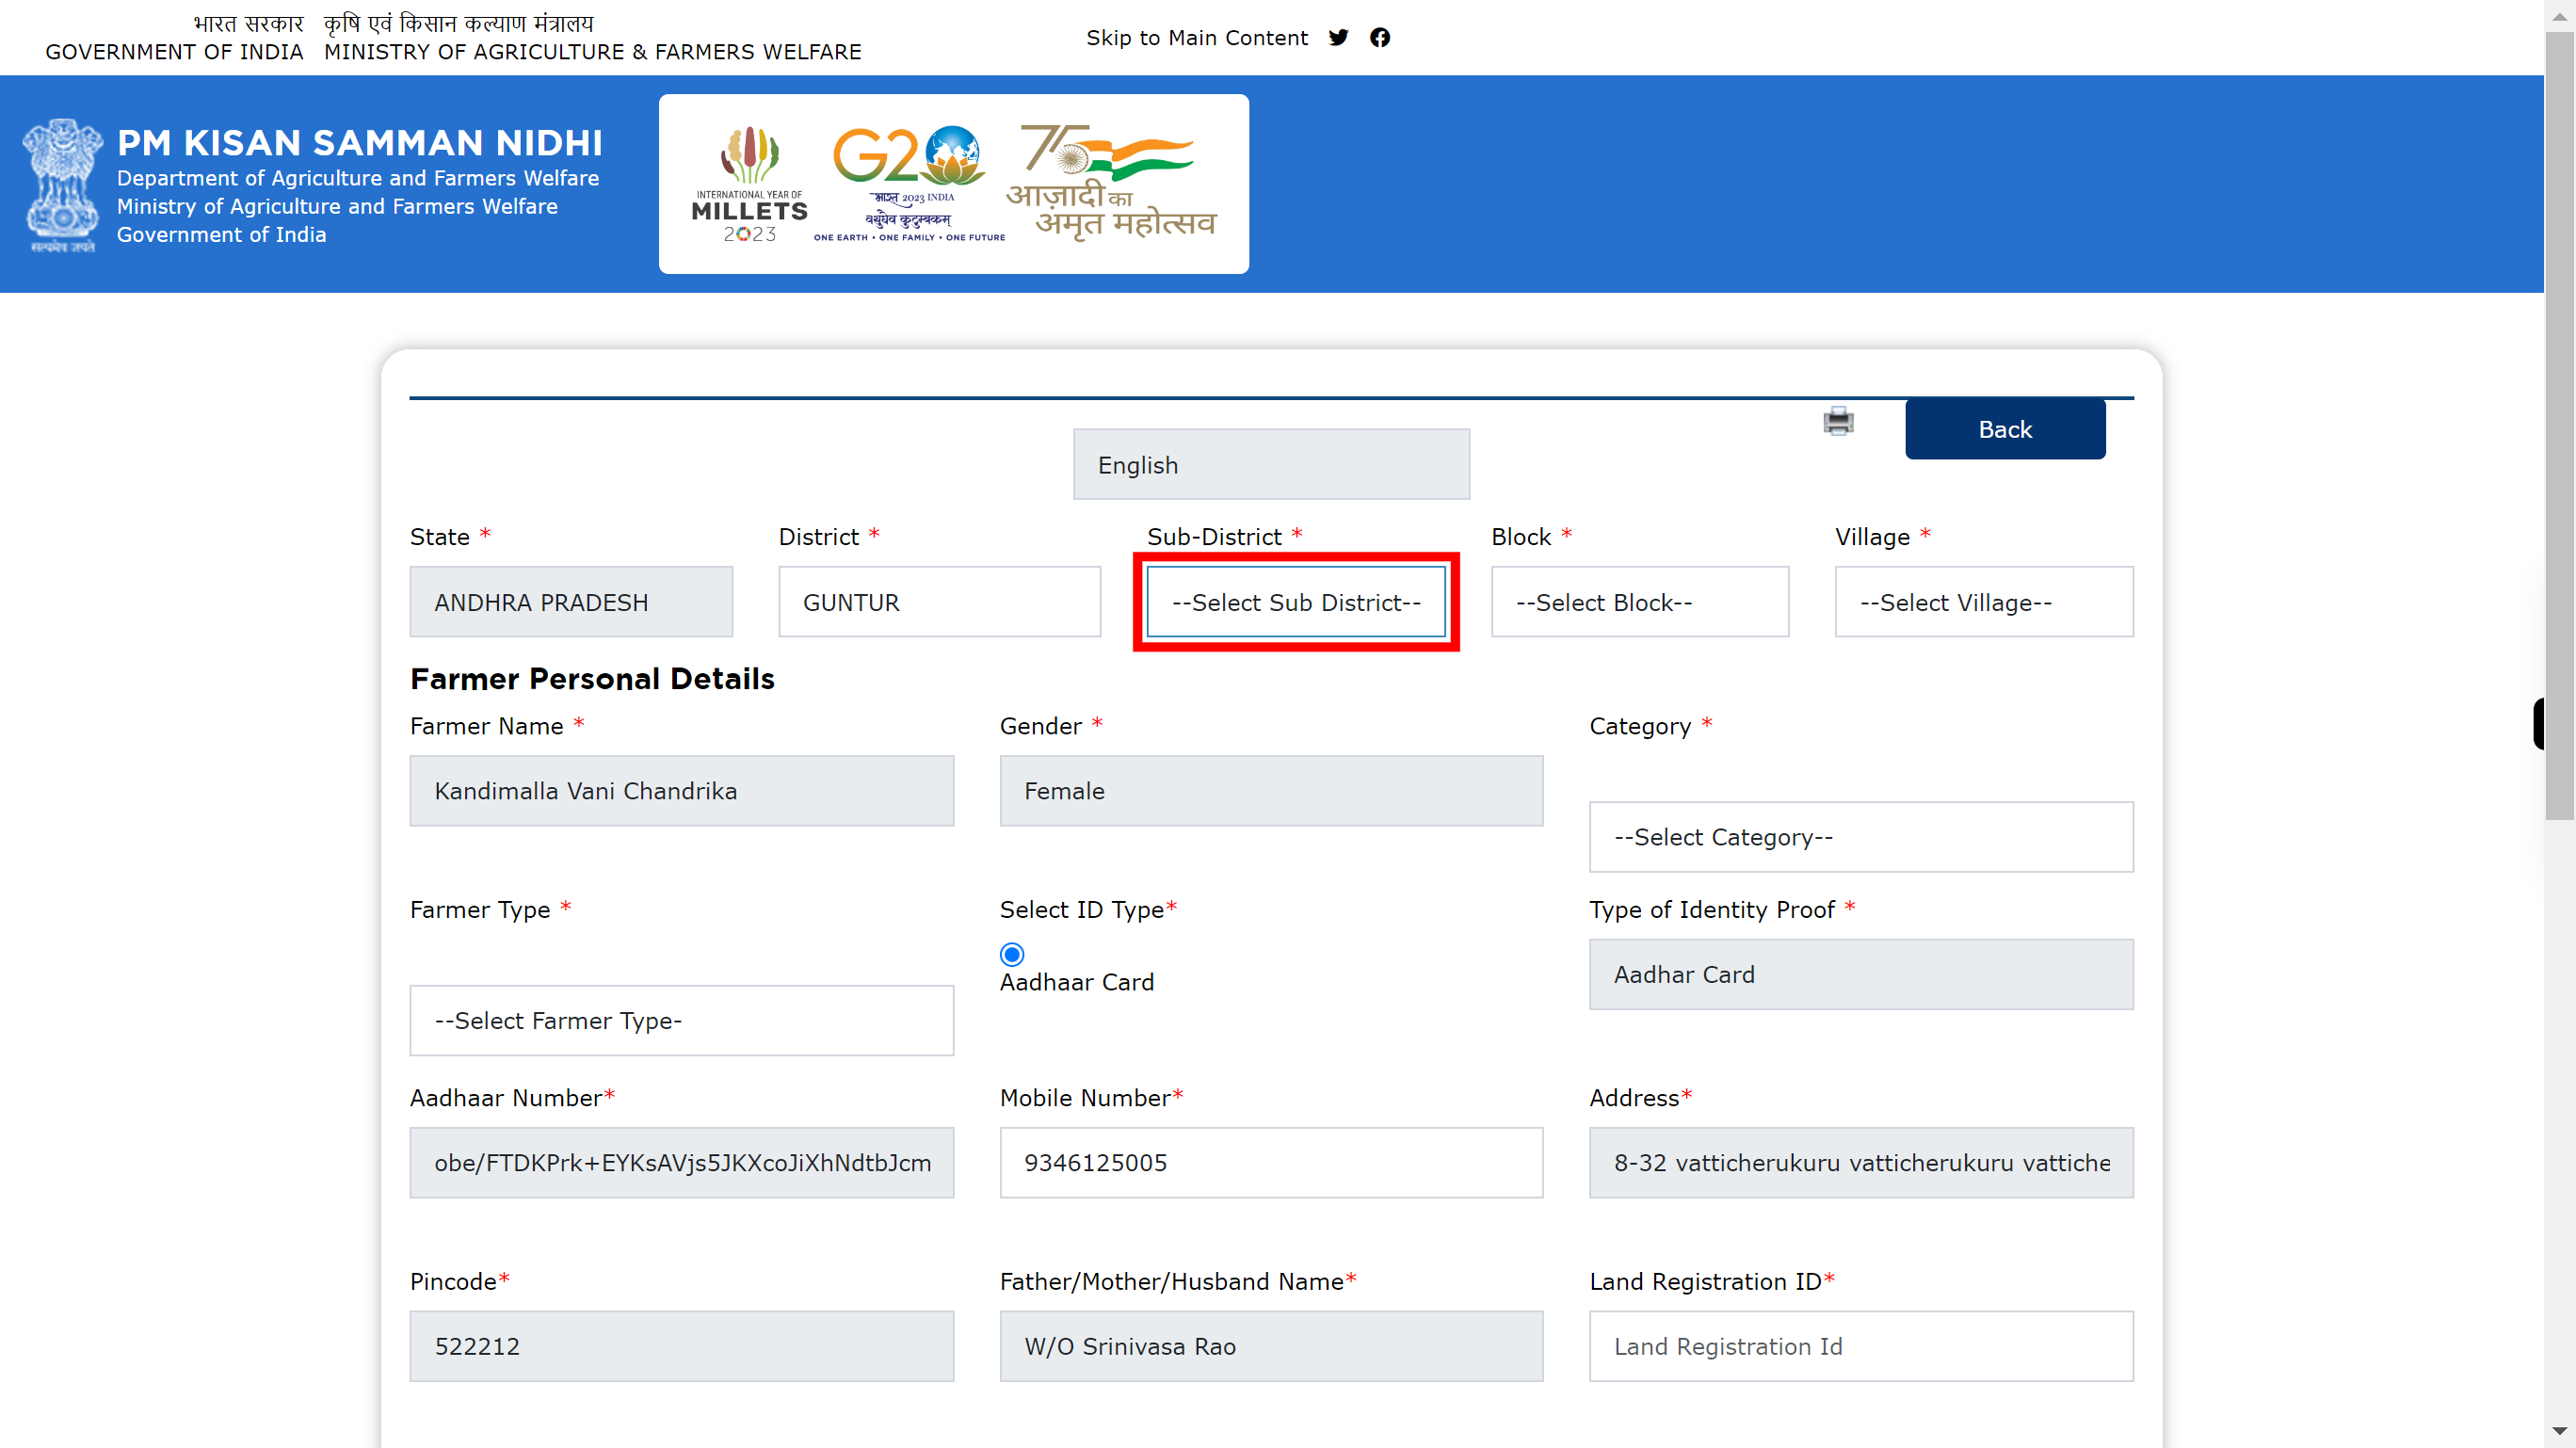
Click and Select the respective Sub District from the drop-down list. Once done, click on the 'Next' button in the Supervity instruction widget.
-
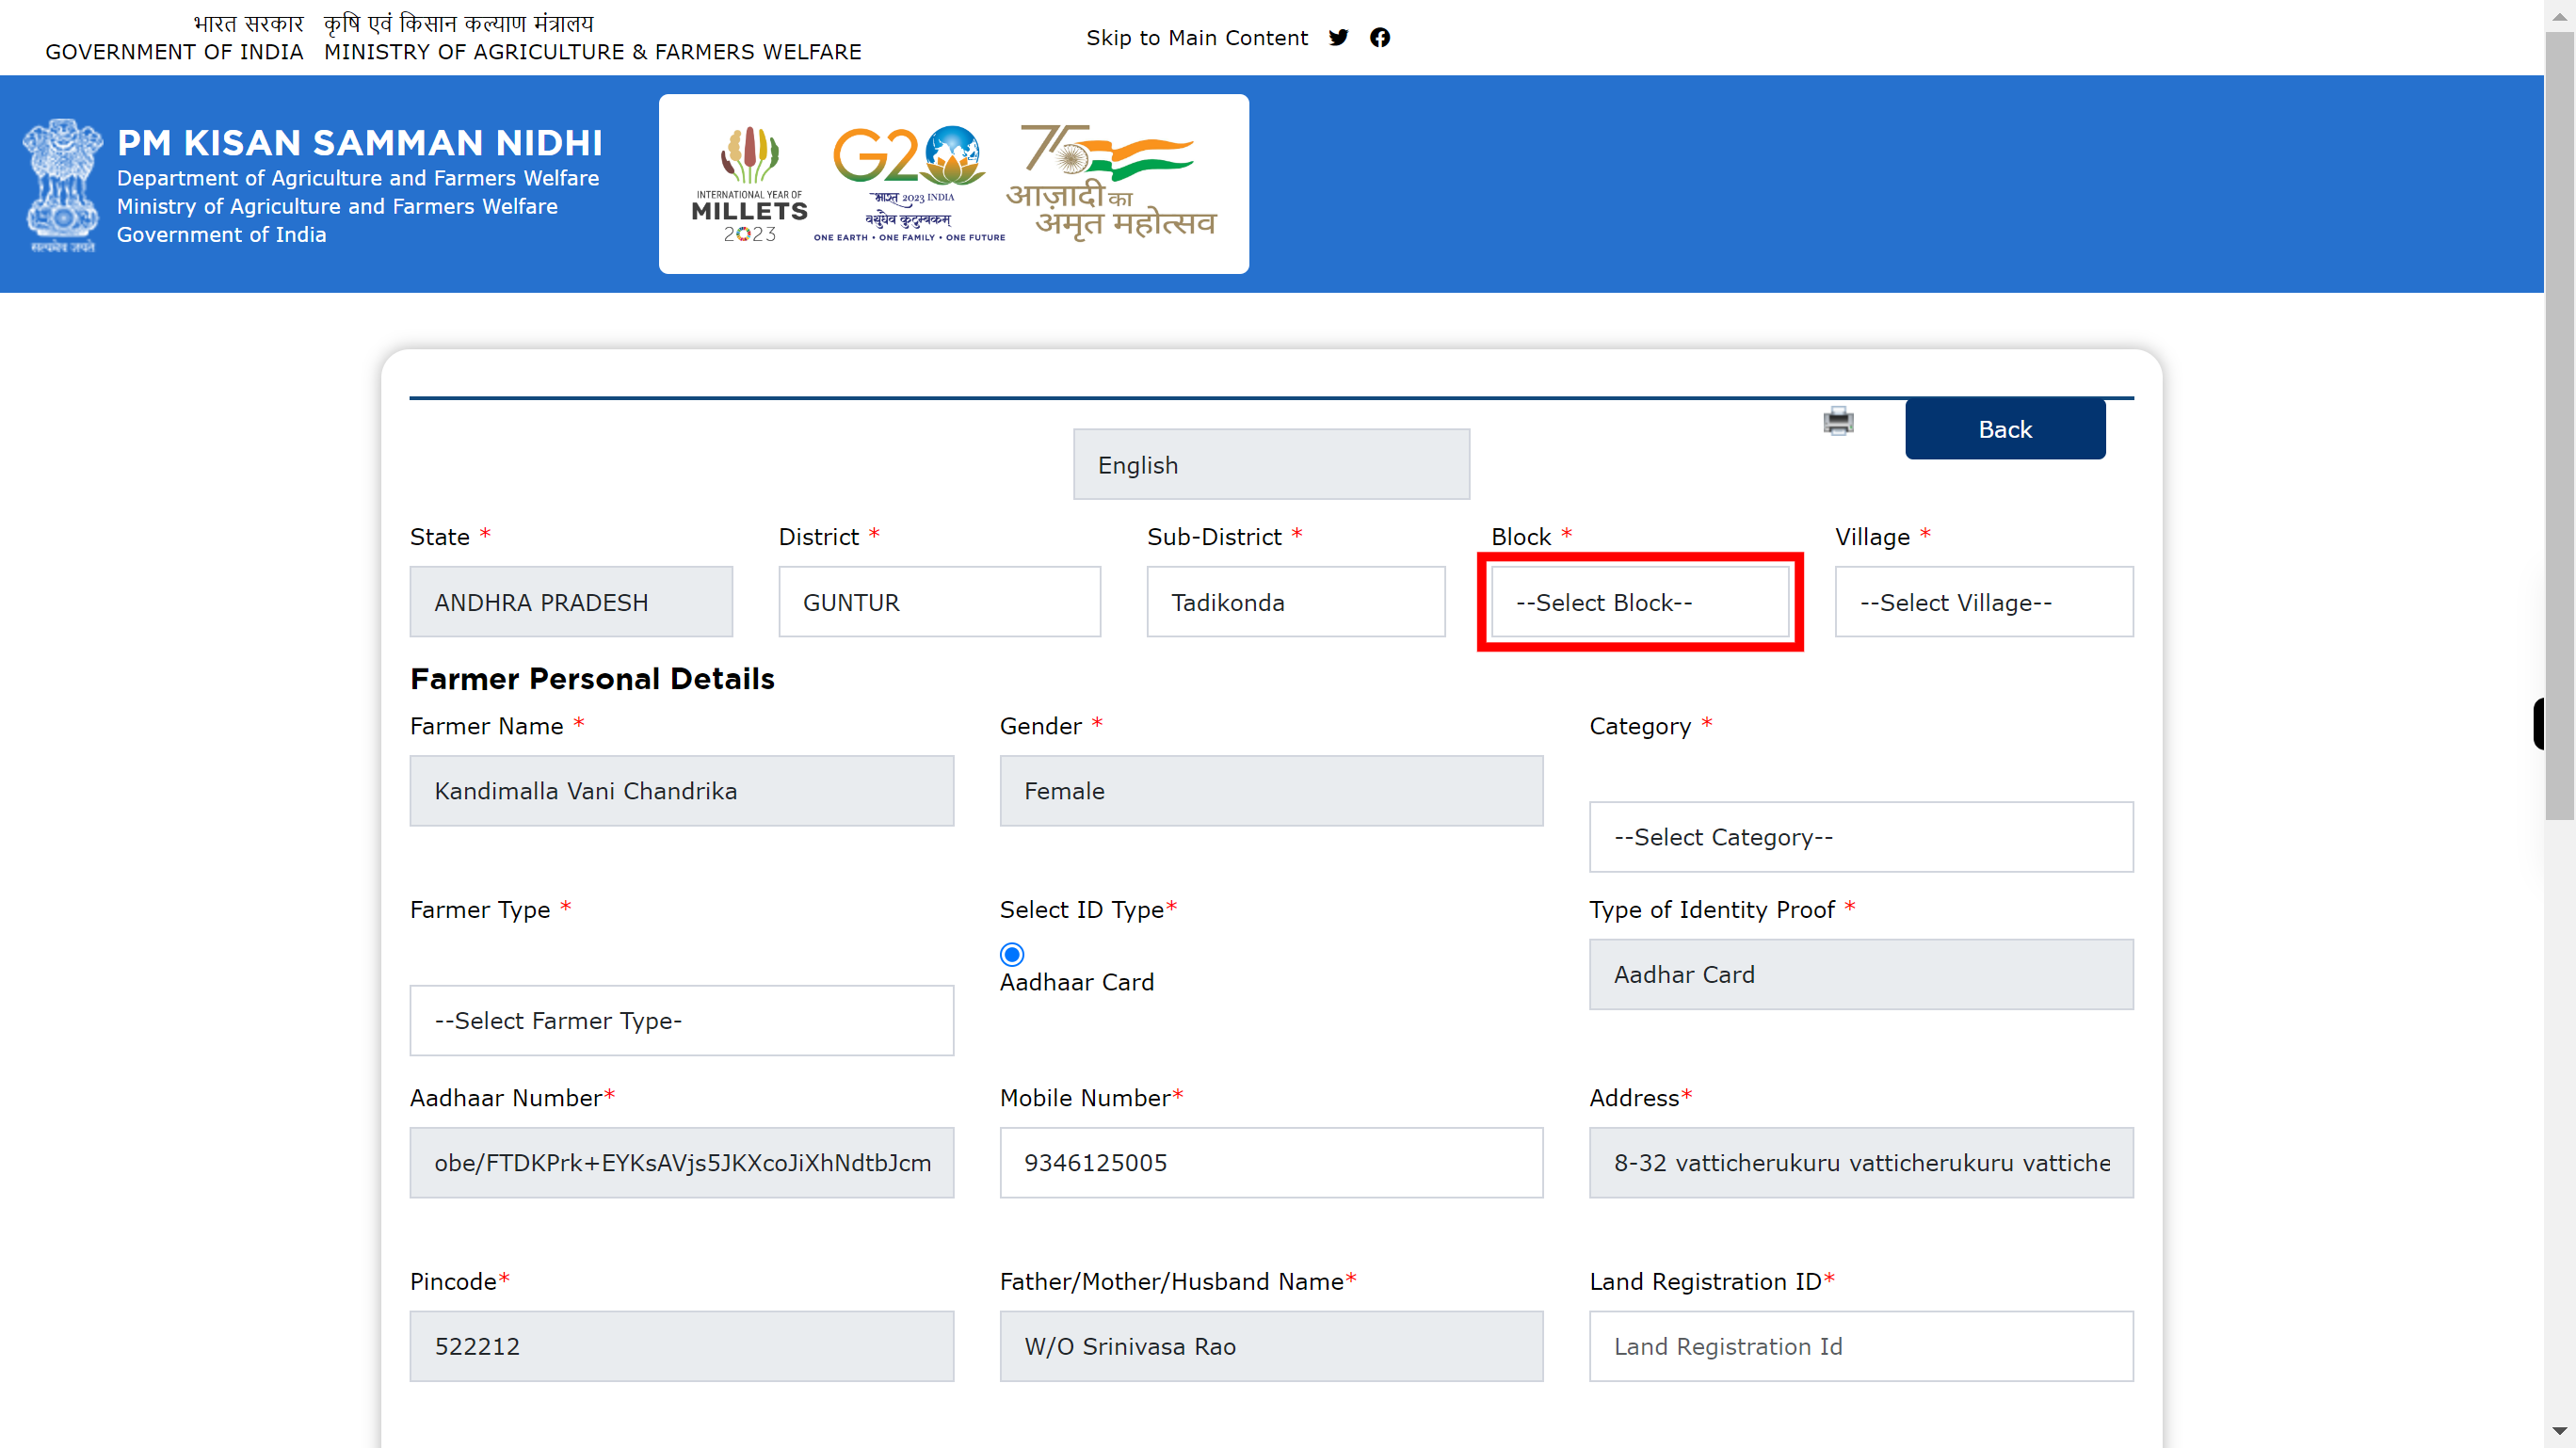
16.
Click and select the required Block from drop-down list. Once done, click on the 'Next' button in the Supervity instruction widget.
-
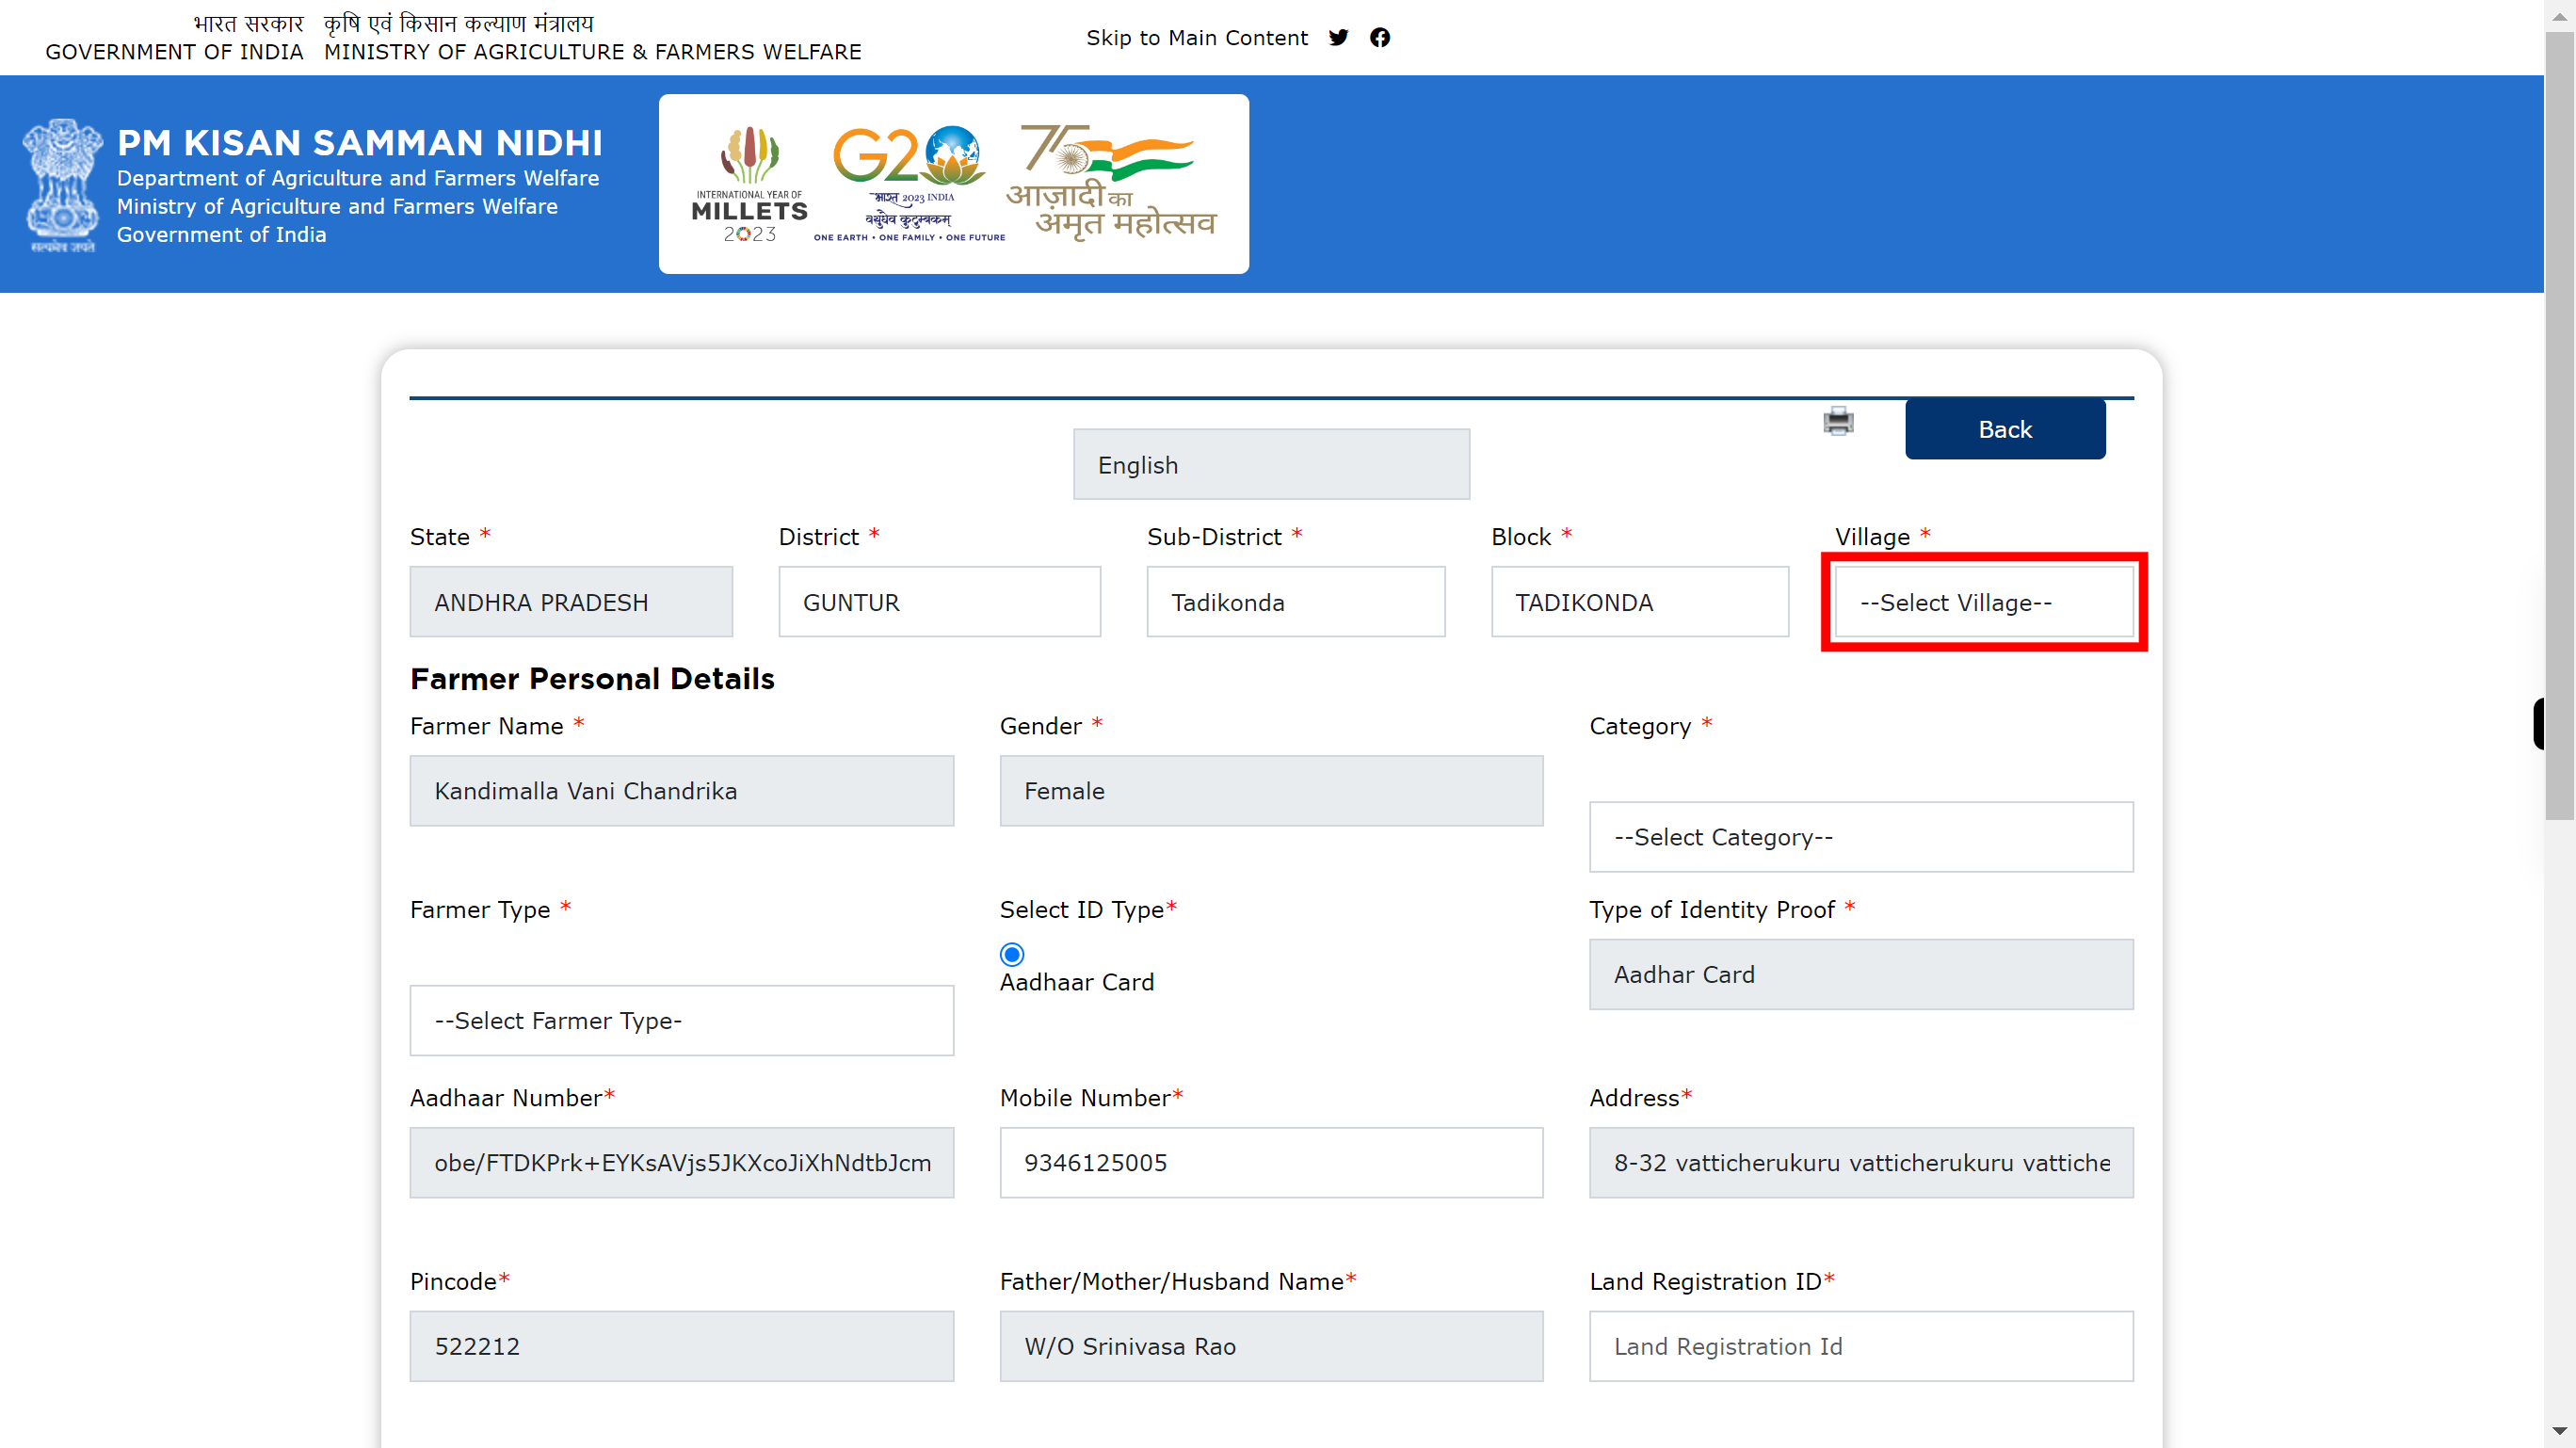
17.
Click and select the respective Village from the drop-down list. Once done, click on the 'Next' button in the Supervity instruction widget.
-
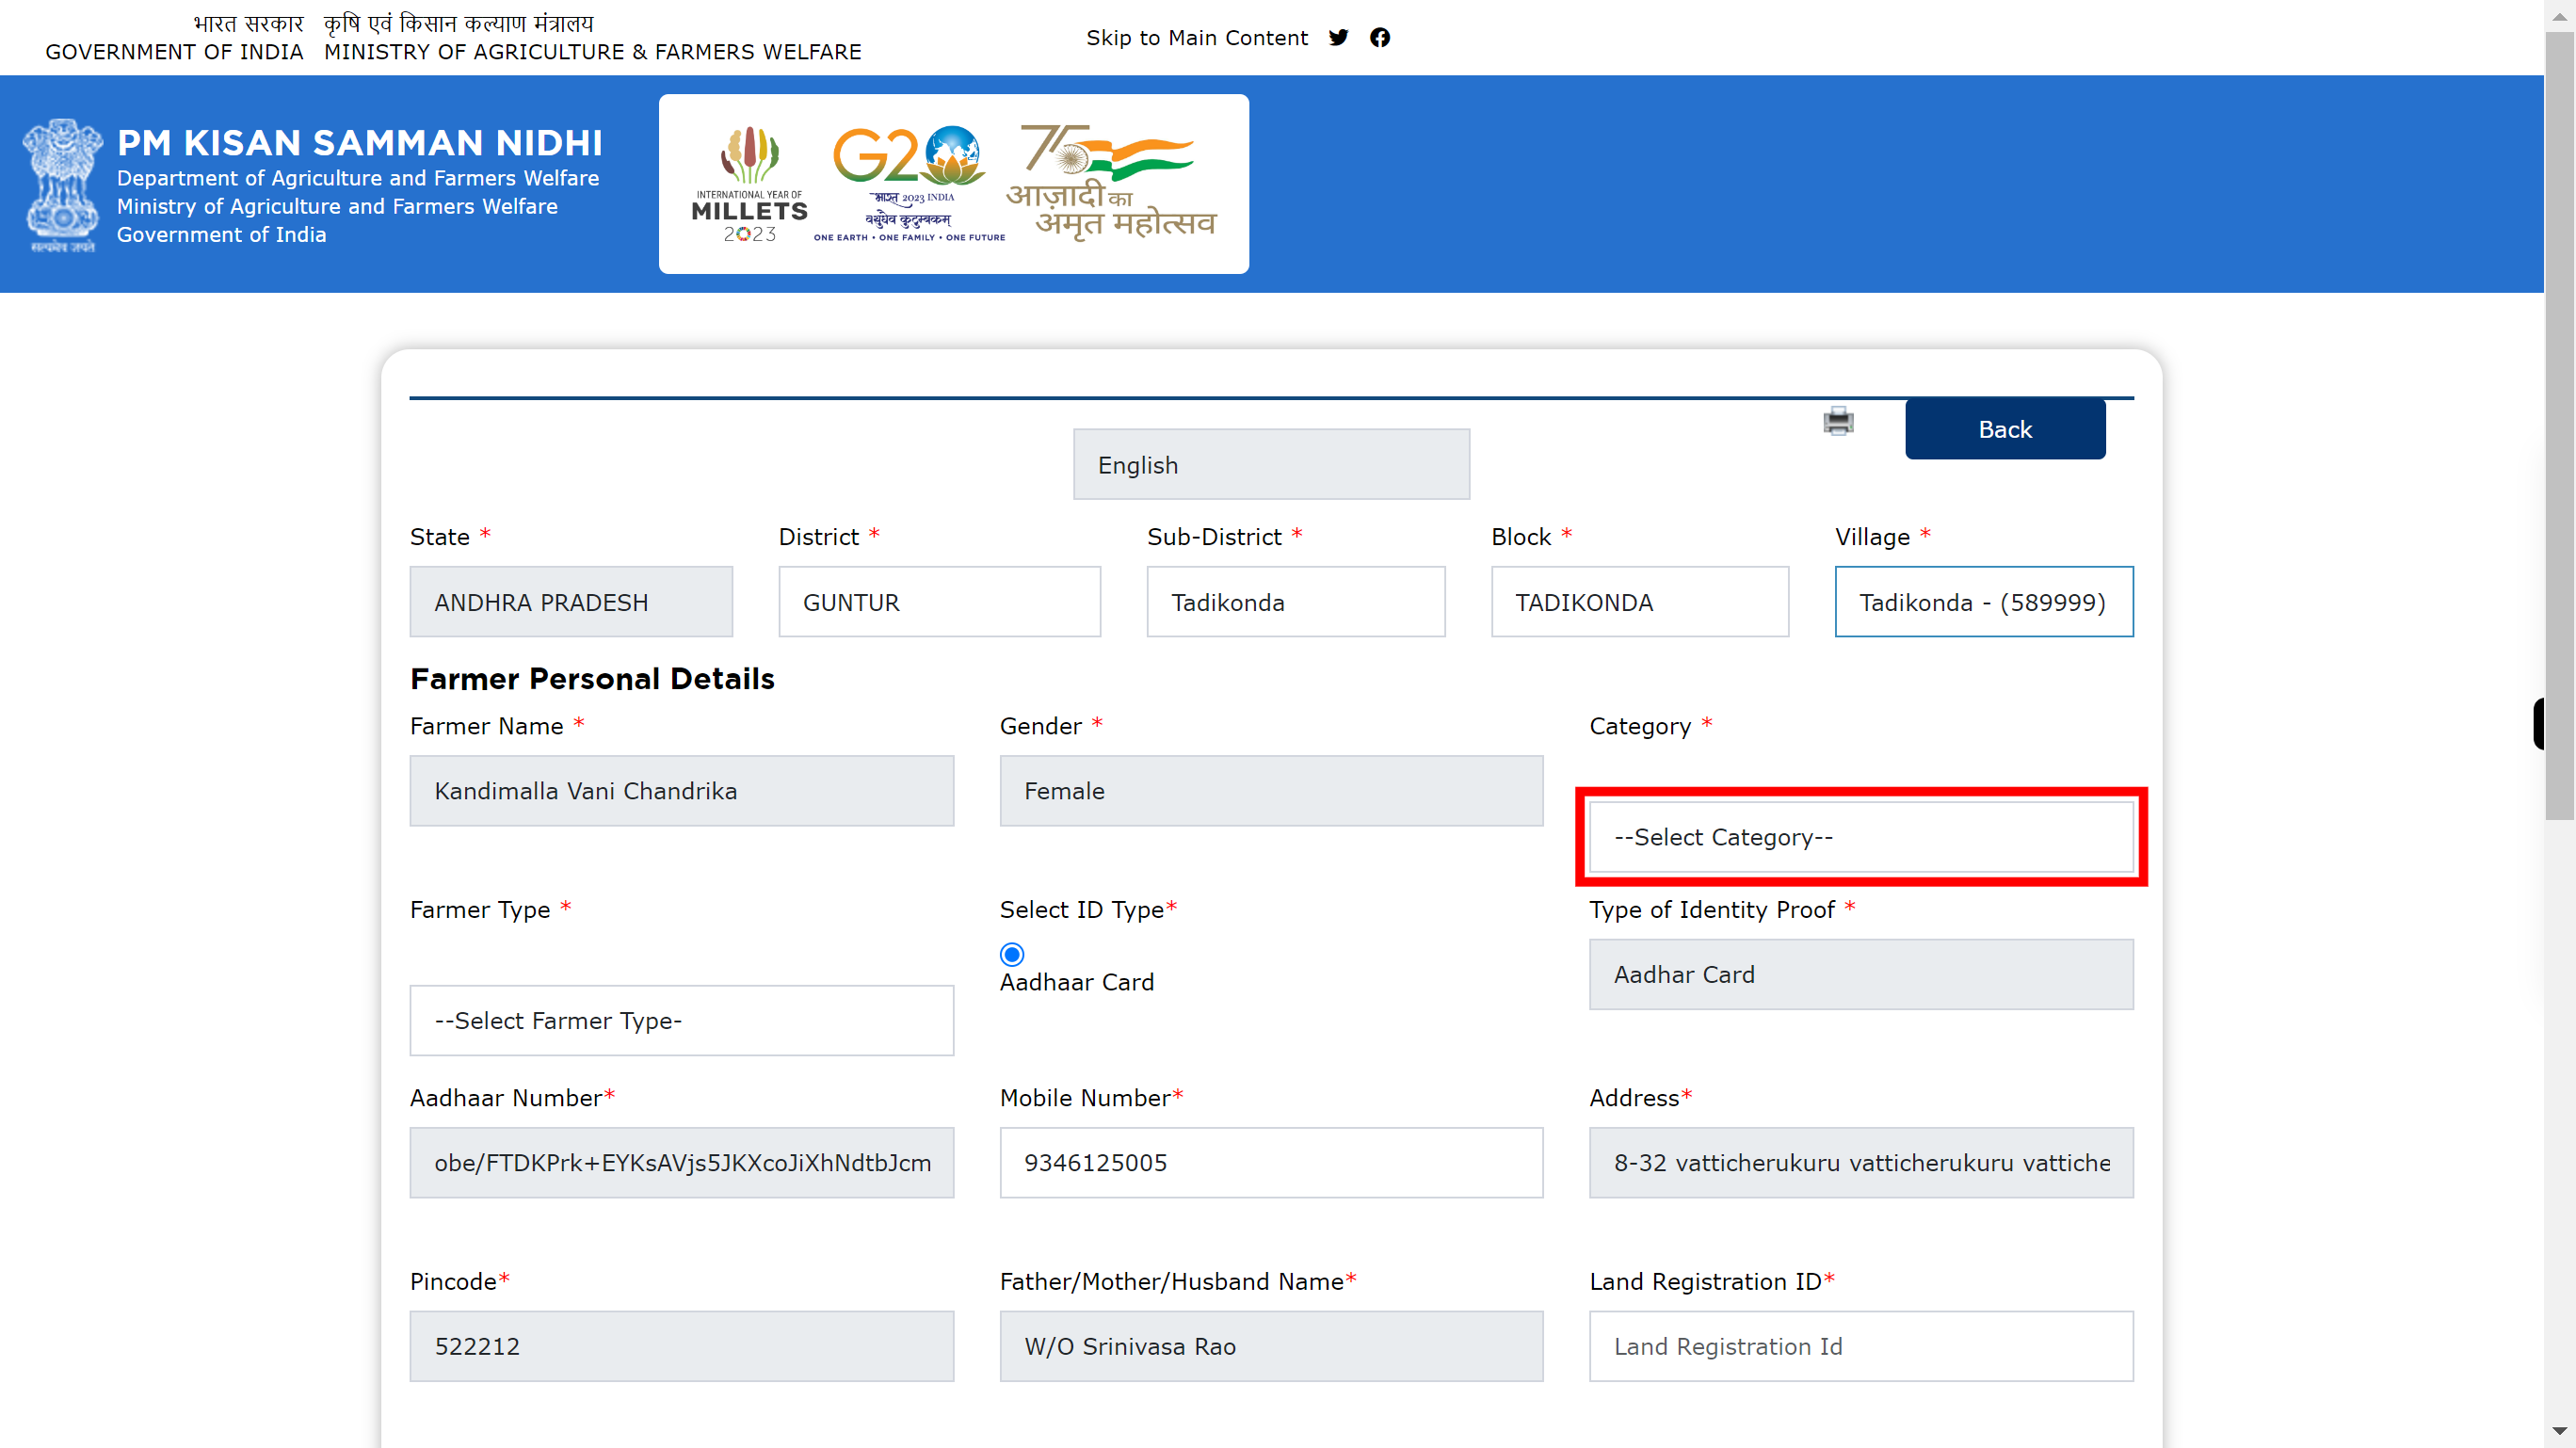
18.
Click and select your Category from the drop-down list. Once done, click on the 'Next' button in the Supervity instruction widget.
-
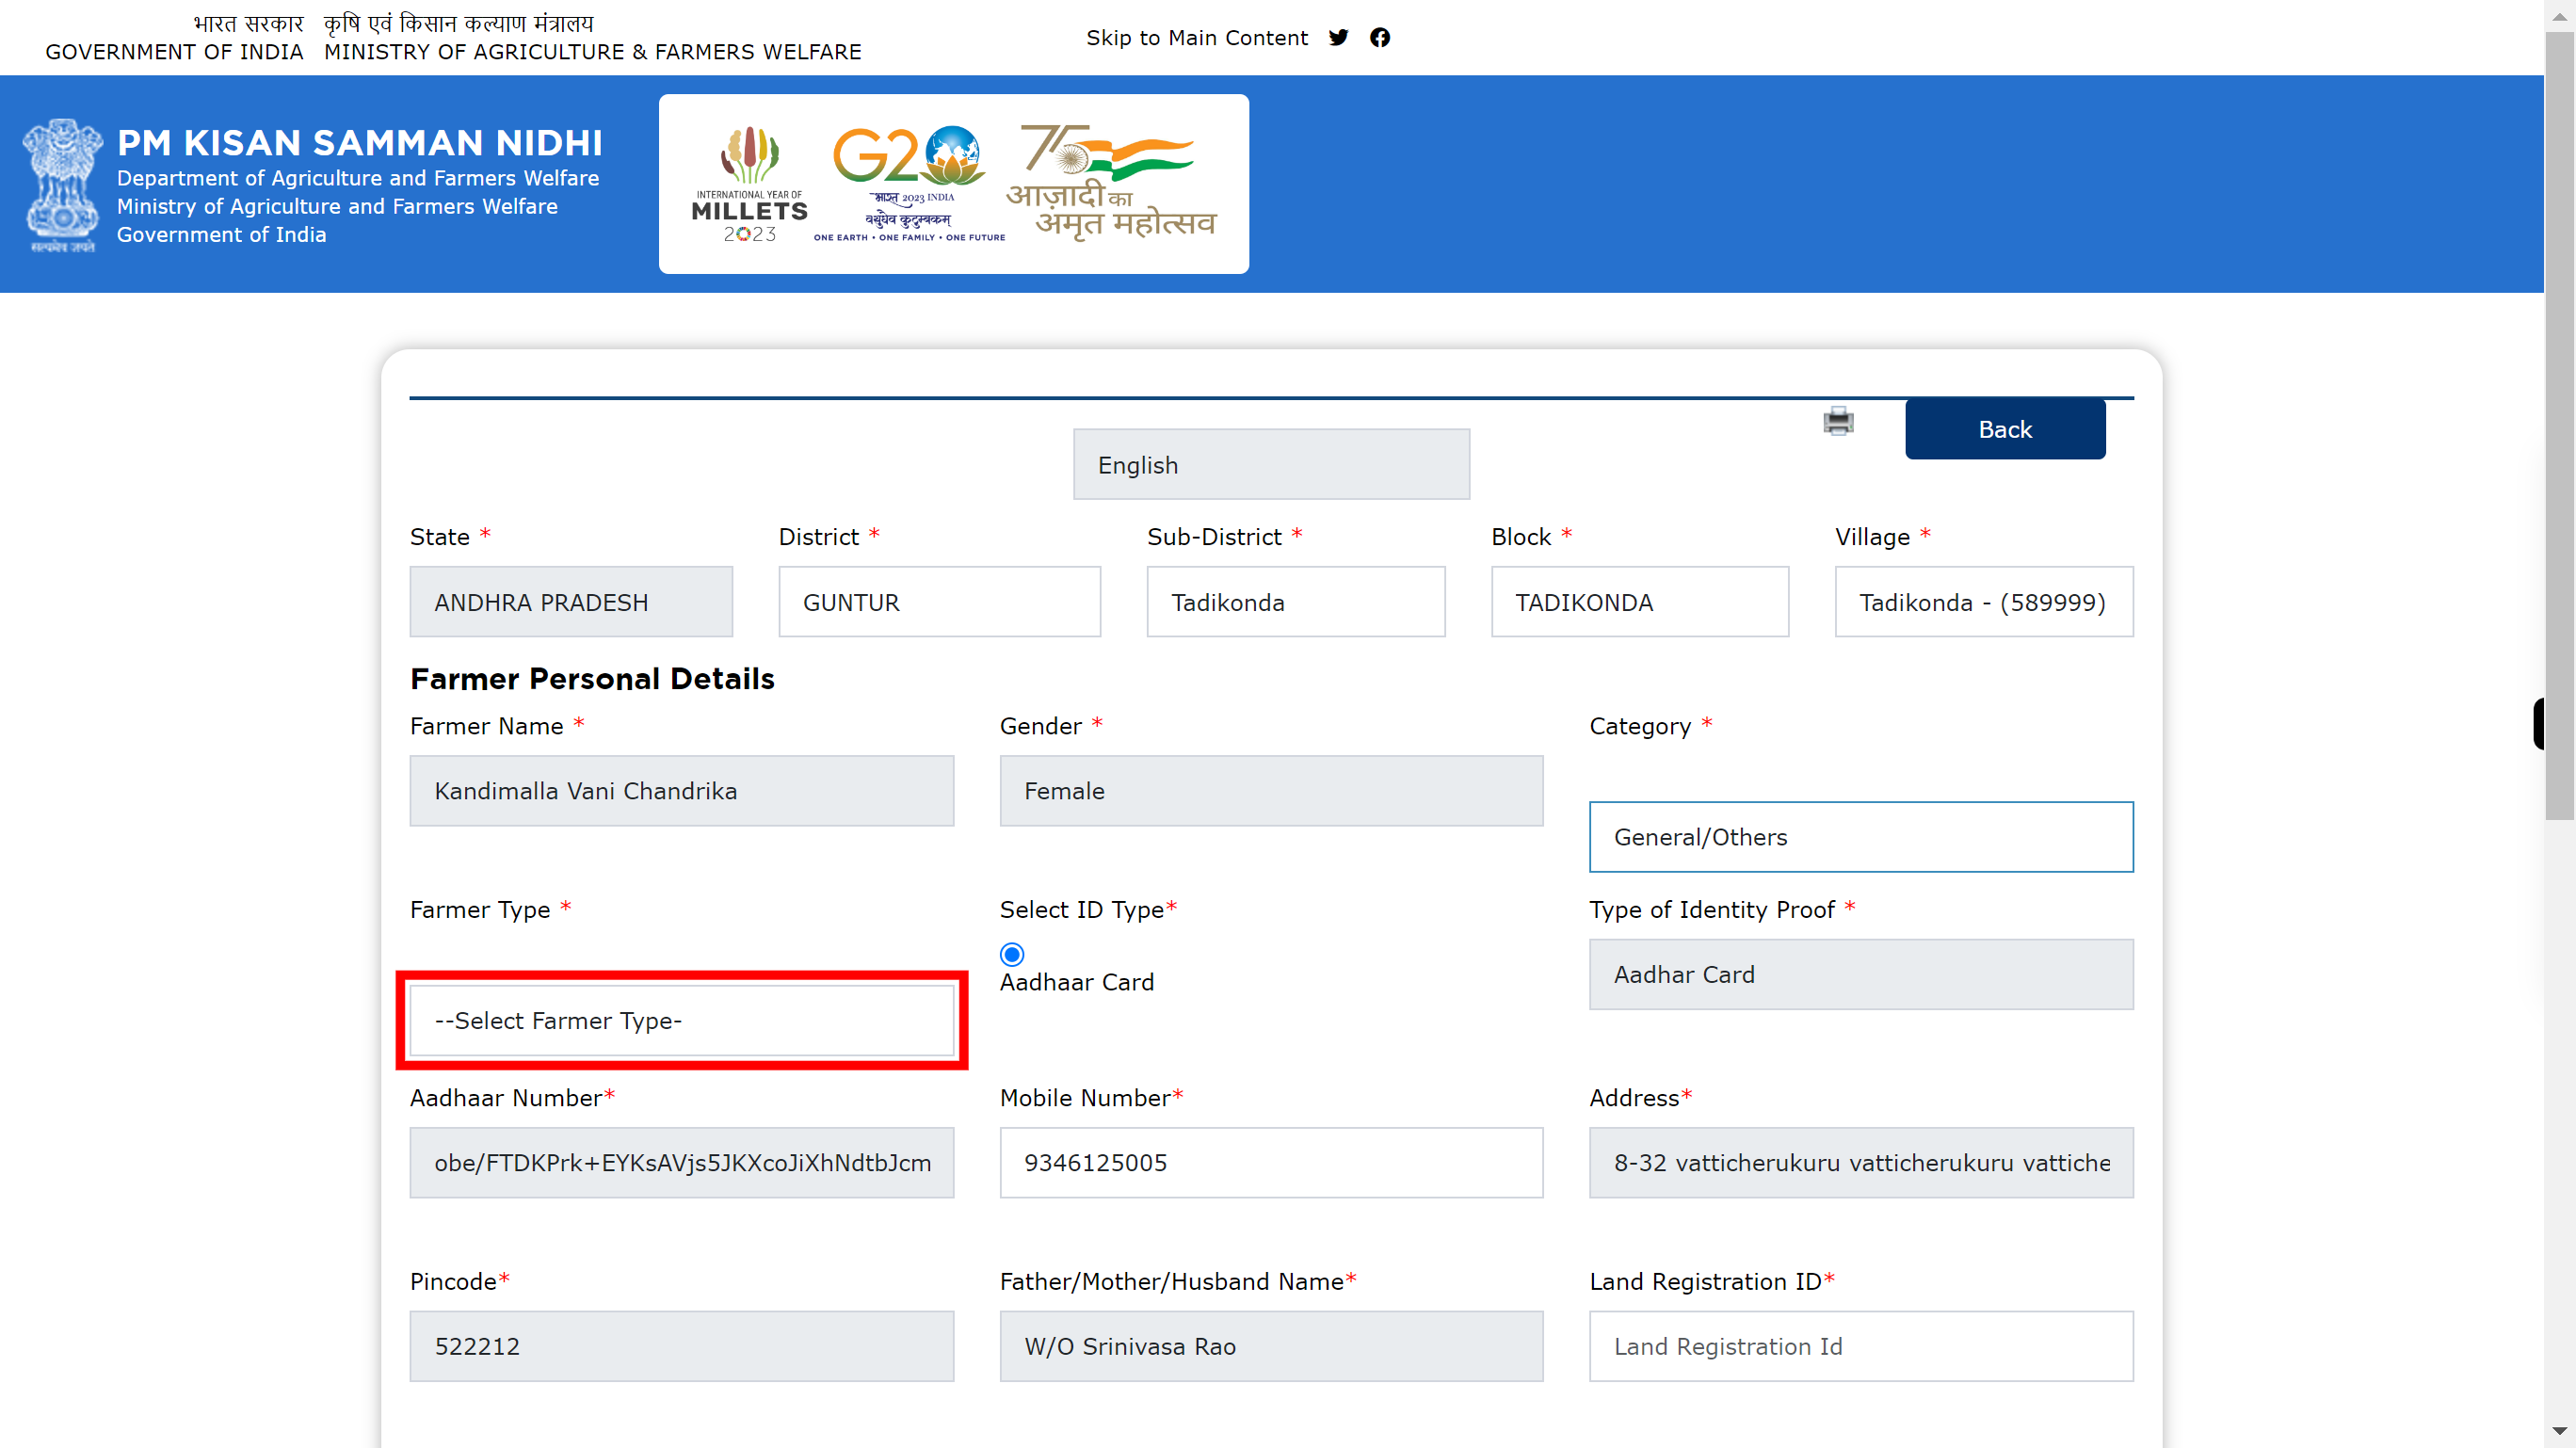
19.
Click and select the Farmer Type from the drop-down list Once done, click on the 'Next' button in the Supervity instruction widget.
-
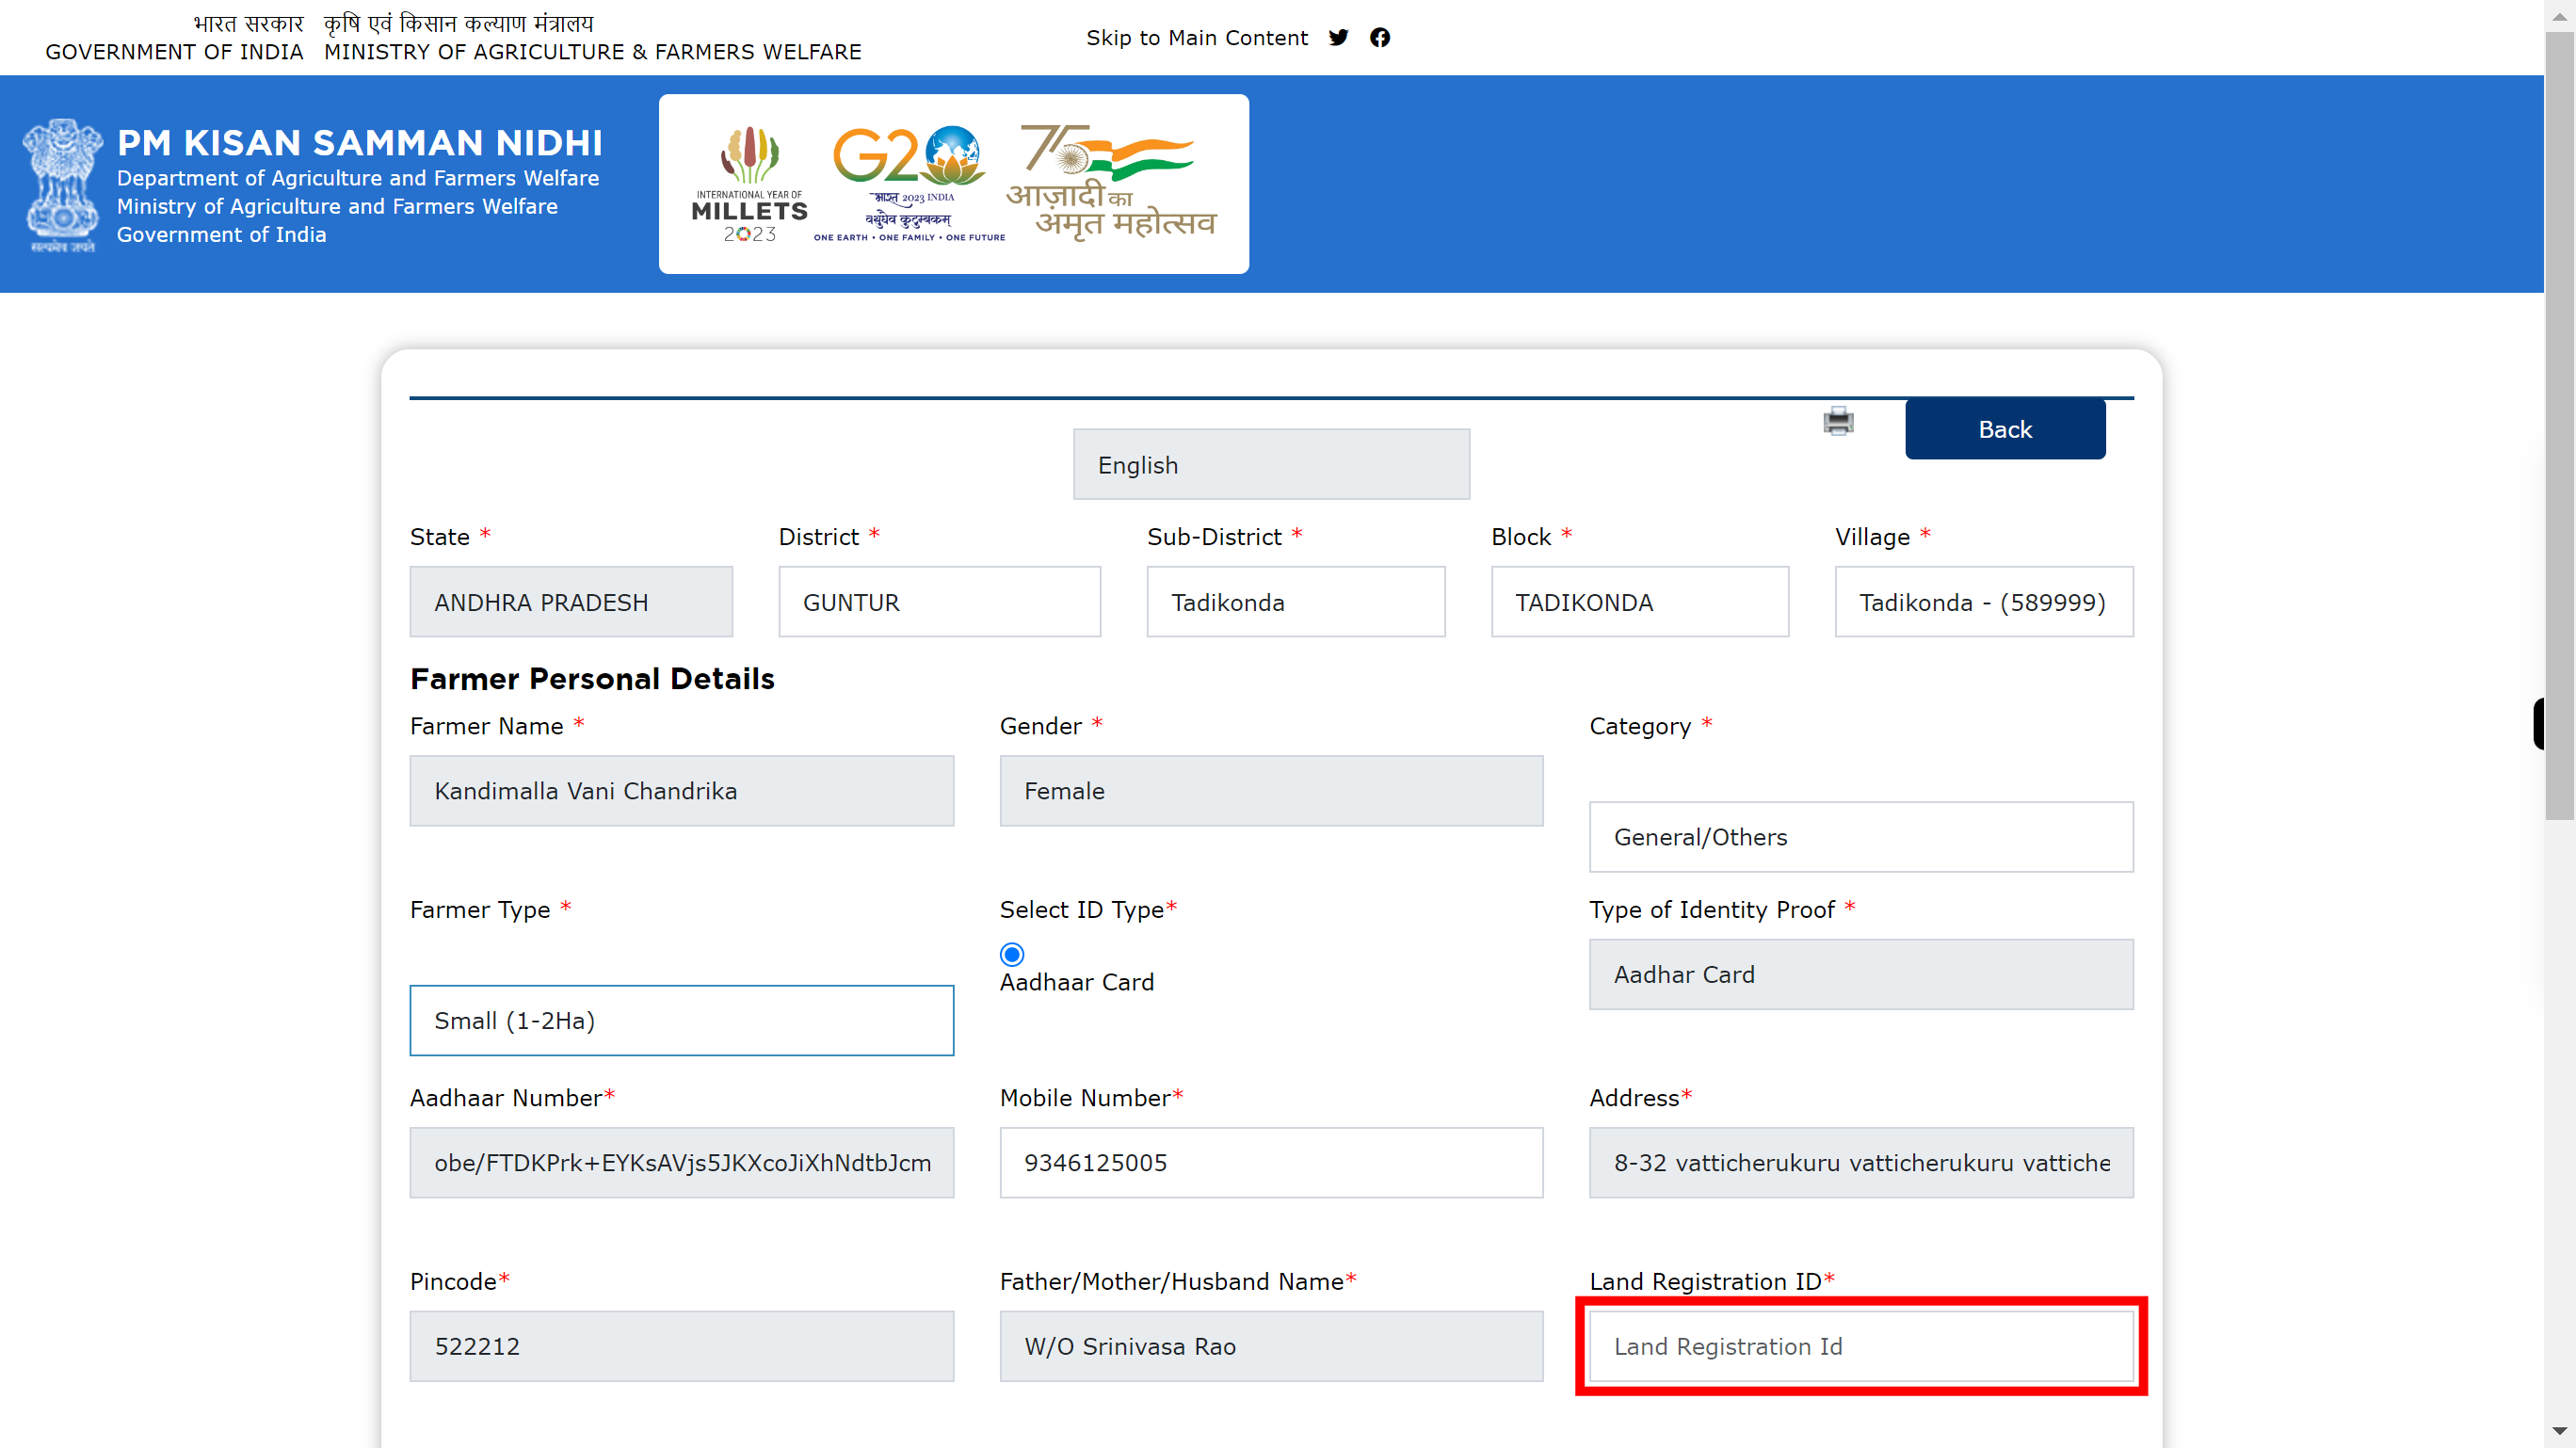
20.
Click and enter Land Registration Id. Once done, click on the 'Next' button in the Supervity instruction widget.
-
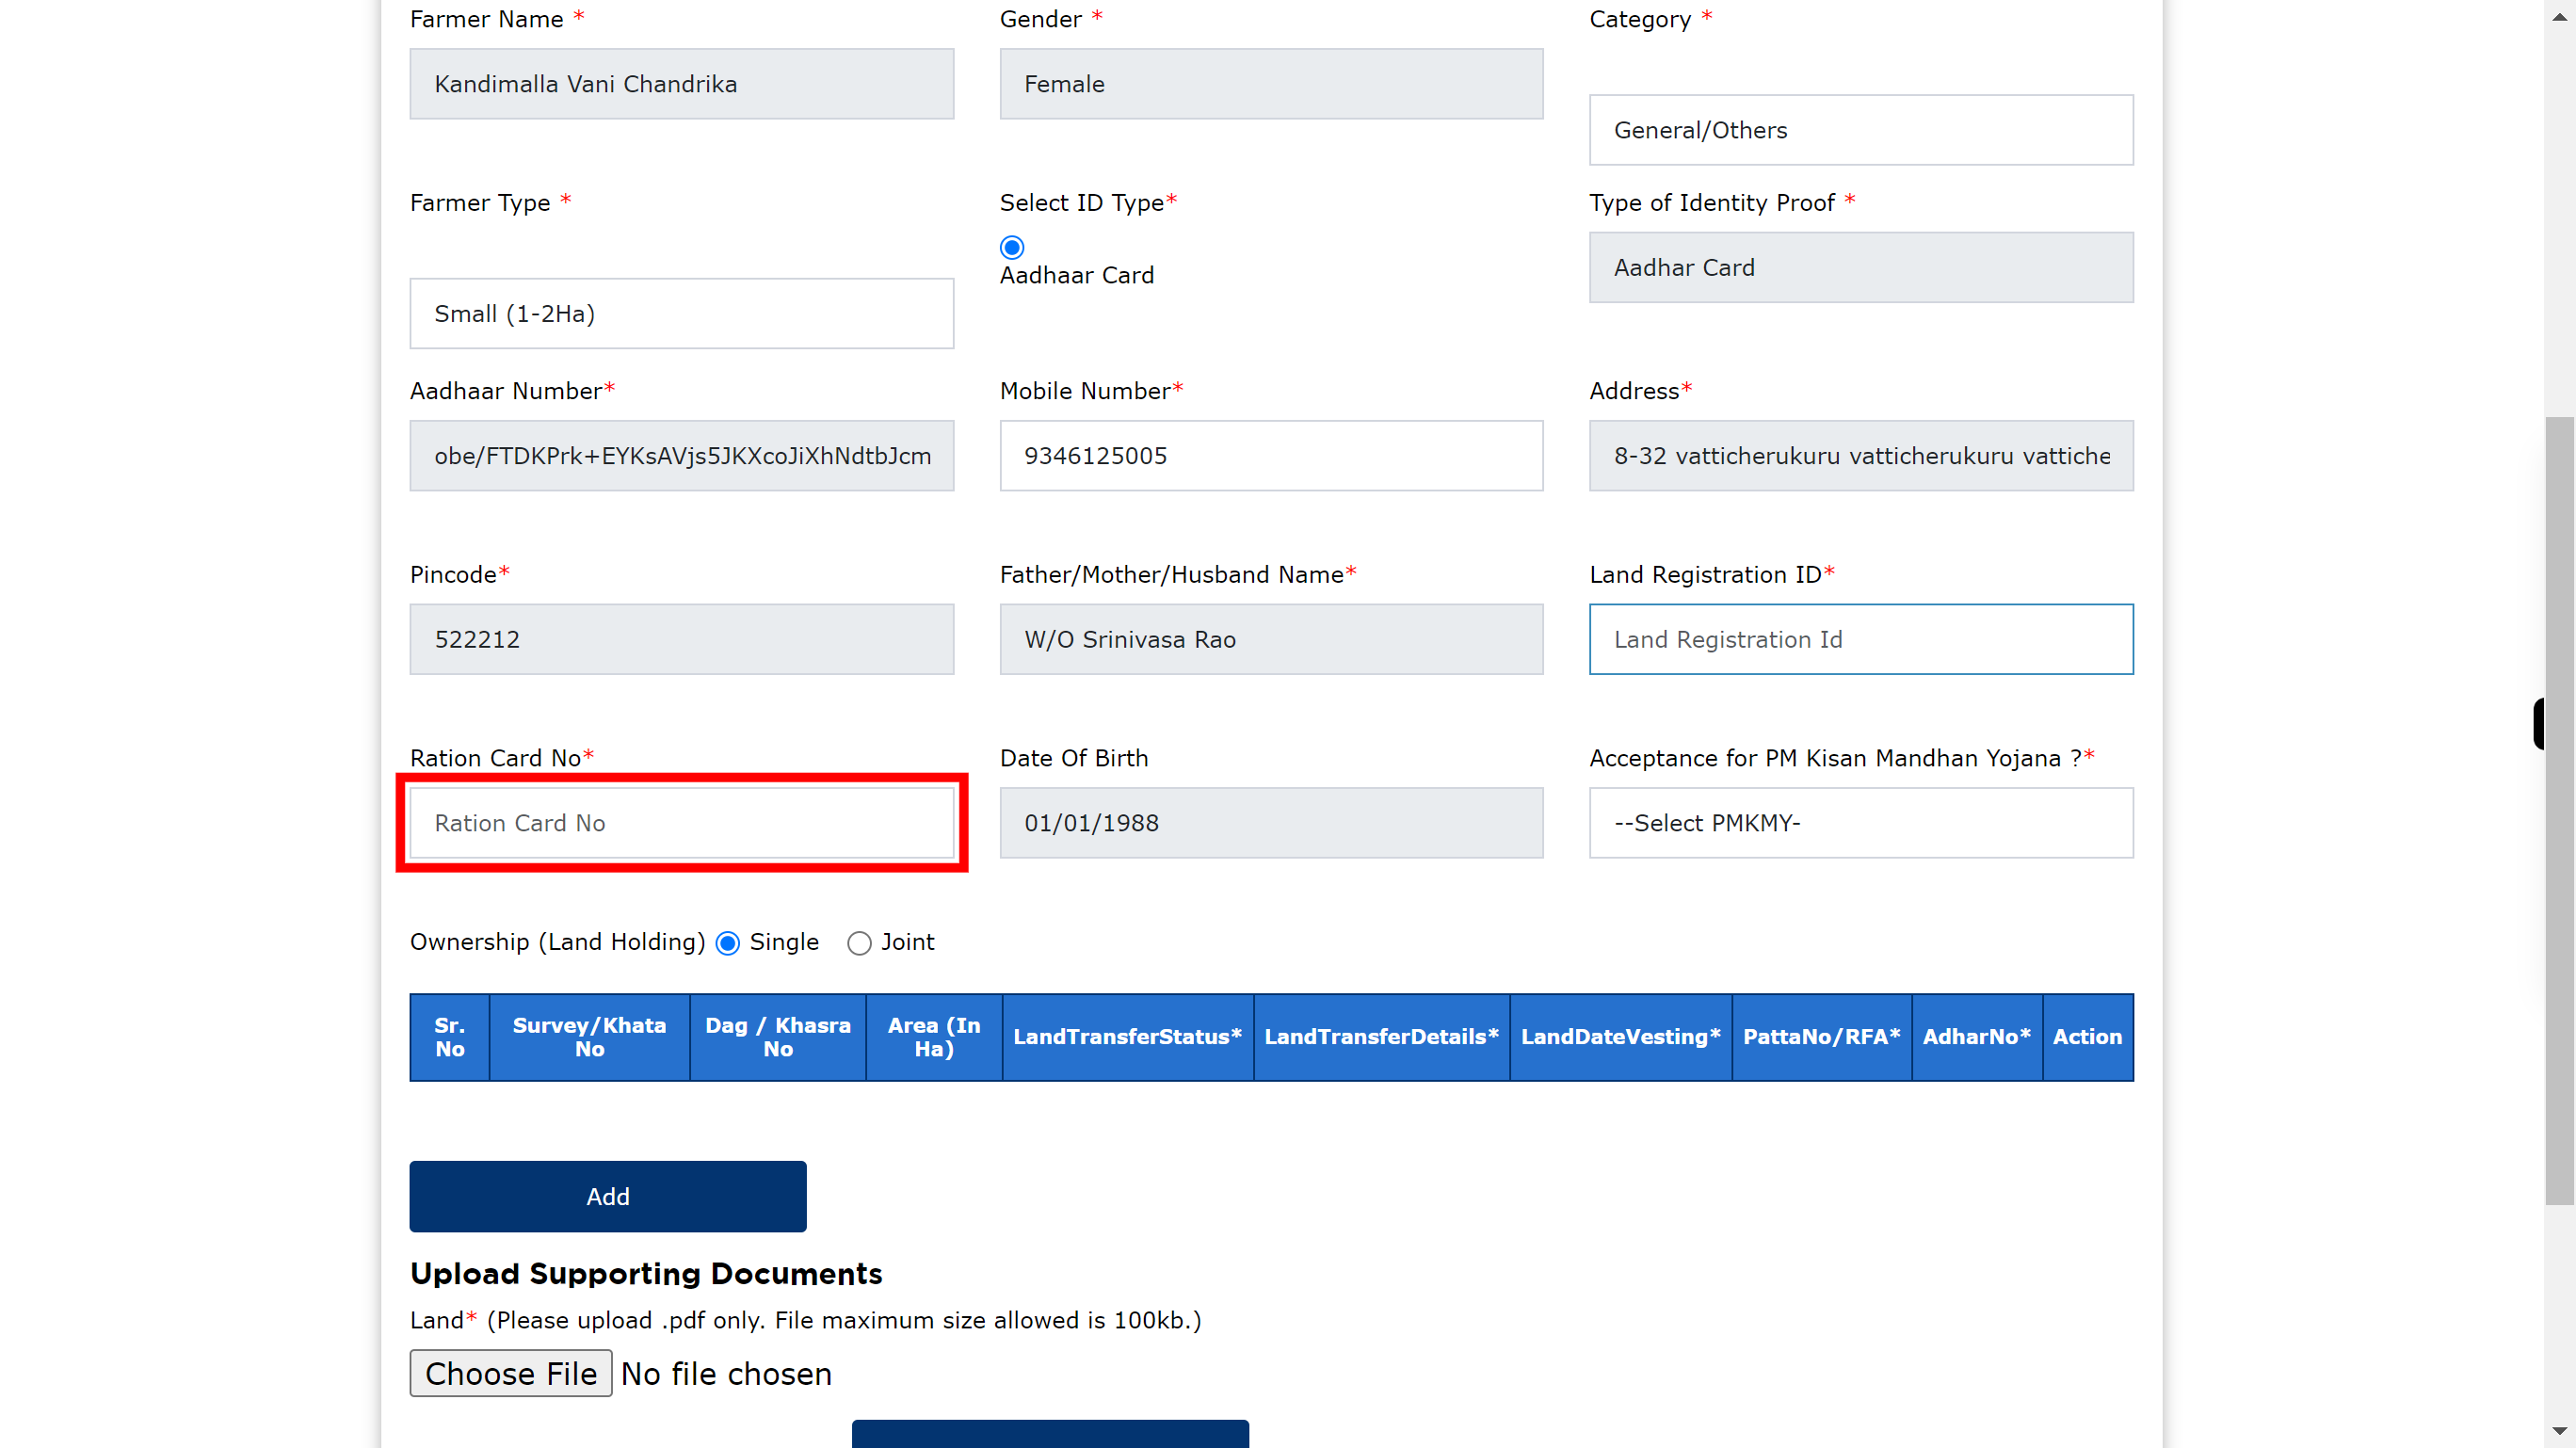
21.
Click and enter the Ration Card No. Once done, click on the 'Next' button in the Supervity instruction widget.
-
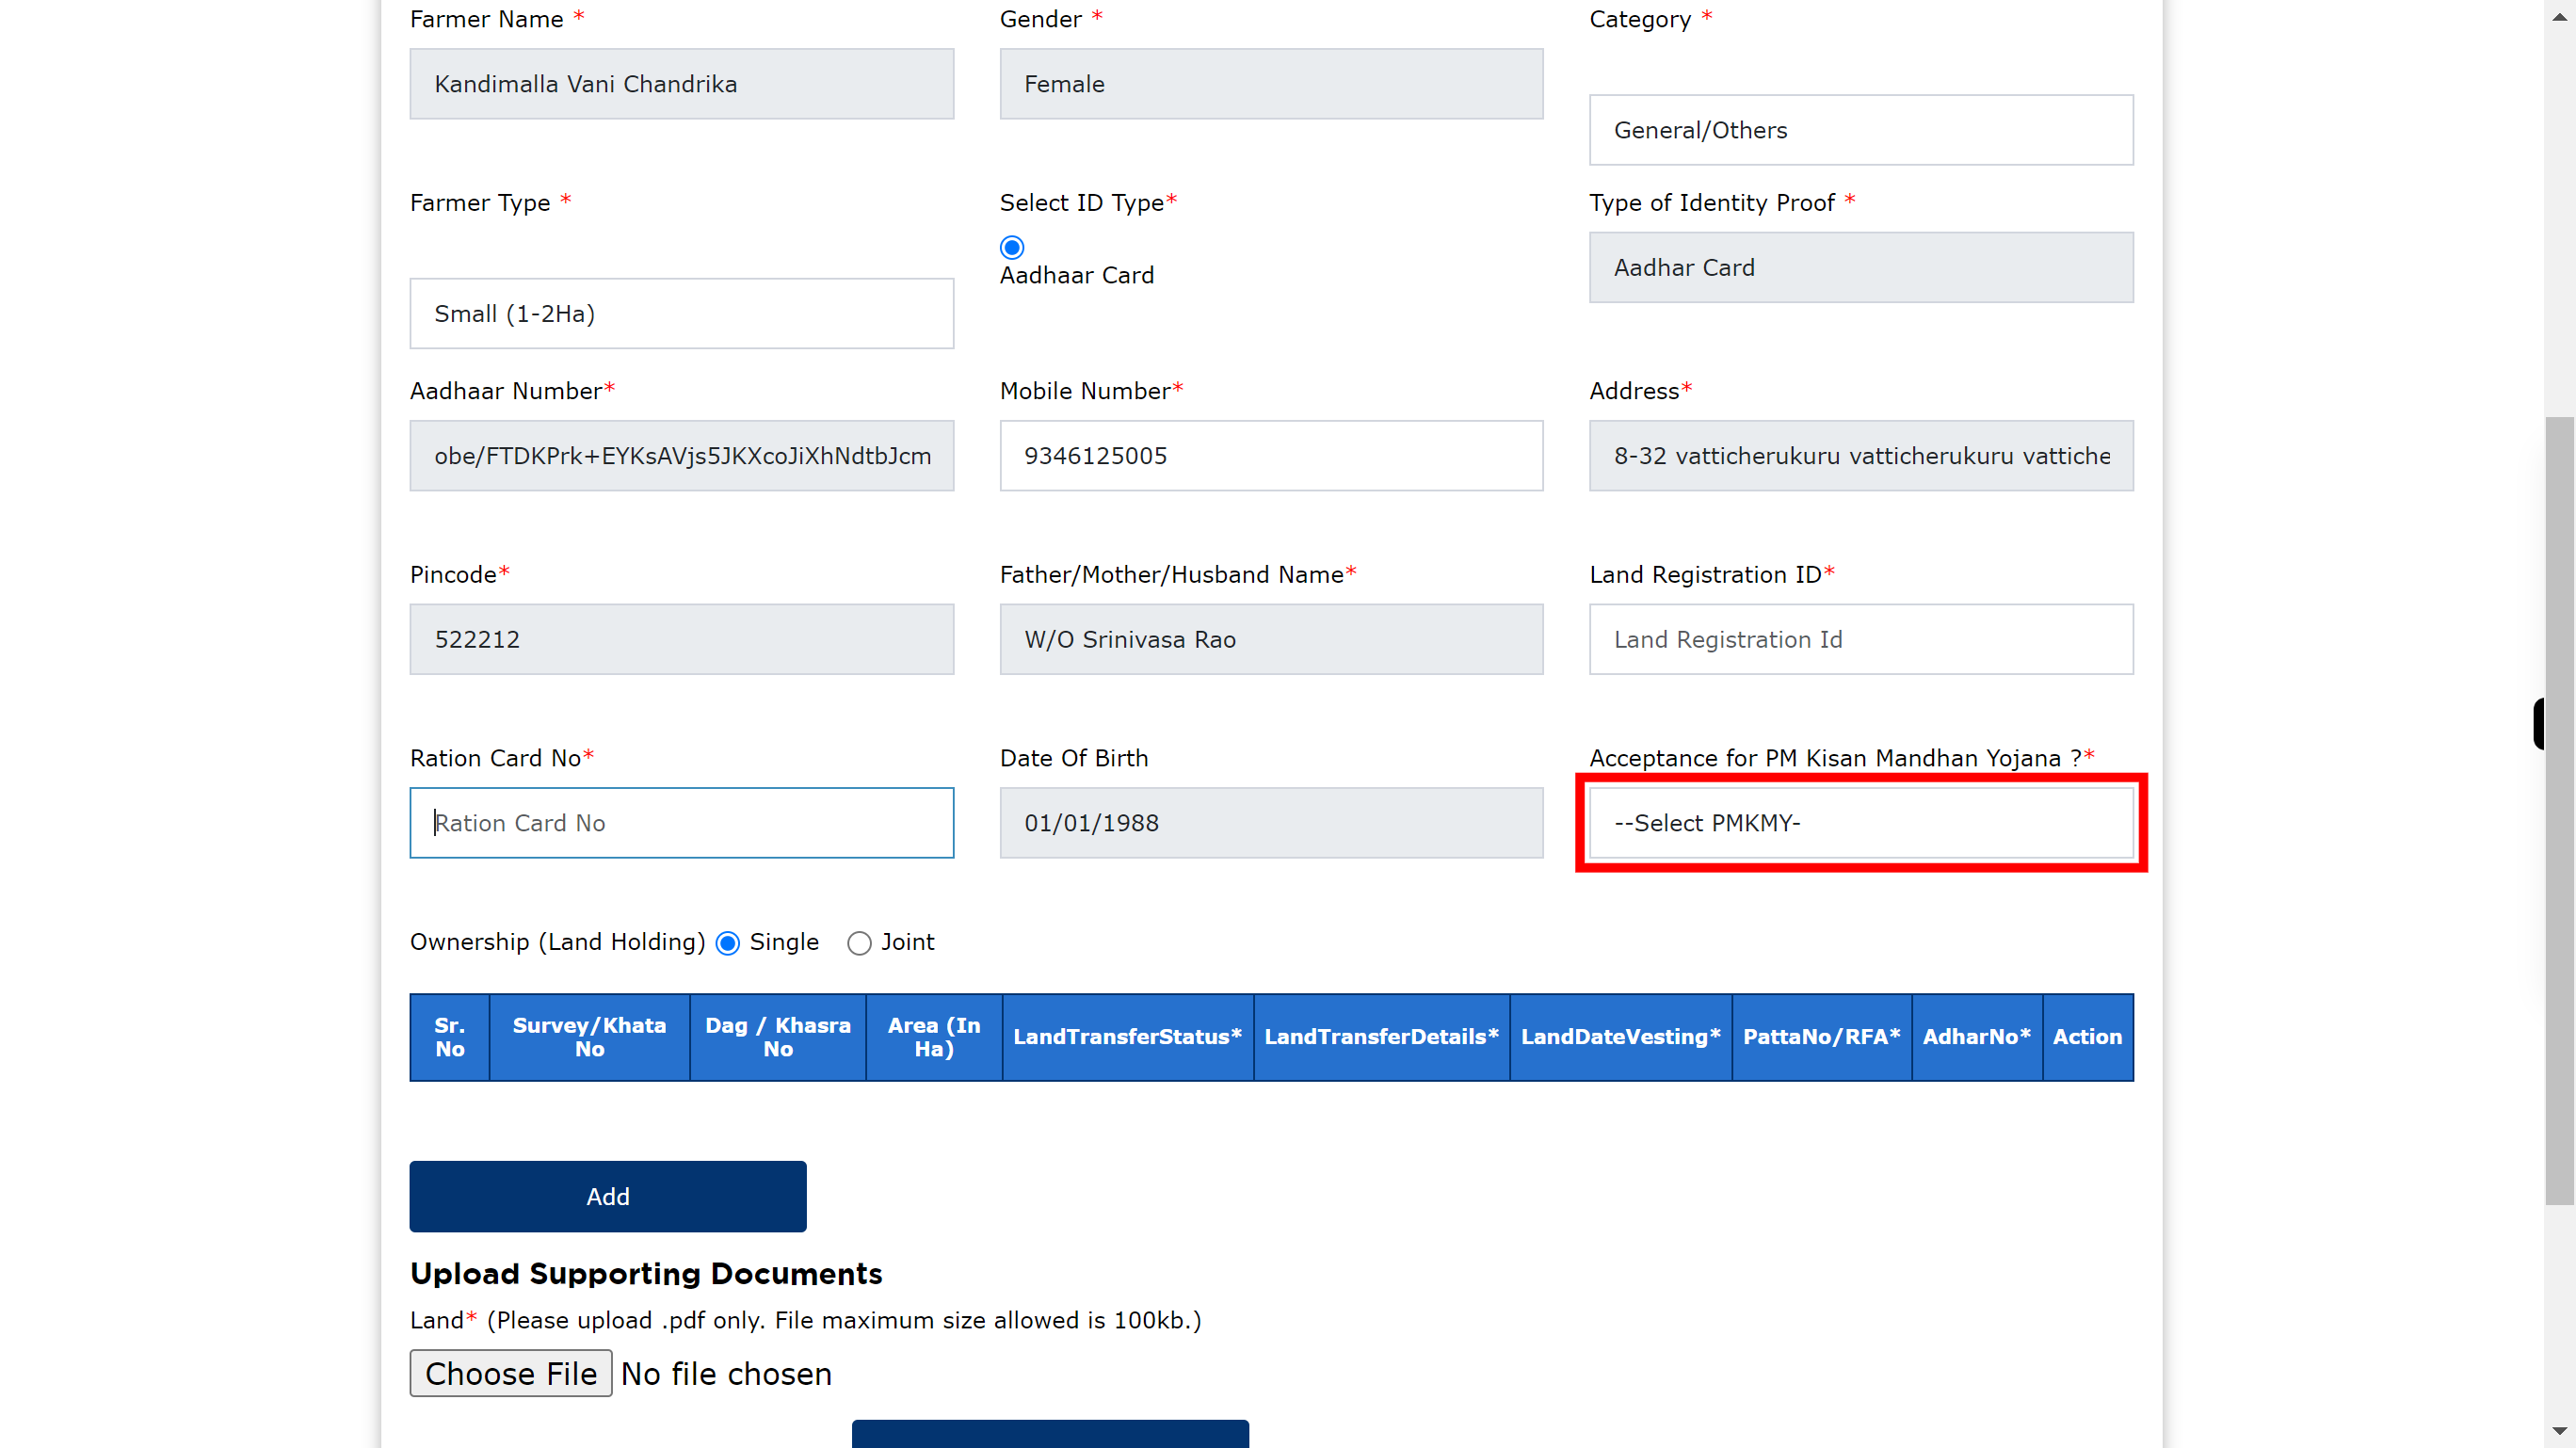
22.
Click and select PMKMY from drop-down list. Once done, click on the 'Next' button in the Supervity instruction widget.
-
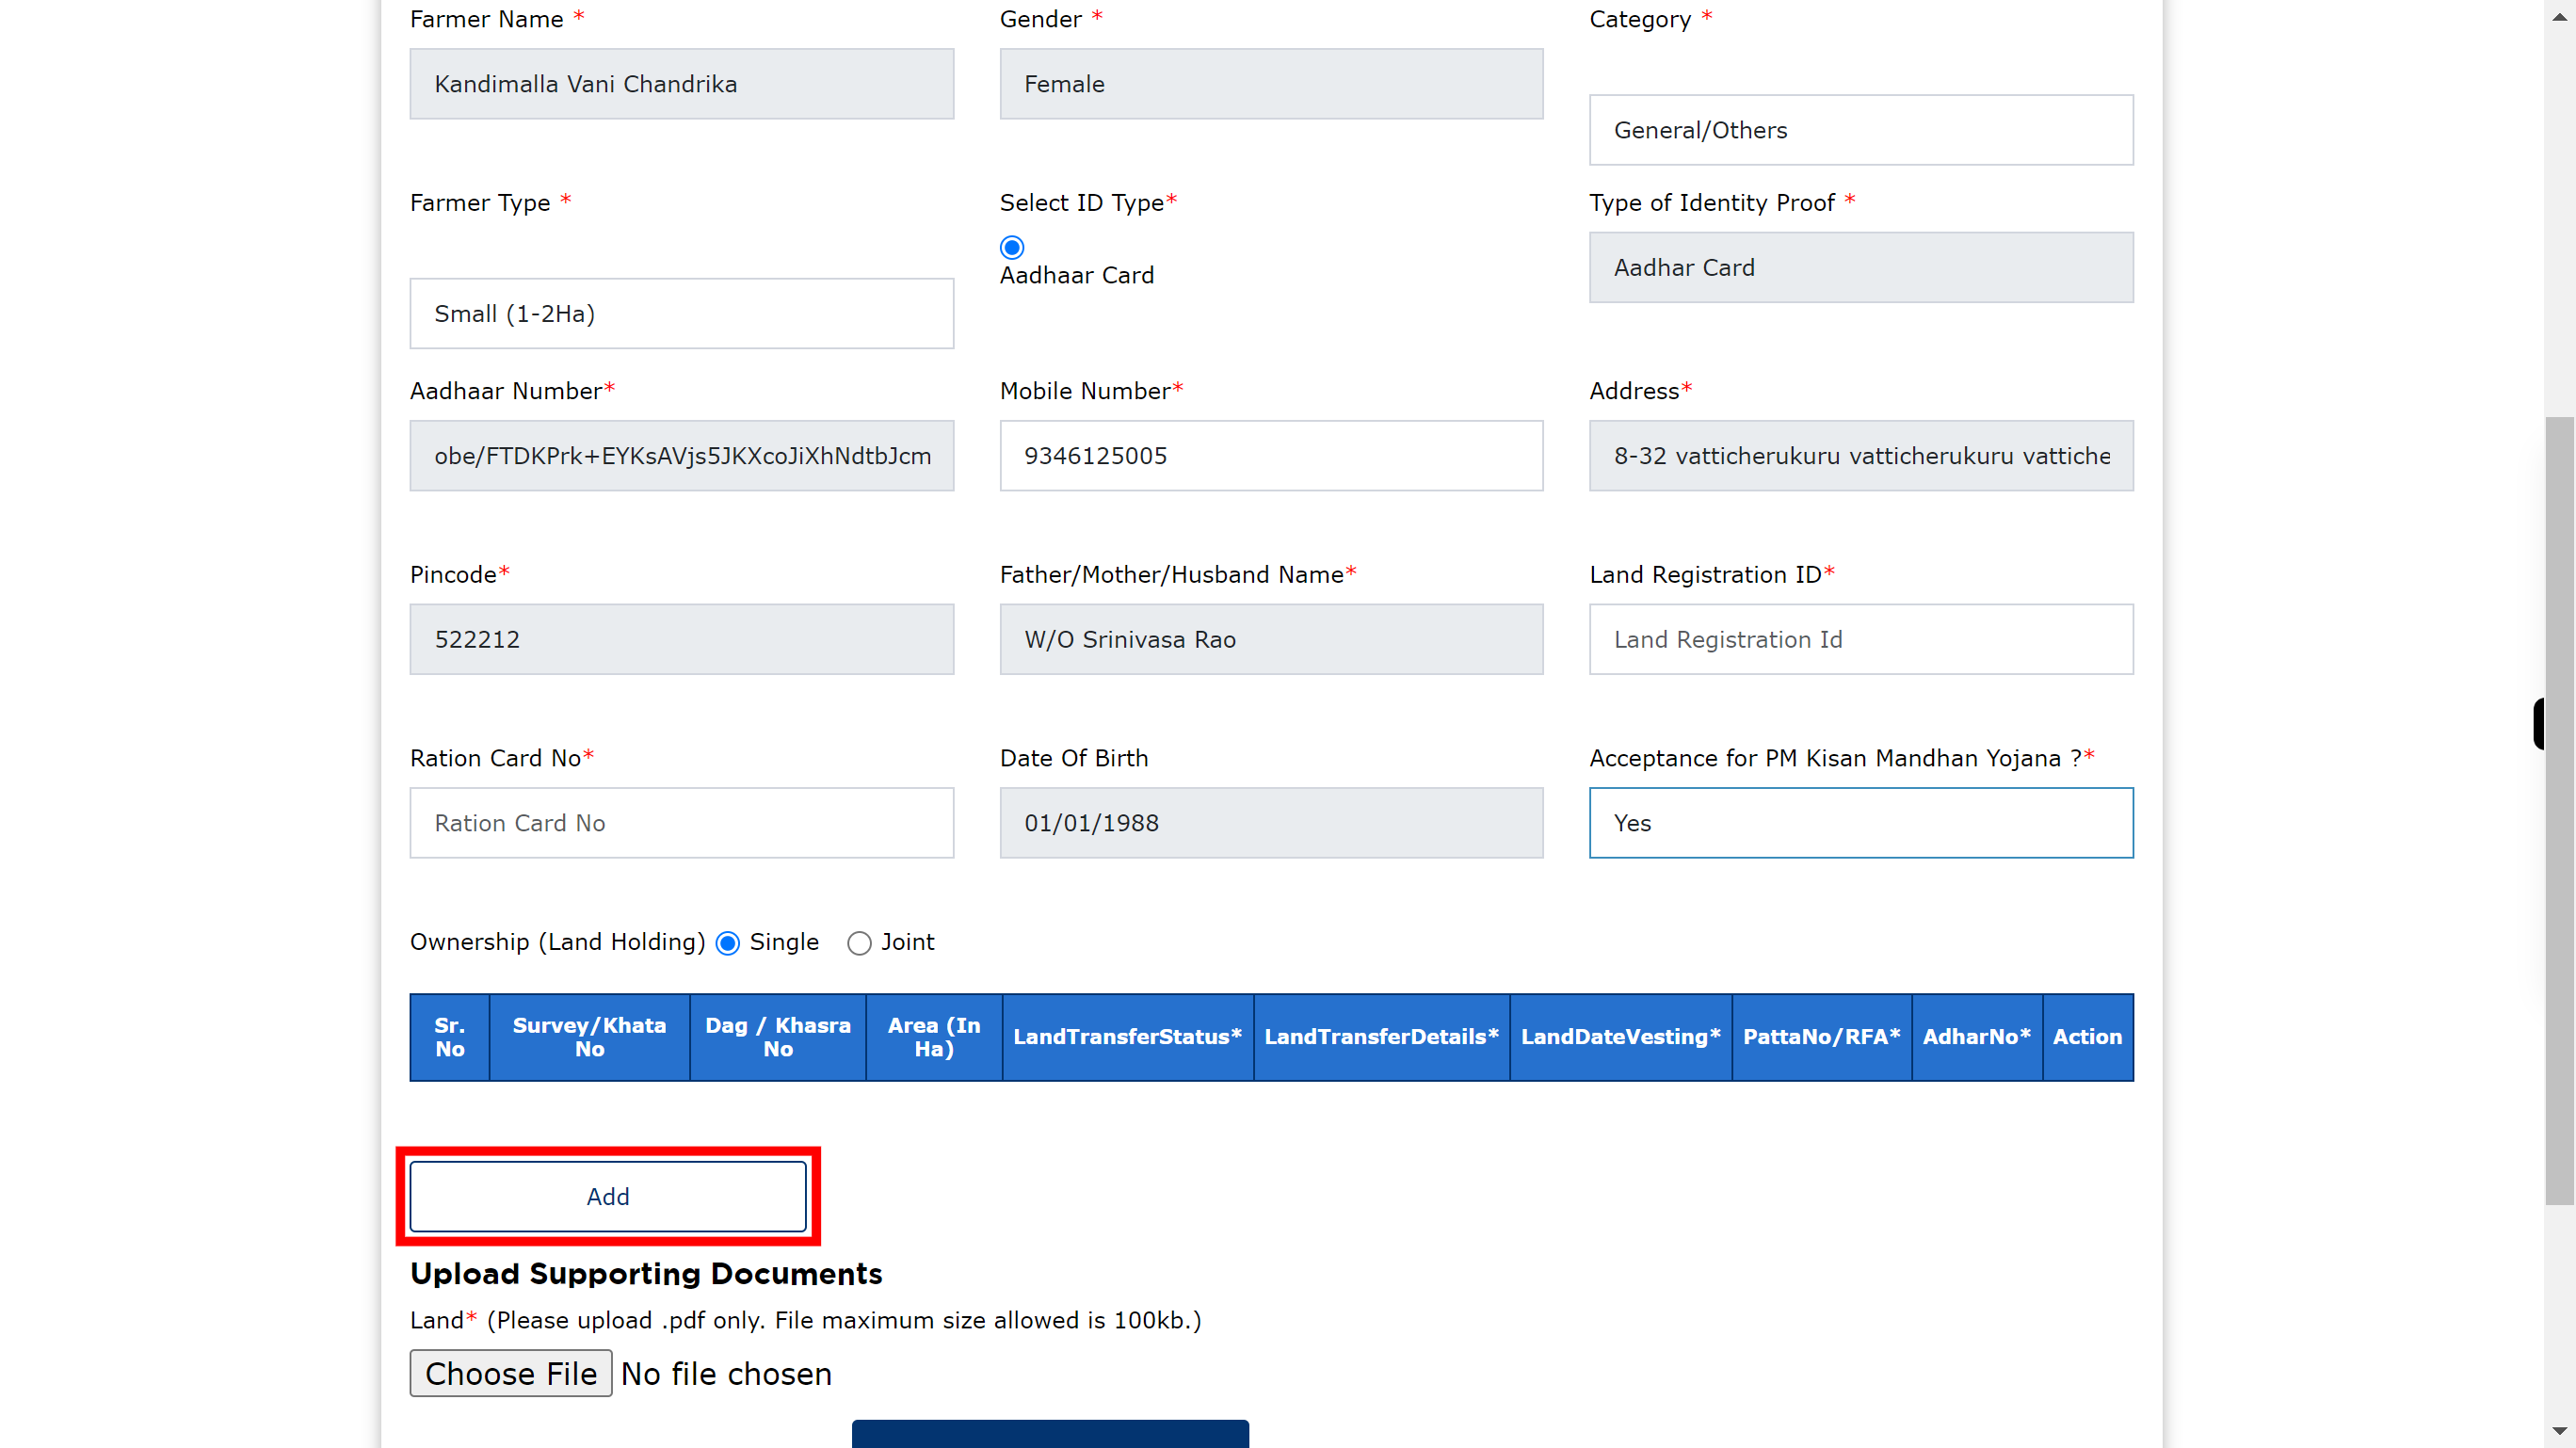
23.
Click on Add button.
-
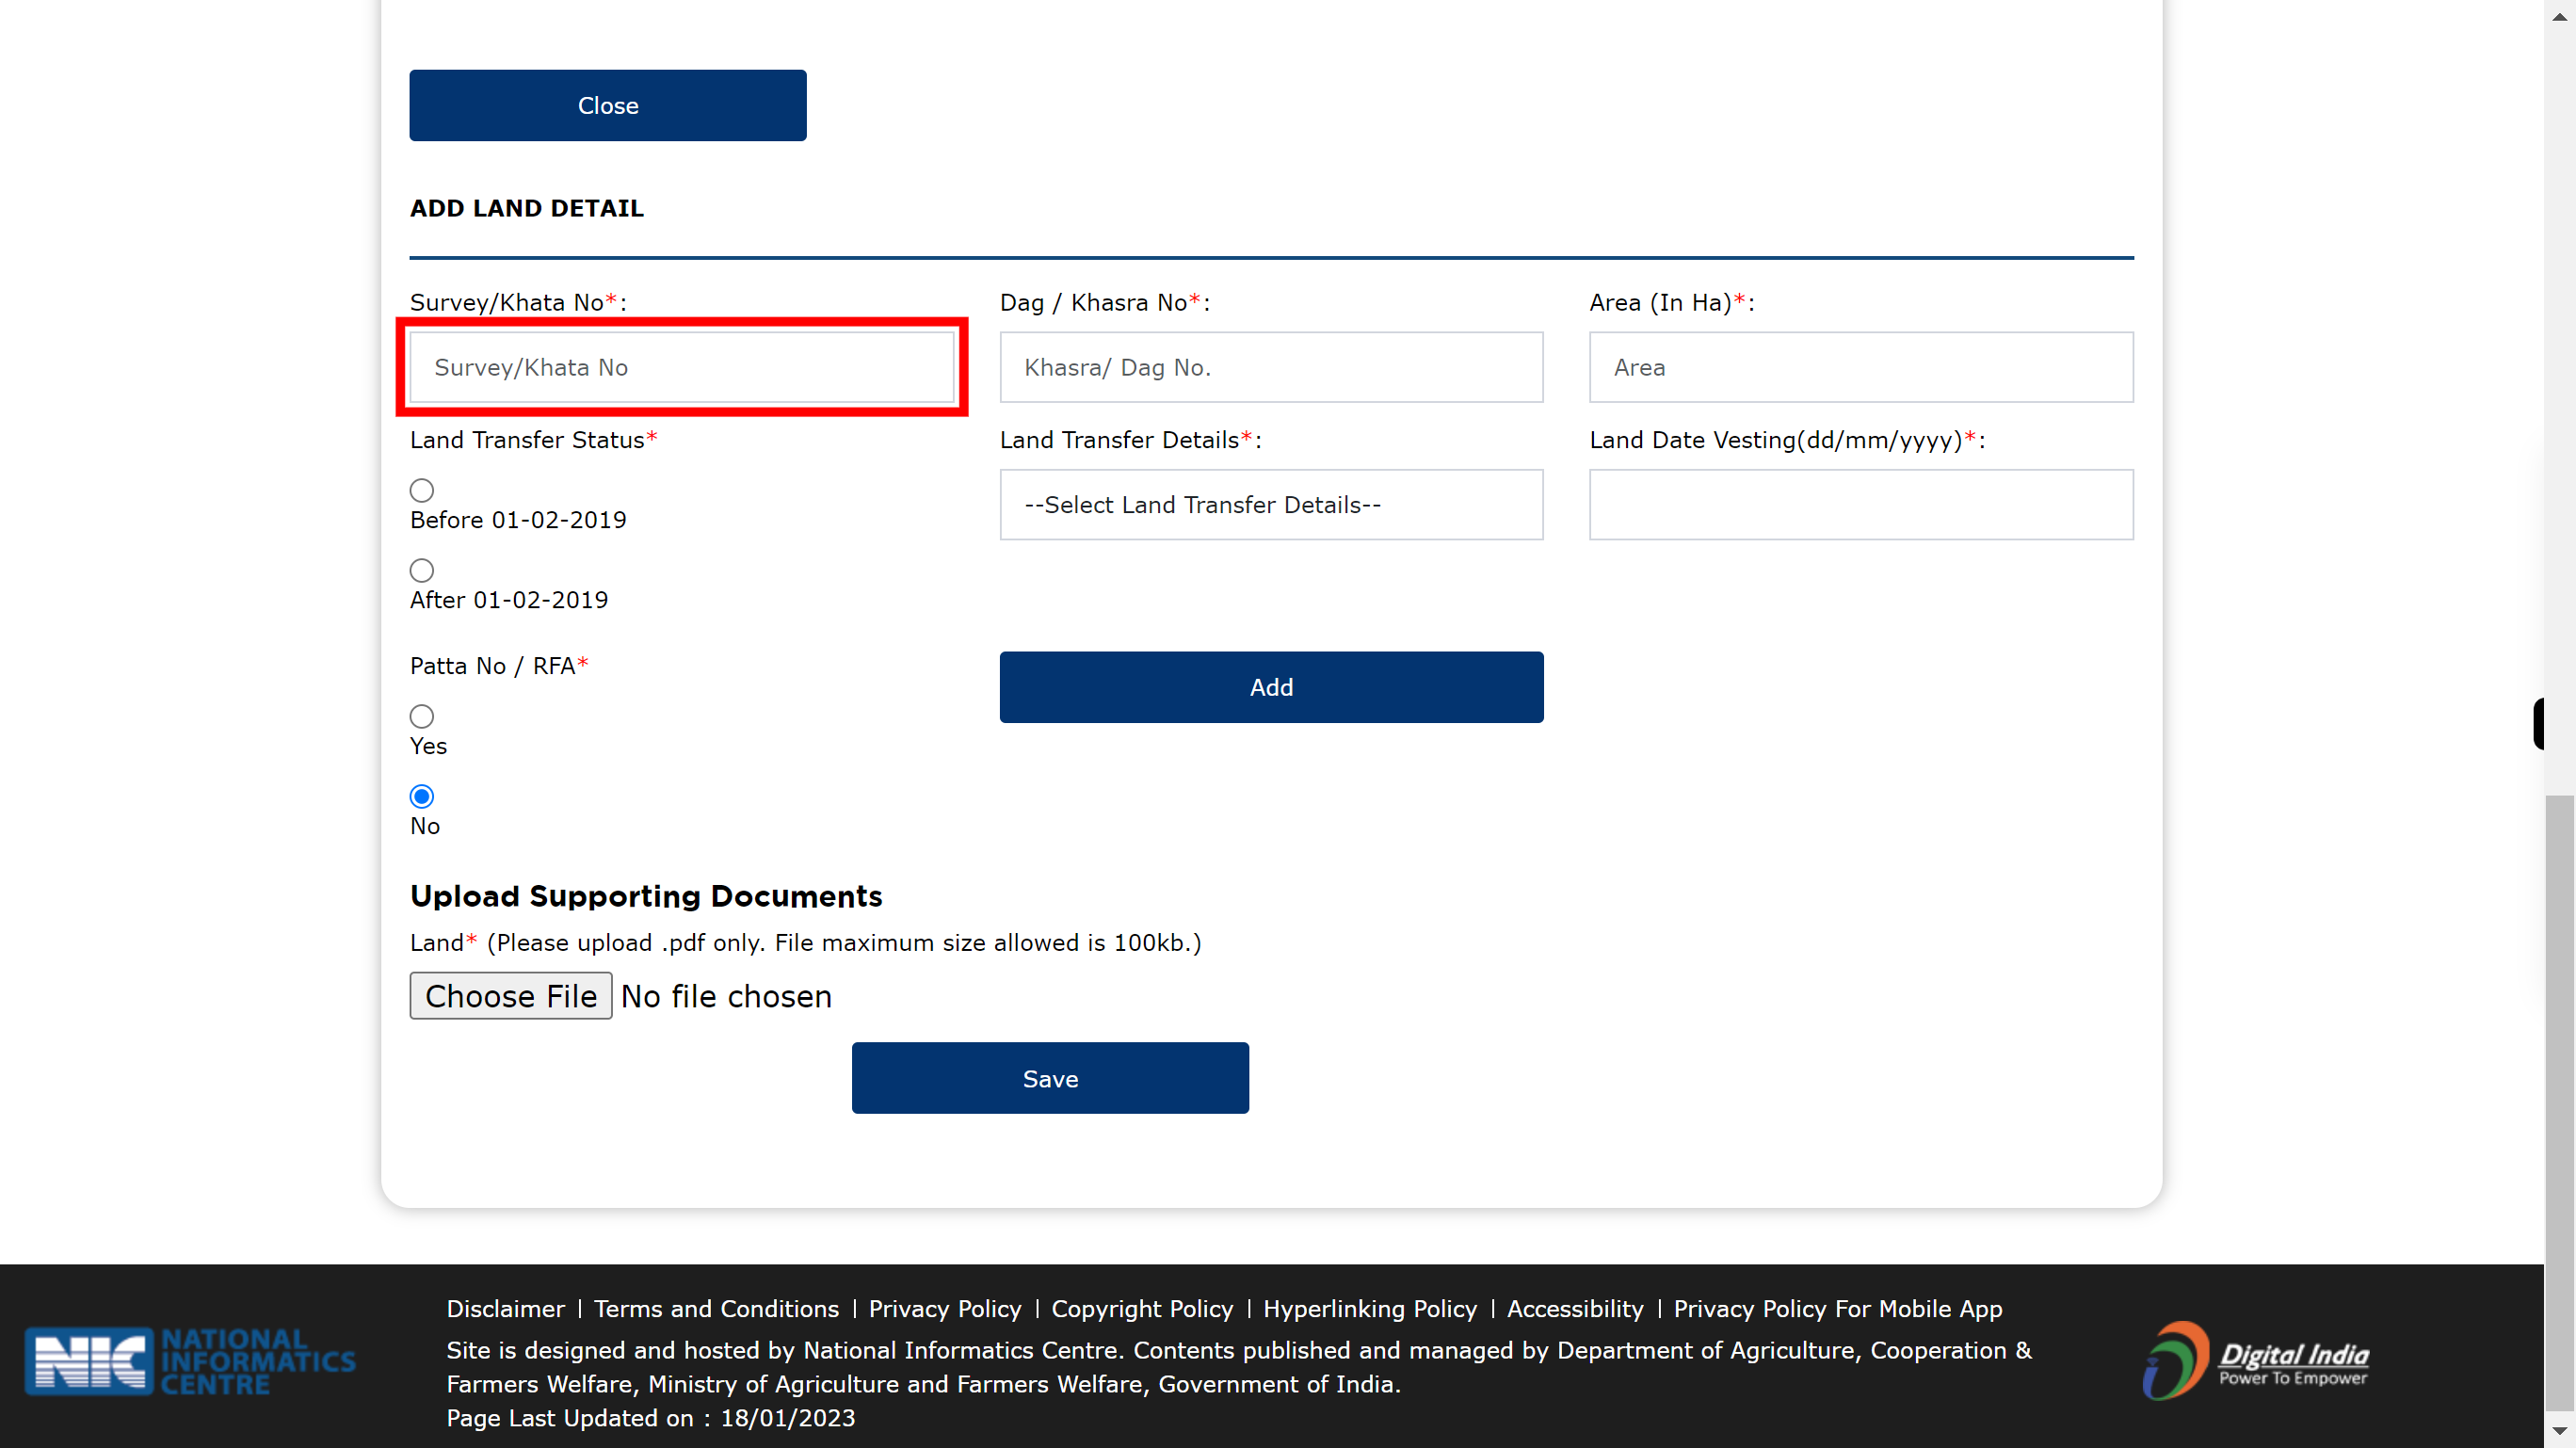
24.
Click and enter the Survey/Khata No. Once done, click on the 'Next' button in the Supervity instruction widget.
-
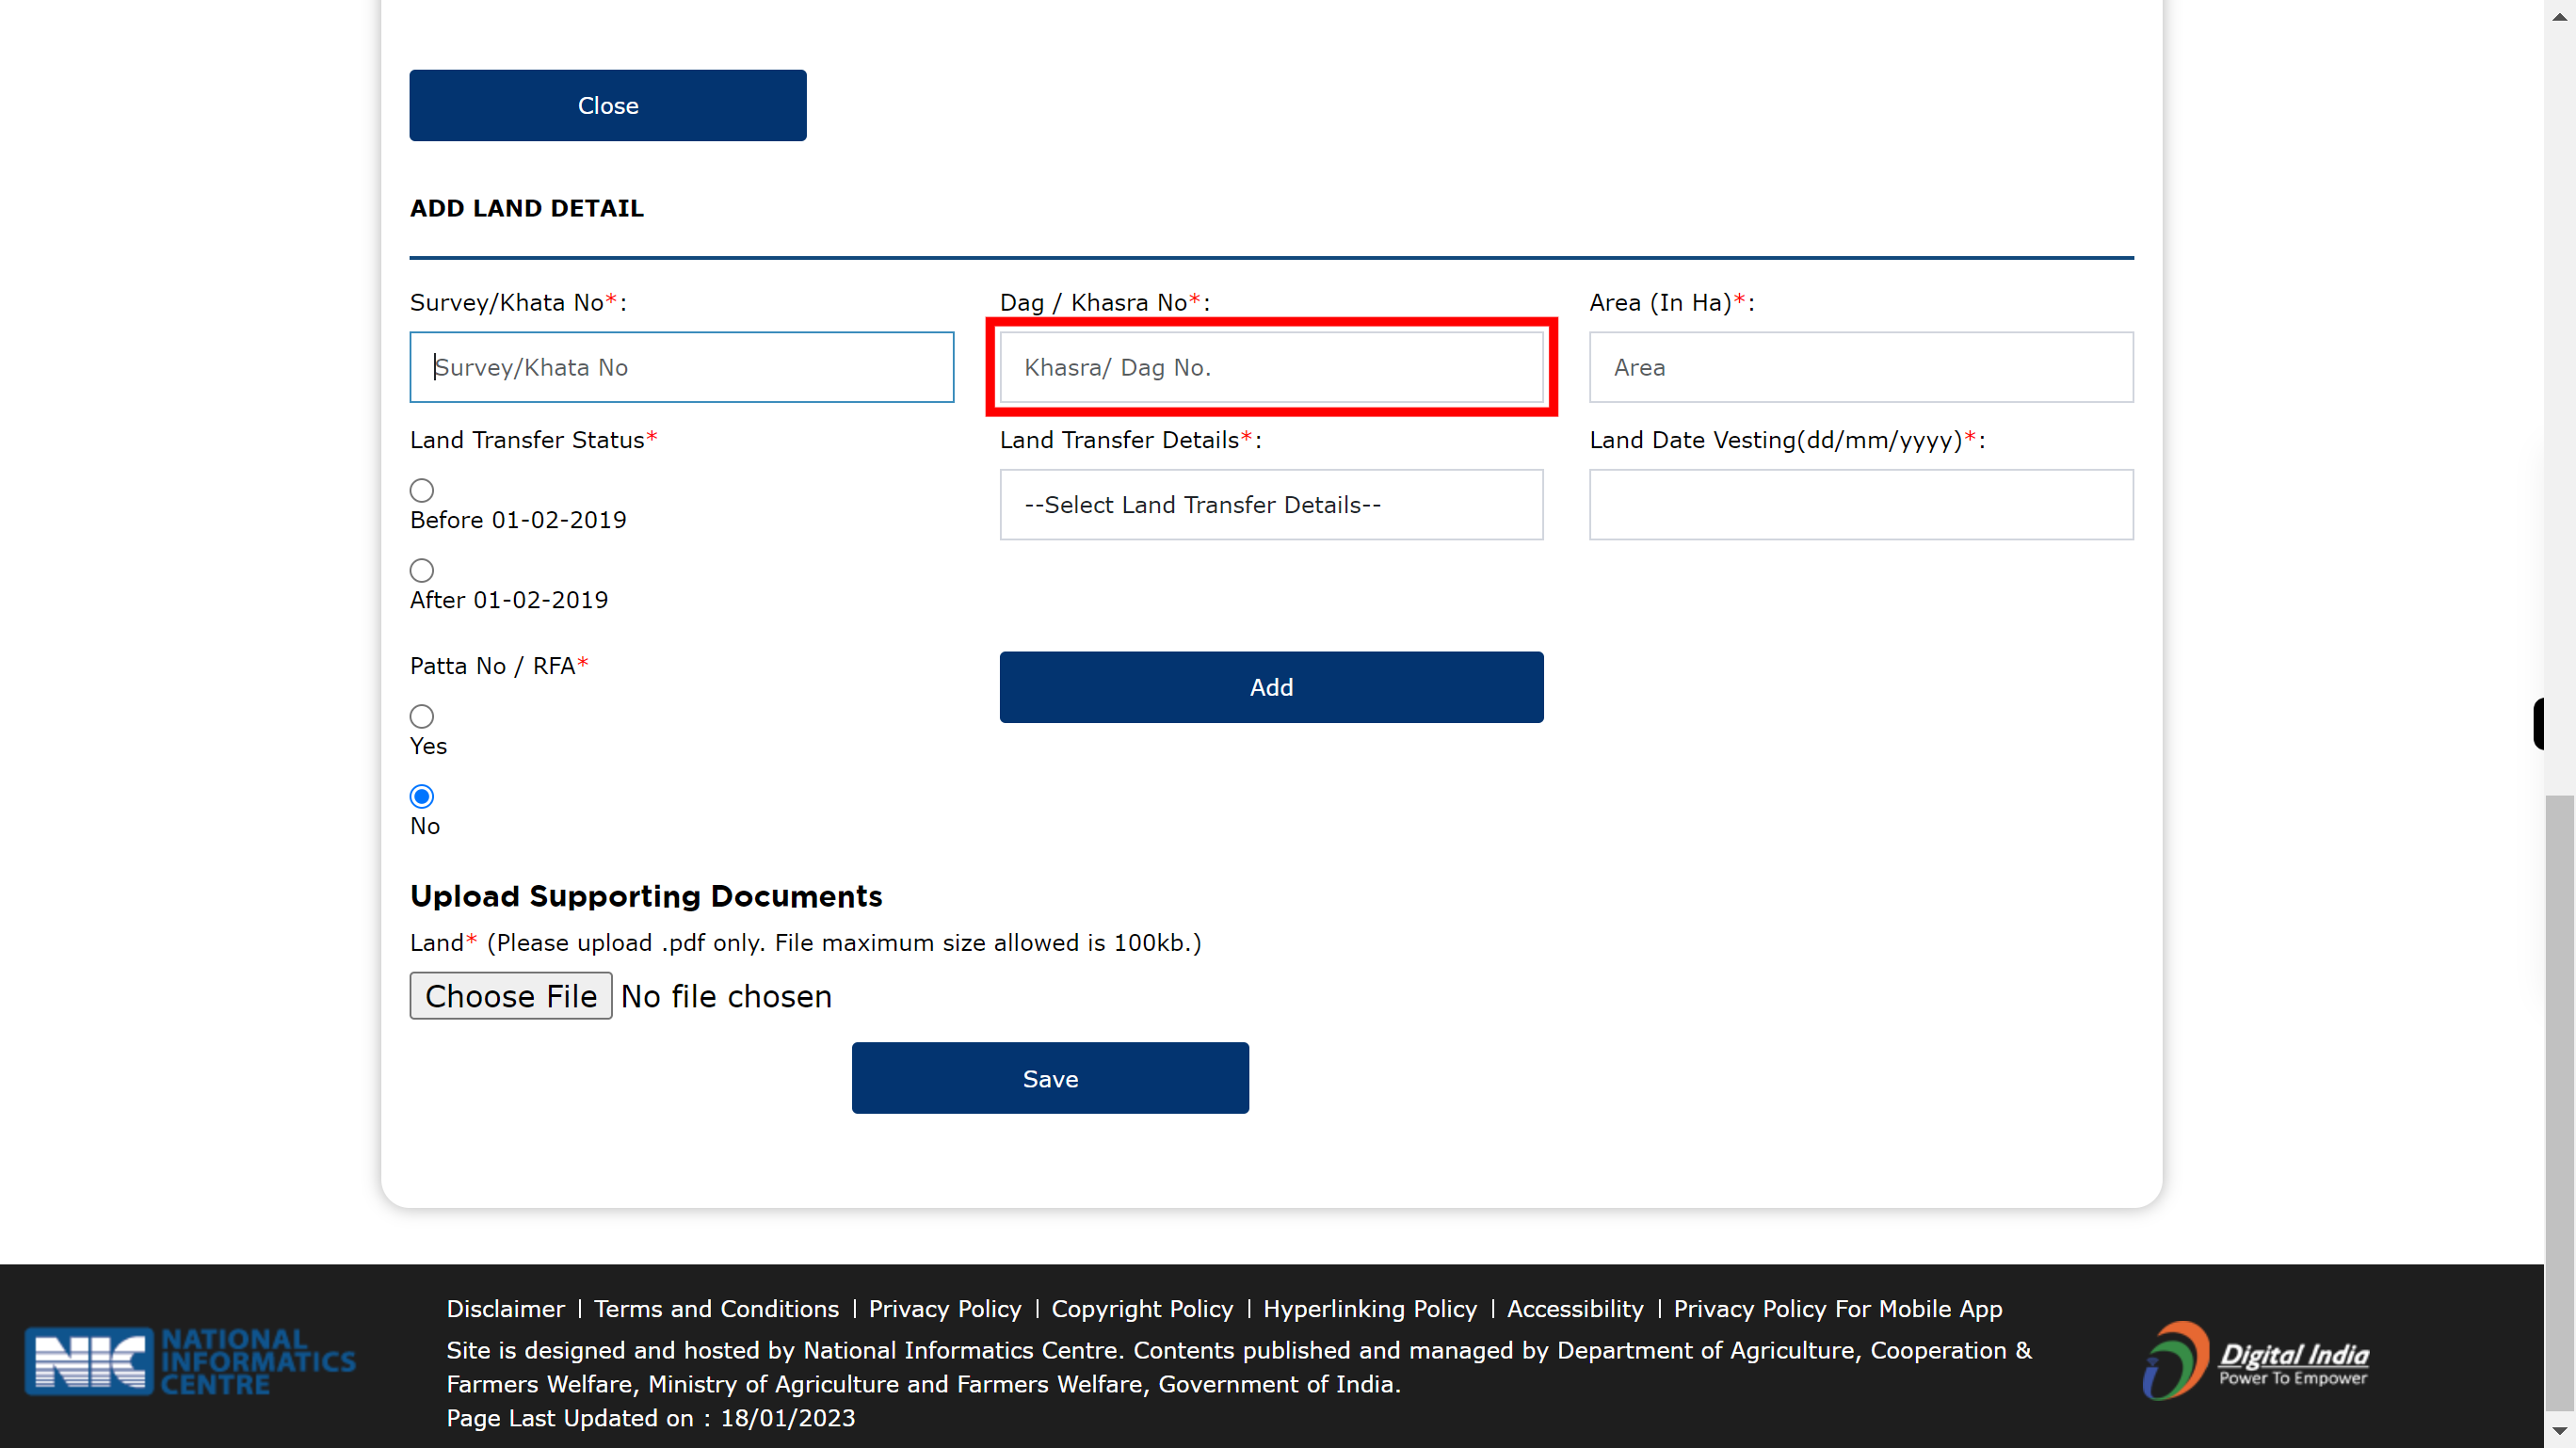
25.
Click and enter Khasra/ Dag No. Once done, click on the 'Next' button in the Supervity instruction widget.
-
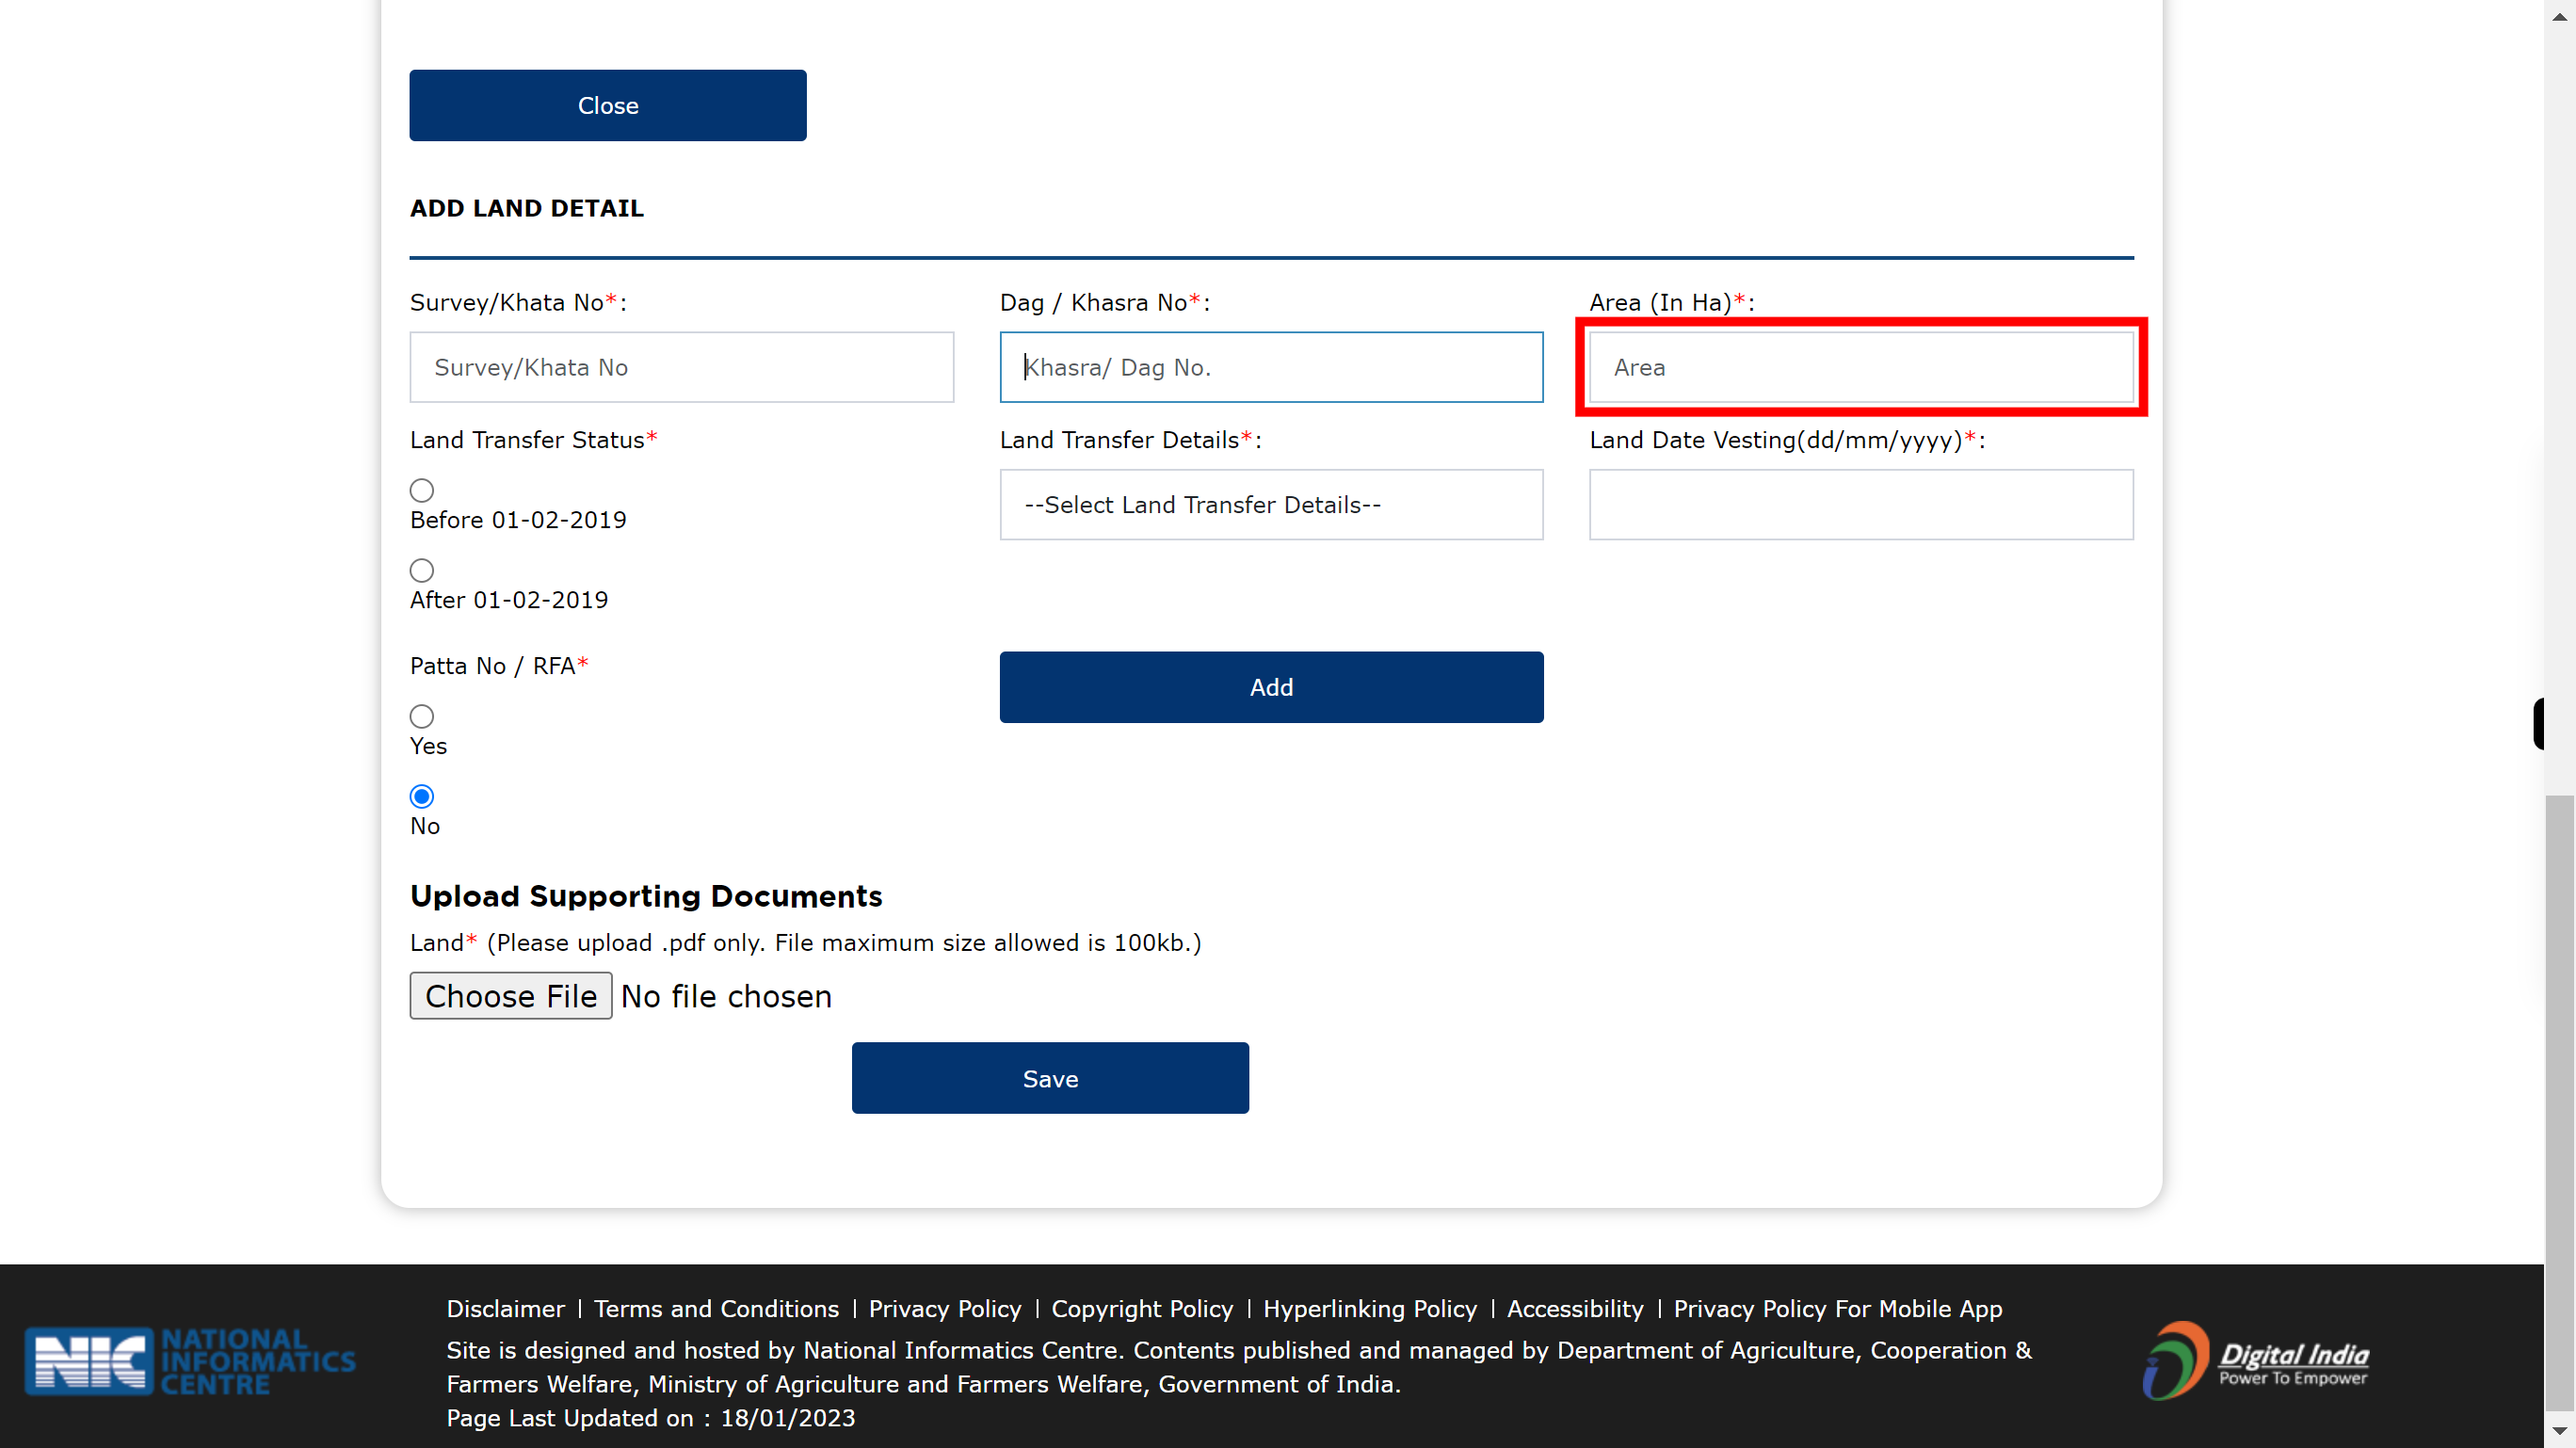
26.
Click and enter Area. Once done, click on the 'Next' button in the Supervity instruction widget.
-
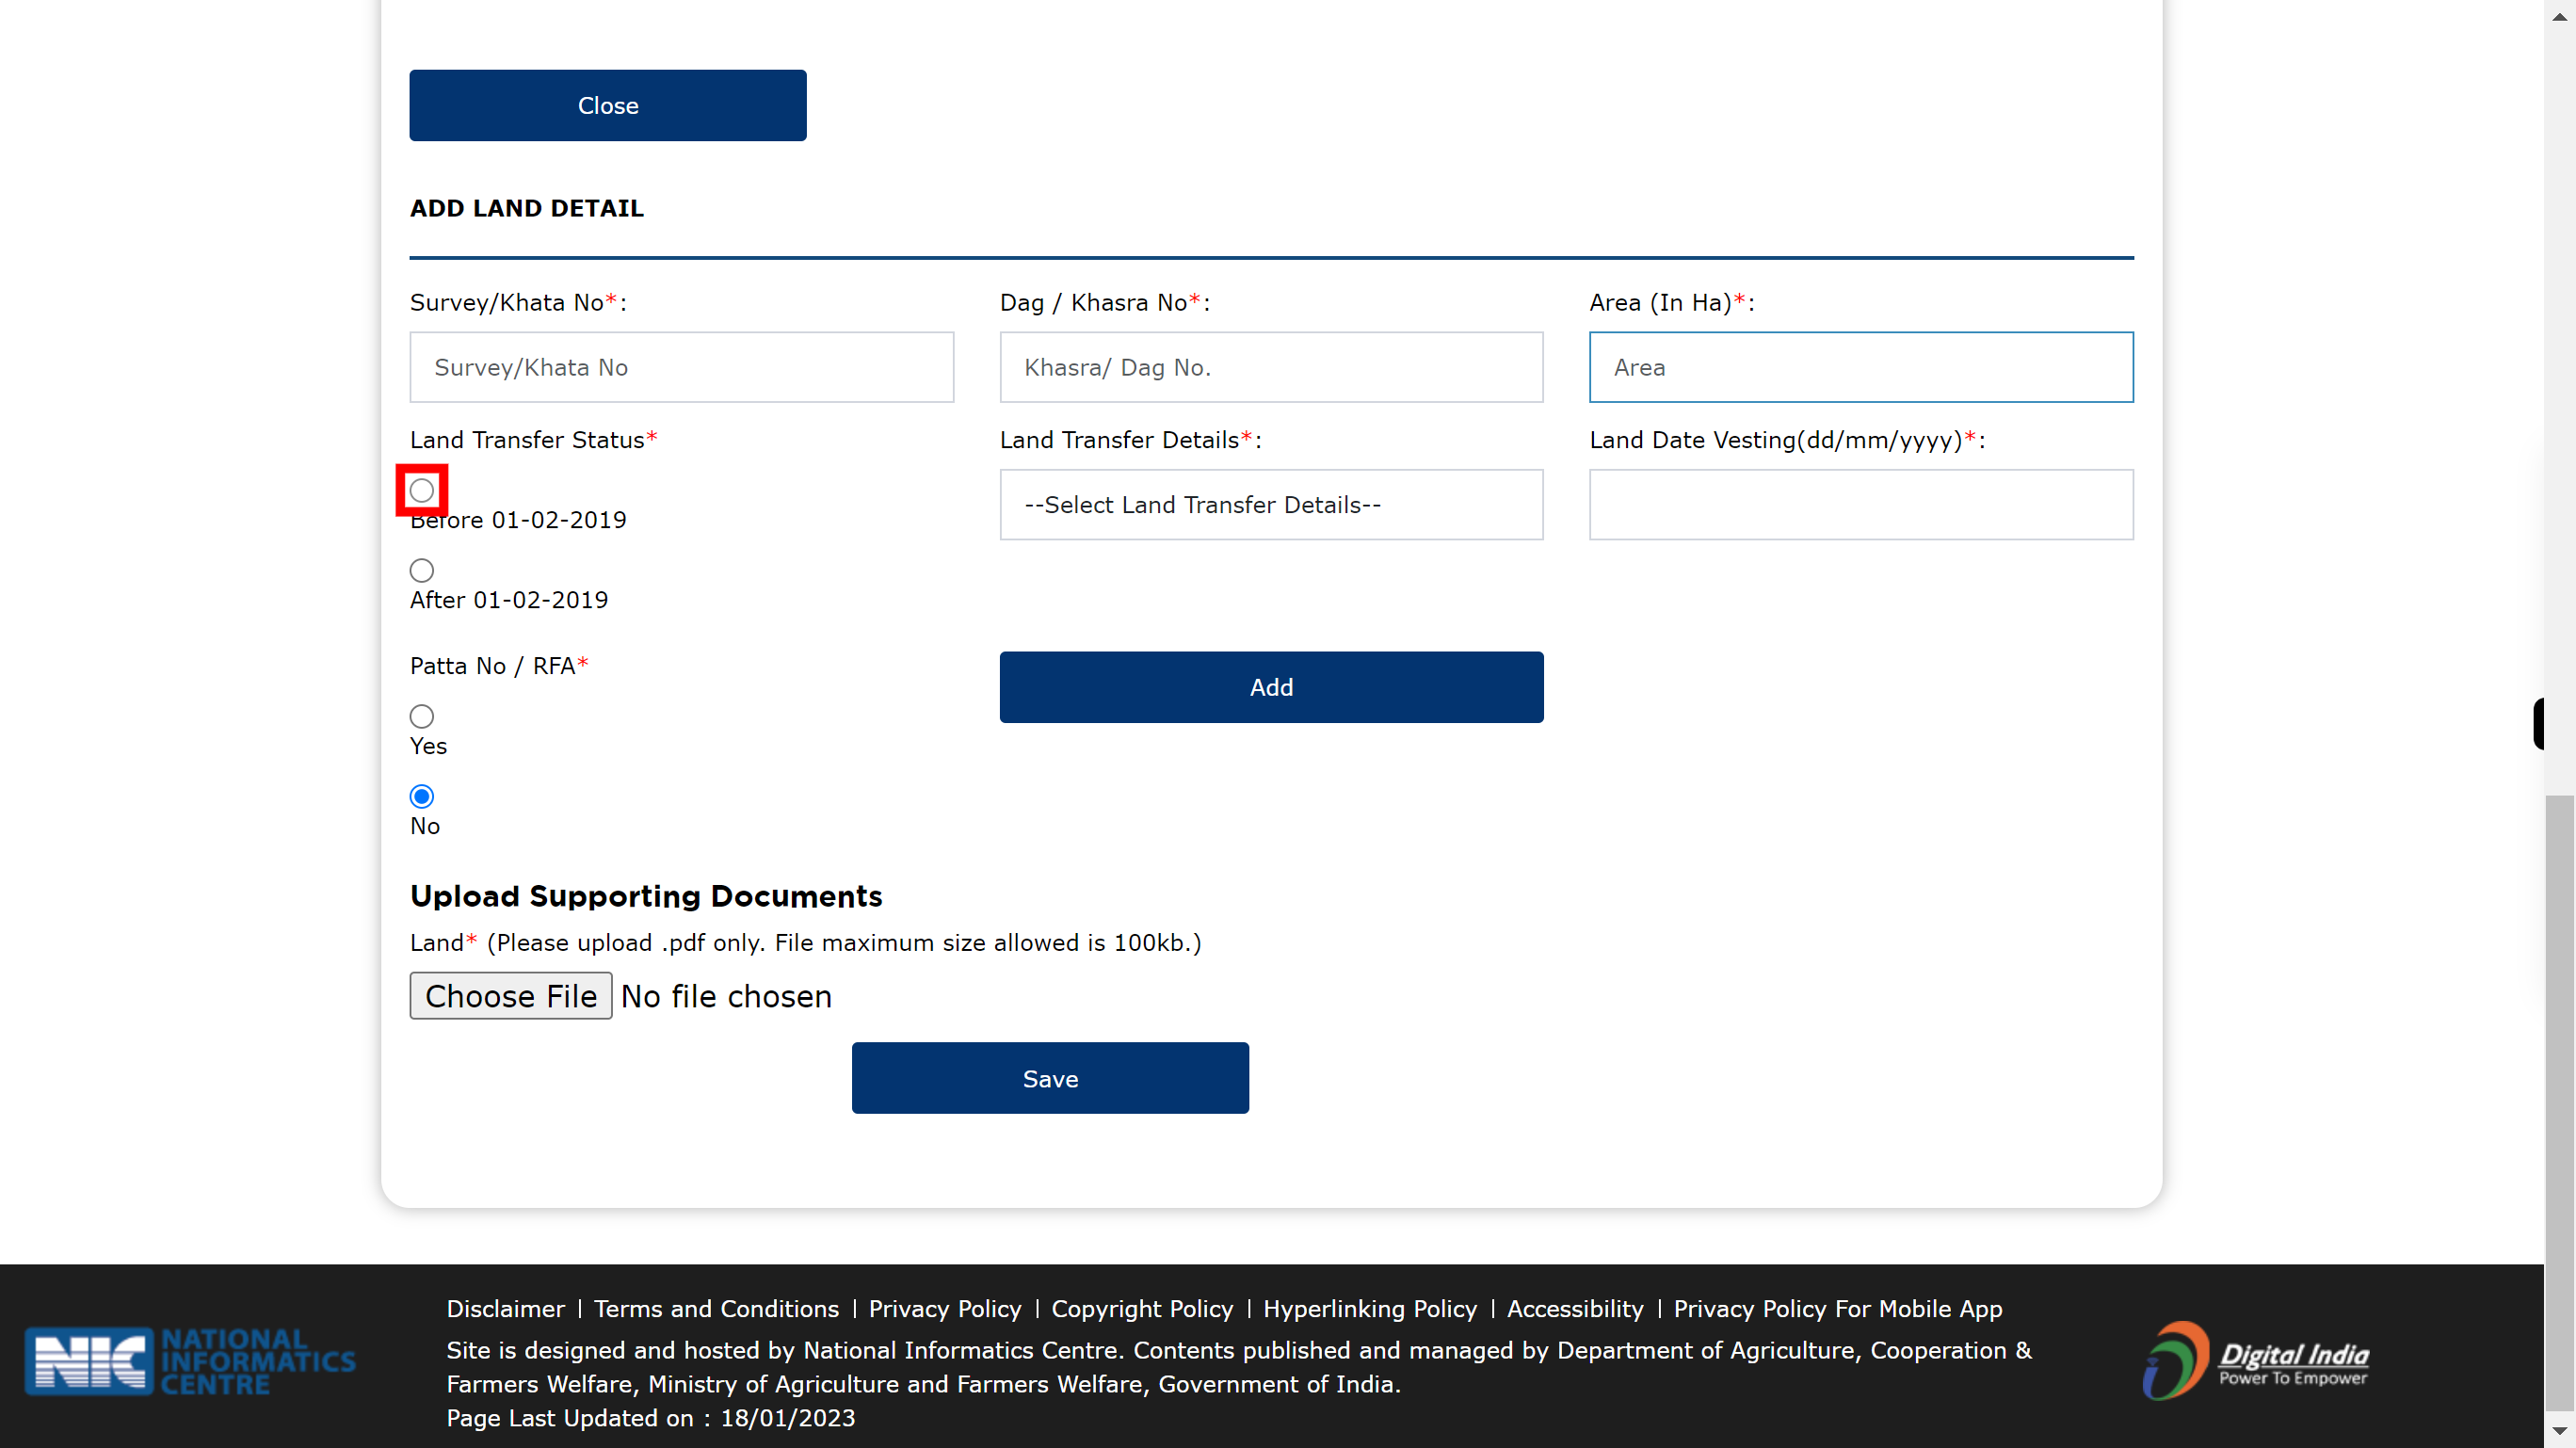
27.
check the land transfer status radio button. Once done, click on the 'Next' button in the Supervity instruction widget.
-
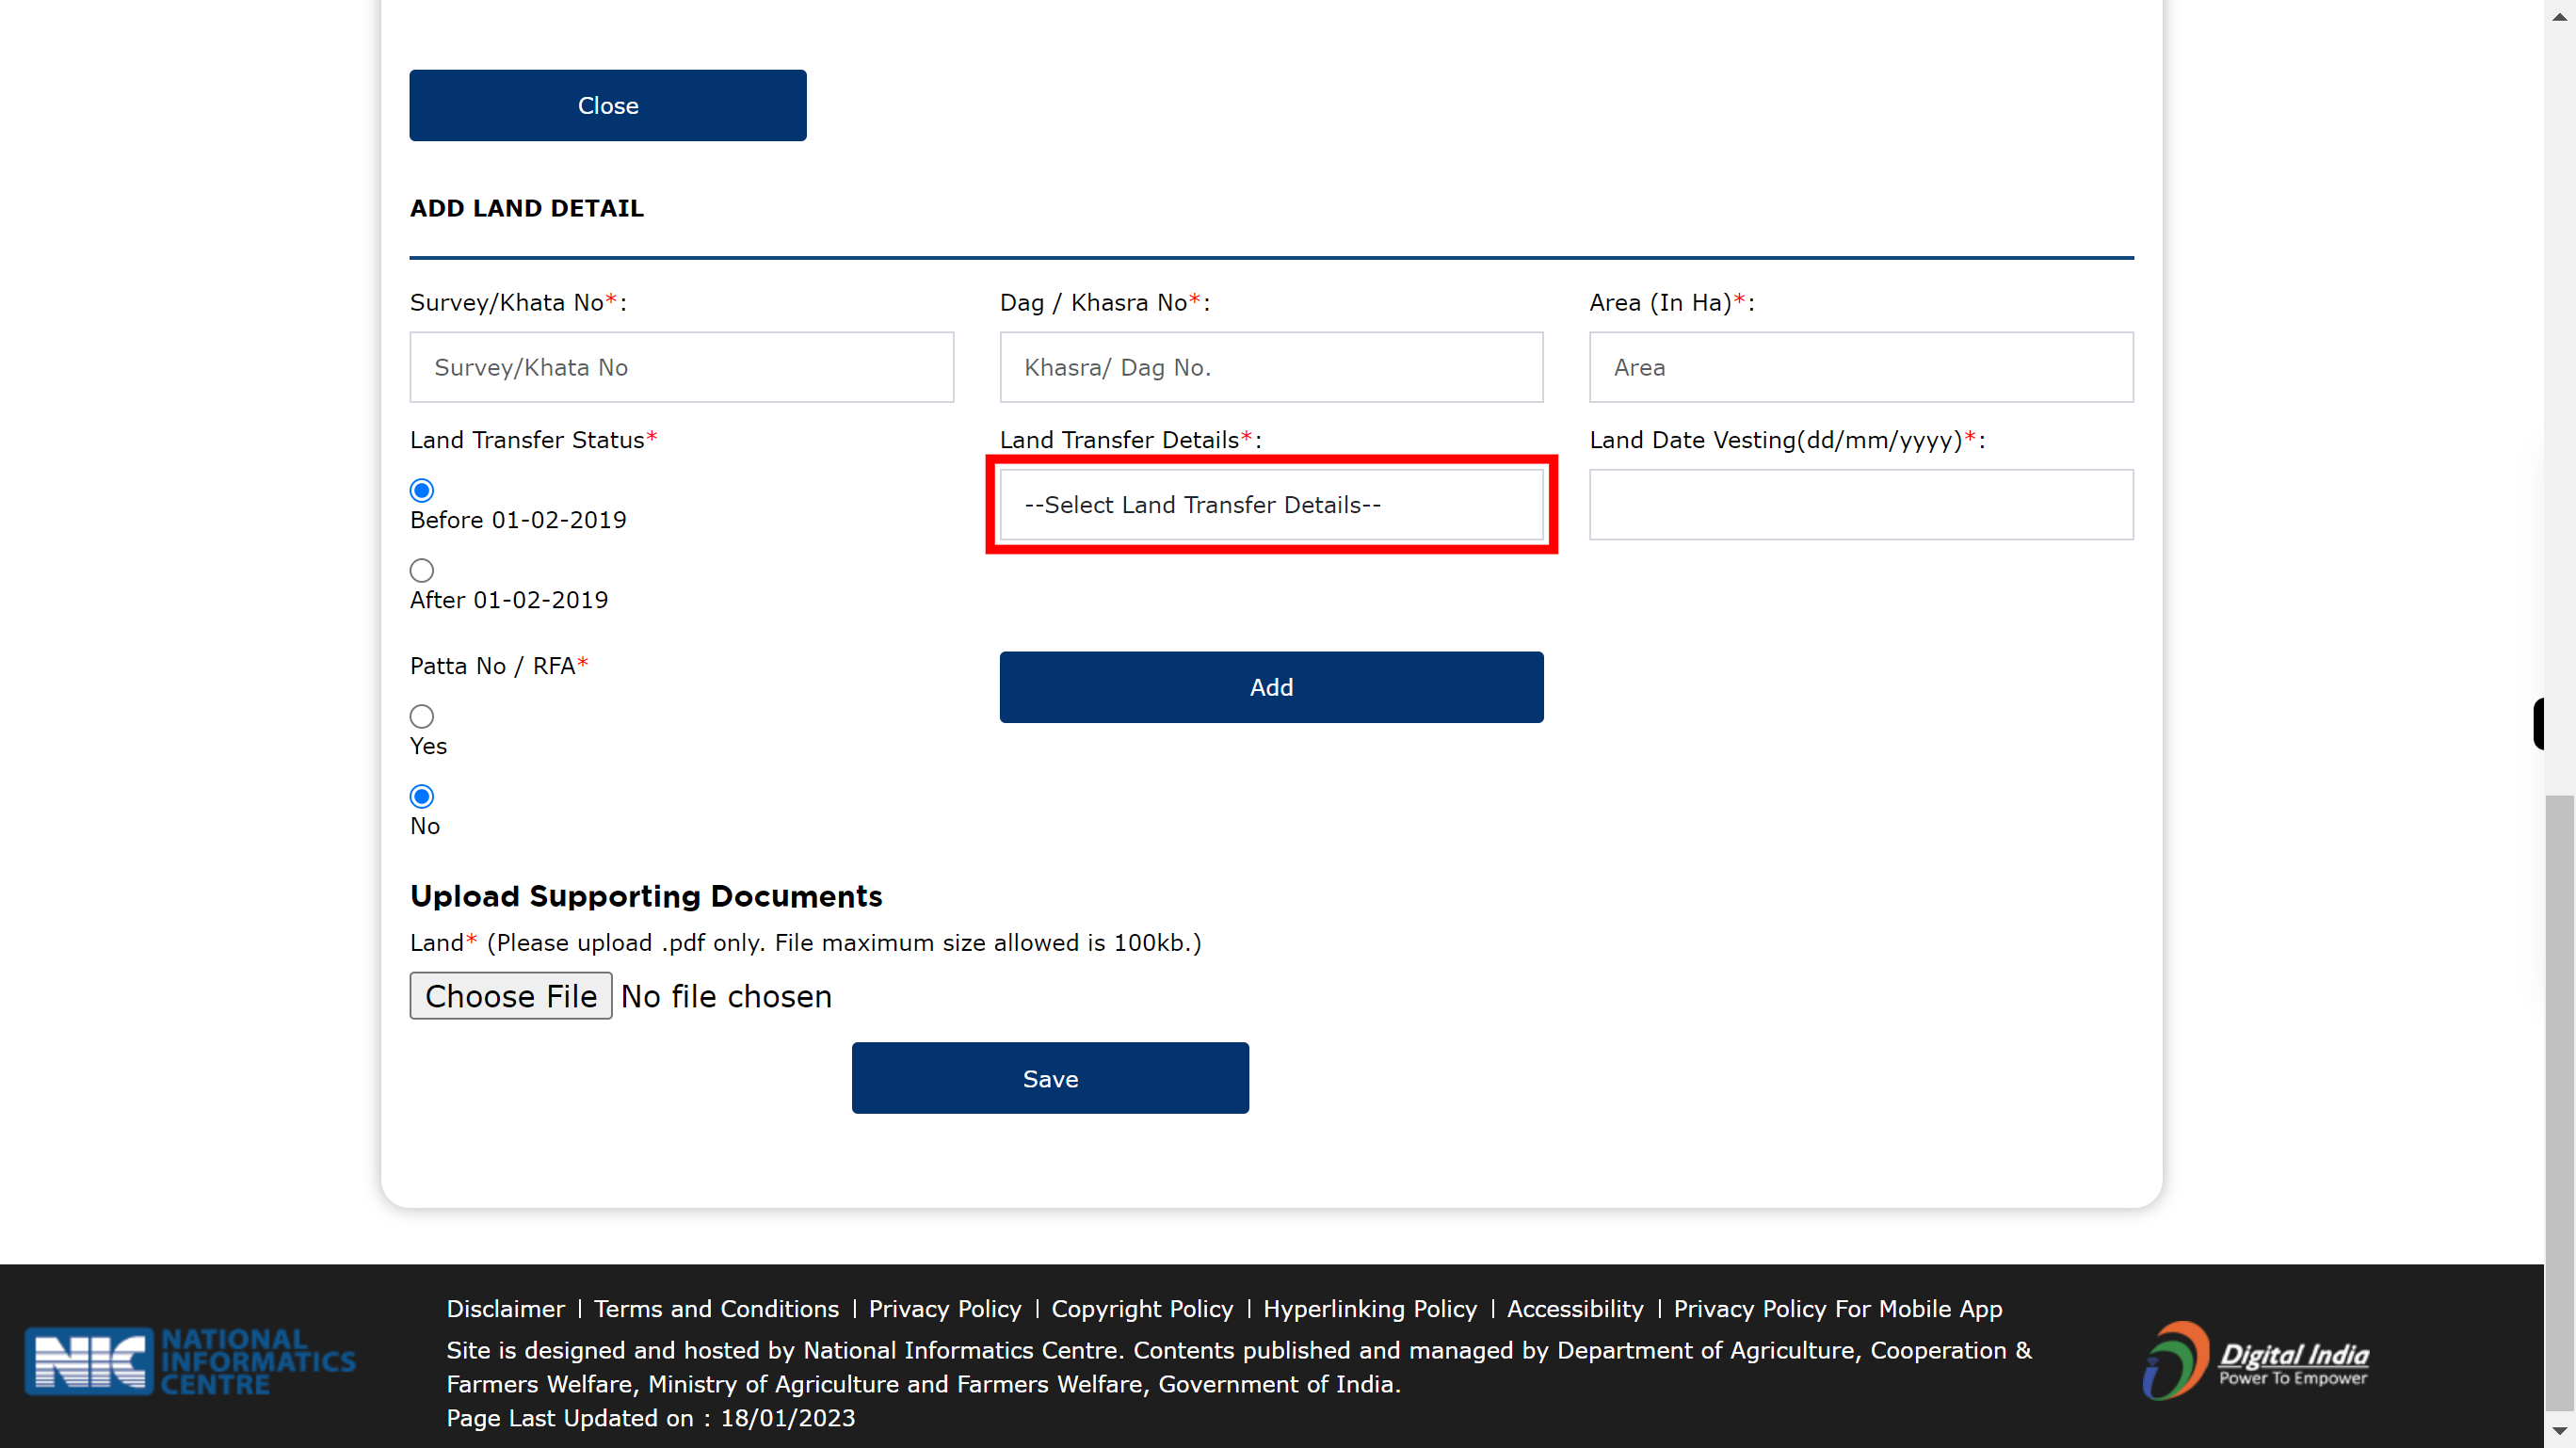
28.
Click and select Land Transfer Details from the drop-down list. Once done, click on the 'Next' button in the Supervity instruction widget.
-
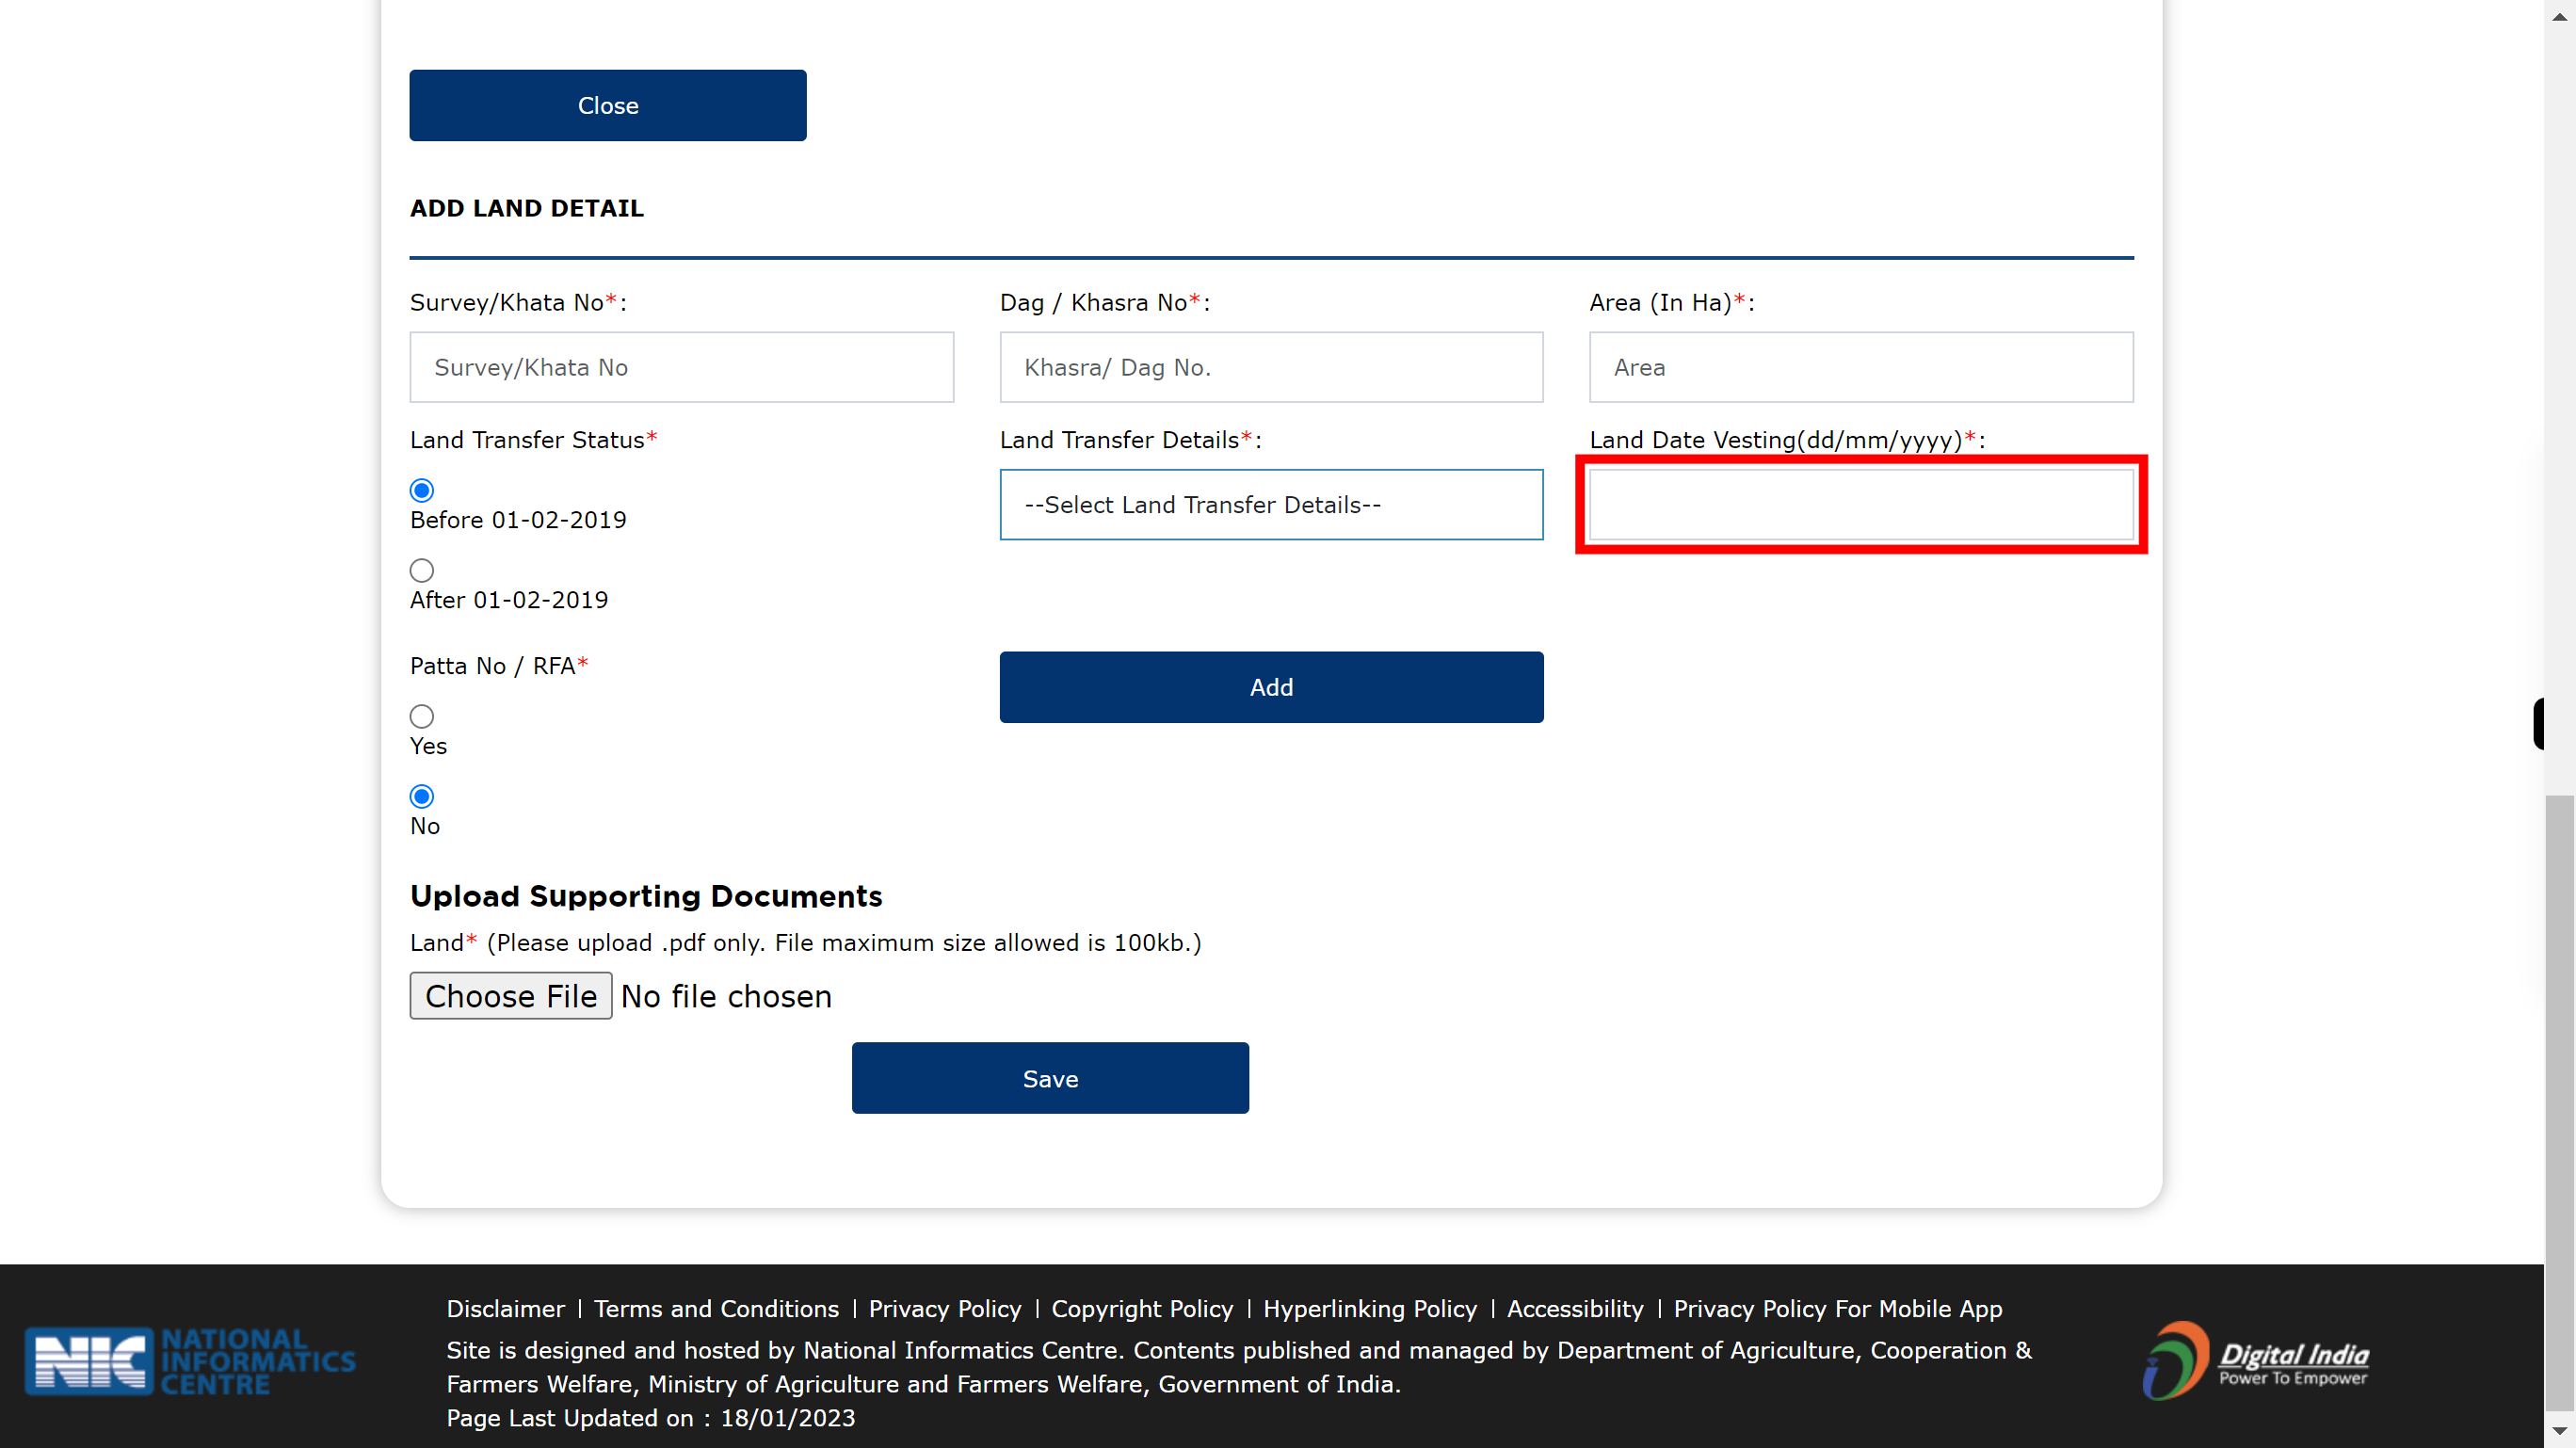
29.
Click and select Land Date Vesting(dd/mm/yyyy). Once done, click on the 'Next' button in the Supervity instruction widget.
-
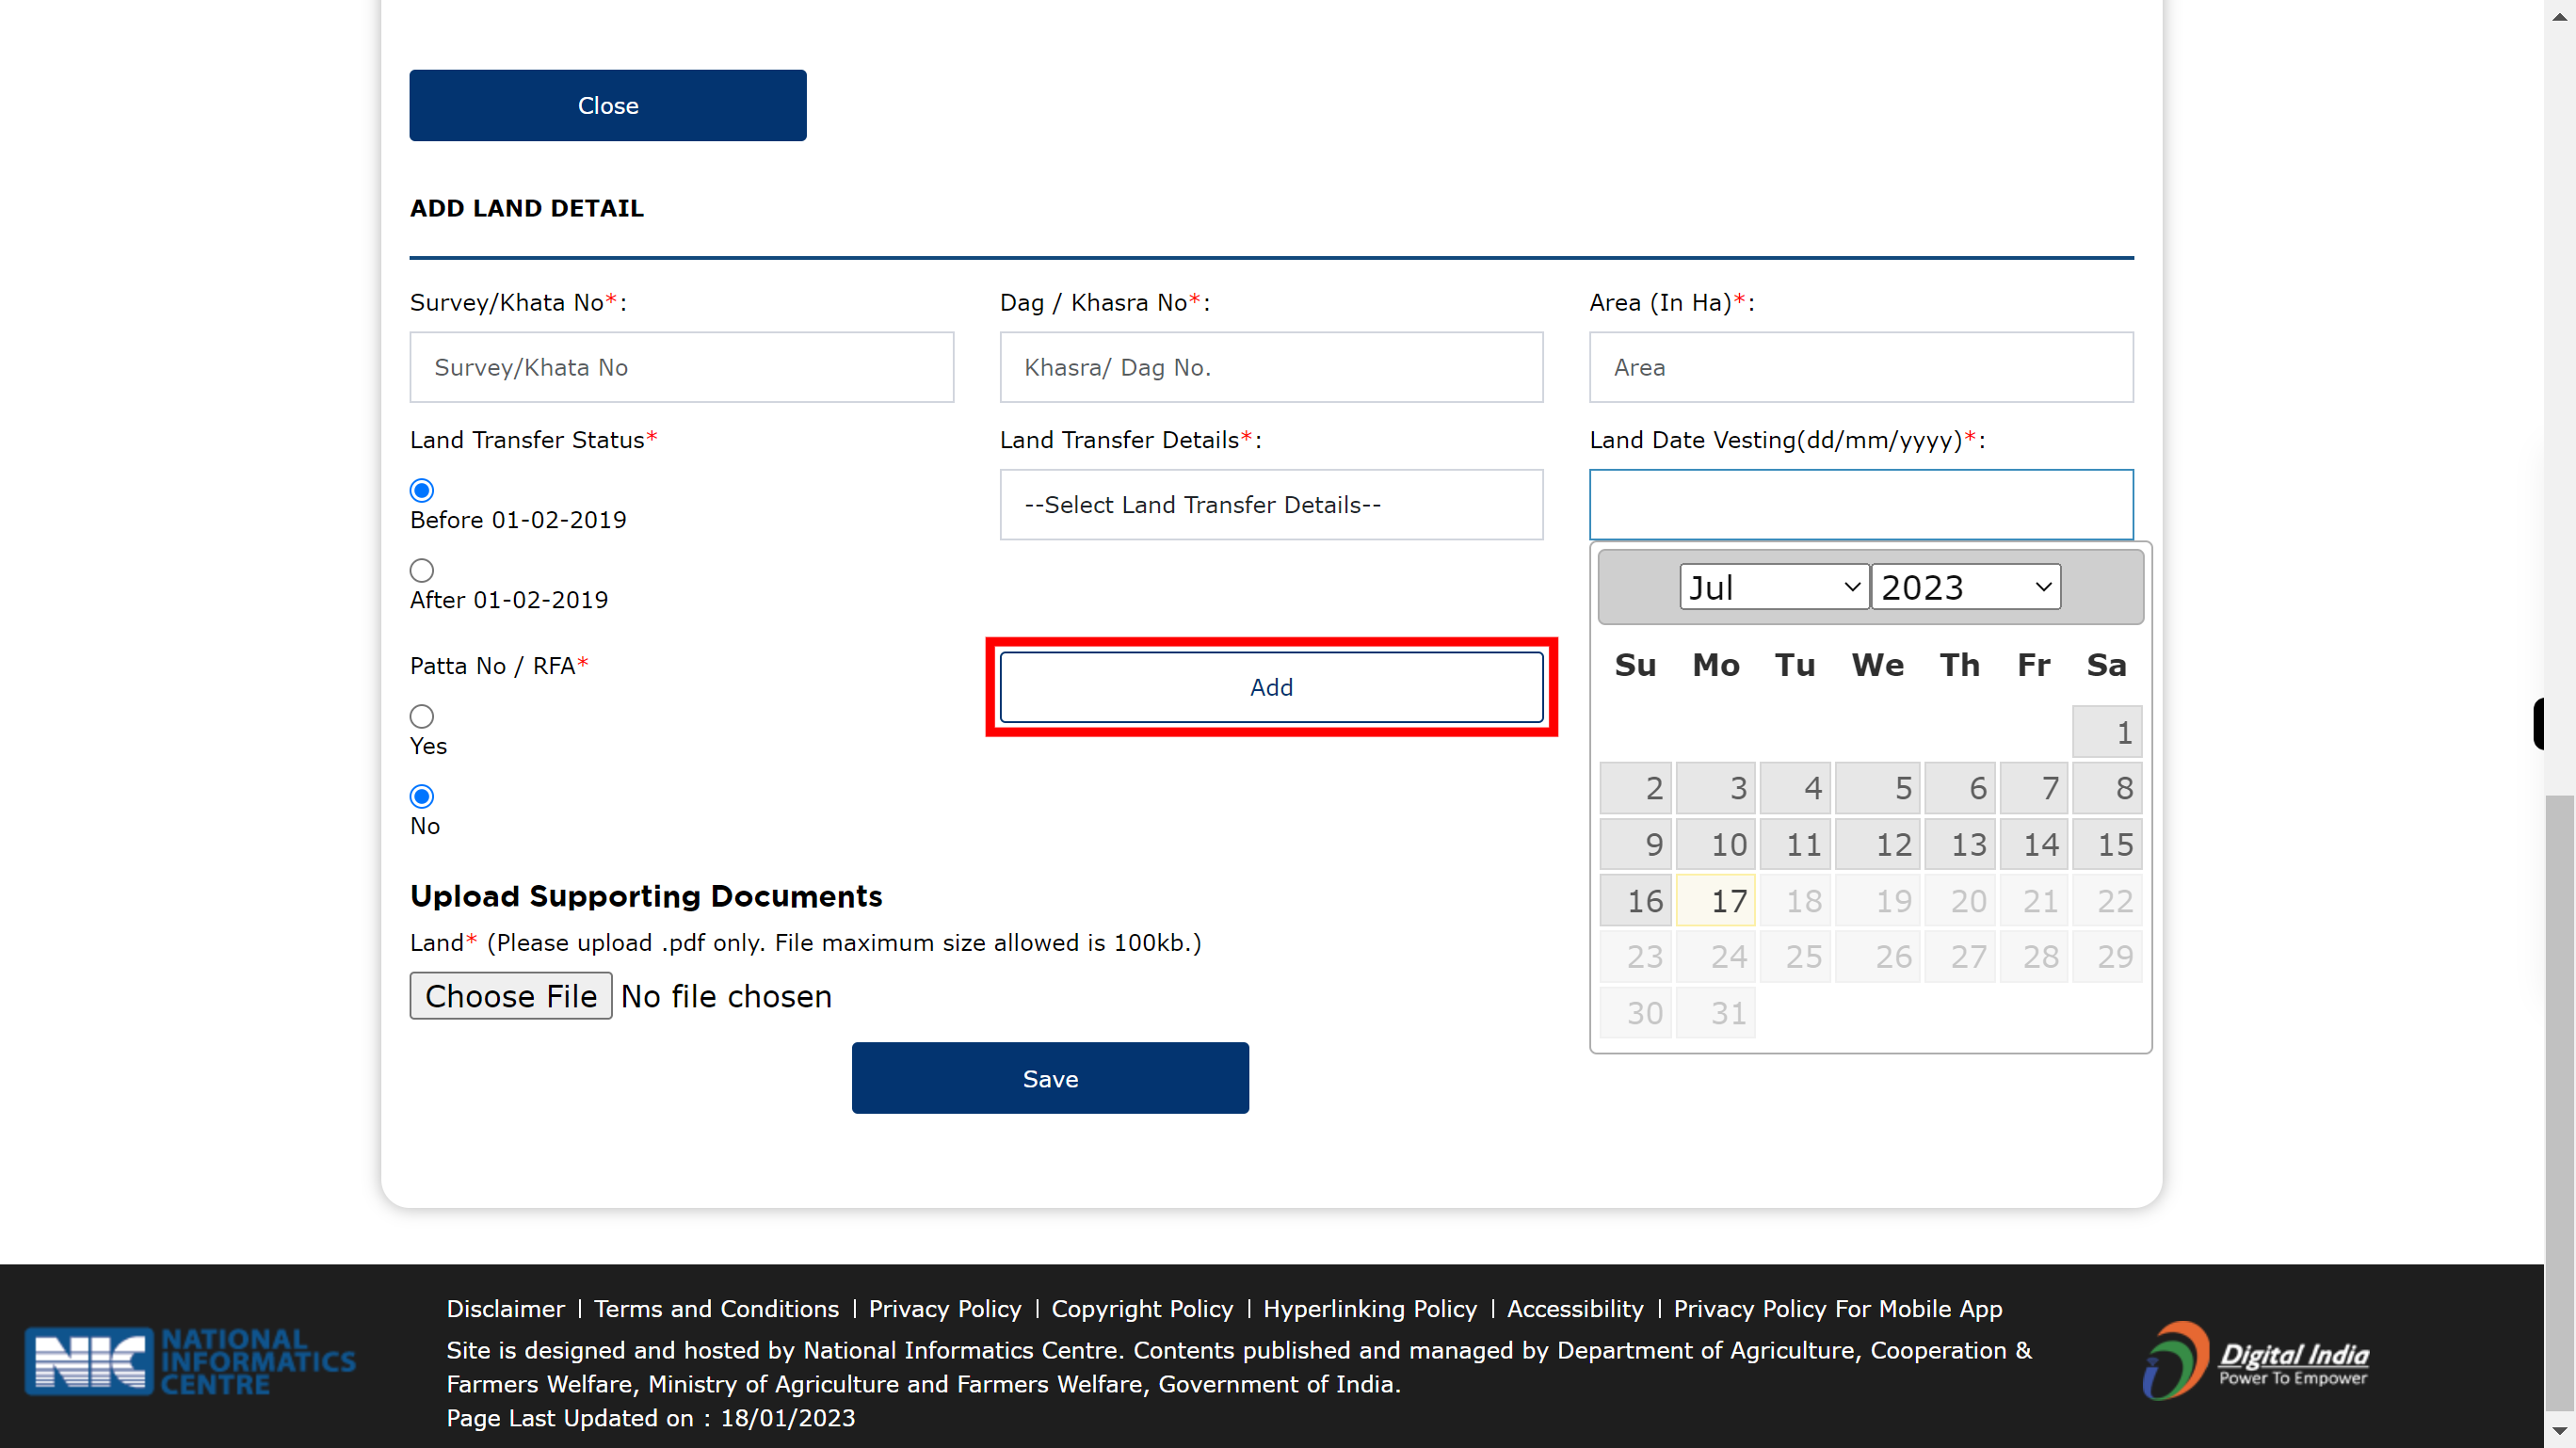
30.
Click on the Add button.
-
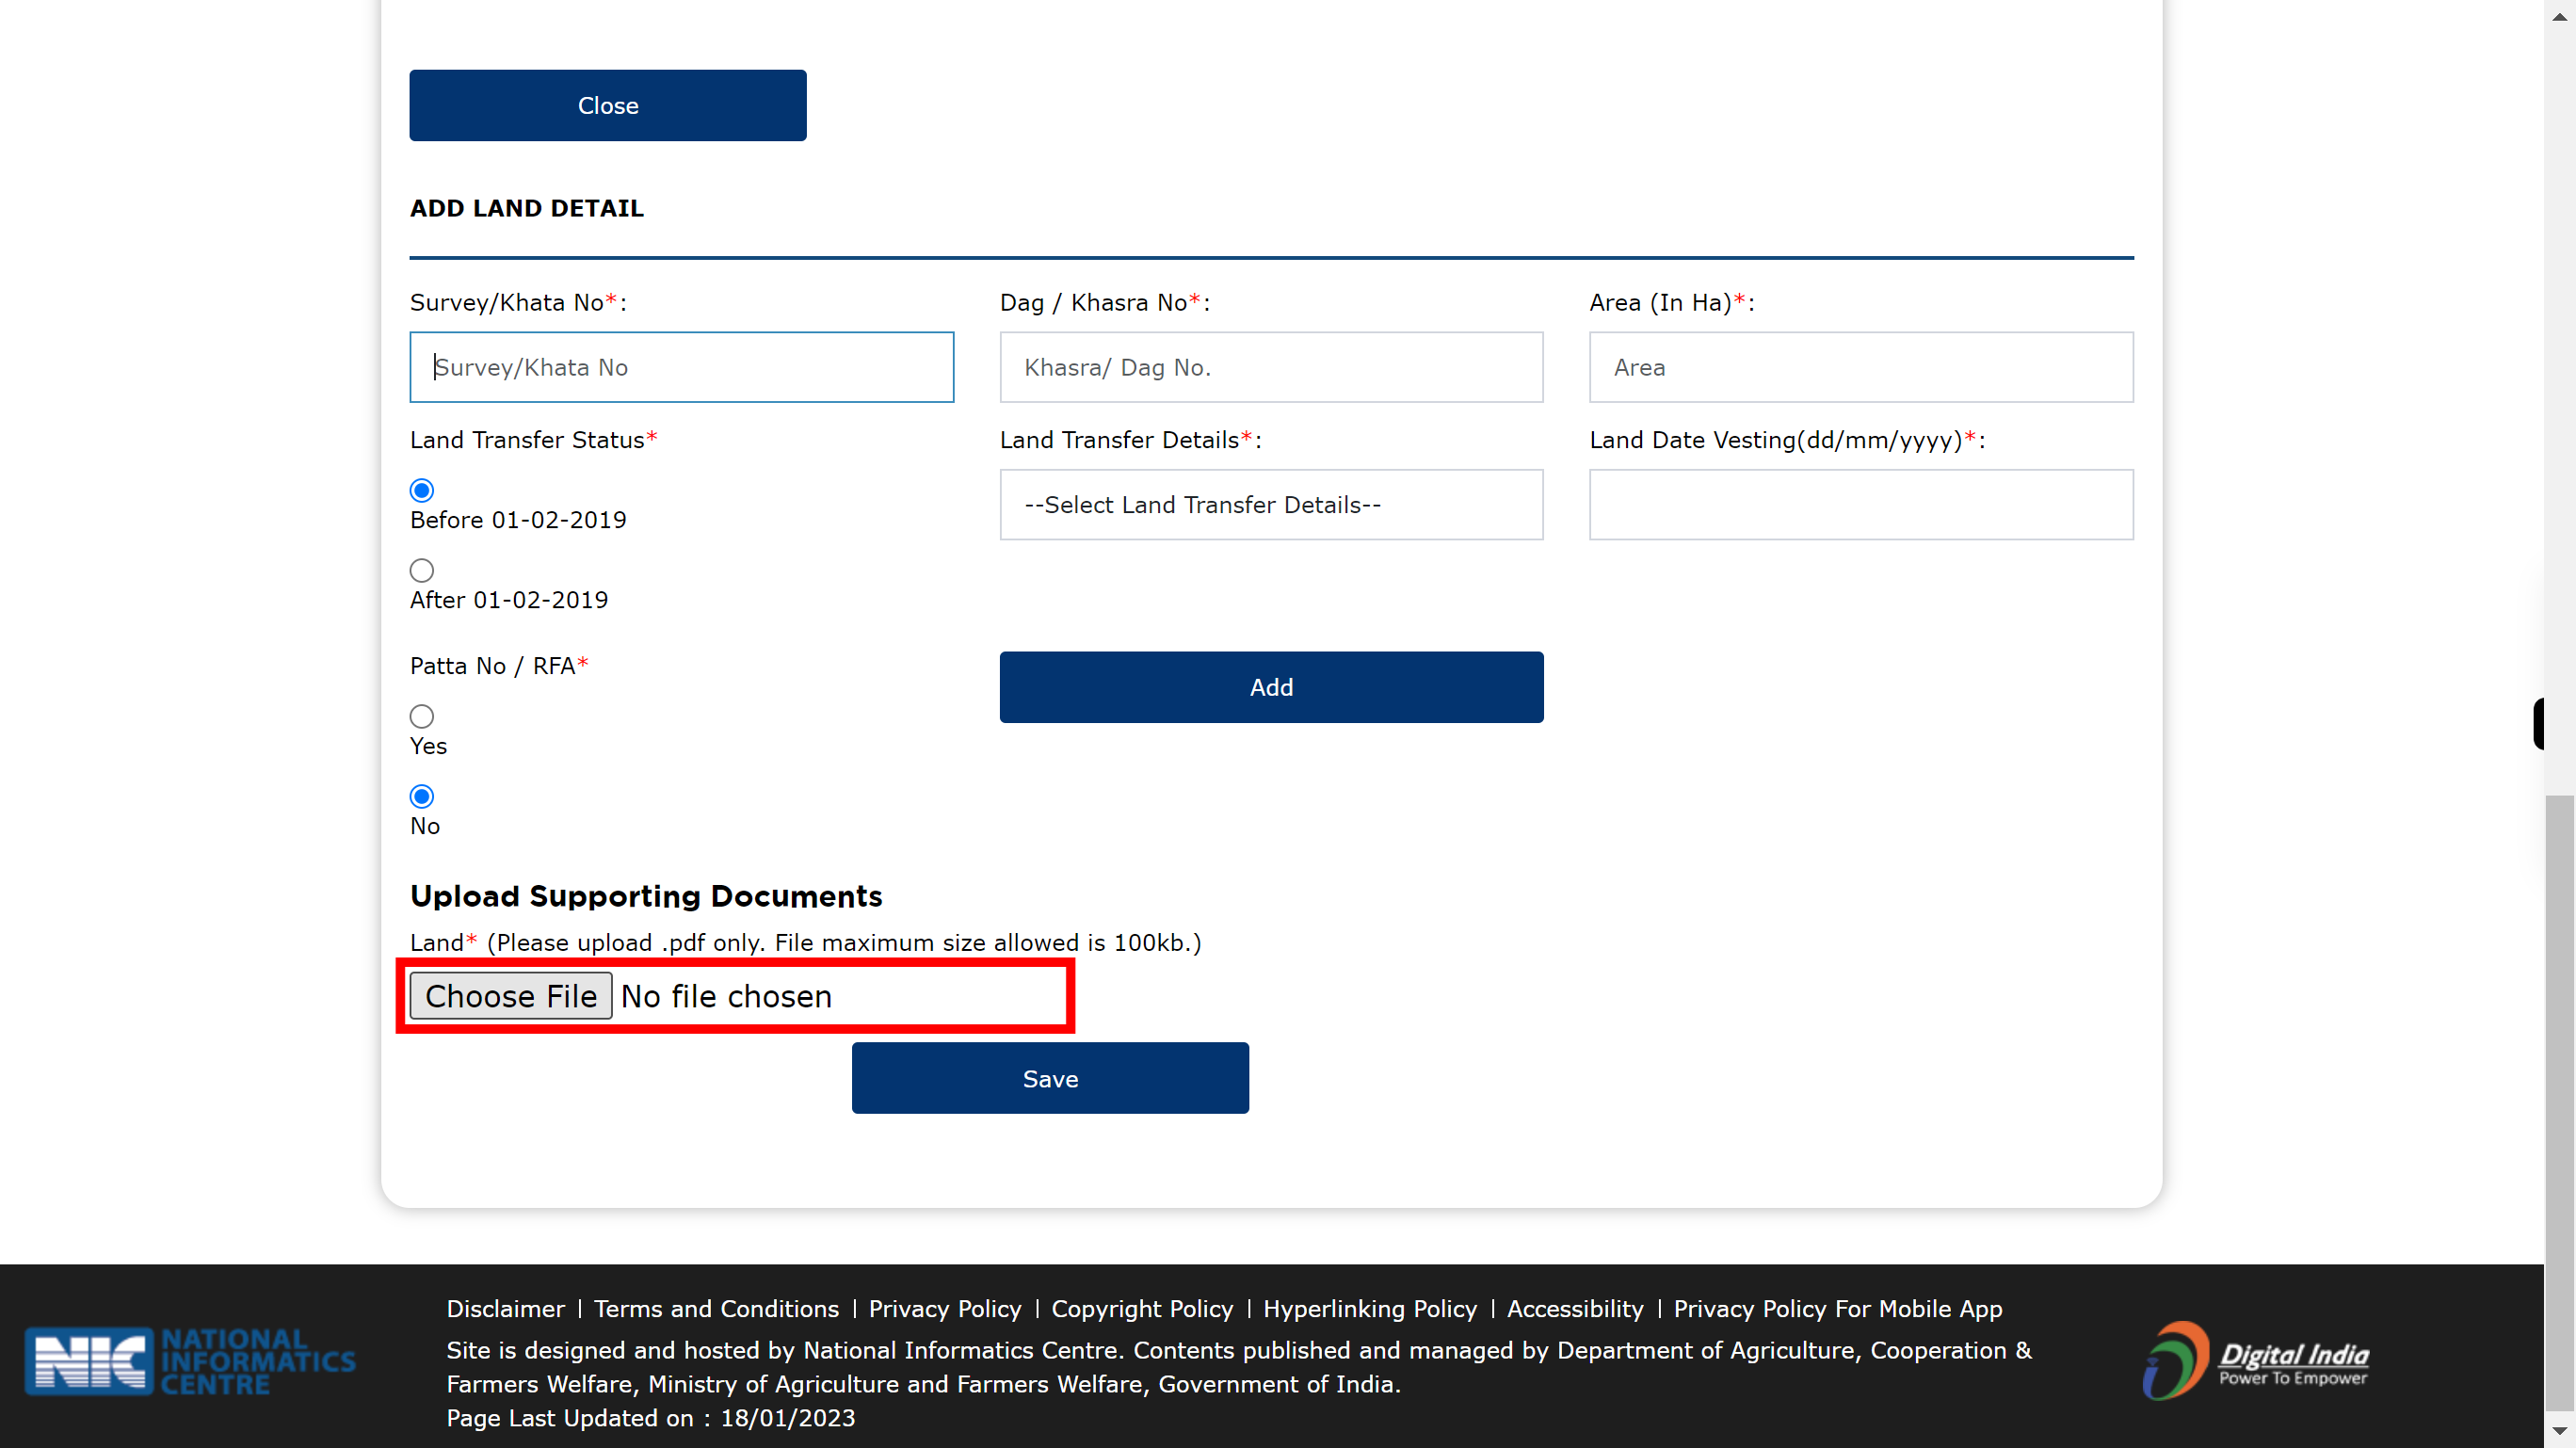
31.
Click and upload the required doc. Once done, click on the 'Next' button in the Supervity instruction widget.
-
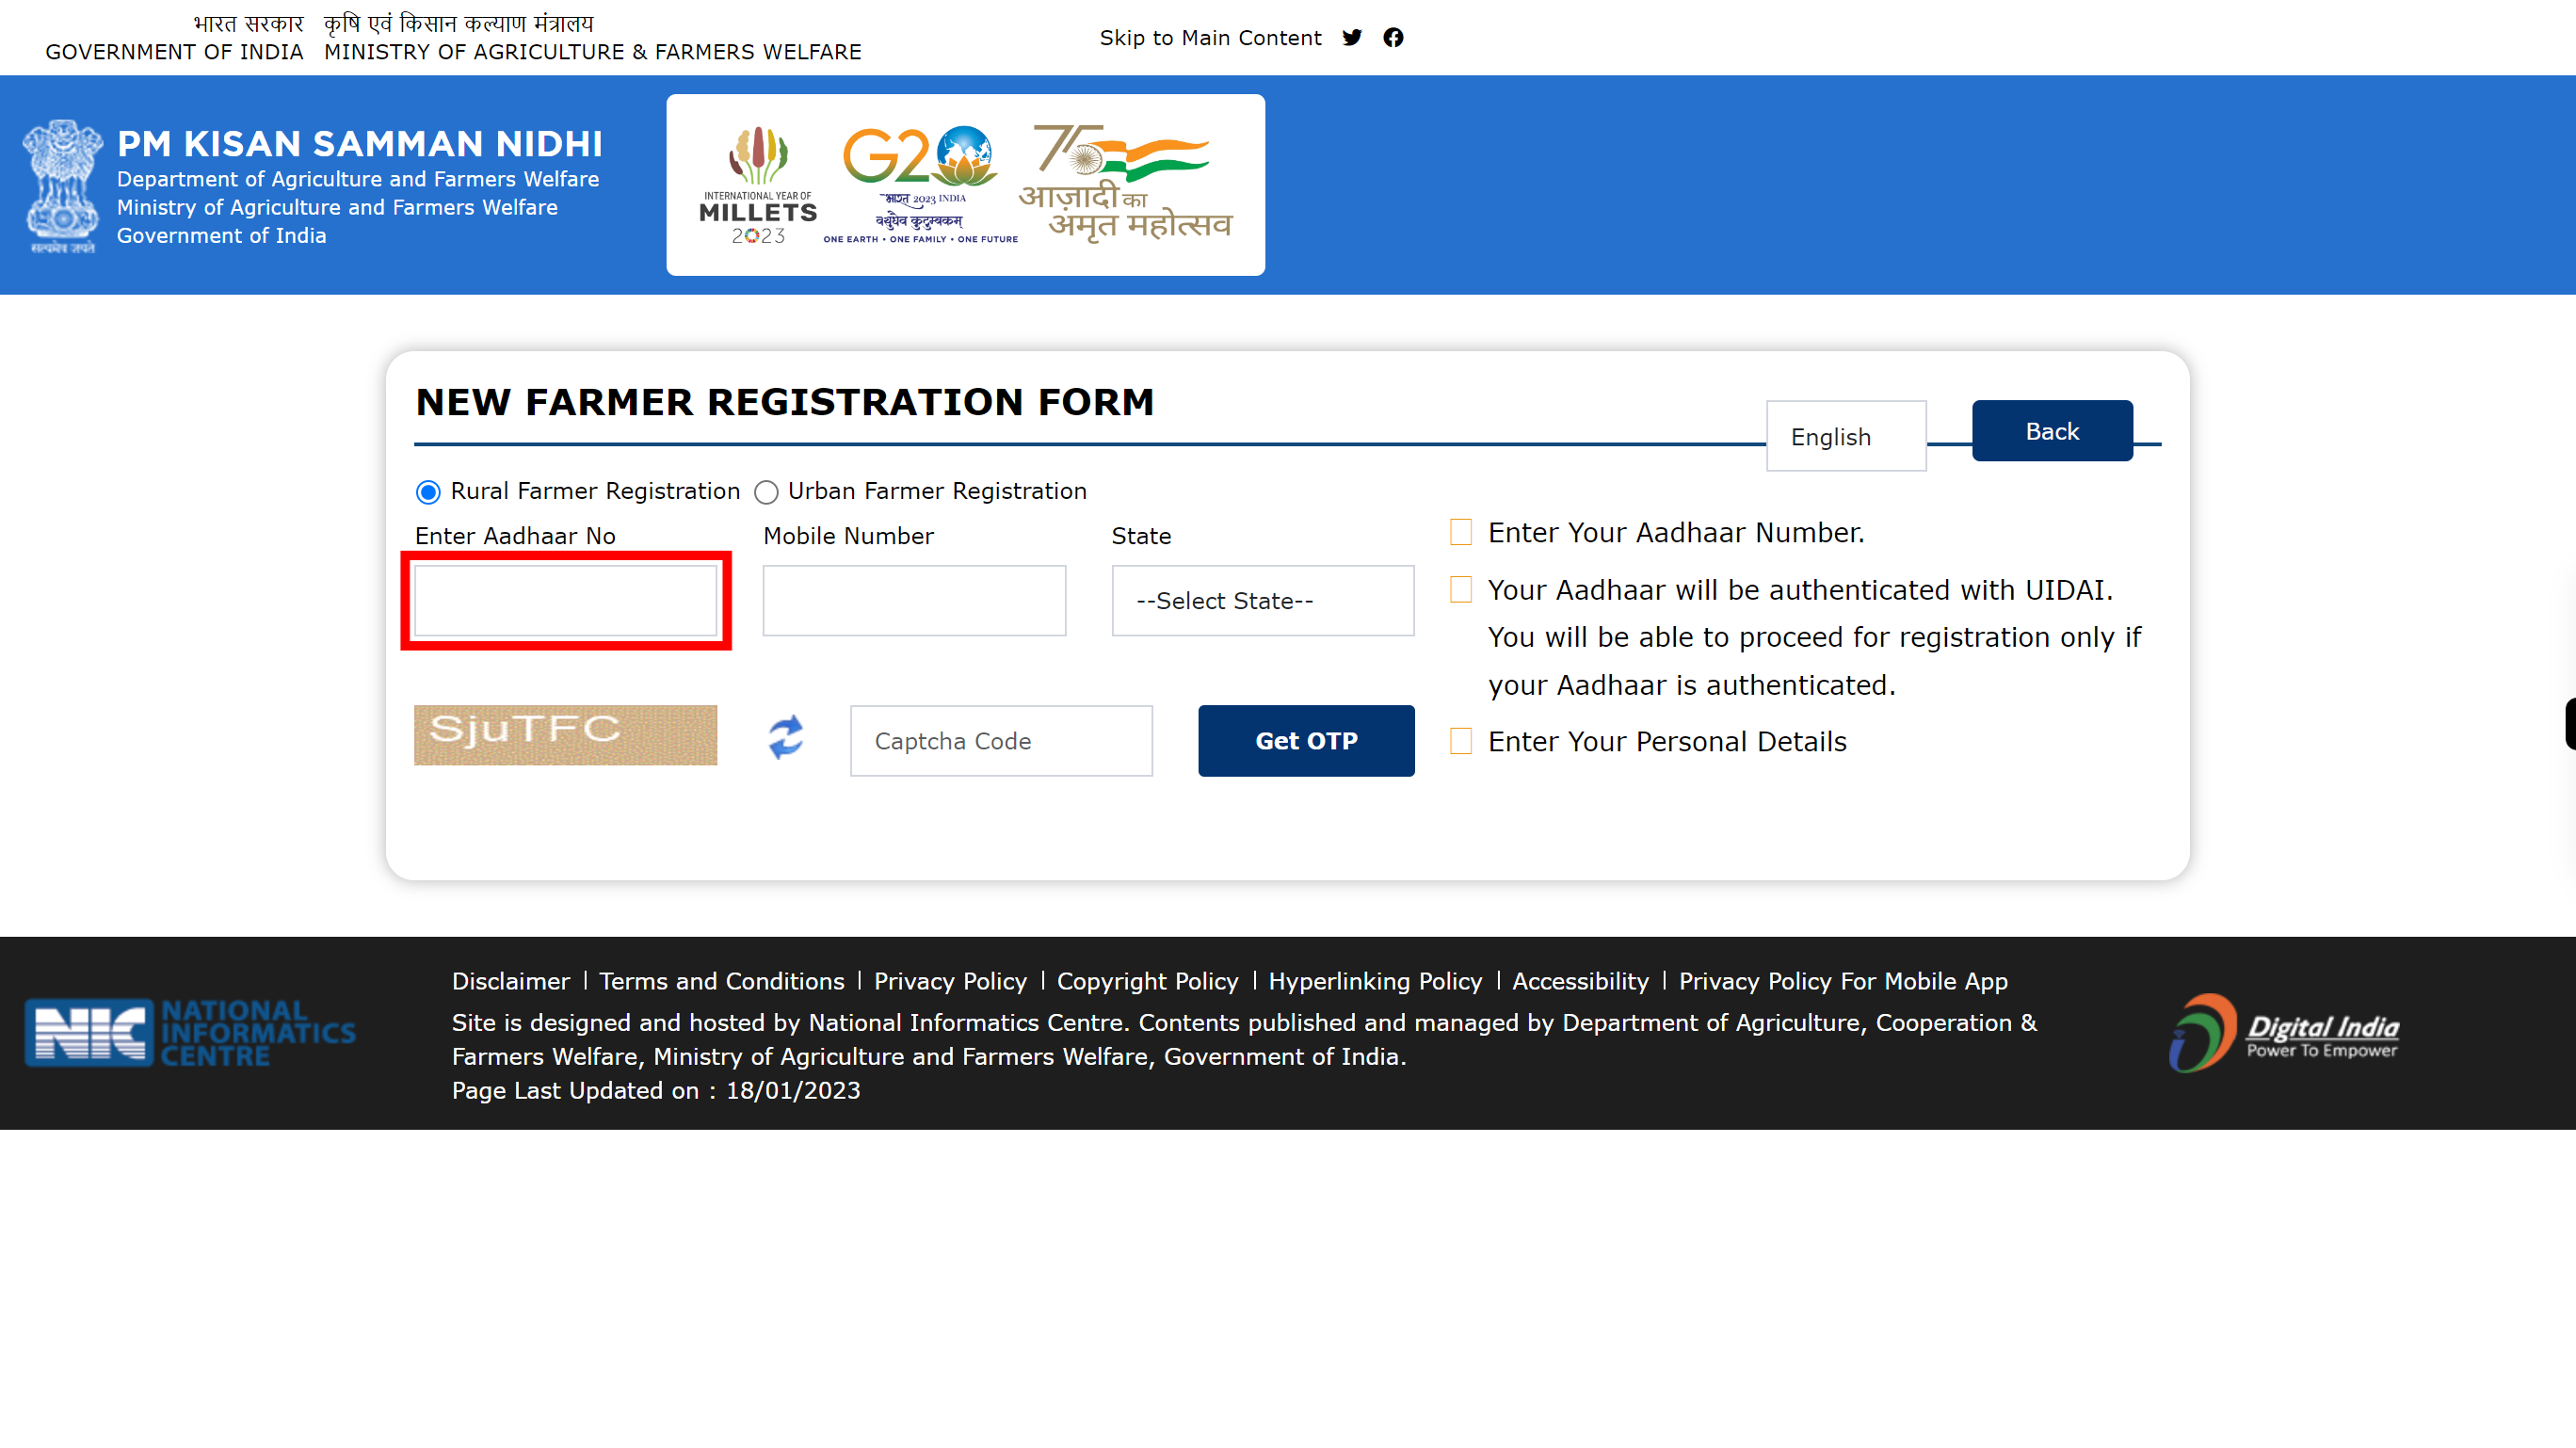
32.
Click on the Save button to save the updated information.
