This skill shows the steps to be followed to apply caste certificate. Prerequisites: caste certificate Application form to be filled and scanned Aadhar, ration card, SSC marks memo, DOB, Caste certificate issued to the family members and filled application form[NOTE: Please make sure that log in to the AP Meeseva website before playing the skill].
-
1.
Open :: Meeseva - Online Login Form
-
2.
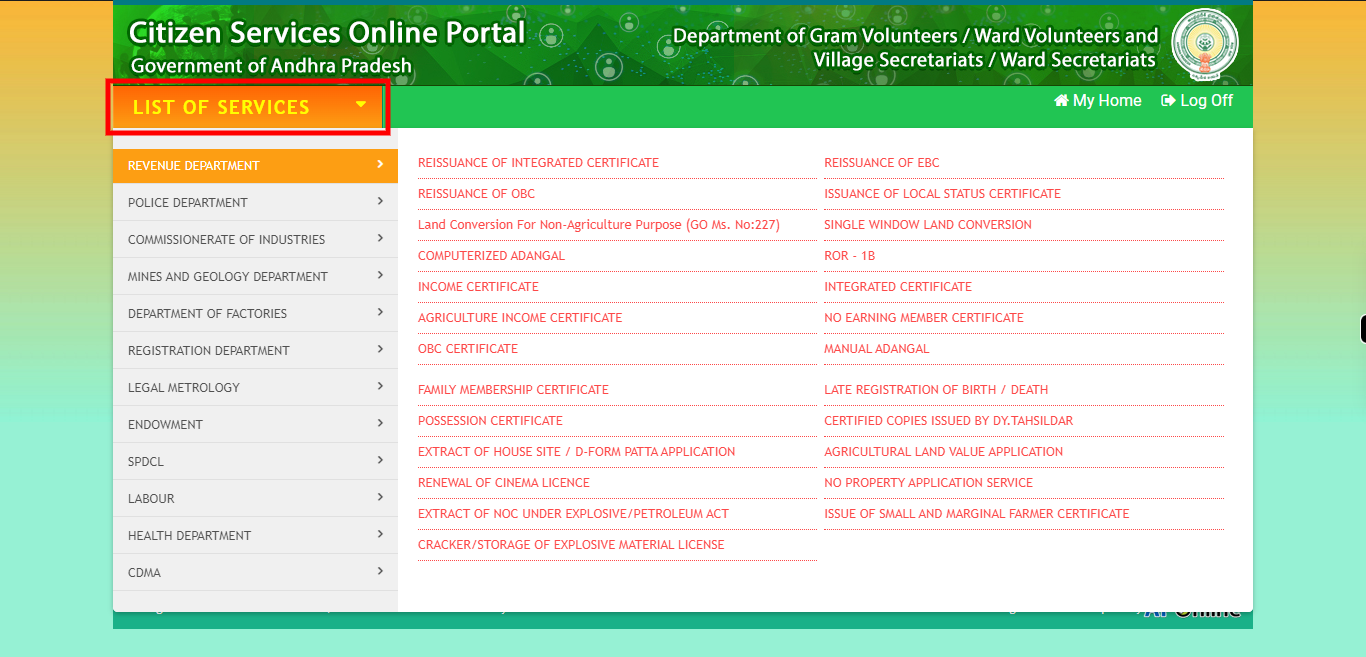
Click on the "List of services" button to access the available services in AP meesava website
-
3.
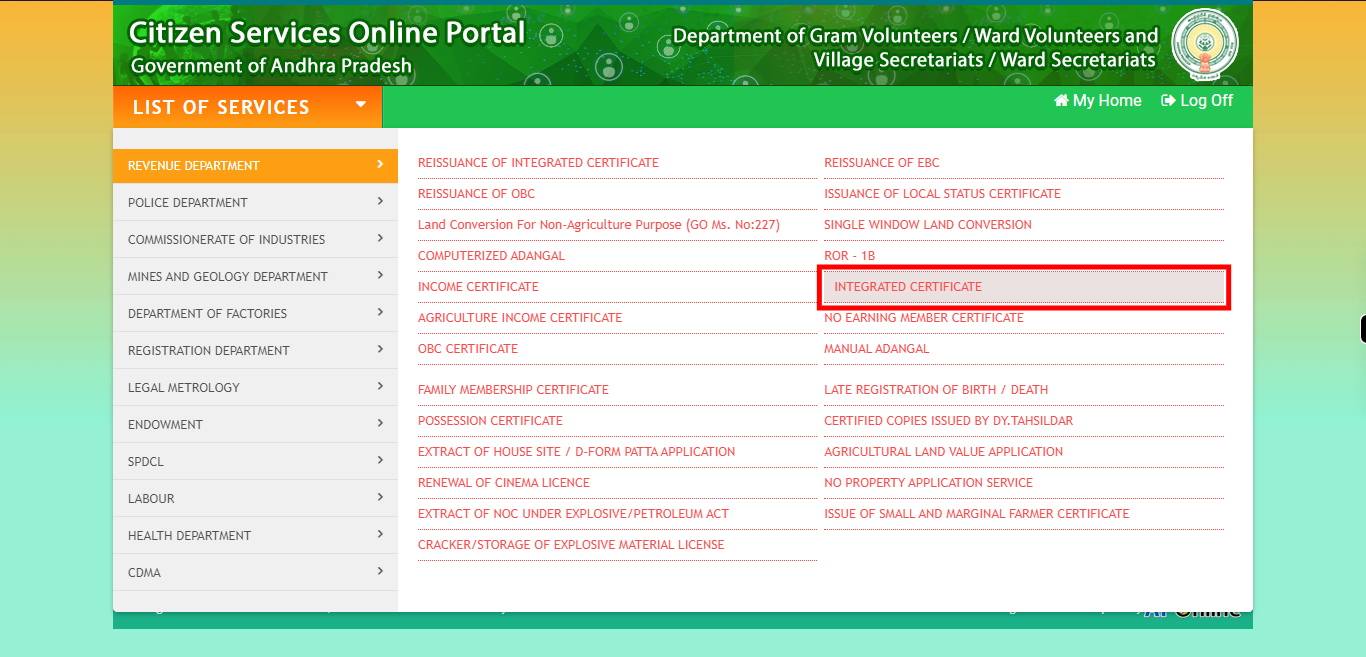
Click on the "INTEGRATED CERTIFICATE" option from the list of available options.
-
4.
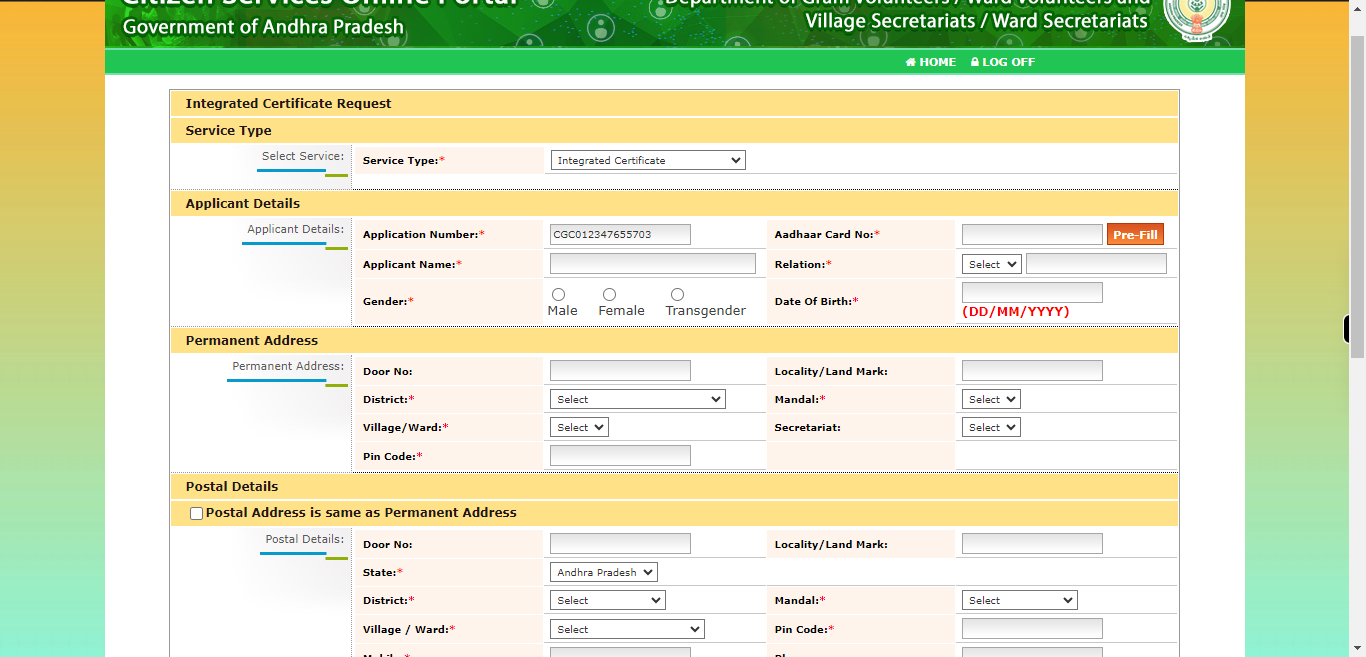
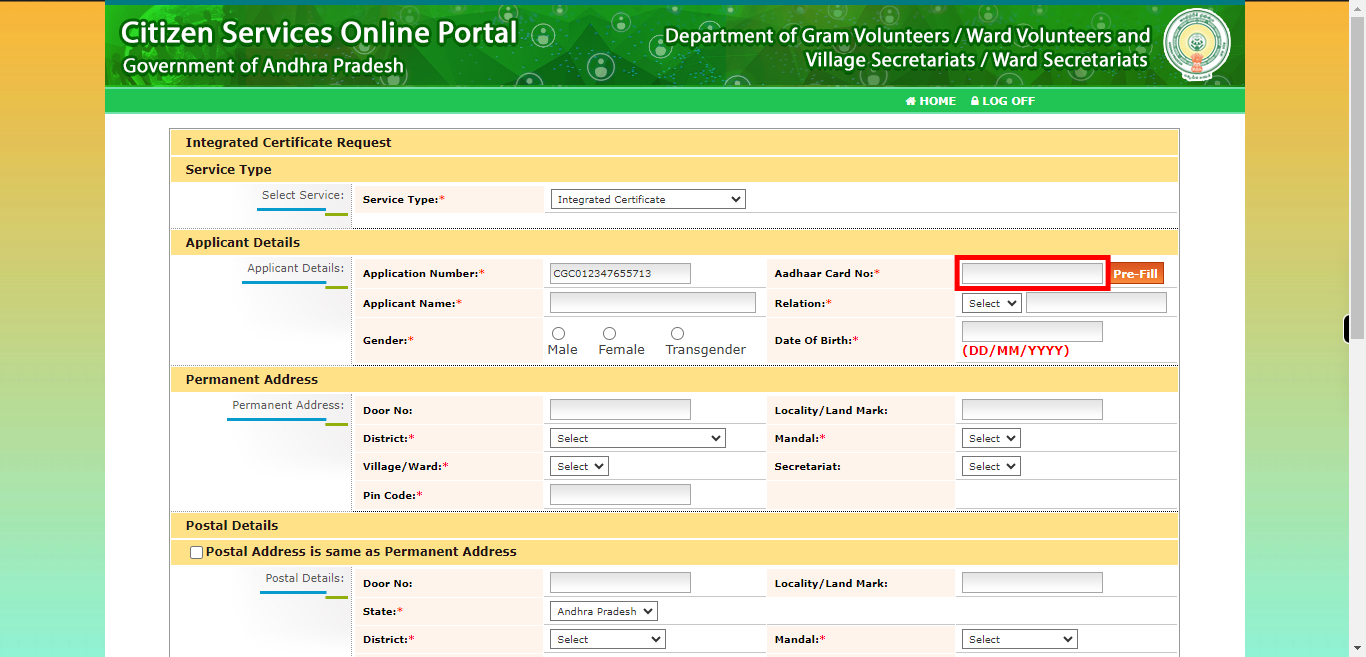
Enter the applicant's Aadhaar card number in the designated field. The Aadhaar card number is a unique 12-digit identification number issued by the Unique Identification Authority of India (UIDAI). Click on the "Next" button on the Supervity instruction widget.
-
5.
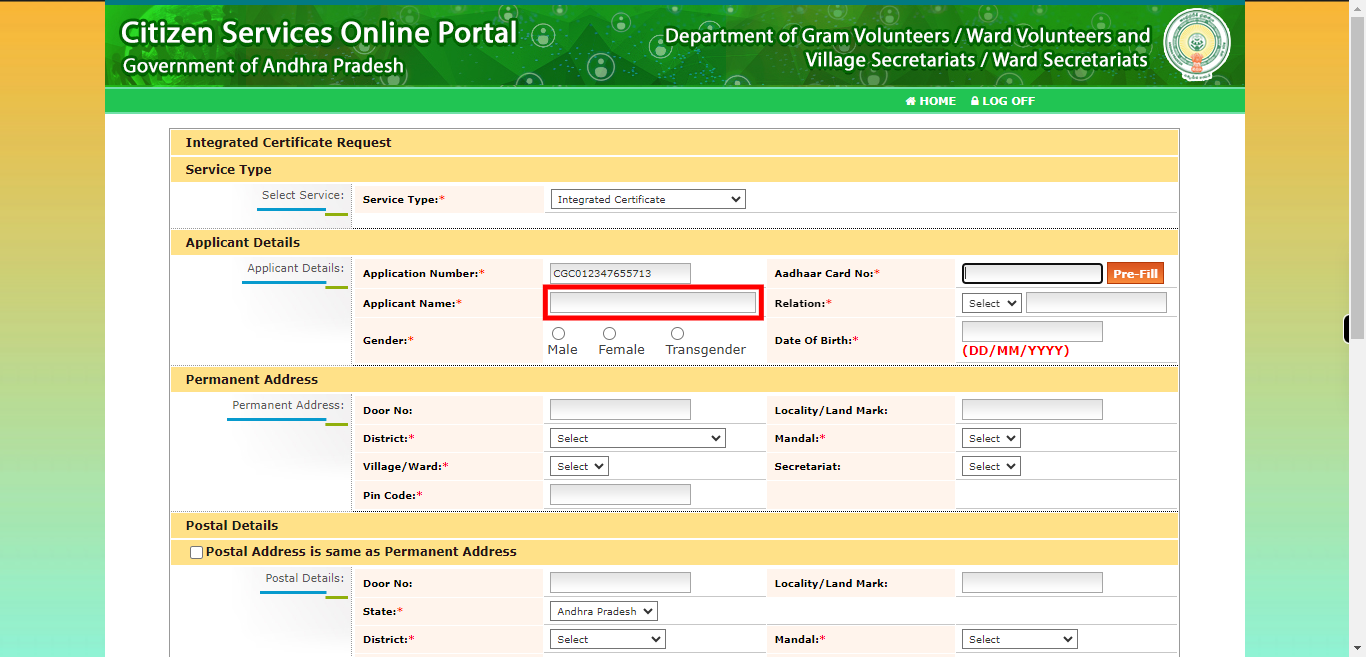
Enter the full name of the applicant in the designated field. Make sure to provide the applicant's name exactly as it appears on their identification documents or official records. Click on the "Next" button on the Supervity instruction widget.
-
6.
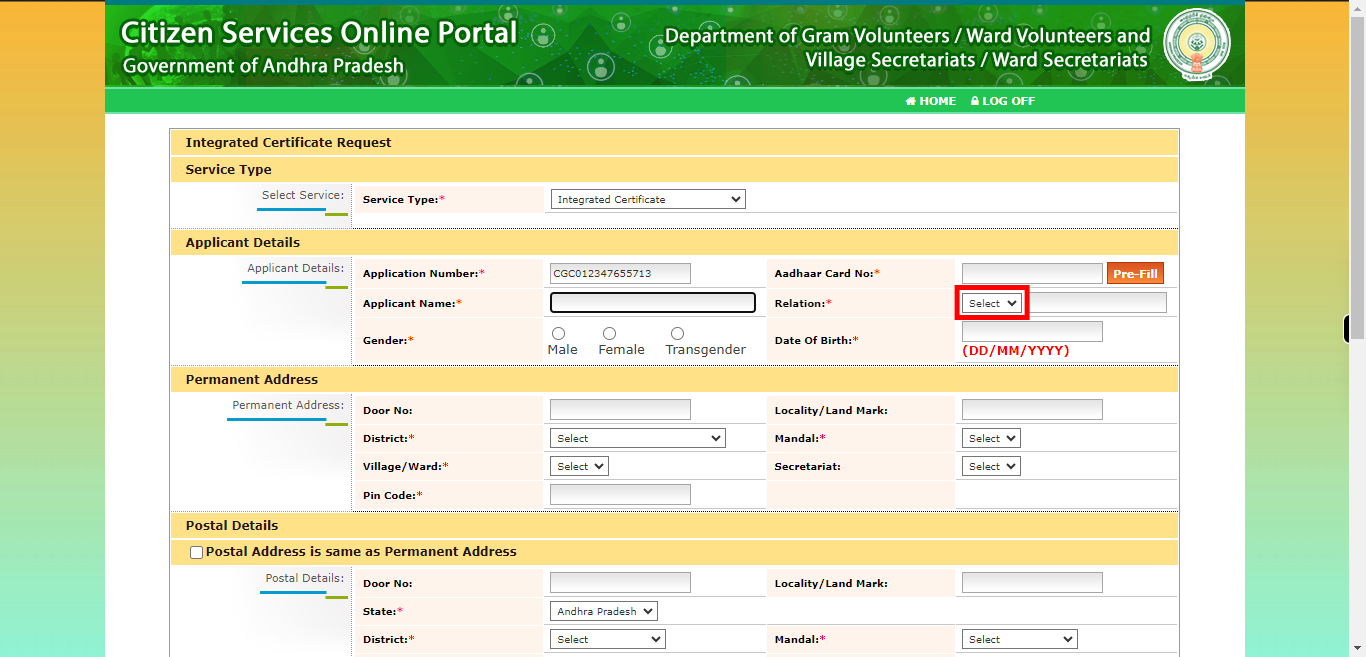
To proceed, please select the appropriate relation from the available dropdown options. The dropdown will provide a list of relations or relationships that you can choose from. Select the option that accurately represents the applicant's relationship with the person mentioned in the form. Enter the name you chose from the drop-down in the above step. Click on the "Next" button on the Supervity instruction widget.
-
7.
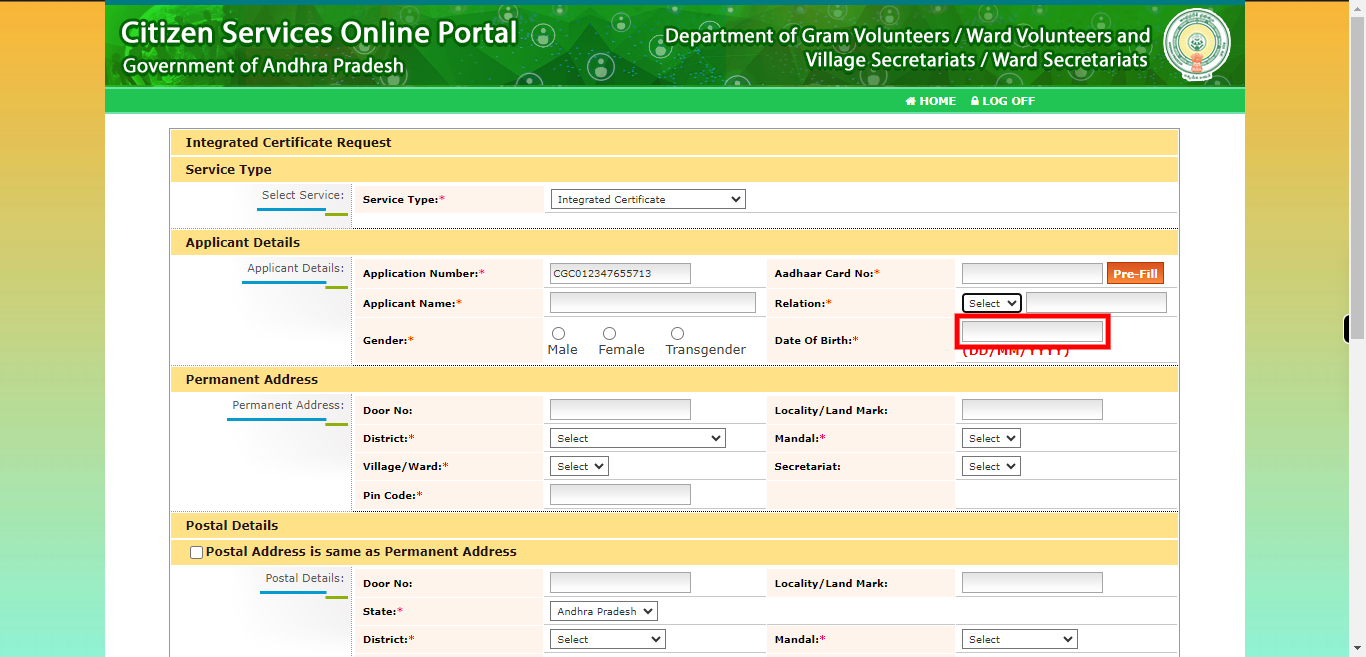
Enter your DOB in the format of DD/MM/YYYY. Make sure to provide the applicant's DOB exactly as it appears on their identification documents or official records. Click on the "Next" button on the Supervity instruction widget.
-
8.
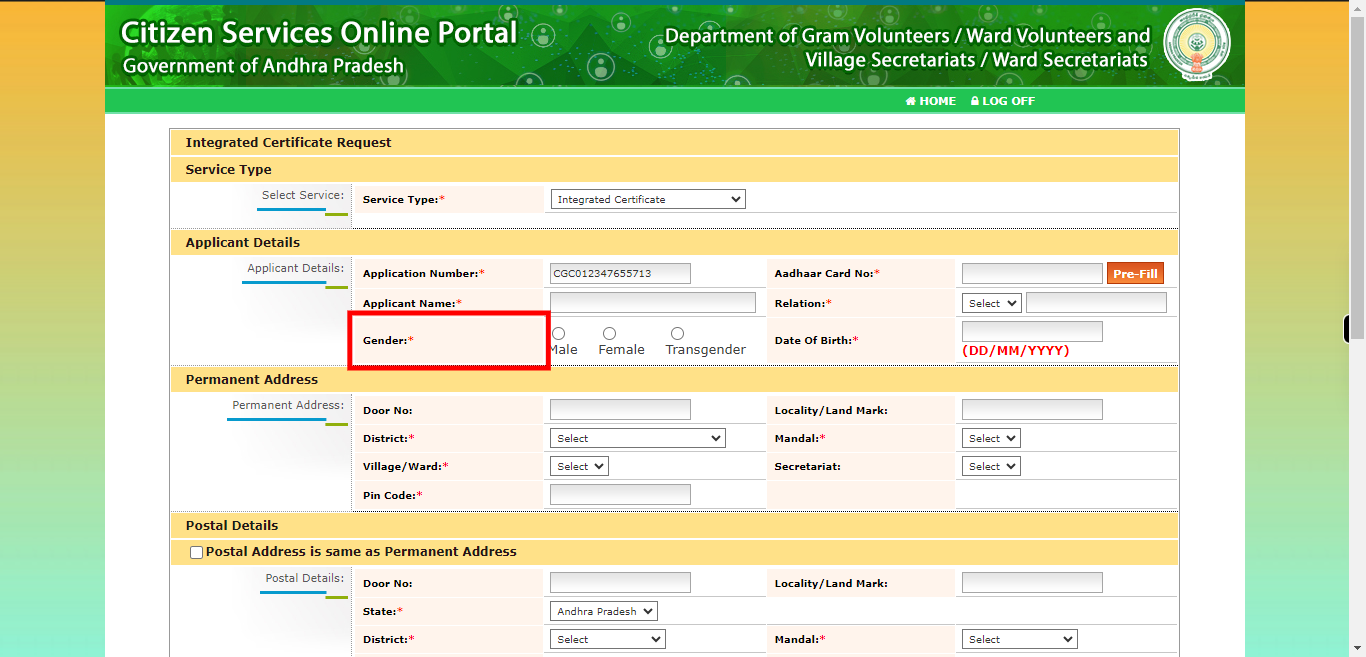
Please select your gender from the available options. Click on the "Next" button on the Supervity instruction widget.
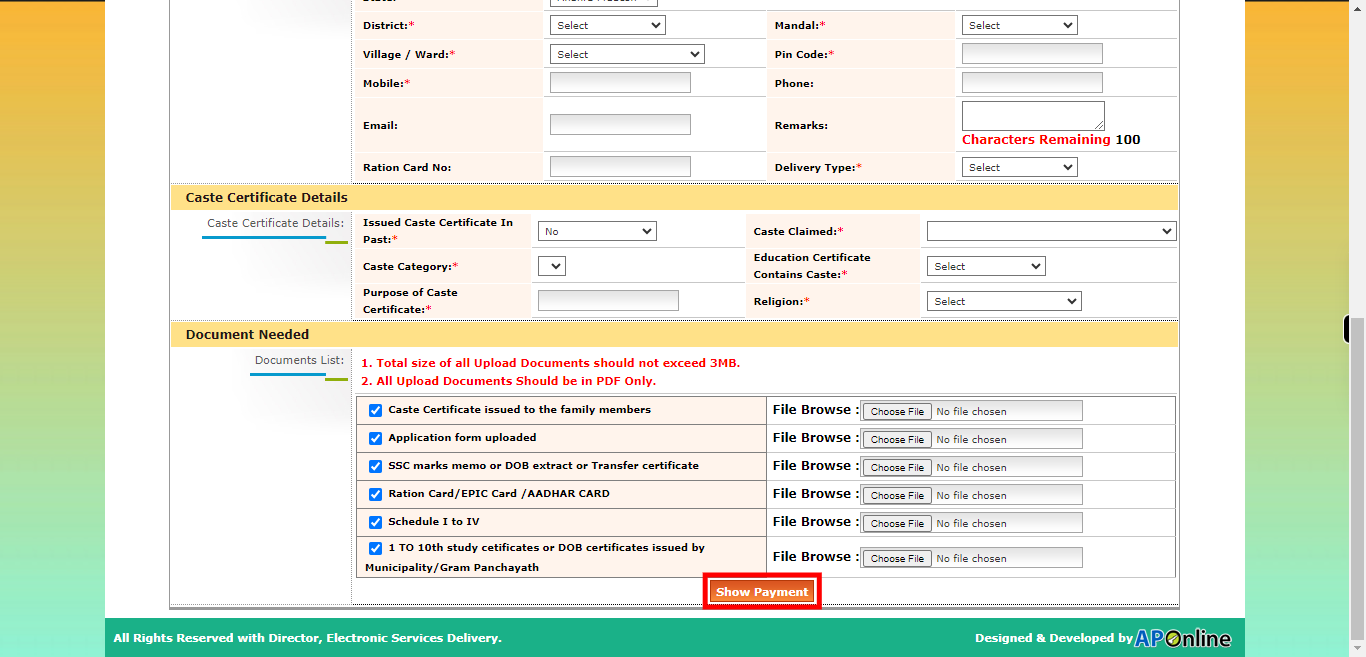
-
9.
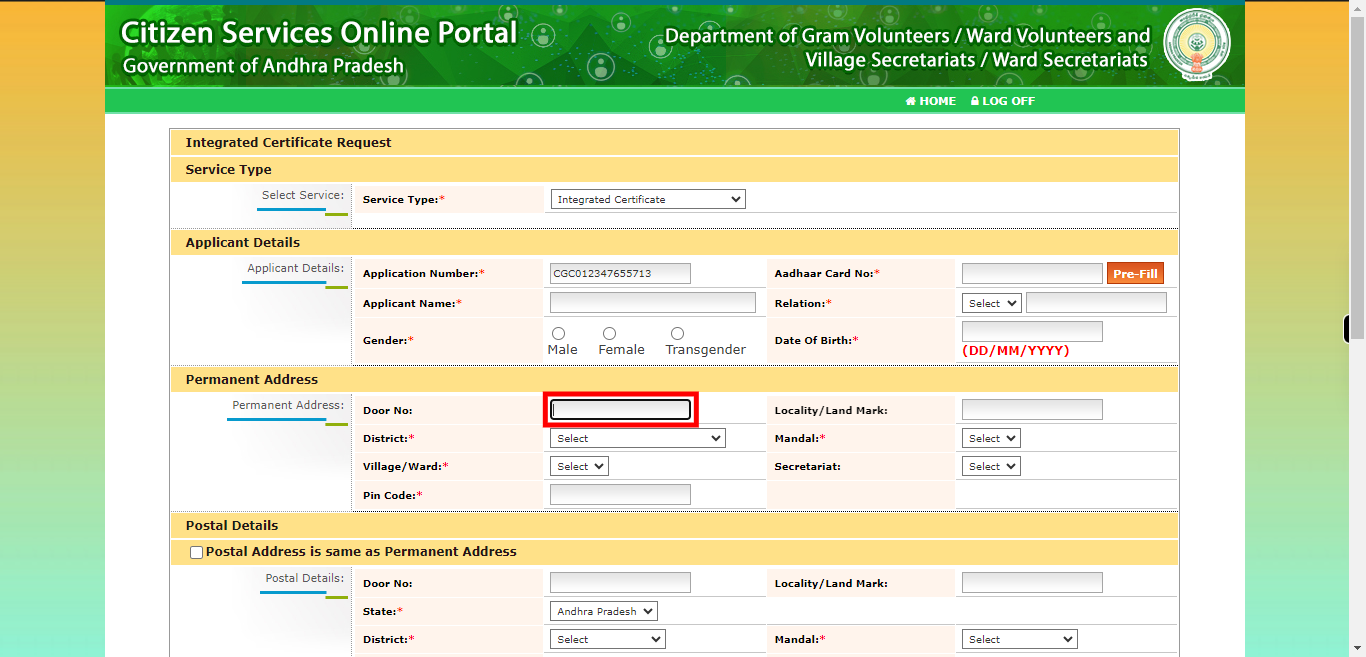
Enter the door number or house number as part of your residential address in the designated field. The door number is typically used to identify a specific residential unit or building within a street or locality. Click on the "Next" button on the Supervity instruction widget.
-
10.
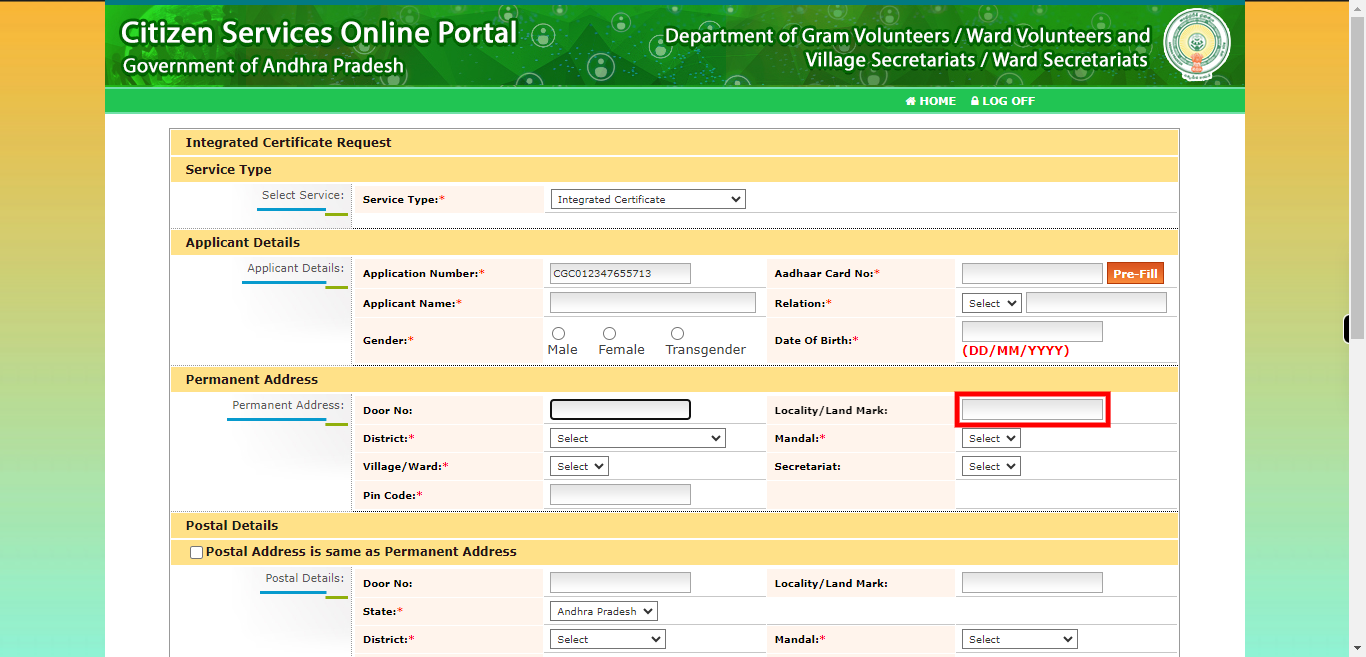
Provide the landmark associated with your residential address in the designated field. A landmark is a notable or distinctive feature near your residence that can help in identifying the location more easily. Click on the "Next" button on the Supervity instruction widget.
-
11.
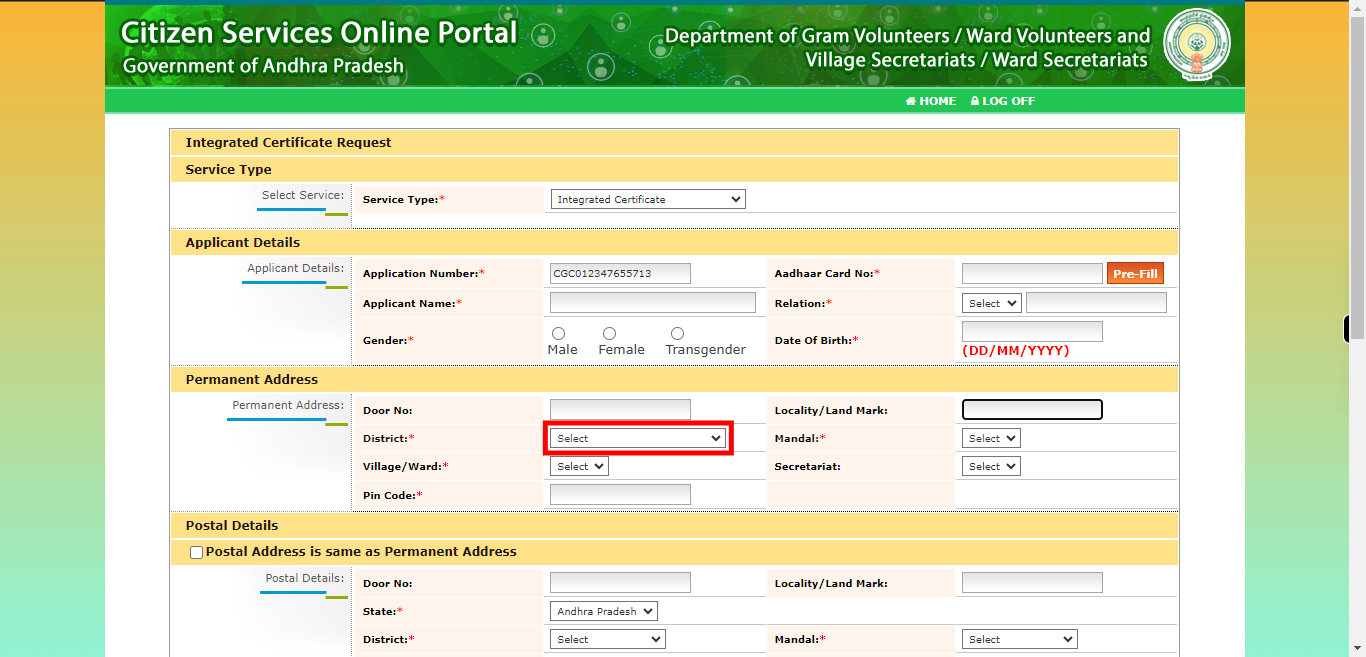
Select the district from the available options provided for your residential address. The district refers to the administrative division or region. Click on the "Next" button on the Supervity instruction widget.
-
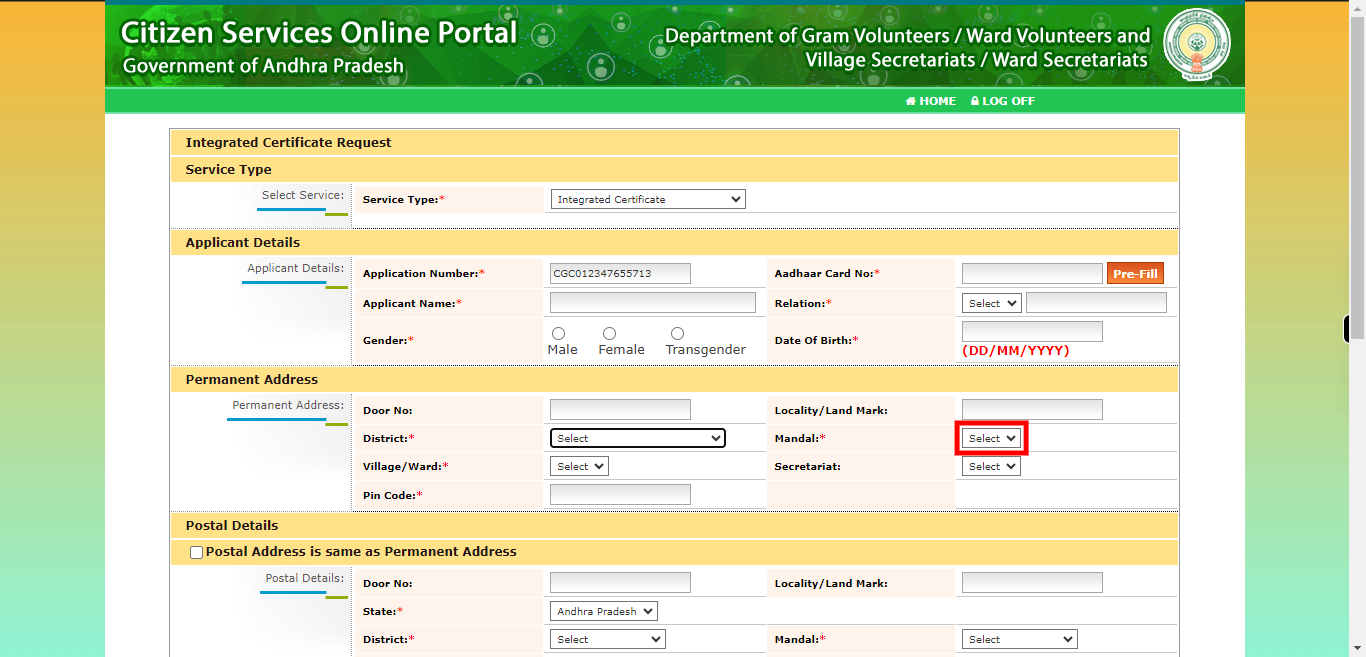
12.
Select the mandal from the available options provided for your residential address. A mandal is an administrative division within a district in some regions. Click on the "Next" button on the Supervity instruction widget.
-
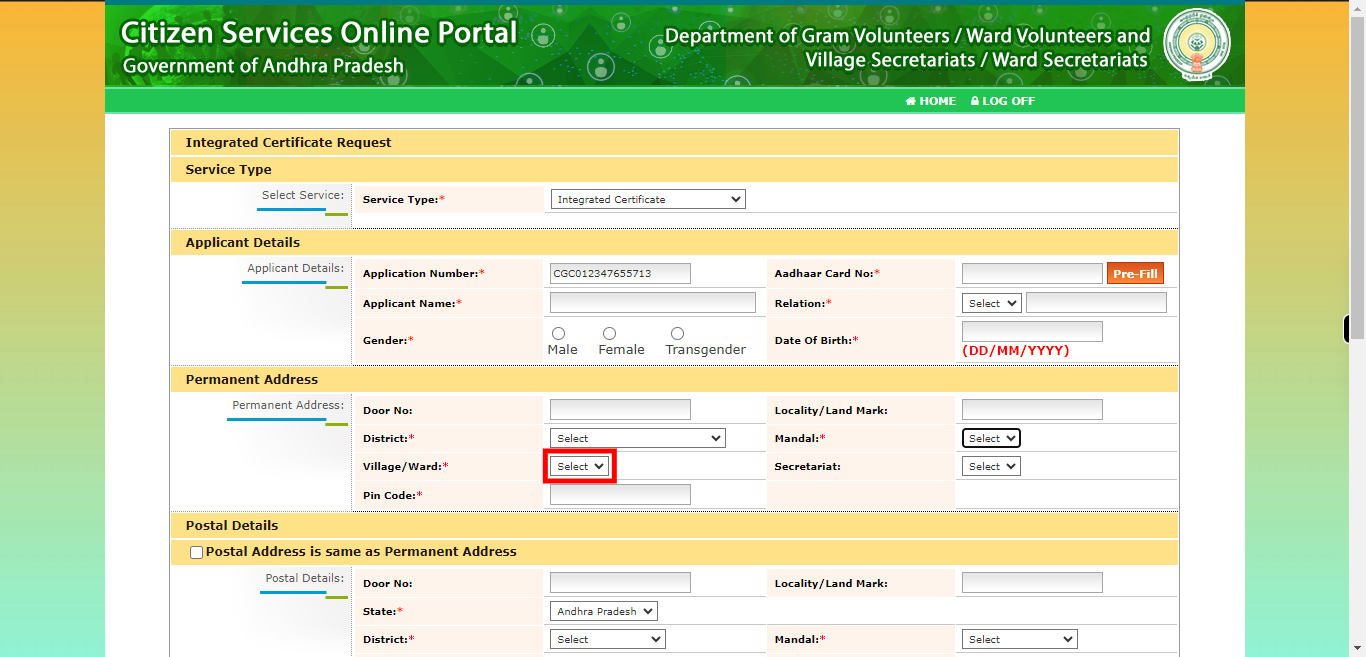
13.
Select the village from the available options provided for your residential address. The village represents a small community or settlement within a specific mandal or district. Click on the "Next" button on the Supervity instruction widget.
-
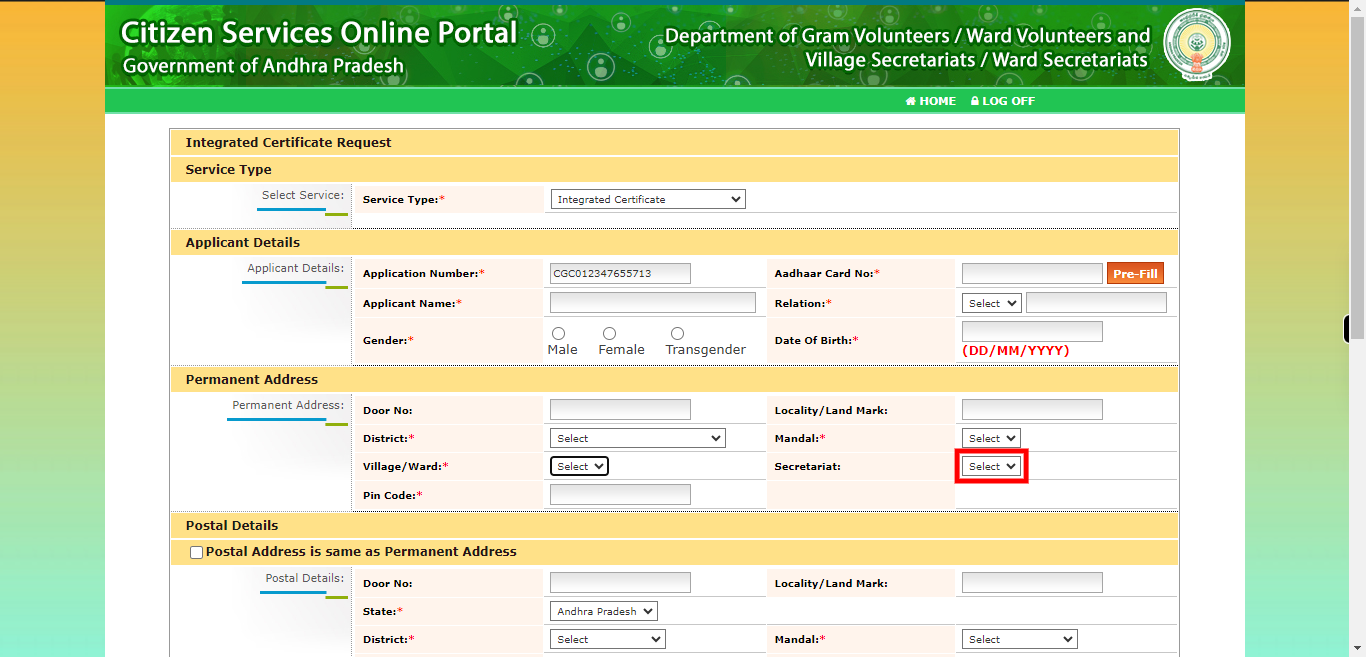
14.
If you have the option to select the Secretariat as part of your residential address, please choose the appropriate Secretariat from the available options provided. The Secretariat typically refers to the administrative headquarters or office complex where government officials and departments operate. Otherwise, leave it blank if it is not applicable. Click on the "Next" button on the Supervity instruction widget.
-
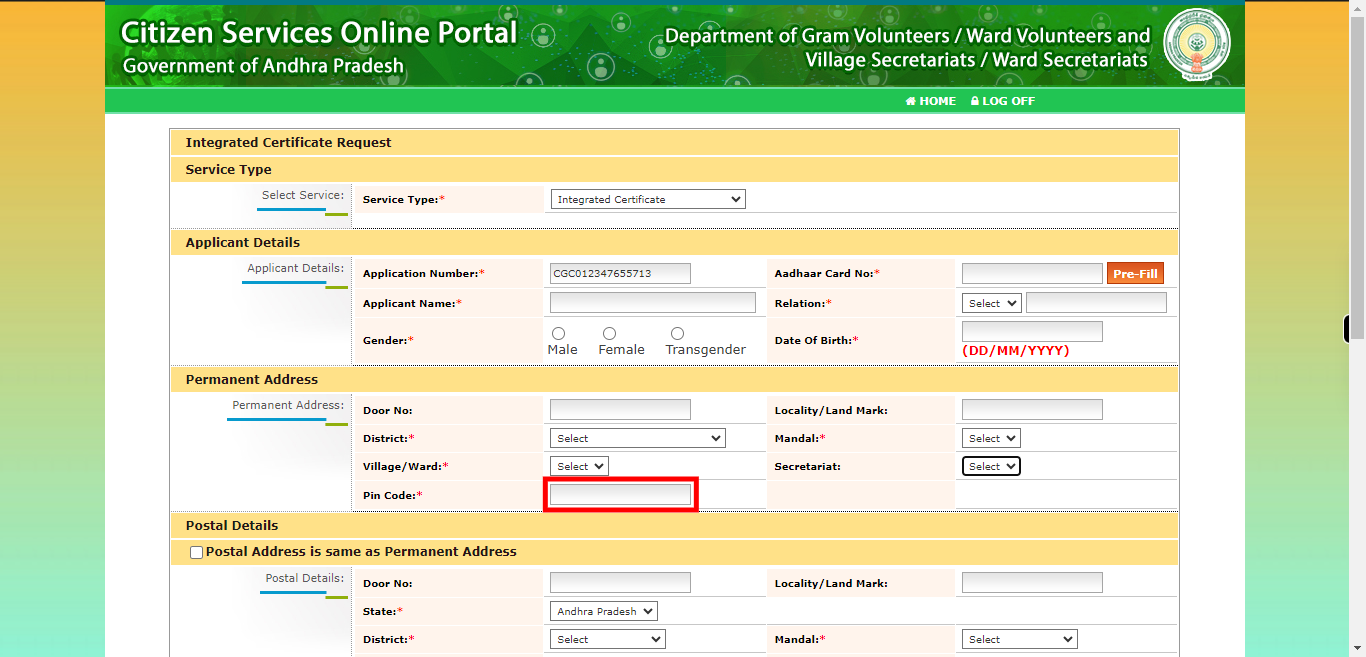
15.
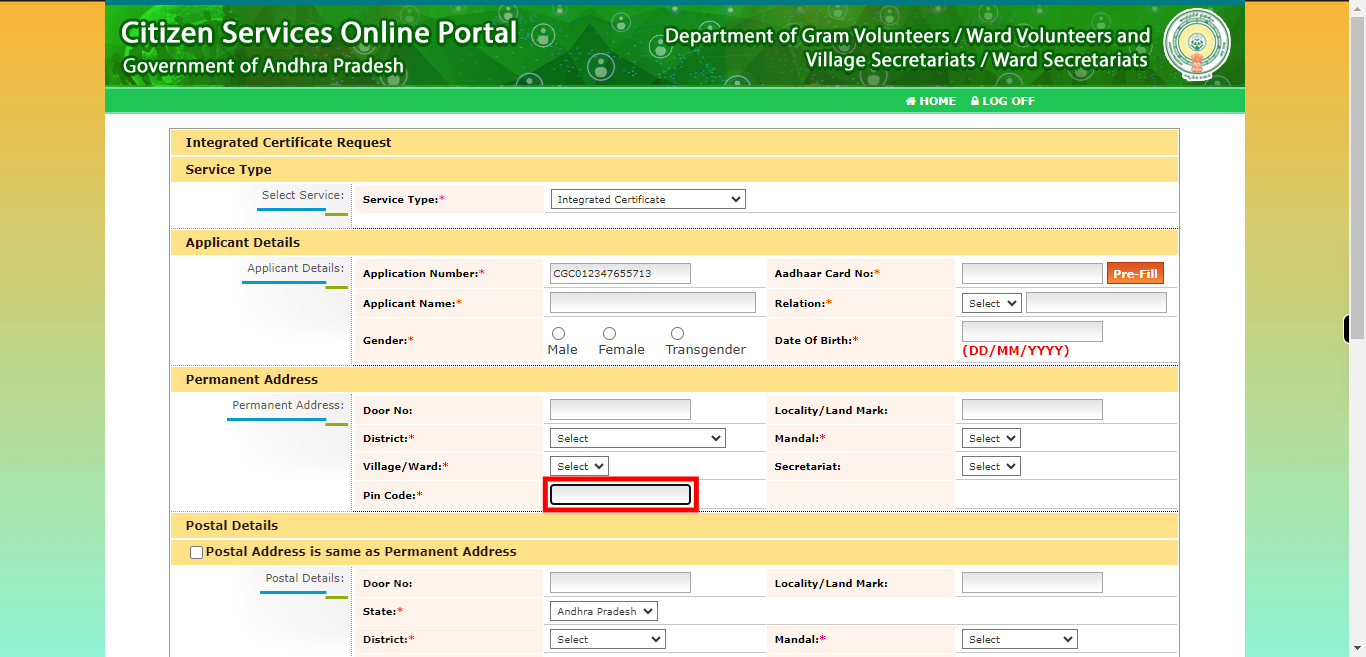
Enter the PIN code or postal code associated with your residential address in the designated field. Click on the "Next" button on the Supervity instruction widget.
-
16.
If your residential address is the same as your postal address check it, please indicate that the residential address is identical to the postal address. This means there is no difference between the two addresses. Click on the "Next" button on the Supervity instruction widget.
-
17.
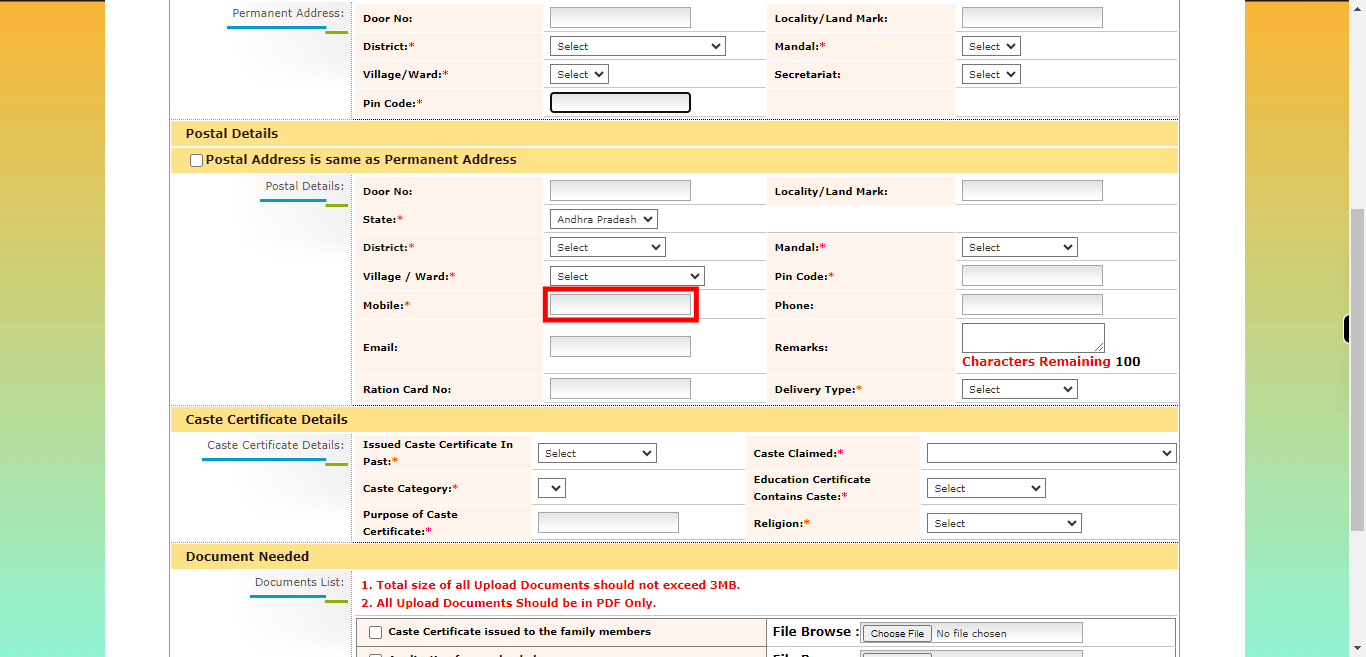
If your residential address is different from your postal address, please manually fill in all the required address fields. Enter your mobile number in the designated field. Click on the "Next" button on the Supervity instruction widget.
-
18.
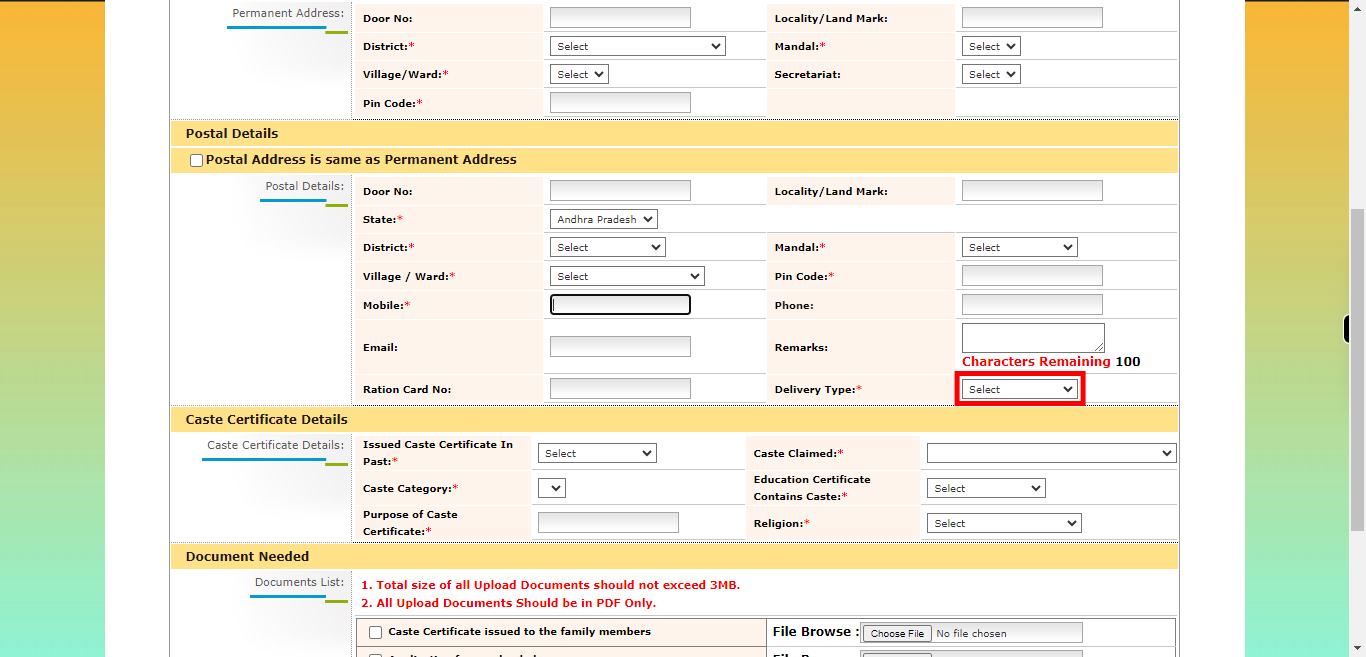
Please select one option from the following: Certificate from the Postal Service Certificate from the Person If you choose the postal option, please provide the address details where the certificate should be sent. Click on the "Next" button on the Supervity instruction widget.
-
19.
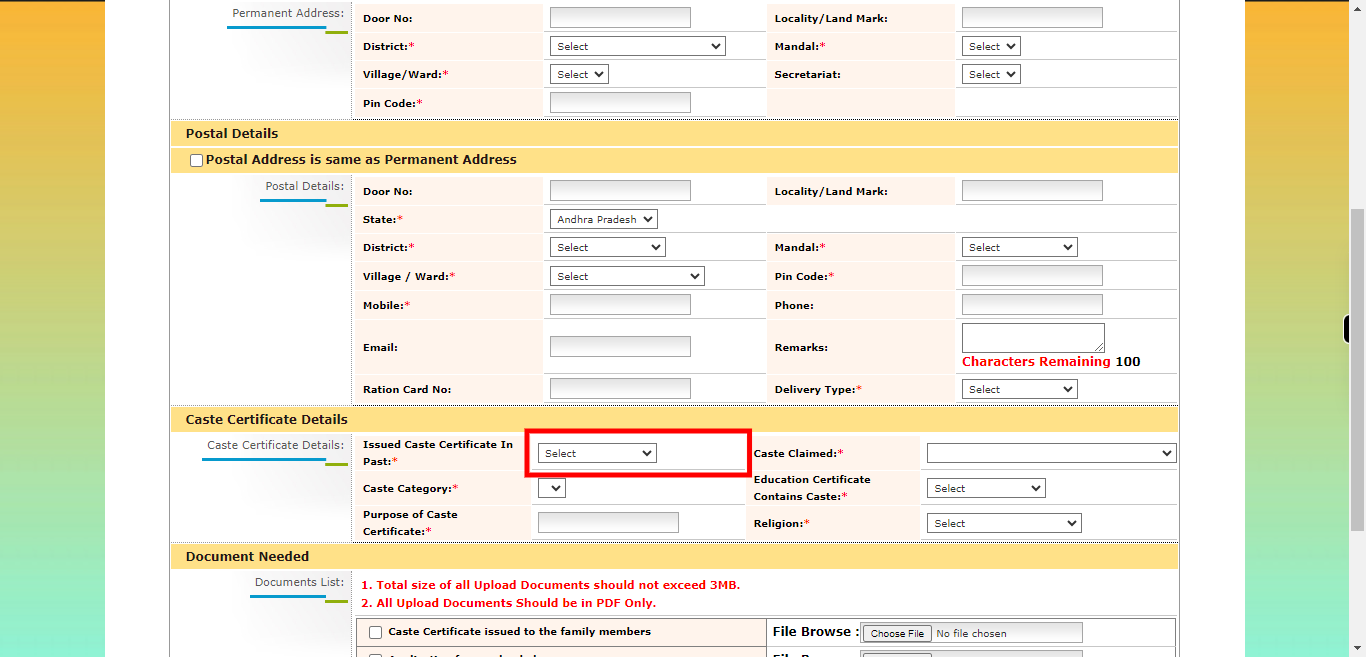
If you have already been issued a caste certificate, please select "Yes" to indicate that you possess a caste certificate. However, if you have not been issued a caste certificate, please select "No" to indicate that you do not have a caste certificate. Click on the "Next" button on the Supervity instruction widget.
-
20.
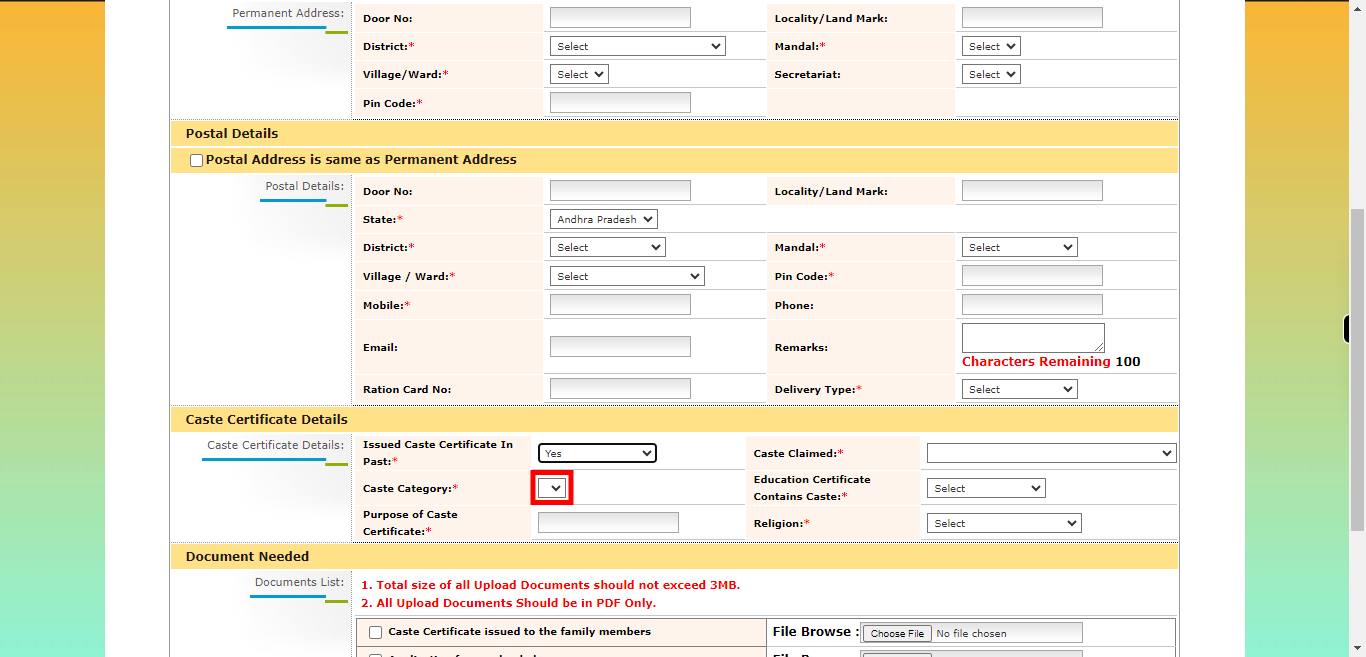
Select the caste claimed option that accurately represents your claimed caste based on the options provided in the form or application. Click on the "Next" button on the Supervity instruction widget.
-
21.
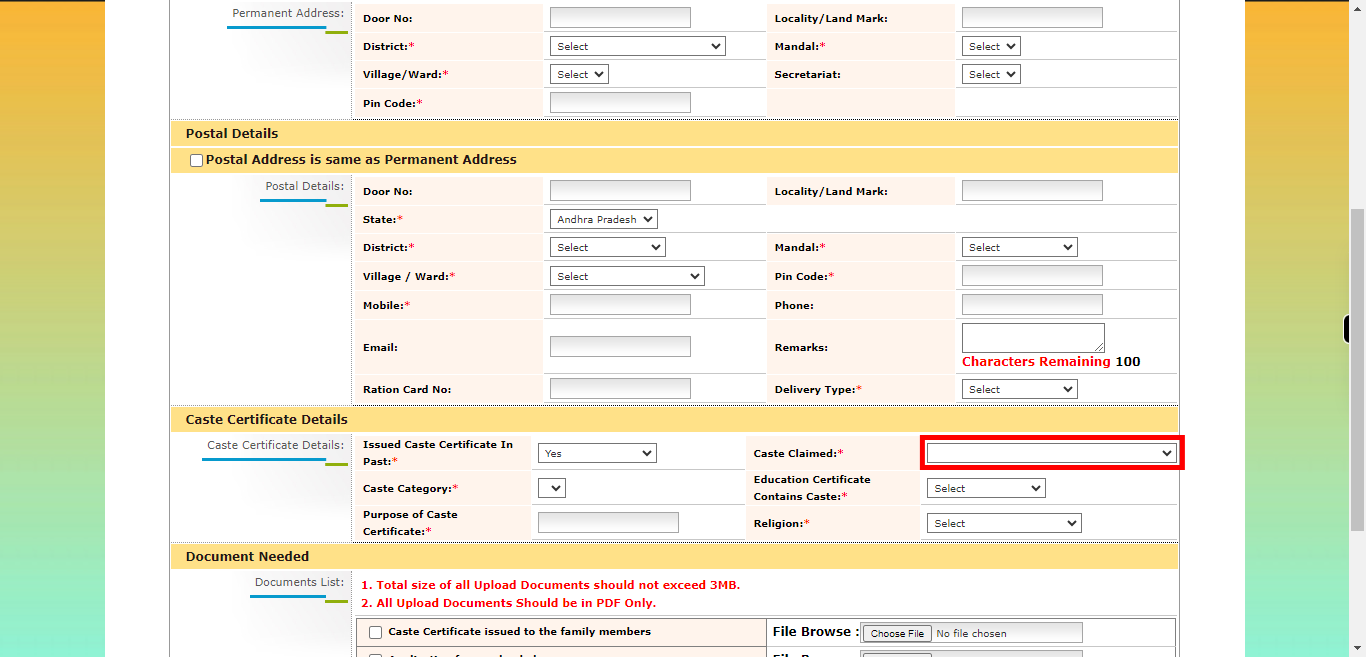
To proceed, please select the appropriate caste category from the available options. The caste category selection typically includes options such as General, Scheduled Caste (SC), Scheduled Tribe (ST), Other Backward Class (OBC), or any specific caste categories recognized in your region or country. Choose the caste category that accurately represents your caste or community affiliation. Click on the "Next" button on the Supervity instruction widget.
-
22.
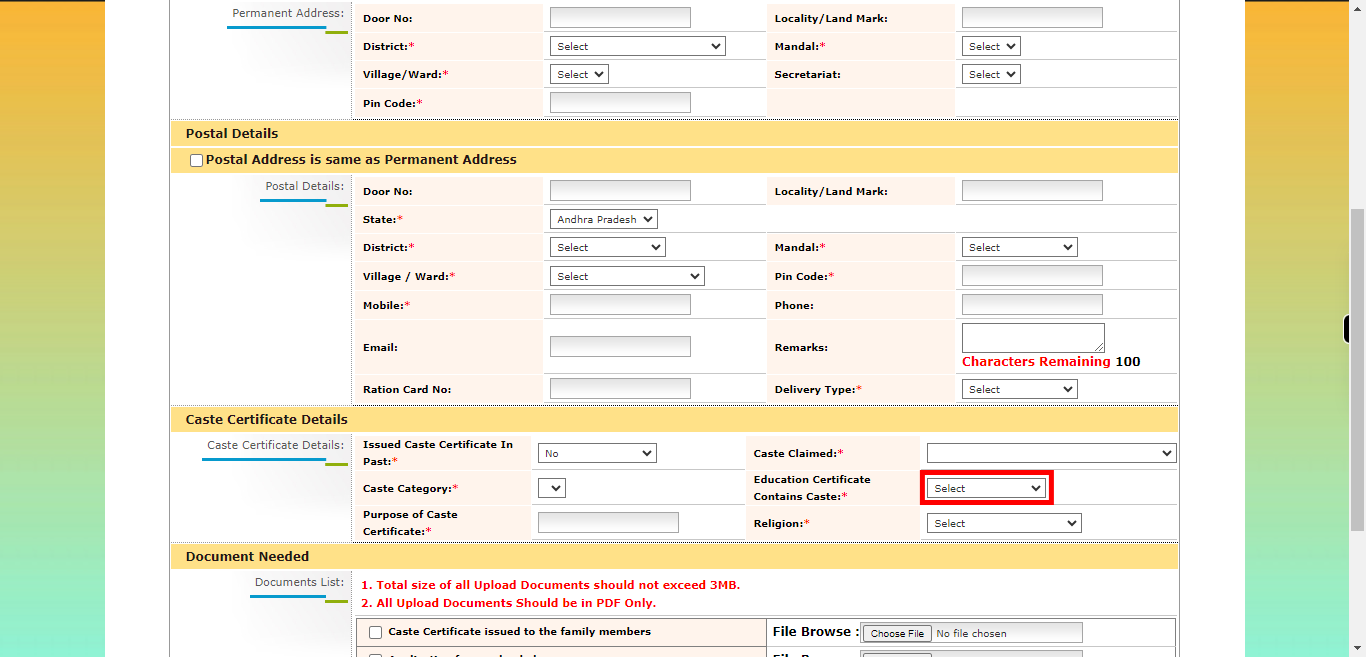
Select yes your education certificate contains caste or else no. Click on the "Next" button on the Supervity instruction widget.
-
23.
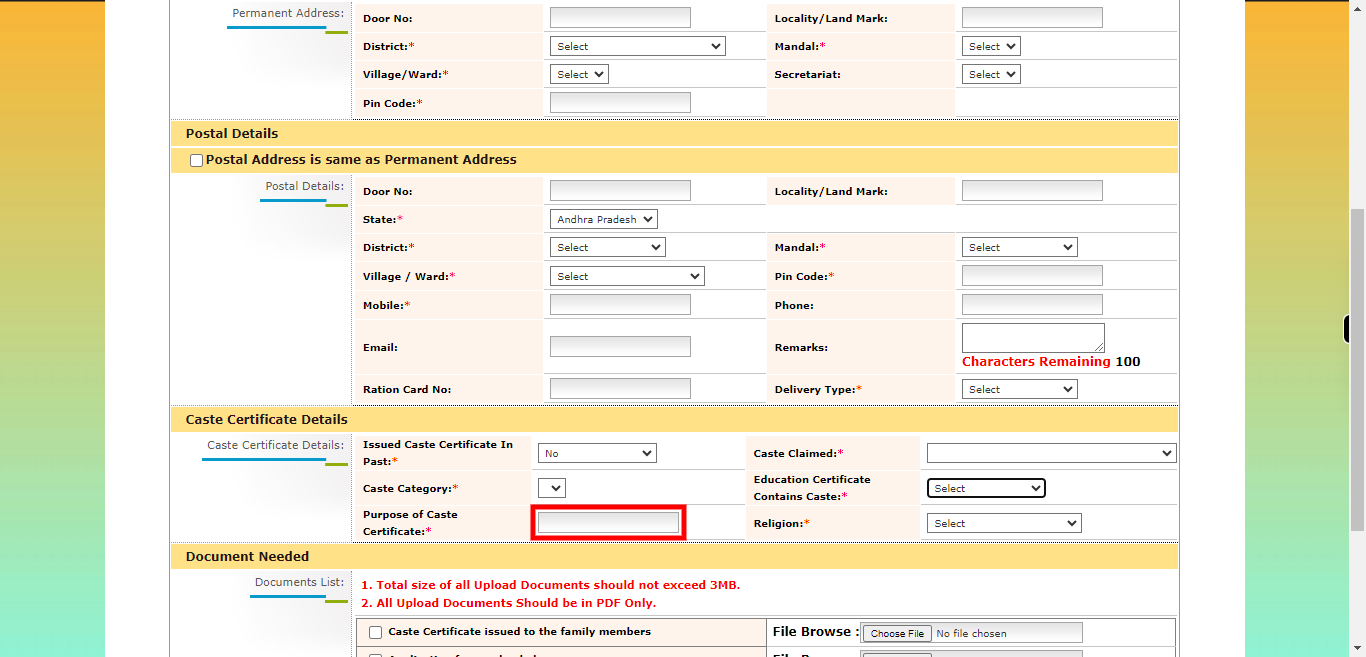
Please provide the purpose for which the certificate is being issued. The purpose could be related to education, employment, legal proceedings, identification, or any other specific reason. Kindly specify the purpose so that the appropriate certificate can be issued accordingly. Click on the "Next" button on the Supervity instruction widget.
-
24.
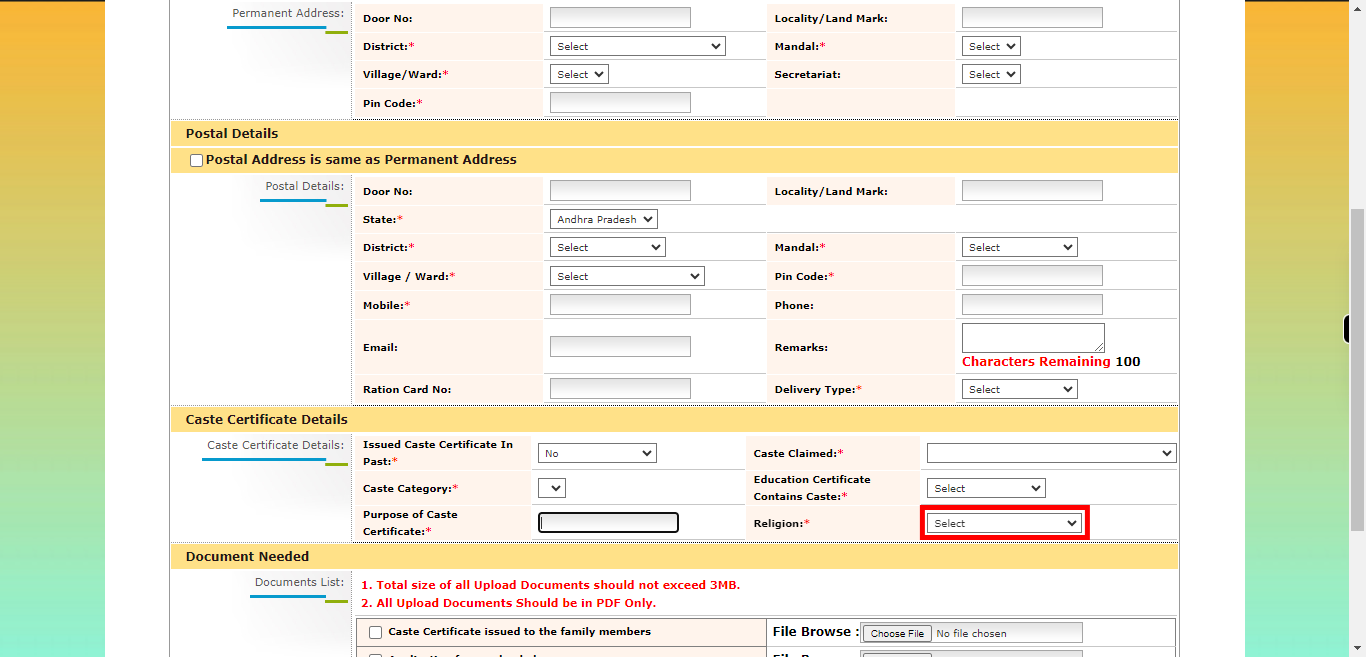
To proceed, please select your religion from the available options. The options may include commonly recognized religions such as Christianity, Islam, Hinduism, Buddhism, Sikhism, Judaism, or other specific religious affiliations. Choose the religion that accurately represents your religious beliefs and affiliation. Click on the "Next" button on the Supervity instruction widget.
-
25.
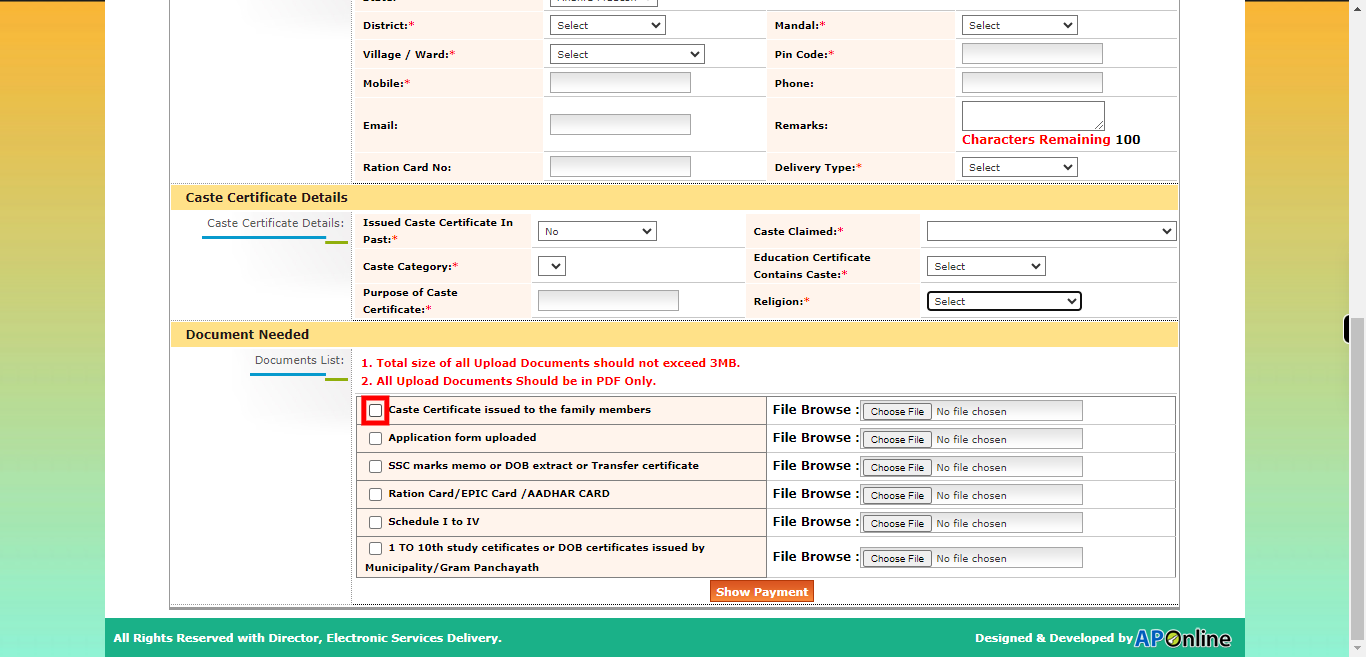
Click on the checkbox to indicate that you want to upload the caste certificate issued to a family member. Click on the "Next" button on the Supervity instruction widget.
-
26.
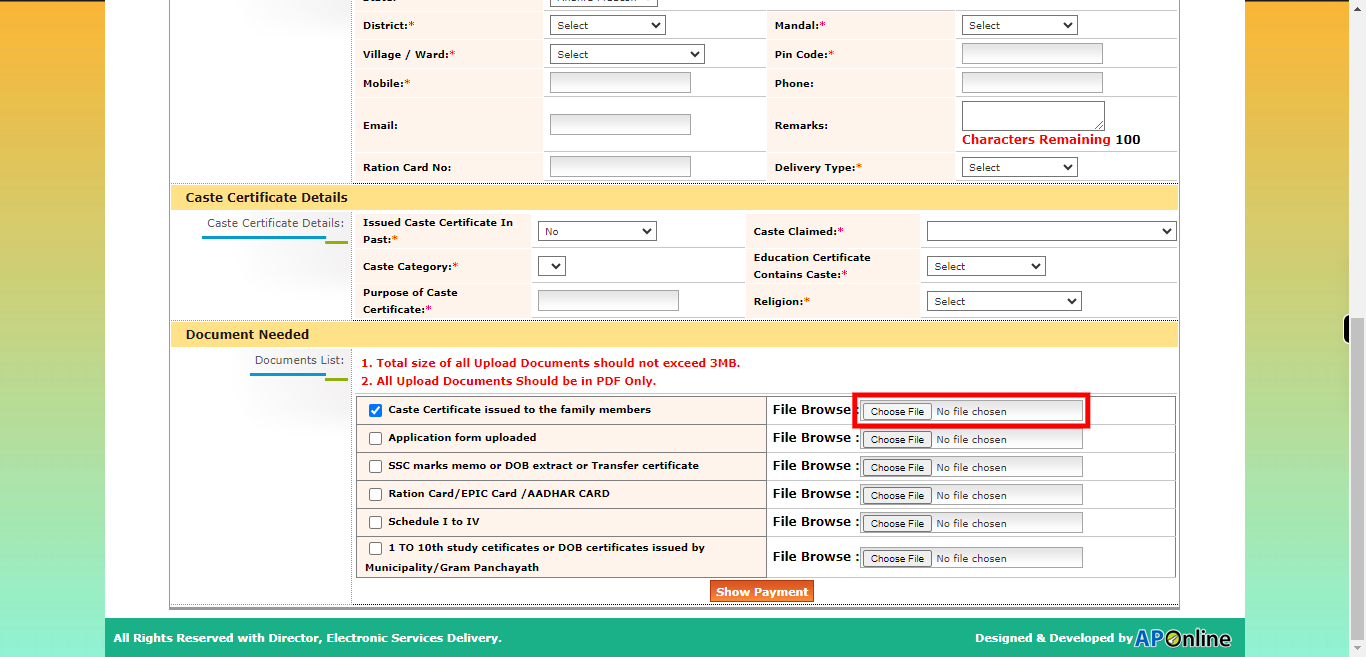
Click on the "Choose File" button to browse and select the scanned document of the caste certificate issued to the family member. This will open a file browser window or dialog box on your device. Click on the "Next" button on the Supervity instruction widget.
-
27.
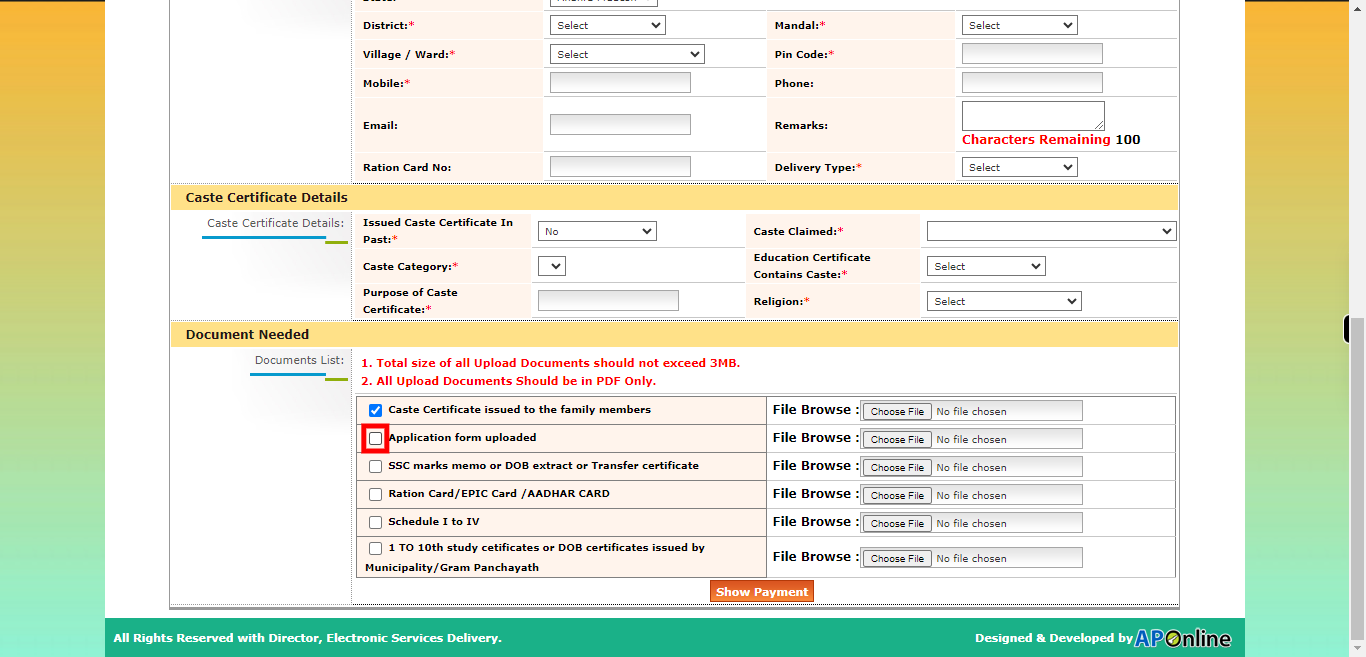
Click on the checkbox next to "caste Certificate Application" to select it as the desired form. Fill in the necessary data and details in the application form. After filling in the application form, Scan the filled application form using a scanner or a scanning app on your device. Save the scanned application form into your local storage. Click on the "Next" button on the Supervity instruction widget.
-
28.
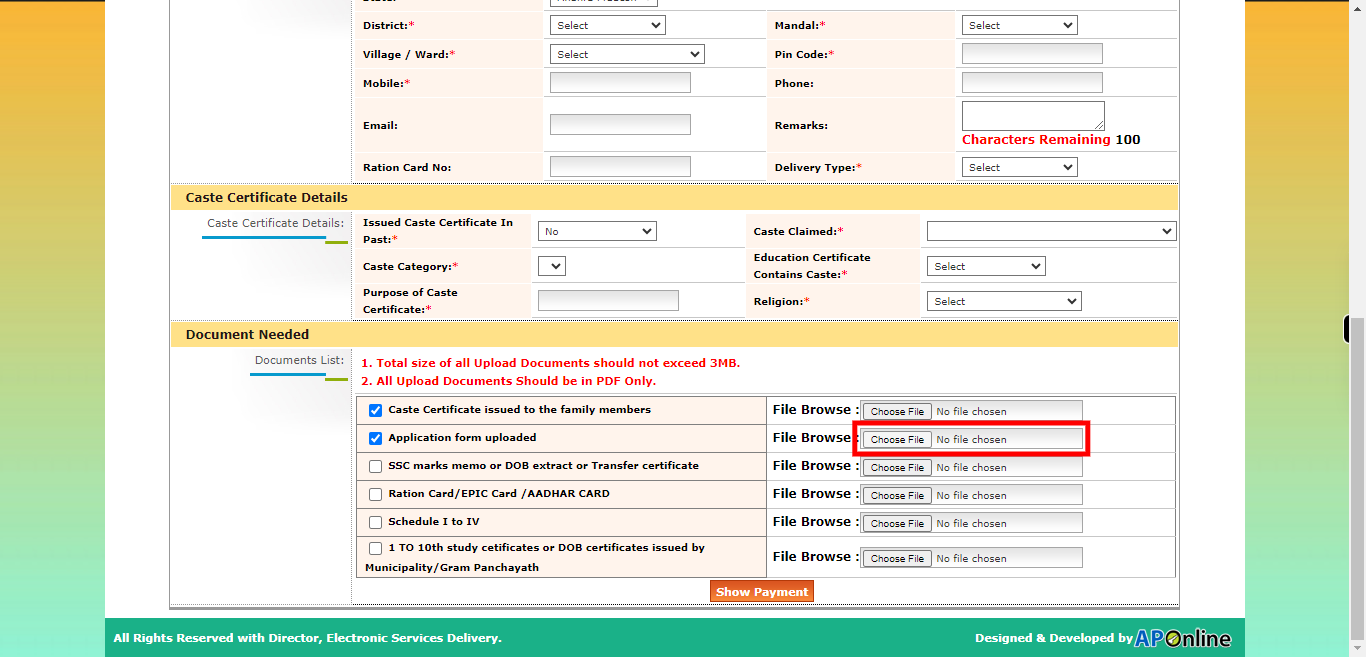
Click on the "Choose File" option. This will open a file browser window or dialog box on your device. Navigate to the location where you have saved the scanned application form. Select the scanned application form file by clicking on it. Click on the "Next" button on the Supervity instruction widget.
-
29.
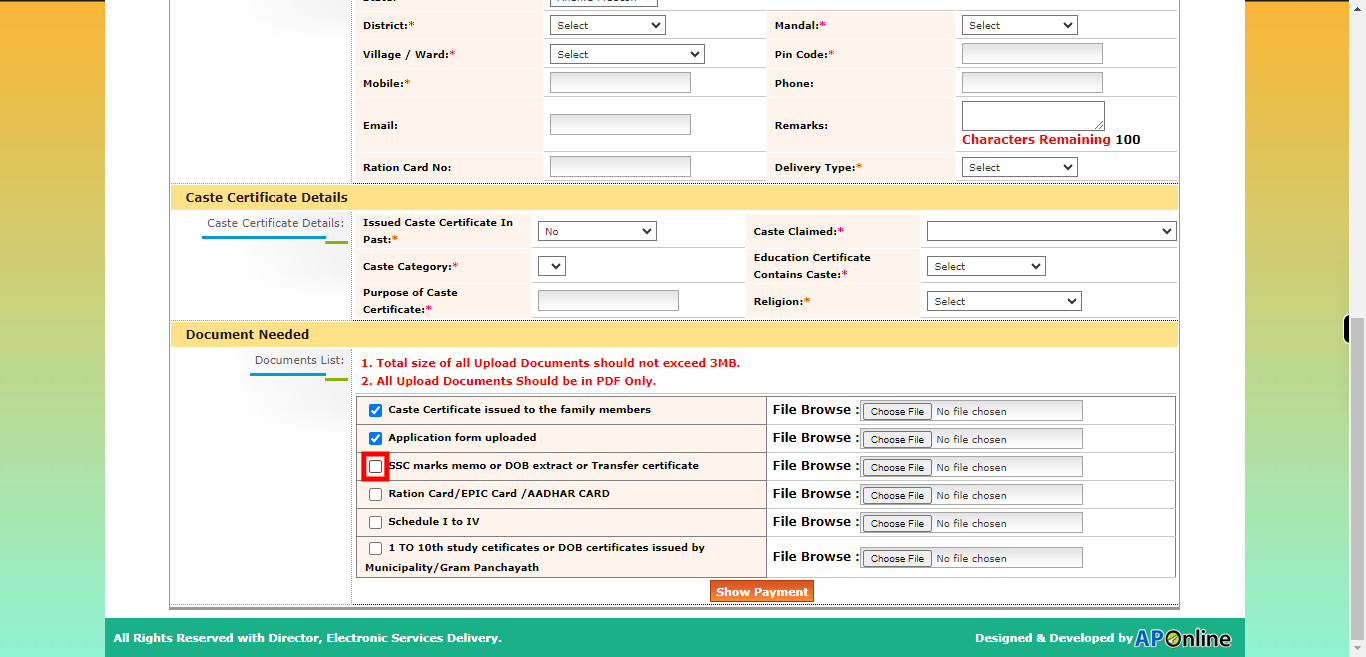
Click on the checkbox to indicate that you want to upload the SSC marks memo. This checkbox selection will initiate the process of attaching and uploading the scanned document of your SSC marks memo. Click on the "Next" button on the Supervity instruction widget.
-
30.
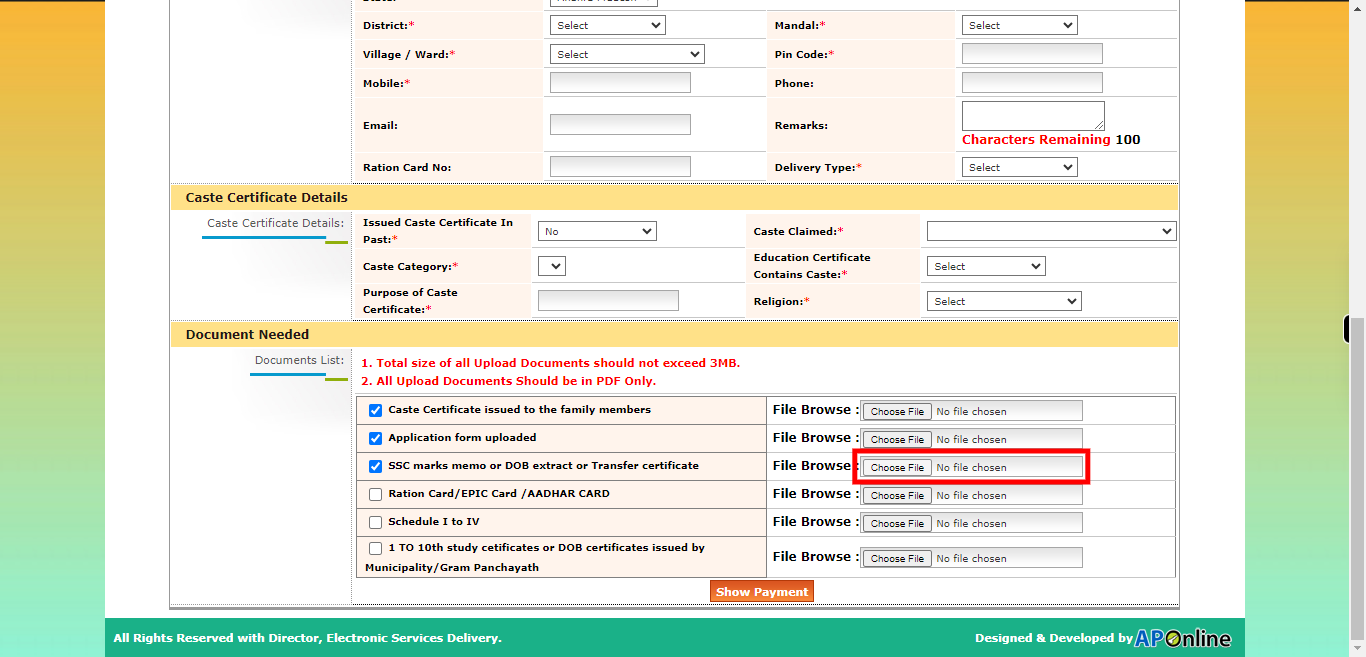
Click on the "Choose File" button to browse and select the scanned document of your SSC marks memo. This will open a file browser window or dialog box on your device. Click on the "Next" button on the Supervity instruction widget.
-
31.
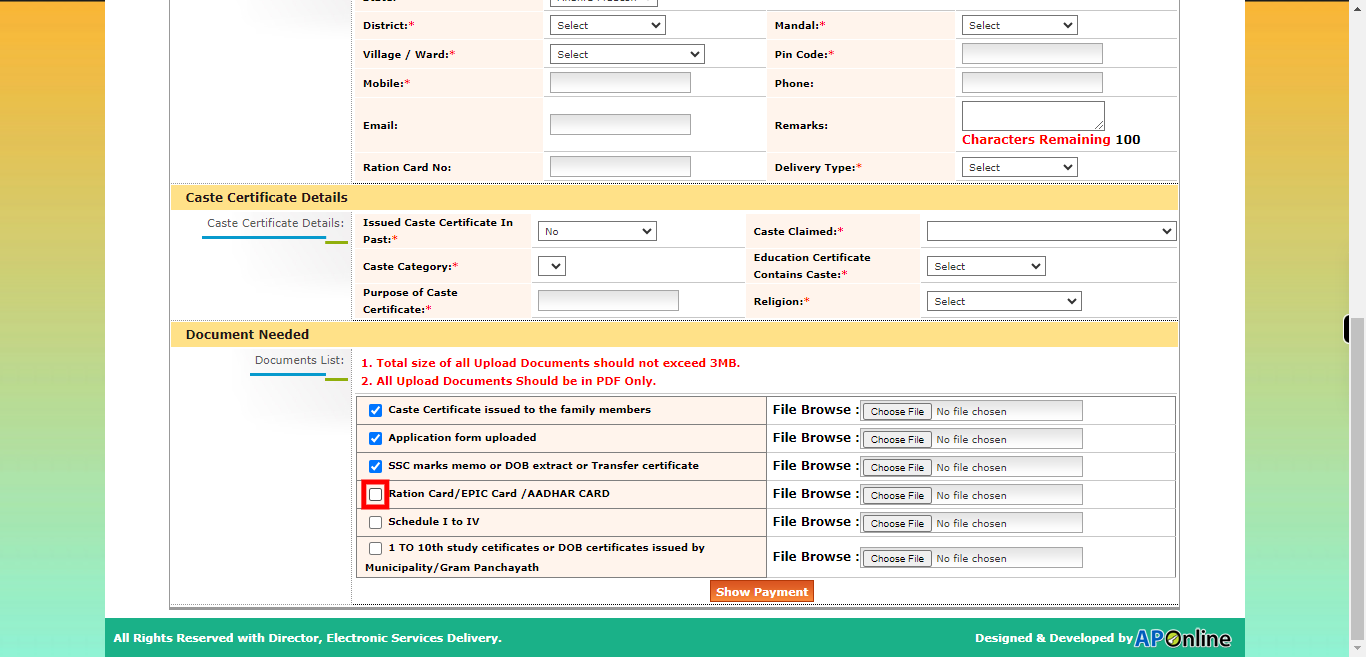
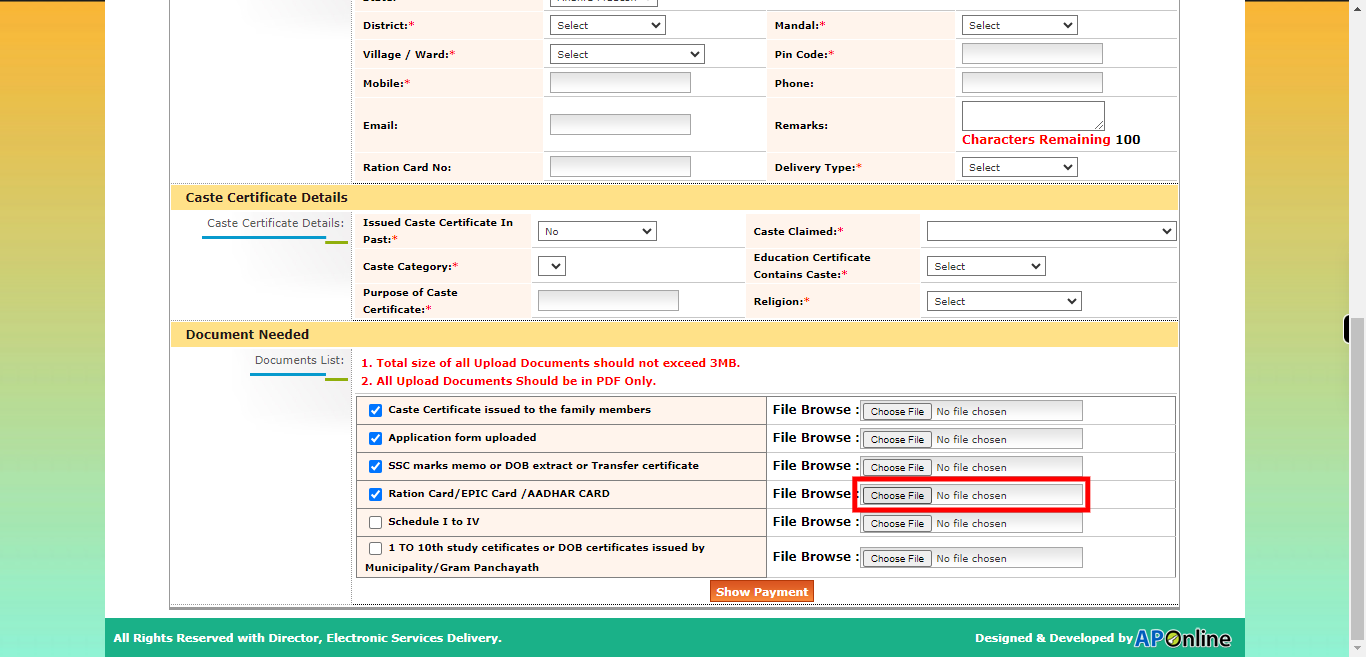
Click on the checkbox to indicate that you want to upload an identity proof document, which can be either Aadhaar card or a ration card. This checkbox selection will initiate the process of attaching and uploading the relevant identity proof document to your application. Click on the "Next" button on the Supervity instruction widget.
-
32.
Click on the "Choose File" button to initiate the process of selecting and uploading the scanned document of your chosen ID proof (Aadhaar card or ration card). This action will open a file browser or dialog box on your device. Click on the "Next" button on the Supervity instruction widget.
-
33.
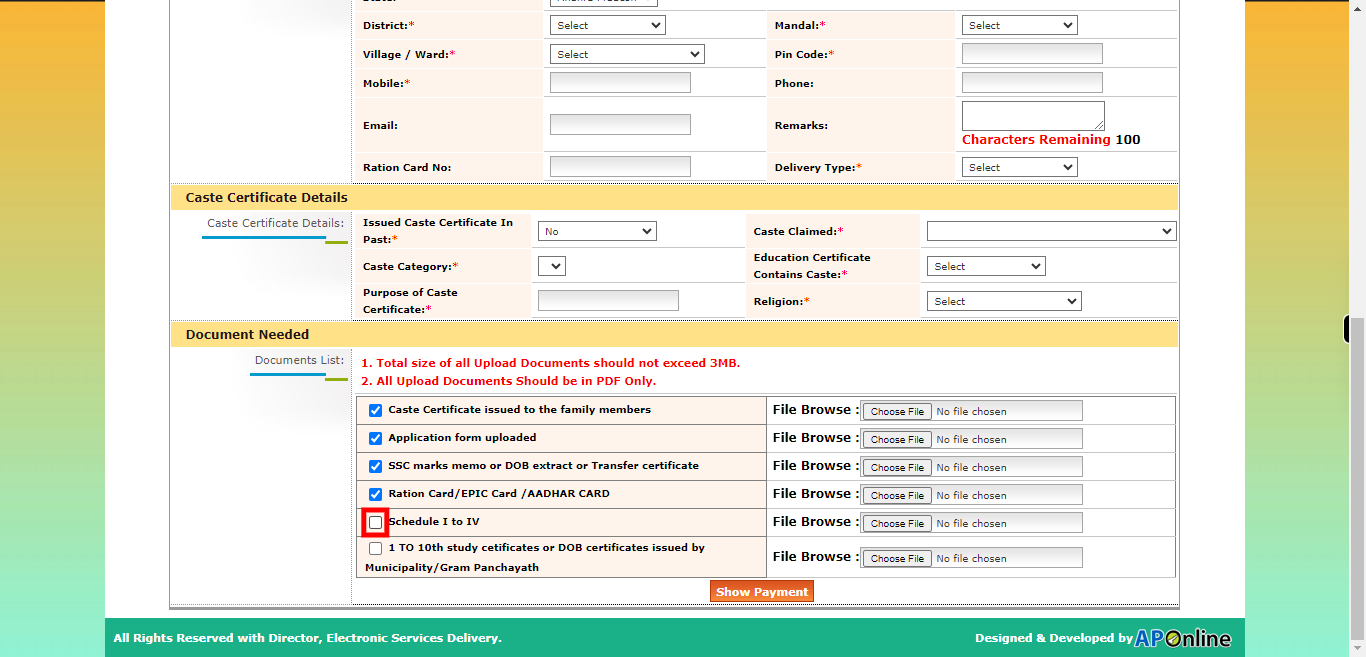
you are an individual belonging to the Scheduled Castes (SC) or Scheduled Tribes (ST) and you need to upload your Schedule I to IV certificate, please ensure you have the necessary documentation in hand. Upload the document from your computer. Click on the "Next" button on the Supervity instruction widget.
-
34.
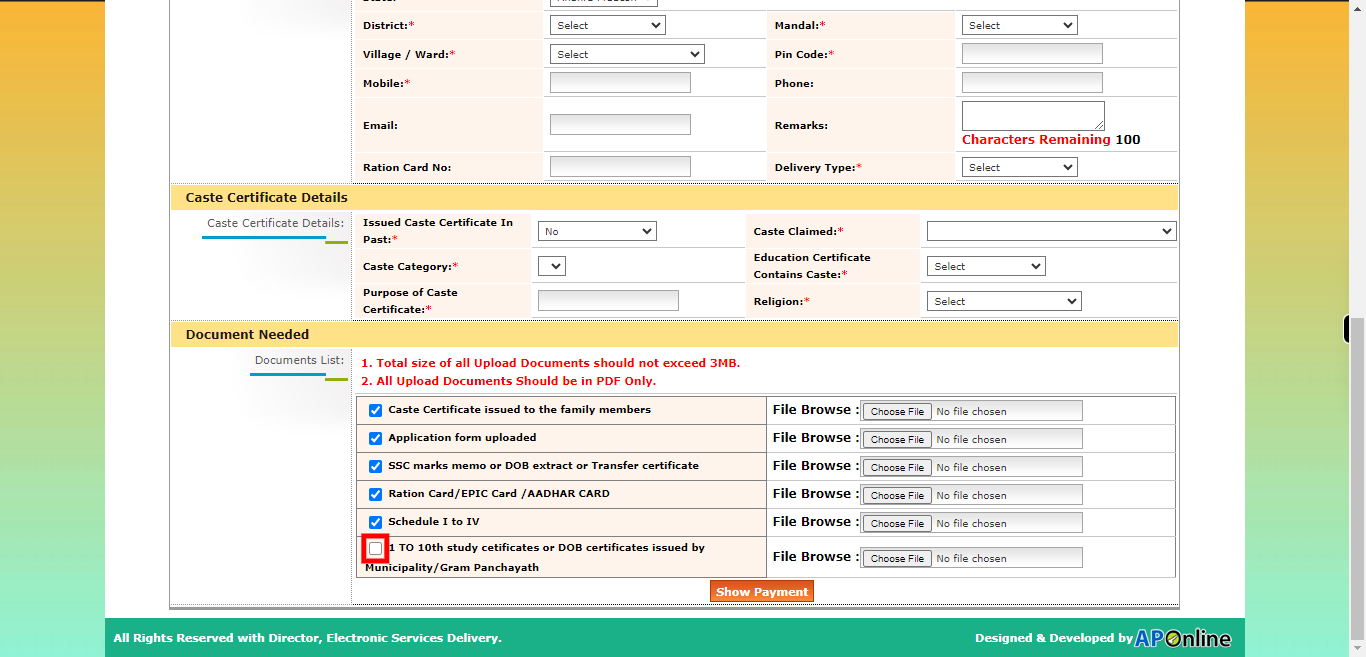
Click on the checkbox to indicate that you want to upload the 1 to 10 study certificate. This checkbox selection will initiate the process of attaching and uploading the scanned or digital copy of your 1 to 10 study certificate as required. Click on the "Next" button on the Supervity instruction widget.
-
35.
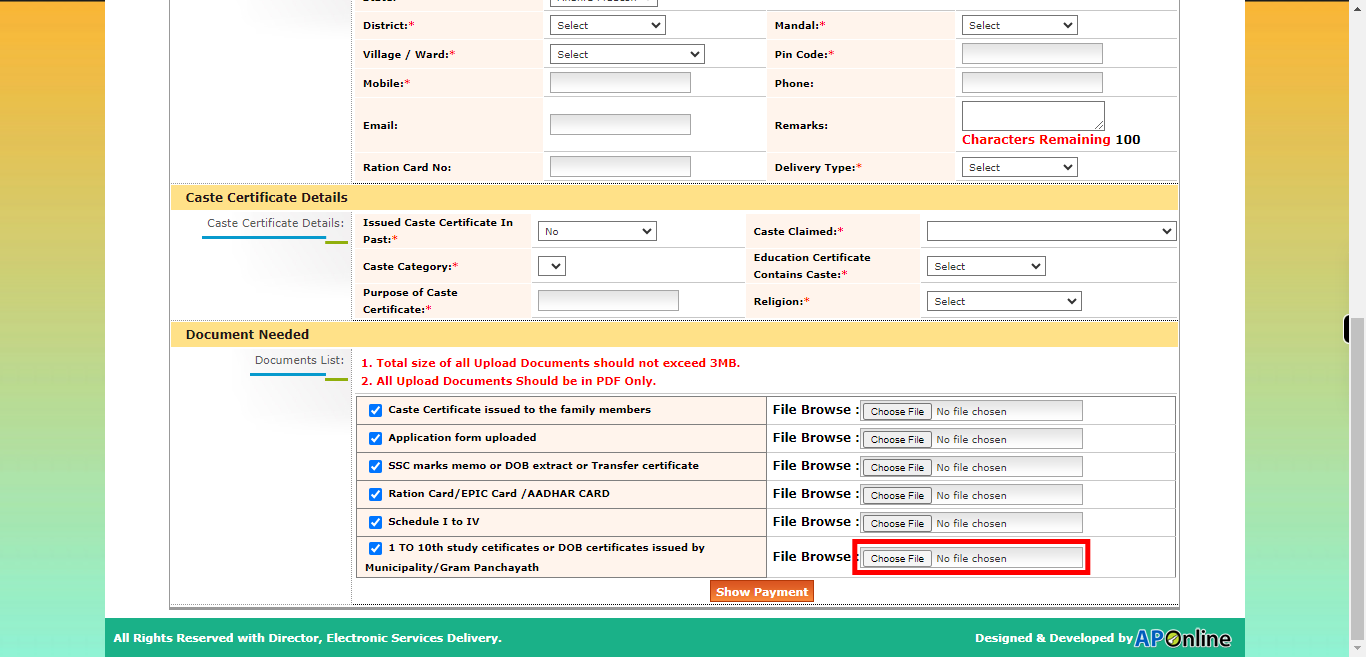
Click on the "Choose File" button to browse and select the scanned document of your 1 to 10 study certificate. This will open a file browser window or dialog box on your device. Click on the "Next" button on the Supervity instruction widget.
-
36.
Click on the "Show Payment" button. This will be redirected to the payment page once done will receive the certificate.
