Here are the step-by-step instructions to create a pull request directly on the GitHub website. Continue to monitor the discussion on the pull request page and make further changes as required until your contribution gets merged into the main repository. Pre-Requisites: Ensure that you had a valid GitHub account and at least one repository. NOTE: Please sign in to your GitHub account and then execute this skill.
-
1.
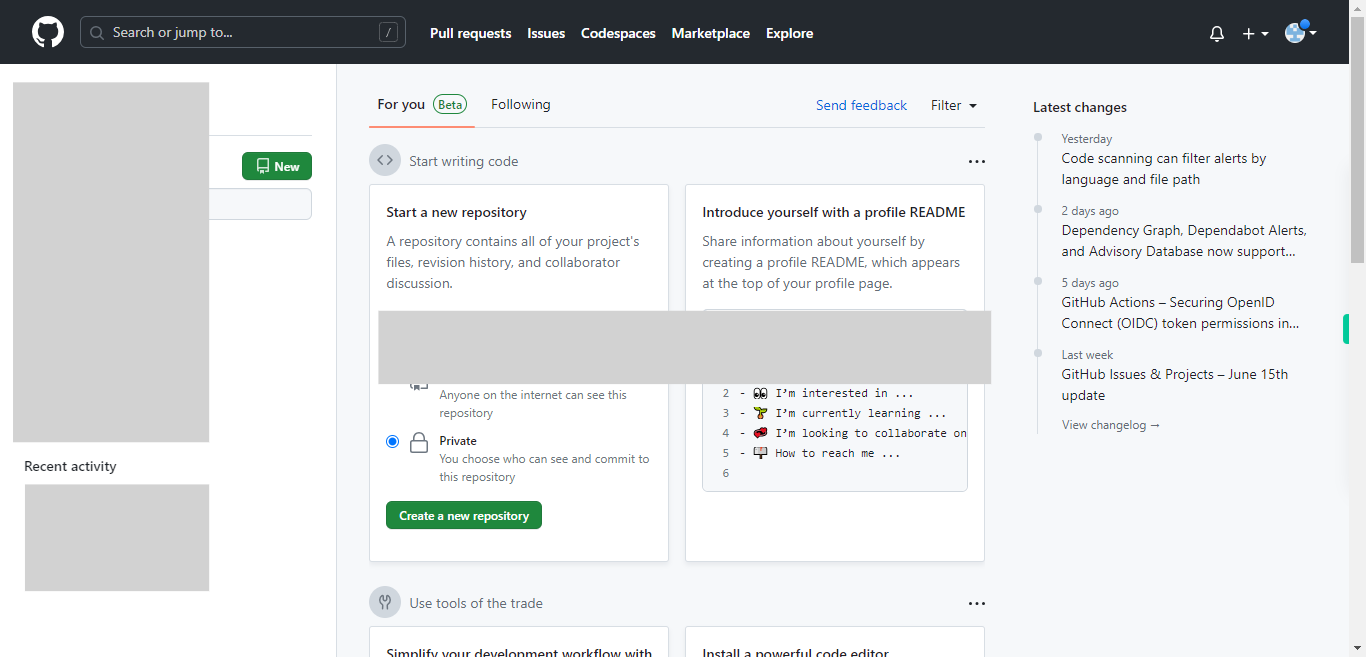
Open GitHub on the web.
-
2.
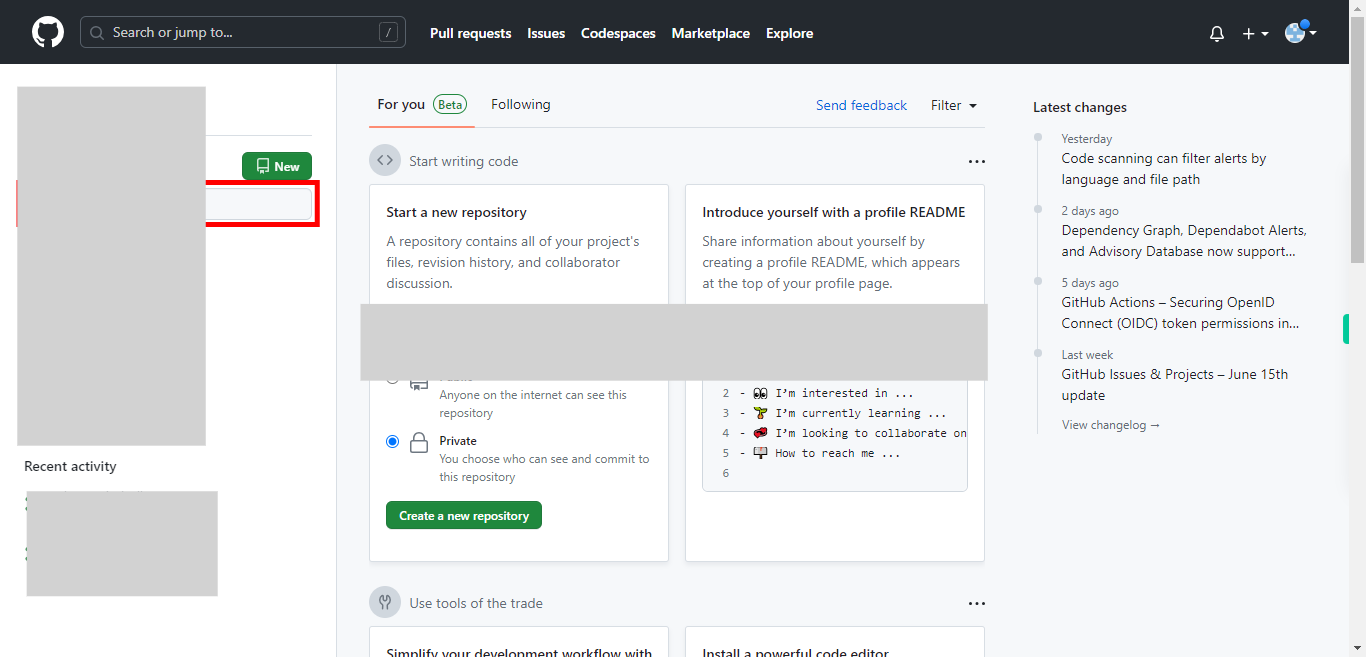
To navigate to the repository where you want to contribute, type the repository name in the search bar. Then click on the "Next" button in the Supervity instruction widget. Select the repository of your choice.
-
3.
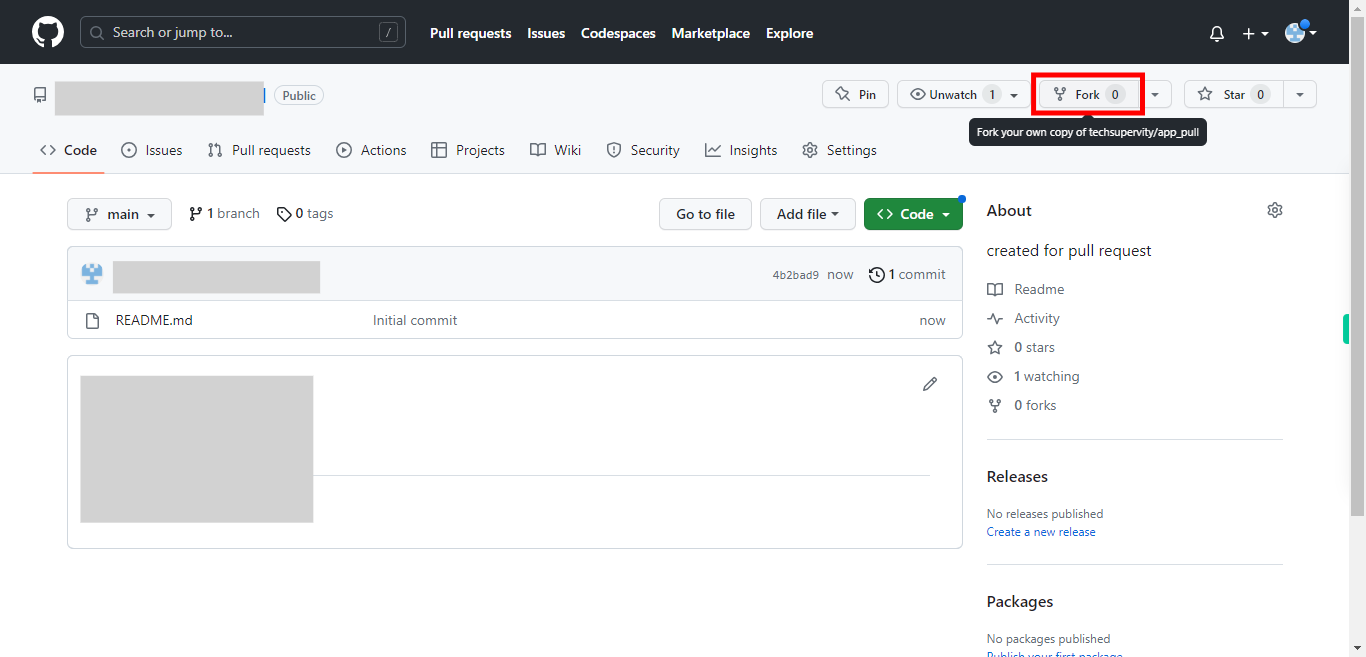
Click on the "Fork" button in the top-right corner of the repository page. This will create a copy of the repository under your GitHub account
-
4.
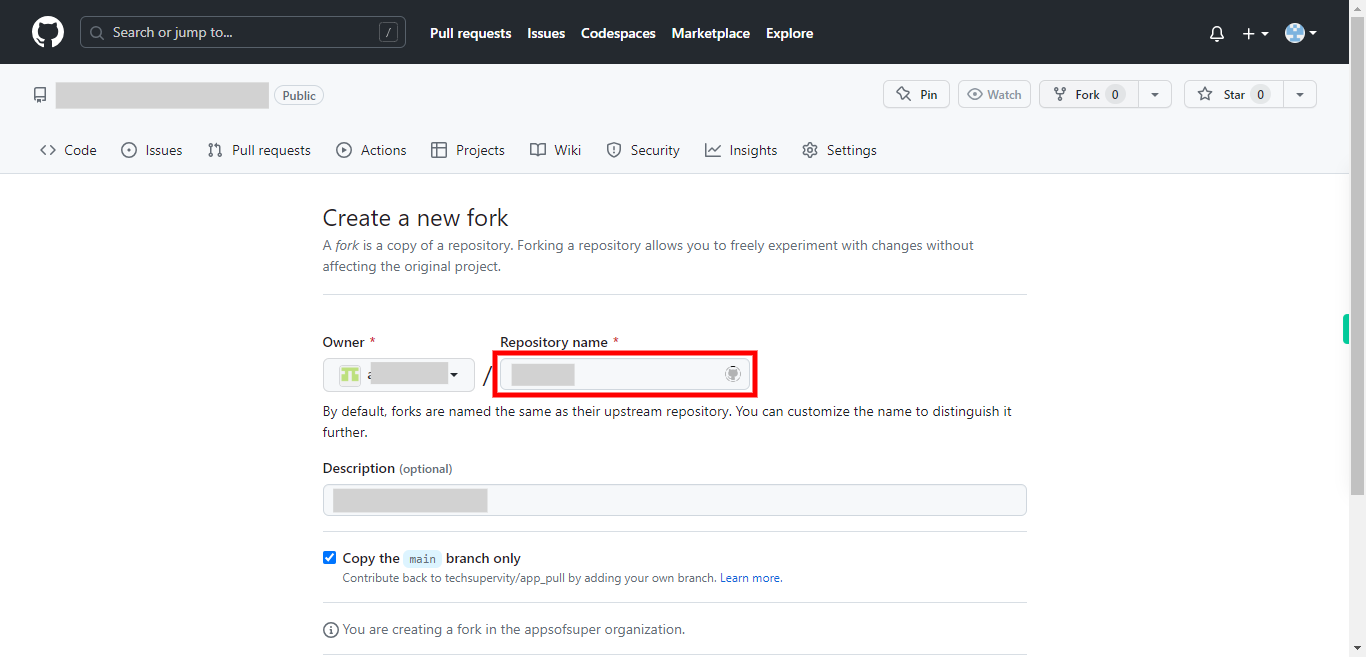
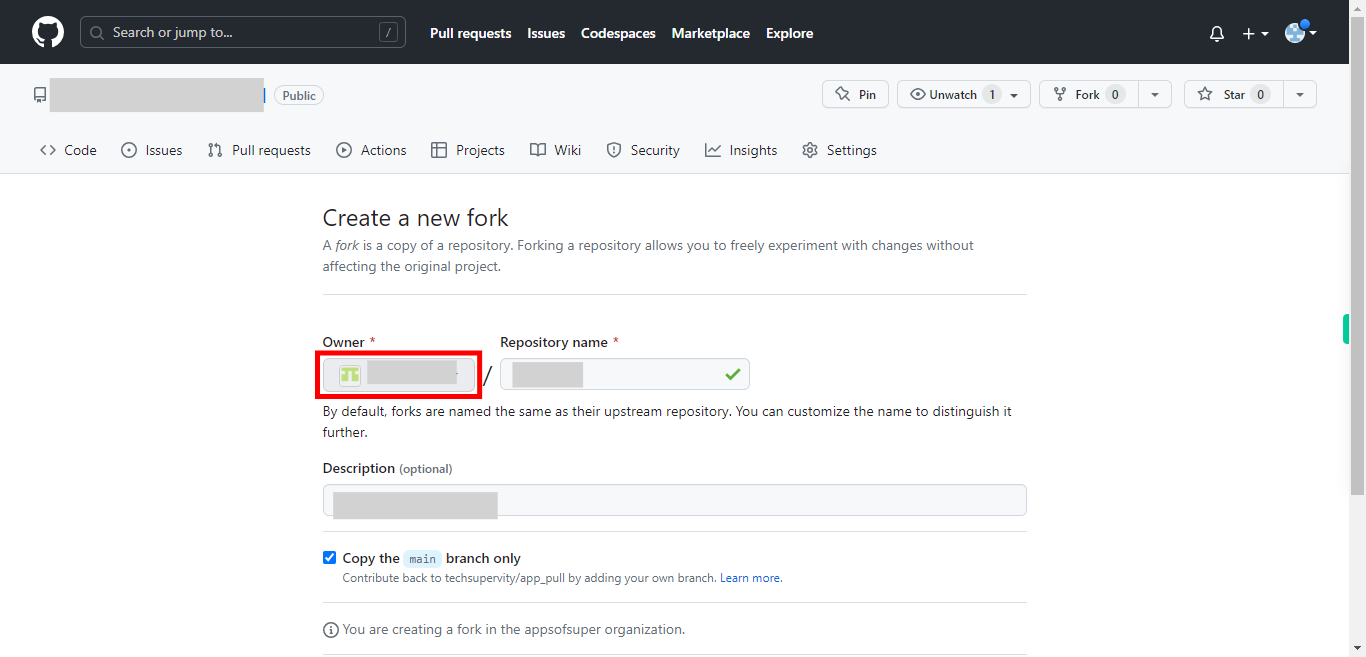
Here you can define your own repository name to make a copy of the existing repository.
-
5.
Select the owner of the copy from the drop-down list.
-
6.
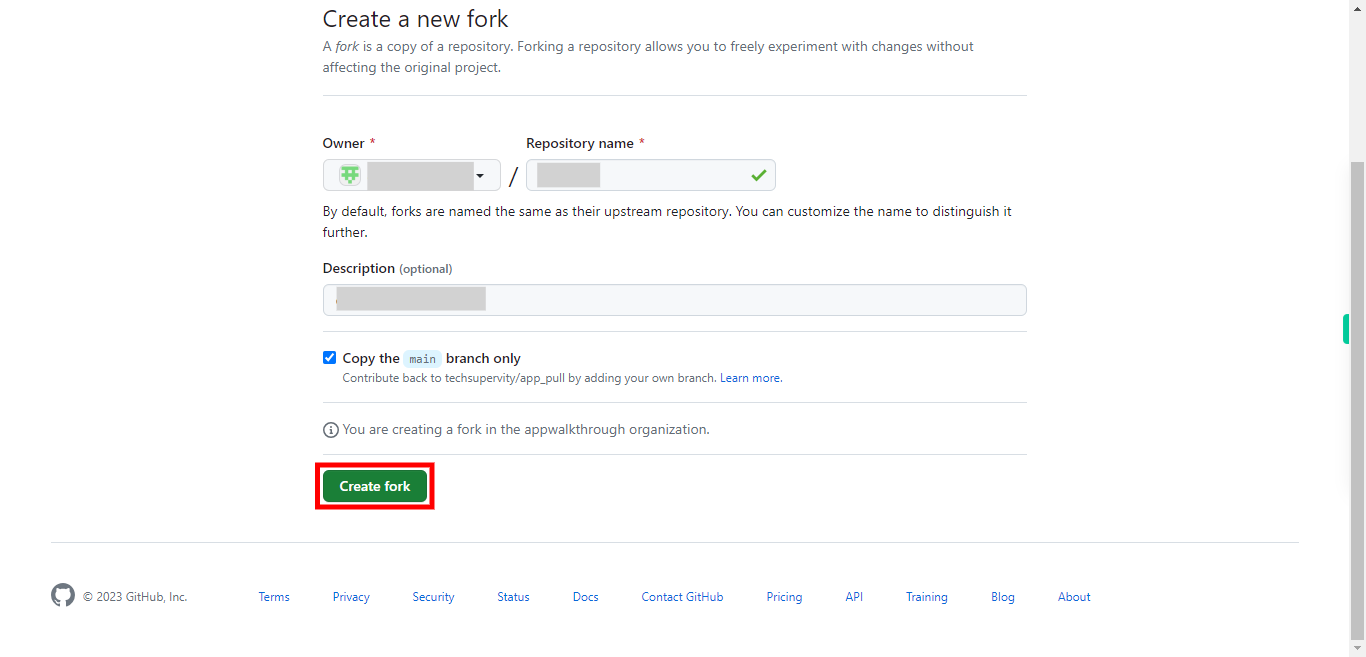
Click on the "Create fork" button. After forking, you will be redirected to your forked repository. If not, go to your GitHub profile, click on the "Repositories" tab, and select your forked repository from the list.
-
7.
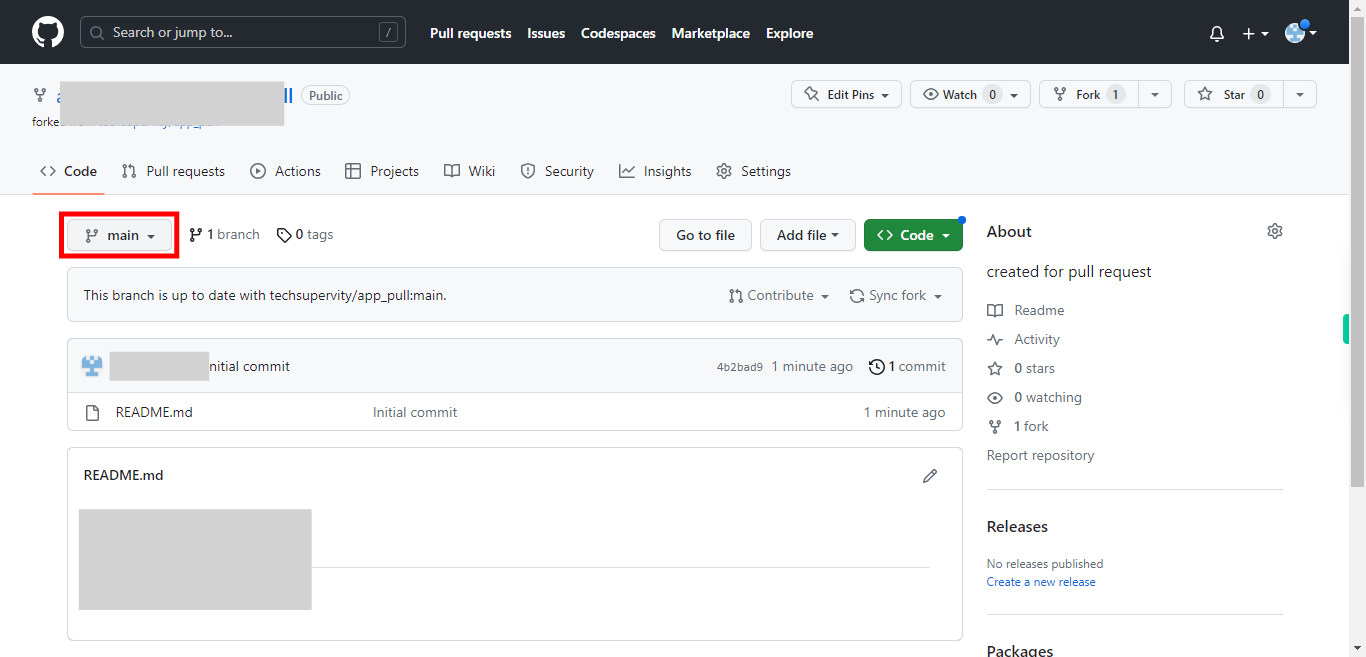
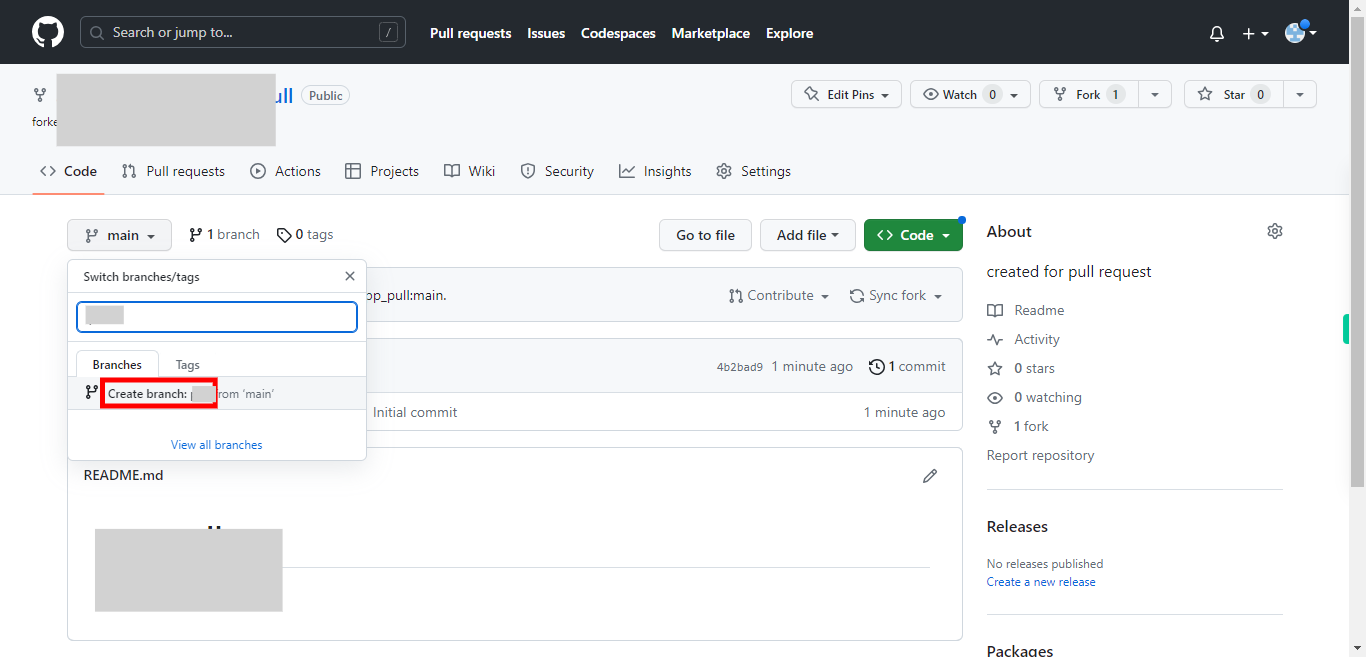
Click on the "Branch" dropdown menu on the left-hand side of the repository page. Type in a branch name for your changes, then click the "Create branch" button. It's a good practice to give the branch a descriptive name related to your changes.
-
8.
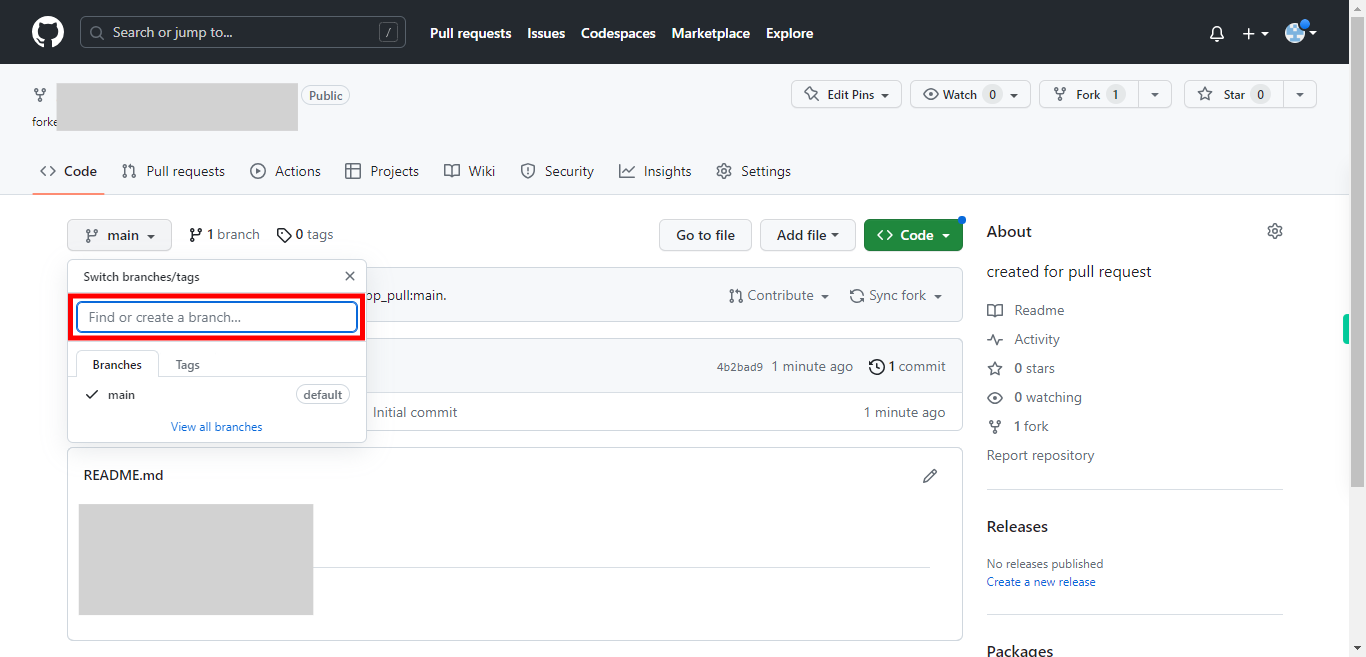
Type in the branch name in the provided text box labeled "Find or create a branch". Then click on the "Next" button in the Supervity instruction widget.
-
9.
Click on the text "Create branch: followed by the name provided". Open the file, you want to modify or add and make the necessary changes using the built-in GitHub editor.
-
10.
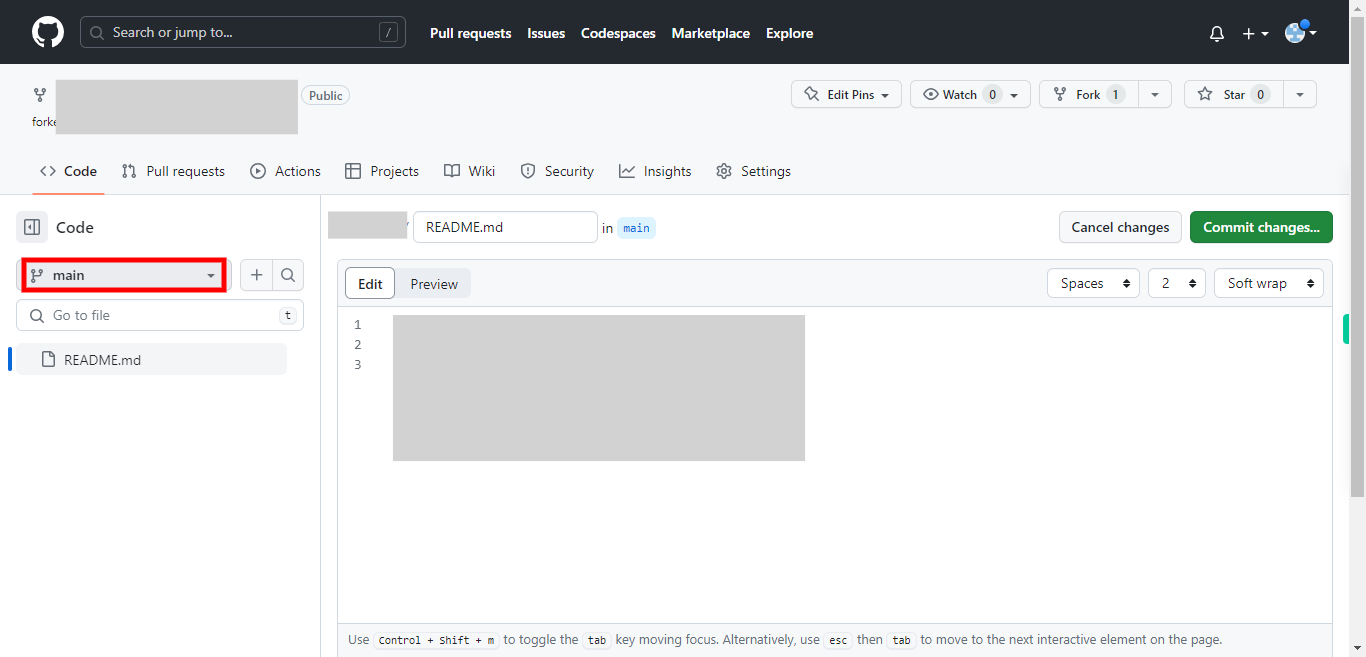
If you can see a newly created branch in the left side panel skip this step by clicking on the "Next" button in the Supervity instruction widget. Else first click on the "Next" button in the Supervity instruction widget, and then select the new branch.
-
11.
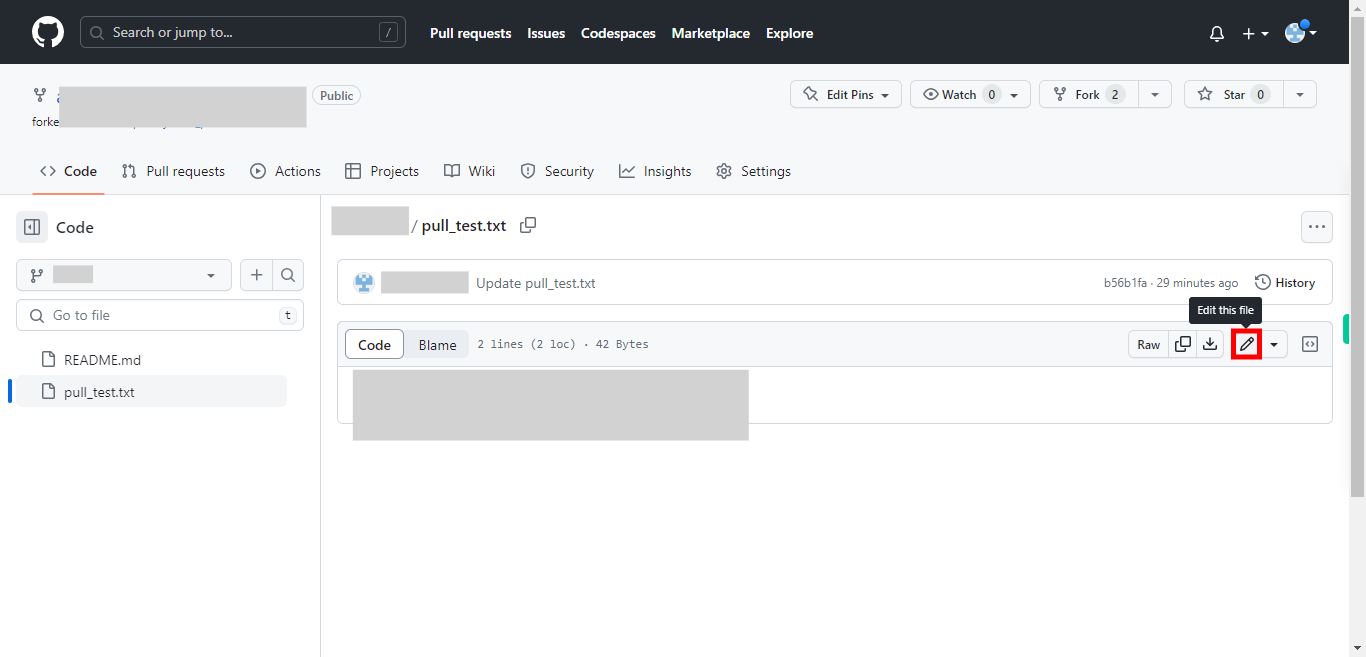
Click on the pencil ✏ or edit icon to perform any changes in the file.
-
12.
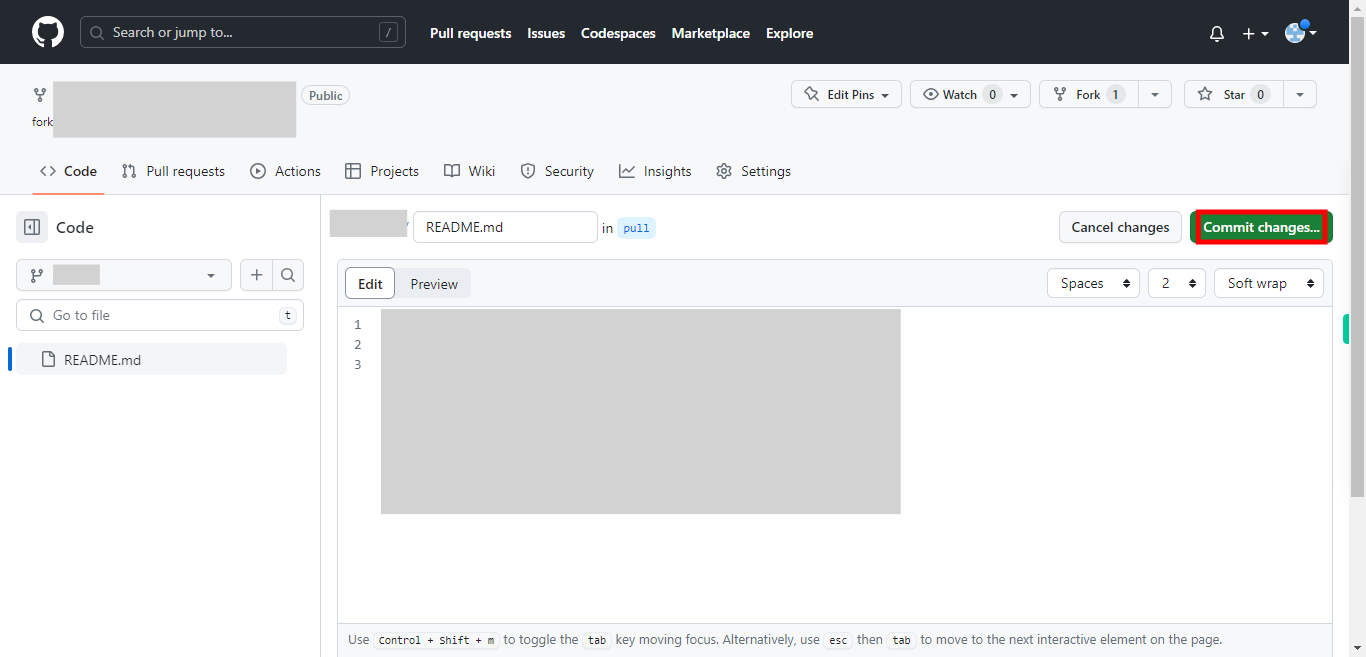
Click on the "Commit changes", button located at the top right corner of the page.
-
13.
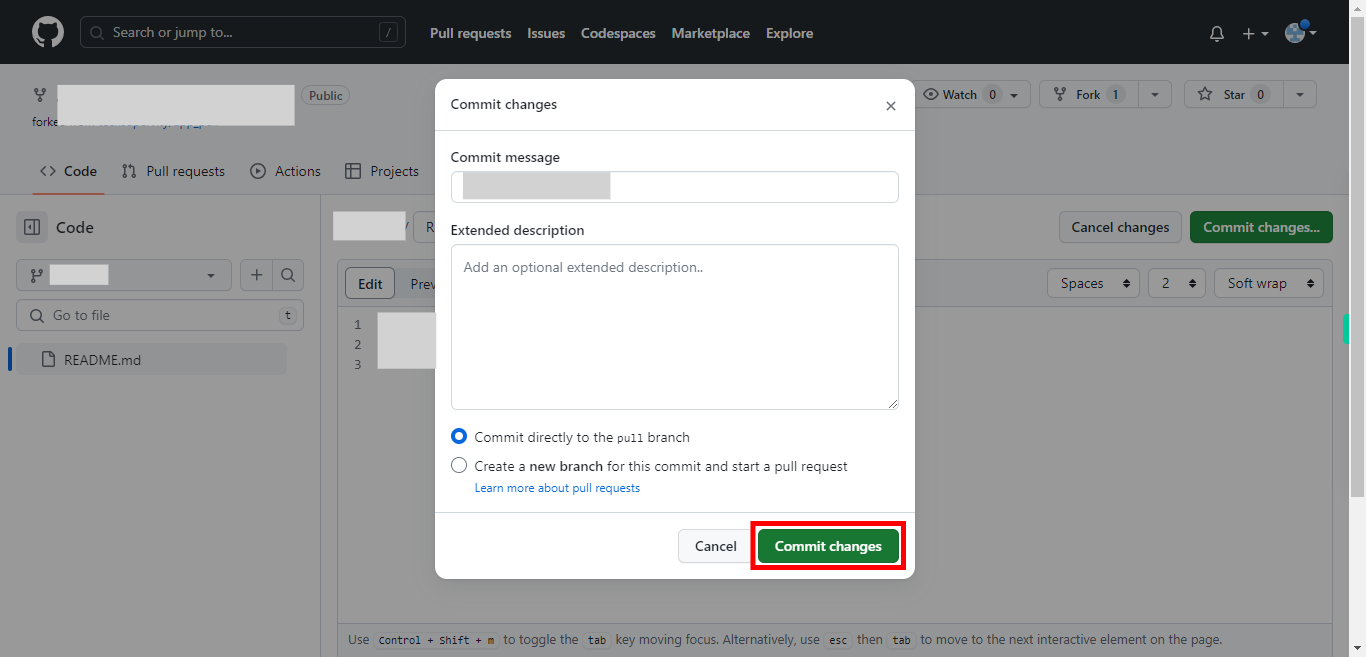
You can provide a descriptive title for your commit in the "Commit changes" input box. Optionally, you can provide a more detailed description in the "Add an optional extended description" box. Once you're ready, click on the "Commit changes" button to save your changes.
-
14.
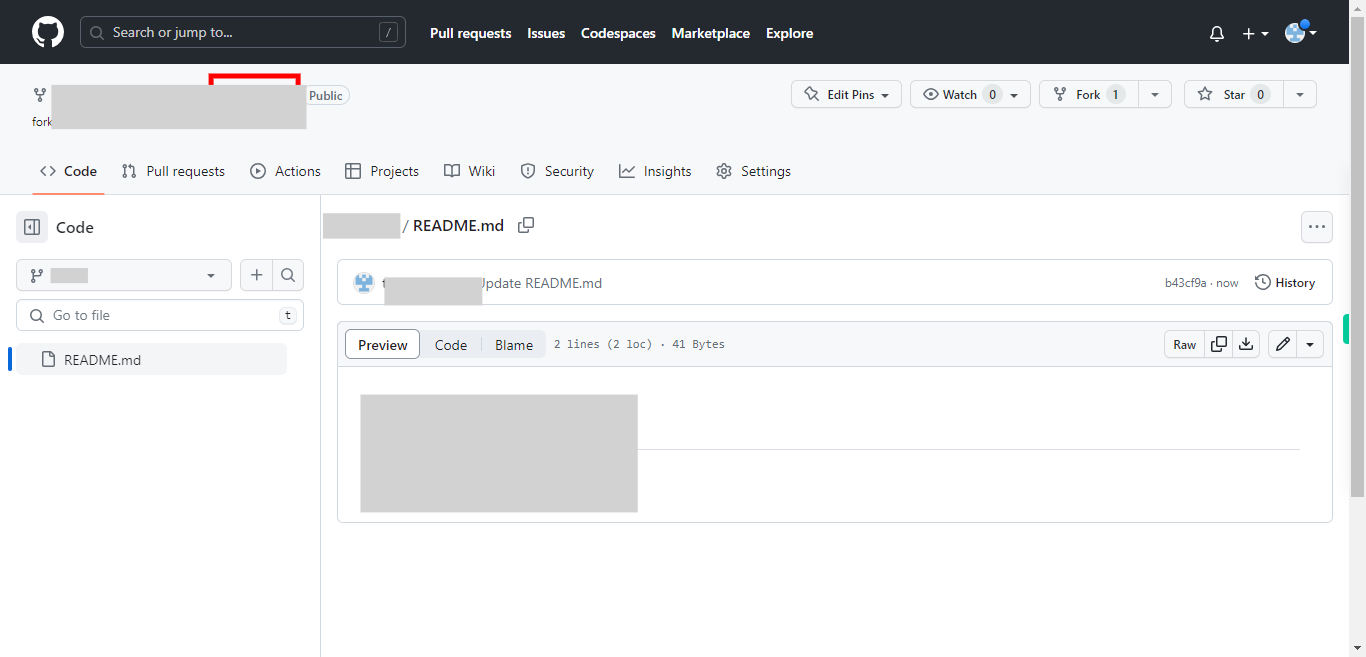
Go to your forked repository by clicking on the name of it.
-
15.
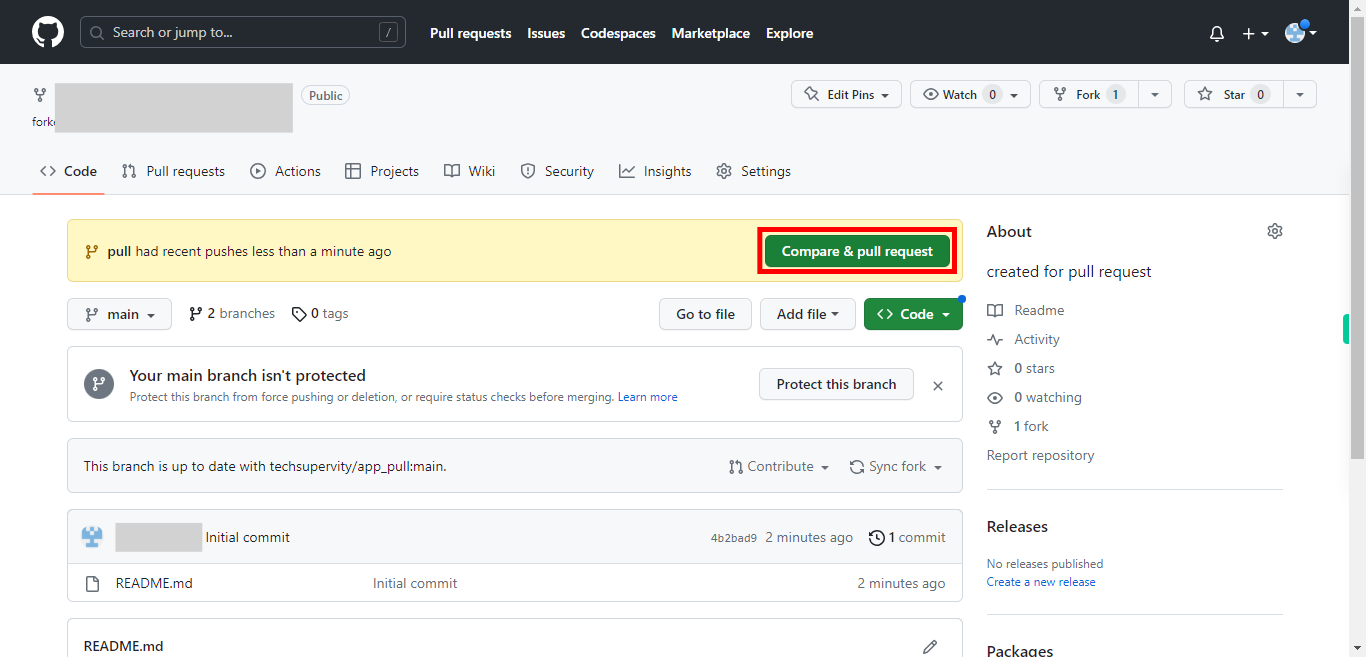
At the top of the repository page, you should see a notification banner indicating that you recently pushed a new branch. Click on the "Compare & pull request" button within the banner.
-
16.
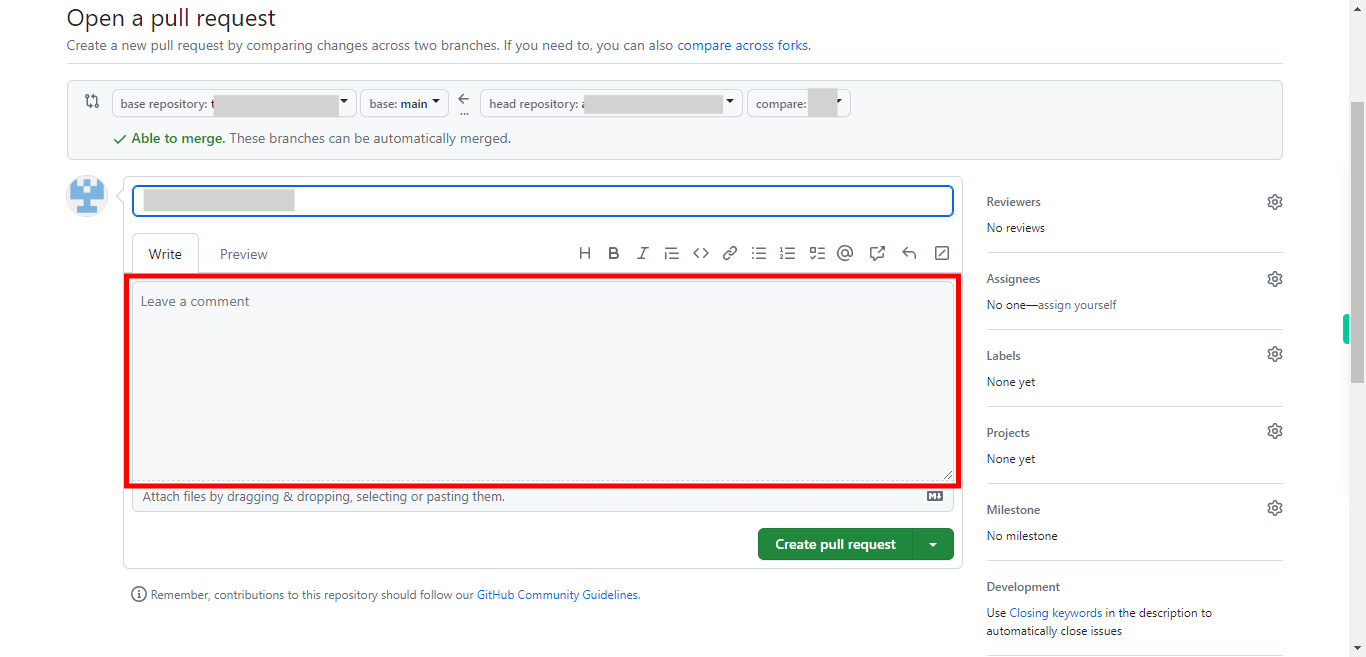
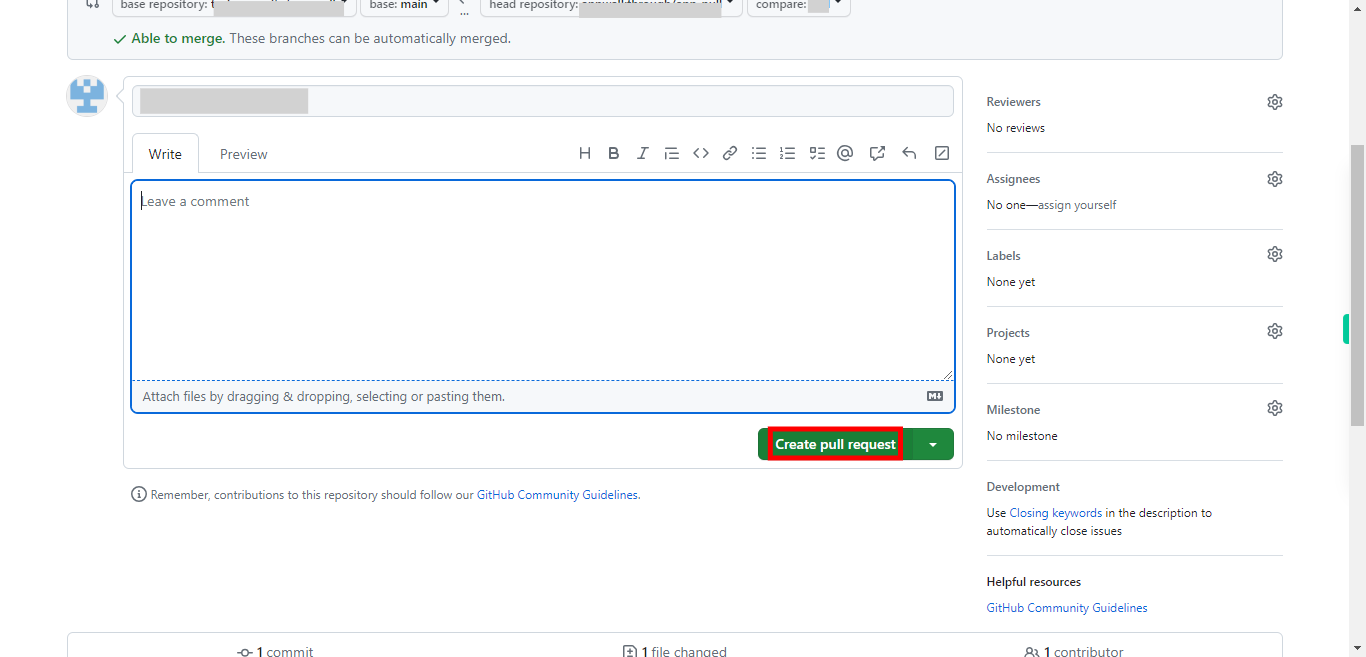
On the pull request page, review the changes you made. GitHub will show you a comparison between the base repository's main branch and your newly created branch. Ensure that the changes displayed are what you intended to submit. If necessary, you can provide additional information or context about your changes. You can add comments, screenshots, or references to related issues in the comment box. Then click on the "Next" button in the Supervity instruction widget.
-
17.
Click on the "Create pull request" button. Once you're satisfied with the changes and any additional comments, click on the "Create pull request" button. Give your pull request a descriptive title and add any additional comments or details in the comment box.


