This skill shows the steps to be followed to Login into the Passport account.Prerequisites: To ensure that you have an Aadhaar number.[NOTE: Please make sure that log into the Passport official website].
-
1.
Open Applicant Home.
-
2.
To proceed with applying for a fresh passport or re-issuing your passport, please click on the "Apply for Fresh Passport/Re-issue of Passport" option.
-
3.
Click on the Click here to fill out the application form online. The whole application process is completed online only.
-
4.
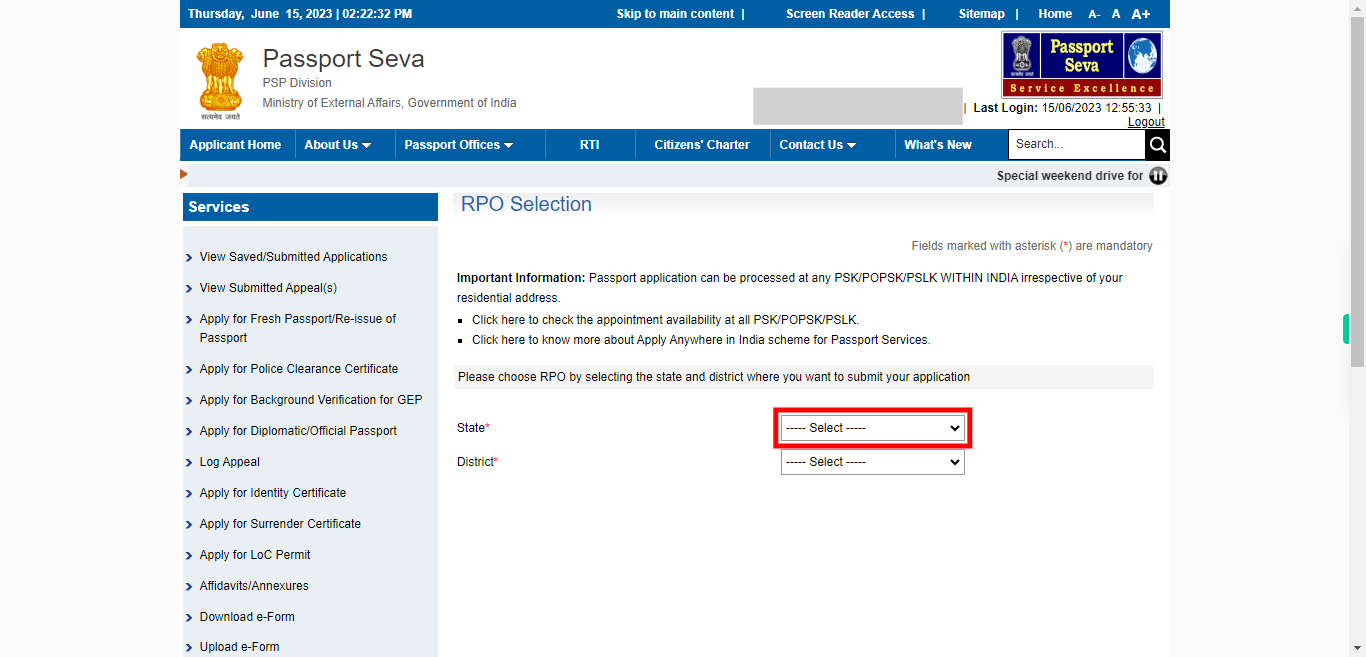
To continue with your passport application, please select your state from the provided options. The state selection allows the system to determine the appropriate passport office or regional center for processing your application. Once done, click on the "Next" button on the Supervity instruction widget.
-
5.
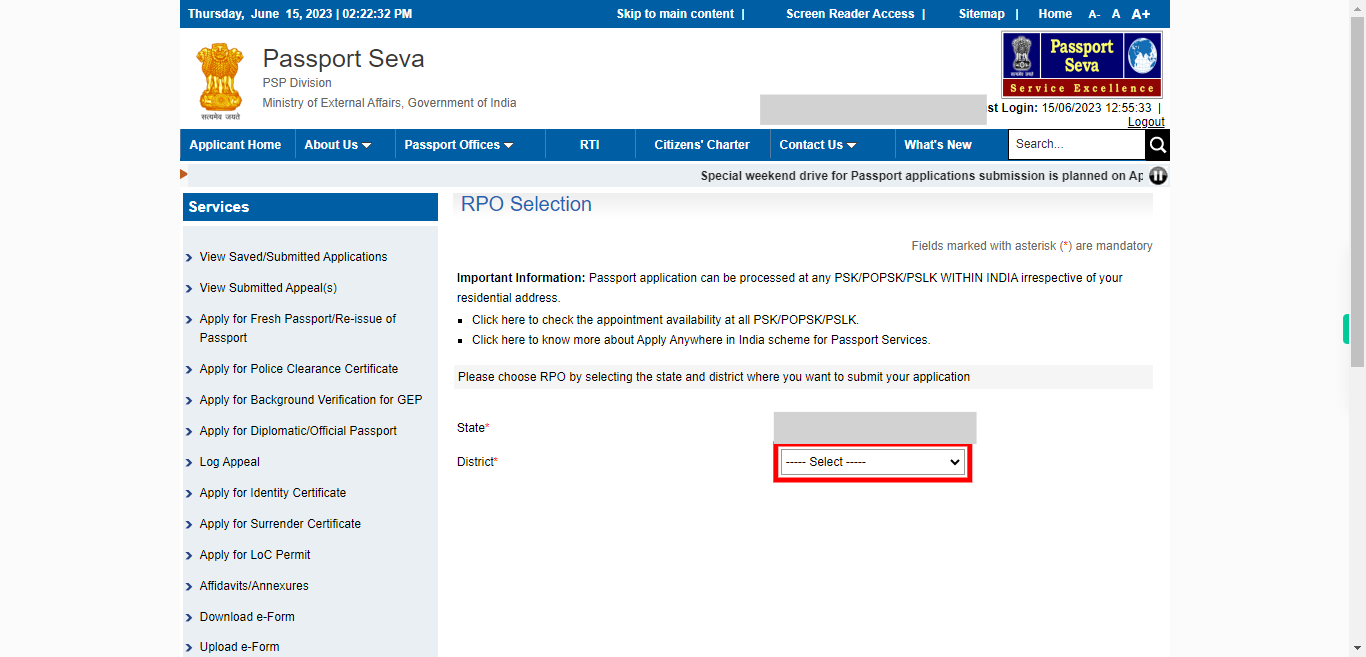
First click on the "Next" button on the Supervity instruction widget. To proceed with your passport application, please select your district from the available options. The district selection helps determine the specific passport office or center within your state where your application will be processed.
-
6.
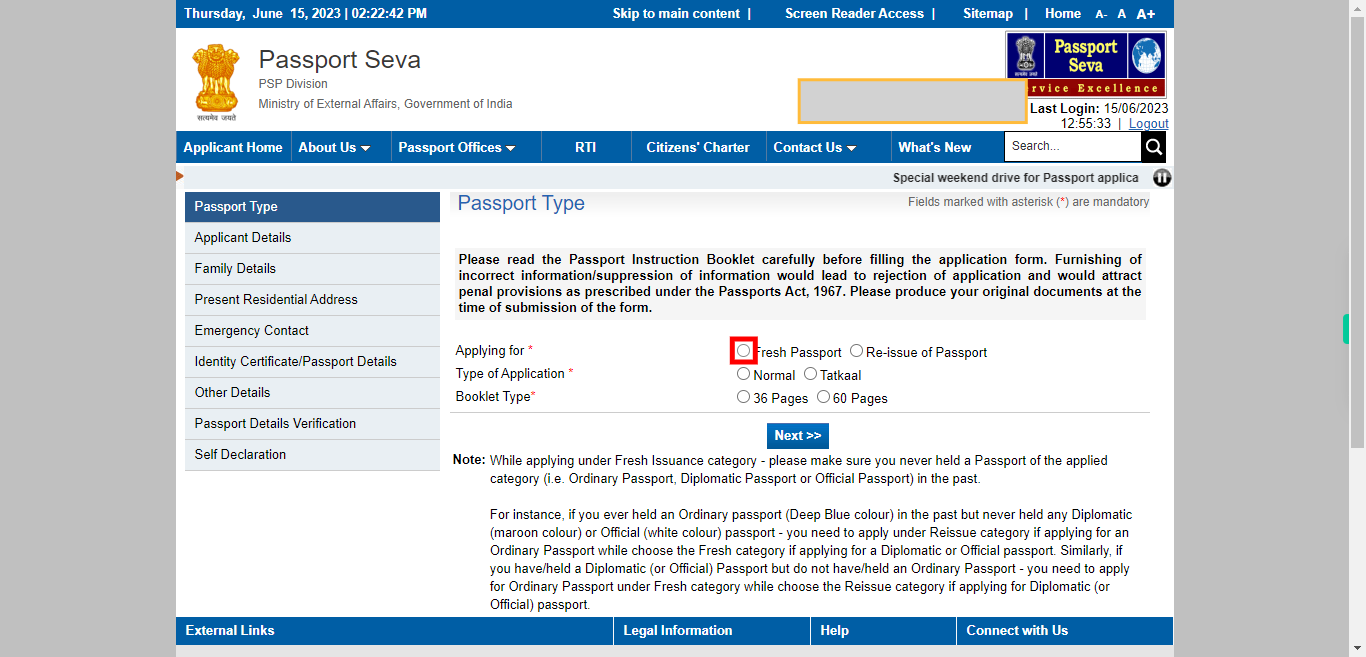
To apply for a fresh policy, please click on the "Apply for Fresh Policy" option. Once done, click on the "Next" button on the Supervity instruction widget.
-
7.
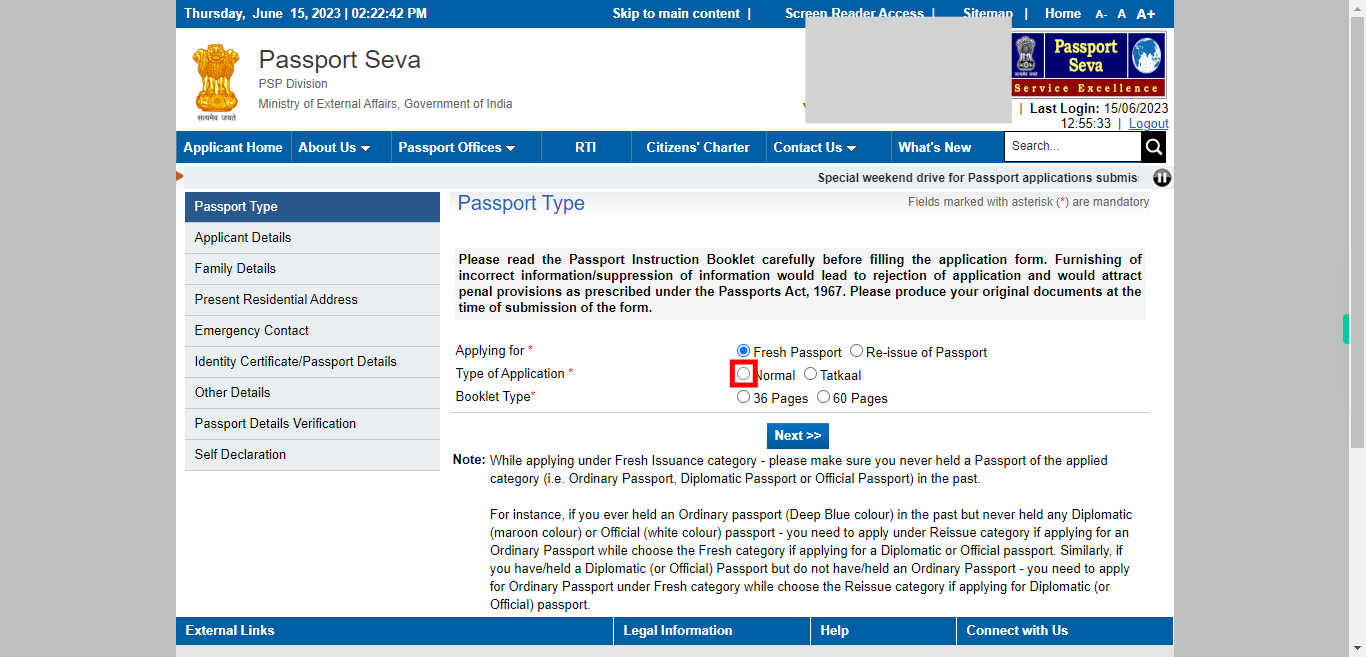
To proceed with your application, please select the desired application type: "Normal" or "Tatkaal." If you choose the "Normal" application type, it indicates that you want to follow the regular processing timeline for your application. If you opt for the "Tatkaal" application type, it implies that you require expedited processing of your application. Once done, click on the "Next" button on the Supervity instruction widget.
-
8.
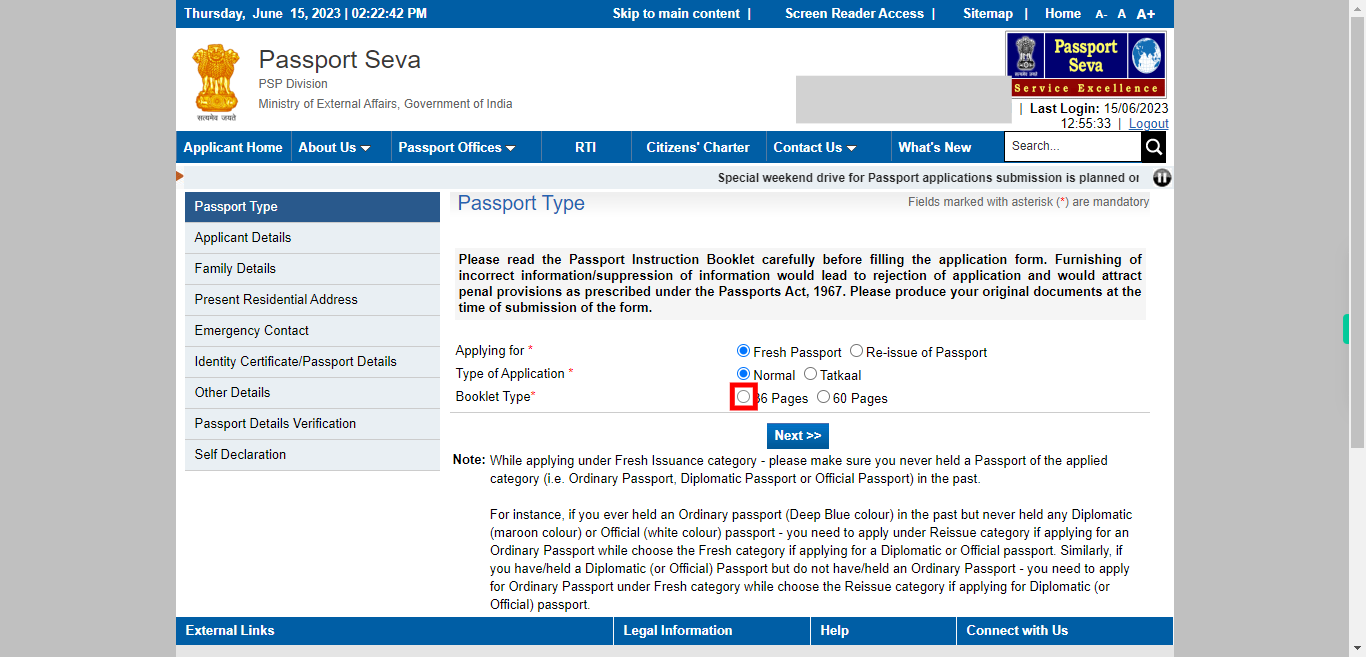
To proceed, please select the appropriate page count for your application. You have two options: 36 pages or 60 pages. Once done, click on the "Next" button on the Supervity instruction widget.
-
9.
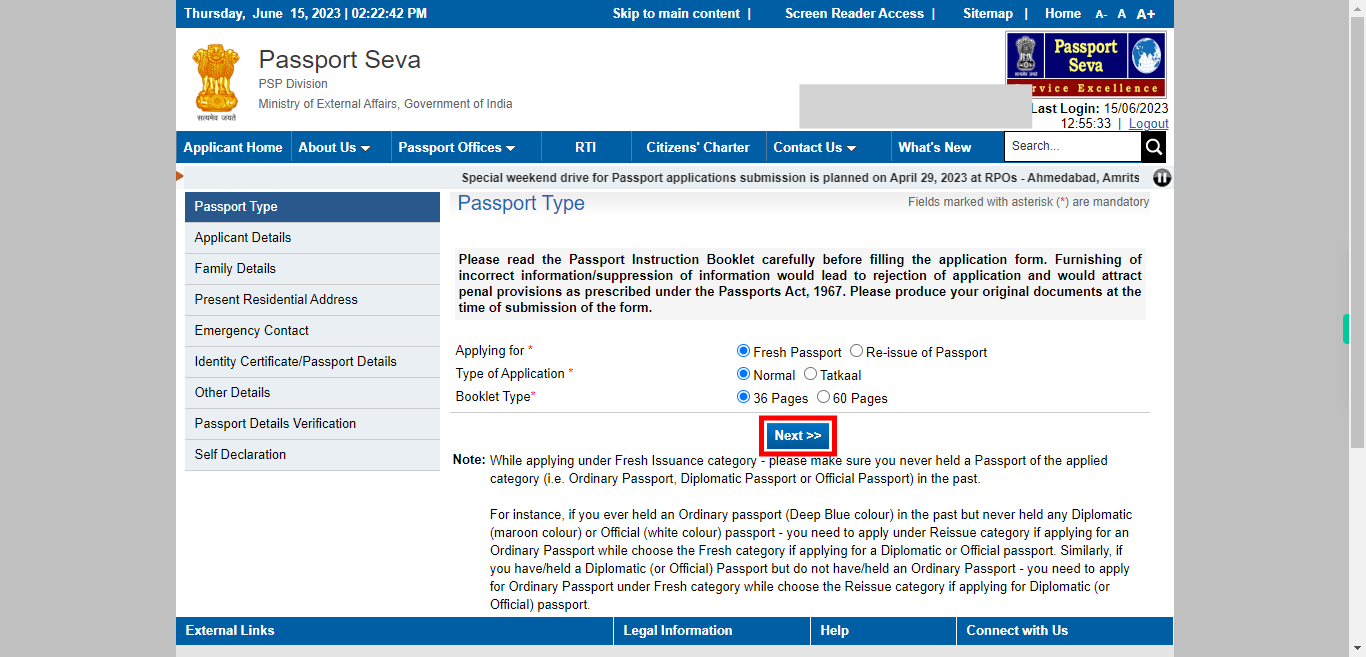
To continue with the application process, please click on the "Next" button. By clicking this button, you will proceed to the next step of the application where you will be asked to provide additional information.
-
10.
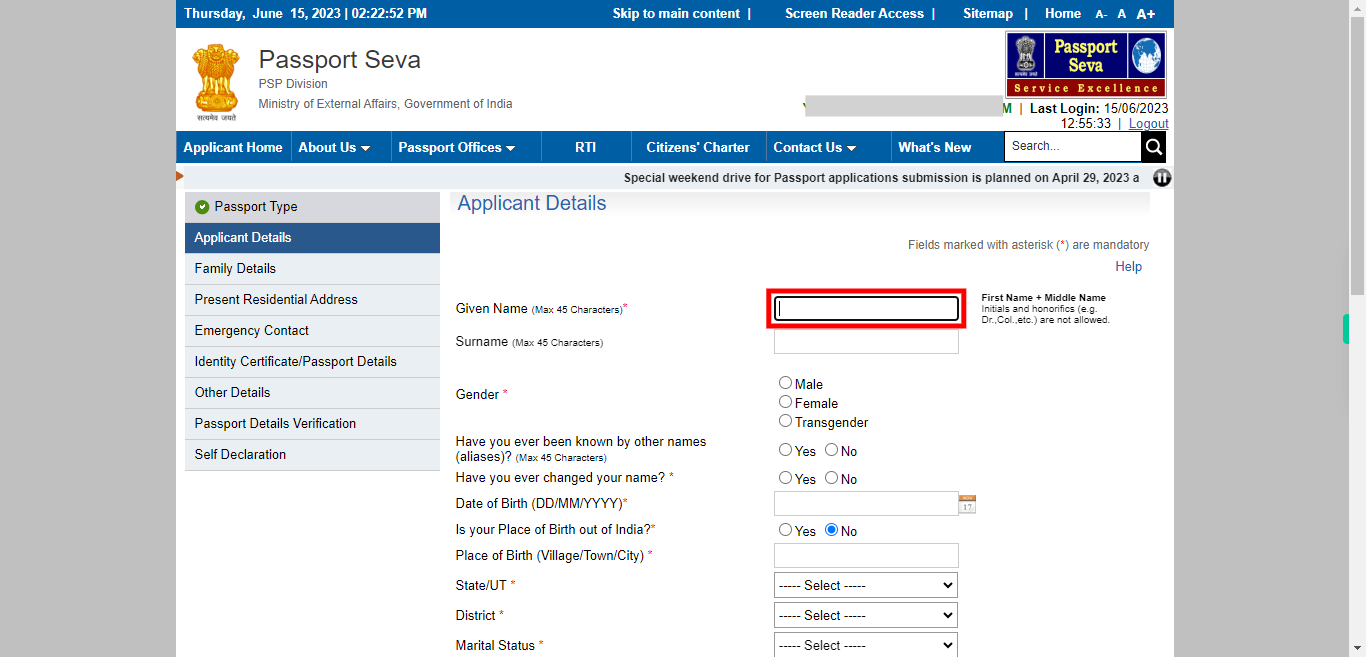
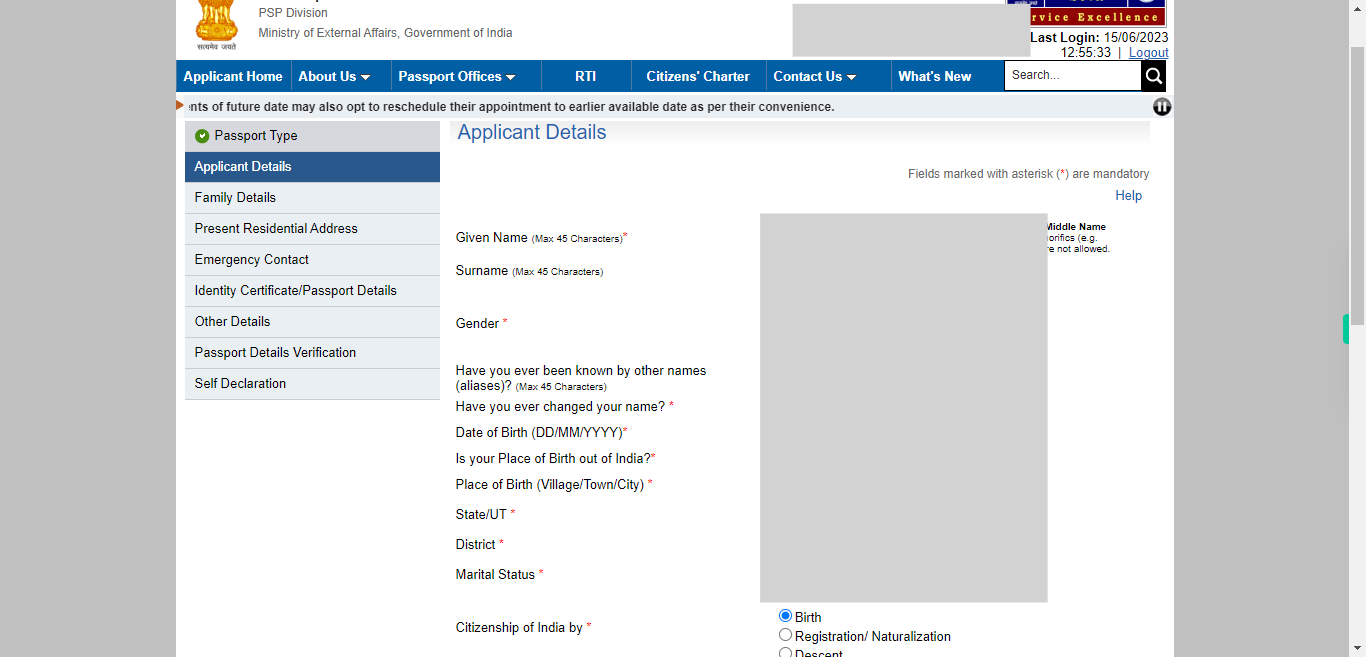
To proceed, please enter your first name or given name in the designated field. Exclude your surname or family name while entering this information. The first name refers to your personal name that is used to identify you individually. [NOTE: The max length is 45 characters] Once done, click on the "Next" button on the Supervity instruction widget.
-
11.
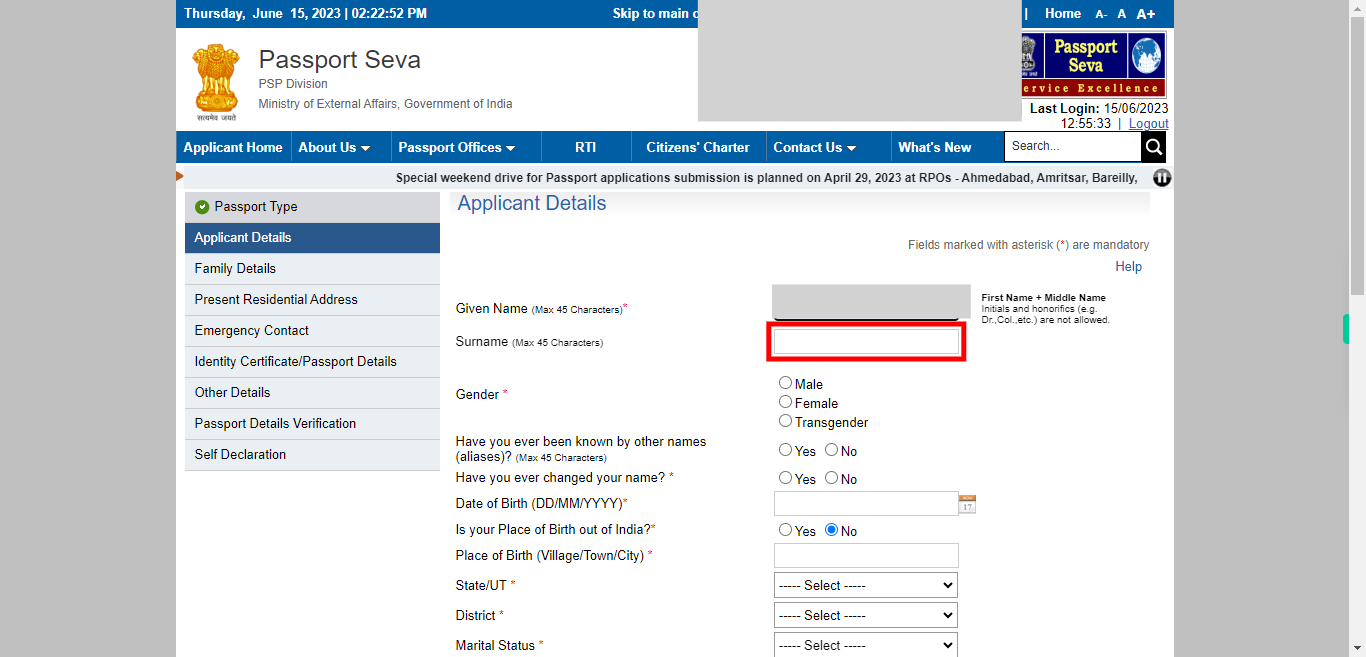
To proceed, please enter your surname or family name in the designated field. The surname represents your family name or last name. Once done, click on the "Next" button on the Supervity instruction widget.
-
12.
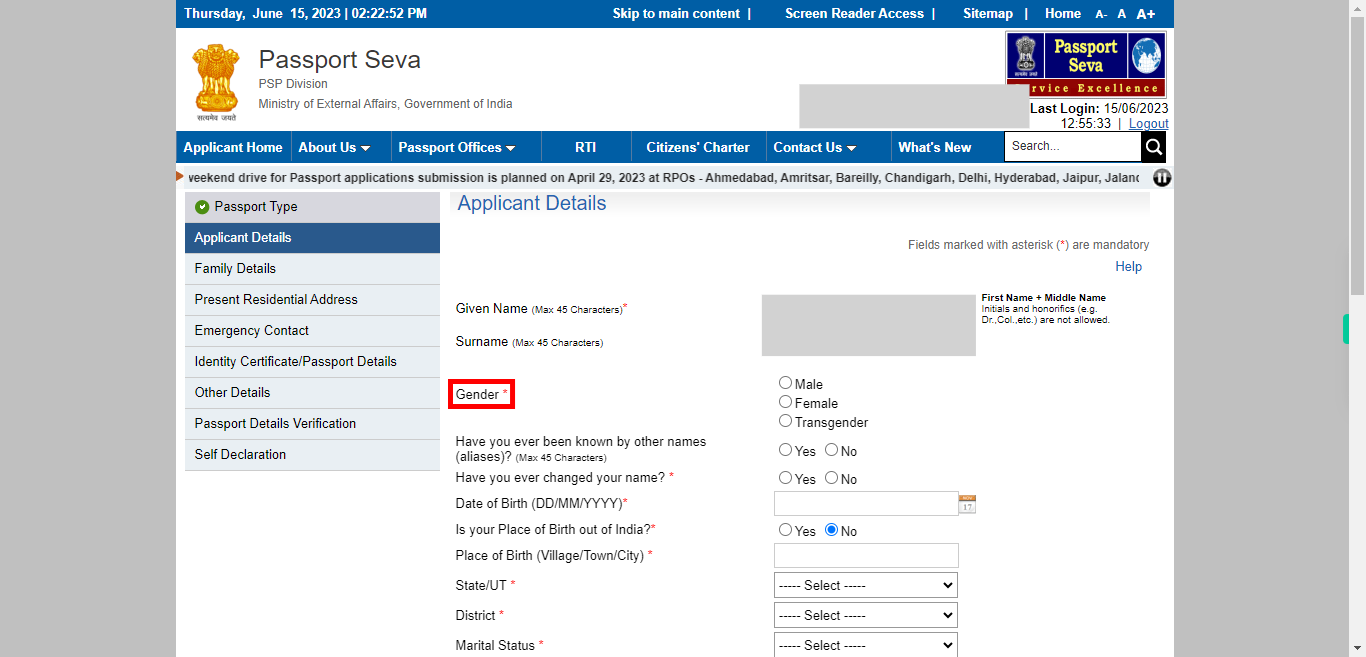
To continue with the application process, please select your gender from the available options. Typically, the options provided are "Male," "Female," and "Transgender". Once done, click on the "Next" button on the Supervity instruction widget.
-
13.
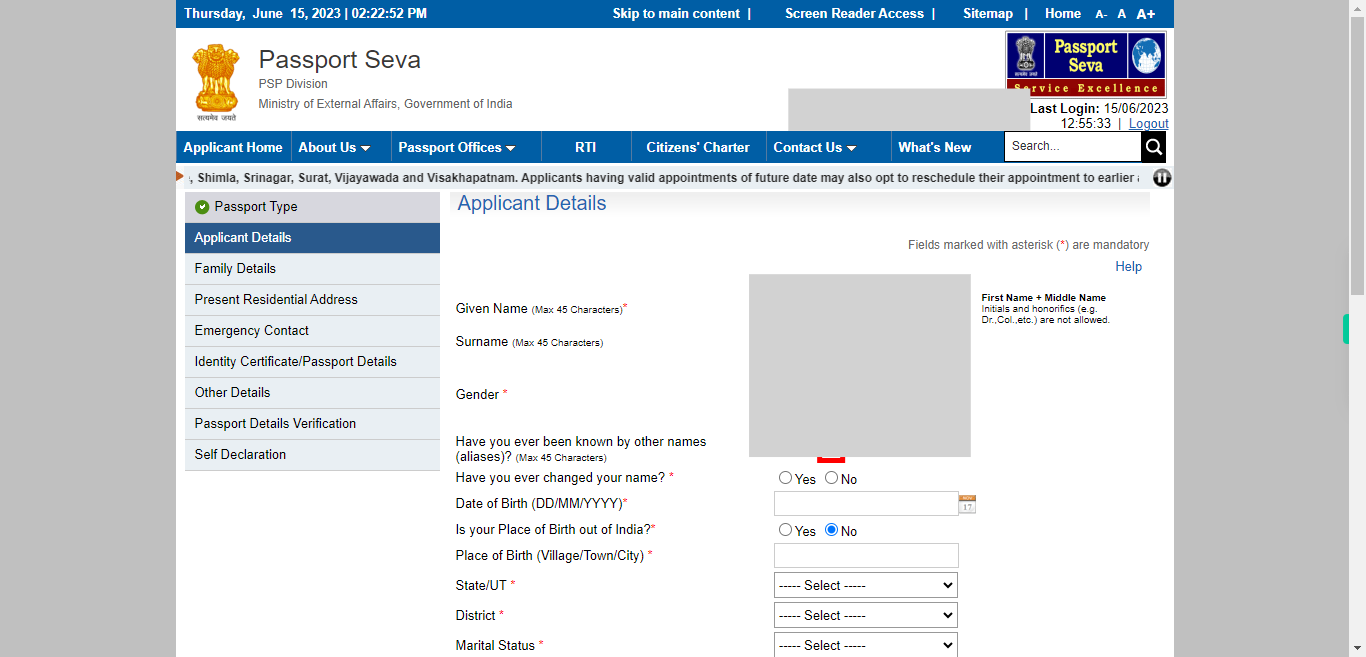
To proceed, please indicate whether you have any alias names by selecting "Yes" or "No" from the available options. If you select "Yes," you will be prompted to provide the alias name in the designated field. An alias name is an alternative name that you may have used or been known by in the past. If you select "No," it means you do not have any alias names to provide. Once done, click on the "Next" button on the Supervity instruction widget.
-
14.
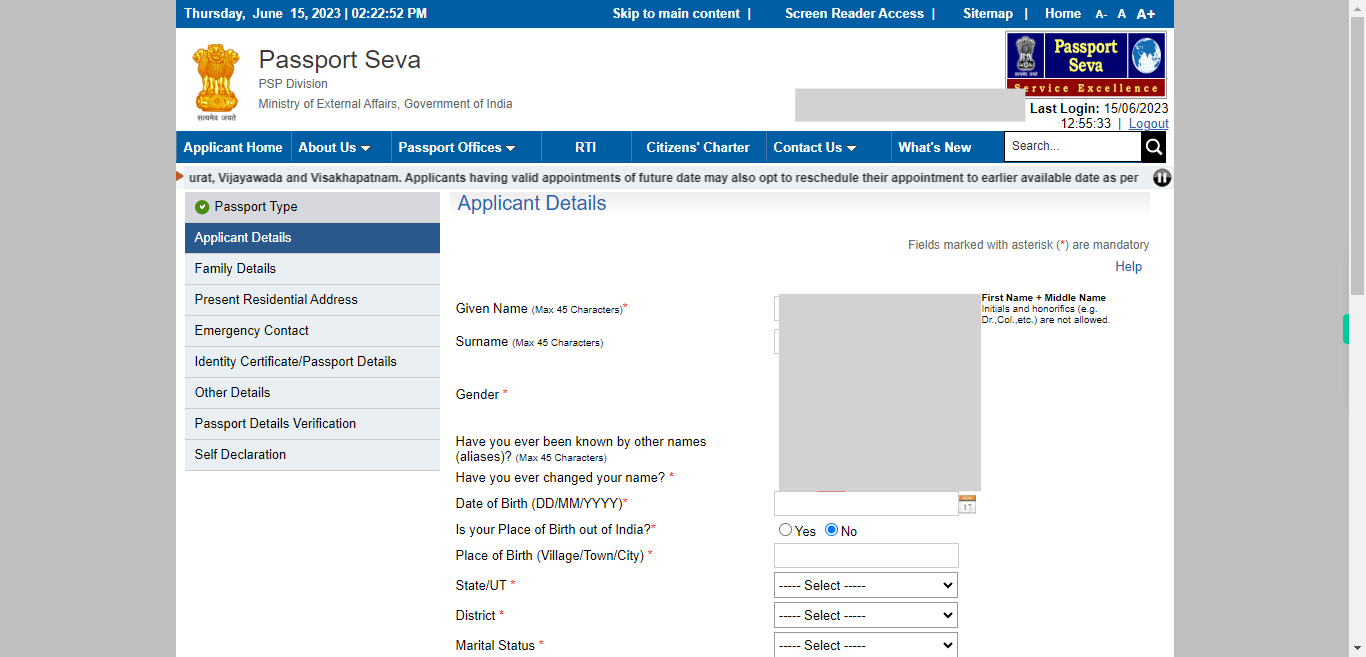
To proceed, please indicate whether you have ever changed your name by selecting "Yes" or "No" from the available options. If you select "Yes," it indicates that you have changed your name at some point. If you select "No," it means you have not changed your name. Once done, click on the "Next" button on the Supervity instruction widget.
-
15.
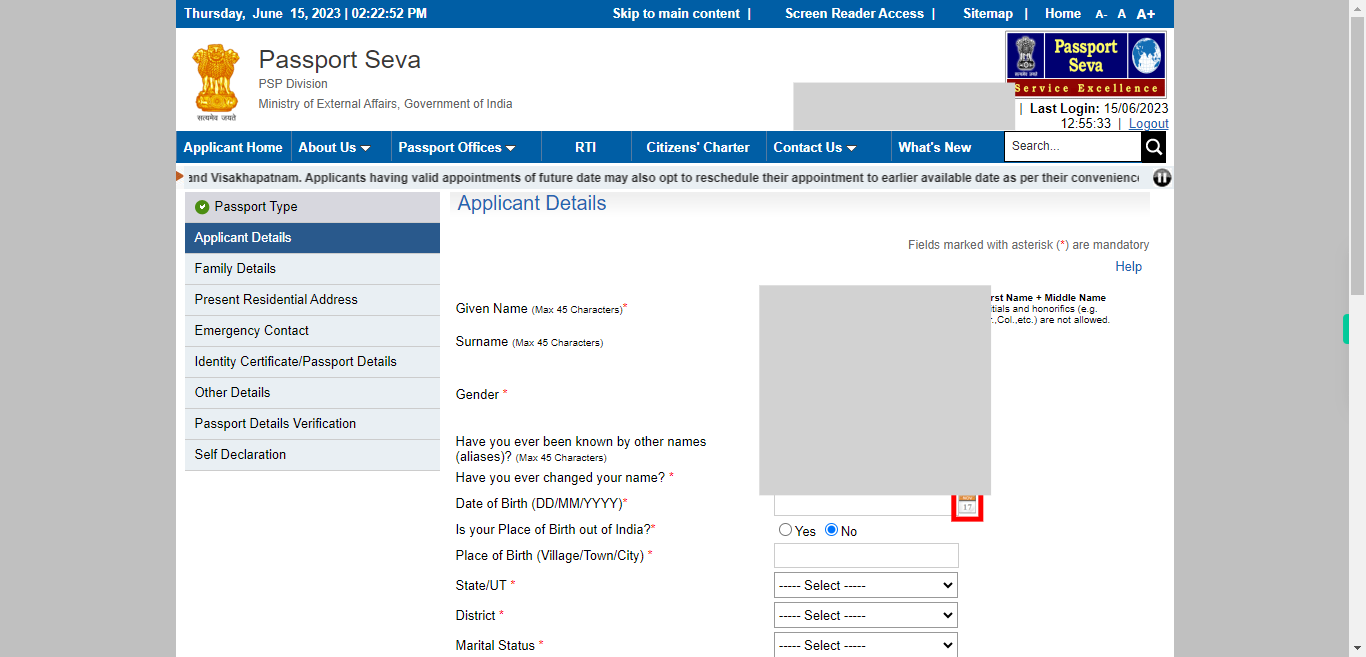
To proceed, please select your date of birth (DOB) from the provided options. Once done, click on the "Next" button on the Supervity instruction widget.
-
16.
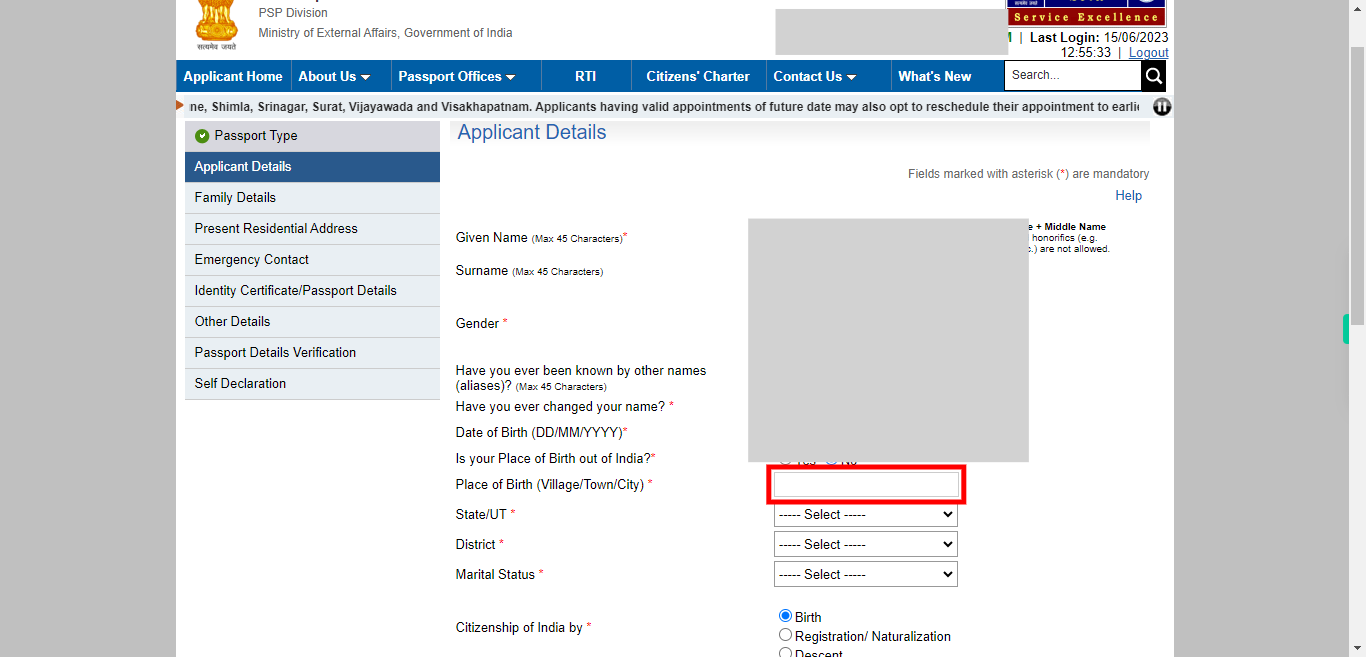
To continue with the application process, please select your place of birth from the available options. This typically includes selecting your country of birth and, if applicable, providing additional details such as the state or city of birth. Once done, click on the "Next" button on the Supervity instruction widget.
-
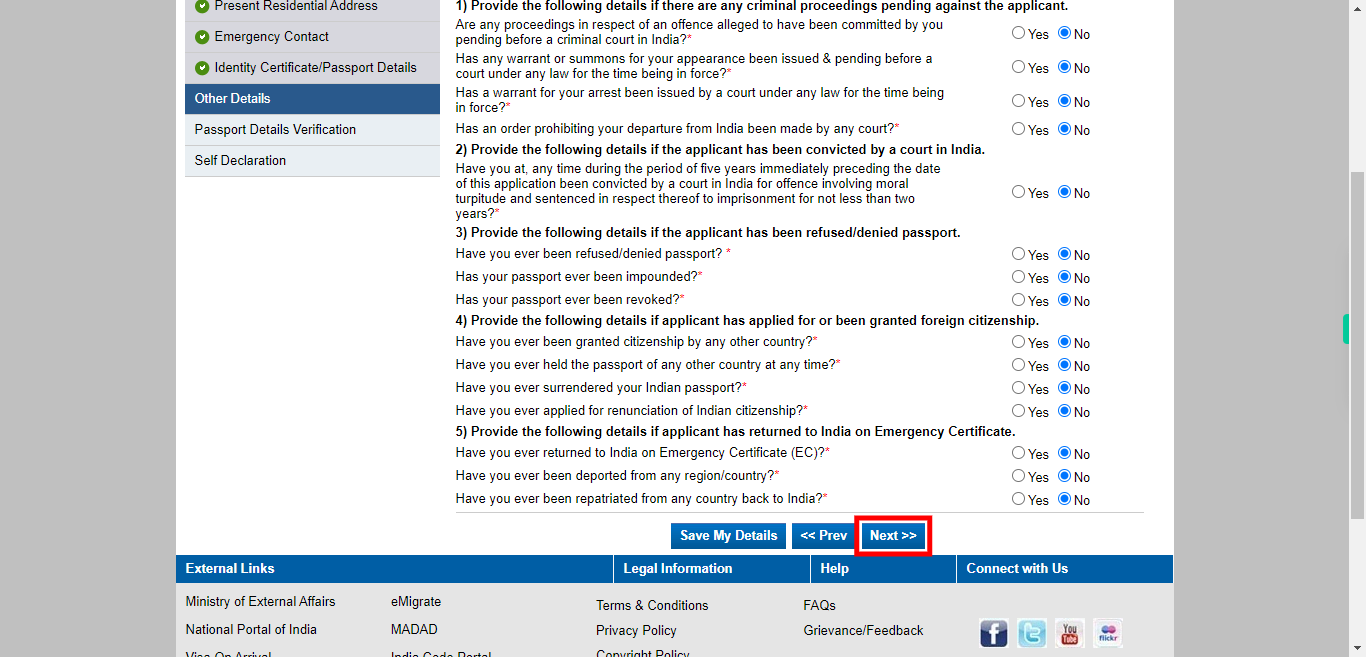
17.
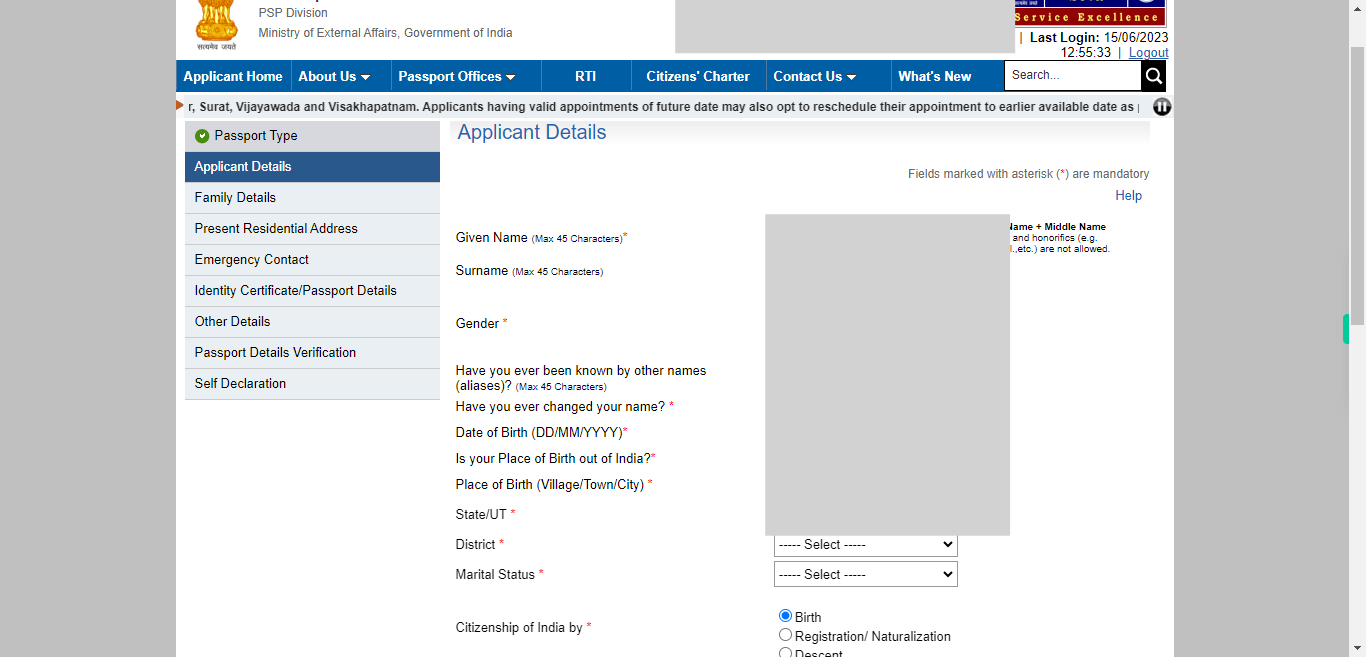
Select your birth state from the available options. Once done, click on the "Next" button on the Supervity instruction widget.
-
18.
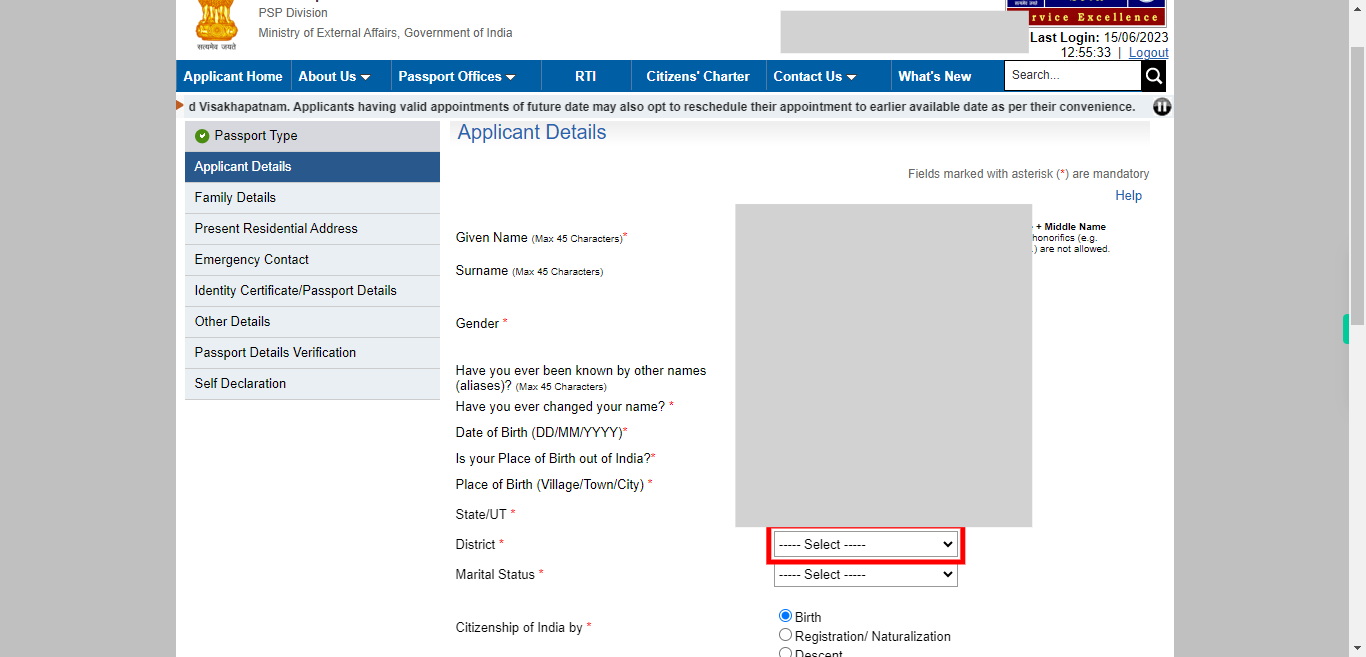
Select your birth district from the available options. Once done, click on the "Next" button on the Supervity instruction widget.
-
19.
Select your marital status from the available option. Once done, click on the "Next" button on the Supervity instruction widget.
-
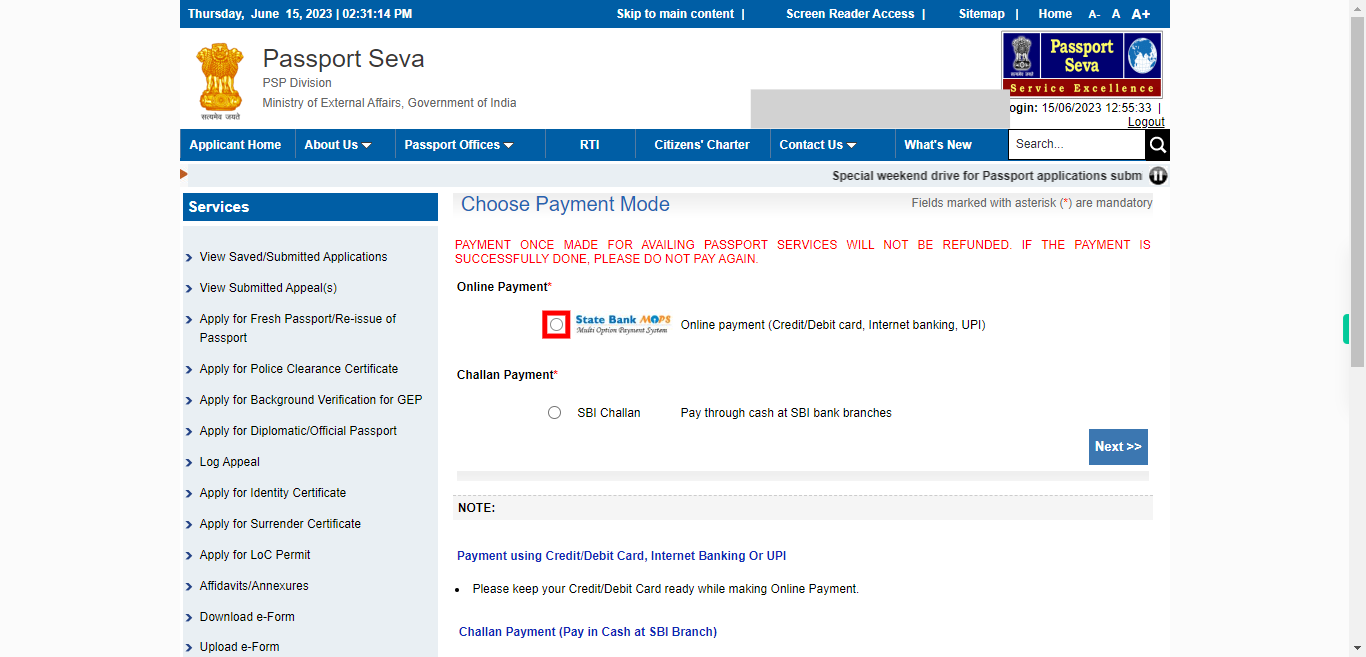
20.
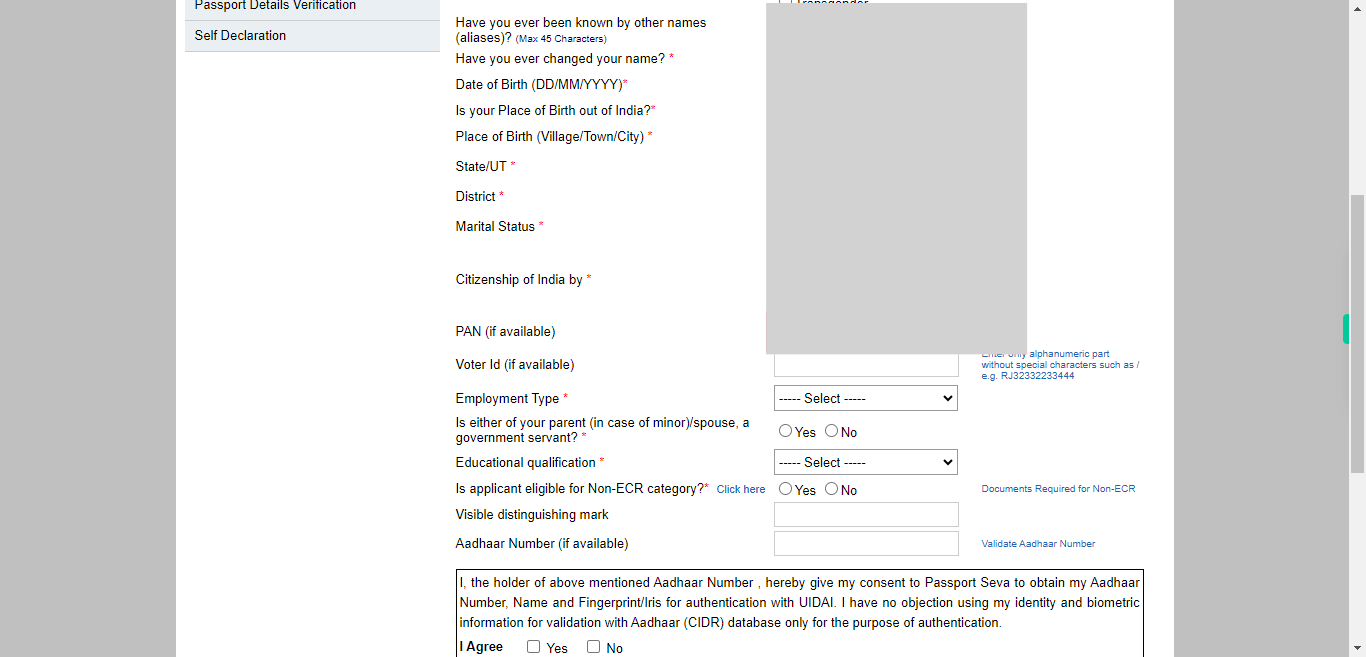
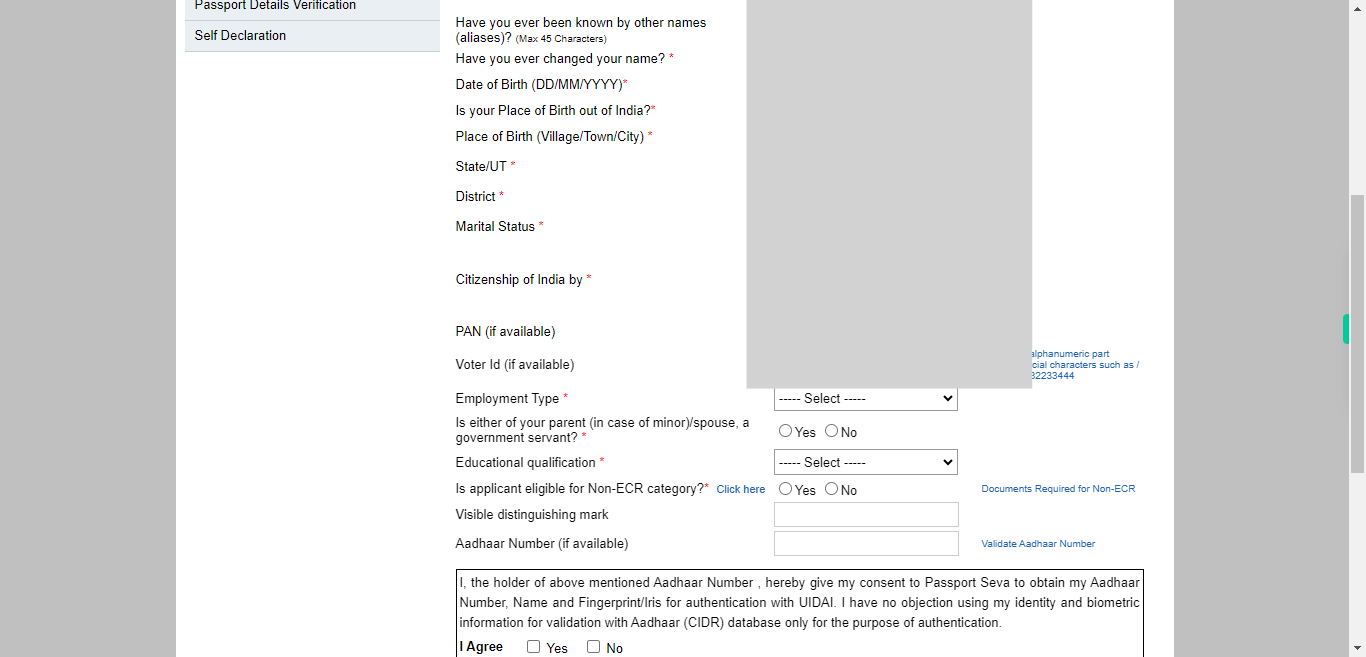
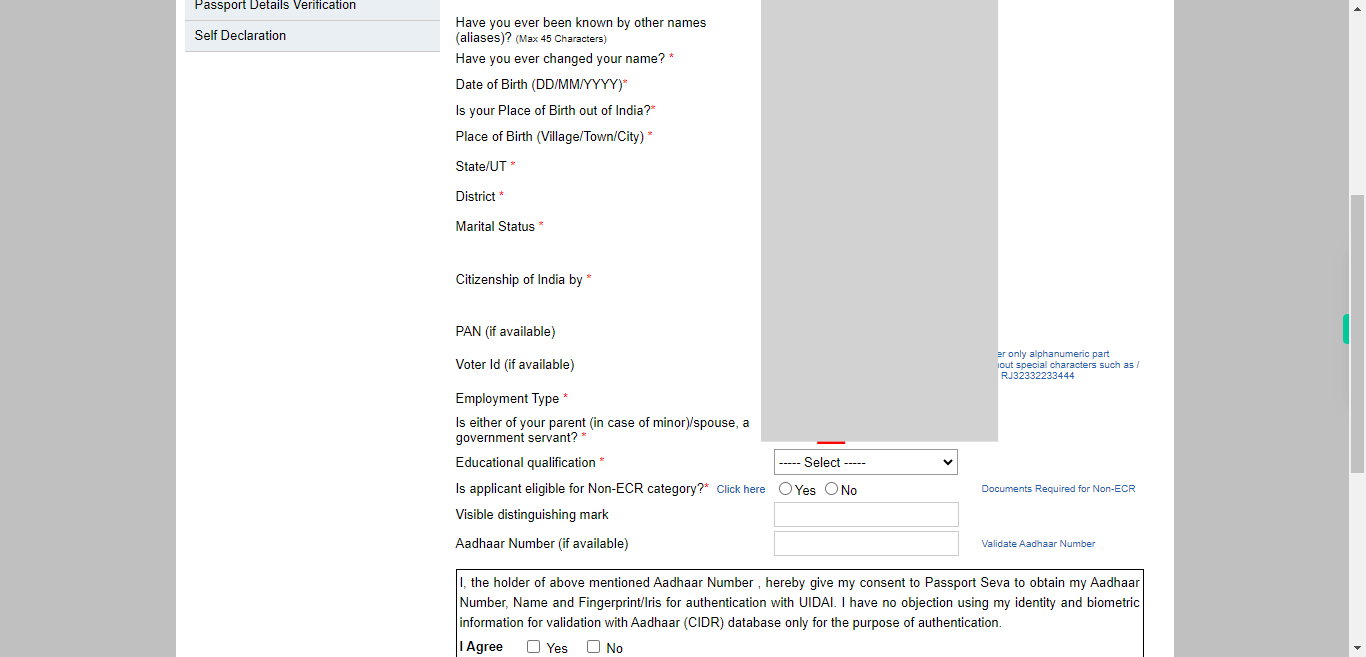
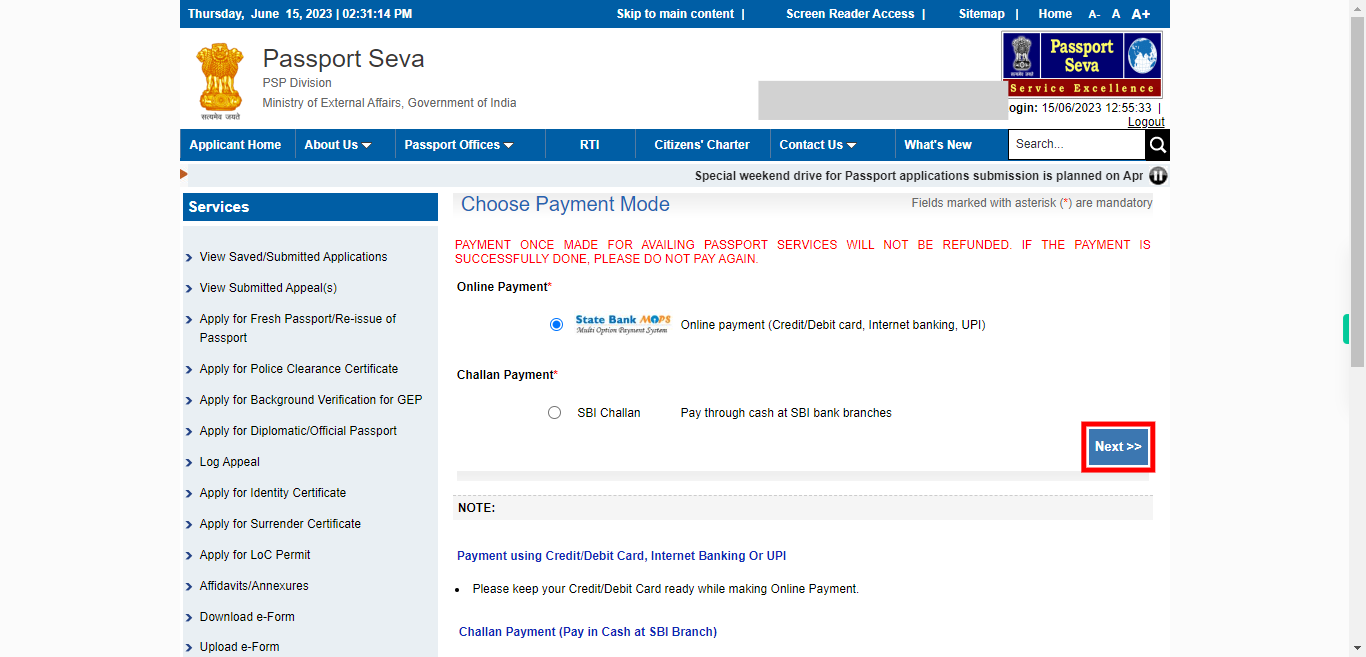
Select your relation in INDIA and you have the option to enter your PAN (Permanent Account Number) if you possess one. PAN is a unique ten-digit alphanumeric identifier issued by the Income Tax Department of India. However, please note that entering your PAN number is optional and not mandatory for the application process. If you do not have a PAN or prefer not to provide it, you can leave the field blank and proceed with the application. Once done, click on the "Next" button on the Supervity instruction widget.
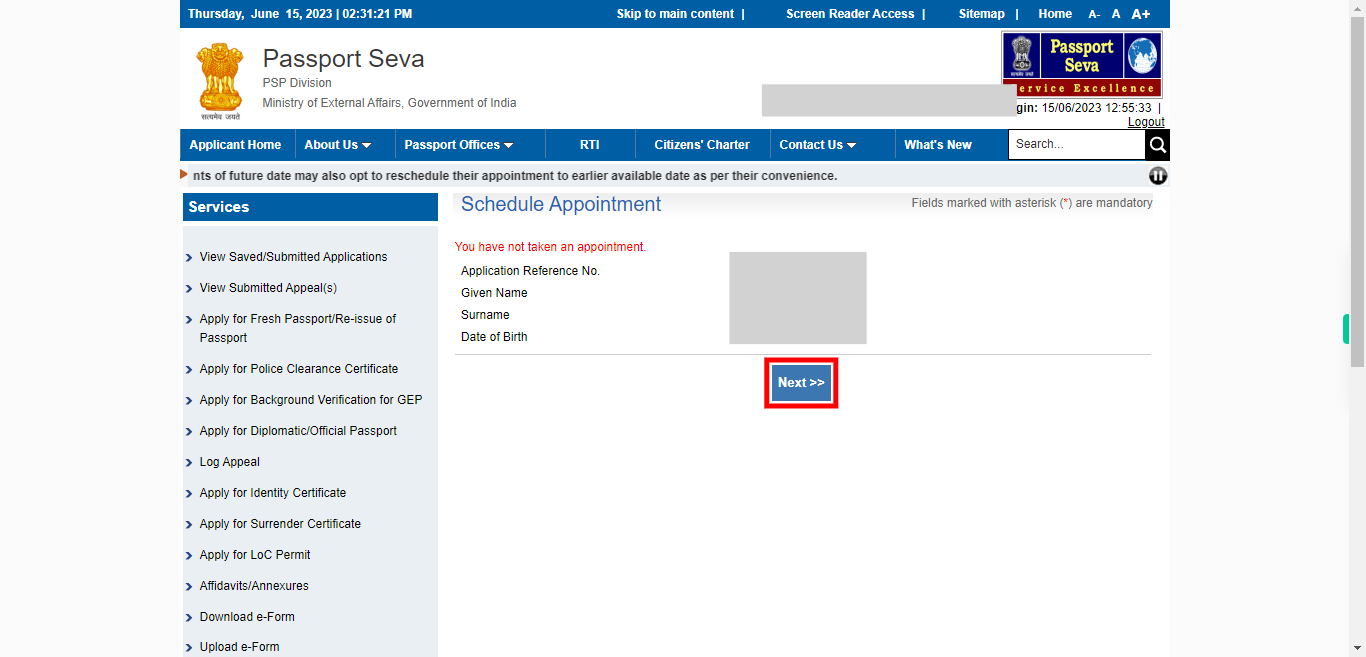
-
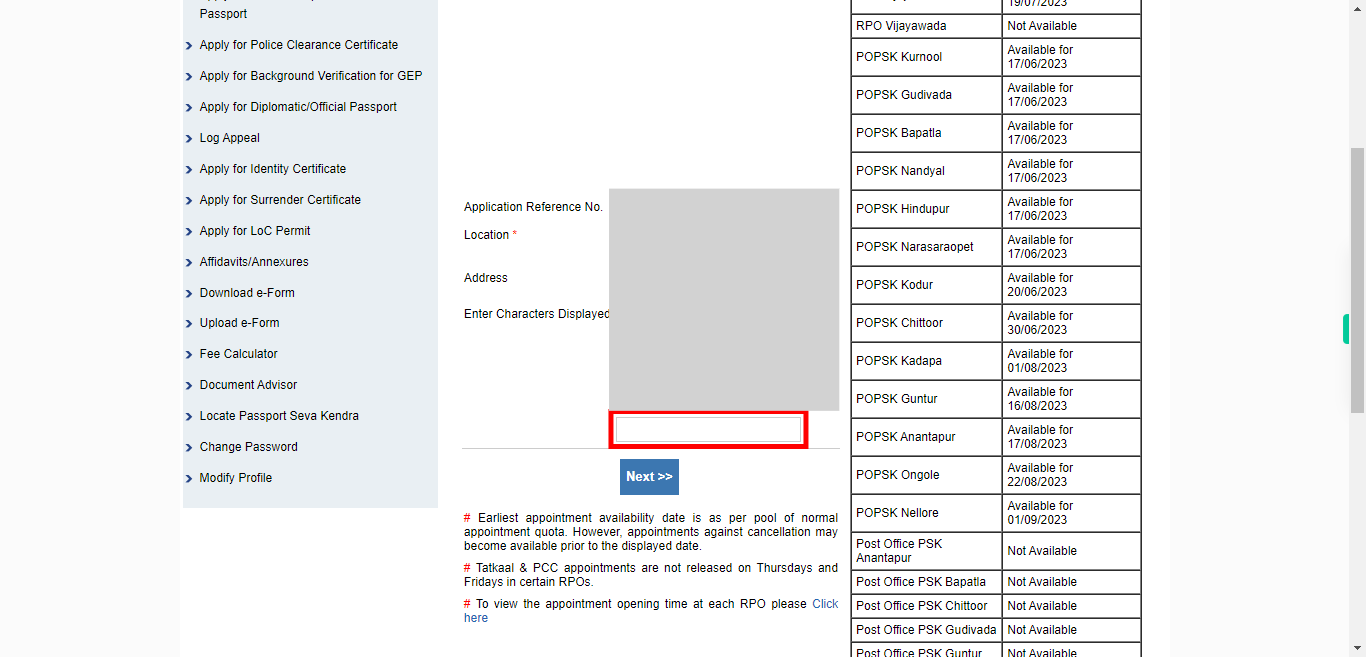
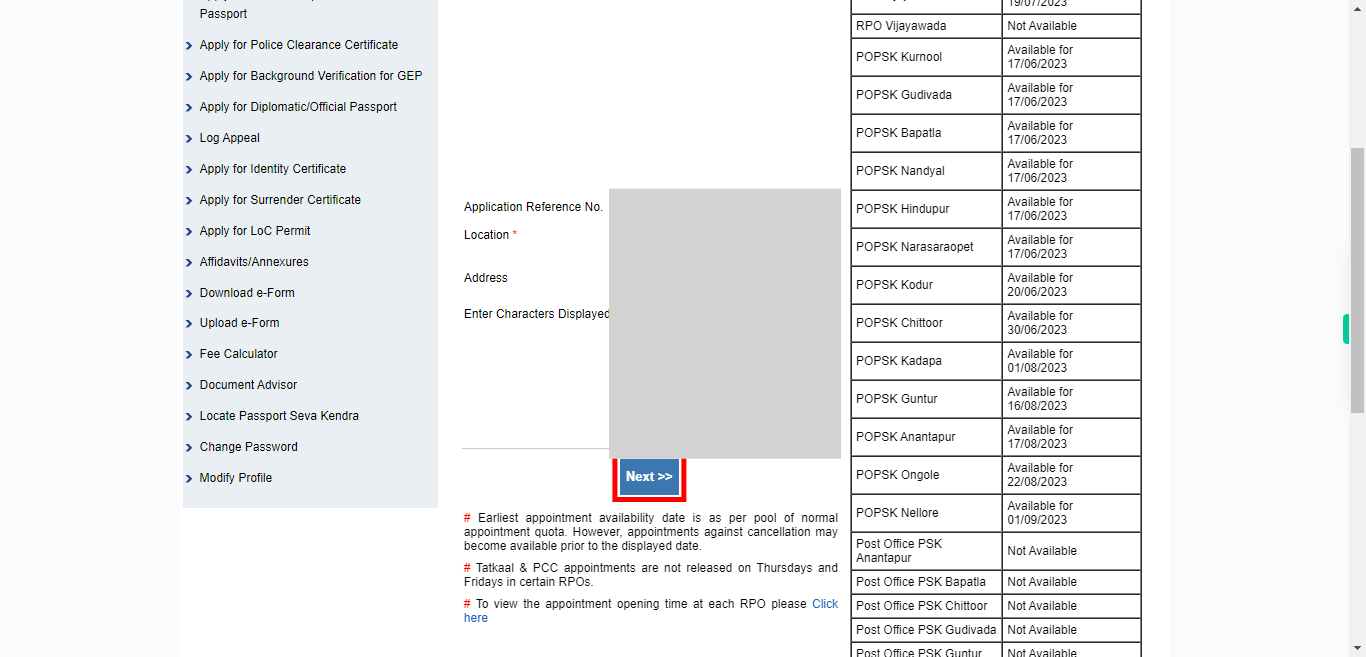
21.
To proceed, you have the option to enter your Voter ID (Voter Identification) number if you possess one. Voter ID is a unique identification number issued by the Election Commission of India. If you have a Voter ID, you can enter it in the designated field. However, please note that entering your Voter ID number is optional and not mandatory. Once done, click on the "Next" button on the Supervity instruction widget.
-
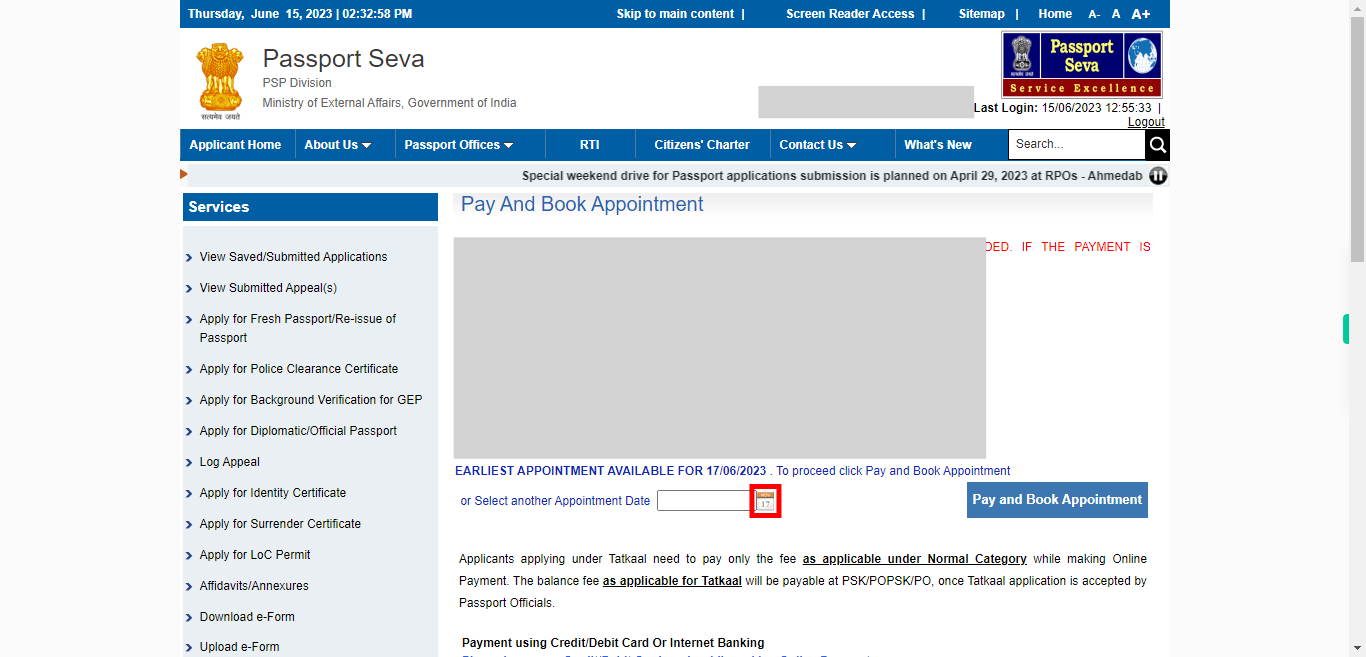
22.
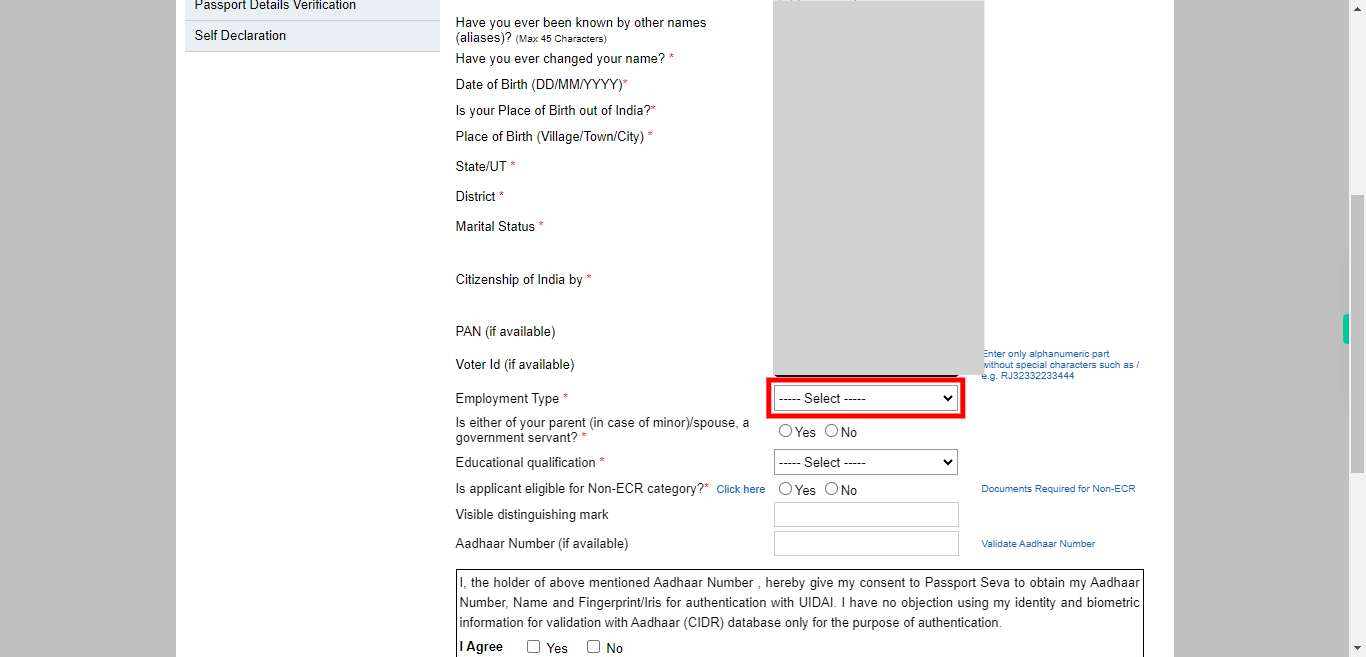
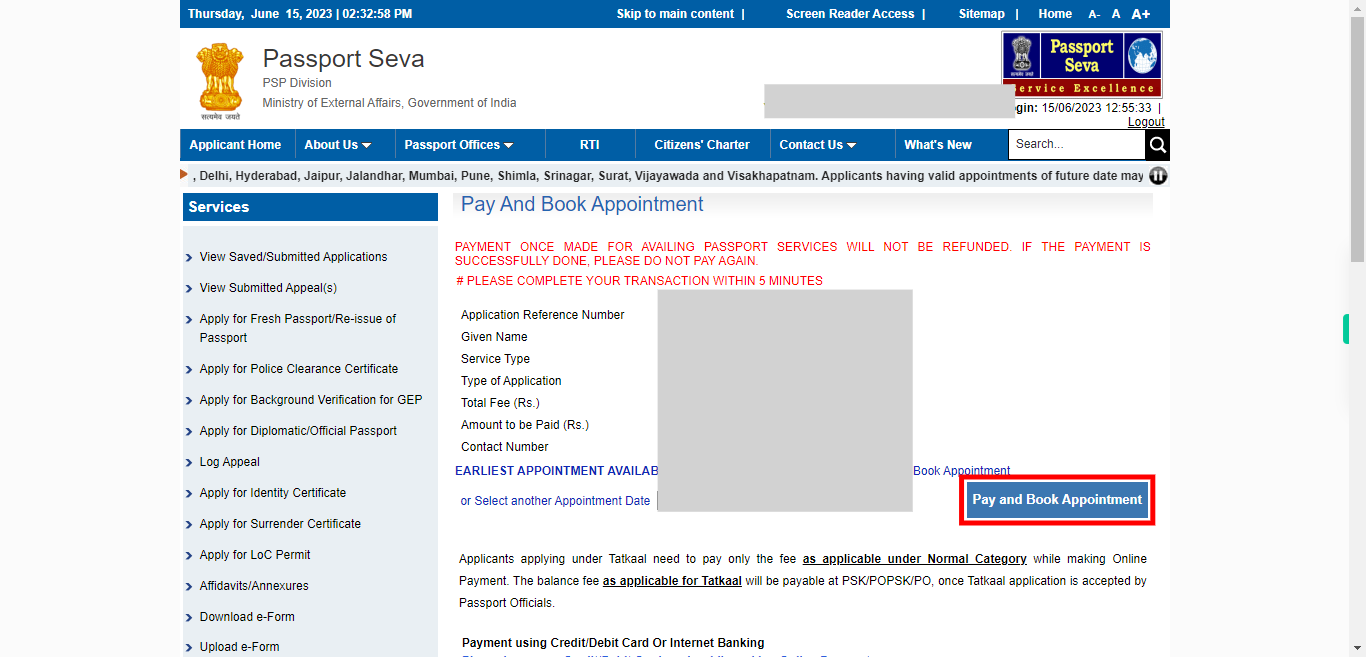
To continue, please select your employment type from the available options. Once done, click on the "Next" button on the Supervity instruction widget.
-
23.
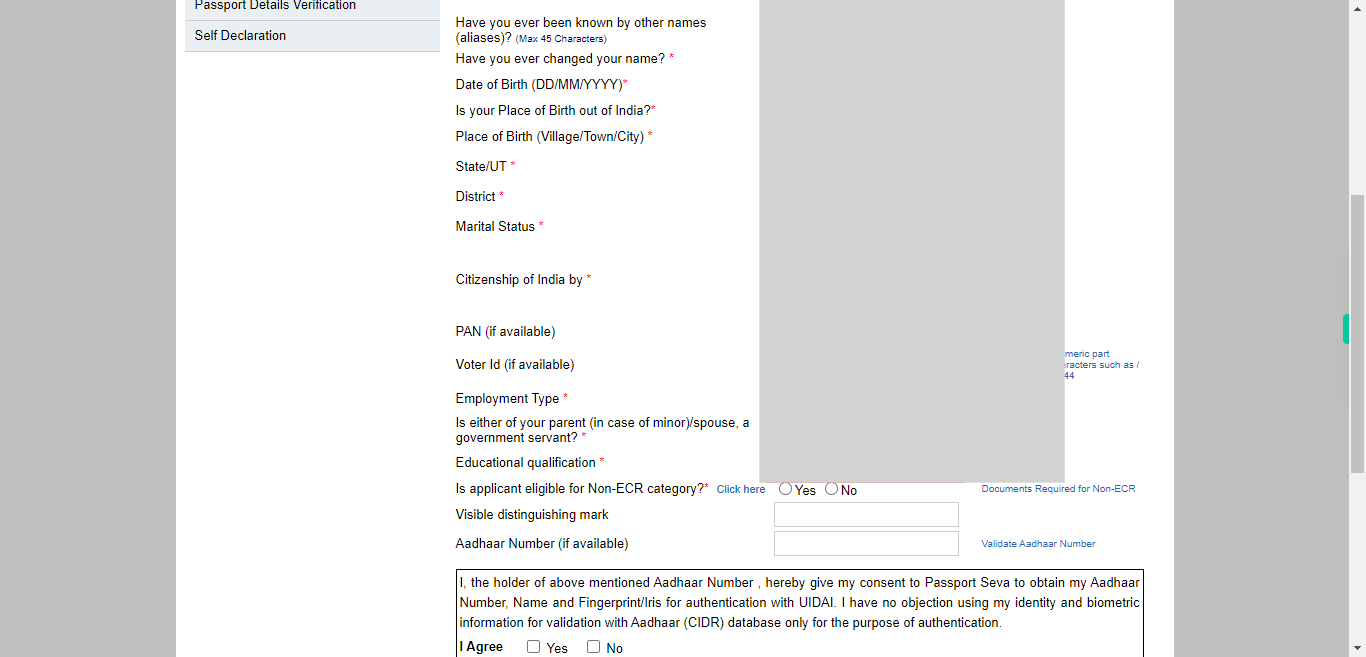
To proceed, please indicate whether any member of your family is a government employee by selecting "Yes" or "No" from the available options. If you select "Yes," it means that at least one family member is employed by the government. If you select "No," it indicates that there are no family members working as government employees. Once done, click on the "Next" button on the Supervity instruction widget.
-
24.
To continue, please select your educational qualification from the provided list. Once done, click on the "Next" button on the Supervity instruction widget.
-
25.
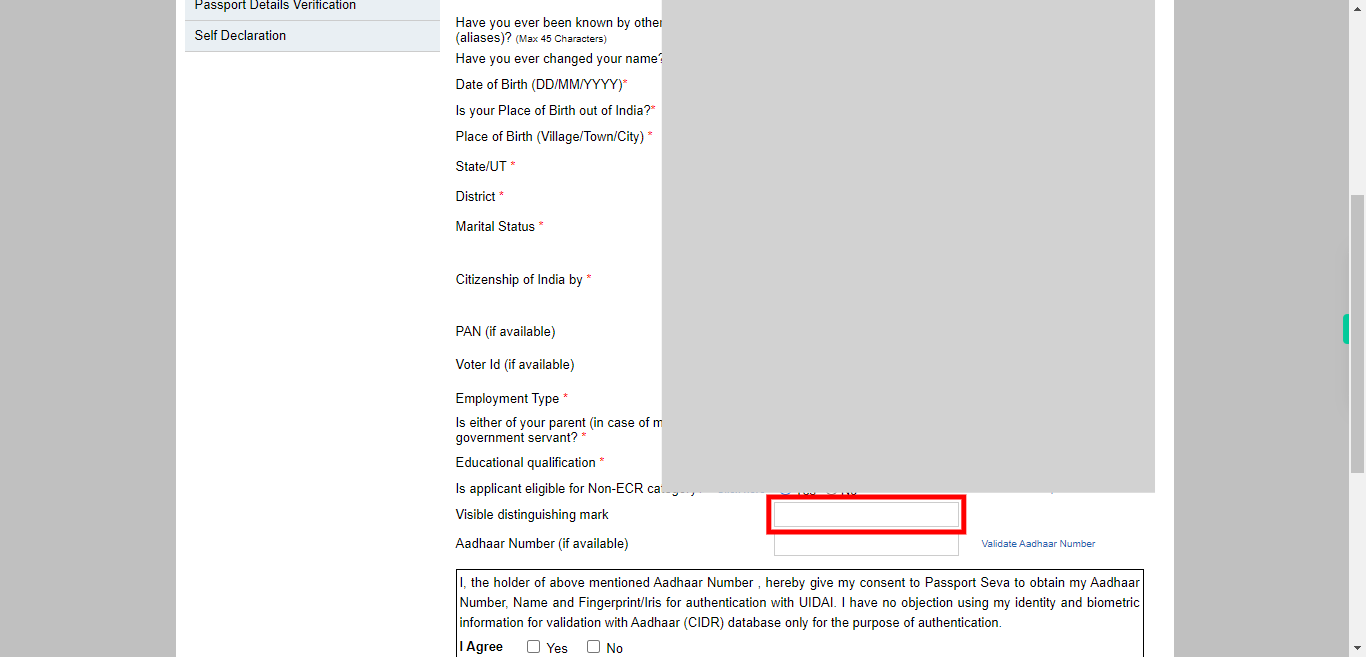
Enter Visible distinguishing marks to uniquely identify the person. Once done, click on the "Next" button on the Supervity instruction widget.
-
26.
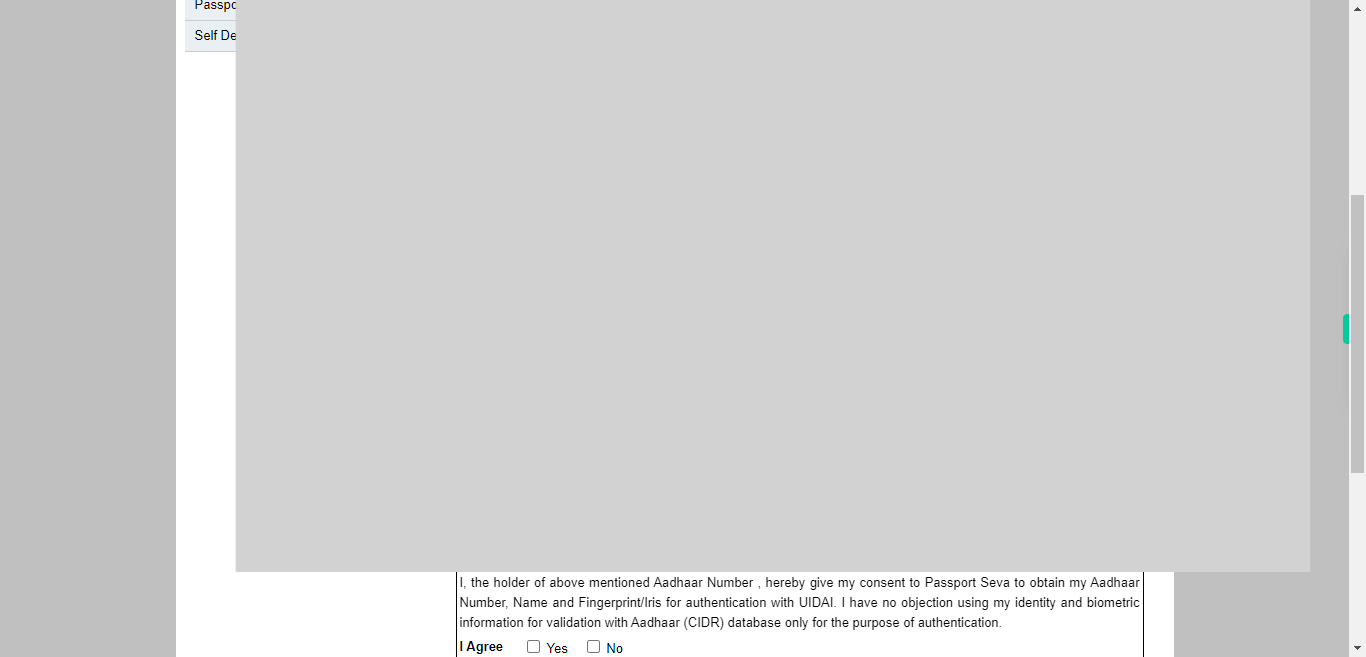
To proceed, you have the option to enter your Aadhaar number, which is a 12-digit unique identification number issued by the Unique Identification Authority of India (UIDAI). Once done, click on the "Next" button on the Supervity instruction widget.
-
27.
To proceed, please click on the "Yes" button to indicate that you agree to the terms and conditions. By selecting "Yes," you confirm that you have read and understood the terms and conditions associated with the application process or any applicable agreements. Once done, click on the "Next" button on the Supervity instruction widget.
-
28.
To continue with the application process, please click on the "Next" button. Click on the "OK" button twice the pop-up raised on the window
-
29.
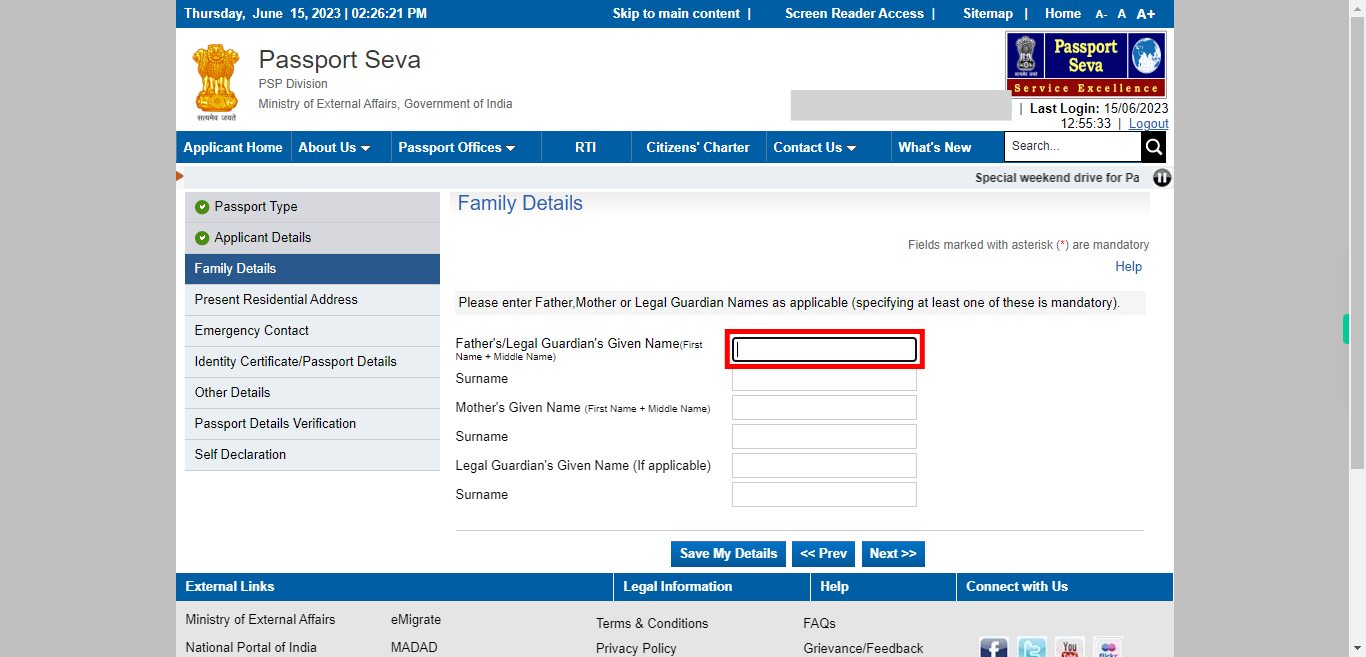
To proceed, please enter your father's first name (excluding the surname) in the designated field. Provide your father's first name accurately without any typographical errors or additional information. Once done, click on the "Next" button on the Supervity instruction widget.
-
30.
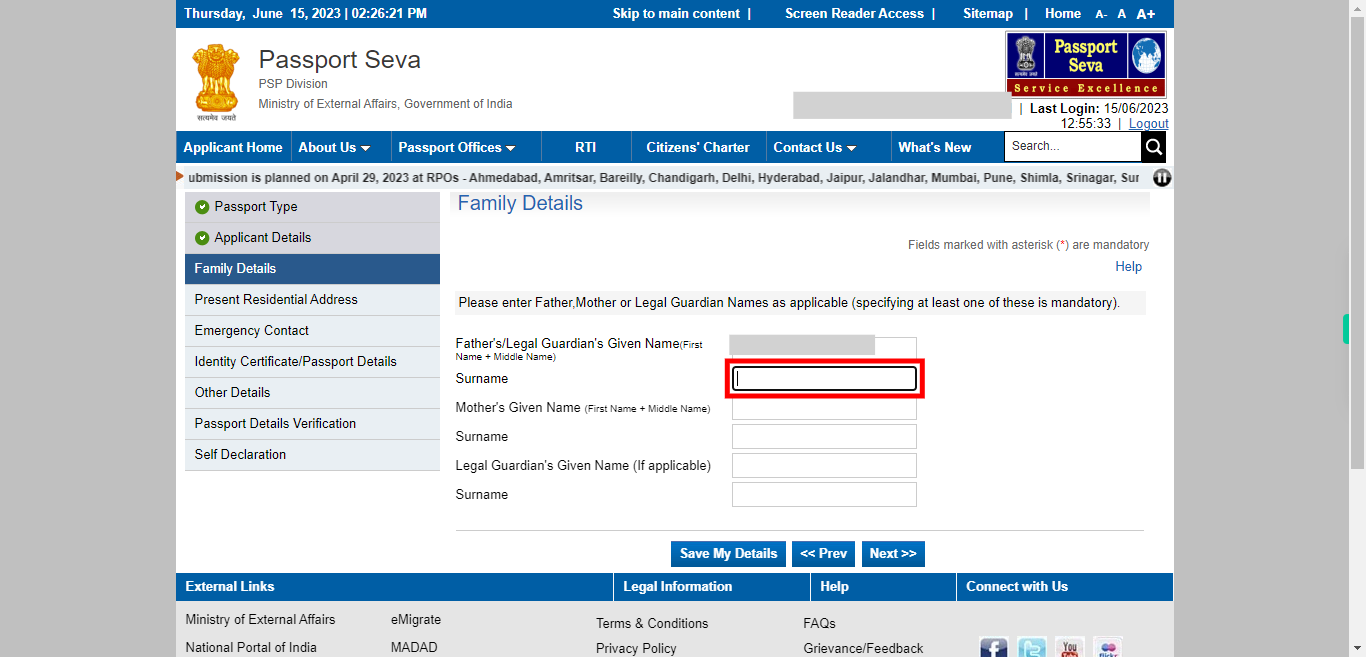
To proceed, please enter your father's surname or family name in the designated field. Provide your father's surname accurately, without any typographical errors or additional information. Once done, click on the "Next" button on the Supervity instruction widget.
-
31.
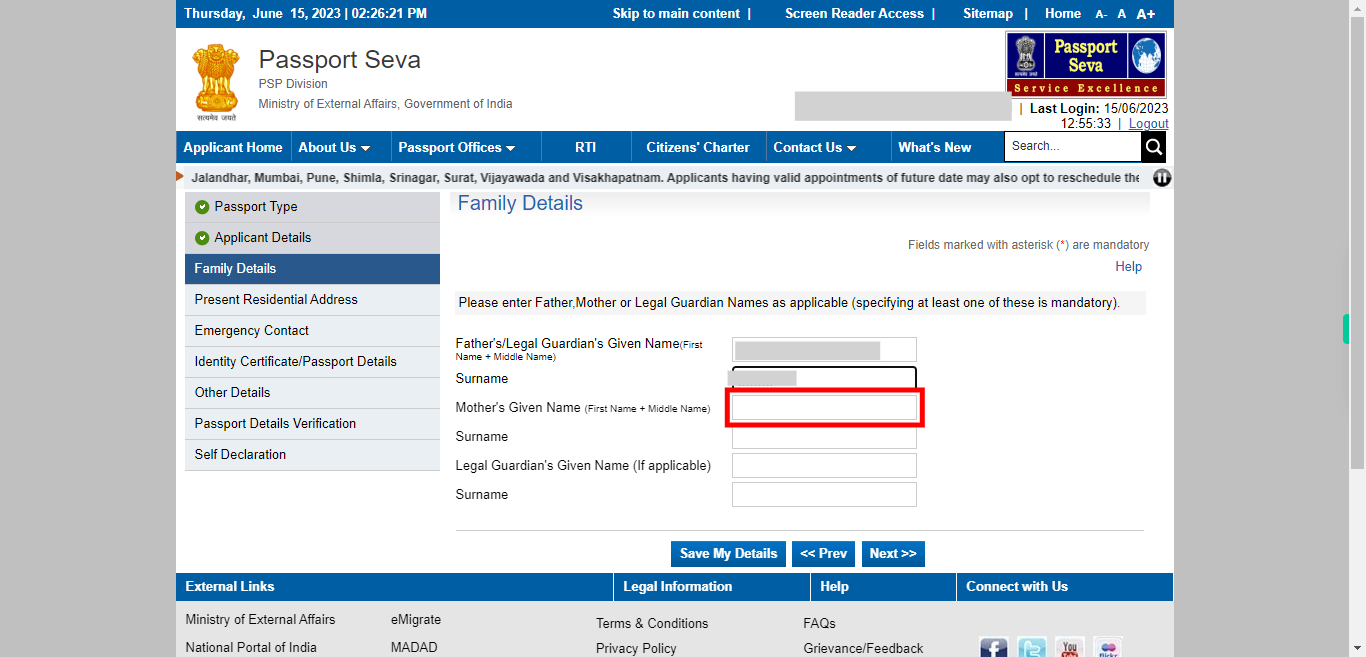
To proceed, please enter your mother's first name (excluding the surname) in the designated field. Provide your mother's first name accurately without any typographical errors or additional information. Once done, click on the "Next" button on the Supervity instruction widget.
-
32.
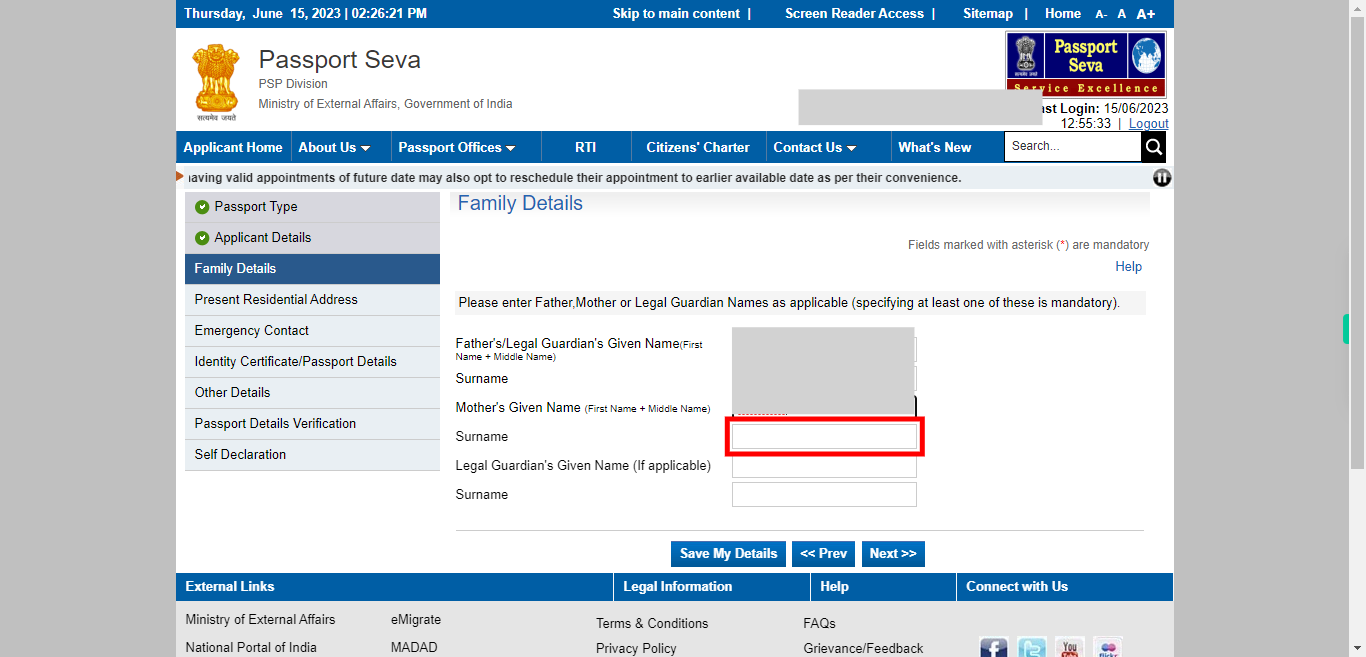
First, click on the "Next" button on the Supervity instruction widget. To proceed, please enter your mother's surname or family name in the designated field. Provide your mother's surname accurately, without any typographical errors or additional information.
-
33.
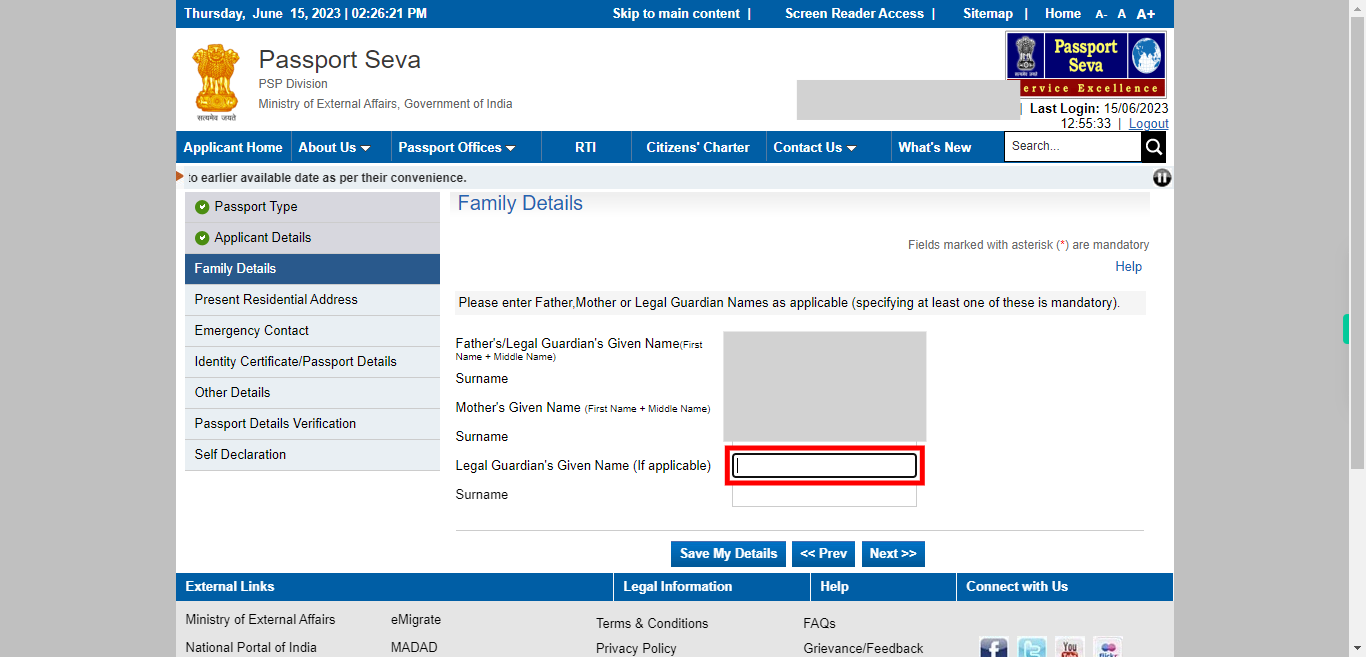
To proceed, please provide the name of your legal guardian if applicable. If you have a legal guardian, enter their full name accurately in the designated field. The legal guardian is a person appointed by law to take care of and make decisions on behalf of a minor or someone who is unable to make decisions for themselves. If you do not have a legal guardian, you can leave this field blank and proceed to the next step of the application process. Once done, click on the "Next" button on the Supervity instruction widget.
-
34.
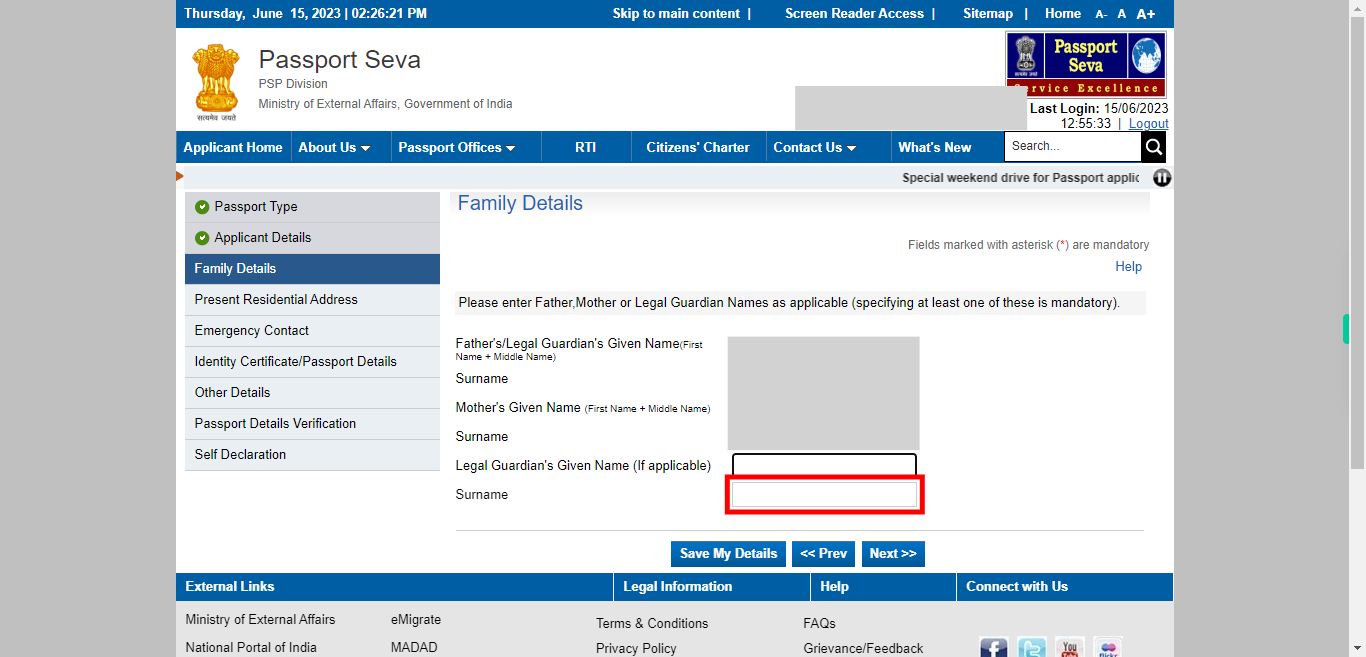
To proceed, please enter the surname or family name of your legal guardian in the designated field. Once done, click on the "Next" button on the Supervity instruction widget.
-
35.
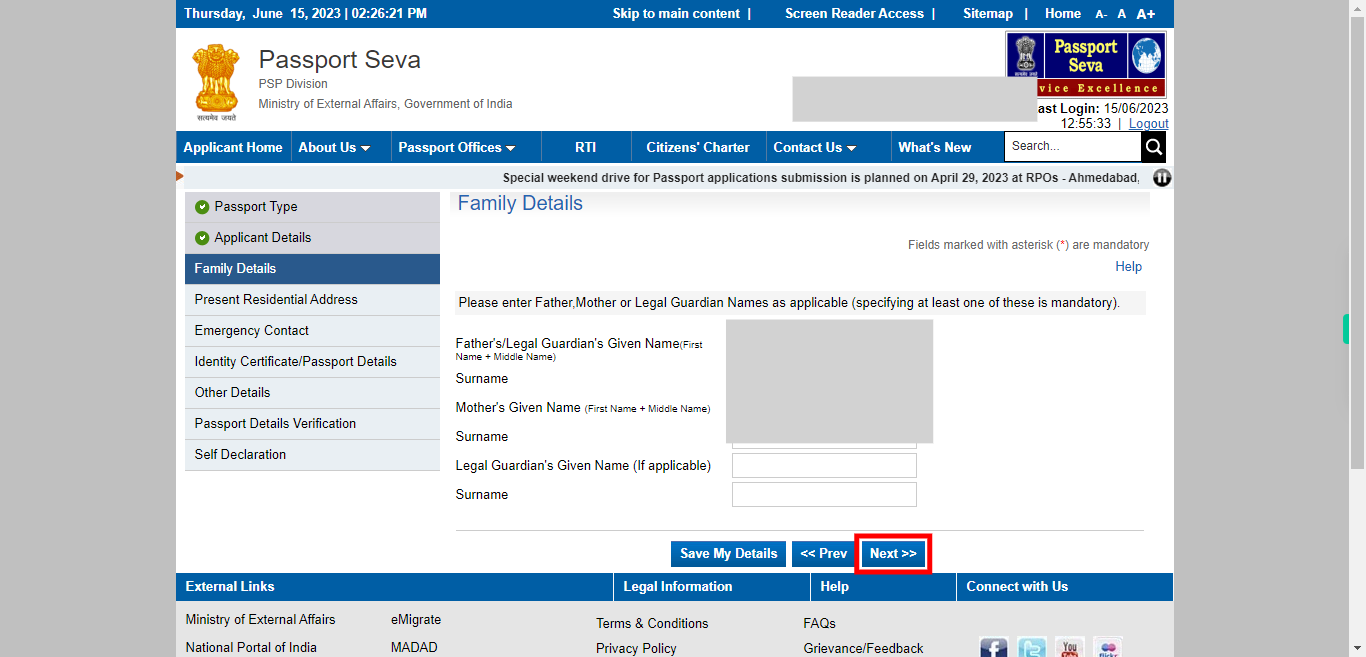
To continue with the application process, please click on the "Next" button. By clicking this button, you will proceed to the next step of the application where you may be required to provide additional information.
-
36.
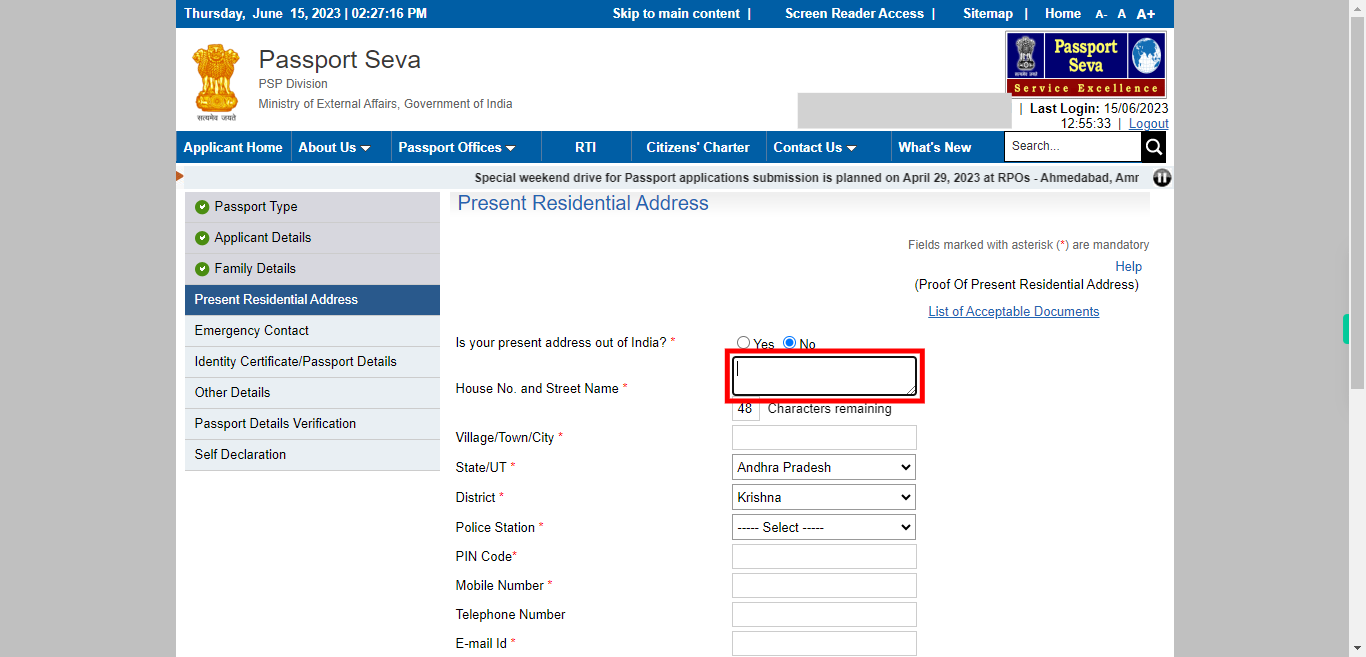
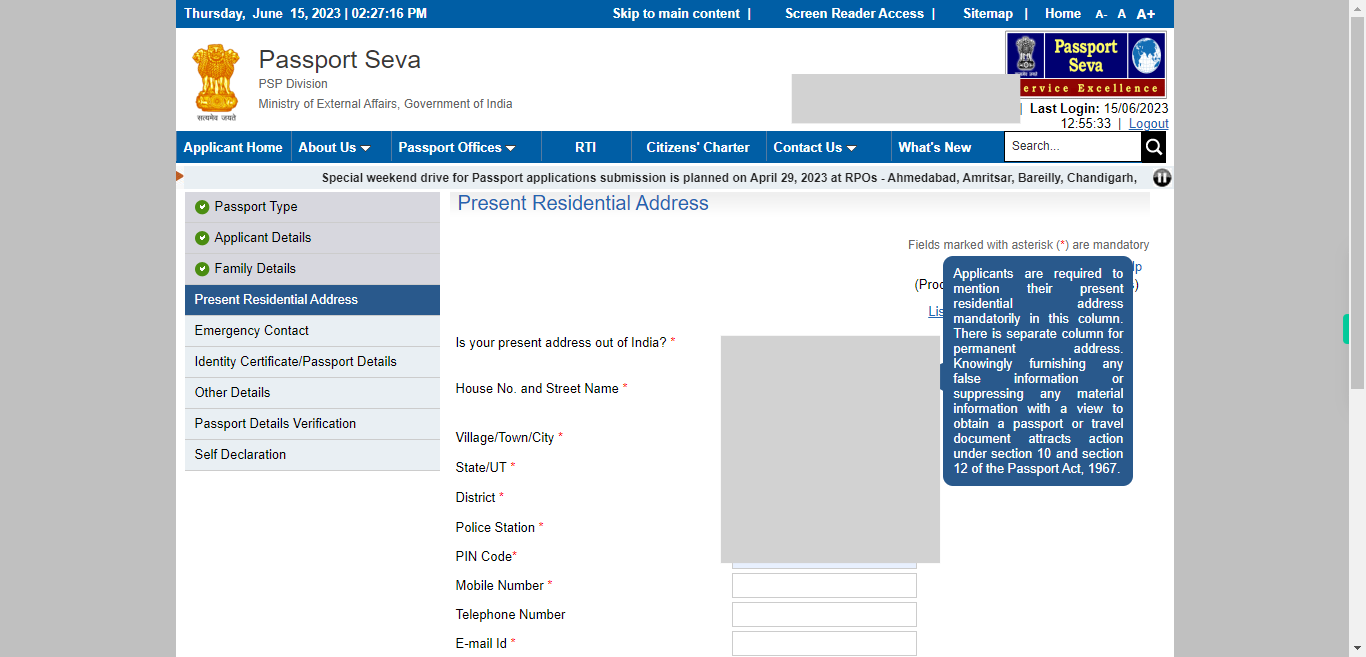
Select yes if the permanent address is in India or else no. To proceed, please enter the house number and street name in the designated field. Provide the complete and accurate details of your house number and street name where you reside. Once done, click on the "Next" button on the Supervity instruction widget.
-
37.
To proceed, please enter the name of your village, town, or city, state, and District, in the designated field. Provide the complete and accurate name of the place where you reside. Once done, click on the "Next" button on the Supervity instruction widget.
-
38.
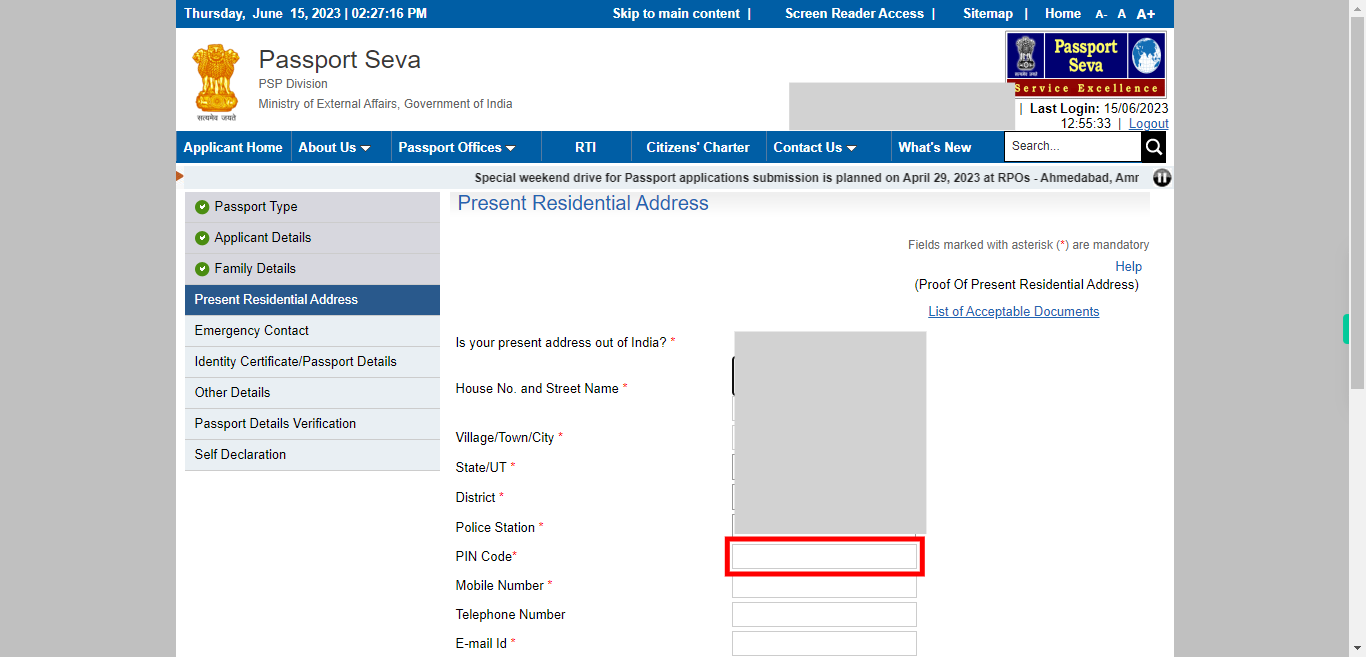
Enter your Pin Code in the provided field. Once done, click on the "Next" button on the Supervity instruction widget.
-
39.
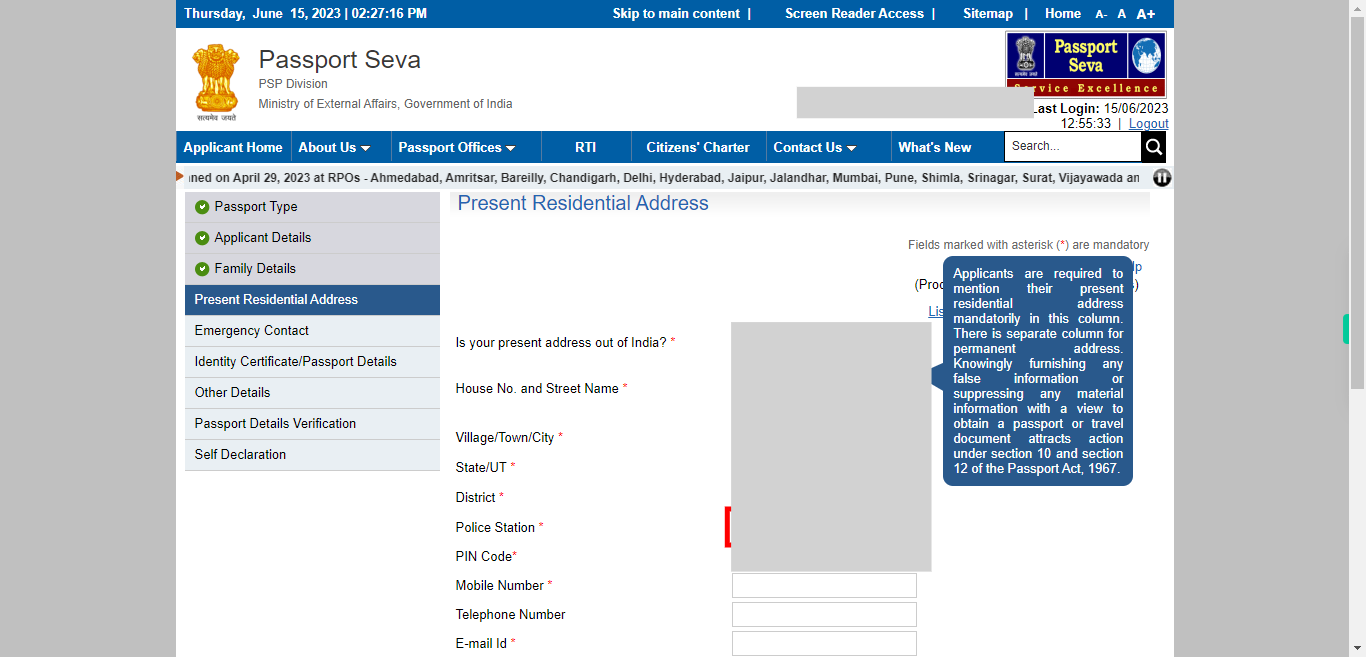
To proceed, please select the nearest police station from the provided options for any inquiry purposes. Once done, click on the "Next" button on the Supervity instruction widget.
-
40.
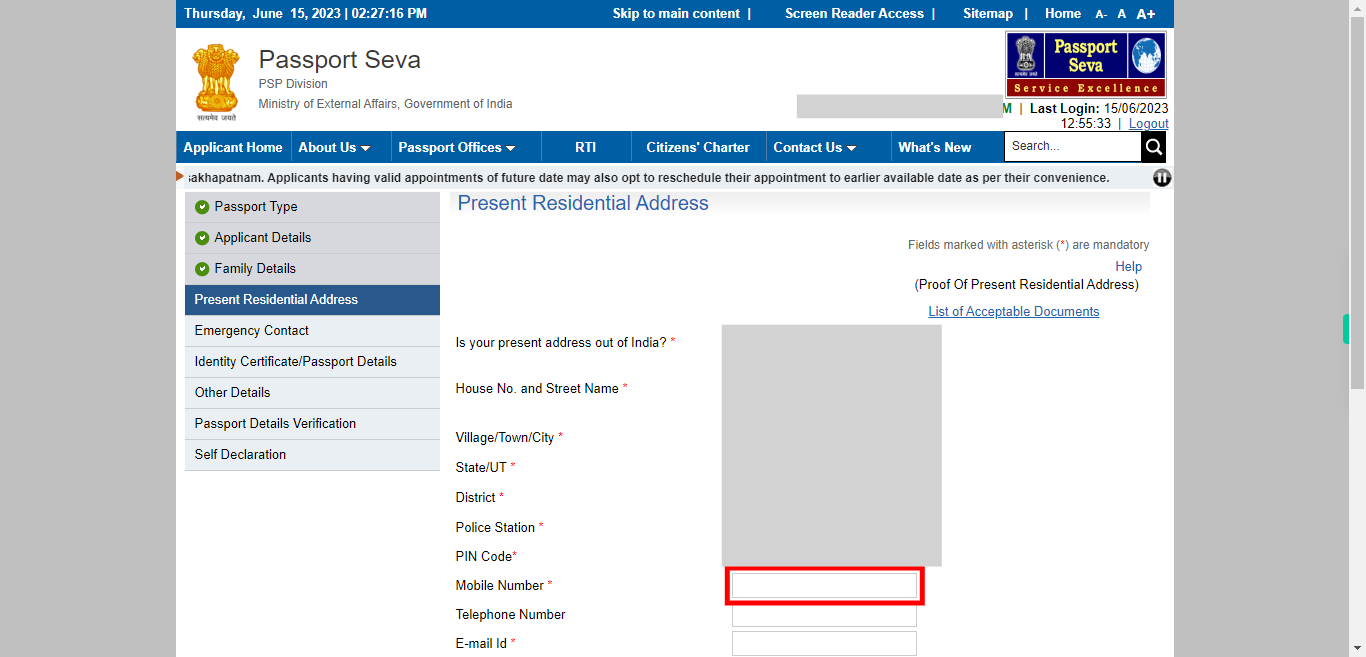
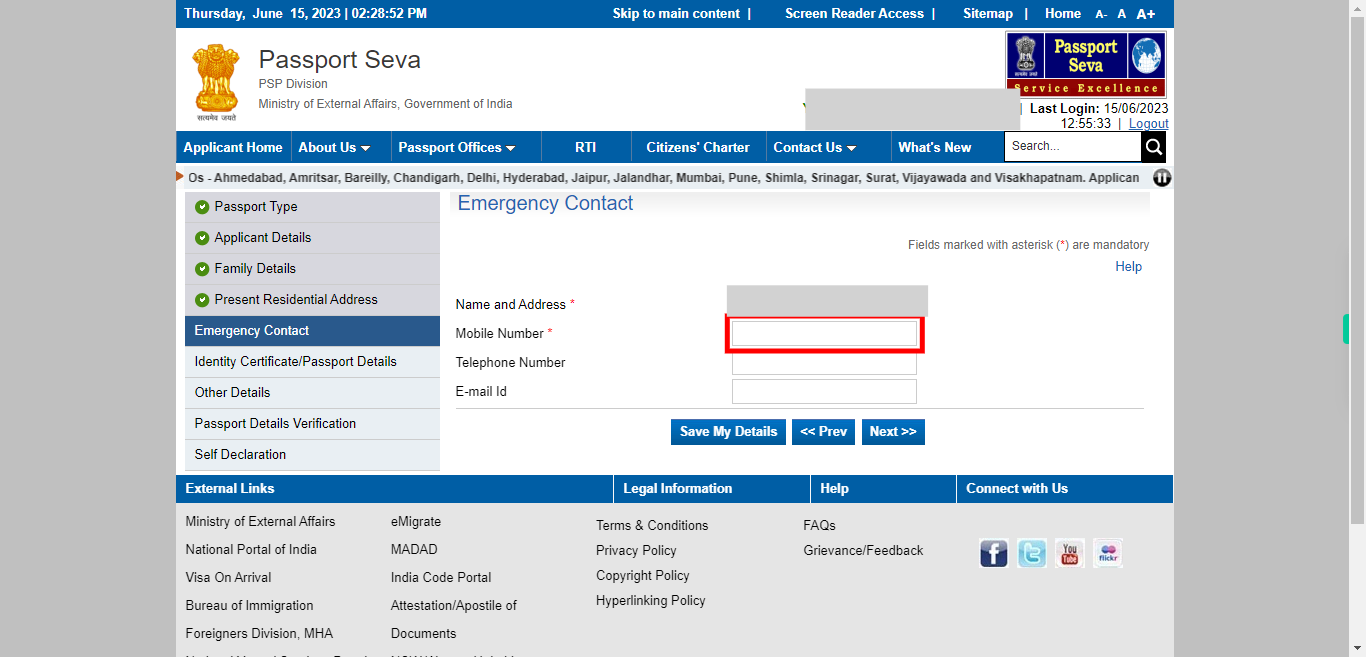
To proceed, please enter your mobile number in the designated field. Ensure that you enter your mobile number accurately without any spaces or special characters. Once done, click on the "Next" button on the Supervity instruction widget.
-
41.
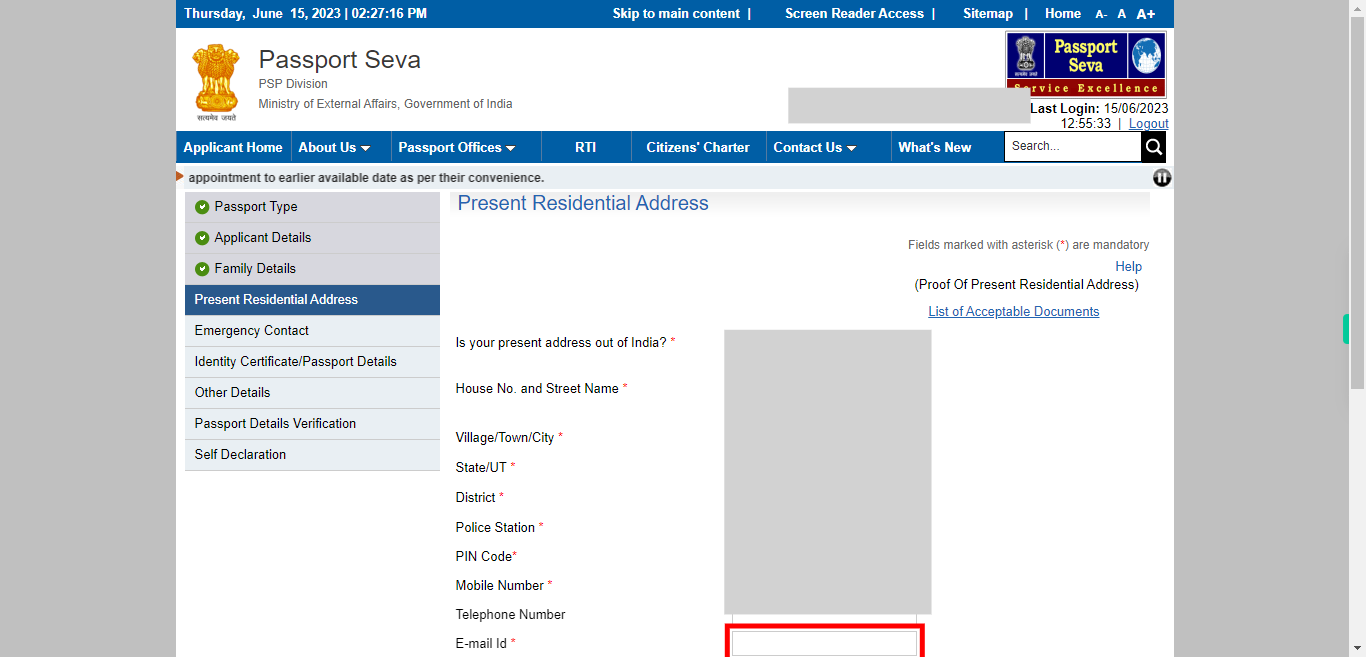
To proceed, please enter your email address in the designated field. Ensure that you enter your email address accurately, following the standard email format (e.g., example@example.com). Once done, click on the "Next" button on the Supervity instruction widget.
-
42.
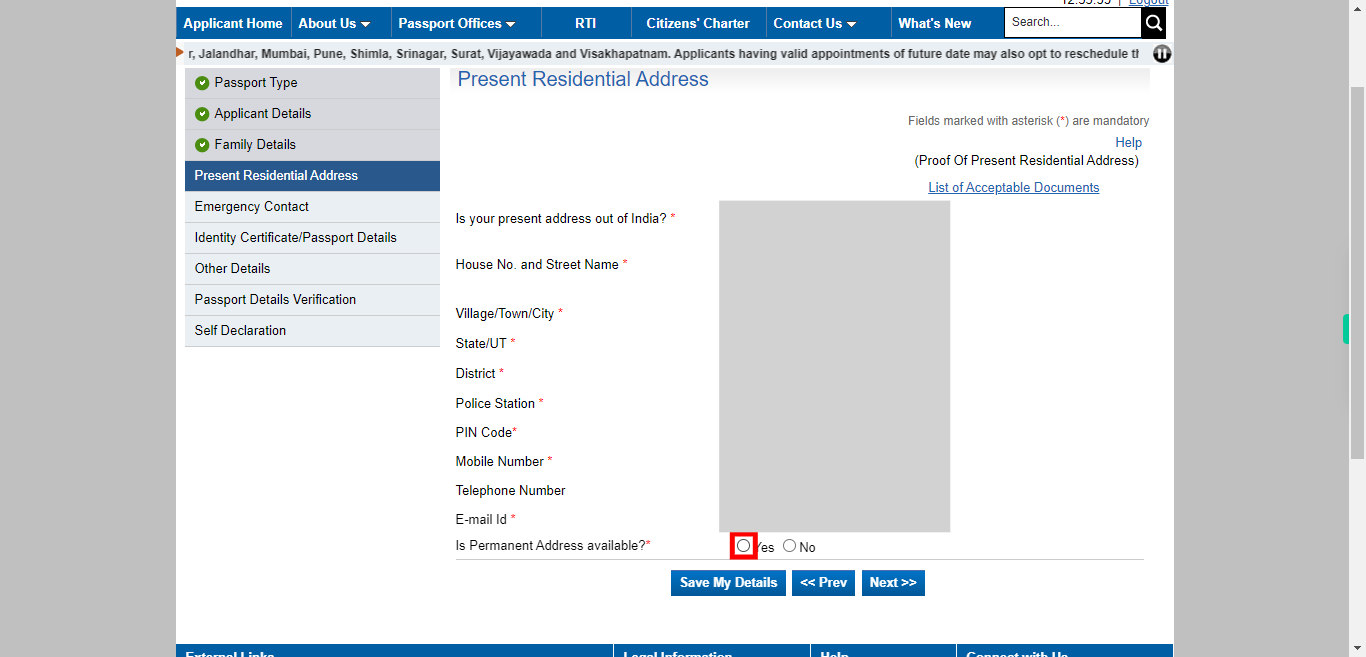
To proceed, please click on the "Yes" button if you have a permanent address available. Selecting "Yes" indicates that you have a permanent address to provide. If you do not have a permanent address or prefer not to provide it, you can click on the "No" button. And select the permanent address that is the same as the present address click on yes or else no. If you select No enter the permanent address. Once done, click on the "Next" button on the Supervity instruction widget.
-
43.
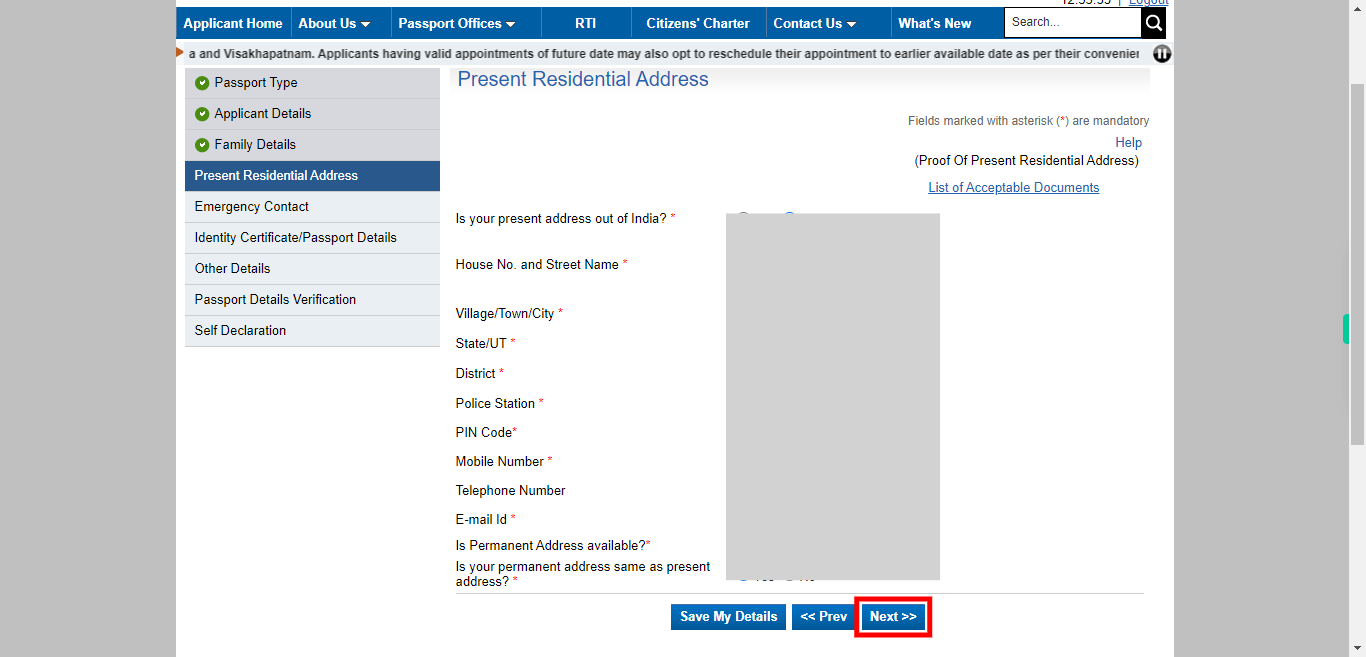
To continue with the application process, please click on the "Next" button. By clicking this button, you will proceed to the next step of the application where you may be required to provide additional information. Click OK twice the popup appeared on the above page.
-
44.
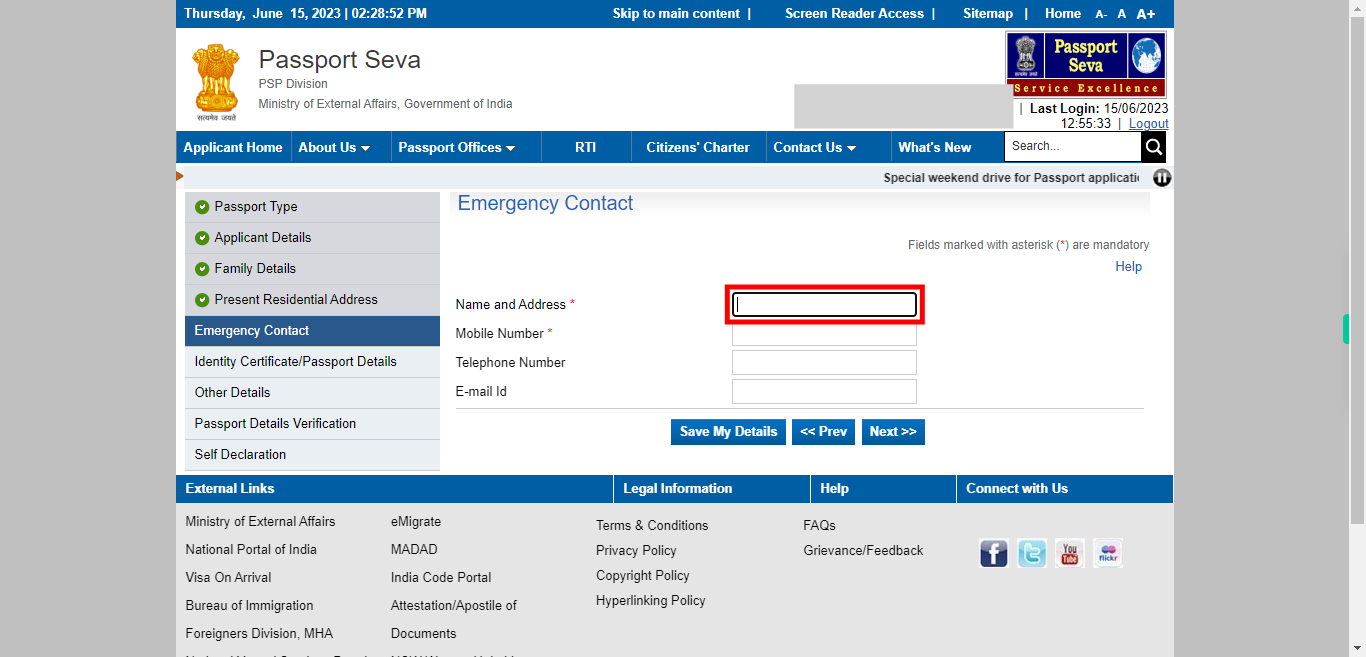
Enter the name and address of your emergency contact in the designated fields. Provide the complete and accurate details of your emergency contact, including their full name and address. This information is important in case of any emergency situations or when contact with you is not possible. Once done, click on the "Next" button on the Supervity instruction widget.
-
45.
Enter the mobile number of your emergency contact in the designated field. This mobile number will be used to reach out to your emergency contact if necessary. If they have a landline number or email id enter those details also these are not mandatory. Once done, click on the "Next" button on the Supervity instruction widget.
-
46.
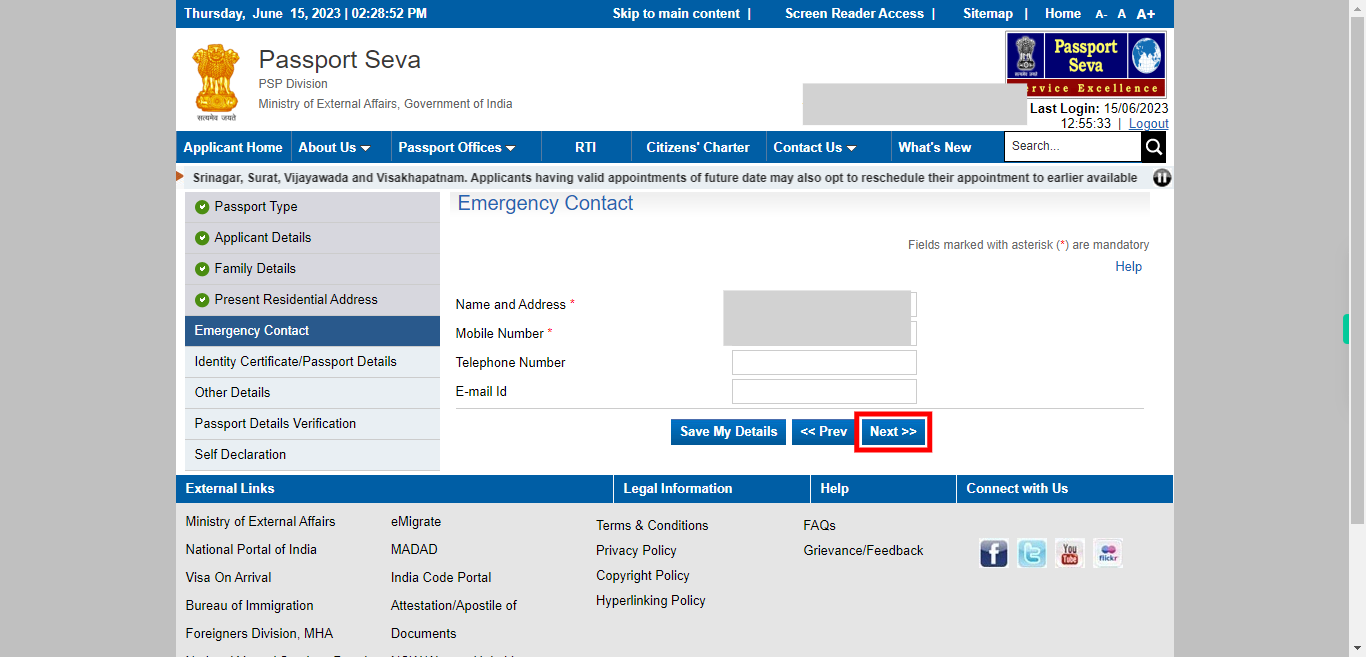
To continue with the application process, please click on the "Next" button. By clicking this button, you will proceed to the next step of the application.
-
47.
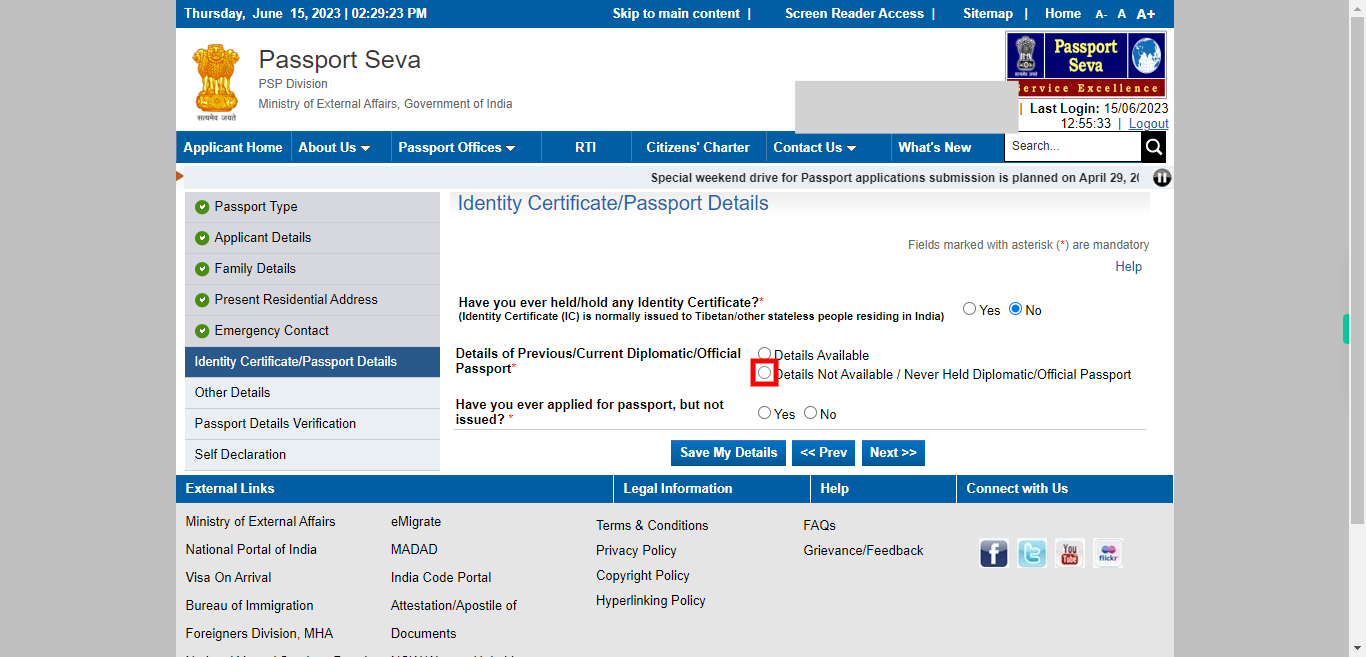
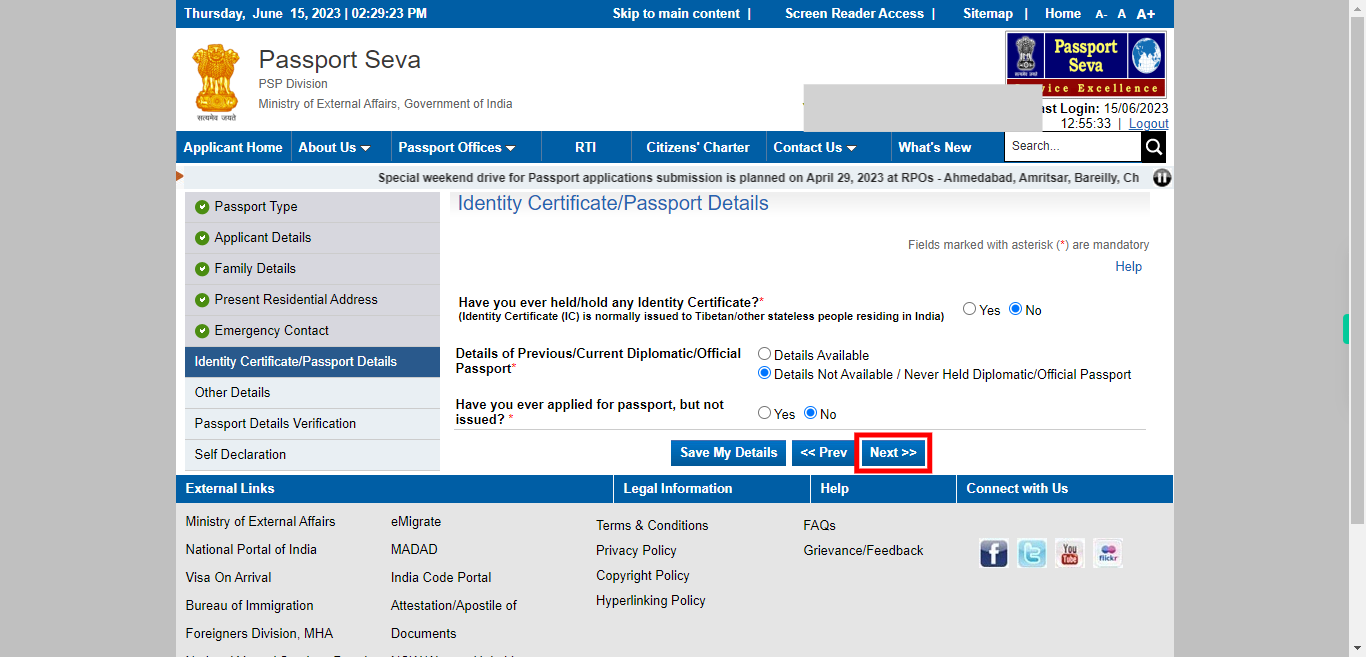
You are applying for a fresh passport and certain details are not available or applicable to you, you may look for an option such as "Details Not Available" or "Not Applicable" to indicate that those specific details are not applicable or currently unavailable for your application. Once done, click on the "Next" button on the Supervity instruction widget.
-
48.
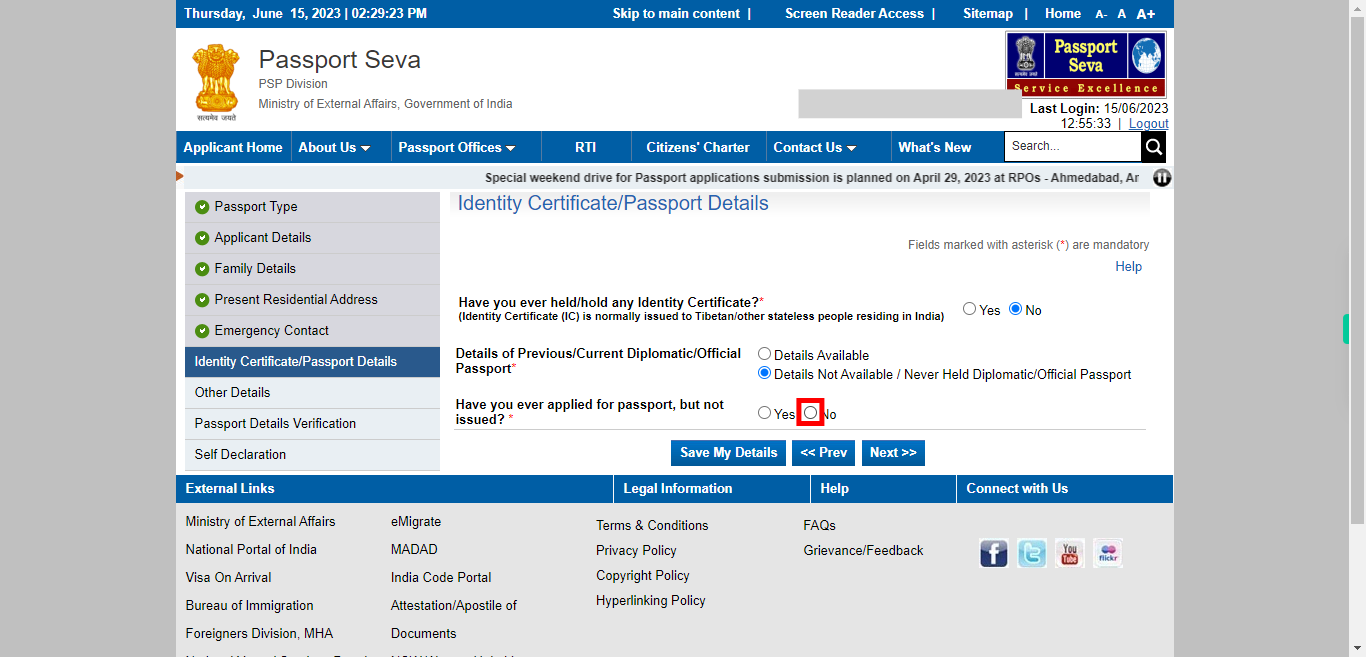
If you have previously applied for a passport but it was not issued to you, select "Yes" to indicate that you have applied for a passport before but it was not issued. If you have not previously applied for a passport or if you have applied and your application was successfully issued, select "No" to indicate that you have not faced such a situation. Once done, click on the "Next" button on the Supervity instruction widget.
-
49.
To continue with the application process, please click on the "Next" button. By clicking this button, you will proceed to the next step of the application.
-
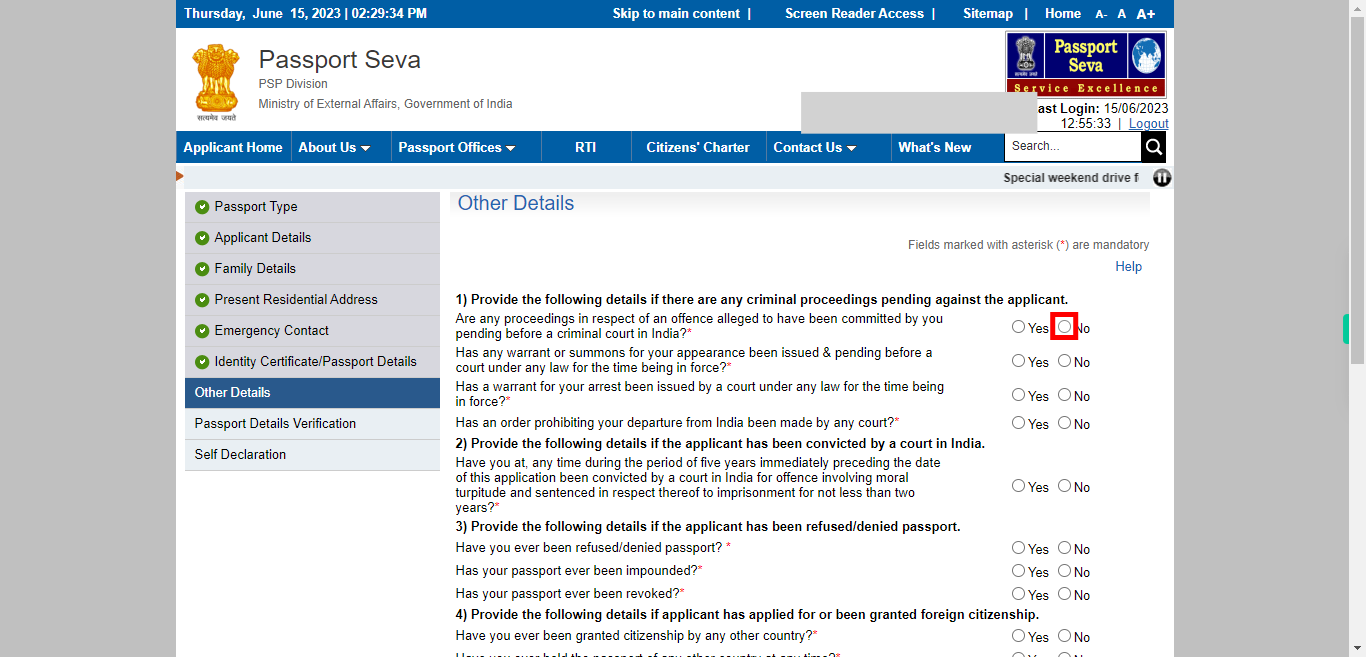
50.
To complete the application process, please provide all the necessary information in the "Other Details" section. Fill out all the questions accurately and thoroughly to ensure the completeness and accuracy of your application. Make sure to read each question carefully and provide the required information in the designated fields. Once done, click on the "Next" button on the Supervity instruction widget.
-
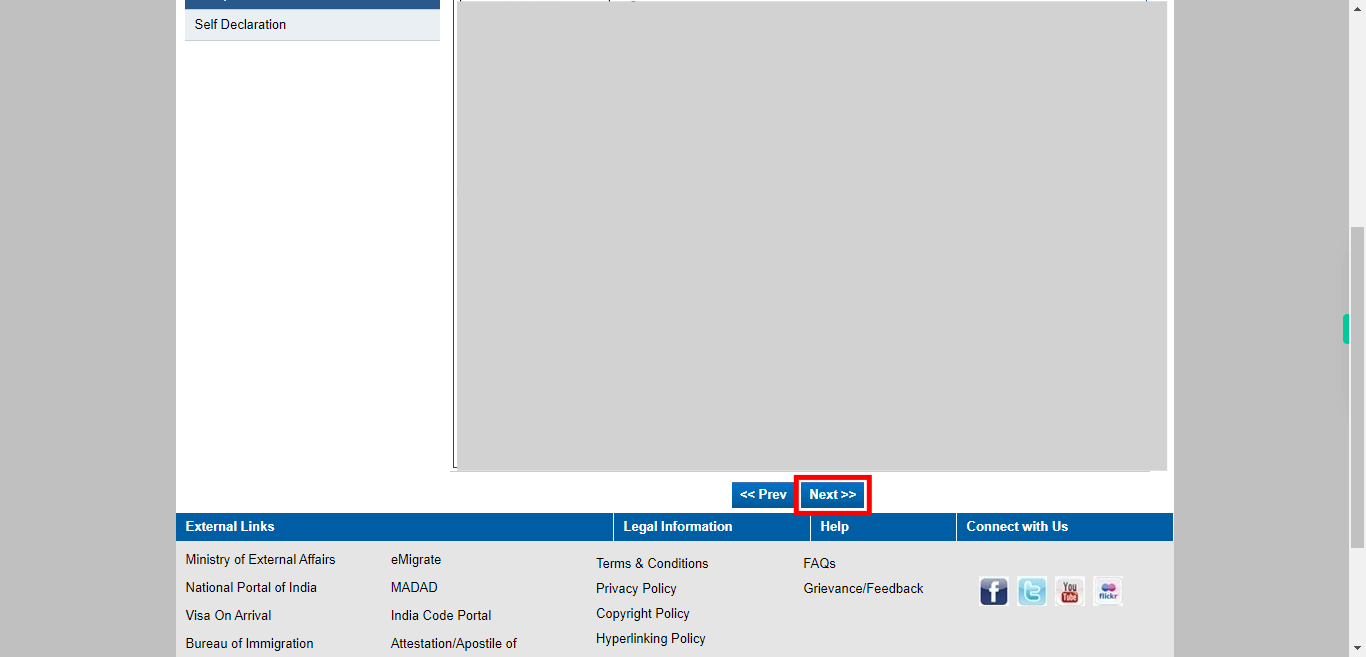
51.
To continue with the application process, please click on the "Next" button. By clicking this button, you will proceed to the next step of the application.
-
52.
Before proceeding, please take a moment to carefully review all the details you have entered in the application. Verify that all the information is accurate and matches your official documents. Check for any typographical errors or missing information. Once you have verified and ensured the accuracy of all the details, click on the "Next" button to proceed. By clicking this button, you will move forward to the next step of the application process.
-
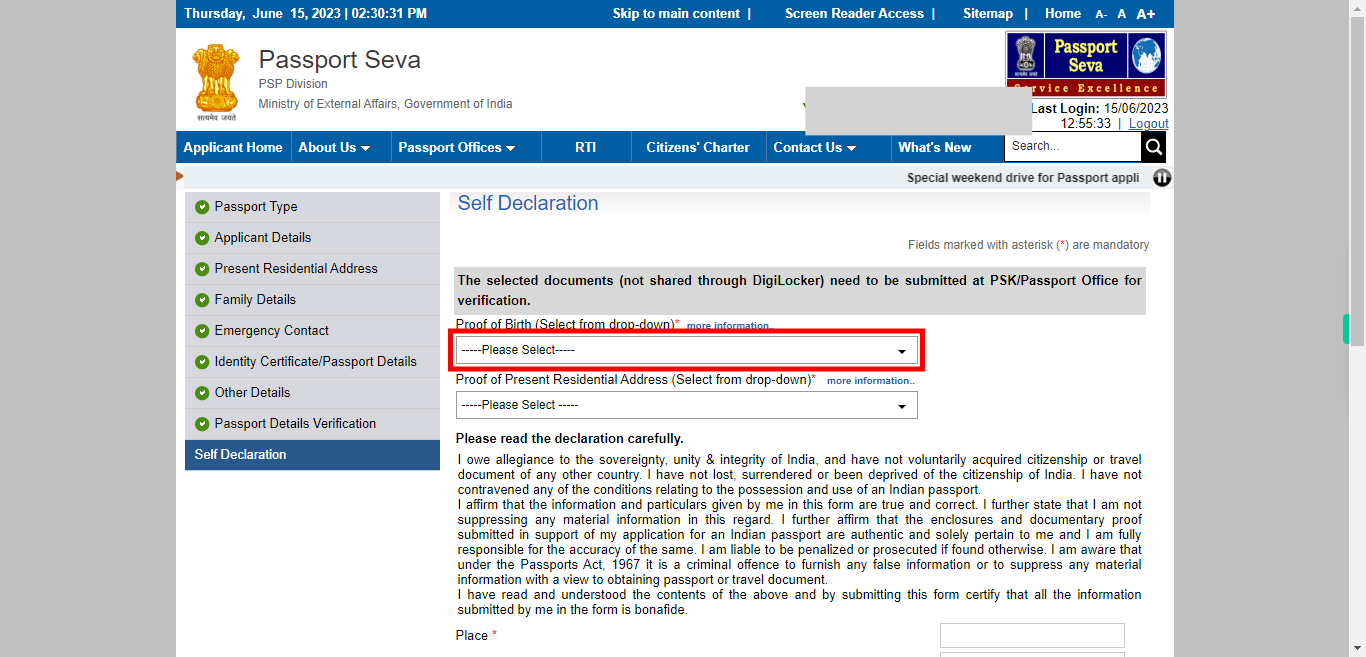
53.
please select the appropriate proof of birth document from the provided options. This document is typically required to verify your date of birth. Click on the "OK" button on the pop-up raised on the window. Once done, click on the "Next" button on the Supervity instruction widget.
-
54.
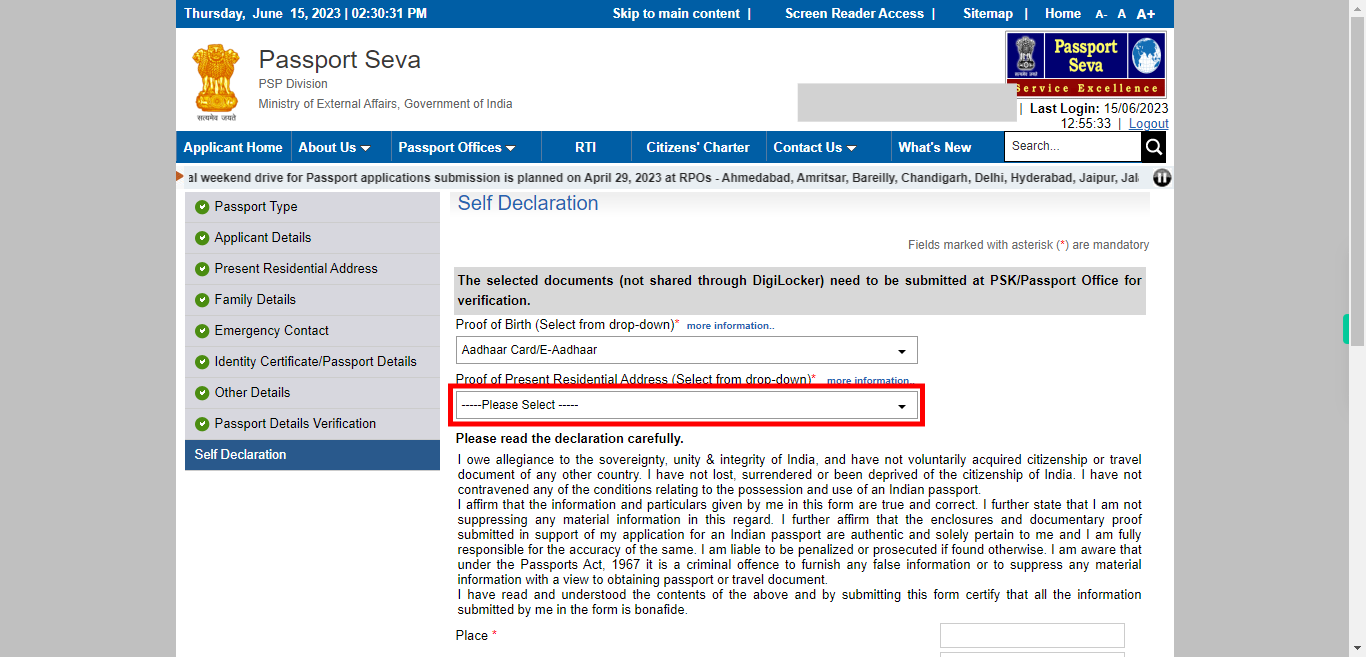
To proceed, please select the appropriate proof of address document from the provided options. This document is typically required to verify your residential address. Click on the "OK" button on the pop-up raised on the window Once done, click on the "Next" button on the Supervity instruction widget.
-
55.
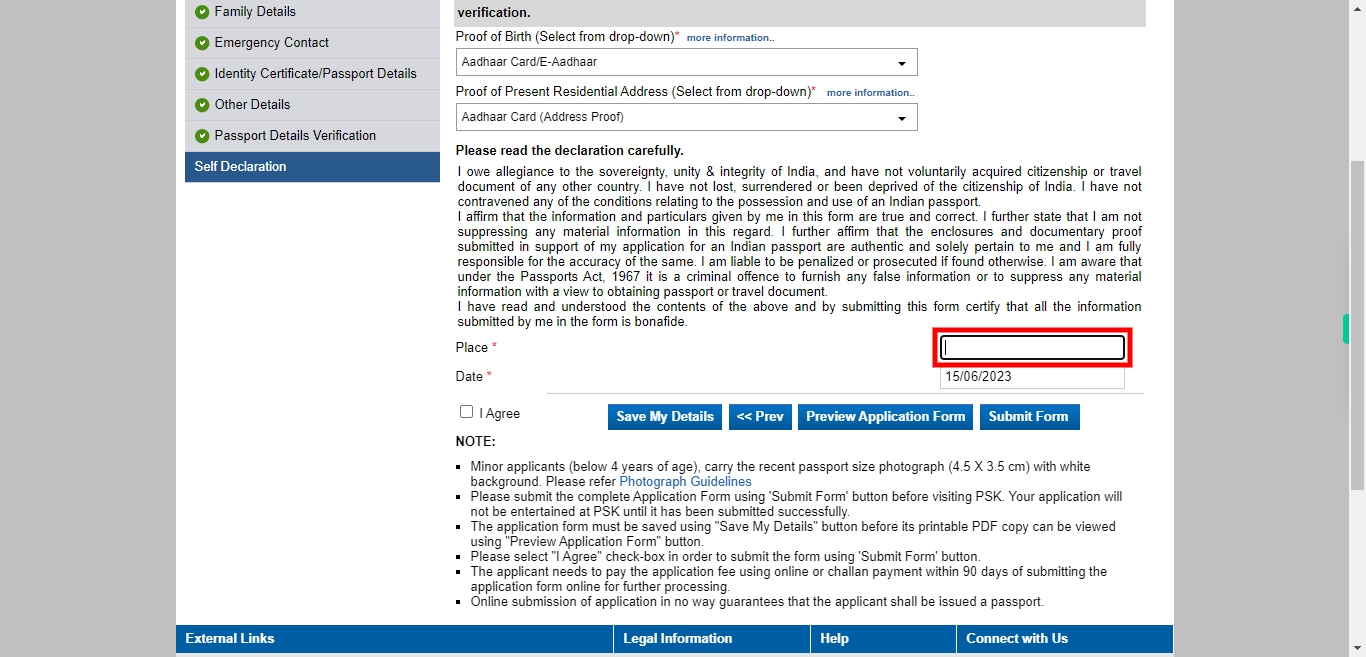
To proceed, please enter the place from where you are applying for the application form. Provide the name of the city, town, or location where you are currently residing and apply for the passport. Once done, click on the "Next" button on the Supervity instruction widget.
-
56.
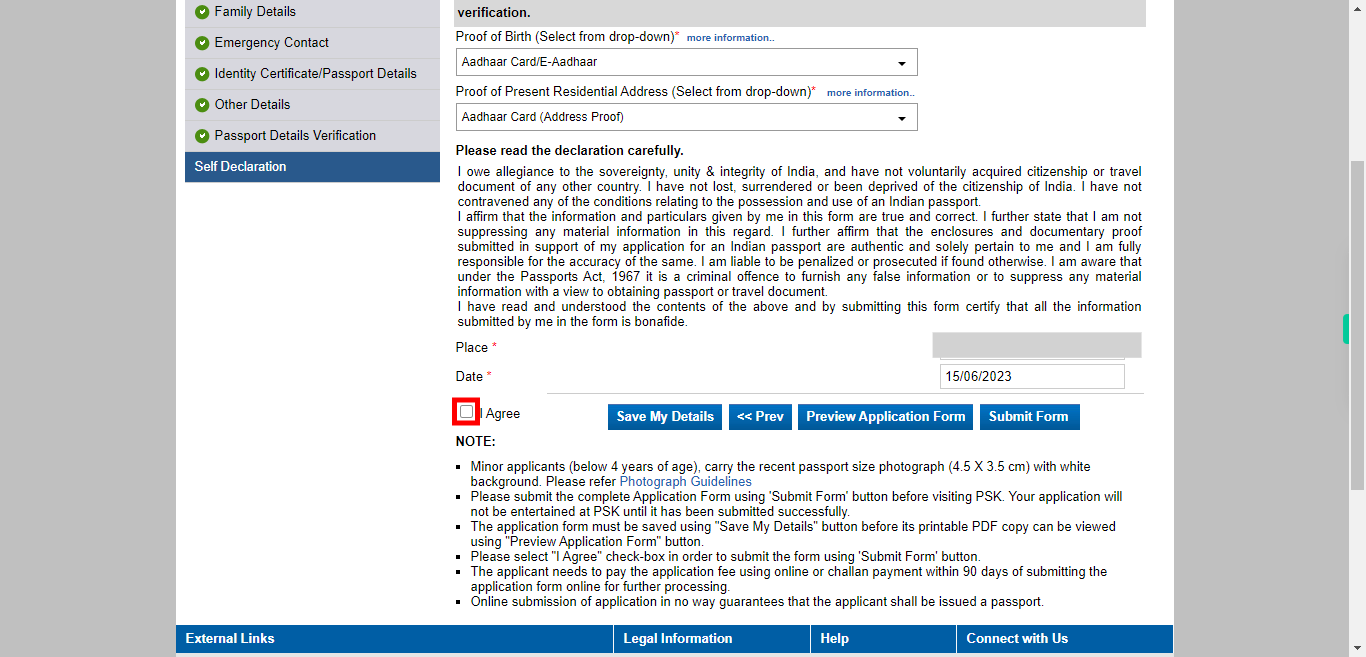
To proceed, please click on the checkbox next to the statement that indicates your agreement. This checkbox is typically labeled as "I agree". By clicking on the checkbox, you are acknowledging that you have read and understood the terms and conditions, privacy policy, or any other relevant agreements associated with the application process. Once done, click on the "Next" button on the Supervity instruction widget.
-
57.
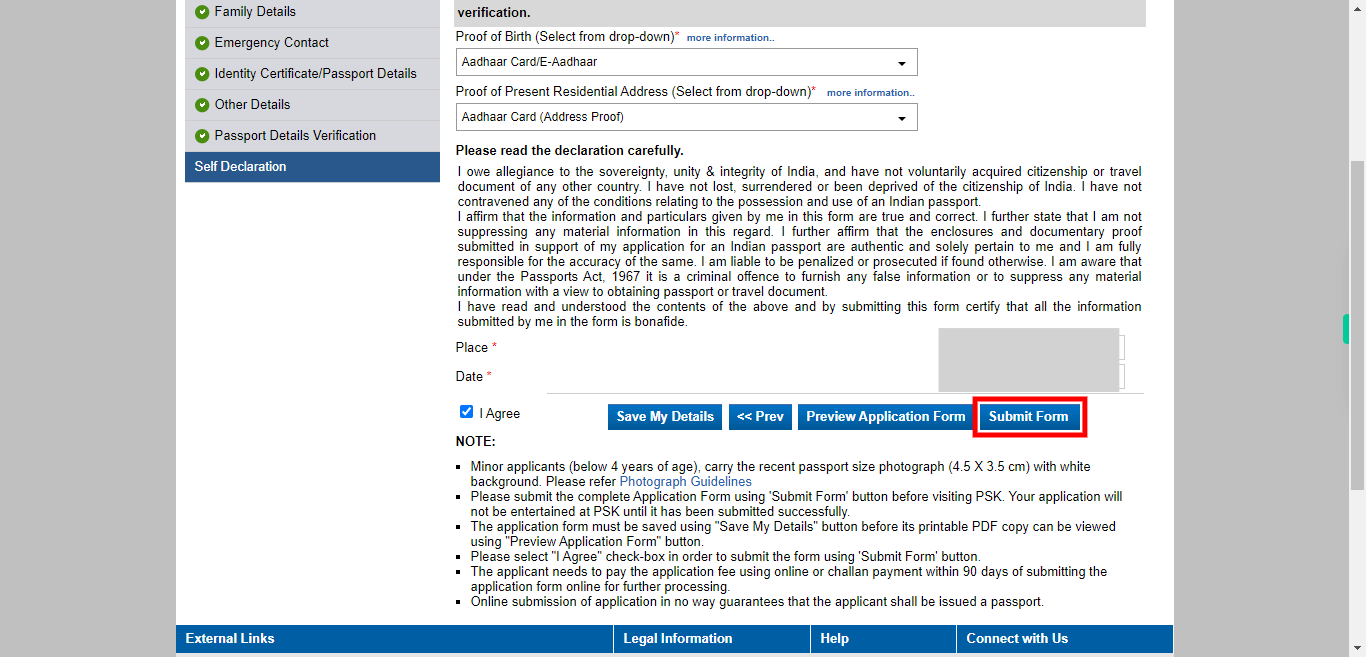
To complete the application process, please click on the "Submit" button. By clicking this button, you are confirming that you have filled out all the required information accurately and are ready to submit your application form.
-
58.
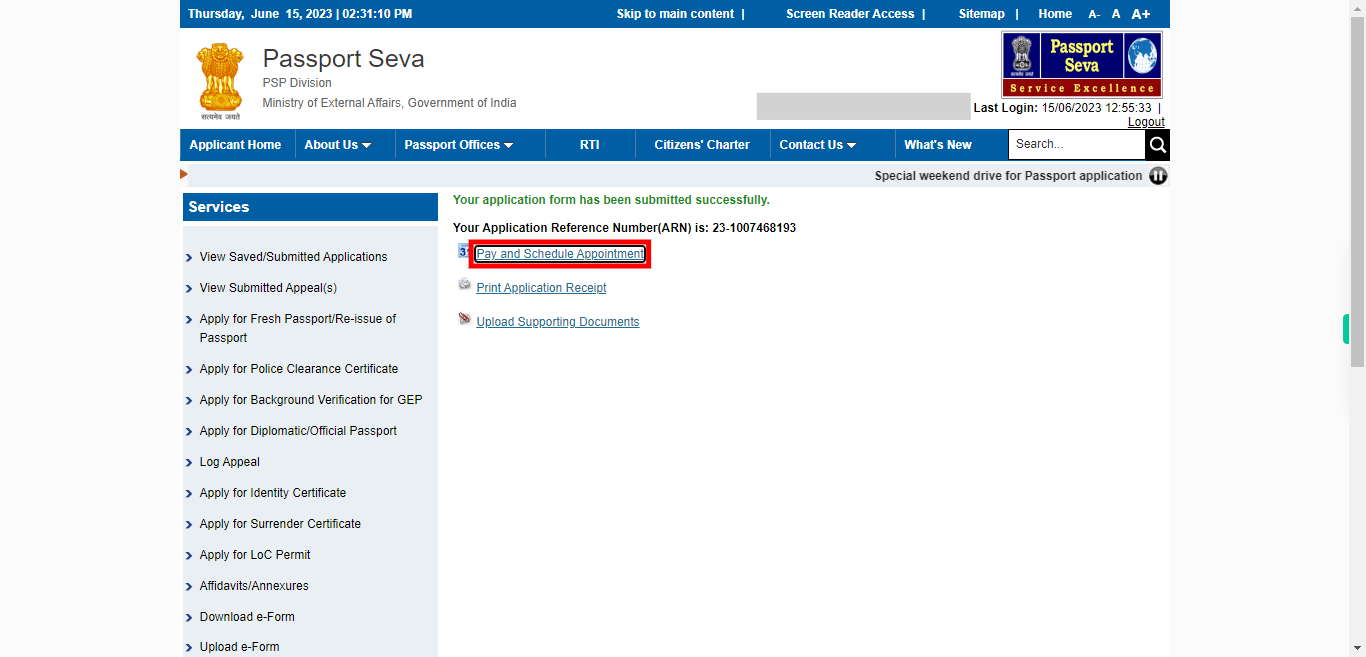
To proceed, please click on the "Pay and Schedule Appointment" option. This option allows you to make the payment for your passport application and schedule an appointment for document verification and biometric data collection.
-
59.
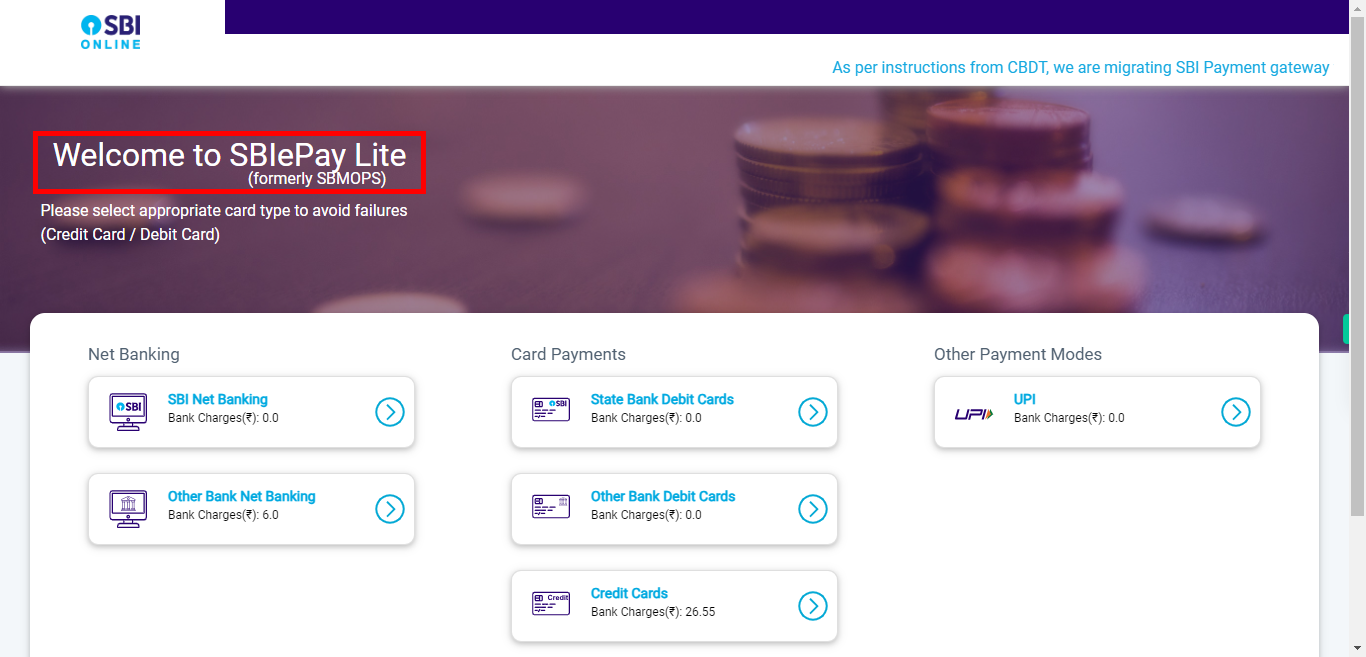
To proceed with the online payment, please select the "SBI Online Payment" option. This option allows you to make the payment for your passport application using the State Bank of India (SBI) online payment gateway. Once done, click on the "Next" button on the Supervity instruction widget.
-
60.
To proceed with the online payment using the selected option, please click on the "Next" button. By clicking this button, you will proceed to the next step of the payment process where you can enter the necessary payment details and complete the transaction.
-
61.
Before proceeding, please take a moment to carefully review the details displayed on the screen. Once you have thoroughly reviewed the details and are satisfied with the accuracy, you can proceed by clicking on the "Next" button. By doing so, you will move forward to the next step of the payment process.
-
62.
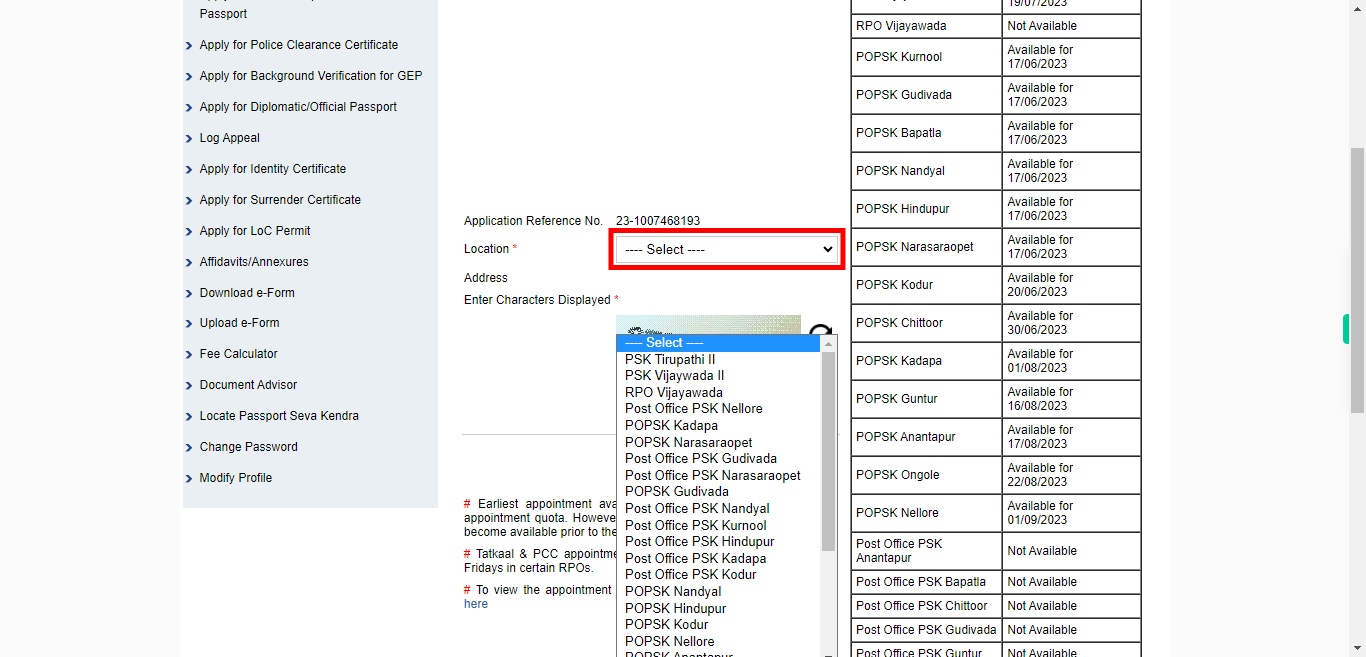
To proceed, please select the nearest passport office where you would like to schedule your document verification appointment. Choose the passport office that is most convenient for you in terms of location and accessibility. Once done, click on the "Next" button on the Supervity instruction widget.
-
63.
Please enter the characters displayed in the captcha field. The captcha is a security measure to verify that you are a real person and not a computer program attempting to automate the process. Once done, click on the "Next" button on the Supervity instruction widget.
-
64.
To proceed further, please click on the "Next" button. By clicking this button, you will move to the next step of the application process.
-
65.
If you are satisfied with the displayed appointment date, you can ignore the calendar option and proceed with the next steps of the application process. However, if you wish to change the appointment date, click on the "Calendar" option. On the calendar, the red marks indicate dates that are not available or fully booked, while the green marks indicate dates that have availability for appointment booking. Select a date from the calendar that suits your convenience and has a green mark, indicating that it is available. Once you have chosen a new date, you can proceed with the application process based on the updated appointment date. Once done, click on the "Next" button on the Supervity instruction widget.
-
66.
To proceed with booking your appointment, please click on the "Pay and Book Appointment" button. By clicking this button, you will be directed to the payment page where you can complete the payment process for your appointment.
-
67.
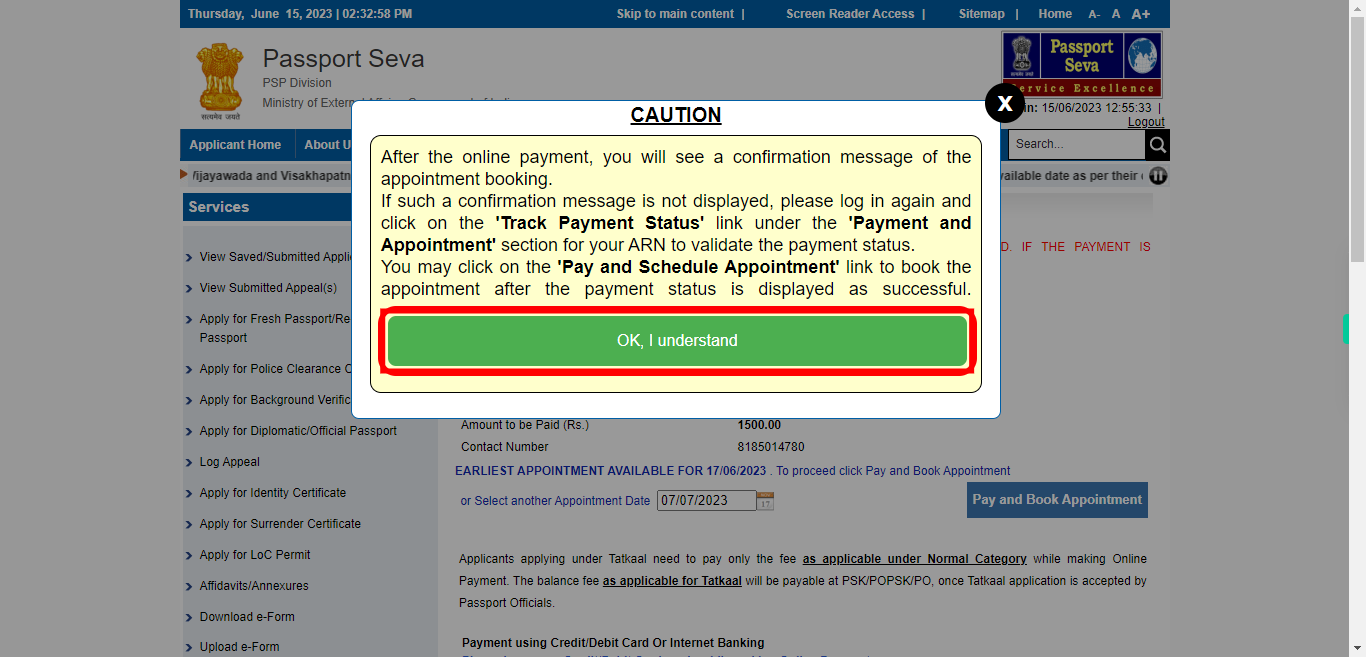
Click on the "OK, I understand" button.
-
68.
To complete the payment process and successfully schedule your appointment, please select one of the available payment methods provided. After the payment is successfully processed, you will receive a confirmation message indicating that your appointment has been scheduled. Take note of the appointment details and any additional instructions provided.
