This skill helps you in editing your profile on GitHub, and also to customize and manage various aspects of your GitHub profile. Pre-Requisites: Ensure that you had a valid GitHub account. NOTE: Please sign in to your GitHub account and then execute this skill.
-
1.
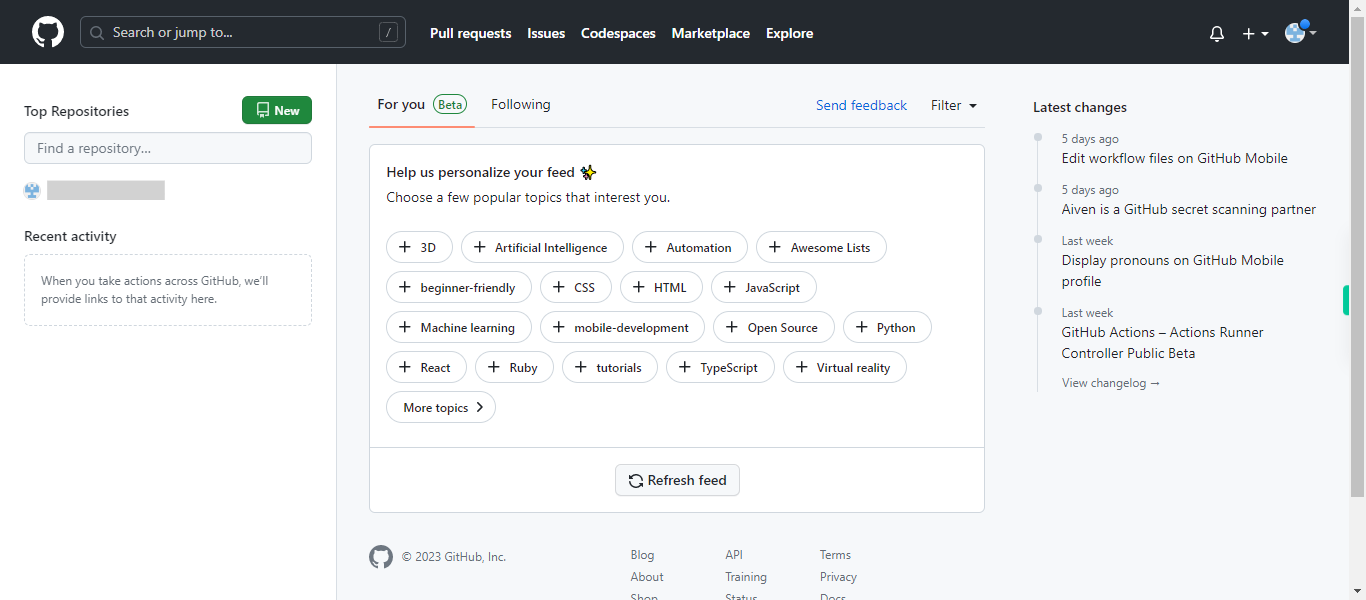
Open GitHub on the web.
-
2.
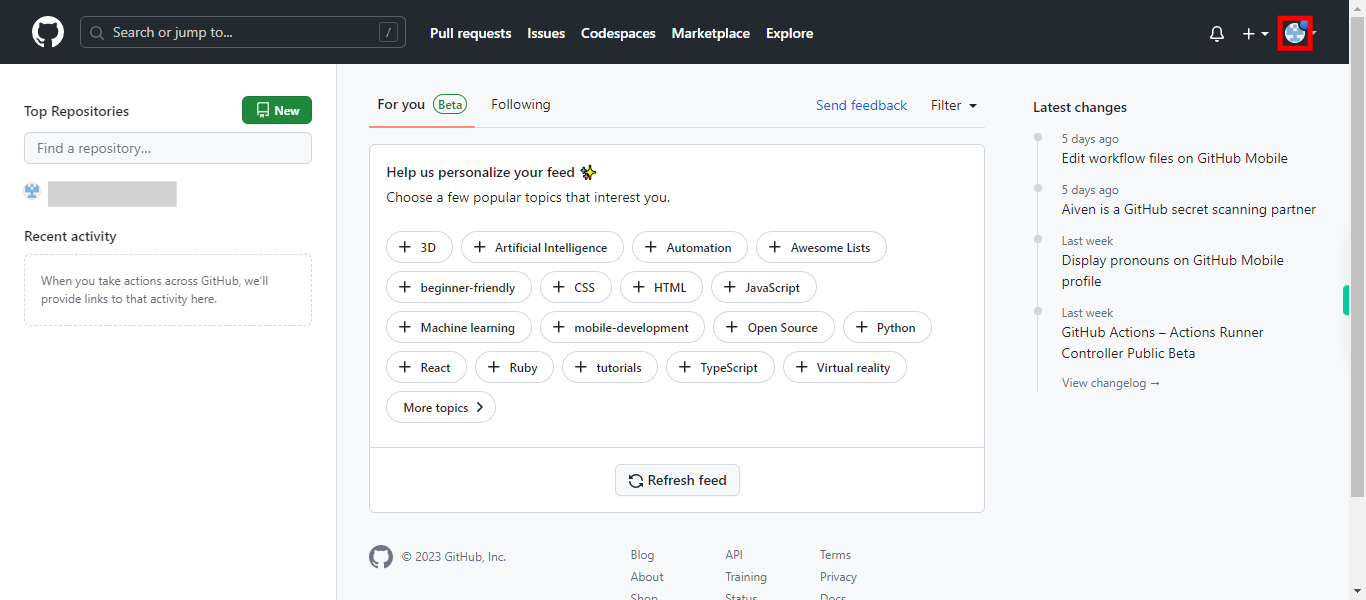
In the top-right corner of the page, click on your "profile picture", and a drop-down menu will appear.
-
3.
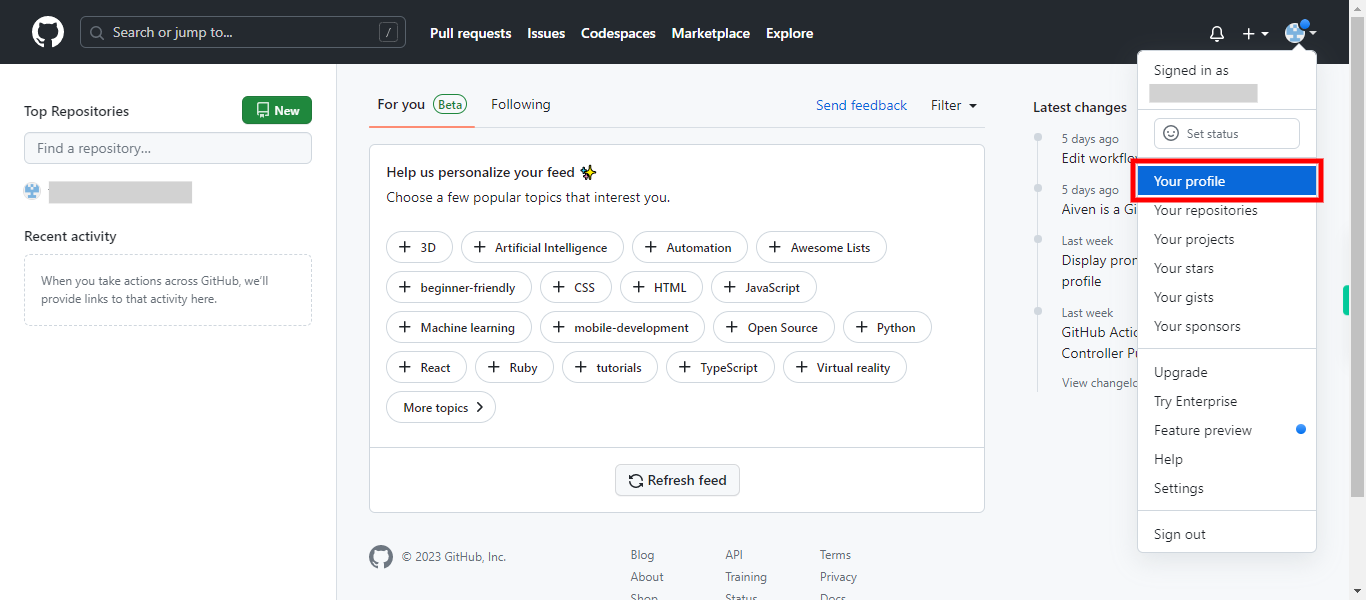
From the dropdown menu, select "Your profile". You will be redirected to your profile page
-
4.
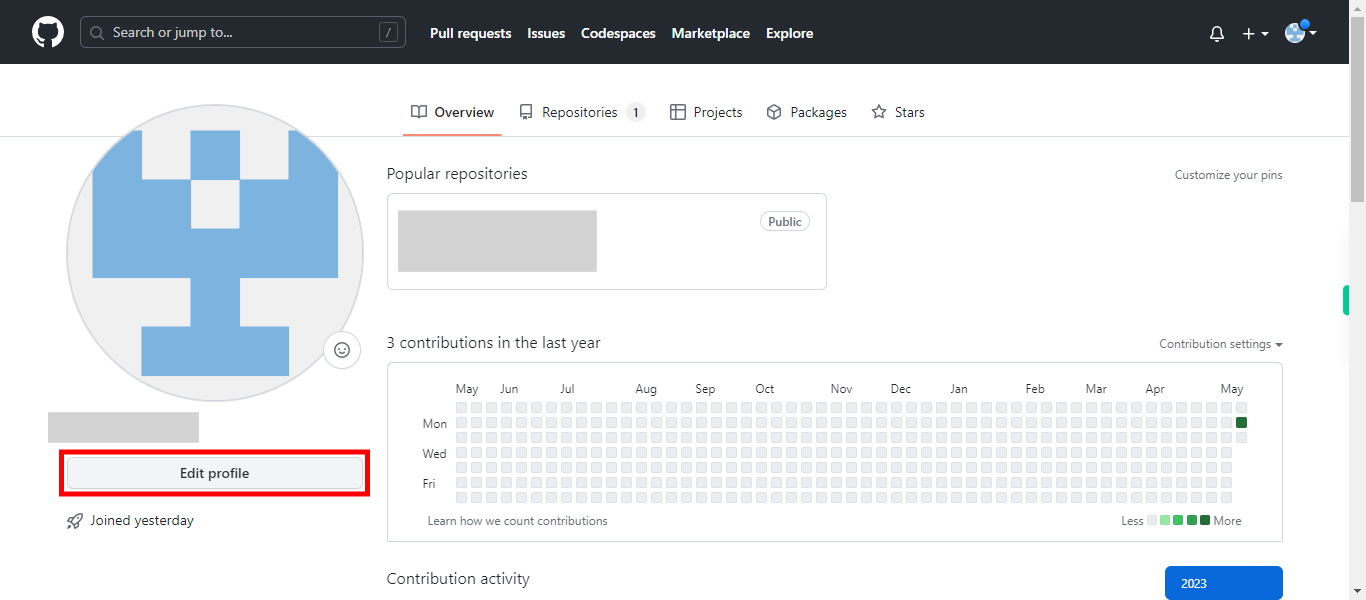
On your profile page, locate the "Edit profile" button and click on it. It is located below your profile picture and name.
-
5.
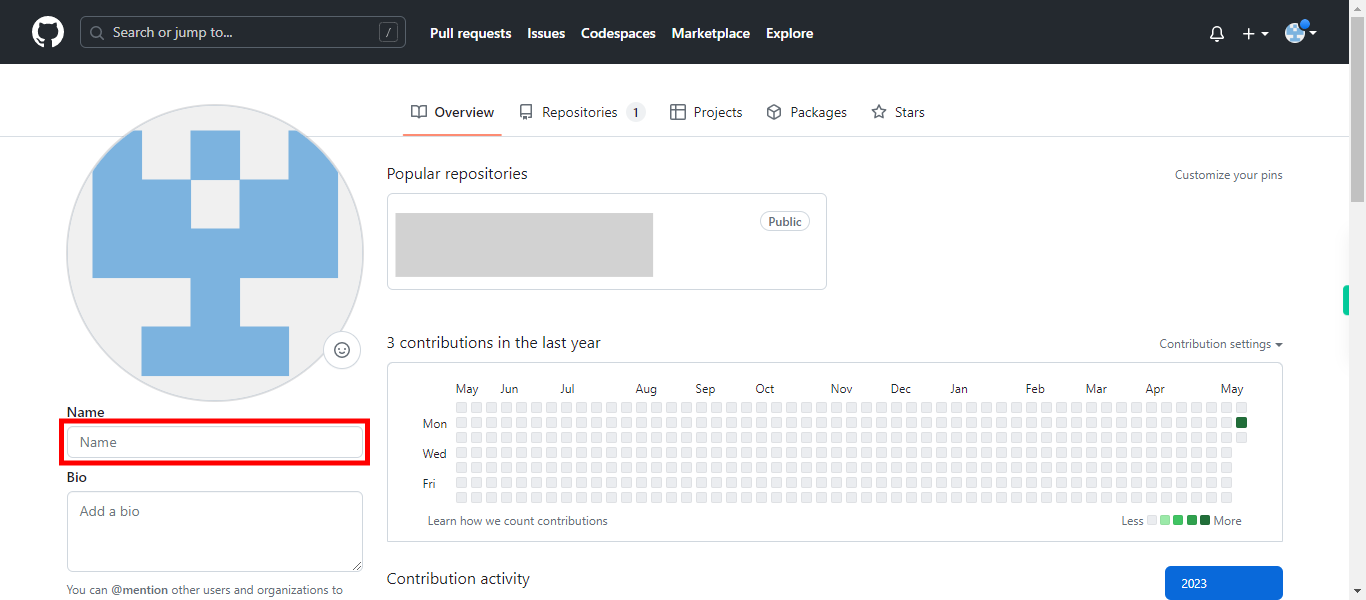
You will now be in the "Edit profile" section, where you can make changes to your profile information. For editing your name enter the name in the Name tab. Then click on the Next button in the Supervity instruction widget. Else directly click on the Next button in the Supervity instruction widget, to avoid editing the name.
-
6.
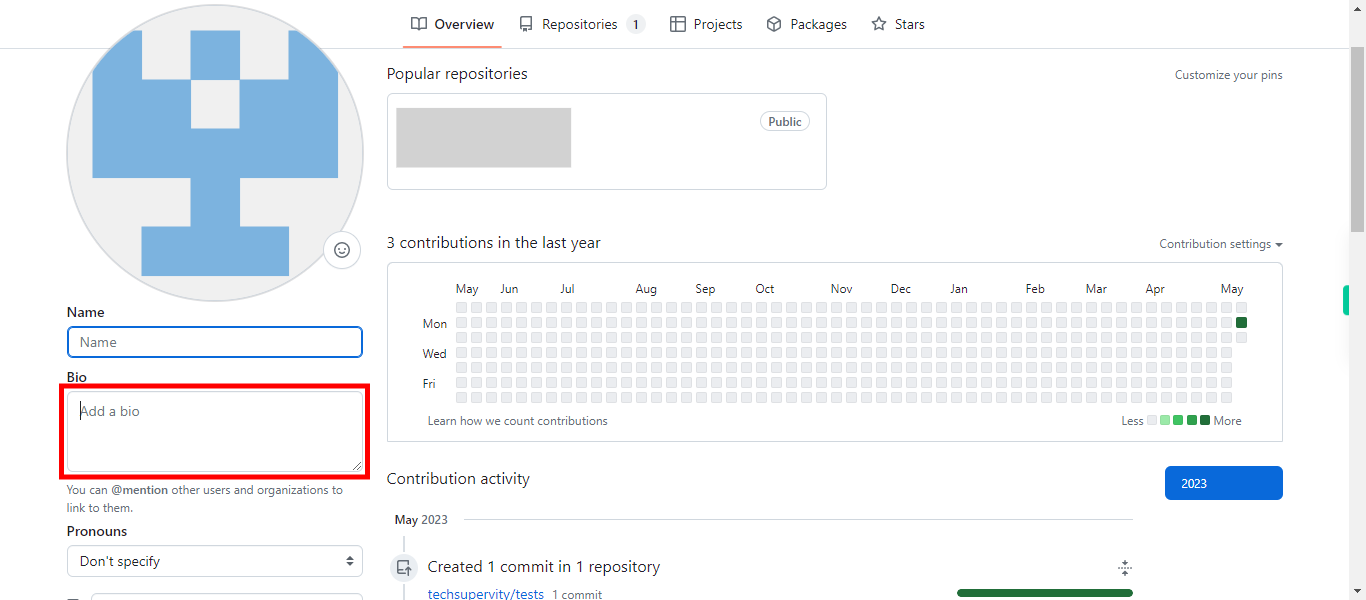
For adding or editing the Bio enter the text in the Add a bio tab. Then click on the Next button in the Supervity instruction widget. Else directly click on the Next button in the Supervity instruction widget, to avoid editing the Bio.
-
7.
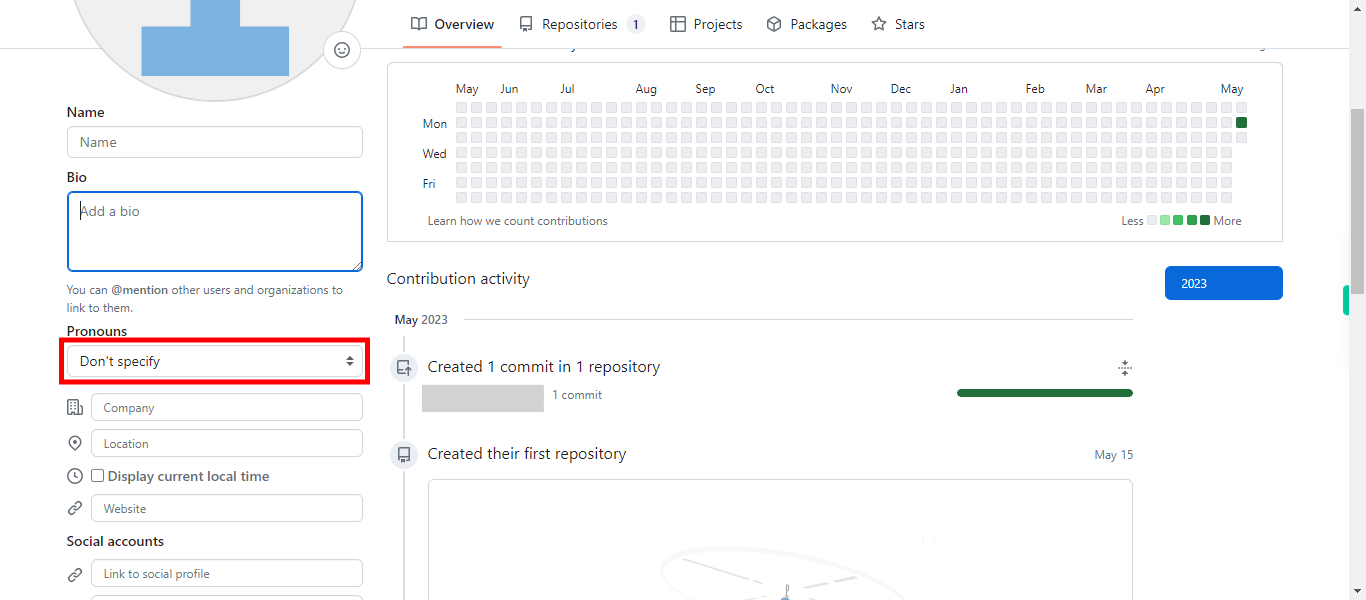
For editing the pronouns, select the required option from the Pronouns drop-down. Then click on the Next button in the Supervity instruction widget. Else directly click on the Next button in the Supervity instruction widget, to avoid editing pronouns.
-
8.
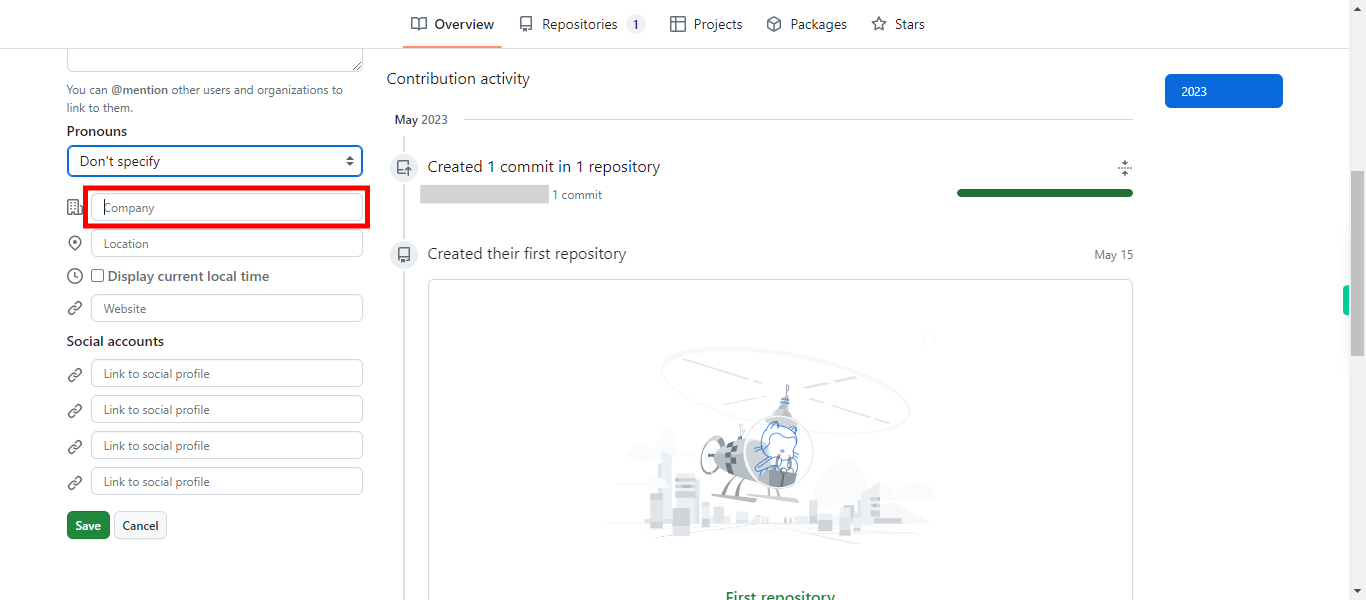
For editing or updating the company, enter the organization name in the Company tab. Then click on the Next button in the Supervity instruction widget. Else directly click on the Next button in the Supervity instruction widget, to avoid editing the company.
-
9.
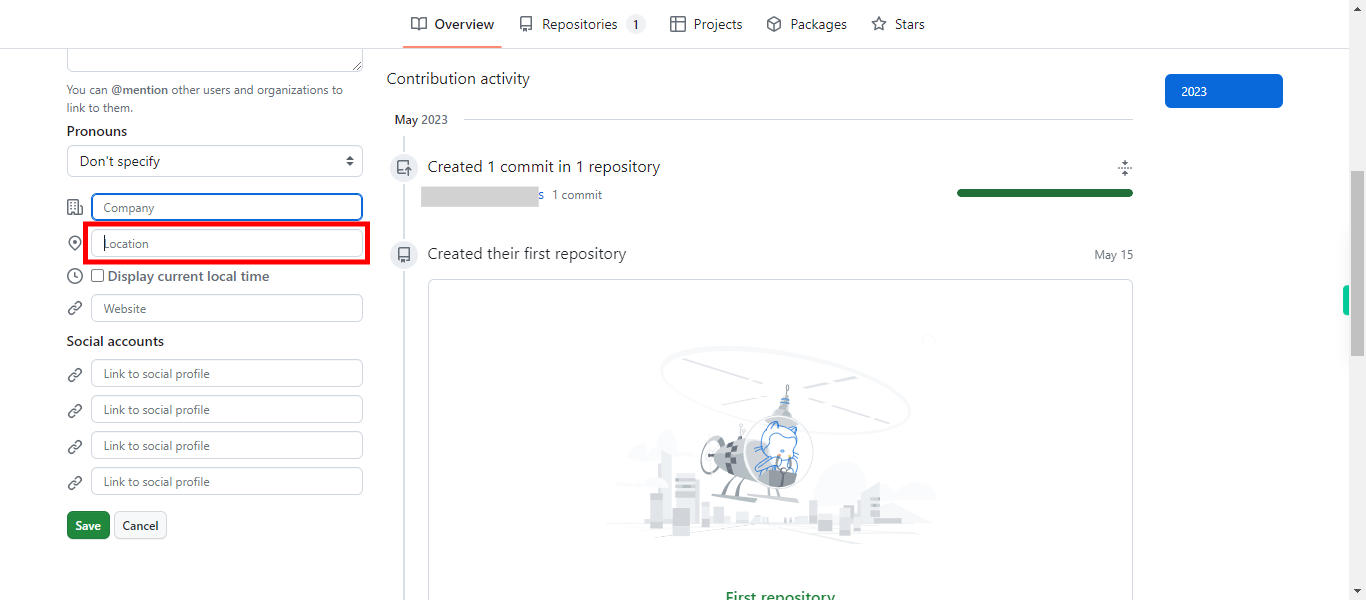
For editing or updating the location, enter your place in the Location tab. Then click on the Next button in the Supervity instruction widget. Else directly click on the Next button in the Supervity instruction widget, to avoid editing the location.
-
10.
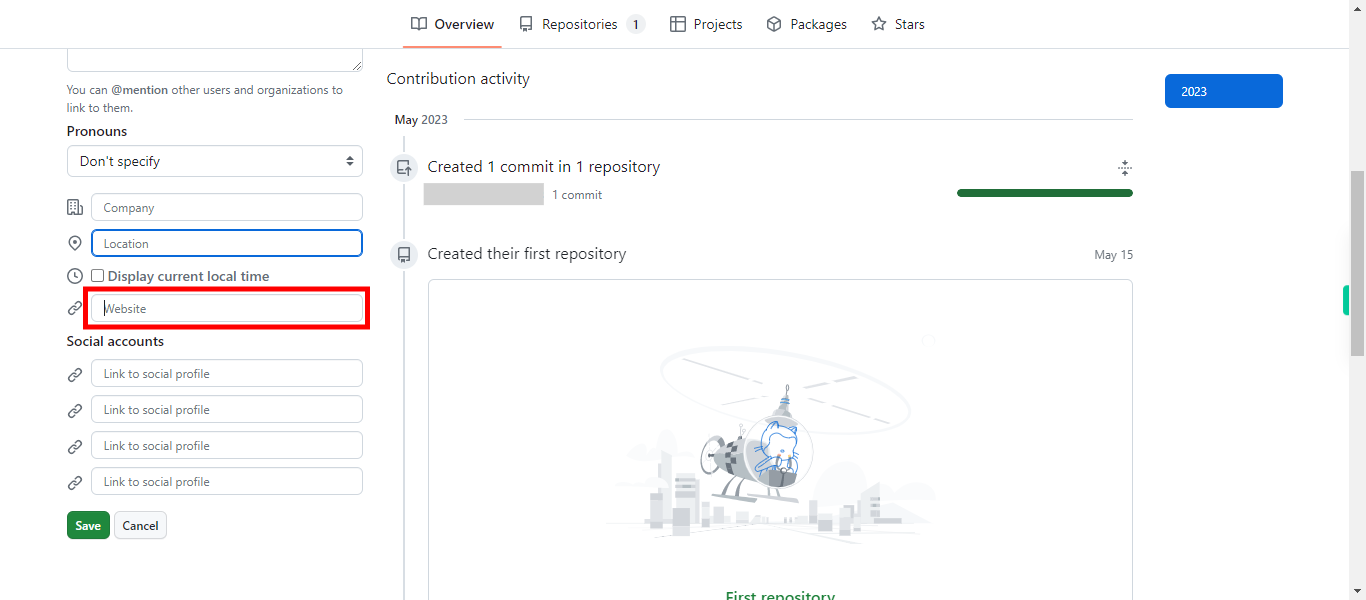
For editing or adding the website, enter the website information in the Website tab. Then click on the Next button in the Supervity instruction widget. Else directly click on the Next button in the Supervity instruction widget, to avoid editing the website.
-
11.
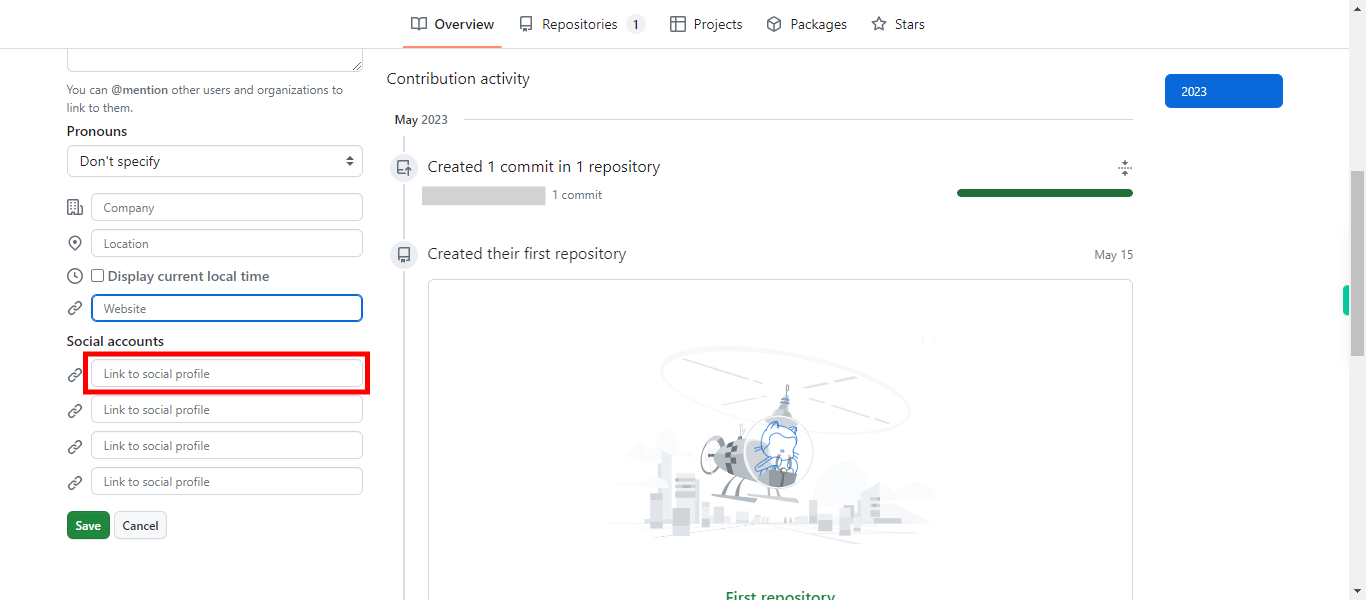
If you had any Social Accounts, for editing or adding those, enter the respective URLs in the Link a social profile tab. Then click on the Next button in the Supervity instruction widget. Else directly click on the Next button in the Supervity instruction widget, to avoid adding the social profile links.
-
12.
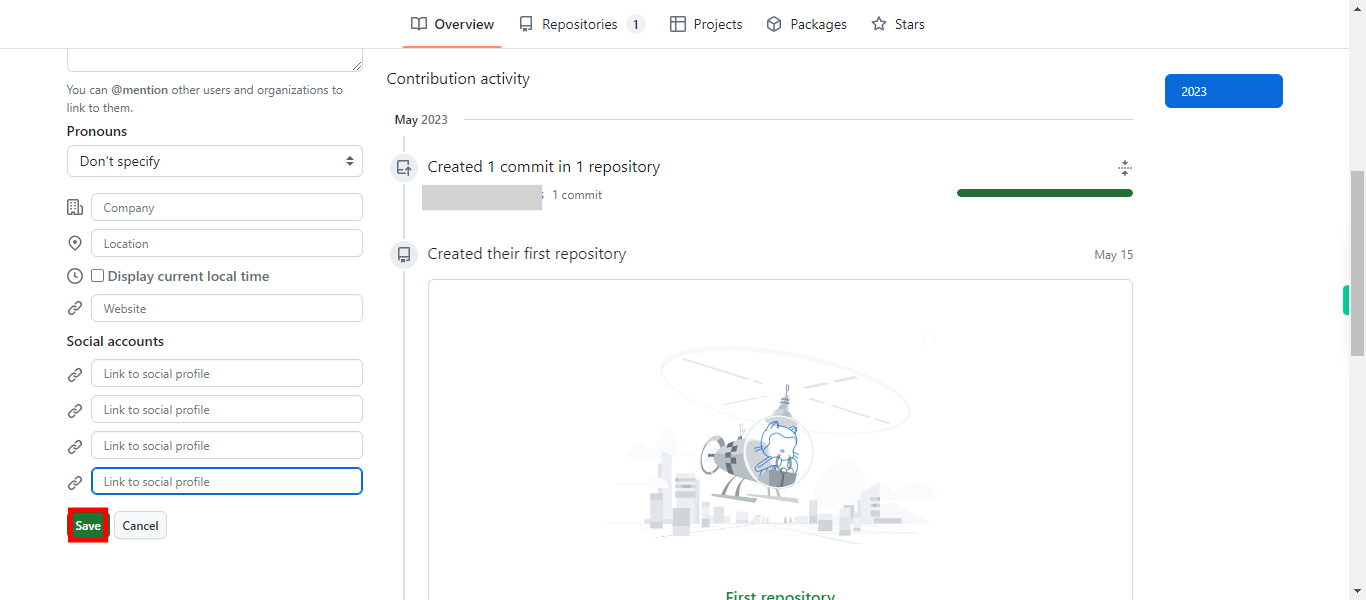
Once you have made the desired changes, scroll to the bottom of the page and click on the "Save" button to save your updated profile. GitHub will now apply the changes, and your profile will be updated with the new information.
-
13.
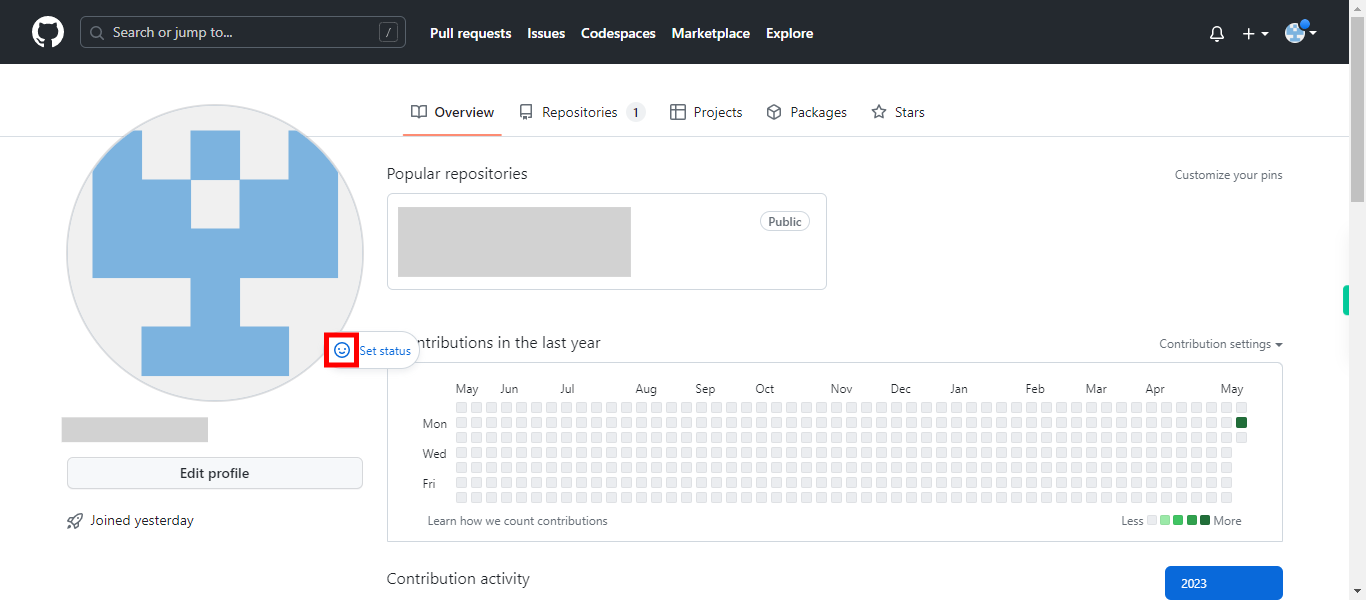
Click on the 😊 Set status icon.
-
14.
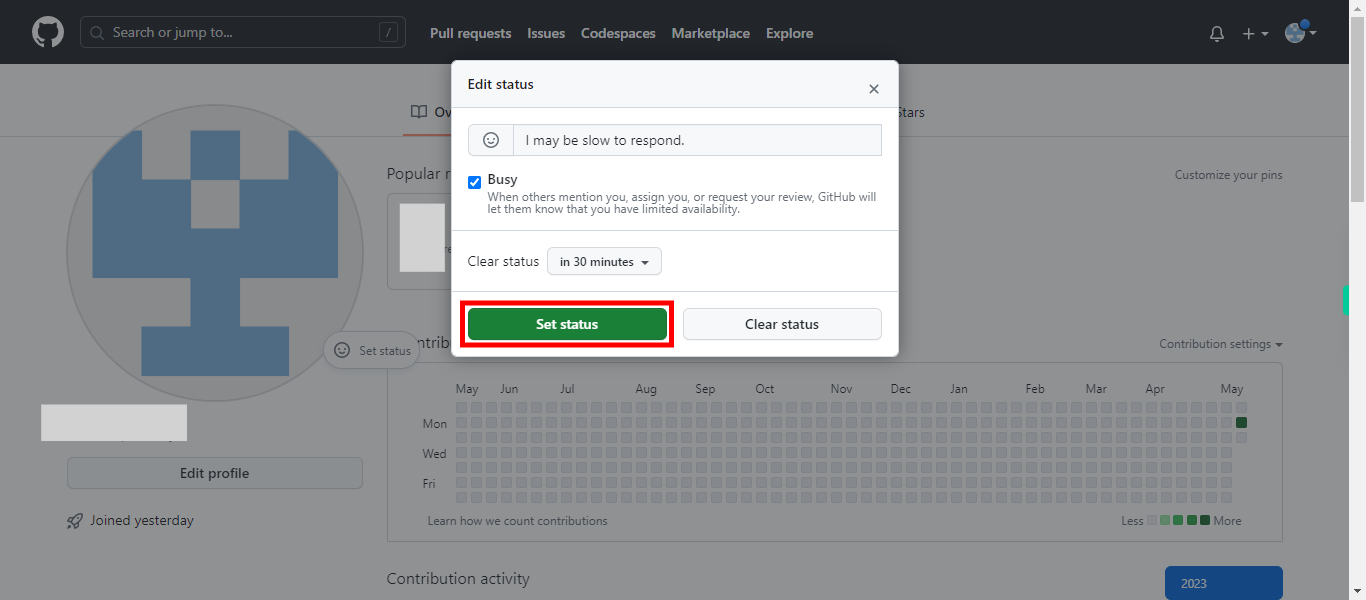
A pop-up window will appear where you can add your own status message. Click on the Next button in the Supervity instruction widget. Type in the status message in the text box provided, and for a particular period of time by selecting the time period from the Clear status drop-down. Once done click on the "Set status" button to apply these changes. And close the Set status pop-up window once done with your settings.
-
15.
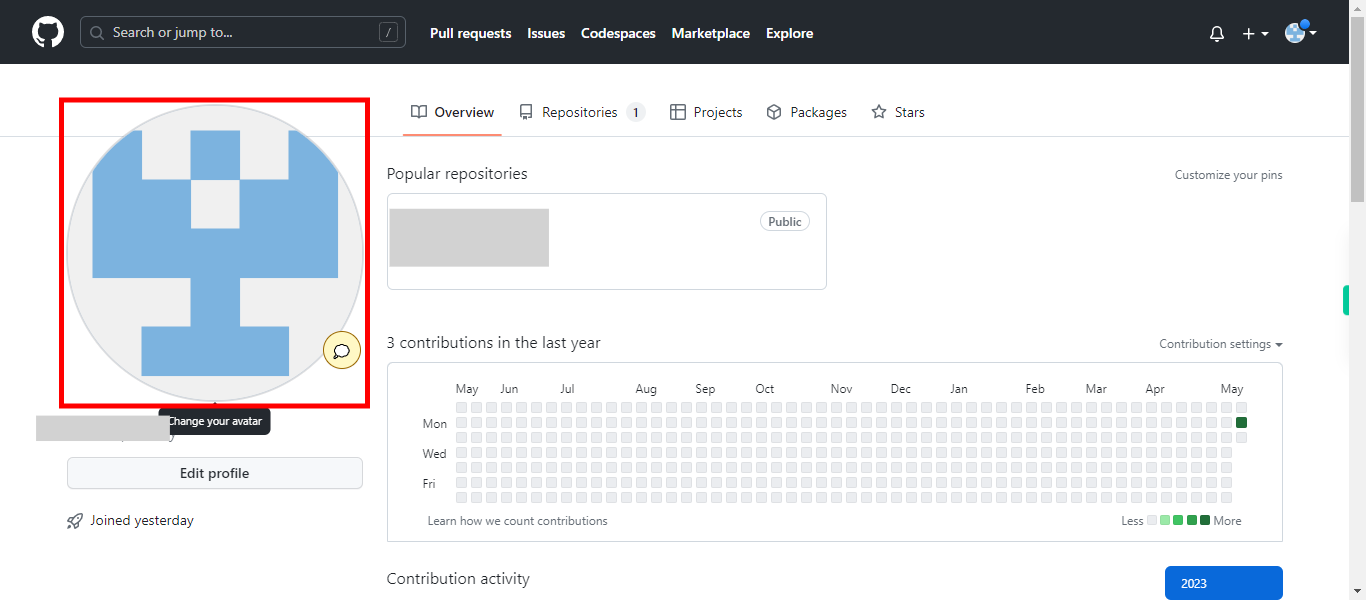
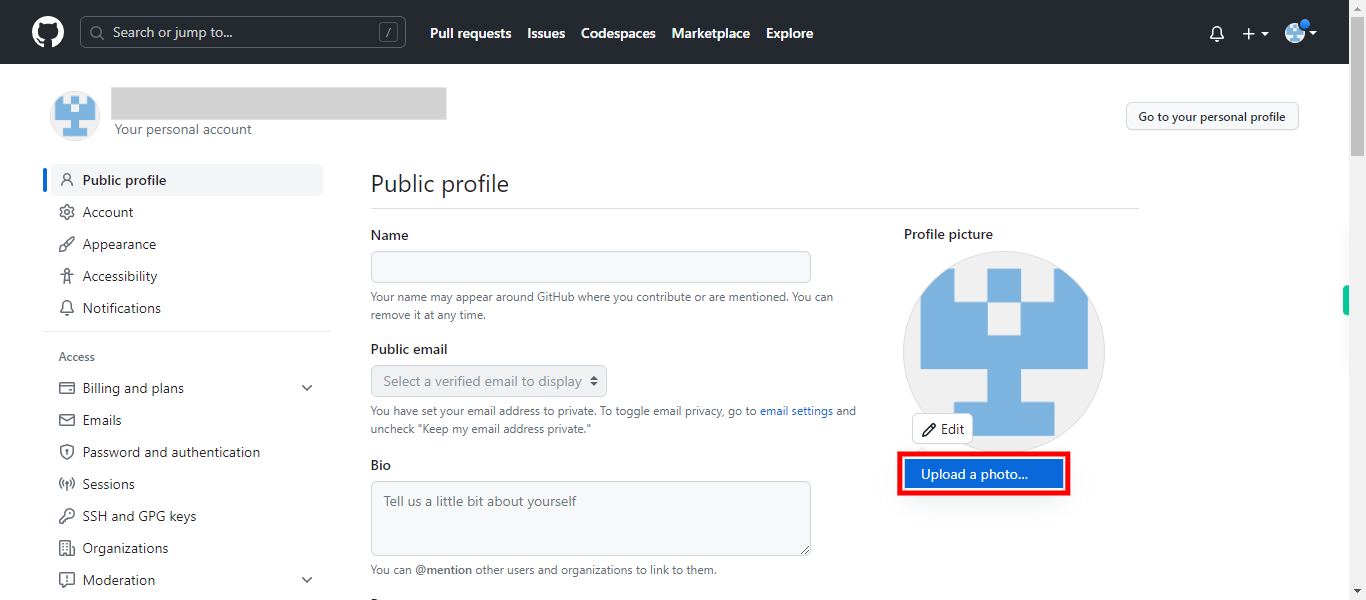
You can also update your profile picture by clicking on the camera icon in the profile picture area and selecting a new image from your computer
-
16.
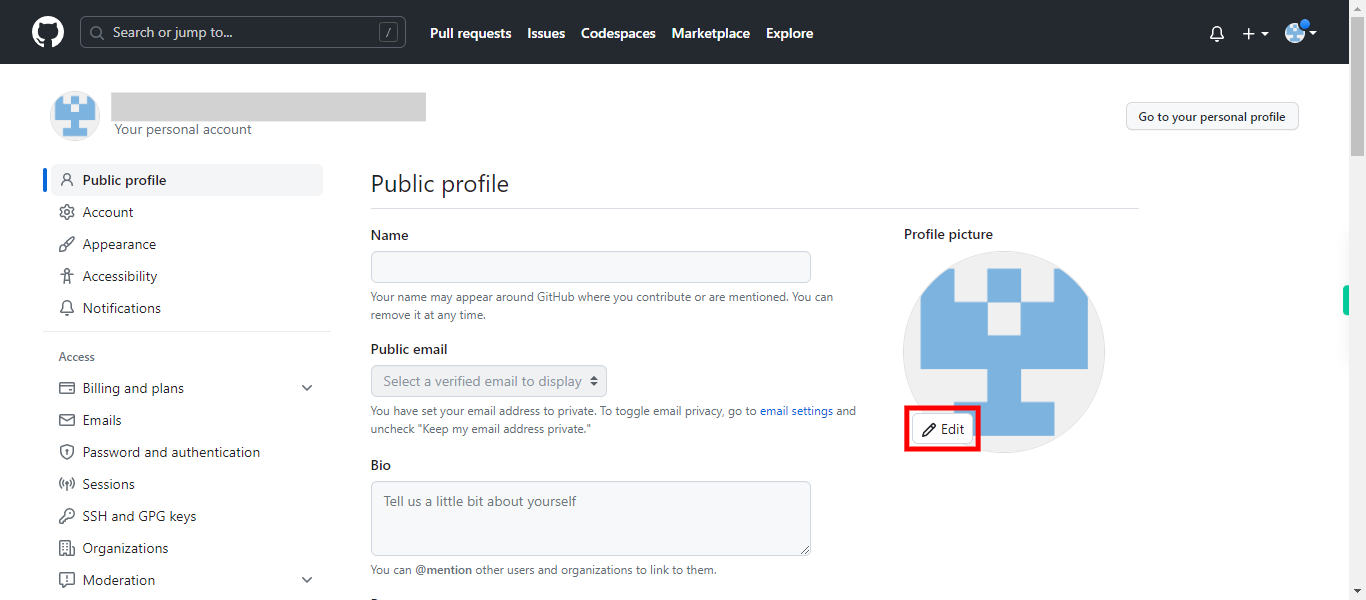
Click on the ✏ Edit button located on the bottom of your profile picture.
-
17.
Click on "Upload a photo..." and browse the picture from your local, to edit or set your profile picture.


