This skill helps in deleting a project from any repository in GitHub. Pre-Requisites: Make sure you had a valid GitHub account and also projects under repositories. NOTE: Please sign in to your GitHub account and then execute this skill.
-
1.
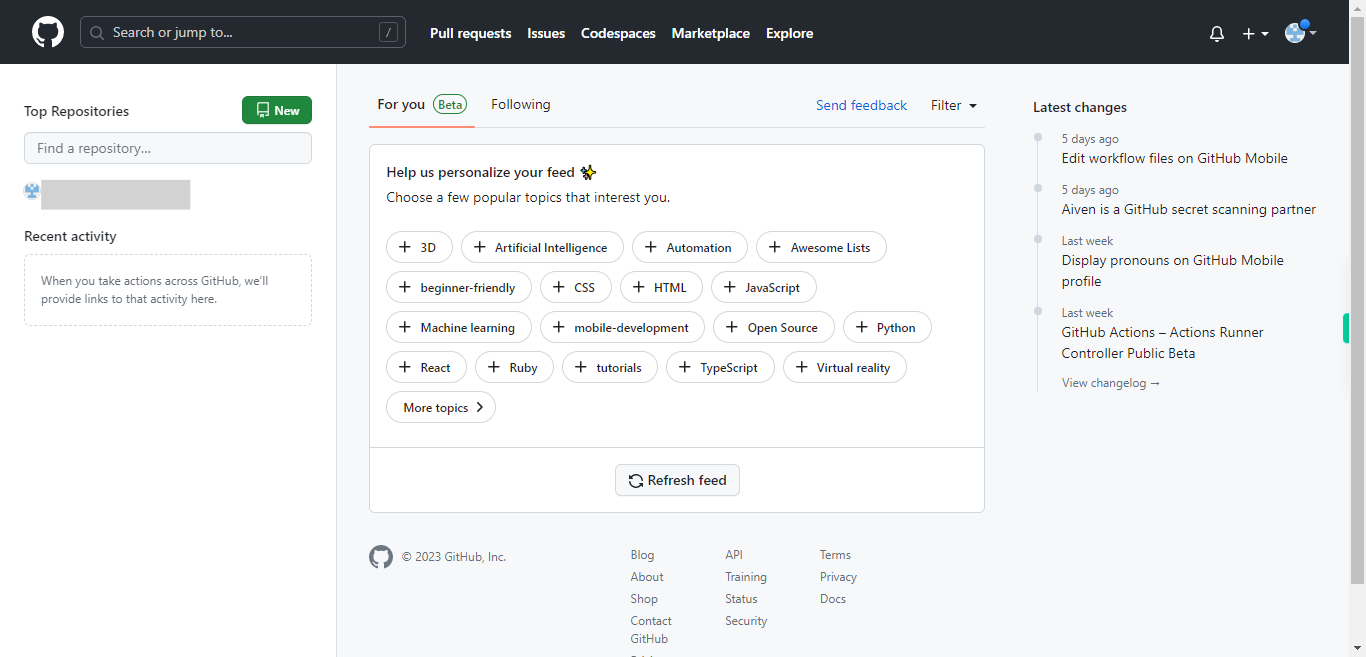
Open GitHub on the web.
-
2.
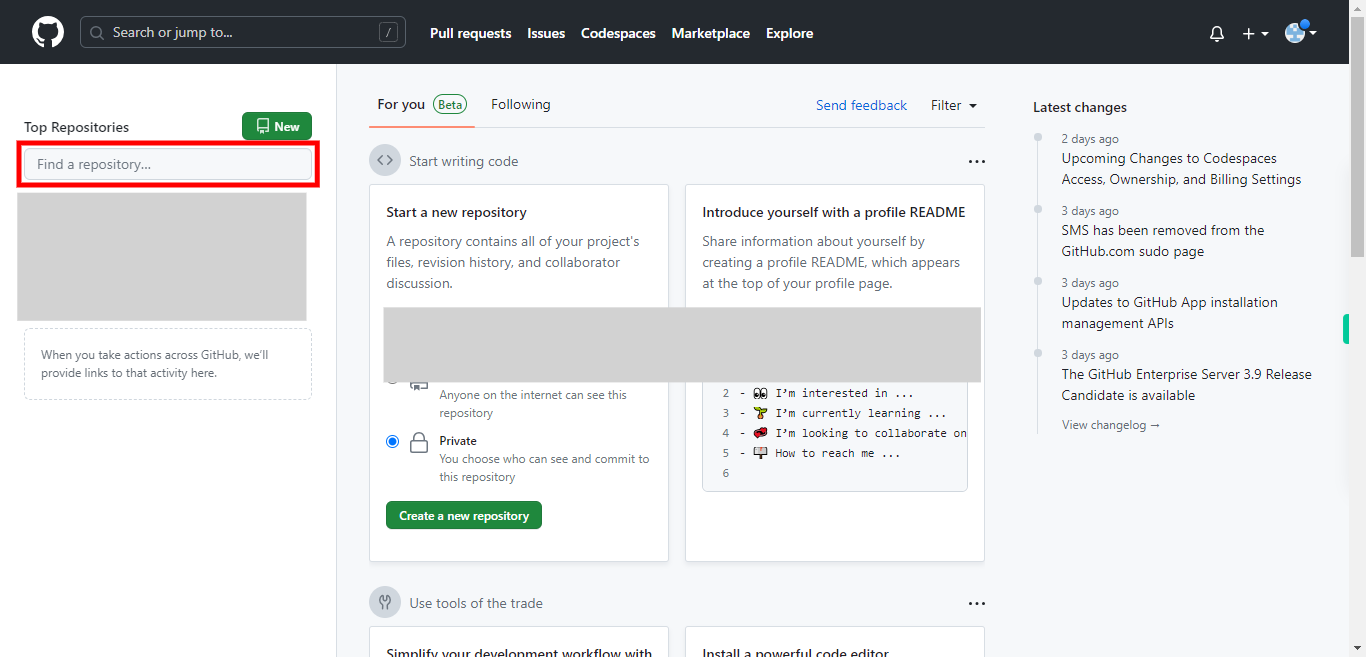
To navigate to the repository that contains the project you want to delete, type in the repository name in the "Find a repository" text box, then press "Enter" on your keyboard. Then click on the Next button in the Supervity instruction widget. And now click on the selected repository.
-
3.
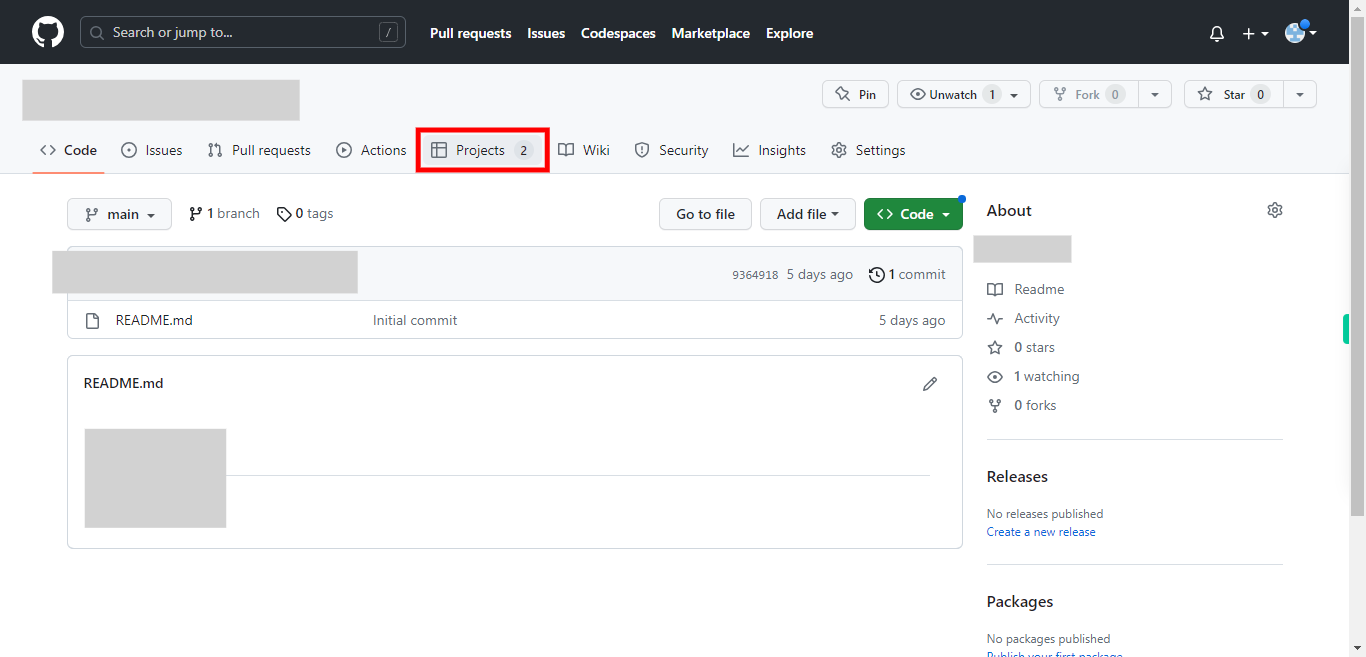
You are inside the repository's main page. First, click on the "Next" button in the Supervity instruction widget, then Click on the "Projects" tab near the top of the page. You will see a list of projects associated with the repository. Locate the project you want to delete and click on it to open it
-
4.
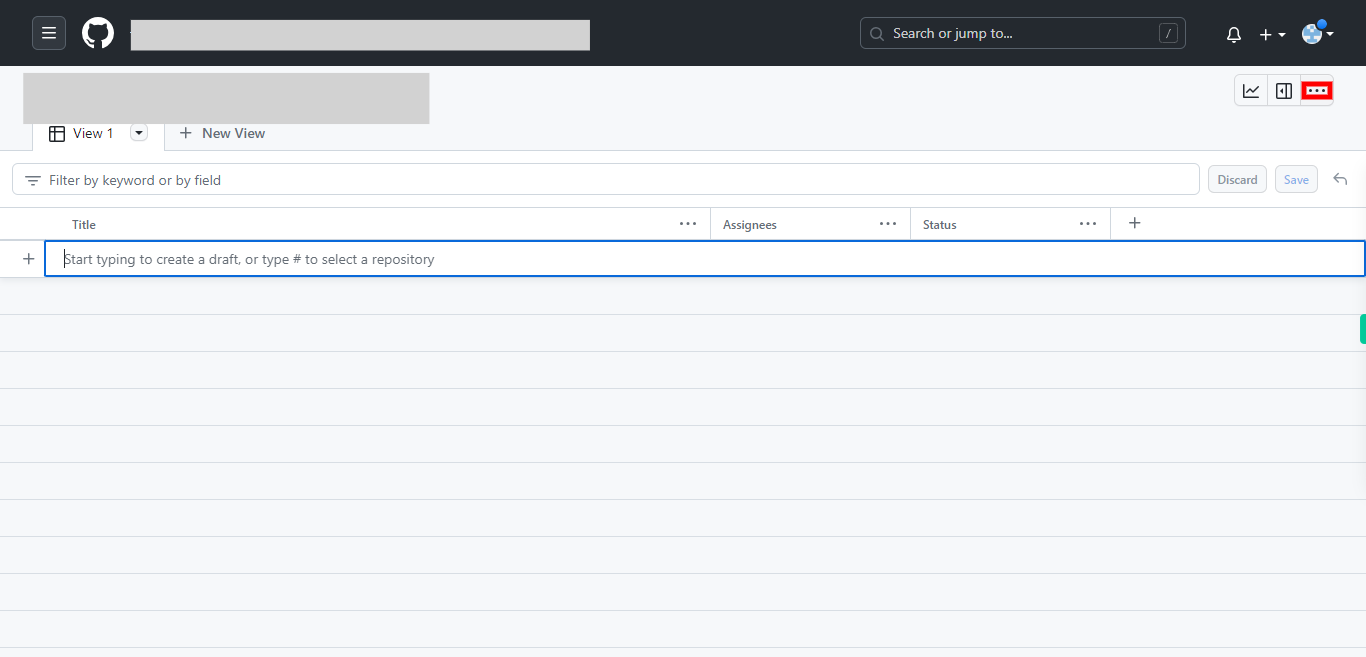
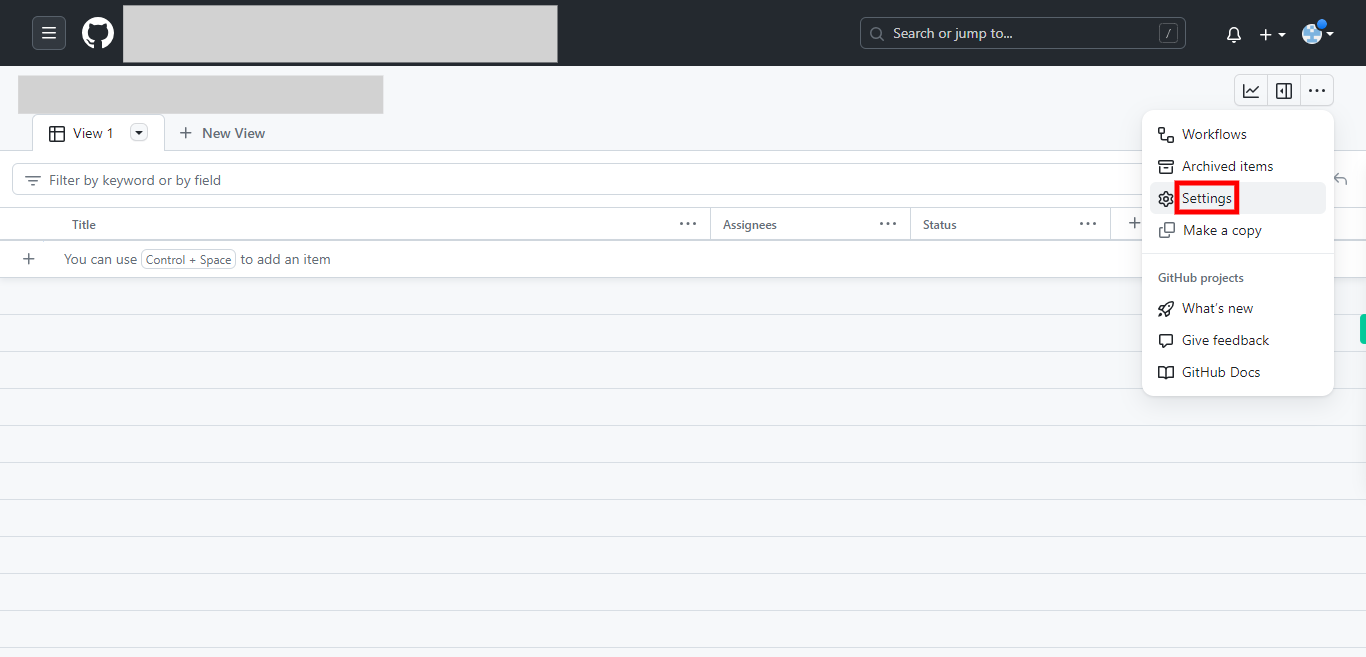
Once the project is open, you will see its board with columns and cards representing tasks or issues. At the top right corner of the project board, click on the three-dot menu icon ("...") to open the project options.
-
5.
From the dropdown menu, select "Settings".
-
6.
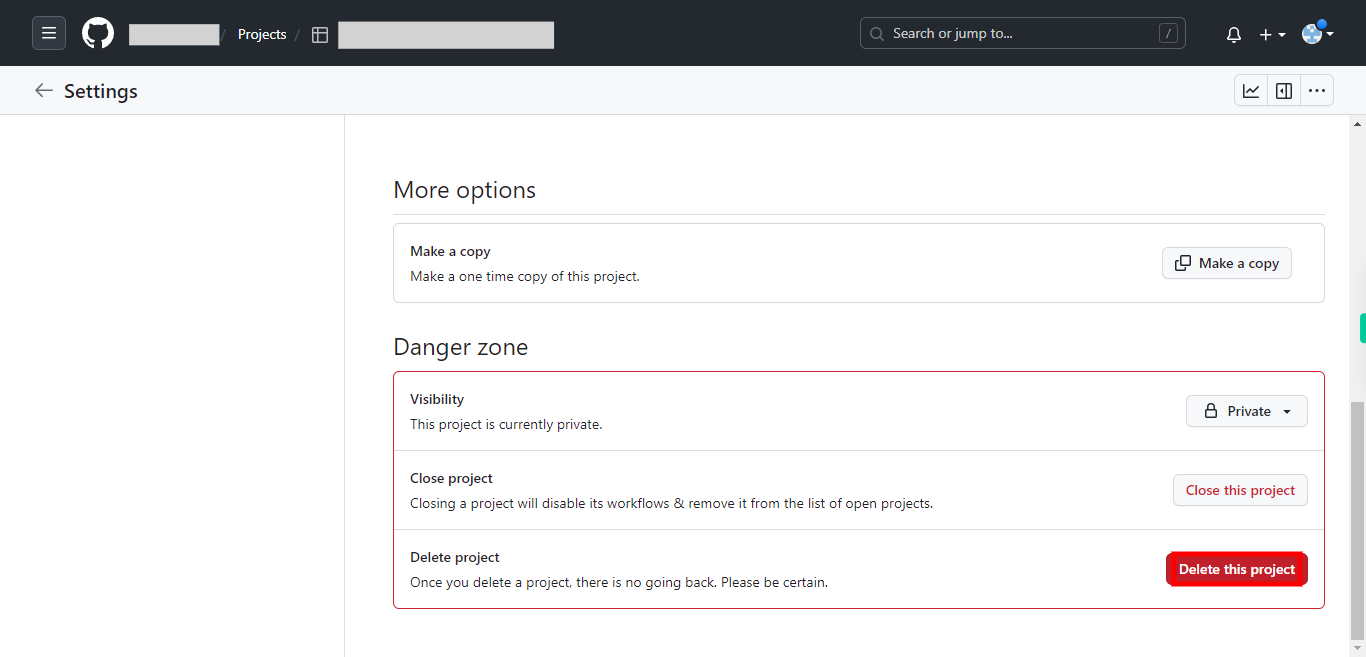
In the project settings page, scroll down to the bottom until you find the "Danger Zone" section. In the "Danger Zone" section, click on the "Delete this project" button.
-
7.
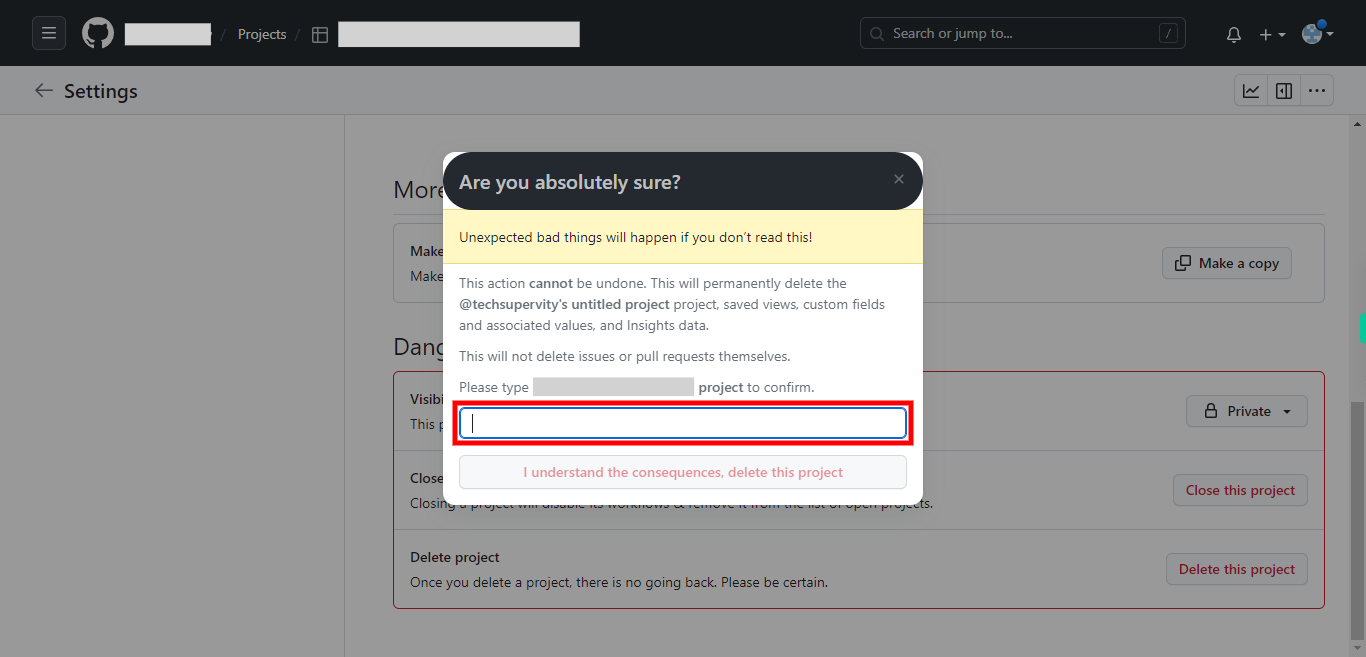
A confirmation dialog will appear. Read the warning message carefully, as deleting a project is irreversible. If you still want to proceed, type the project name as prompted in the dialog box. Then click on the Next button in the Supervity instruction widget.
-
8.
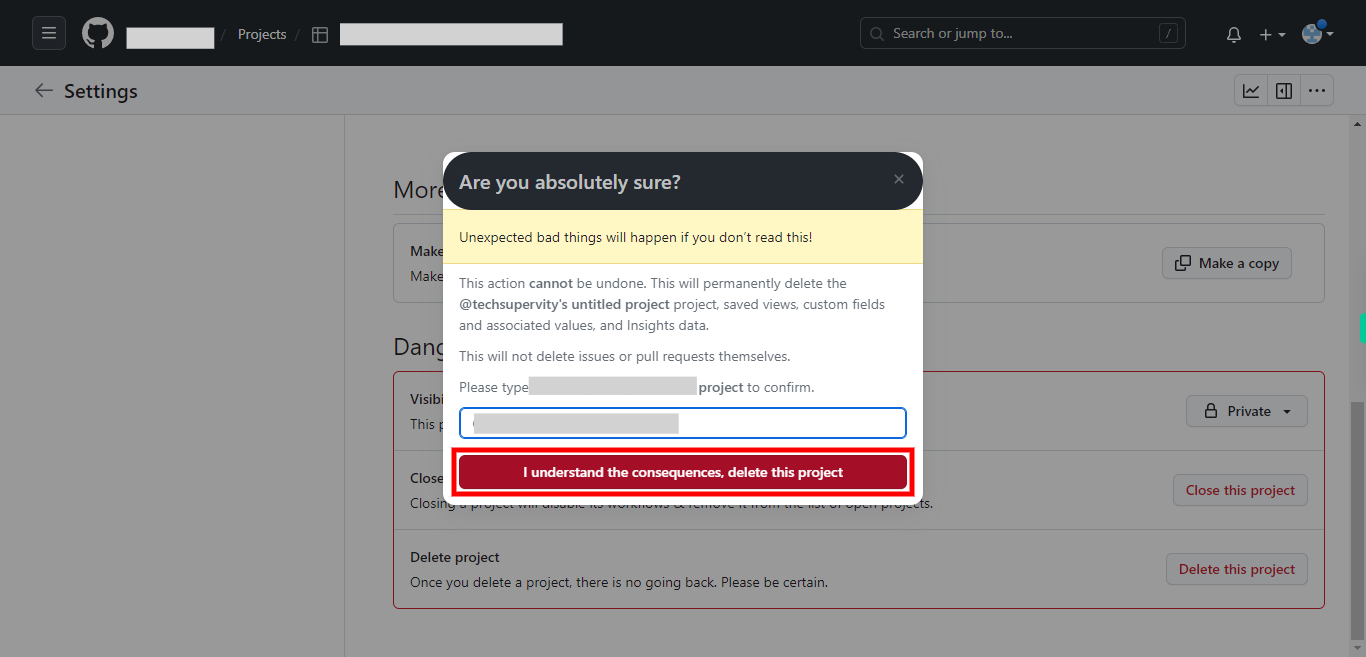
Finally, click on the "I understand the consequences, delete this project" button. GitHub will then delete the project and you will be redirected back to the repository's main page. Note: Deleting a project will permanently remove all its associated columns, cards, and project data. Make sure you have a backup or are certain that you want to delete the project before proceeding.


