The digital skill for Voice Typing in Google Docs assists users in mastering the feature, optimizing accuracy, customizing settings, resolving issues, and ultimately improving productivity through voice-based input. Use the skill to get a systematic guide on how to use the Voice Typing feature as it breaks down the process into manageable steps, ensuring users understand each stage of the process. [NOTE:1.Please signup into your Google account and then execute this skill.2.Please note that voice typing in Google Docs requires a microphone and a stable internet connection. ]
-
1.
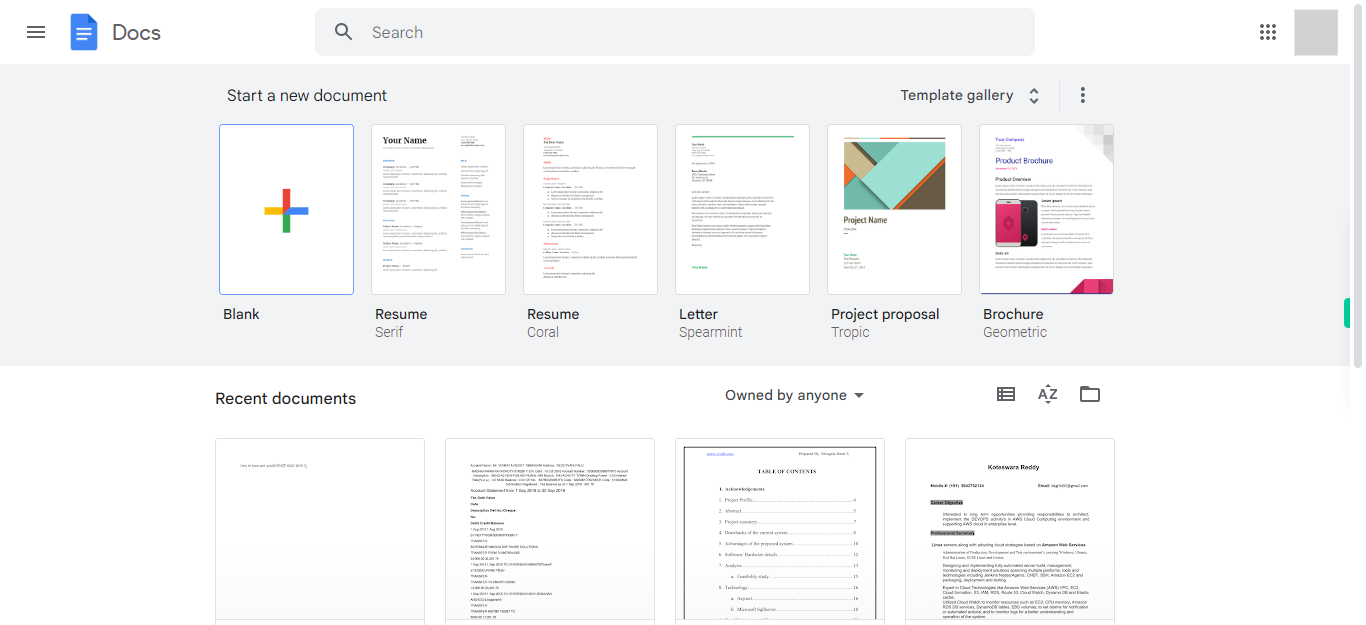
Open Google Docs on the web.
-
2.
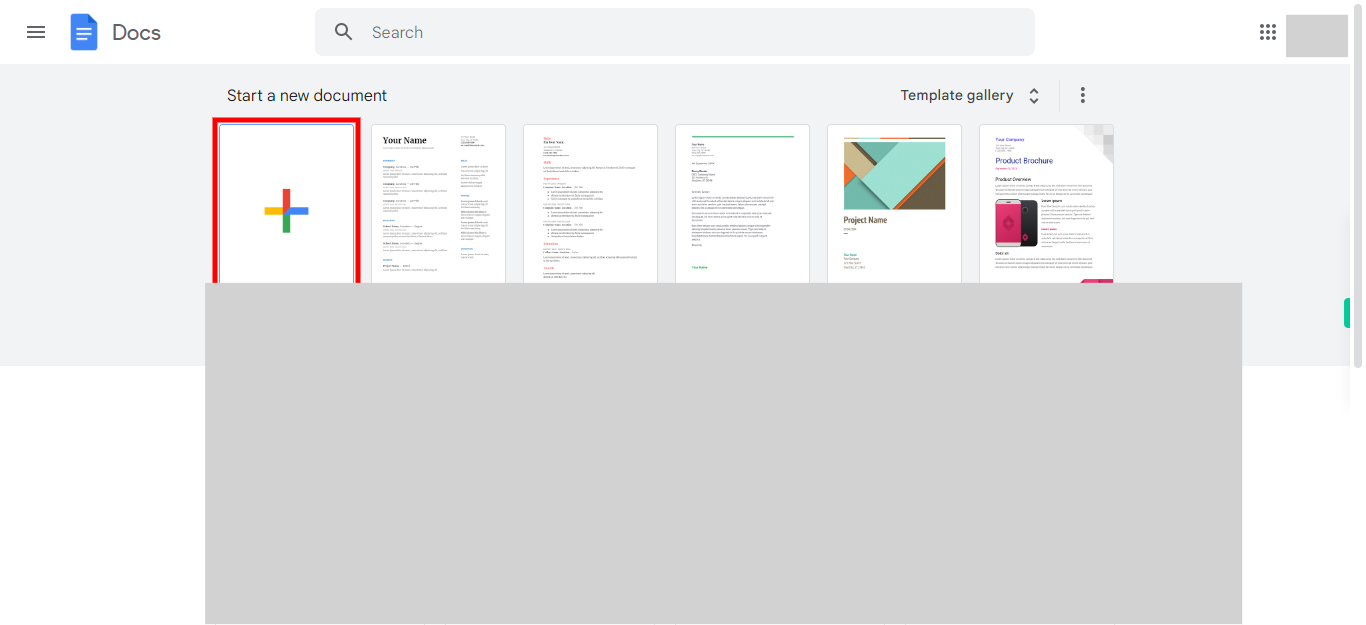
To access a blank template, simply click on the option that says "Blank Template". This will allow you to start with a fresh and empty document where you can create and customize the content according to your needs.
-
3.
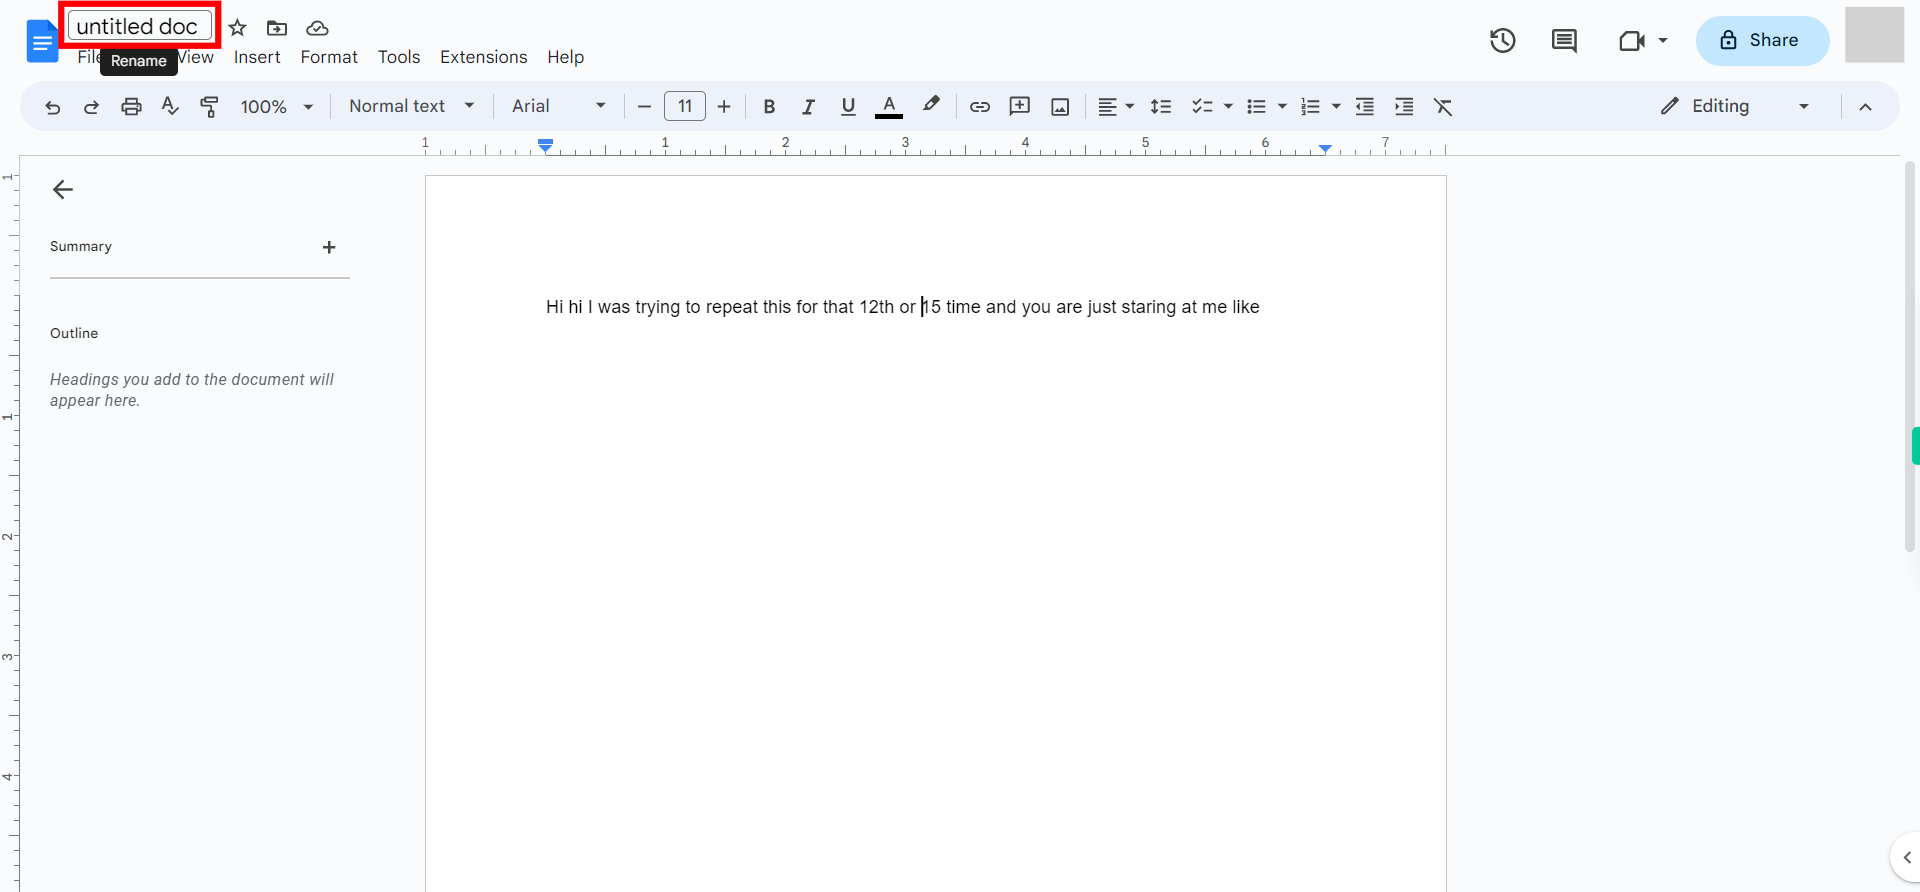
To rename the document, click on the current file name and type in the desired file name that you prefer. Click on the Next button in the Supervity instruction widget.
-
4.
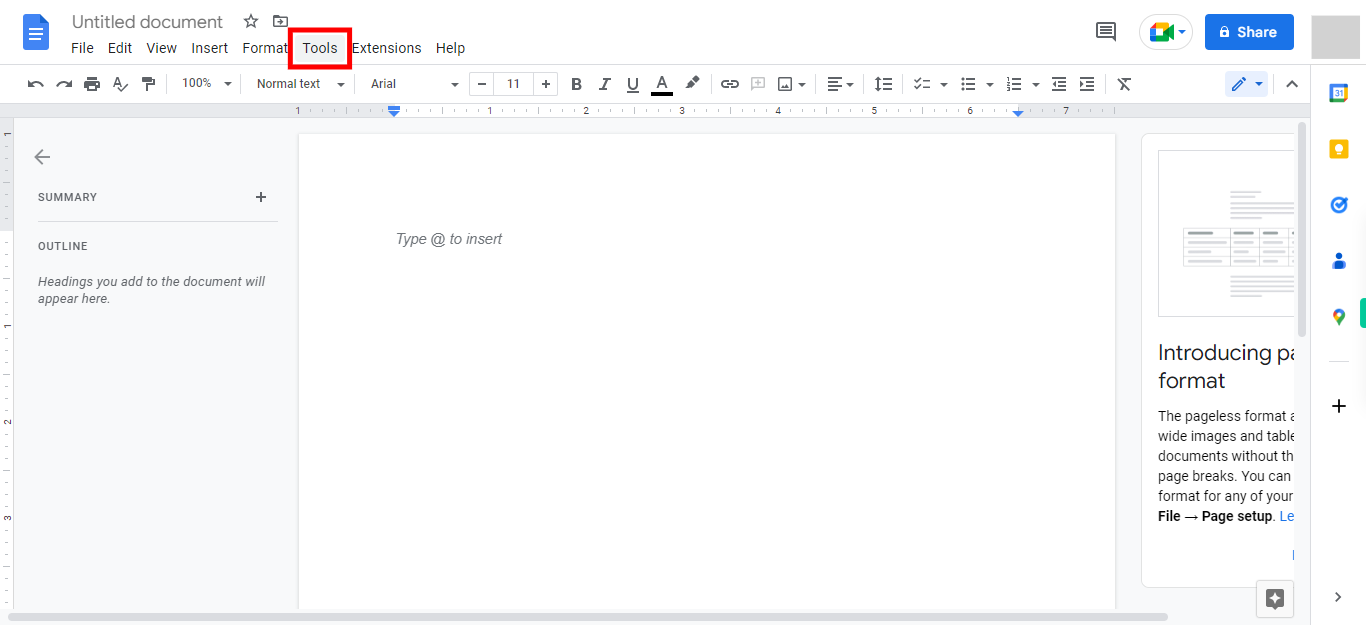
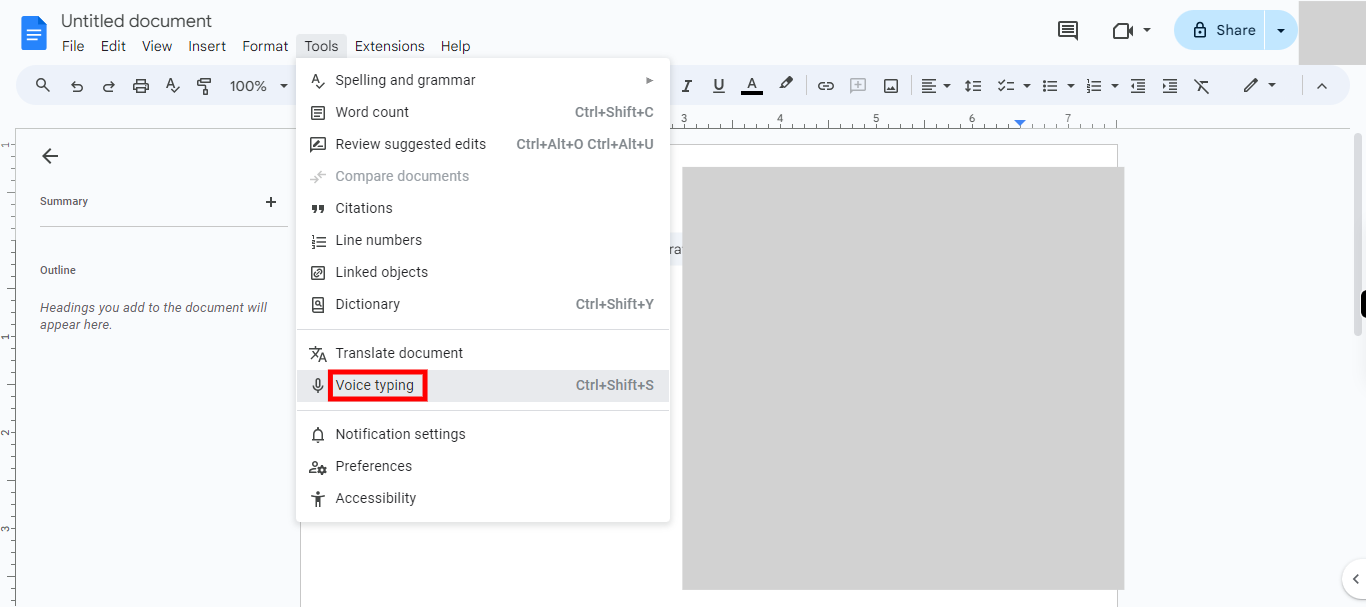
To access additional tools and features, click on the "Tools" option. This will open a drop-down menu where you can explore various functionalities to enhance your editing, formatting, and collaboration experience.
-
5.
To enable the voice typing feature, click on the "Voice typing" option. This will activate the microphone and allow you to dictate your text, which will be automatically transcribed into the document in real-time.
-
6.
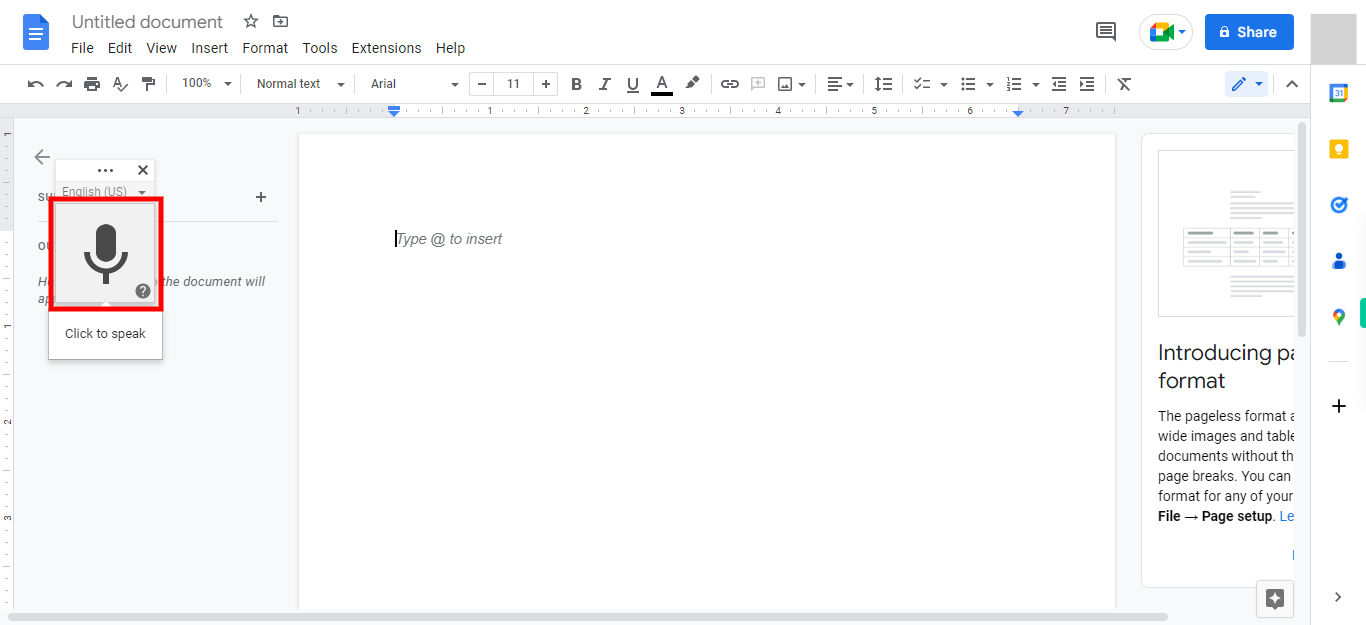
By clicking on the microphone icon and commencing dictation, your spoken words will be transformed into written text, seamlessly transcribing your speech into the document. You can now successfully use your voice to type in Google Docs.


